LT1-LT4 Modifications 1993-97 Gen II Small Block V8

A/C & powersteering delete

Thread Tools
 
Search this Thread
 
Old 12-09-2006, 05:12 PM
  #1  
11 Second Club
Thread Starter
iTrader: (17)
 
Armyman2445's Avatar
 
Join Date: May 2006
Location: Greenville SC
Posts: 574
Likes: 0
Received 0 Likes on 0 Posts

Default A/C & powersteering delete

Ok I know how to delete the A/C but on the power steering.....how did you do it? What did you plug? I know how I can do it but I want it to look clean.
Old 12-09-2006, 05:55 PM
  #2  
11 Second Club
iTrader: (88)
 
the_merv's Avatar
 
Join Date: Mar 2006
Location: The Beach...
Posts: 19,261
Received 63 Likes on 54 Posts

Default

I would plug the inlet and outlet lines that go to the Pump. I have never done this before, no reason too. It would kinda suck with my 285/40's on the front.
Old 12-09-2006, 09:51 PM
  #3  
TECH Resident
iTrader: (8)
 
Razor_Blade's Avatar
 
Join Date: Jul 2006
Location: Florida
Posts: 826
Likes: 0
Received 0 Likes on 0 Posts

Default

You don't want to plug PS lines. It will be a little easier to turn if you connect them into a loop. It is best to get a manual rack, because it will have a more friendly ratio. That is a costly route though, since no fourth gens came with manual steering. The only ones available would be aftermarket.
Old 12-09-2006, 10:11 PM
  #4  
11 Second Club
Thread Starter
iTrader: (17)
 
Armyman2445's Avatar
 
Join Date: May 2006
Location: Greenville SC
Posts: 574
Likes: 0
Received 0 Likes on 0 Posts

Default

I was planning to get a manual rack later but I would like to move my car around for now and didnt want pluged hoses everywhere..
Old 12-09-2006, 10:20 PM
  #5  
11 Second Club
iTrader: (88)
 
the_merv's Avatar
 
Join Date: Mar 2006
Location: The Beach...
Posts: 19,261
Received 63 Likes on 54 Posts

Default

I was thinking about that earlier..the loop instead of straight plugging them.
Old 12-11-2006, 09:46 AM
  #6  
TECH Apprentice
iTrader: (1)
 
LT14LIFE JT's Avatar
 
Join Date: Oct 2005
Location: VA
Posts: 339
Likes: 0
Received 0 Likes on 0 Posts

Default

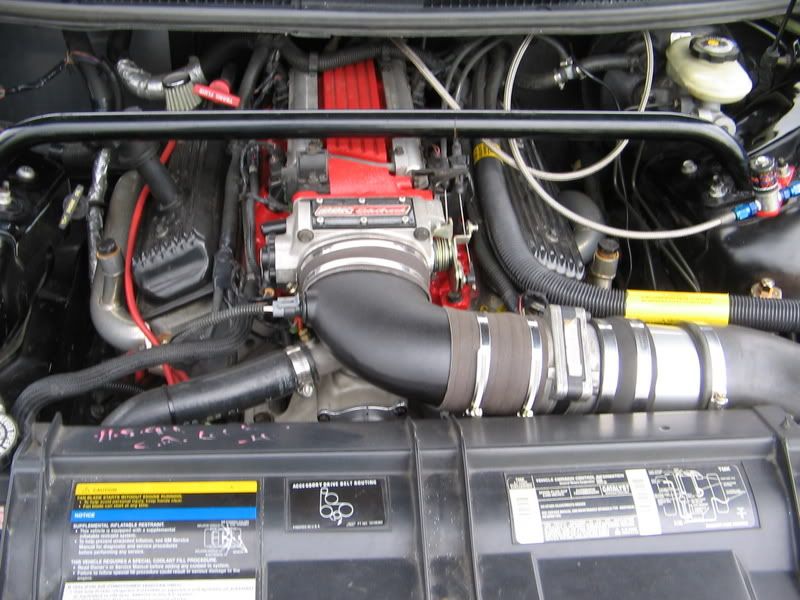
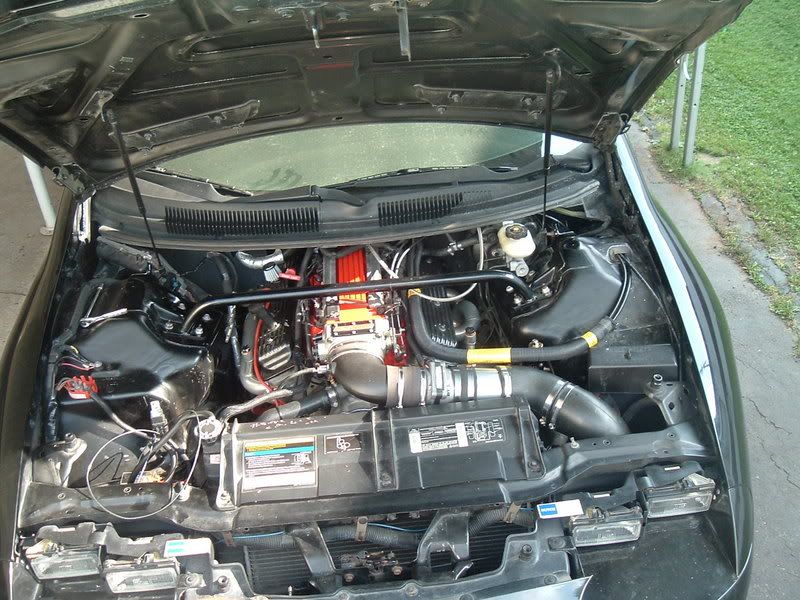
To clean it up, remove the A/C, PS, the entire bracket and relocate the alternator to the bottom. You can do a search for relocation brackets, but on my previous Z, I just used a collar and kept cutting it down until everything lined up. I also used the middle bolt in the water pump as an extra brace for the alternator. I fabbed up an old school "slide" type tensioner for it, but most people use the turnbuckle type.
Old 12-11-2006, 10:06 AM
  #7  
TECH Enthusiast
iTrader: (1)
 
foggedz's Avatar
 
Join Date: Jul 2005
Posts: 555
Likes: 0
Received 1 Like on 1 Post
Default

Def do not plug the power steering holes. It will be almost impossible to turn. If you plan on hooking the power steering back up in the future loop them. This will keep dirt out of the system, and keep the seals working properly. If you dont plan to hook it back up just leave the lines open. It will be easyest to steer with the lines left open, but it will probably tear up the seals inside the rack. The seals are only needed in you plan to run power steering again in the future, and do nothing when the power steering is disconnected.
Old 12-11-2006, 10:22 AM
  #8  
TECH Veteran
iTrader: (32)
 
Taubr Unit's Avatar
 
Join Date: Nov 2005
Location: Chicago
Posts: 4,146
Likes: 0
Received 15 Likes on 6 Posts

Default

I did exactely what LT1LIFE sais, i deleted everything and mounted my alt. lower on the pass side. Its sooooooooooo easy to work on my car now. Moved the battery to the rear, deleted my ABS. Its awsome.


Old 12-11-2006, 10:43 AM
  #9  
12 Second Club
iTrader: (26)
 
Jditlfm's Avatar
 
Join Date: Apr 2005
Location: Brockport NY
Posts: 1,456
Likes: 0
Received 0 Likes on 0 Posts

Default

I like that elbow to the throttle body were did you get that?
Old 12-11-2006, 11:16 AM
  #10  
TECH Veteran
iTrader: (32)
 
Taubr Unit's Avatar
 
Join Date: Nov 2005
Location: Chicago
Posts: 4,146
Likes: 0
Received 15 Likes on 6 Posts

Default

its the black trick flow from summit.
Old 12-11-2006, 02:48 PM
  #11  
11 Second Club
Thread Starter
iTrader: (17)
 
Armyman2445's Avatar
 
Join Date: May 2006
Location: Greenville SC
Posts: 574
Likes: 0
Received 0 Likes on 0 Posts

Default

they also make a polished one
Old 12-11-2006, 04:33 PM
  #12  
TECH Veteran
iTrader: (32)
 
Taubr Unit's Avatar
 
Join Date: Nov 2005
Location: Chicago
Posts: 4,146
Likes: 0
Received 15 Likes on 6 Posts

Default

here my alt. bracket

Old 12-11-2006, 04:57 PM
  #13  
TECH Apprentice
iTrader: (1)
 
LT14LIFE JT's Avatar
 
Join Date: Oct 2005
Location: VA
Posts: 339
Likes: 0
Received 0 Likes on 0 Posts

Default

^

Exactly.
Old 12-11-2006, 05:05 PM
  #14  
Staging Lane
iTrader: (-1)
 
93 4mula's Avatar
 
Join Date: Oct 2005
Location: Ocean Springs, MS (Gulf Coast)
Posts: 89
Likes: 0
Received 0 Likes on 0 Posts
Default

Originally Posted by Taubr Unit
here my alt. bracket

What did you mount the bottom to? Also how do you tighten your belt?
Old 12-11-2006, 05:30 PM
  #15  
TECH Veteran
iTrader: (32)
 
Taubr Unit's Avatar
 
Join Date: Nov 2005
Location: Chicago
Posts: 4,146
Likes: 0
Received 15 Likes on 6 Posts

Default

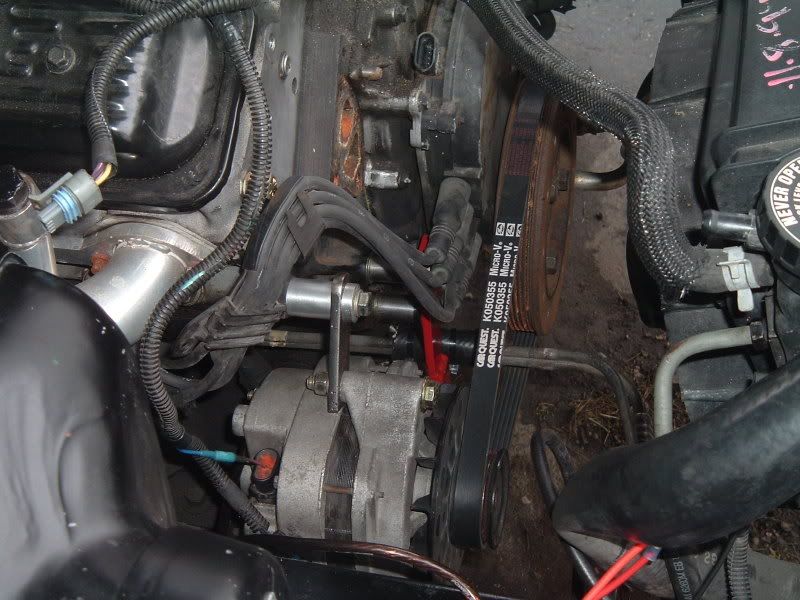
If you look close and look at the red bracket?? It bolts to the block with the 2 bolts you can see, then the bottom is a reg. alt. bracket with the "U" shape adjuster. I bought it off ebay for $20 new but had to modify it to make it longer cause our lt1 alternators are bigger then reg. chevy 350 ones. So i just extended it a extra inch or so and re-welded it back toghter. Then when you loosen the top bolt it will swing to adjust it. But when mine was all done it would twist just enough to make the belt to slip. So i added a turn buckle style i bought from Home Depot for $5 and bolted it to the front of the top bracket and the other end to the top bolt of the red bracket. Ill try to get updated pics for ya guys. All in all, i put 300 miles on my car and took it on a hour and a half road trip at 80mph cruising and i NEVER had 1 problem, so i know its proven to work!!!!
Old 12-11-2006, 05:38 PM
  #16  
Staging Lane
iTrader: (-1)
 
93 4mula's Avatar
 
Join Date: Oct 2005
Location: Ocean Springs, MS (Gulf Coast)
Posts: 89
Likes: 0
Received 0 Likes on 0 Posts
Default

Cool. I am wanting to delete a/c and powersteering also when I put my motor back in.
Old 12-11-2006, 05:40 PM
  #17  
TECH Veteran
iTrader: (32)
 
Taubr Unit's Avatar
 
Join Date: Nov 2005
Location: Chicago
Posts: 4,146
Likes: 0
Received 15 Likes on 6 Posts

Default

it was all easy, just takes a little time to get it all adjusted perfect. power stearing was too easy, just take it all off and loop the lines toghter. ABS was easy too, should do that too. Makes making a intake easy as hell too!!
Old 12-11-2006, 06:25 PM
  #18  
12 Second Club
iTrader: (26)
 
Jditlfm's Avatar
 
Join Date: Apr 2005
Location: Brockport NY
Posts: 1,456
Likes: 0
Received 0 Likes on 0 Posts

Default

i was really hoping it was plastic, damn aluminum intake elbows.
Old 12-11-2006, 08:01 PM
  #19  
11 Second Club
iTrader: (88)
 
the_merv's Avatar
 
Join Date: Mar 2006
Location: The Beach...
Posts: 19,261
Received 63 Likes on 54 Posts

Default

That looks pretty good. I would have an extra one on the back of it going to the side of the Block.
Hey Taubr, where is the plug for your OPTI, or were you guys messing with something.
NM..I see you got the water pump off..
Did that today, that is how I noticed it.

Last edited by the_merv; 12-12-2006 at 06:53 PM.


Quick Reply: A/C & powersteering delete


All times are GMT -5. The time now is 02:33 PM.