
Subframe connectors (house brand)
 05-13-2013, 09:06 PM
#1
TECH Addict
Thread Starter
Join Date: Mar 2004
Location: Fat Chance Hotel
Posts: 2,336
Likes: 0
Received 0 Likes
on
0 Posts

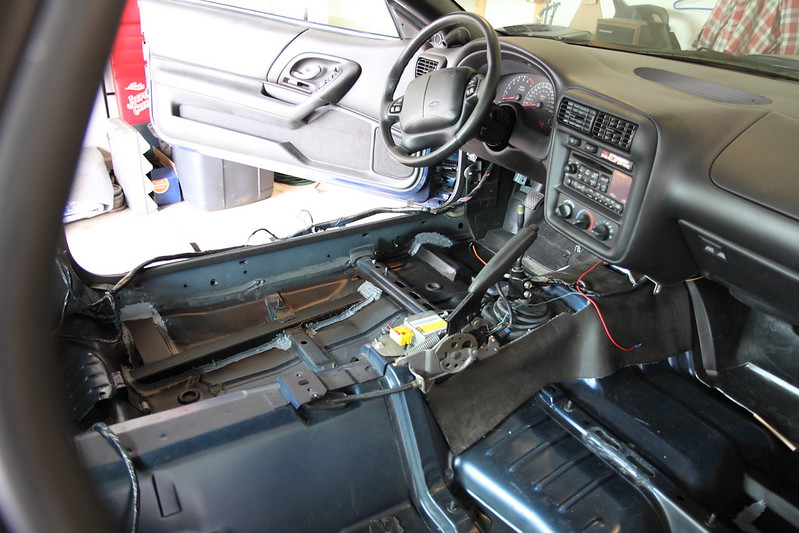
Decided to make my own sfcs over the winter from 2x2/2x3 .120 wall tubing.

Last edited by technical; 05-13-2013 at 09:14 PM.
 05-14-2013, 06:51 AM
#6
Looks good! I would love to see more pics of the underside. Props to you for getting down and dirty and making your own stuff thats more than likely better than what can be bought!
05-14-2013, 08:52 AM
#7

Nice job.... this is by far the best way to do a set of subframe connectors, but obviously a whole lot more involved than what your average guy is looking to do too.
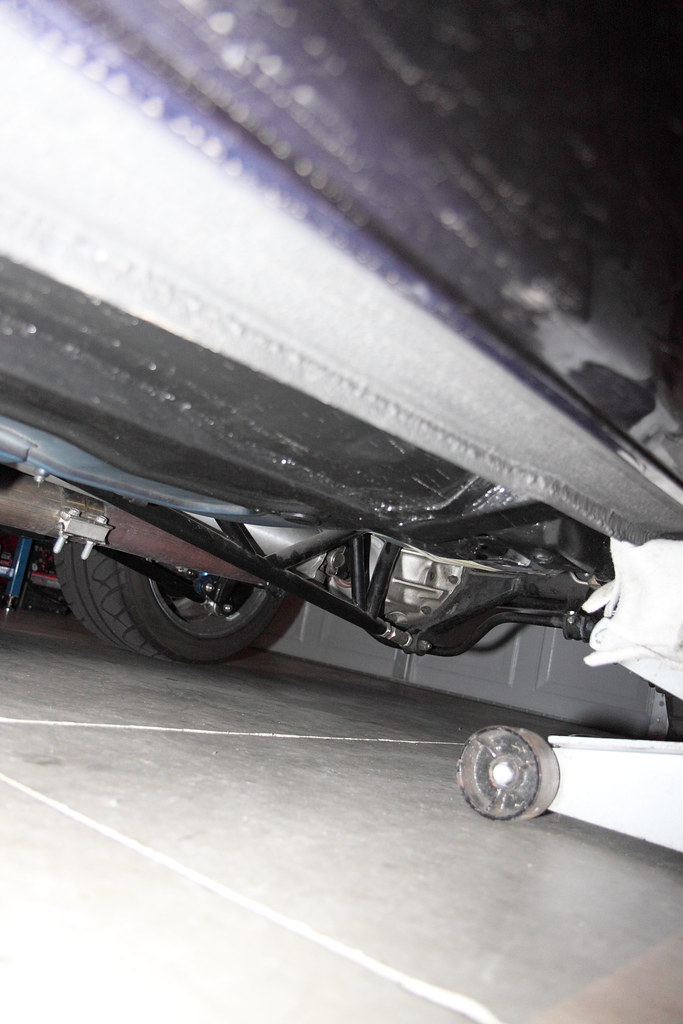
BTW... nice rearend and torque arm you have there
Give me a call when your ready for a cage kit!
BTW... nice rearend and torque arm you have there
Give me a call when your ready for a cage kit!
Trending Topics
05-14-2013, 08:30 PM
#9
TECH Addict
Thread Starter
Join Date: Mar 2004
Location: Fat Chance Hotel
Posts: 2,336
Likes: 0
Received 0 Likes
on
0 Posts
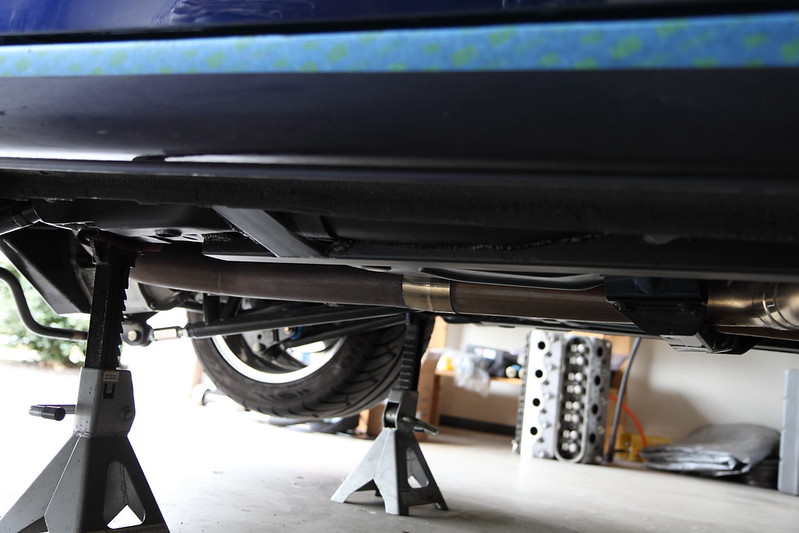
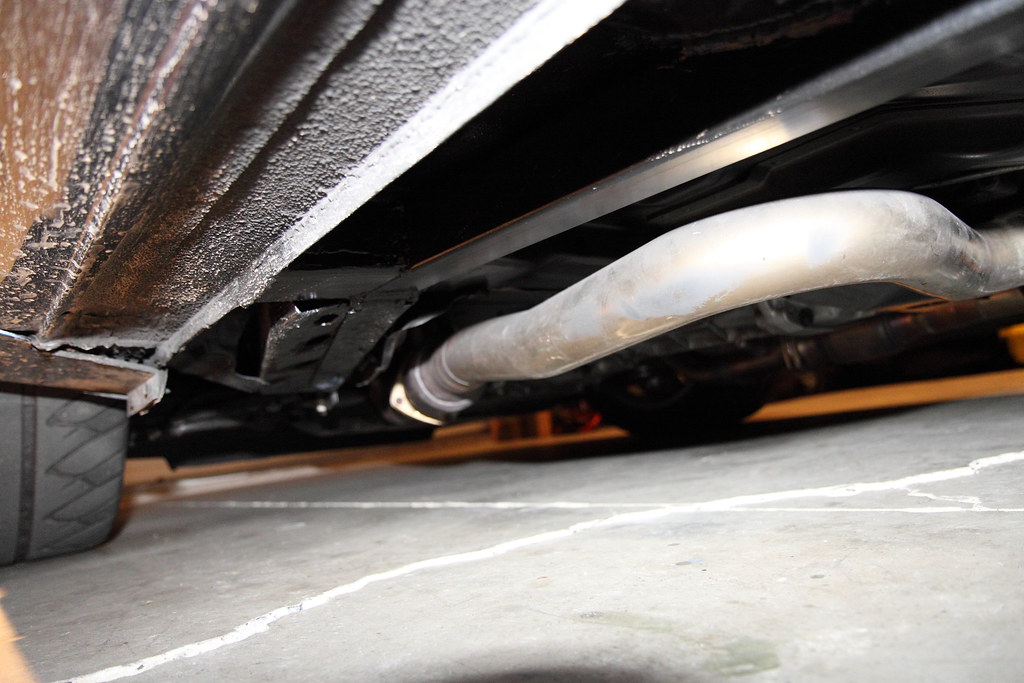
As requested... some more pics (underneath the car)
Driver side:
Driver side attaching to the front subframe:
Driver side rear attachment:
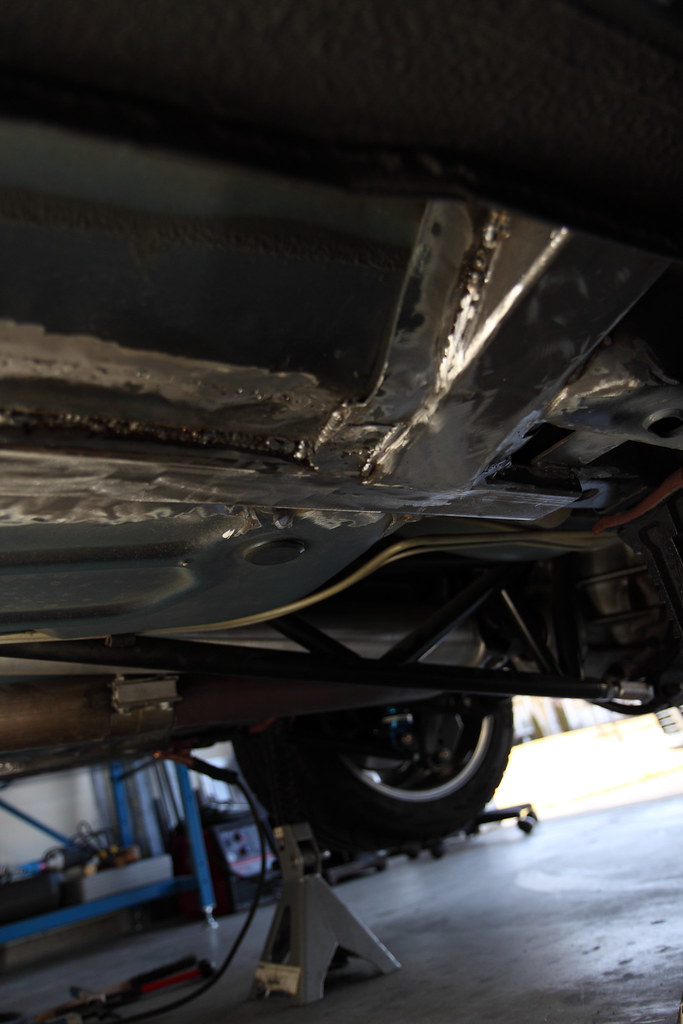
Passenger side attaching to the front subframe:

Passenger side rear attachment:

Driver side:
Driver side attaching to the front subframe:
Driver side rear attachment:
Passenger side attaching to the front subframe:
Passenger side rear attachment:
Last edited by technical; 05-14-2013 at 08:48 PM.
05-14-2013, 08:56 PM
#10
TECH Addict
Thread Starter
Join Date: Mar 2004
Location: Fat Chance Hotel
Posts: 2,336
Likes: 0
Received 0 Likes
on
0 Posts
 05-20-2013, 06:07 PM
#11
12 Second Club
Join Date: Feb 2006
Location: Catlettsburg, Ky
Posts: 876
Likes: 0
Received 0 Likes
on
0 Posts
Looks good! I'm really digging this style of subframe connector. So much do that I have a 24' stick of 2x2x.125" tube sitting in the shop ready to be used for this exact purpose. Lol
I like the outrigger idea, but I think I'll wait till I actually
Put the cage in the car to weld them in. Should aid in letting te cage drop thru the floor some to make it easier on welding fully around each joint (not to mention fighting with stubborn tubes.
In the case of using outriggers from the rocker to the sfc, are 6x6" plates still required under the main hoop and front down bars? To me the outrigger is substantially stronger than the plate
05-20-2013, 10:56 PM
#13
TECH Addict
Thread Starter
Join Date: Mar 2004
Location: Fat Chance Hotel
Posts: 2,336
Likes: 0
Received 0 Likes
on
0 Posts
A fair amount. Much was spent measuring/fitting. All told: disassembly, cutting/welding, seam sealer, paint, reassembly.. probably north of 50 but south of 100 hours.
 05-30-2013, 02:23 AM
#16
12 Second Club
Join Date: Feb 2006
Location: Catlettsburg, Ky
Posts: 876
Likes: 0
Received 0 Likes
on
0 Posts
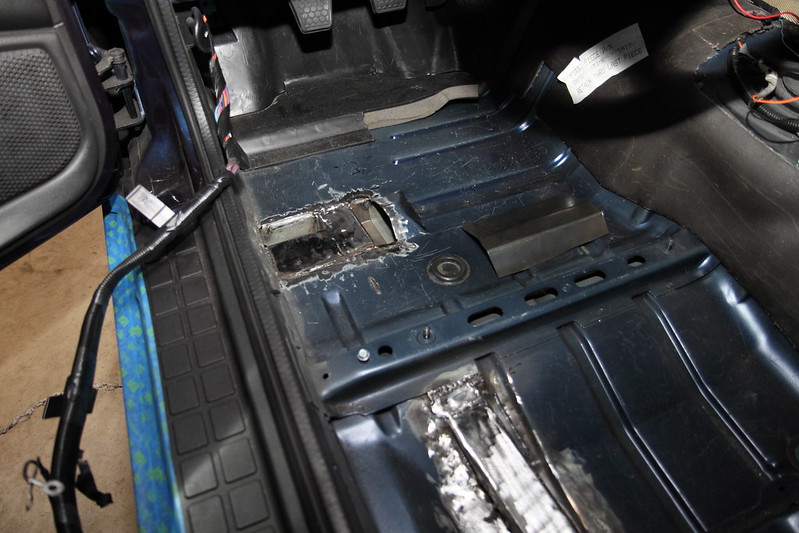
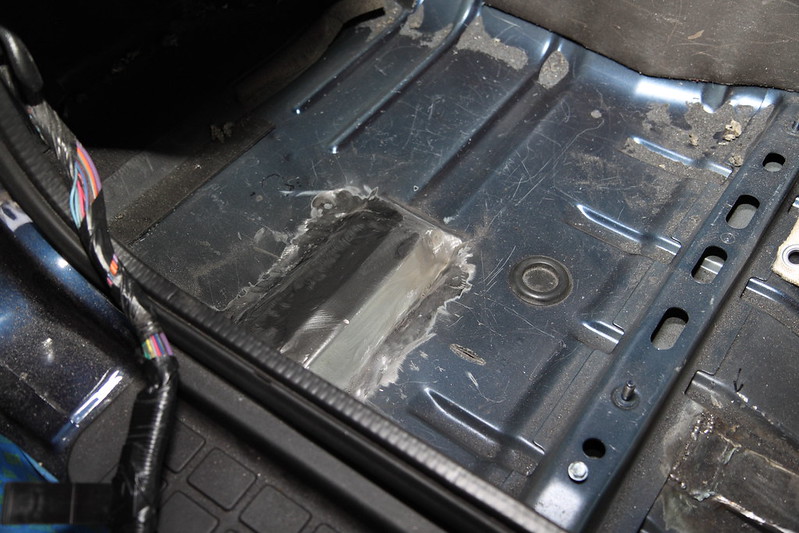
How did you measure to cut the slot out in the floor pan?
That's the only thing I'm racking my brain on. Don't really want to cut to wide and put some god awful weld bead down to fill the gap. Lol
That's the only thing I'm racking my brain on. Don't really want to cut to wide and put some god awful weld bead down to fill the gap. Lol
05-30-2013, 07:47 AM
#17
TECH Addict
Thread Starter
Join Date: Mar 2004
Location: Fat Chance Hotel
Posts: 2,336
Likes: 0
Received 0 Likes
on
0 Posts
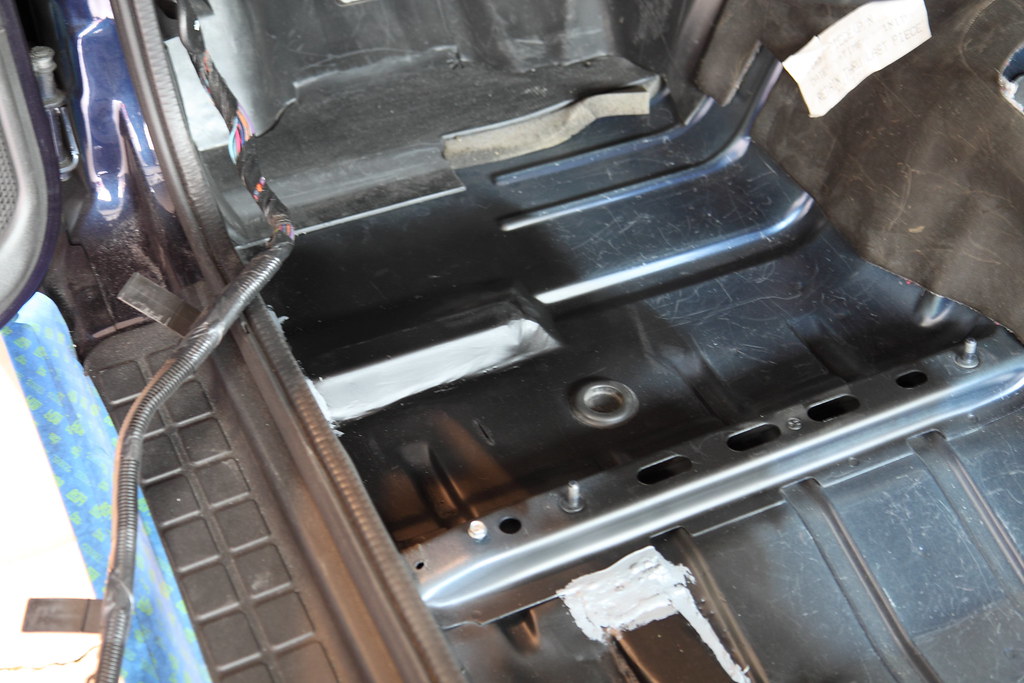
Don't sweat that part. You're not gonna cut it perfect 100%. Find you're spot from underneath. Drill some holes along the way using flat stock as a guide then you'll be able to find the line on the top side. *WHEN* you cut wide you can fix it with a patch. I cut the outside of the driver side wide because I wanted to move the rail inward so I made a long patch by bending/flanging/punching a piece of sheet so that I could weld it on several sides. You can see it in the picture. (Driver side underneath)