
How-to: aftermarket driving lights in 93-97 TA & 98+ Formula

Thread Starter
12 Second Club
iTrader: (28)
Joined: May 2007
Posts: 2,793
Likes: 16
From: under a JEGS hat
Current status: removed due to unusual circumstances (Hollywood-status explosion of glass shrapnel & stuff) causing a cracked lens on one side.
A big thanks to VIP1. Without his descriptions and pictures I wouldn't have done it.
I wanted brighter fog lights. Seems stupid, I know - since brighter doesn't equal better during foggy conditions, but whatever. I couldn't locate glass LT1 TA fog lights so I went on a quest to install aftermarket beams. I used VIP1's guide but I still had a lot of questions unanswered until I could take everything apart (which made the install take longer).
Unfortunately, I found out about direct-fit 880 HID bulbs afterwards.
These use 55w halogen bulbs so they will not overload the stock foglight wiring/fuses. These lights have a lot more glare than stock, but they work great!
So, this is what you need:
The lights that I bought. The lens is 4.5" across the face. They also have multi-colored LEDs which light up a halo:
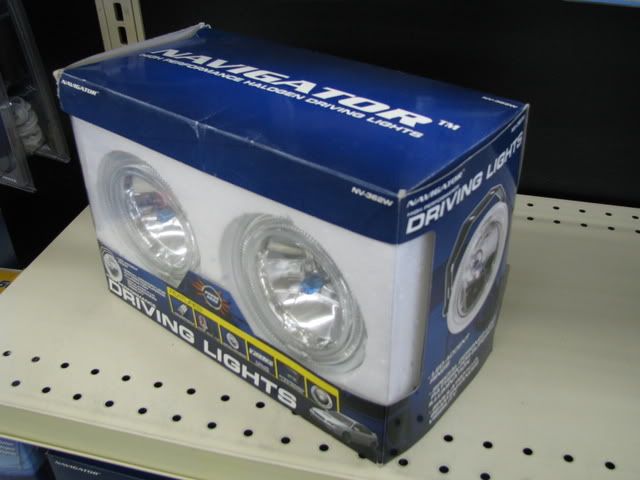
Be careful that you don't get ones that LOOK like these inside the box, make sure they're the ones with a multi-colored LED halo around them and with the blue tinted bulbs. The reflector has a square quilt-like pattern indented in it and there is no metal reflector blocking the bulb.
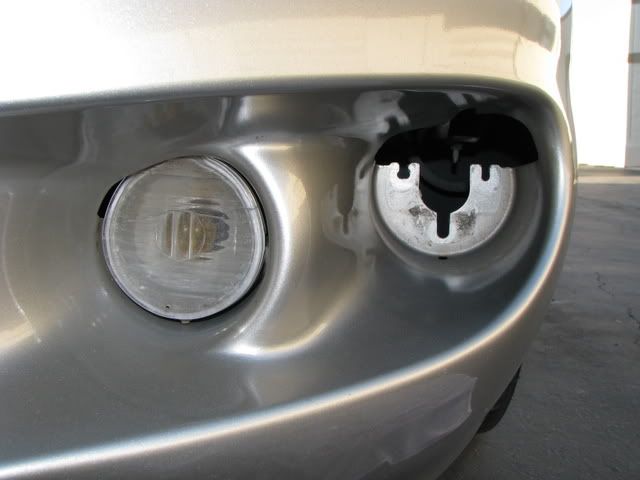
Next, you have to unbolt the stock fog lights from behind the bumper. There is an easy access panel under the fog lights consisting of two 7mm(?) bolts. Disconnect the light from the wire harness and then proceed. The fog light bracket is held in by three nuts (also 7mm I think) that you can remove with a socket - an extension MAY make this easier but don't quote me on it . When you are done unbolting, lift the lights upwards and towards the license plate, while rotating (you'll see what I mean when you get there):
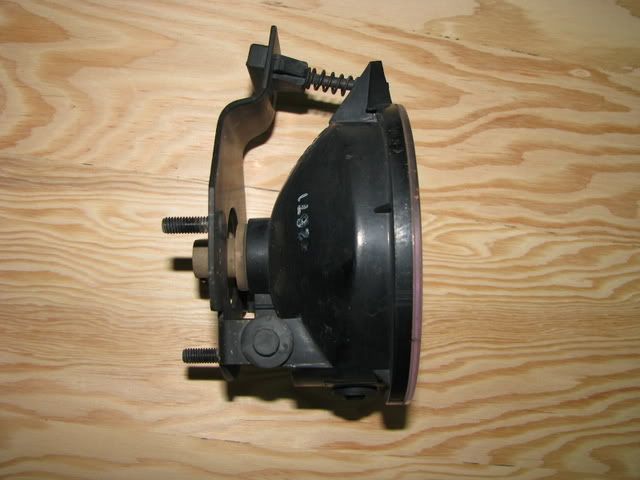
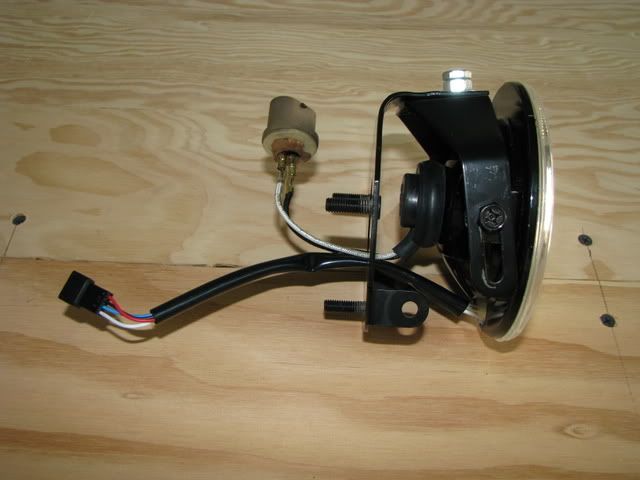
This is what the stock fog light assembly looks like when removed from the bumper. You'll have to unscrew the adjustment screw on top, detach the adjuster clip, and pop out the two nuts holding the stock lens on:
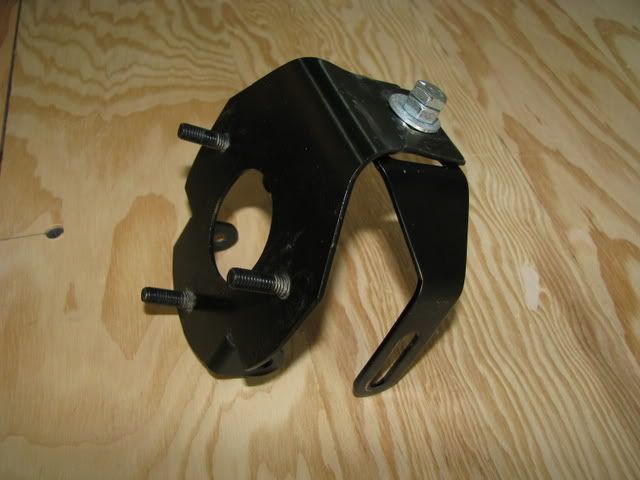
This is how you have to bend the OEM bracket to mount the aftermarket driving light to it. I didn't have a bench vise so I got creative and used my manly strength to bend it evenly by wedging it between two pieces of steel/wood (table/platform with heavy objects), then a hammer/2x4 to fix any imperfections. I still recommend using a bench vise. I recoated the bend with a layer of connector coating so that it wouldn't rust from flaking paint. Once dry, I used spare nuts/bolts/washers/spacers to keep the light attached and adjustable. Make sure you use the same combo for both so it's easily adjustable:
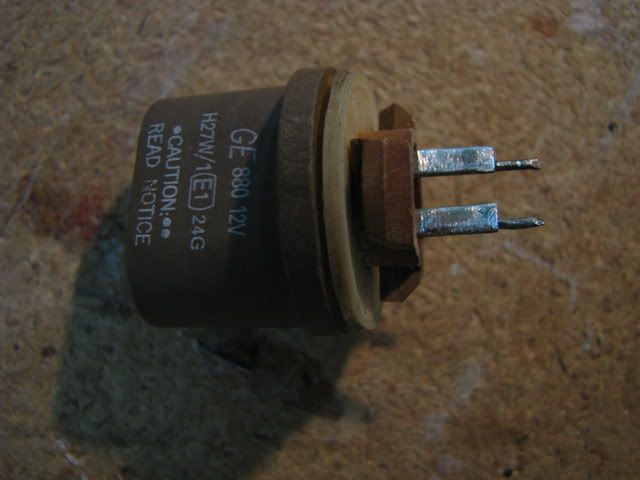
This is what I did to retain the ability to easily go back to stock if I had to. I took an 880 bulb and cut it at the base, leaving only two electrical contact points and the connector plug. I filed down the connectors for maximum adhesion when soldering (not 100% necessary to solder).
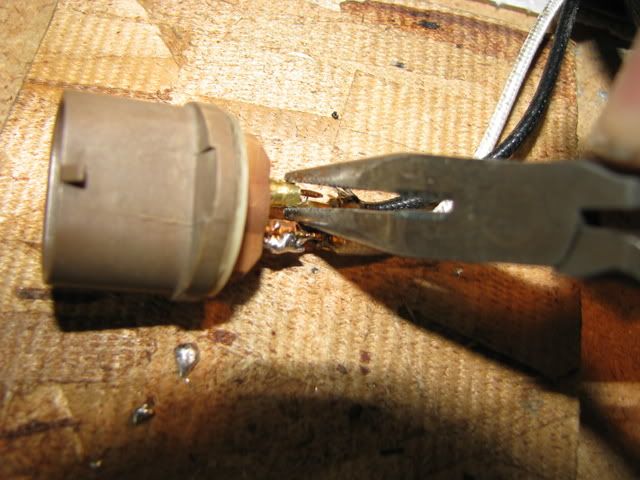
The H3 light bulbs come with wires and crimp connectors attached. You can probably crimp these on and wrap the terminals up individually with electrical tape and call it a day, but I took it a step further:
Mocked up. Just making sure I have the electrical connections in the right spot so as to not create any twists/tension when they are on the car. Had to rotate the rubber wire guide on the lens housing to point it in the proper direction:
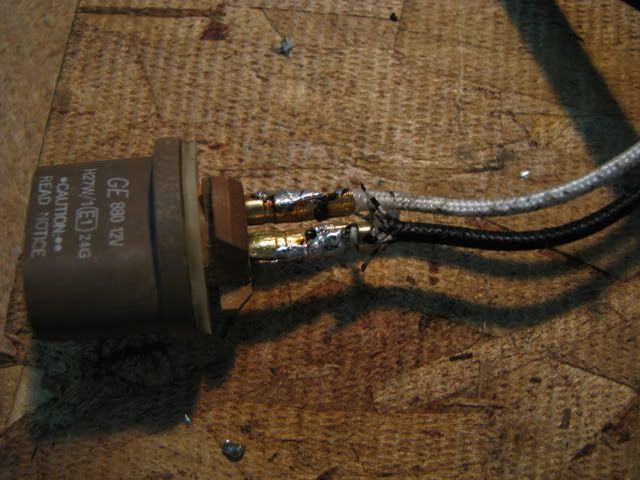
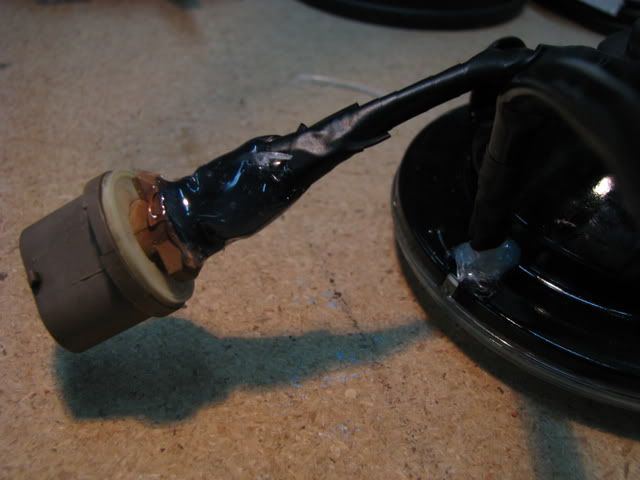
Soldered on. If the light goes out I will cut the wires and start over, since a new bulb comes with wires/crimp connectors attached:
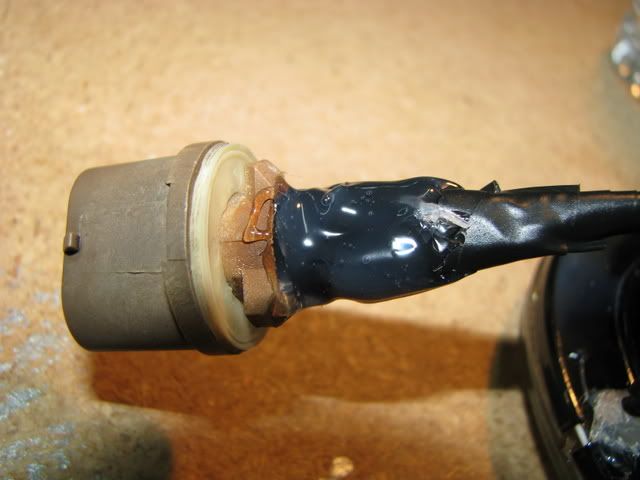
As far as I can remember, I used connector coating as an insulator over the contact points, waited for that to dry, then wrapped that with electrical tape, and then used a hot glue gun to put hot glue over that:
I taped up the unused LED halo control plug since I didn't want to spend the time wiring it up. Should be weather-proofed and good as new should I ever want to set up the halos in the future.

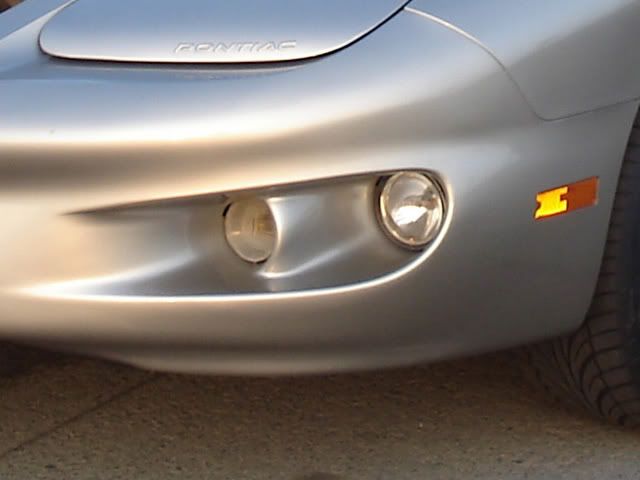
After taping everything up, I mounted it back to the bracket and then placed it back on the car for initial alignment.
Adjusted it to the proper angles (I adjusted it higher cause I was tired of having them point down) and to the right tension to where I could slightly adjust it on the car by pushing hard enough in one direction. I pretty much aimed them to where the headlights were pointing, then adjusted them downwards from there.
A big thanks to VIP1. Without his descriptions and pictures I wouldn't have done it.
I wanted brighter fog lights. Seems stupid, I know - since brighter doesn't equal better during foggy conditions, but whatever. I couldn't locate glass LT1 TA fog lights so I went on a quest to install aftermarket beams.
I used VIP1's guide but I still had a lot of questions unanswered until I could take everything apart (which made the install take longer).Unfortunately, I found out about direct-fit 880 HID bulbs afterwards.
These use 55w halogen bulbs so they will not overload the stock foglight wiring/fuses. These lights have a lot more glare than stock, but they work great!
So, this is what you need:
- A good small socket set
- 2 880 light bulbs (these should already be in your car)
- Wire cutters
- Needle-nosed pliers
- Electrical tape
- A bench vise or a way to make a 90 degree bend on a piece of flat steel
- A hammer to help out with bending the steel.
- A piece of wood to help out with the hammer which is helping you reshape the steel bracket (optional)
- Hot melt glue gun (optional - electrical tape should do alright)
- Connector coating (optional - used for electrical contact insulation, a liquid that dries to non-conductive rubber)
- Soldering iron (optional)
- Paint to prevent rust in the bracket after bending (optional)
- The lights! Duh! I got them from Pep Boys. Pilot/Navigator branded NV-362W
The lights that I bought. The lens is 4.5" across the face. They also have multi-colored LEDs which light up a halo:
Be careful that you don't get ones that LOOK like these inside the box, make sure they're the ones with a multi-colored LED halo around them and with the blue tinted bulbs. The reflector has a square quilt-like pattern indented in it and there is no metal reflector blocking the bulb.
Next, you have to unbolt the stock fog lights from behind the bumper. There is an easy access panel under the fog lights consisting of two 7mm(?) bolts. Disconnect the light from the wire harness and then proceed. The fog light bracket is held in by three nuts (also 7mm I think) that you can remove with a socket - an extension MAY make this easier but don't quote me on it
. When you are done unbolting, lift the lights upwards and towards the license plate, while rotating (you'll see what I mean when you get there):This is what the stock fog light assembly looks like when removed from the bumper. You'll have to unscrew the adjustment screw on top, detach the adjuster clip, and pop out the two nuts holding the stock lens on:
This is how you have to bend the OEM bracket to mount the aftermarket driving light to it. I didn't have a bench vise so I got creative and used my manly strength to bend it evenly by wedging it between two pieces of steel/wood (table/platform with heavy objects), then a hammer/2x4 to fix any imperfections. I still recommend using a bench vise. I recoated the bend with a layer of connector coating so that it wouldn't rust from flaking paint. Once dry, I used spare nuts/bolts/washers/spacers to keep the light attached and adjustable. Make sure you use the same combo for both so it's easily adjustable:
This is what I did to retain the ability to easily go back to stock if I had to. I took an 880 bulb and cut it at the base, leaving only two electrical contact points and the connector plug. I filed down the connectors for maximum adhesion when soldering (not 100% necessary to solder).
The H3 light bulbs come with wires and crimp connectors attached. You can probably crimp these on and wrap the terminals up individually with electrical tape and call it a day, but I took it a step further:
Mocked up. Just making sure I have the electrical connections in the right spot so as to not create any twists/tension when they are on the car. Had to rotate the rubber wire guide on the lens housing to point it in the proper direction:
Soldered on. If the light goes out I will cut the wires and start over, since a new bulb comes with wires/crimp connectors attached:
As far as I can remember, I used connector coating as an insulator over the contact points, waited for that to dry, then wrapped that with electrical tape, and then used a hot glue gun to put hot glue over that:
I taped up the unused LED halo control plug since I didn't want to spend the time wiring it up. Should be weather-proofed and good as new should I ever want to set up the halos in the future.
After taping everything up, I mounted it back to the bracket and then placed it back on the car for initial alignment.
Adjusted it to the proper angles (I adjusted it higher cause I was tired of having them point down) and to the right tension to where I could slightly adjust it on the car by pushing hard enough in one direction. I pretty much aimed them to where the headlights were pointing, then adjusted them downwards from there.
Last edited by ZexGX; Jun 16, 2011 at 08:26 PM.

Copy & Paste Moderator


Joined: Apr 2002
Posts: 9,761
Likes: 206
From: Eastern MA
Wow, how'd I miss this thread. Good Work!
I soldered my connections too, but I used heat shrink tubing on each connection and and silicone covering it all instead connector coating and hot glue.
Glad I could help. 
Here is my write-up if anyone else wants to look:
http://www.fadingarrow.com/foglights.htm
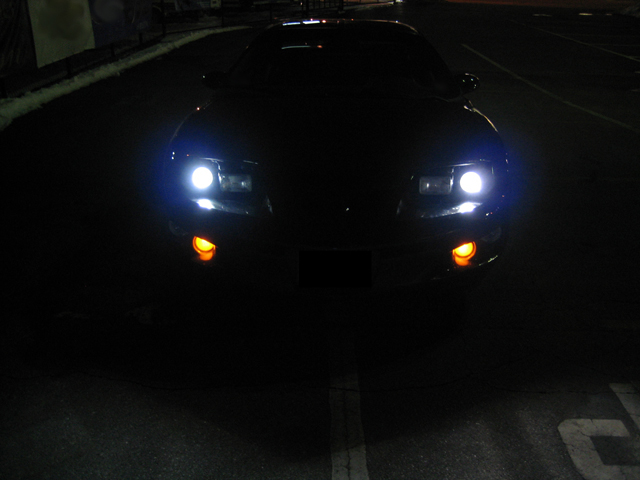
Their beam pattern is conical instead of flat. Which makes these more of a driving light than a fog light. Because of this (and my low beam HID projectors), I usually leave these fog lights off around town.
I soldered my connections too, but I used heat shrink tubing on each connection and and silicone covering it all instead connector coating and hot glue.
Here is my write-up if anyone else wants to look:
http://www.fadingarrow.com/foglights.htm
Their beam pattern is conical instead of flat. Which makes these more of a driving light than a fog light. Because of this (and my low beam HID projectors), I usually leave these fog lights off around town.
Copy & Paste Moderator
Joined: Apr 2002
Posts: 9,761
Likes: 206
From: Eastern MA

Thread Starter
12 Second Club
iTrader: (28)
Joined: May 2007
Posts: 2,793
Likes: 16
From: under a JEGS hat
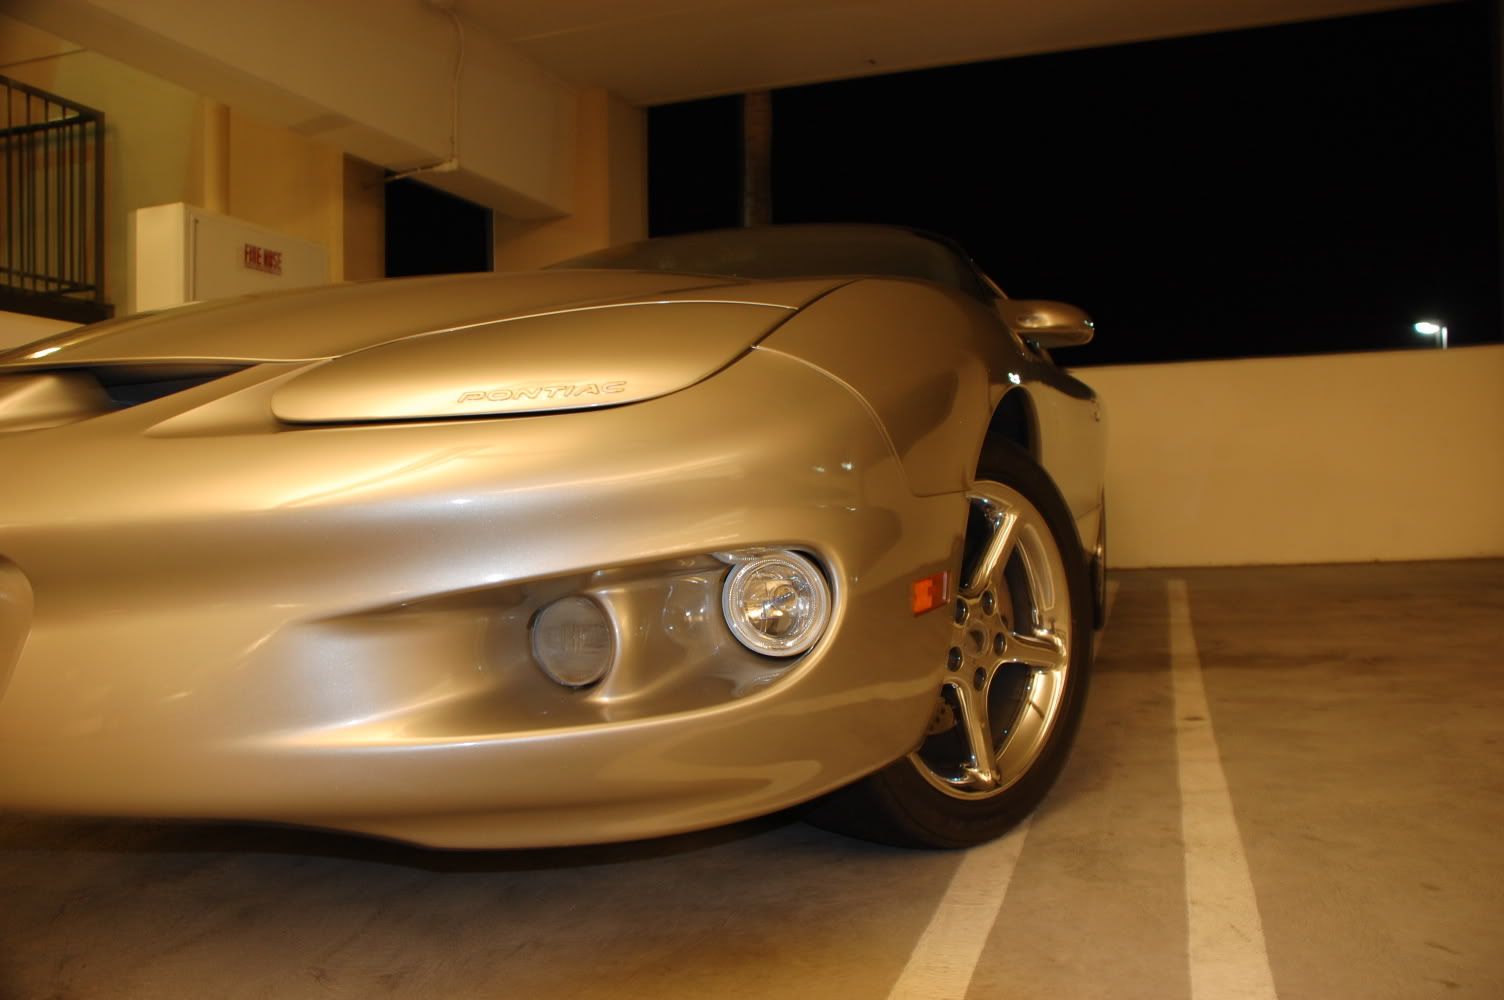
Just an update... I wired up the halos several months ago and they have been working great. The hot glue looks the same as it did on day 1 and is still providing support. The glass lenses are still in good shape and I've put at least 15k miles on them since install. Bulbs are still good, and no foglight fuses have been blown. I'm happy with this mod - but I rarely use them. I had an issue in February with my both low beams not getting power, and I used these to drive around for a few nights (right past a cop or two) with no major issues since they are about as bright as the stock Wagner 4703 headlamps.
Trending Topics

Thread Starter
12 Second Club
iTrader: (28)
Joined: May 2007
Posts: 2,793
Likes: 16
From: under a JEGS hat
Thread Starter
12 Second Club
iTrader: (28)
Joined: May 2007
Posts: 2,793
Likes: 16
From: under a JEGS hat
FYI the 98-02 Trans Ams have completely different mounts, so this guide does not apply to those years. The lens size should be the same (4.5") but the mounting is different.
$60 from Pep Boys, but they have been kind of hard to find lately.
$60 from Pep Boys, but they have been kind of hard to find lately.
Thread Starter
12 Second Club
iTrader: (28)
Joined: May 2007
Posts: 2,793
Likes: 16
From: under a JEGS hat
Quick bump with a status update... Last year I drove through an explosion of glass & metal shards and one of the Pilot lenses got cracked, so I removed them and went back to stock w/5000k HIDs. My upcoming fog/DRL project is on the backburner until I have more time/money to spend on appearance mods, but I promise to do a write-up for that too.