
Smoothed and Blacked out my Tails
 02-21-2009, 12:07 AM
#1
As some of you know, Nymphadora is mostly blacked out with small chrome accents here and there. When I first bought her, the first "mod" I did was buy some AVS Tail Shades. I preferred the smooth look over VHT'ing the tails and having the reverse lights be an eye sore. So over the past year, my Tail Shades have gotten scratched to the point that I decided to take them off and VHT my tails.
I spent a lot of time looking for the best possible way to fill in the reverse lights while still keeping them functional. I obviously needed something that would hold shape till it dried, and could also be sanded. I settled on filling it in with Super Glue. Needless to say, this failed. I completely trashed a spare taillight I had sitting in my garage. It wasn't pretty. I then toyed with the idea of just doing away with the reverse light altogether. I mean, I don't DD her and when I do drive her, I park so far away that reversing need not be done when I'm leaving. The only reversing I do is when I come out of my garage/driveway and even then I live on a slow residential street. I weighed the Pros and Cons of doing this and after two weeks of debating with myself, I started my work.
I took my perfectly MINT tail lights off of my baby and got cracking. It was funny...I ruined the first batch of Bondo I mixed up because I couldn't bring myself to put it on my tails...I had to have my fiance stand over me to make sure I started . Well, after I started I couldn't stop. I probably spent 3 weeks sanding and reapplying Bondo because I would sand the Bondo lower than the plastic. I eventually got it the way I wanted it and got out the filler primer to seal the elements out. After it was primed, I had to reapply a small amount of Bondo to fill in the minuscule ring left by the reverse light (I then had to tape it back up and primer again.
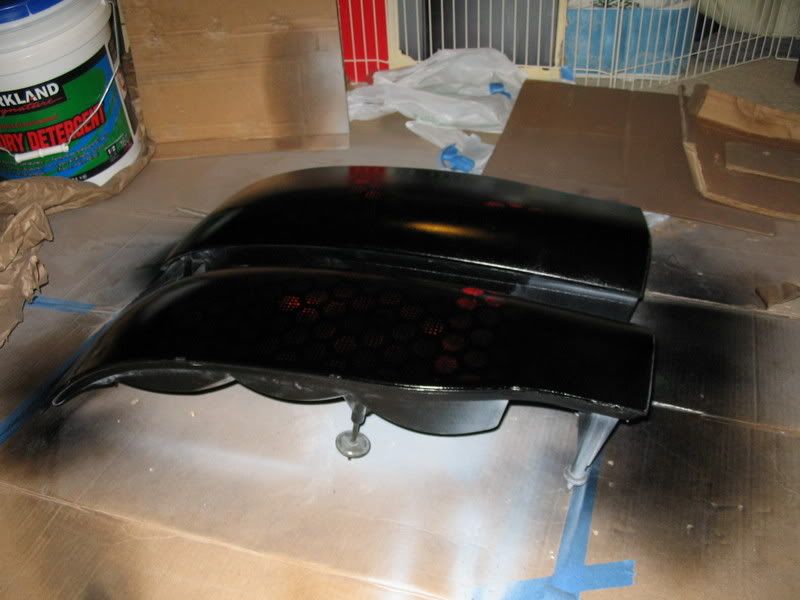
When the primer was dry, I sanded it down so it was level with the rest of the light. I then sprayed the primer area with black paint (no tape, just eye balled it). After the black dried, I started applying the VHT. I decided to use 1 can per light so I wouldn't have to worry about getting it even, and I also wanted them really dark, so it was a win-win situation. Note: My fiance is getting my LED Lights for my B-day, so light coming through won't really be a problem. After the VHT was on, I applied about half a can of automotive clear coat. I then wet sanded them down with 2000 grit sandpaper. Next, I buffed it to a shine with Meguiars Scratch-X. Last I put a coat of Turtle Wax on so they don't get scratched in the process of putting them back on the car. I'm sure I'll use NXT Tech Wax when I detail the her in the Spring.
Enjoy
Before:
After:
Are they LT1 Lights???
OMG...they aren't....how'd he do that?
During:
Scuffing up the plastic:
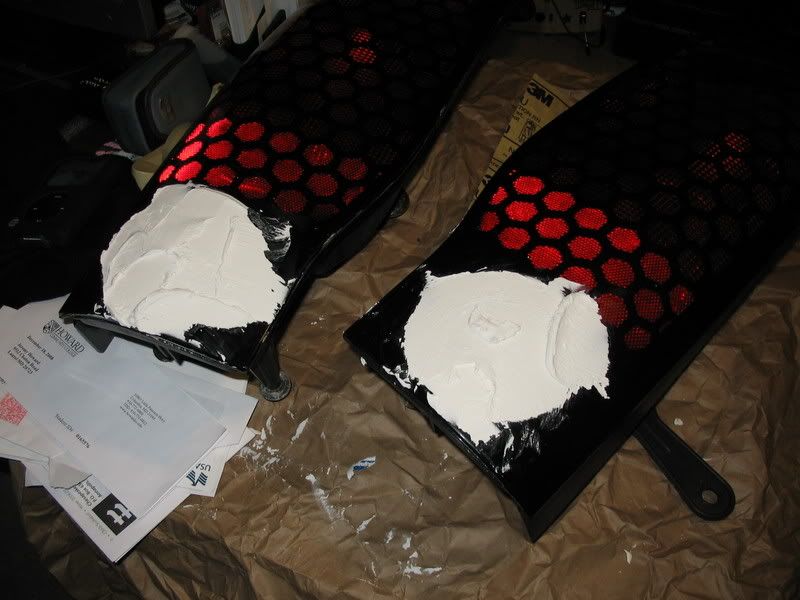
Adding Bondo as a filler:
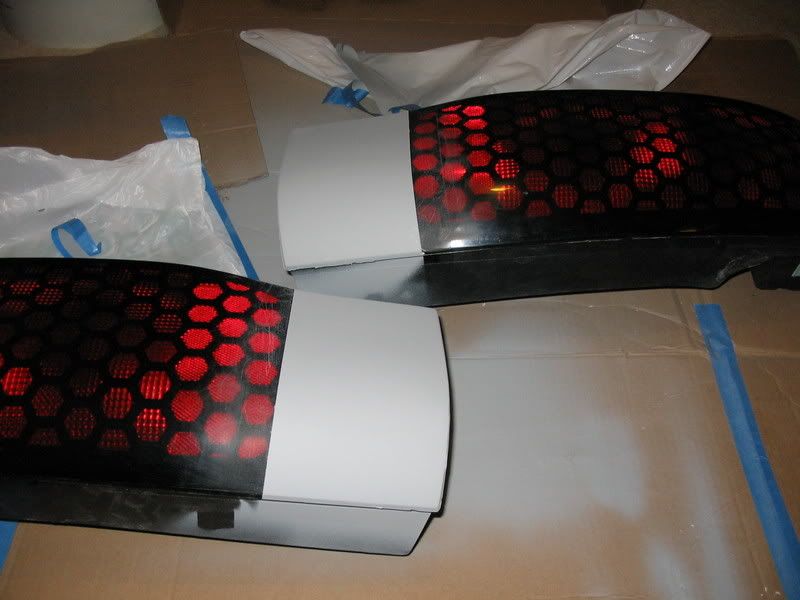
Smoothed and Primed:
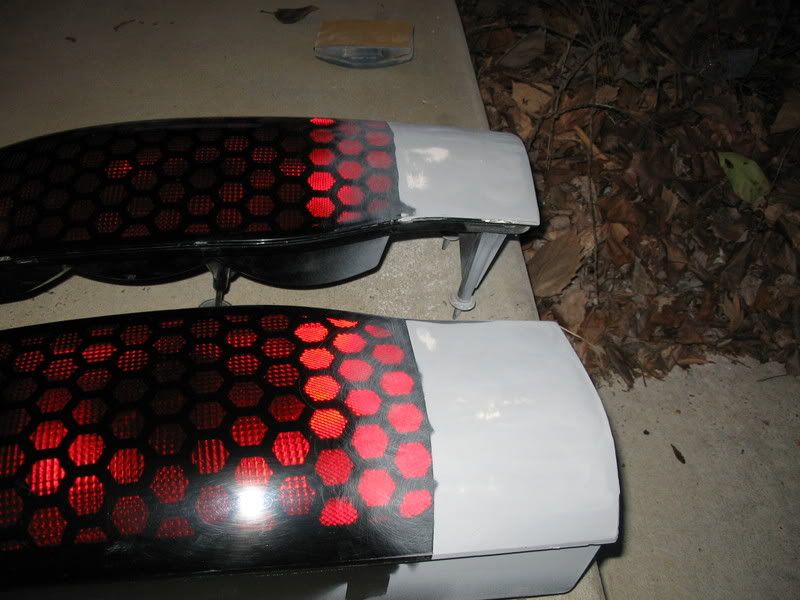
Blending Primer to Plastic:

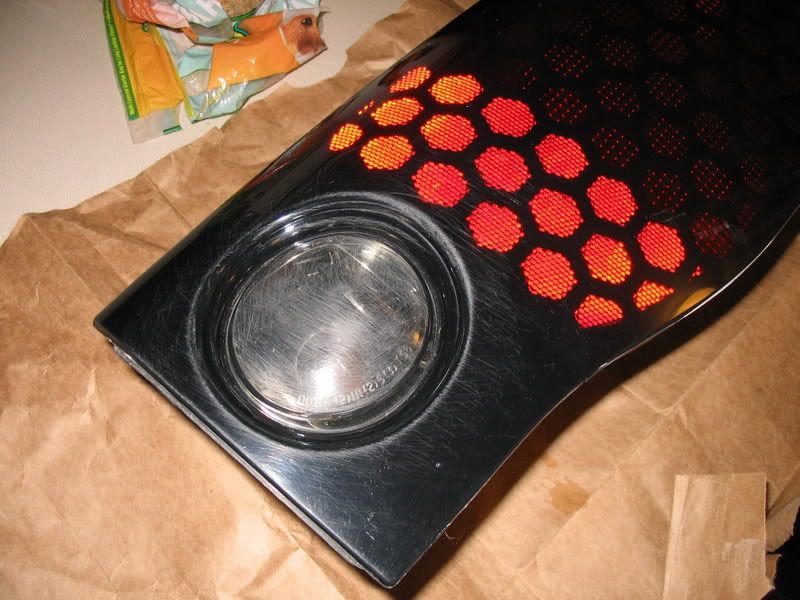
Black Paint for the Primed Areas and the first pass with the VHT:

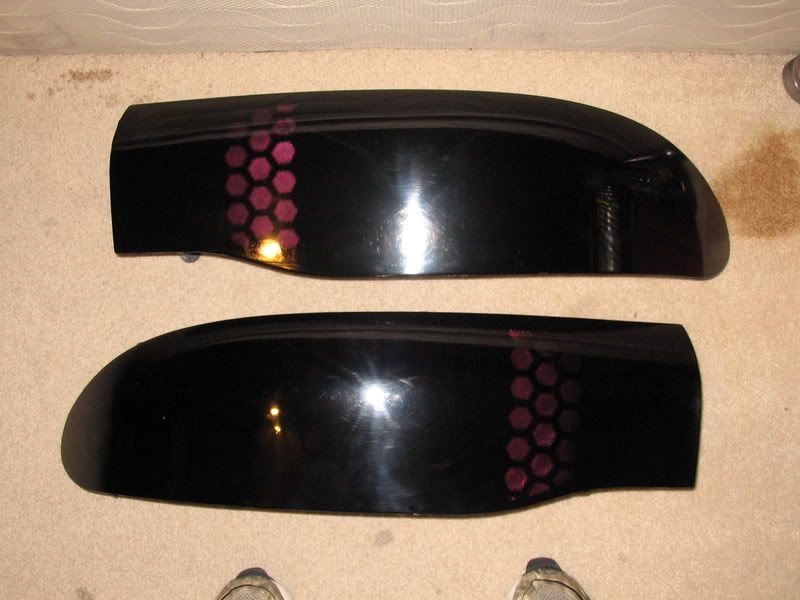
Second, Third, and Fourth Layers of VHT:
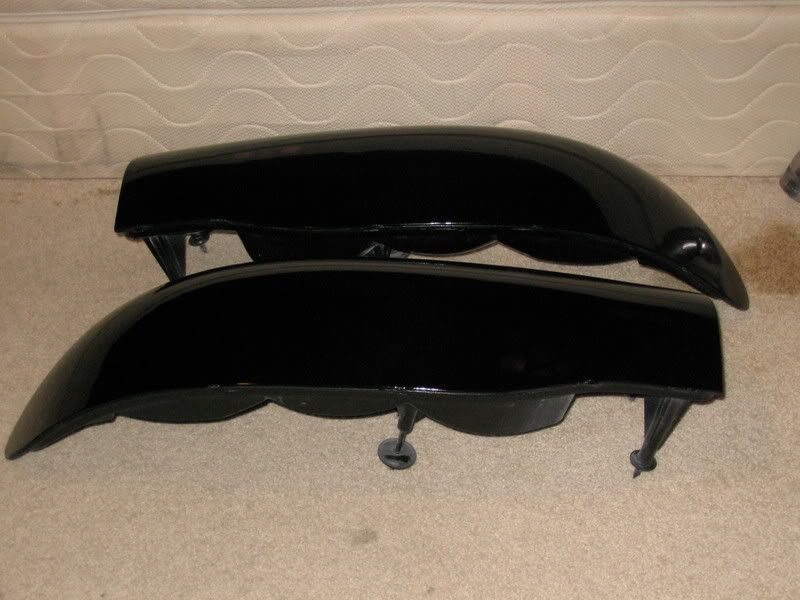
1 Can of VHT per Light...Clear Coated, Wet Sanded, Buffed and Waxed:
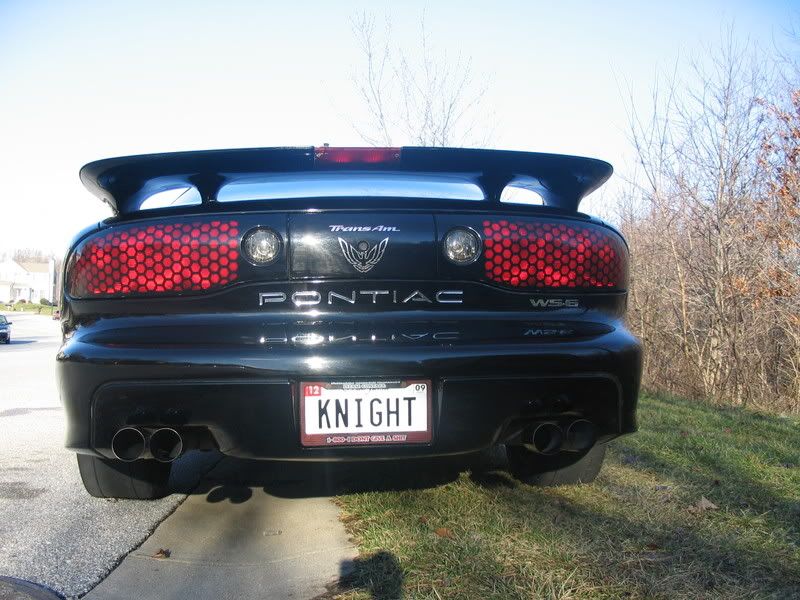
I'll get some on-the-car shots tomorrow after I install my new (to me) 9" and Adjustable Torque Arm
I spent a lot of time looking for the best possible way to fill in the reverse lights while still keeping them functional. I obviously needed something that would hold shape till it dried, and could also be sanded. I settled on filling it in with Super Glue. Needless to say, this failed. I completely trashed a spare taillight I had sitting in my garage. It wasn't pretty. I then toyed with the idea of just doing away with the reverse light altogether. I mean, I don't DD her and when I do drive her, I park so far away that reversing need not be done when I'm leaving. The only reversing I do is when I come out of my garage/driveway and even then I live on a slow residential street. I weighed the Pros and Cons of doing this and after two weeks of debating with myself, I started my work.
I took my perfectly MINT tail lights off of my baby and got cracking. It was funny...I ruined the first batch of Bondo I mixed up because I couldn't bring myself to put it on my tails...I had to have my fiance stand over me to make sure I started
When the primer was dry, I sanded it down so it was level with the rest of the light. I then sprayed the primer area with black paint (no tape, just eye balled it). After the black dried, I started applying the VHT. I decided to use 1 can per light so I wouldn't have to worry about getting it even, and I also wanted them really dark, so it was a win-win situation. Note: My fiance is getting my LED Lights for my B-day, so light coming through won't really be a problem. After the VHT was on, I applied about half a can of automotive clear coat. I then wet sanded them down with 2000 grit sandpaper. Next, I buffed it to a shine with Meguiars Scratch-X. Last I put a coat of Turtle Wax on so they don't get scratched in the process of putting them back on the car. I'm sure I'll use NXT Tech Wax when I detail the her in the Spring.
Enjoy
Before:
After:
Are they LT1 Lights???
OMG...they aren't....how'd he do that?
During:
Scuffing up the plastic:
Adding Bondo as a filler:
Smoothed and Primed:
Blending Primer to Plastic:
Black Paint for the Primed Areas and the first pass with the VHT:
Second, Third, and Fourth Layers of VHT:
1 Can of VHT per Light...Clear Coated, Wet Sanded, Buffed and Waxed:
I'll get some on-the-car shots tomorrow after I install my new (to me) 9" and Adjustable Torque Arm


 02-22-2009, 12:20 PM
#4
Here you go guys:
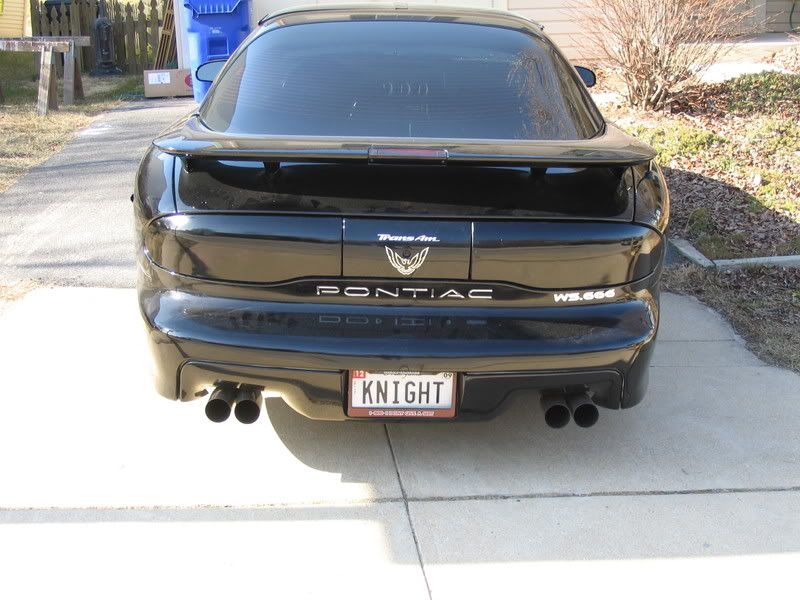
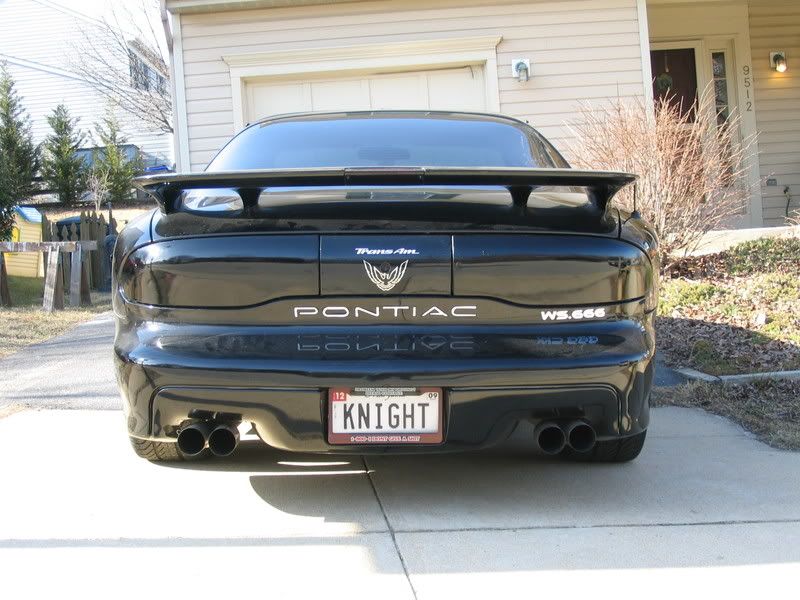
If you look at the inside of the passenger light, you'll see two "fisheyes", or airbubbles under the paint. I was pissed when I saw those. I tried my best to keep my fingers off of the lights while I was painting, but I guess I wasn't careful enough. I have to take it off, sand it down in those areas, and repaint. Luckily, they are located where there is straight black paint, so I don't have to worry about evening out the VHT.
Edit: Oh, and ignore the dirtiness of my car, like I said, It's been sitting in my garage for 3 months


Trending Topics
02-22-2009, 03:37 PM
#9
TECH Enthusiast
iTrader: (5)
Join Date: Aug 2008
Location: Middletown, DE
Posts: 696
Likes: 0
Received 0 Likes
on
0 Posts

i definatly like it man. Its brave for you to remove your reverse lights. If it was me, i would really think twice about it since it would be my luck that i would need my lights at some point in time. but it looks great man. I think it makes the car look better vs. the honeycombs...
 02-22-2009, 08:32 PM
#17
How does light get through? Dimmer than normal? Enough to be safe during the day? I know with that product its supposed to shine through but ive never seen such a heavy coat of it.
02-22-2009, 09:07 PM
#18
TECH Regular
iTrader: (3)
Join Date: Feb 2009
Location: Mooresville, Indiana
Posts: 430
Likes: 0
Received 0 Likes
on
0 Posts
another idea is to take off the bird emblem on the back i dont know how you feel about it but i did it to mine i actually used a buff ball and buffed it all off and was quite happy with the results, the paint is off but the emblem is still there its more like a ghost bird now you can just barely see it from an angle
02-22-2009, 09:17 PM
#20
another idea is to take off the bird emblem on the back i dont know how you feel about it but i did it to mine i actually used a buff ball and buffed it all off and was quite happy with the results, the paint is off but the emblem is still there its more like a ghost bird now you can just barely see it from an angle