


Alum Polishing help
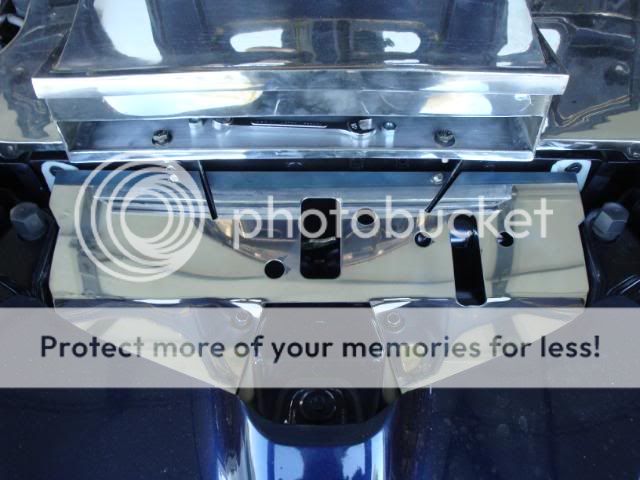
HELP........... here is the deal, some of you have seen the parts I made from alum. I have tried everthing I know to get a mirror finish. I still see a good amount of scratches.
Here is what I did so far: wetsanded all the parts with 320, 400, 600, 1000, and finally 1500 grit. I purchased from Home Depot (4) buffing pads, (2) hard & (2) soft. I also bought there buffing compounds Sticks which range from Hard buff to a finish buff. They have them numbered from 1 to 5. I also bought a white rouge compound and used if on a new soft wheel. Hand polished with Mothers and Blue Star polishing compounds. I'm missing something, it's not the bright finish I'm looking for........ I need help from the experts...............
The picture looks good but.......
Any thought or advice would be greatly Appreciated
Bill
I usually sand to 600 or 800 grit at the highest. Anything above that is not necessary when you use compounds. The buff wheels at lows are decent but the compounds probably suck. I would get 1 hard orange 1 medium white and one soft white buffing pads from lowes/home depot. Start with black rouge on the hard pad and go in the same direction all over the part. Up and down, no circling around or anything. Then move to white rouge on the medium pad, finish with green on the soft pad. Spend alot of time with each pad and you will be good to go. Once you finish with green you won't need to Hand polish anything.
Only use this kind of buff from Eastwood: http://www.eastwoodco.com/shopping/p...ProductID=1005

I never use emory (black garbage) or white rouge (worthless) -I only use tripoli from start to finish. http://www.eastwoodco.com/shopping/p...roductID=15302

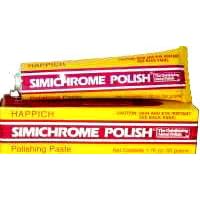
To finish it up I'll use the same buff with tripoli, be gentle (not much pressure) with this stuff: http://www.amazon.com/1-76-oz-TUBE-S.../dp/B000FGICHM
Some metal (alloy) just doesn't like to shine up... it likes to be cloudy, but using the products above you can make it close as possible to wet chrome:


I never use emory (black garbage) or white rouge (worthless) -I only use tripoli from start to finish. http://www.eastwoodco.com/shopping/p...roductID=15302
To finish it up I'll use the same buff with tripoli, be gentle (not much pressure) with this stuff: http://www.amazon.com/1-76-oz-TUBE-S.../dp/B000FGICHM
Some metal (alloy) just doesn't like to shine up... it likes to be cloudy, but using the products above you can make it close as possible to wet chrome:
You know... this is the 1st time I've looked into this forum in over a year! I got into an argument with a "pole jockey" of a moderator and haven't bothered to add/help in a while.
Stopped in for a quick second and right there on the 1st page is a guy asking for bling advice... fate huh?
Stopped in for a quick second and right there on the 1st page is a guy asking for bling advice... fate huh?
^ If it works for you... fine.
For me,
The black is emory (cut- no color) still leaves much work to be done. (Tripoli is next anyway)
The white is all color and no cut.
I've never had results with solid felt or cotton buffs, only with the waffle one listed above.
The tripoli (which is the step between black and white) has both cut and color properties. It does both and does a perfect job... every picture I've ever posted looks like wet chrome.
If I used black, then white, and with the regular hardware store buffs, and didn't have access to the Simichrome paste I'd end up with less than what I've been known to produce.
Hey, like I said at the very top, "Here's my advice for what it's worth."
Take my $ .02 or leave it....
later.
Trending Topics
LS1 Tech Stories
The Best V8 Stories One Small Block at Time

Topdon ONE vs. Artidiag 800 BT2: Which is the Diagnostic Tablet For You?
Pouria Savadkouei
Gas Monkey Built a 6-Wheel Ferrari Testarossa With a Corvette LT4 Engine
Verdad Gallardo
7 Most Reliable High-Performance Engines GM Has Ever Built
Verdad Gallardo
Amazing '71 Camaro Restomod Is Modern Muscle Car Under the Skin
Verdad Gallardo
6 Common C5 Corvette Failures and What's Involved In Repairing Them
Pouria Savadkouei
Retro Modern Bandit Pontiac Trans AM Comes With Burt Reynolds' Autograph
Verdad Gallardo
Top 10 Greatest Cadillac V Series Performance Models Ever, Ranked
Pouria Savadkouei
Top 10 Most Powerful Chevy Trucks Ever Made!

Hennessey's New Supercharged Silverado ZR2 Has 700 HP
Verdad Gallardo ^ Thanks! 
To the original poster, you've done all the hard work, if you order that lil' tube of Simichrome and one of those waffle pads I'm sure you'll be glad. That particular paste lives up to it's name. Nothing comes close.
To the original poster, you've done all the hard work, if you order that lil' tube of Simichrome and one of those waffle pads I'm sure you'll be glad. That particular paste lives up to it's name. Nothing comes close.

Joined: Oct 2006
Posts: 2,608
Likes: 0
From: Webb City, MO...out in the garage
~JOSHUA's opinion should be considered above all others' on this topic, but one other element that CAN be crucial in getting the desired shine is HEAT. the hotter you can get the part while polishing, the better. don't preheat or use a torch on it, just rub/buff vigorously to generate enough friction to heat the part up. it will let the compound do what it does better. Another thing to remember is not to use too much compound, it needs to break down to work like it's designed and if you have too much, you'll just be smearing it around with poor results.
You guys are awesome!! A lot of good info here, you got to believe the man with the Chrome Engine. All this info is good stuff. I will be trying some of this and I'll let you know the out come!!!!!!
Again Thanks!!!!
Bill
Again Thanks!!!!
Bill
Simichrome is a paste (pink in color) of medium consistency. It works well keeping up parts (wheels ect) when you don't have power tools available. I personally haven't any positive results with Mother's...
I've never used Zoopseal, but I've heard great things about it....
Here's a couple pictures of my old engine after ONE YEAR with no maintenance, if you get it perfect to start with, it will last longer.
The car was a garage queen, so daily driving was out of the picture.

Before the TT kit:

I've never used Zoopseal, but I've heard great things about it....
Here's a couple pictures of my old engine after ONE YEAR with no maintenance, if you get it perfect to start with, it will last longer.
The car was a garage queen, so daily driving was out of the picture.
Before the TT kit:
It was just a generic breather that had a thick o-ring to give it just barely enough tension to "press fit" in the oil fill neck. Sure was better than dumping $50 on a billit (purpose made) one from retailers.

I don't put my polishing work at Joshua's level(I don't think), but I don't suck at it lol
I stop the wet sanding at 400 grit, then start the buffs at about 3k rpm using enough force to create enough heat in the part that its almost uncomfortable to hold on to with bare hands as I work. I do ok going from black with a medium stiffness buff, then white with a soft buff, then oddly enough finishing with mothers billet on a medium buff again..then removing the excess by hand with a mothers microfiber towel.
One important step I didn't see mentioned is to remove your compounds with acetone on a microfiber cloth between compounds so you are back to bare clean metal for each new compound. Also to rake your buff often with a buff rake.
Also you may still be having trouble removing scratches due to your wet sanding process. I soak the paper in a bucket of warm water with a few drops of dish washing soap for an hour before I start on the metal. I only will sand for maybe 10 seconds at a time at most before dunking that paper back in for a second. You gotta keep the crap off it, and plenty of lube between that paper and the part you are sanding. If anyting gets in there, it'll put a much deeper scratch in the metal than the grit you are using and you just got put backwards without even realizing it..you'll only find that scratch when you get to the point of buffing and going for the final finish. Sucks to have to go back to step X to fix it.
I have more but I'm tired, lol.

TECH Fanatic


Joined: Jun 2003
Posts: 1,869
Likes: 99