Appearance & Detailing Interior & Exterior Appearance Modifications

Thanks 6LITEREATER and EmblemPros

Thread Tools
 
Search this Thread
 
Old 09-04-2009, 11:01 AM
  #1  
Kleeborp the Moderator™
Thread Starter
iTrader: (11)
 
MeentSS02's Avatar
 
Join Date: Mar 2004
Location: Dayton, OH
Posts: 10,317
Likes: 0
Received 2 Likes on 2 Posts

Default Thanks 6LITEREATER and EmblemPros

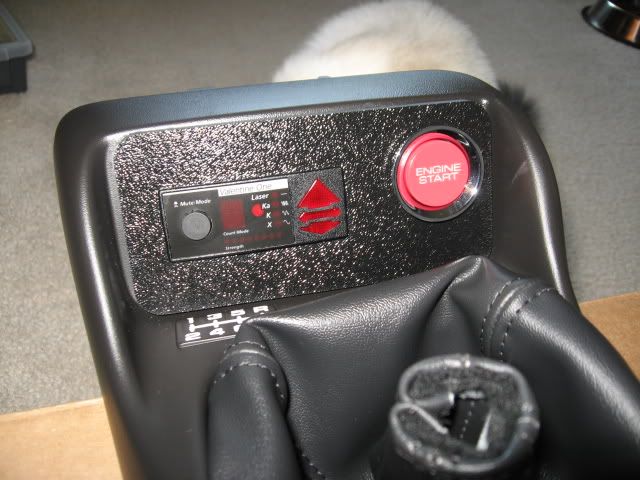
Nothing special, but I thought I'd share a few pics of my center console switch panels. The panel that has the Valentine One remote display and the engine start button was from 6LE (it was a blank panel that I cut myself), and EmblemPros made the line lock switch panel for my ash tray. Pics below...

With flash (the ball of fur is my cat trying to eat the connectors coming out of the back):
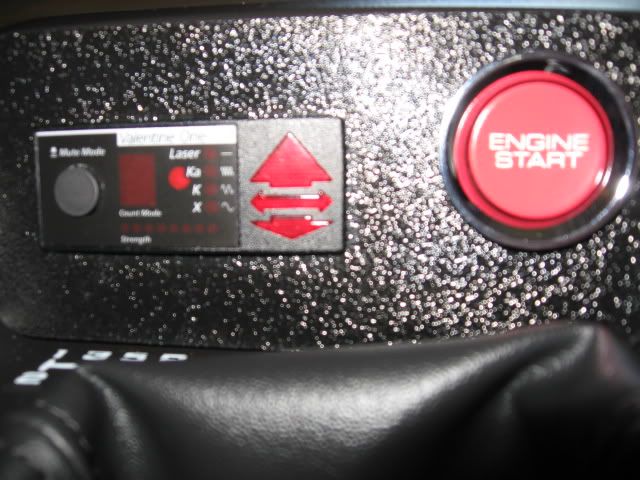


Without flash:


A little closer of the 6LE panel:


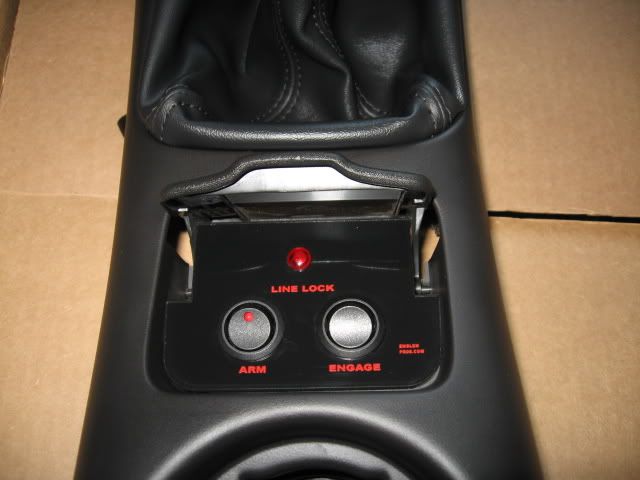
Line Lock switch panel by EmblemPros:


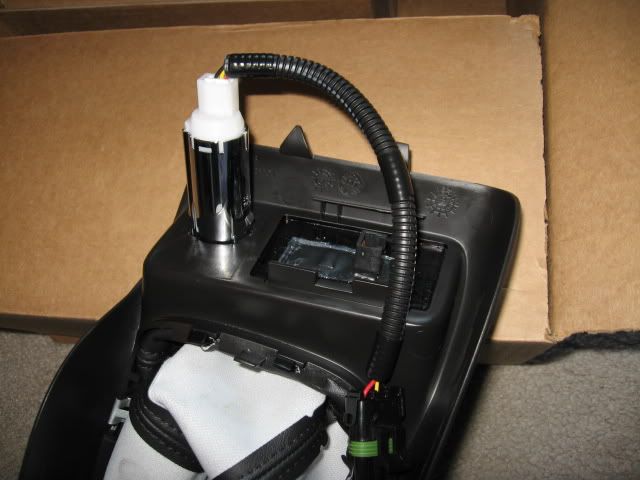
Underneath the switch panel:


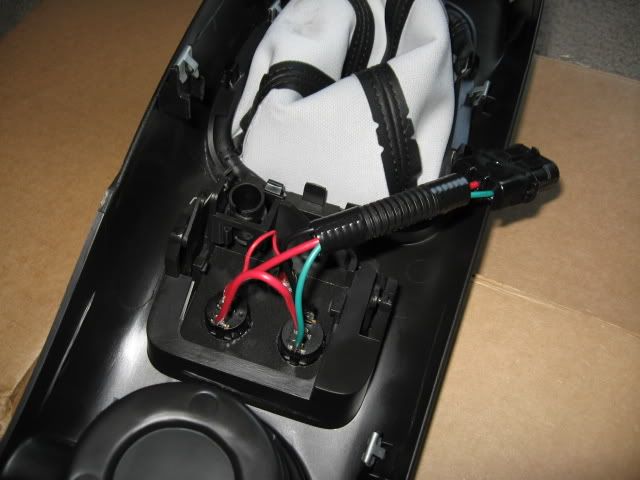
Behind the 6LE panel:


The Valentine One remote display was actually a custom made piece from a guy on Ebay that takes the regular remote display and converts them to a thinner piece for easier mounting in applications like these.

Again, thanks to 6LITEREATER and EmblemPros (dragonZ28)!
Old 09-04-2009, 11:11 AM
  #2  
12 Second Club
iTrader: (5)
 
01 Trans-Am WS6's Avatar
 
Join Date: Mar 2008
Location: Saylorsburg, PA
Posts: 673
Likes: 0
Received 0 Likes on 0 Posts
Default

Looks really good
Old 09-04-2009, 12:51 PM
  #3  
12 Second Club
iTrader: (7)
 
99_Z_155's Avatar
 
Join Date: Oct 2005
Location: Englewood, CO
Posts: 1,018
Likes: 0
Received 0 Likes on 0 Posts

Default

It was a good idea to put a connector there for the wires. its a pain in the ***** to take that shift boot plate etc. with wires holding it down.
Old 09-04-2009, 01:17 PM
  #4  
Launching!
iTrader: (2)
 
TransAm578's Avatar
 
Join Date: Aug 2006
Location: St. Louis, MO
Posts: 270
Likes: 0
Received 0 Likes on 0 Posts

Default

That looks amazing! The details are what makes some cars, such as yours, really stand out.

Please post some installed pics!
Old 09-04-2009, 01:43 PM
  #5  
TECH Enthusiast
 
CHRRRIS's Avatar
 
Join Date: Jan 2008
Location: North Chicagoland
Posts: 509
Likes: 0
Received 1 Like on 1 Post
Default

Hot. Also want to see it installed.
Old 09-04-2009, 02:24 PM
  #6  
12 Second Club
iTrader: (13)
 
Bad30th's Avatar
 
Join Date: Nov 2001
Location: San Diego, CA
Posts: 1,898
Likes: 0
Received 0 Likes on 0 Posts

Default

Very nice, functional and the install looks clean !

Rob (Bad30th)
Old 09-04-2009, 02:29 PM
  #7  
TECH Resident
 
1998Z28LOADED's Avatar
 
Join Date: Jul 2006
Location: SE OHIO
Posts: 840
Likes: 0
Received 0 Likes on 0 Posts
Default

nice!
Old 09-04-2009, 03:05 PM
  #8  
Banned
iTrader: (56)
 
6LITEREATER's Avatar
 
Join Date: Jul 2004
Location: Valley Village, CA
Posts: 12,638
Likes: 0
Received 3 Likes on 3 Posts

Default

at the cat!

Man, you did a GREAT job cutting that!
Old 09-04-2009, 03:42 PM
  #9  
10 Second Club
iTrader: (14)
 
Detoxx03's Avatar
 
Join Date: Jan 2007
Location: Woodward Avenue
Posts: 7,336
Received 72 Likes on 37 Posts

Default

That looks real clean.
Old 09-04-2009, 04:11 PM
  #10  
Kleeborp the Moderator™
Thread Starter
iTrader: (11)
 
MeentSS02's Avatar
 
Join Date: Mar 2004
Location: Dayton, OH
Posts: 10,317
Likes: 0
Received 2 Likes on 2 Posts

Default

Originally Posted by 99_Z_155
It was a good idea to put a connector there for the wires. its a pain in the ***** to take that shift boot plate etc. with wires holding it down.
Thanks...I bought all the stuff to make weatherpack connectors a while back, and I've been going overboard with them lately That was my #1 goal this iteration - to make it much more user friendly when I have to take parts of the interior out. I'll have to grab a pic of what it is replacing - it isn't a huge difference, but it really cleaned everything up.

As for cutting out the stuff in the 6LE panel - yeah, that took a LONG time. I went very, very slowly to make sure everything just fit the holes. I probably have a good 5-6 hours in just that portion from start to finish.
Old 09-04-2009, 04:44 PM
  #11  
FormerVendor
iTrader: (32)
 
dragonZ28's Avatar
 
Join Date: Jul 2003
Location: Lexington, KY
Posts: 3,654
Likes: 0
Received 0 Likes on 0 Posts

Default

looks very professional!!!
Old 09-04-2009, 05:18 PM
  #12  
TECH Regular
iTrader: (4)
 
Tbird232ci's Avatar
 
Join Date: Jun 2009
Location: Cockeysville, Md
Posts: 408
Likes: 0
Received 2 Likes on 2 Posts

Default

How does the EmblemPro's panel install? Is it a friction fit or does it tape/glue in?

It looks great man.
Old 09-04-2009, 06:10 PM
  #13  
Kleeborp the Moderator™
Thread Starter
iTrader: (11)
 
MeentSS02's Avatar
 
Join Date: Mar 2004
Location: Dayton, OH
Posts: 10,317
Likes: 0
Received 2 Likes on 2 Posts

Default

Originally Posted by Tbird232ci
How does the EmblemPro's panel install? Is it a friction fit or does it tape/glue in?

It looks great man.
Double sided tape for the panel itself.

I was very pleased with how it all came out.
Old 09-05-2009, 11:10 AM
  #14  
TECH Regular
iTrader: (1)
 
EsCrasston's Avatar
 
Join Date: Jul 2006
Location: Central PA
Posts: 446
Likes: 0
Received 0 Likes on 0 Posts

Default

very nice!!
Old 09-05-2009, 02:23 PM
  #15  
TECH Addict
iTrader: (76)
 
94'BLKBRD's Avatar
 
Join Date: May 2005
Location: SoCal
Posts: 2,977
Likes: 0
Received 0 Likes on 0 Posts

Default

Good job on the install.
Old 09-05-2009, 04:32 PM
  #16  
Staging Lane
iTrader: (3)
 
BluShadowSS's Avatar
 
Join Date: Jun 2009
Posts: 50
Likes: 0
Received 0 Likes on 0 Posts
Default

very clean set up.
Old 10-22-2009, 09:37 PM
  #17  
TECH Addict
 
SRfastZ's Avatar
 
Join Date: Feb 2004
Location: Dallas
Posts: 2,653
Likes: 0
Received 0 Likes on 0 Posts

Default

clean set up


Quick Reply: Thanks 6LITEREATER and EmblemPros


All times are GMT -5. The time now is 11:30 PM.