Seat Heater Install in T/A SEATS (LOTS OF PICS)
#1
Thread Starter
Joined: Jan 2007
Posts: 1,349
Likes: 3
From: Doylestown, Pa
I just got done installing a set of left and right seat heaters in my ebony T/A seats. The install was rather easy but time consuming. I got the seat heaters from one of our vendors, FAST TOYS. http://fasttoys.net/shop/
They are made by CARBOTECH who actually supplies GM and other automotive manufacturers. They are very well made and easy to make fit your application.
Each kit comes with a 2 panels. One panel is 24" x 12" and the other is 20" x 12". I used the smaller panel on the top and cut it to the shape. The bottom panel was the perfect size so no cutting was required. some may find that they want to trim a section out of the bottom panel due to some velcro not being attached but I assure that that it did not affect the finish of the covers. They look factory.
They come with dual wiring harness's. They are 100% complete and come with your choice of a on/off switch or for a couple of more dollars you can have a switch with 2 temperature settings and of course an off switch. Each section of wire has a connector already fastened onto it so it all snaps together and is dummy proof. Just hook the power to ignition source and your done.
These things work awesome! They heat up really fast! After I tore into the seats, I noticed that there was lots of padding under the legs and I didn't think that the heat would penetrate through but it does alot.
This kit is complete! Bring it home and install it with basic handtools!
The seat back and map pocket must be removed if you plan on seperating the seat back and seat bottom. Doing this is not necessary.
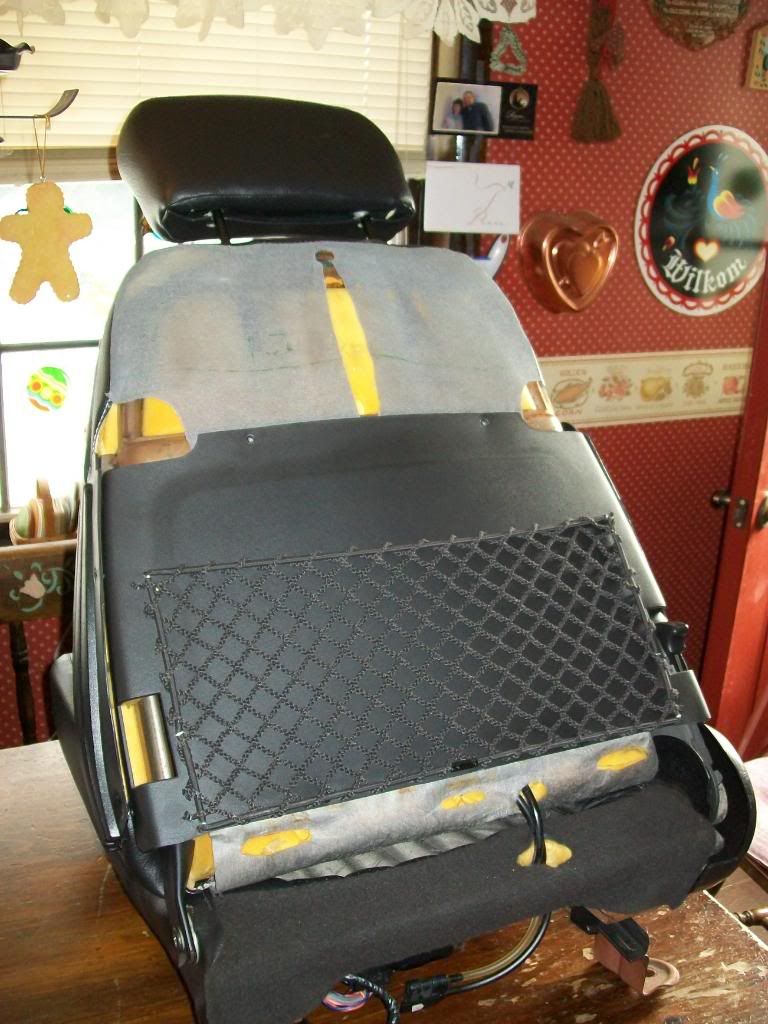
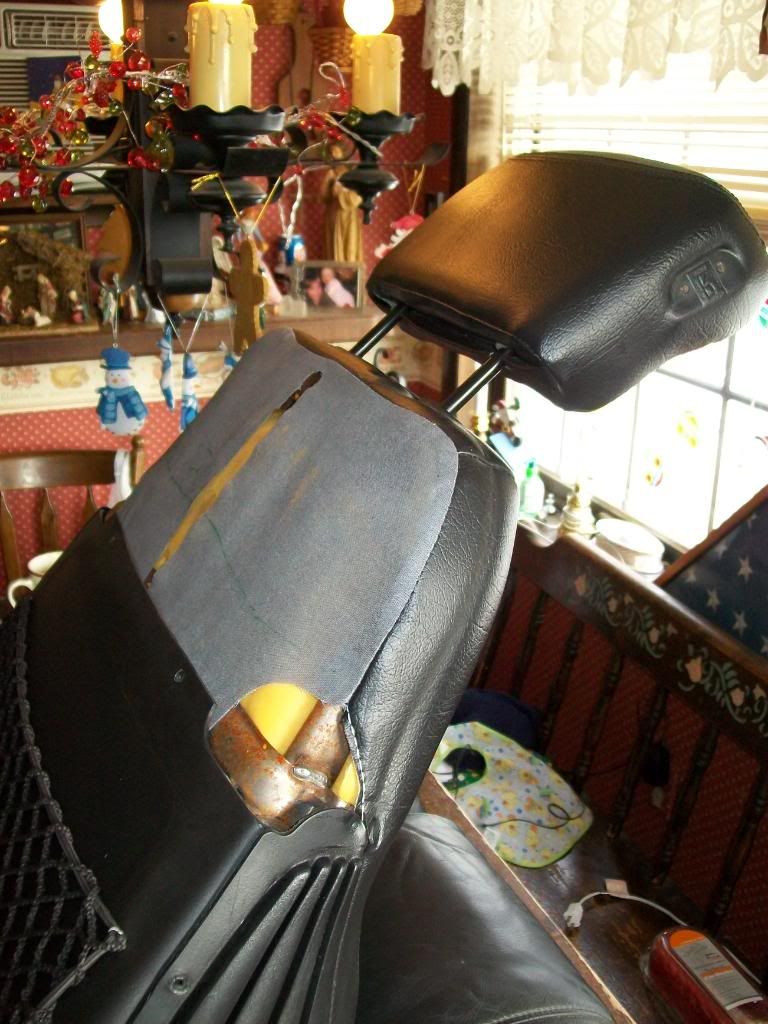

The hog rings must be cut and removed to access the tubing for the air bolsters if you plan to seperate the back rest from the seat bottom


The seat back seat cover cannot be completely removed unless you plan on cutting all of the hog rings that secure the seat. There are hog rings that fasten the side bolsters to give it it's shape so that the side air bolsters are separated from the center air bolster.

This pic is of the seat back looking under the seat cover. This is where the smaller heating pad will be slid into. Sorry, NO PICS of the seat back heating pad installed

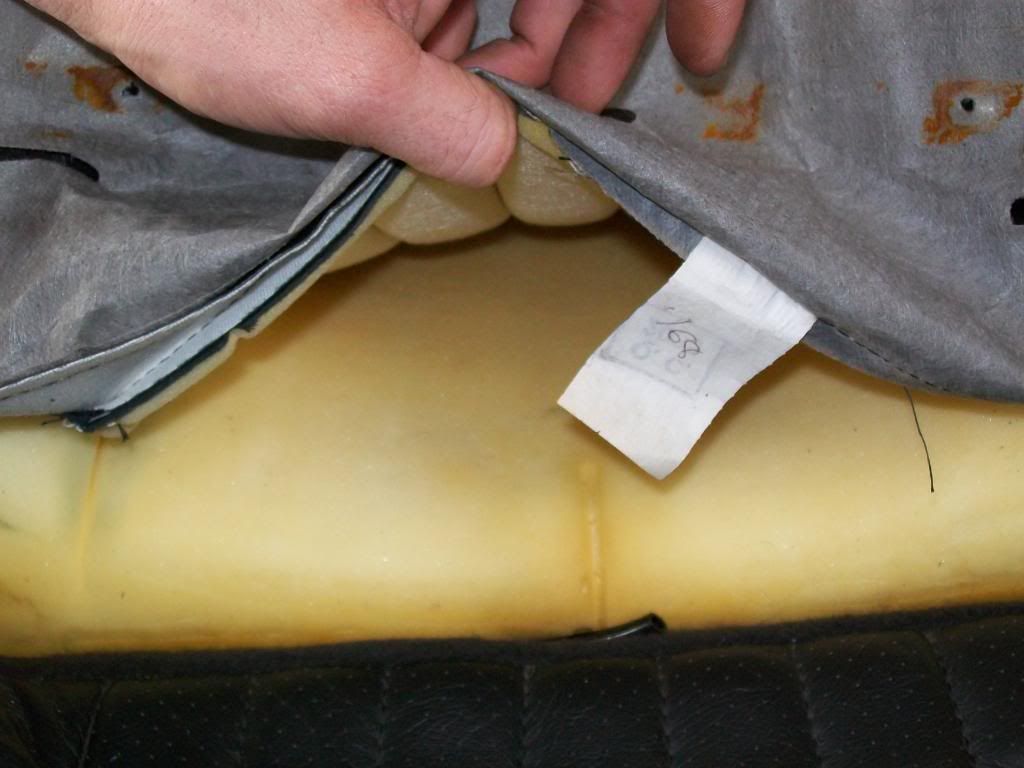
This pic shows where the harness for the seat back heater pads comes through at. I ran it along with the air tubes.

Instead of reinstalling hog rings, I used zip ties which I thought wouldn't work very well but to my suprise, they were easier to use and allowed adjustment of the tension of the panels.

The seat tracks must be removed. Don't ask me why the previous owner of the seats painted them with RED RUSTOLEUM!?

The seat bottom seat cover needs to be pulled almost all the way off. I find it easier to peel it back as least as possible as it helps for reinstallation.

Here you can see that the pad fits perfect and does not need to be trimmed. Only one strip of velcro is covered by the panel and does not affect the fit of the panel or it laying flat.
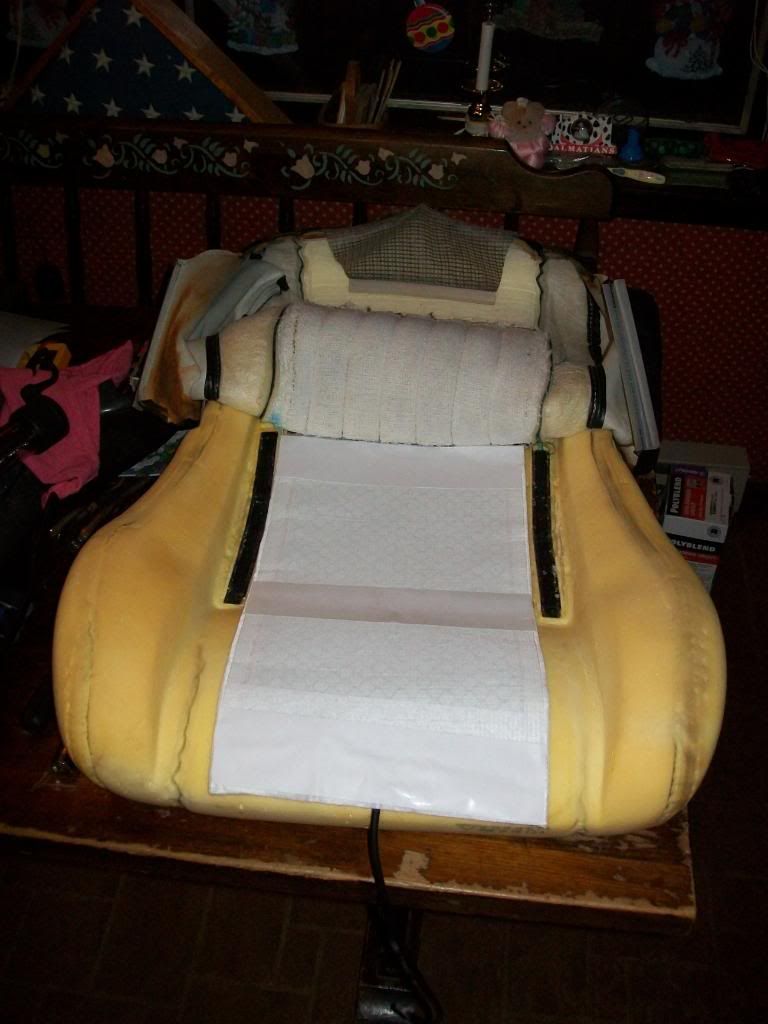

The panel is now reinstalled. This is the last step and the seats can be put back together now.

I chose to install the switches in my console. I wanted to install them in my door T/A door panels but I really didn't have that much time to rip them apart as well. AND believe me, the harness is long enough to do so! Maybe this summer I'll put the switch there, but until then, its freezin in Pa so I am going to go cruising and enjoy them!
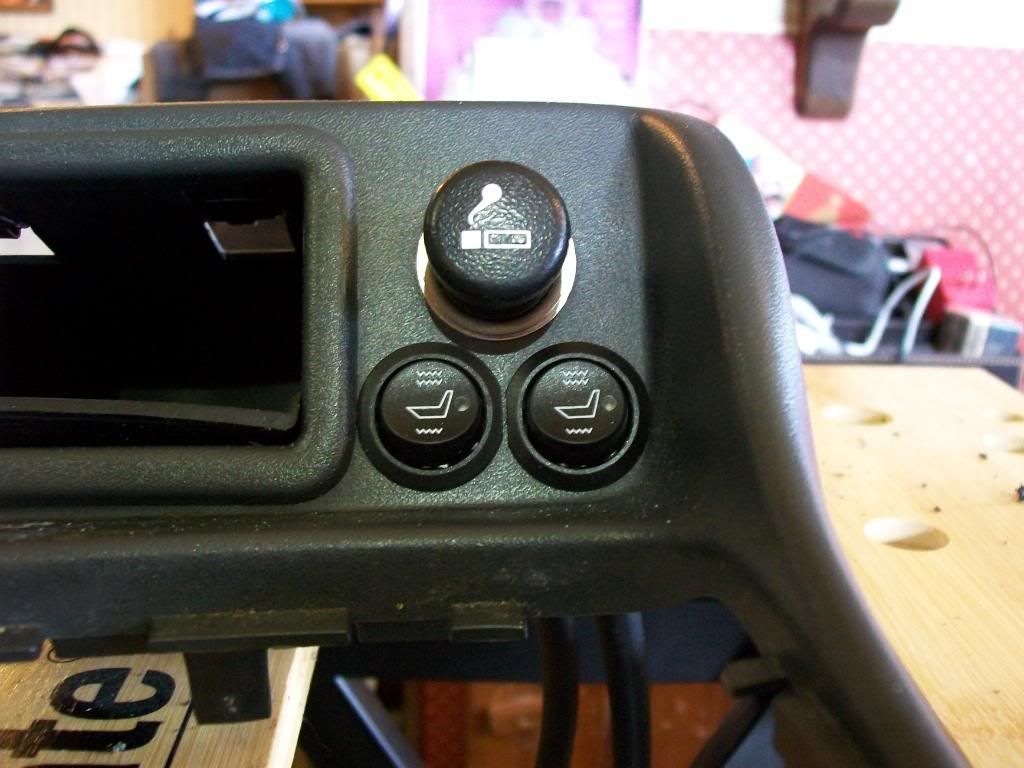
If anyone has anymore questions or needs more detailed directions, just ask.
They are made by CARBOTECH who actually supplies GM and other automotive manufacturers. They are very well made and easy to make fit your application.
Each kit comes with a 2 panels. One panel is 24" x 12" and the other is 20" x 12". I used the smaller panel on the top and cut it to the shape. The bottom panel was the perfect size so no cutting was required. some may find that they want to trim a section out of the bottom panel due to some velcro not being attached but I assure that that it did not affect the finish of the covers. They look factory.
They come with dual wiring harness's. They are 100% complete and come with your choice of a on/off switch or for a couple of more dollars you can have a switch with 2 temperature settings and of course an off switch. Each section of wire has a connector already fastened onto it so it all snaps together and is dummy proof. Just hook the power to ignition source and your done.
These things work awesome! They heat up really fast! After I tore into the seats, I noticed that there was lots of padding under the legs and I didn't think that the heat would penetrate through but it does alot.
This kit is complete! Bring it home and install it with basic handtools!
The seat back and map pocket must be removed if you plan on seperating the seat back and seat bottom. Doing this is not necessary.


The hog rings must be cut and removed to access the tubing for the air bolsters if you plan to seperate the back rest from the seat bottom


The seat back seat cover cannot be completely removed unless you plan on cutting all of the hog rings that secure the seat. There are hog rings that fasten the side bolsters to give it it's shape so that the side air bolsters are separated from the center air bolster.

This pic is of the seat back looking under the seat cover. This is where the smaller heating pad will be slid into. Sorry, NO PICS of the seat back heating pad installed


This pic shows where the harness for the seat back heater pads comes through at. I ran it along with the air tubes.

Instead of reinstalling hog rings, I used zip ties which I thought wouldn't work very well but to my suprise, they were easier to use and allowed adjustment of the tension of the panels.

The seat tracks must be removed. Don't ask me why the previous owner of the seats painted them with RED RUSTOLEUM!?

The seat bottom seat cover needs to be pulled almost all the way off. I find it easier to peel it back as least as possible as it helps for reinstallation.

Here you can see that the pad fits perfect and does not need to be trimmed. Only one strip of velcro is covered by the panel and does not affect the fit of the panel or it laying flat.


The panel is now reinstalled. This is the last step and the seats can be put back together now.

I chose to install the switches in my console. I wanted to install them in my door T/A door panels but I really didn't have that much time to rip them apart as well. AND believe me, the harness is long enough to do so! Maybe this summer I'll put the switch there, but until then, its freezin in Pa so I am going to go cruising and enjoy them!

If anyone has anymore questions or needs more detailed directions, just ask.
Last edited by 9t8z28; 01-18-2010 at 03:48 PM.
The following users liked this post:
LFSADRG (03-30-2023)
#4
Thread Starter
Joined: Jan 2007
Posts: 1,349
Likes: 3
From: Doylestown, Pa
Trending Topics
#10
Dude I have been wanting to get some of these for a long *** time now. I'm thinking I might pick up a setthis summer so I'm prepared for next winter.
Really sucks on mornings below freezing when you warm the car up & get in to leave only to find your *** is on a block of ice cold leather while everything else in the car is somewhat warm, LOL. Especially in dress pants for work cause we all know how thin those bastages are, LOL.
Really sucks on mornings below freezing when you warm the car up & get in to leave only to find your *** is on a block of ice cold leather while everything else in the car is somewhat warm, LOL. Especially in dress pants for work cause we all know how thin those bastages are, LOL.
#14
Thread Starter
Joined: Jan 2007
Posts: 1,349
Likes: 3
From: Doylestown, Pa
I got the CARBOTECH dual seat heater kit with high/low settings from FAST TOYS.
I can't imagine not spending an additional $8 for the 2 way switch because it can get pretty hot even with a winter jacket and jeans on.
Like I said, go to FAST TOYS for these seat heaters. There products and customer service are top notch!
I can't imagine not spending an additional $8 for the 2 way switch because it can get pretty hot even with a winter jacket and jeans on.
Like I said, go to FAST TOYS for these seat heaters. There products and customer service are top notch!
Last edited by 9t8z28; 01-18-2010 at 07:11 PM.
#15
Thank you for the pics. Been thinking of doing this for a few years now. One question....no adhesive or anything holding the heating pads in place? I'd think they would 'walk' around under there after a while and bunch up or something especially on the seat back. Some 3M spray adhesive might go a long way on those. Oh and nice wallpaper btw. 
Craig

Craig
#16
Thread Starter
Joined: Jan 2007
Posts: 1,349
Likes: 3
From: Doylestown, Pa
Thank you for the pics. Been thinking of doing this for a few years now. One question....no adhesive or anything holding the heating pads in place? I'd think they would 'walk' around under there after a while and bunch up or something especially on the seat back. Some 3M spray adhesive might go a long way on those. Oh and nice wallpaper btw. 
Craig

Craig
Also, there are 3 tacky strip sections on each pad (as you can see in my pic) that have adhesive already installed on them. They are covered by a non (shinny white) stick paper material that needs to be peeled off to reveal the glue.
To be honest with you, no adhesive or glue is needed. They fit so perfect that they will not slide around.
Last edited by 9t8z28; 01-18-2010 at 07:13 PM.
#19
#20
Thread Starter
Joined: Jan 2007
Posts: 1,349
Likes: 3
From: Doylestown, Pa


