
My engine bay and engine redo - 98 TA


 09-14-2012, 10:26 PM
#163
TECH Apprentice
Thread Starter
iTrader: (13)
Join Date: Aug 2003
Location: Wake Forest, NC
Posts: 355
Likes: 0
Received 0 Likes
on
0 Posts

OK, here's my PCV setup. Two shielded taps in the valve covers, then to a t-fitting, then an inline PCV and into the intake connection. Will be a catch can eventually, but right now can't justify the cost.
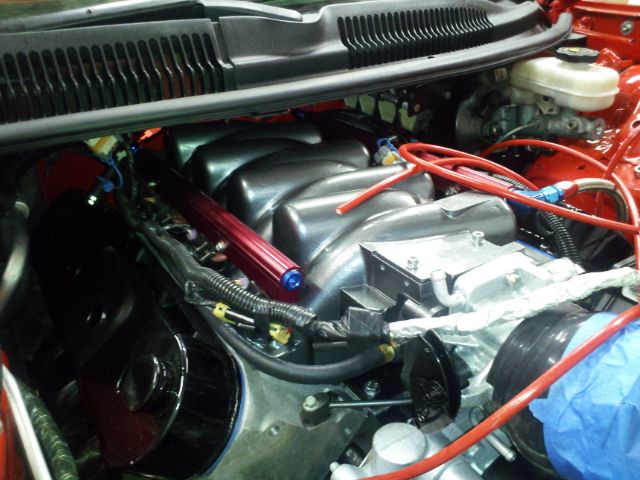
Wiring is done, all hides up out of the way under the fender liner. TCS is relocated too, but I did that a while ago.
Wiring is done, all hides up out of the way under the fender liner. TCS is relocated too, but I did that a while ago.
09-17-2012, 12:29 PM
#164
wow. really nice. great updating. i hope to repaint my engine bay this winter as well. what process did you go through when doing the engine bay? strip the original paint? rattle can or spray gun? if rattle can that looks imaculate.
i was gonna attempt removing everything like you did and scuffing the paint up in the bay and using paint match dupli color spray paint. idk if its a good idea or not.
i was gonna attempt removing everything like you did and scuffing the paint up in the bay and using paint match dupli color spray paint. idk if its a good idea or not.
09-17-2012, 02:31 PM
#165
TECH Apprentice
Thread Starter
iTrader: (13)
Join Date: Aug 2003
Location: Wake Forest, NC
Posts: 355
Likes: 0
Received 0 Likes
on
0 Posts
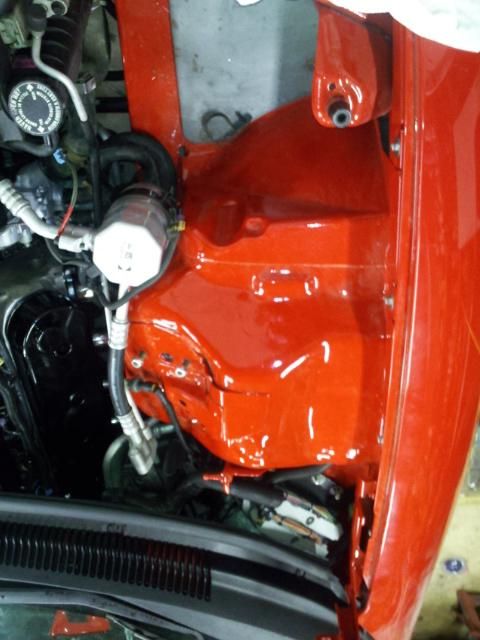
Nah, I used basecoat/clearcoat. It isn't perfect, there is a bunch of junk in the paint, but for an engine bay it is good enough. Plus I painted it in my garage with the door open (gas-fired water heater inside!) so it wasn't an ideal place to do it.
I just scuffed the original paint.
I just scuffed the original paint.
09-17-2012, 07:10 PM
#167
TECH Apprentice
Thread Starter
iTrader: (13)
Join Date: Aug 2003
Location: Wake Forest, NC
Posts: 355
Likes: 0
Received 0 Likes
on
0 Posts
I started to fab up my battery box for the spare tire well, but blew the wheel out of my hot saw. Perfect timing. I got a new one, but I'm too lazy right now. I'll do it tomorrow, I need a little break.
09-18-2012, 10:14 PM
#168
TECH Apprentice
Thread Starter
iTrader: (13)
Join Date: Aug 2003
Location: Wake Forest, NC
Posts: 355
Likes: 0
Received 0 Likes
on
0 Posts
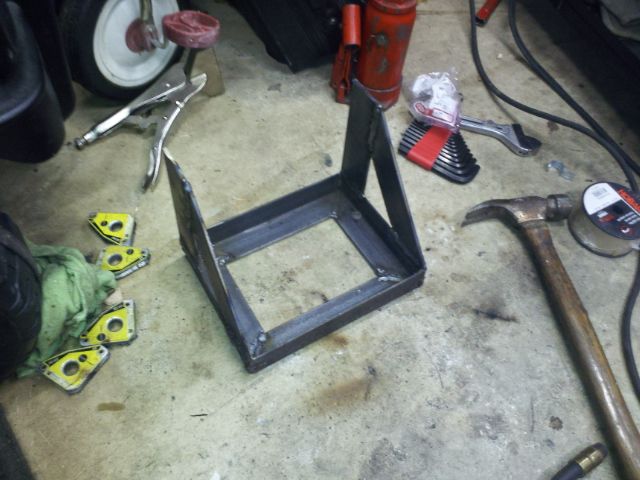
Started building the battery box for the back. I need to go get some more tips for my welder, I ran out and had to weld with a sticky one that was driving me nuts and giving me horrible welds.

09-21-2012, 09:17 PM
#169
TECH Apprentice
Thread Starter
iTrader: (13)
Join Date: Aug 2003
Location: Wake Forest, NC
Posts: 355
Likes: 0
Received 0 Likes
on
0 Posts
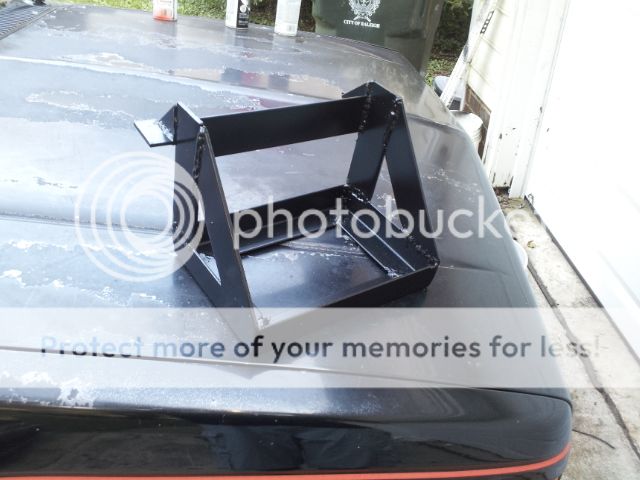
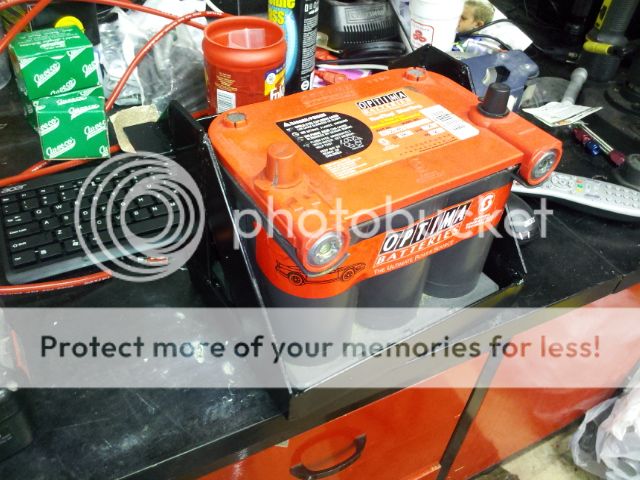
Battery tray for the spare tire well is done!
I'm about to head out of town for a wedding, so on Monday I'll be mounting it in the car.
I'm about to head out of town for a wedding, so on Monday I'll be mounting it in the car.
 09-24-2012, 06:50 PM
#173
TECH Apprentice
Thread Starter
iTrader: (13)
Join Date: Aug 2003
Location: Wake Forest, NC
Posts: 355
Likes: 0
Received 0 Likes
on
0 Posts
It is 1/8" steel. Just weighed it, 5lbs. Possibly 6, my scale sucks. 
I'm not too concerned about that little bit of weight. Not sure what a battery relocation box like a BMR one weighs, but the difference in weight is fine with be considering how much easier on my wallet this one was.
I'm not too concerned about that little bit of weight. Not sure what a battery relocation box like a BMR one weighs, but the difference in weight is fine with be considering how much easier on my wallet this one was.
 10-04-2012, 07:32 AM
#176
TECH Apprentice
Thread Starter
iTrader: (13)
Join Date: Aug 2003
Location: Wake Forest, NC
Posts: 355
Likes: 0
Received 0 Likes
on
0 Posts
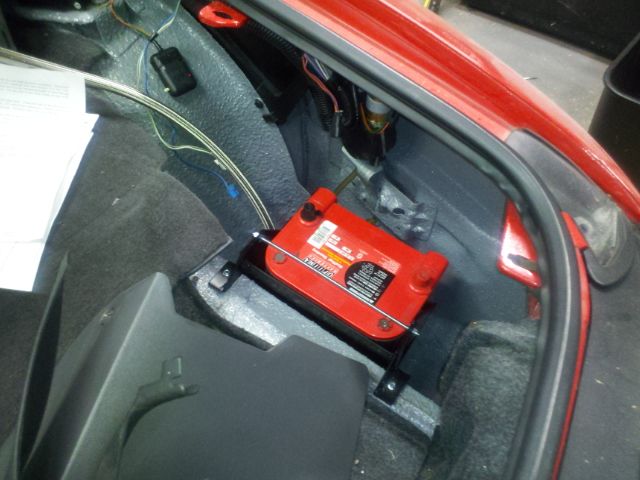
I finished up the battery relo and powered up the car last night. I have a couple of ground issues I gotta dig through, but the car powered up and I was able to roll the windows up and down. Just gotta do some more little wiring things, finish the spark plug wires for the passenger side, install the new fuel pump and I'll be about ready to fire this thing up!
11-28-2012, 07:05 AM
#180
TECH Apprentice
Thread Starter
iTrader: (13)
Join Date: Aug 2003
Location: Wake Forest, NC
Posts: 355
Likes: 0
Received 0 Likes
on
0 Posts
My friend that lives up the street said he was sitting in the bathroom when he heard it start up. He's like 6 houses down. It is REALLY loud.
But somehow both my kids slept through it.
But somehow both my kids slept through it.