Appearance & Detailing Interior & Exterior Appearance Modifications

My 2011 Rebuild Thread

Thread Tools
 
Search this Thread
 
Old 03-17-2011, 06:00 PM
  #21  
TECH Fanatic
iTrader: (7)
 
Shockwave179's Avatar
 
Join Date: Oct 2005
Location: Western NY
Posts: 1,416
Likes: 0
Received 0 Likes on 0 Posts

Default

Like I said before I always thought you went the extra mile as far as engine bays are concerned. I would be interested in knowing where you got the black braided sleeving and how difficult it was etc.
Old 03-17-2011, 06:16 PM
  #22  
TECH Junkie
iTrader: (21)
 
5w20's Avatar
 
Join Date: Oct 2003
Location: Houston , Tx
Posts: 3,419
Likes: 0
Received 0 Likes on 0 Posts

Default

Originally Posted by Shockwave179
Like I said before I always thought you went the extra mile as far as engine bays are concerned. I would be interested in knowing where you got the black braided sleeving and how difficult it was etc.
H-T.com
Old 03-17-2011, 08:38 PM
  #23  
TECH Fanatic
iTrader: (14)
 
Irish350's Avatar
 
Join Date: Mar 2007
Location: Phoenix/Tempe, AZ
Posts: 1,969
Likes: 0
Received 0 Likes on 0 Posts

Default

i was looking for a kit on amazon (cause im getting a weatherpack kit there) but couldnt find any

h-t.com doesnt work..? lol
Old 03-17-2011, 08:43 PM
  #24  
TECH Junkie
iTrader: (21)
 
5w20's Avatar
 
Join Date: Oct 2003
Location: Houston , Tx
Posts: 3,419
Likes: 0
Received 0 Likes on 0 Posts

Default

Originally Posted by Irish350
i was looking for a kit on amazon (cause im getting a weatherpack kit there) but couldnt find any

h-t.com doesnt work..? lol
H-T.com is an inside joke between me and the OP.

I'm not sure where he got his loom. They sell similar looking stuff at fry's electronics.
Old 03-17-2011, 09:35 PM
  #25  
TECH Senior Member
Thread Starter
iTrader: (34)
 
DopeFedZ's Avatar
 
Join Date: Apr 2002
Location: Houston TX
Posts: 5,230
Received 19 Likes on 13 Posts

Default

Originally Posted by Shockwave179
Like I said before I always thought you went the extra mile as far as engine bays are concerned. I would be interested in knowing where you got the black braided sleeving and how difficult it was etc.
http://www.techflex.com/prod_F6N.asp

I bought it from a seller on ebay named furryletters lol. It's split but had some extra material so the wires don't just pop out. Pretty easy to work with.
Old 03-17-2011, 09:40 PM
  #26  
TECH Senior Member
Thread Starter
iTrader: (34)
 
DopeFedZ's Avatar
 
Join Date: Apr 2002
Location: Houston TX
Posts: 5,230
Received 19 Likes on 13 Posts

Default

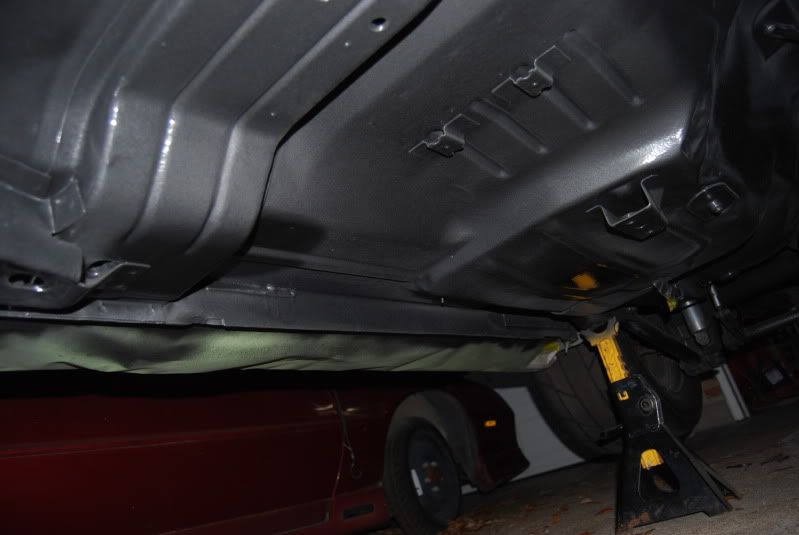
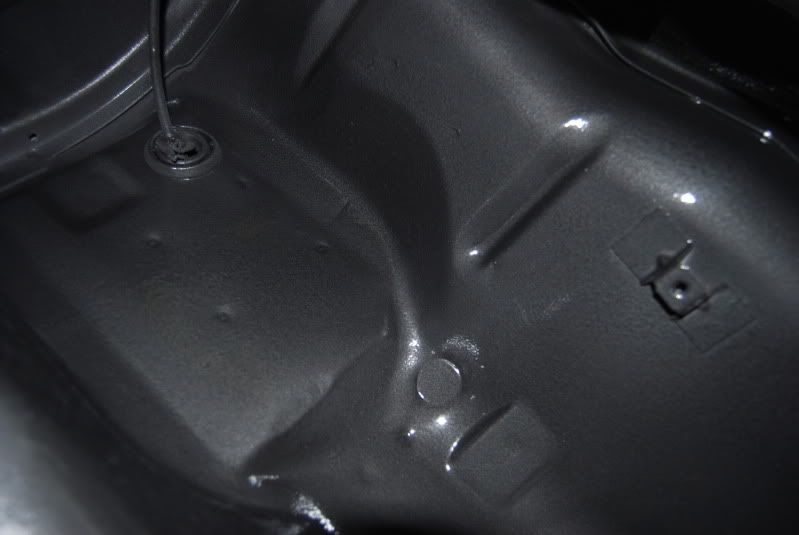
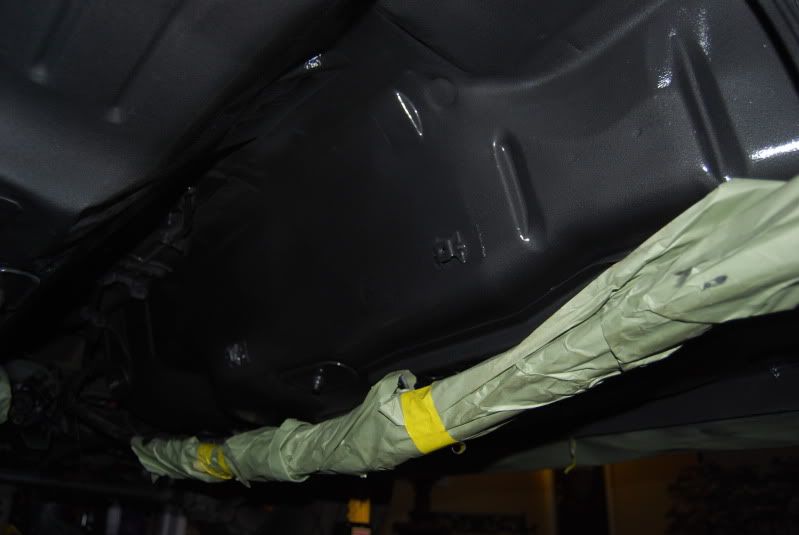
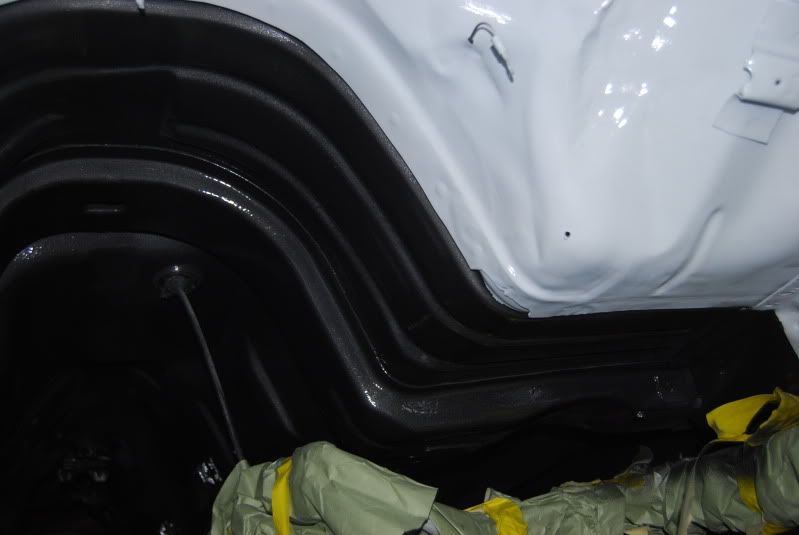
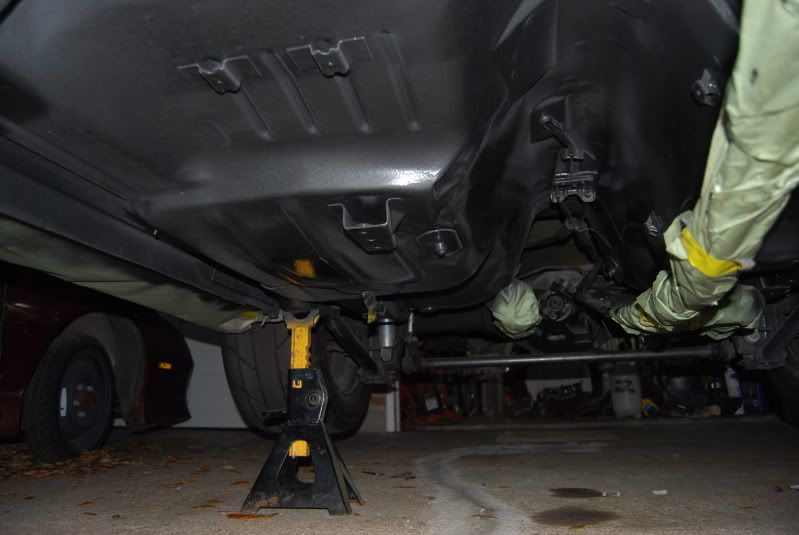
Painted the underbody today. Need to drop the rearend and hit those spots but you really can't see much of that anyways. It was hella fun spraying on my back and holding the gun every which angle I could to get it to spray. This is also Rustoleum Hammertone in black even though it actually comes out charcoal looking.

Everything is coming together nicely. I ordered a whole different set of stainless bolts and nice aluminum washers for the engine bay. I'm waiting on a new nitrous feed line to come in so I can route it to the back of the intake so holding off installing the motor until that comes in.


Last edited by DopeFedZ; 03-17-2011 at 09:48 PM.
Old 03-17-2011, 10:05 PM
  #27  
TECH Junkie
iTrader: (21)
 
5w20's Avatar
 
Join Date: Oct 2003
Location: Houston , Tx
Posts: 3,419
Likes: 0
Received 0 Likes on 0 Posts

Default

Did you get the fancy washers for the bolts? estilo chino?
Old 03-18-2011, 07:22 AM
  #28  
TECH Senior Member
Thread Starter
iTrader: (34)
 
DopeFedZ's Avatar
 
Join Date: Apr 2002
Location: Houston TX
Posts: 5,230
Received 19 Likes on 13 Posts

Default

Originally Posted by 5w20
Did you get the fancy washers for the bolts? estilo chino?
Sure did .
Old 03-18-2011, 08:37 AM
  #29  
TECH Resident
iTrader: (44)
 
Jeff Smith's Avatar
 
Join Date: Jul 2005
Location: Tail of the Dragon's
Posts: 946
Received 1 Like on 1 Post

Default

Look good..
Old 03-19-2011, 07:37 AM
  #30  
TECH Addict
iTrader: (53)
 
White.Lightning's Avatar
 
Join Date: Mar 2005
Location: Aston, PA
Posts: 2,864
Likes: 0
Received 1 Like on 1 Post

Default

Looks real nice man. I plan on doing semi gloss black on my engine bay and undercarriage.
Old 03-20-2011, 12:46 AM
  #31  
TECH Senior Member
Thread Starter
iTrader: (34)
 
DopeFedZ's Avatar
 
Join Date: Apr 2002
Location: Houston TX
Posts: 5,230
Received 19 Likes on 13 Posts

Default

Thanks guys. I got the new bolts and washers that I'm going to use around the engine bay. In the pictures one of the washers is unpolished and the other I polished real quick along with the bolt. Still trying to decide if I want to leave them polished or not. I don't want it to blingy under the hood. I'm thinking about powder coating the washers gloss black and just polishing the bolts. Should look good against the white.


Old 03-20-2011, 04:17 AM
  #32  
Captain Double Post
iTrader: (2)
 
BOBS99SS's Avatar
 
Join Date: Jun 2010
Location: Elyria Ohio
Posts: 1,622
Likes: 0
Received 2 Likes on 2 Posts
Default

Looks great man,nice work,
Old 03-20-2011, 09:17 AM
  #33  
TECH Addict
iTrader: (53)
 
White.Lightning's Avatar
 
Join Date: Mar 2005
Location: Aston, PA
Posts: 2,864
Likes: 0
Received 1 Like on 1 Post

Default

What are those bolts/washers for?
Old 03-20-2011, 01:08 PM
  #34  
TECH Addict
iTrader: (7)
 
SS DNA's Avatar
 
Join Date: Apr 2004
Location: NorcaL
Posts: 2,187
Likes: 0
Received 0 Likes on 0 Posts
Default

Nice project, the best thing is that you are doing the work and it just feels much better doing it this way.
Old 03-20-2011, 01:30 PM
  #35  
TECH Senior Member
Thread Starter
iTrader: (34)
 
DopeFedZ's Avatar
 
Join Date: Apr 2002
Location: Houston TX
Posts: 5,230
Received 19 Likes on 13 Posts

Default

Originally Posted by White.Lightning
What are those bolts/washers for?
The ones in the pictures are the biggest of the three sizes i bought. Those are to replace the plastic push pins that secure the top of the bumper to the bumper support brace, then two for the bumper support brace to the latch bracket and two for the latch bracket to the mounting point on the radiator support.

The majority of the ones I bought were for 6mm bolts for the fenders and all the bolts on the radiator support. The 6mm washer is maybe an inch in diameter.
Old 03-21-2011, 12:53 PM
  #36  
TECH Fanatic
iTrader: (21)
 
regorih383's Avatar
 
Join Date: Dec 2003
Location: Pasadena Tx,
Posts: 1,702
Likes: 0
Received 2 Likes on 2 Posts


Default

The craftsmanship is meh. I seen better build on monster garage. Not sure why all these guys are ridding the ****? This build Is a C+ at best.
Old 03-21-2011, 12:55 PM
  #37  
TECH Fanatic
iTrader: (21)
 
regorih383's Avatar
 
Join Date: Dec 2003
Location: Pasadena Tx,
Posts: 1,702
Likes: 0
Received 2 Likes on 2 Posts


Default

Originally Posted by SS DNA
Nice project, the best thing is that you are doing the work and it just feels much better doing it this way.
Rather pay a shop
Old 03-21-2011, 01:36 PM
  #38  
TECH Senior Member
Thread Starter
iTrader: (34)
 
DopeFedZ's Avatar
 
Join Date: Apr 2002
Location: Houston TX
Posts: 5,230
Received 19 Likes on 13 Posts

Default

Originally Posted by regorih383
The craftsmanship is meh. I seen better build on monster garage. Not sure why all these guys are ridding the ****? This build Is a C+ at best.
This coming from the guy in love with another man.


Old 03-21-2011, 01:38 PM
  #39  
TECH Fanatic
iTrader: (21)
 
regorih383's Avatar
 
Join Date: Dec 2003
Location: Pasadena Tx,
Posts: 1,702
Likes: 0
Received 2 Likes on 2 Posts


Default

Originally Posted by MeenZ28
THose carbon fiber head plates are a nice touch. h
Old 03-21-2011, 01:42 PM
  #40  
TECH Fanatic
iTrader: (21)
 
regorih383's Avatar
 
Join Date: Dec 2003
Location: Pasadena Tx,
Posts: 1,702
Likes: 0
Received 2 Likes on 2 Posts


Default

Originally Posted by DopeFedZ
This coming from the guy in love with another man.


Quick Reply: My 2011 Rebuild Thread


All times are GMT -5. The time now is 05:09 PM.