
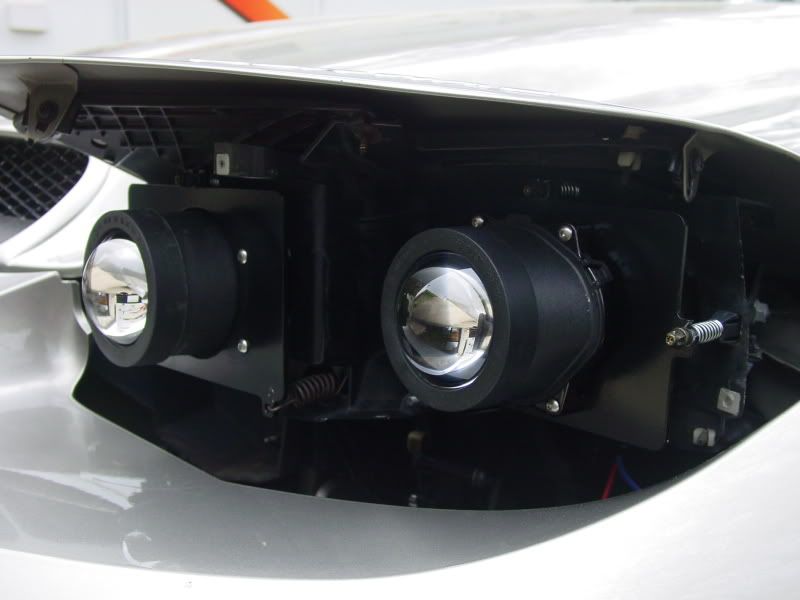
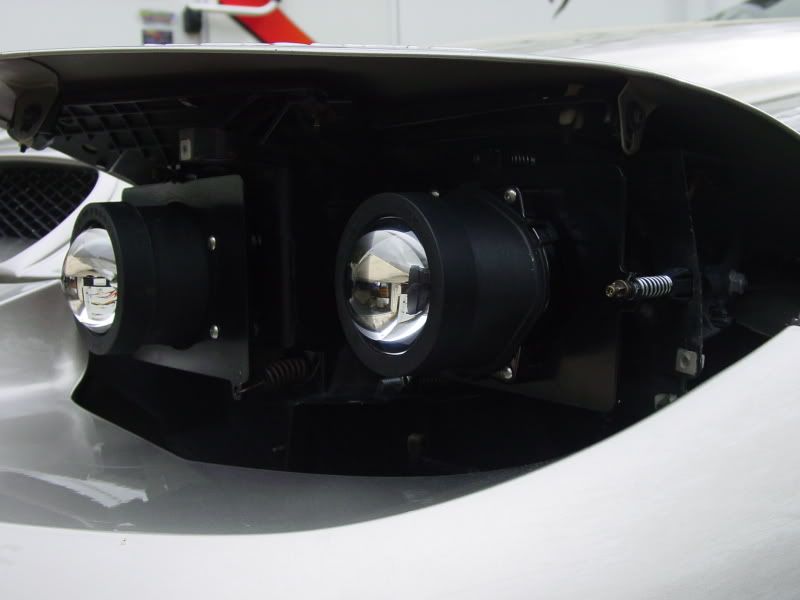
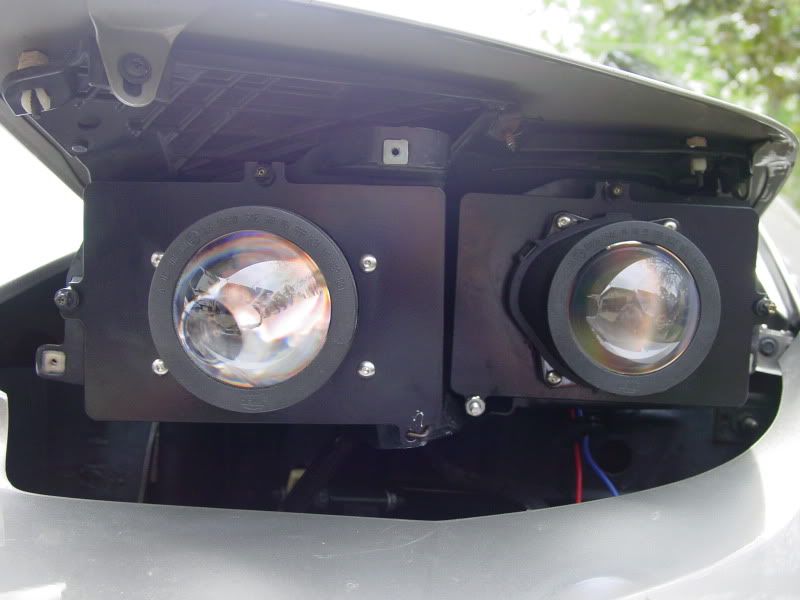
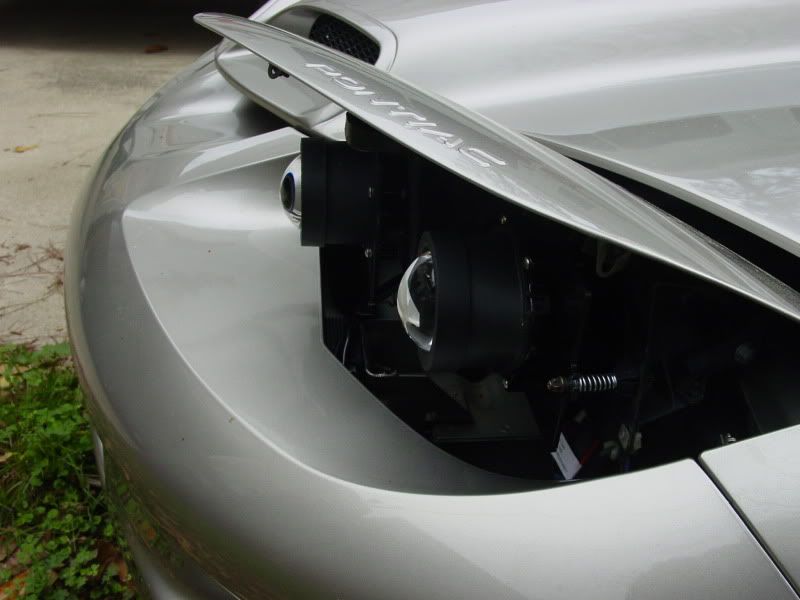
Projector/HID Retrofit into my TA

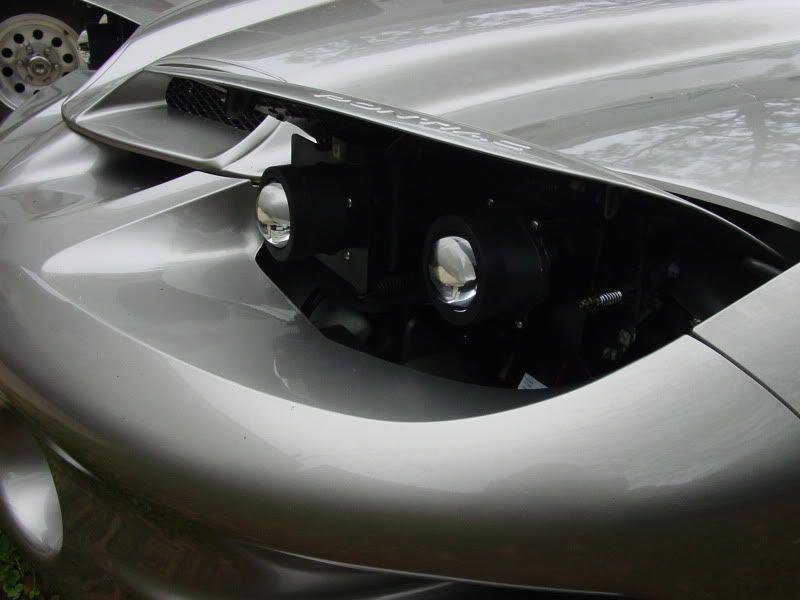
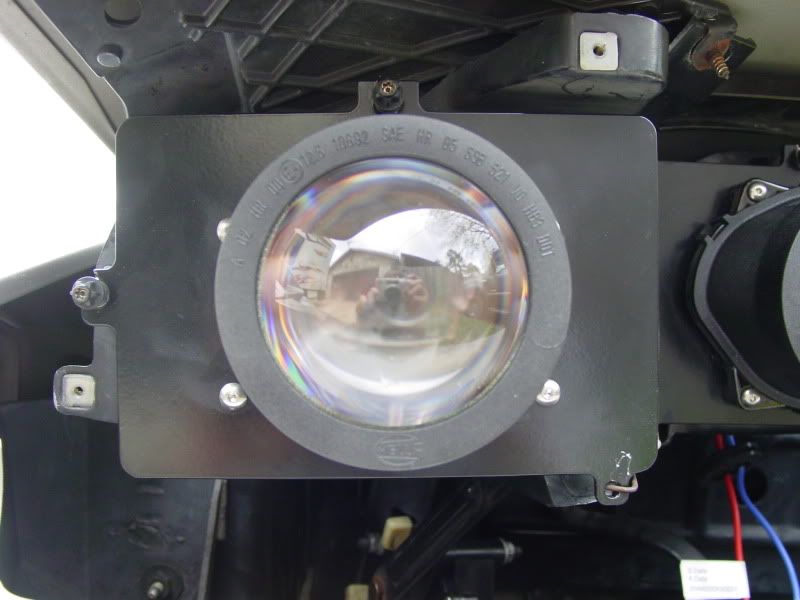
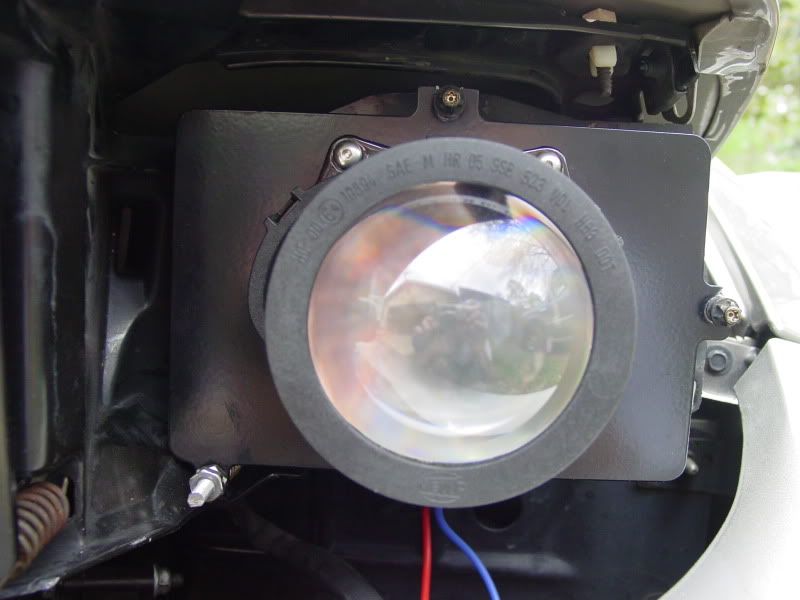
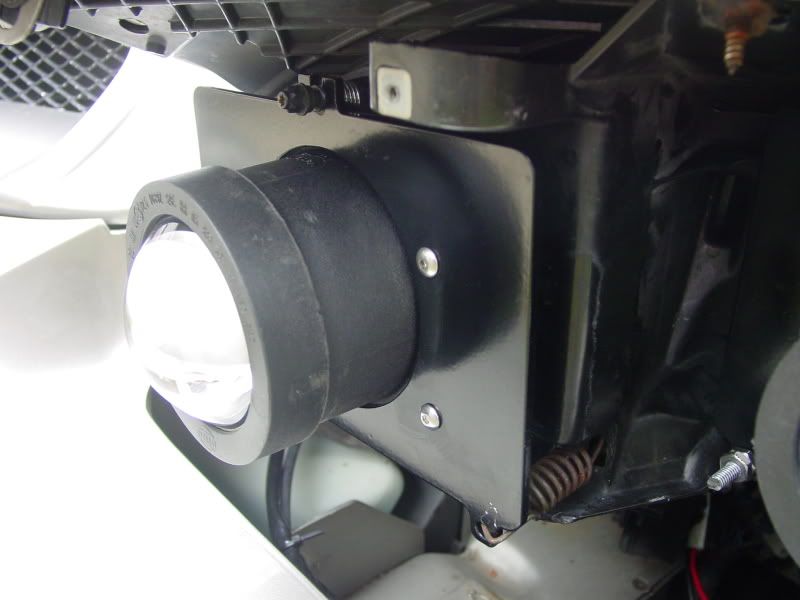
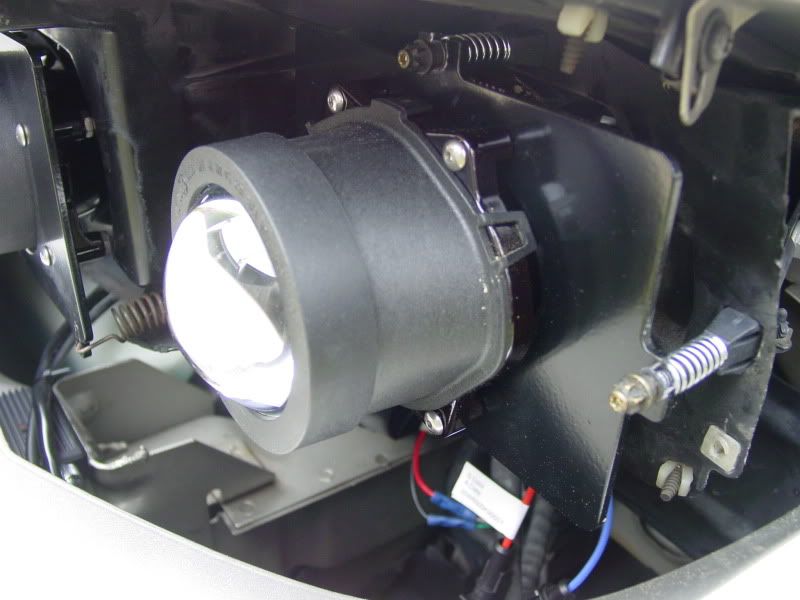
I had the brackets drawn up in ProE and then had them water jet cut out of 1/8" aluminum. Had a local shop powder coat them black. I used Hella 60mm low and high projectors that I got from the only place to get them here in America. I started with a DDM tuning HID kit but regret it. It was a horrible POS kit. One bulb only lasted a day and the relay harness is crap. I have to flip my lights on twice to get them both to kick on. I'm going to try a new relay kit in the hopes that that is the issue and not the ballasts. I ended up getting Morimoto 3Five 6K bulbs instead of waiting over a month for DDM to send me new ones under warranty. I don't have pictures with the shrouds back on and the lights need to be adjusted a little better but it's close. I also forget to get pics with the high beams on. My main goal with doing these, like anything I do to my car, was to not do anything that couldn't be reversed. No cutting or grinding of anything on the car. The project only cost me about $300 (the cost of the projectors and HID plus powder coat). The brackets didn't cost me anything.
On to pics:

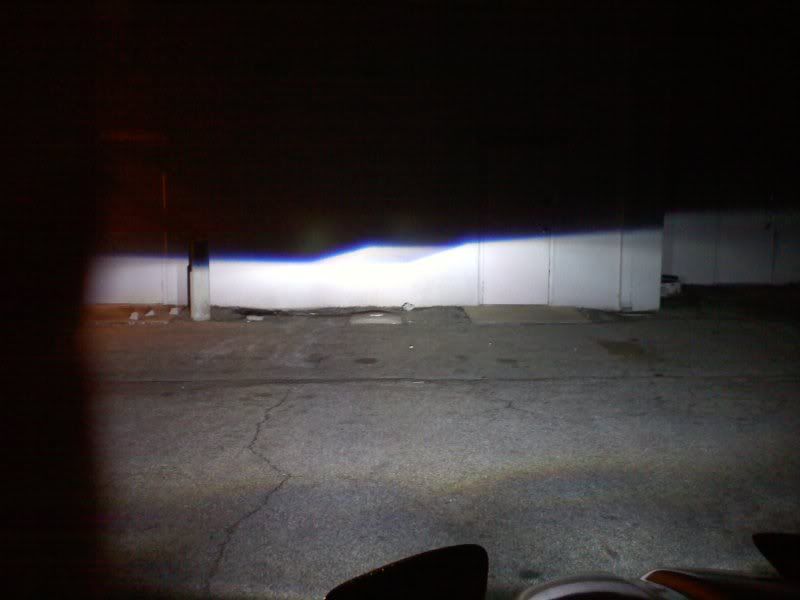
On to pics:
Copy & Paste Moderator


Joined: Apr 2002
Posts: 9,761
Likes: 206
From: Eastern MA
Nice setup. Looks like both need a little rotational adjustment though.
I've added this to the lighting FAQ:
https://ls1tech.com/forums/appearanc...hting-faq.html
I've added this to the lighting FAQ:
https://ls1tech.com/forums/appearanc...hting-faq.html


Thanks for the props guys, I'm pretty proud of them  .
.
I definitely should have paid the extra money and gone with the Morimoto kit instead of DDM.
Yeah they need some rotational adjustment but the brackets aren't really set up for that. That's another thing I would change if I went back and did it again. Is there a way to adjust the projectors themselves? Like pull them apart or something?
I don't plan to do anything to protect them. They are only 60mm in diameter. Which is not a lot of area to worry about, they're only exposed at night, they aren't on the ground like Camaro fogs and if I have a rock that is big enough and fast enough to chip glass I would be much more concerned about it hitting my damn car that high up and damaging paint and/or my windshield. So, I'm just going take my chances.
.I definitely should have paid the extra money and gone with the Morimoto kit instead of DDM.
Yeah they need some rotational adjustment but the brackets aren't really set up for that. That's another thing I would change if I went back and did it again. Is there a way to adjust the projectors themselves? Like pull them apart or something?
I don't plan to do anything to protect them. They are only 60mm in diameter. Which is not a lot of area to worry about, they're only exposed at night, they aren't on the ground like Camaro fogs and if I have a rock that is big enough and fast enough to chip glass I would be much more concerned about it hitting my damn car that high up and damaging paint and/or my windshield. So, I'm just going take my chances.
Trending Topics

Copy & Paste Moderator
Joined: Apr 2002
Posts: 9,761
Likes: 206
From: Eastern MA
Originally Posted by CayenneRedV6
Yeah they need some rotational adjustment but the brackets aren't really set up for that. That's another thing I would change if I went back and did it again. Is there a way to adjust the projectors themselves? Like pull them apart or something?
Something like this for slots
/\
\/
(but more of an arc)
not this
||
||
not this either
--
--
Like I said above, since the rotation is pretty close, you only need elongate the holes a little bit. The end result will probably be invisible with the projectors mounted.
Last edited by VIP1; Mar 22, 2012 at 05:27 PM.
Don't disassemble the projectors. Slot the bolt holes in the mounting plate you made (inline with rotating the projectors). Since the rotation is pretty close, you only need to slot them slightly and the mounting arms from the projectors should hide the slots.
Something like this for slots
/\
\/
(but more of an arc)
not this
||
||
not this either
--
--
Like I said above, since the rotation is pretty close, you only need elongate the holes a little bit. The end result will probably be invisible with the projectors mounted.
Something like this for slots
/\
\/
(but more of an arc)
not this
||
||
not this either
--
--
Like I said above, since the rotation is pretty close, you only need elongate the holes a little bit. The end result will probably be invisible with the projectors mounted.
Ok thanks. I'll do that as soon as I get a chance and finish up the adjustment.
brackets, fl, florida, hid, installers, ls1tech, ma, massachusetts, mounting, projector, projectors, retrofit, service, shop, ta, tallahassee