Trans am LED gauges
 03-12-2013, 09:11 AM
#21


Here's the deal - I've been messing with the cluster in my '00 all winter, so I have some experience here.
The construction of the cluster is:
1) Clear Lens
2) Gauge Face
3) Clear backing
4) whitish/ivory colored housing
5) Circuit board
6) black plastic cover (on the back)
Your options are:
a. Buy the 6LE gauge face, pull off your T/A needles and gauge face, install the 6LE. Buy LEDs of whatever color you want.
b. buy a Camaro Z28 cluster on ebay. Pull the face off, and like the 6LE, put it on your T/A cluster.
c. Buy the Camaro cluster, pull the entire assembly (parts 2-3) off and swap them with your T/A cluster. It's very easy to do. What this does for you is retains your T/A circuit board (by the way, the Odo is stored in the board, NOT just in the display like the pic above shows), you don't need to readjust your needles - you'll have Camaro needles. Conversely, you can get a Camaro cluster and swap just the circuit board between it and your T/A cluster, but I think this will be more difficult than the other way around.
Side note - if you run Cool White LEDs in the Camaro gauge face, you'll get a blue color - not super deep blue, but a nice blue. If you put blue LEDs in, you get a dark "true" blue, but the problem is you lose the red on the needles and gauge face. Blue LEDs won't light up red sections. I'd recommend going with the cool white HP6 bulbs and matching the rest of your interior lighting to the gauges.
 03-12-2013, 09:13 AM
#22
No - the entire circuit board on the back stores the odometer reading. The display, which your pic shows, doesn't store the reading. I know this is 100% true because I changed the color of a spare odometer board like you show and put it on my stock circuit board and it shows my vehicle's mileage, not the donor vehicle.
 03-12-2013, 01:38 PM
#24

Here's the deal - I've been messing with the cluster in my '00 all winter, so I have some experience here.
The construction of the cluster is:
1) Clear Lens
2) Gauge Face
3) Clear backing
4) whitish/ivory colored housing
5) Circuit board
6) black plastic cover (on the back)
Your options are:
a. Buy the 6LE gauge face, pull off your T/A needles and gauge face, install the 6LE. Buy LEDs of whatever color you want.
b. buy a Camaro Z28 cluster on ebay. Pull the face off, and like the 6LE, put it on your T/A cluster.
c. Buy the Camaro cluster, pull the entire assembly (parts 2-3) off and swap them with your T/A cluster. It's very easy to do. What this does for you is retains your T/A circuit board (by the way, the Odo is stored in the board, NOT just in the display like the pic above shows), you don't need to readjust your needles - you'll have Camaro needles. Conversely, you can get a Camaro cluster and swap just the circuit board between it and your T/A cluster, but I think this will be more difficult than the other way around.
Side note - if you run Cool White LEDs in the Camaro gauge face, you'll get a blue color - not super deep blue, but a nice blue. If you put blue LEDs in, you get a dark "true" blue, but the problem is you lose the red on the needles and gauge face. Blue LEDs won't light up red sections. I'd recommend going with the cool white HP6 bulbs and matching the rest of your interior lighting to the gauges.
The construction of the cluster is:
1) Clear Lens
2) Gauge Face
3) Clear backing
4) whitish/ivory colored housing
5) Circuit board
6) black plastic cover (on the back)
Your options are:
a. Buy the 6LE gauge face, pull off your T/A needles and gauge face, install the 6LE. Buy LEDs of whatever color you want.
b. buy a Camaro Z28 cluster on ebay. Pull the face off, and like the 6LE, put it on your T/A cluster.
c. Buy the Camaro cluster, pull the entire assembly (parts 2-3) off and swap them with your T/A cluster. It's very easy to do. What this does for you is retains your T/A circuit board (by the way, the Odo is stored in the board, NOT just in the display like the pic above shows), you don't need to readjust your needles - you'll have Camaro needles. Conversely, you can get a Camaro cluster and swap just the circuit board between it and your T/A cluster, but I think this will be more difficult than the other way around.
Side note - if you run Cool White LEDs in the Camaro gauge face, you'll get a blue color - not super deep blue, but a nice blue. If you put blue LEDs in, you get a dark "true" blue, but the problem is you lose the red on the needles and gauge face. Blue LEDs won't light up red sections. I'd recommend going with the cool white HP6 bulbs and matching the rest of your interior lighting to the gauges.
Thanks, glad someone was able to explain that for me. And so If I did your option "B" and took the Camaro face,put it onto my cluster, then ran some blue LEDs....that would require the removal of needles, correct? Also What color needles do you think could work well if i went with a TRUE blue led, in order to be able to see them?
03-12-2013, 01:50 PM
#25
Thanks, glad someone was able to explain that for me. And so If I did your option "B" and took the Camaro face,put it onto my cluster, then ran some blue LEDs....that would require the removal of needles, correct? Also What color needles do you think could work well if i went with a TRUE blue led, in order to be able to see them?
Again, make sure you look at a lot of pics to ensure it's the look you're going after...the blue LEDs will leave the red areas on the gauge face dark.
03-12-2013, 01:56 PM
#26
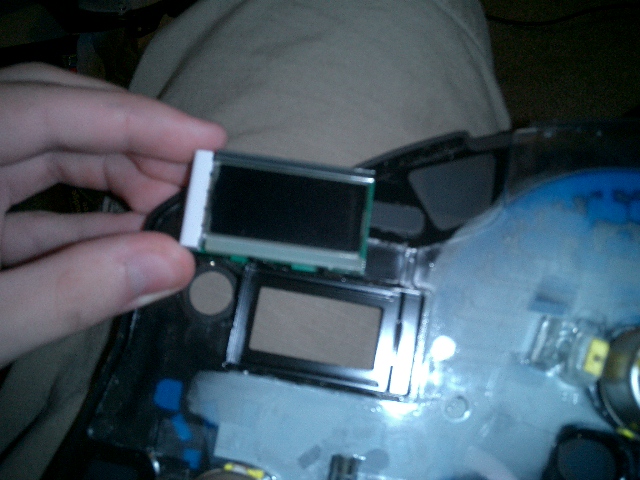
FWIW, here's a teaser pic of my progress. I swapped the odometer to white, cleared the stock Camaro face (CW LEDs lighting it here) and converted the switches over to white LEDs.
I am stalled as I need to get a scantool to set my needles back, and I am currently looking for other LED solutions for the switches as the ones I picked up are too "blue" and don't match the cluster now.

These are misleading. This is the uncleared stock face (blue film still in there) with warm white LEDs. It was really a dirty aqua color, I didn't like it. The switches are bluer than the pic shows. Just including to show you the odometer.


I am stalled as I need to get a scantool to set my needles back, and I am currently looking for other LED solutions for the switches as the ones I picked up are too "blue" and don't match the cluster now.
These are misleading. This is the uncleared stock face (blue film still in there) with warm white LEDs. It was really a dirty aqua color, I didn't like it. The switches are bluer than the pic shows. Just including to show you the odometer.
03-12-2013, 02:07 PM
#27
TECH Apprentice
I am in the process of the same crap lol. Switches I am just waiting on the LEDs and all. Did you recap the switches with the blue cap or leave it off? Wouldnt leaving it off help or?
03-12-2013, 02:14 PM
#28
The problem I am running into is the "white" component LEDs I am finding seem to be more in the 7000k-8000k range. The "warm white" seem to be in the low 3000k range.
The SuperBrightLED HP6's in CW are listed as 6500k. I'd like to find something that closer matches this - a 5000k-6500k component LED.
Tonight, I am going to take the CW 74 (the HVAC bulb) and just light it up behind a button. I'd like to see if the coloring matches my cleared gauge cluster. If it does, I at least know that I want a 6500k component LED bulb to solder in. The next challenge will be actually finding it!
03-12-2013, 02:23 PM
#29
TECH Apprentice
Ya I scratched my face plate so I will eventually just swap out clusters. I'll be playing with the switches all weekend. Maybe something on the backside of the switch cover to clean off the ble tint/film if any(havent removed mine yet) and find some kind of film that is clear to replace it with?
03-12-2013, 02:27 PM
#30
Ya I scratched my face plate so I will eventually just swap out clusters. I'll be playing with the switches all weekend. Maybe something on the backside of the switch cover to clean off the ble tint/film if any(havent removed mine yet) and find some kind of film that is clear to replace it with?
The gauge has a translucent blue paint ("film") applied to the rear.
The Headlight switch is blue and there's nothing you can do about it. The HVAC and Headlight switch icons, text, and black background are all painted on the rear of the plastic. You can't "clear" it because you will remove the black paint and end up with a clear piece of plastic.