Double Din Radio Install
 02-27-2014, 07:09 AM
#1
Teching In
Thread Starter

Join Date: Feb 2014
Location: Chardon Ohio
Posts: 23
Likes: 0
Received 0 Likes
on
0 Posts
Hey Guys,
This was this winter's project for me. I did a lot of looking and couldn't find many examples, so here's my work and hopefully someone else will find this helpful!
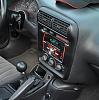
It is possible to install a double DIN radio into a Camaro and have it come out looking nice. I'm very pleased with this outcome. I have pictures of the entire process if anyone's interested. Or post up pic of your radio install!!

This was this winter's project for me. I did a lot of looking and couldn't find many examples, so here's my work and hopefully someone else will find this helpful!
It is possible to install a double DIN radio into a Camaro and have it come out looking nice. I'm very pleased with this outcome. I have pictures of the entire process if anyone's interested. Or post up pic of your radio install!!


 02-28-2014, 08:05 AM
#6
Teching In
Thread Starter
Join Date: Feb 2014
Location: Chardon Ohio
Posts: 23
Likes: 0
Received 0 Likes
on
0 Posts
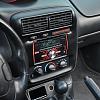
Here’s a couple more pictures, And below are the steps.
1. Choose your radio. I saw this Pioneer and thought it would be perfect for a muscle car! But pick whatever one you like best.
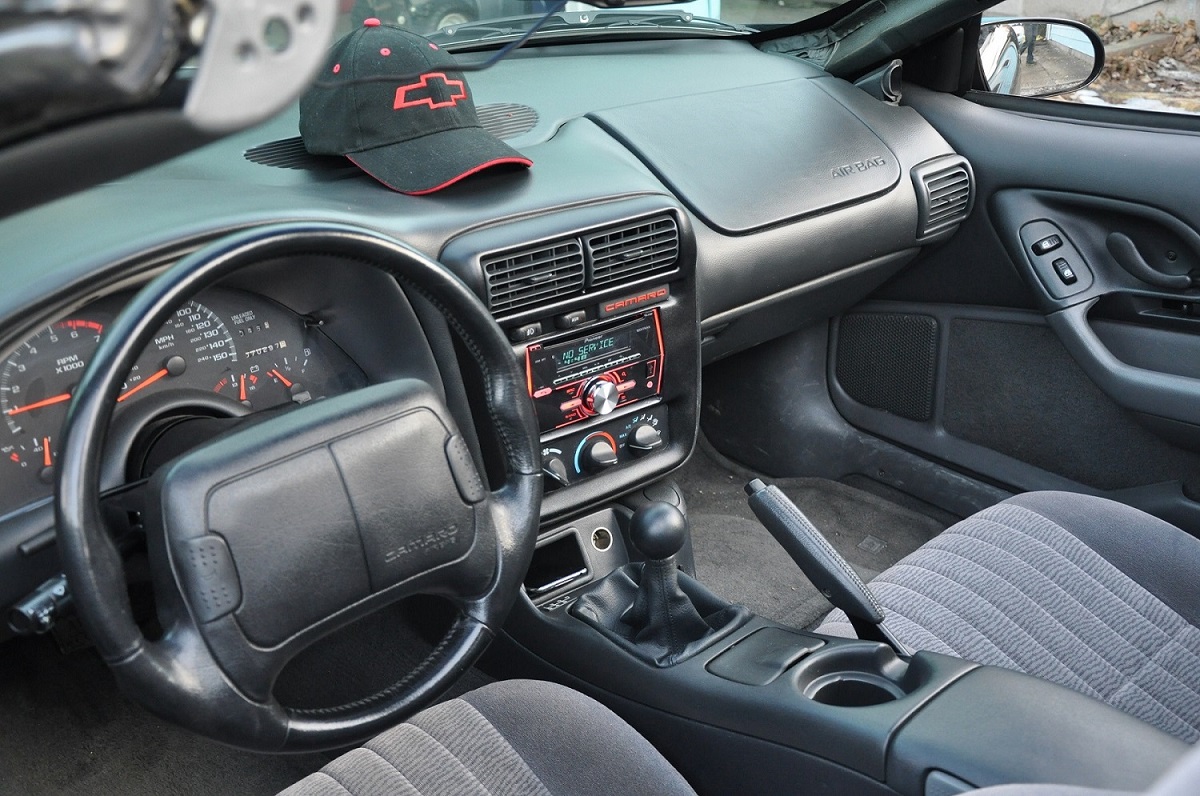
2. Remove the bezel and get the radio mounted. You’ll probably have to remove some plastic from behind the stock radio to get it to fit. (there’s a plastic tab that’ll become self-explanatory) get the radio bolted in its final home so it can’t move.
3. I used a dremel (you can use whatever tool you prefer) to cut away enough of the bezel so that it fit back in place. (cutting away material from the top and bottom) the bezel then should snap back in plase. There will be gaps on the left and right sides of the radio.
4. Using duct tape and cardboard, I made a mold on the back of the bezel. This made adding the Bondo much easier.
5. The next step you’ll have to repeat 4-10 times until it looks correct. Just be patient and careful. Keep adding, sanding, then adding Bondo to form the bezel to match your radio. I think I had 6-7 additions of bondo to get mine correct. BE CAREFUL!!! If you sand too hard, or tweak the bezel, the bondo can crack and you’ll have to start all over.
6. Sand the entire bezel until it’s as smooth as it can be.
7. Prime the bezel using a Rust-oleum filler primer. This primer is thicker, and helps to fill in any inerfections. Spray it, and once it dries sand it all down again. Then repeat. I did this three times.
8. Finally, paint it with a Rust-oleum textured paint. Then it’ll match the rest of your interior body panels and trim. Warning, with the bondo on, it’s not as flexible as it once was. So be careful when installing and removing it.
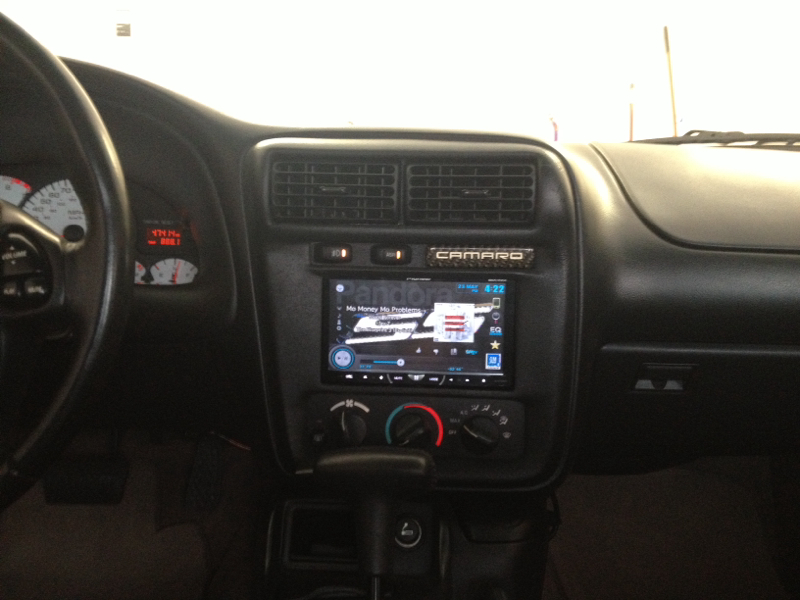
9. That’s it! take your time, and enjoy! I’m thrilled with how mine turned out, hope yours works out as well!
1. Choose your radio. I saw this Pioneer and thought it would be perfect for a muscle car! But pick whatever one you like best.
2. Remove the bezel and get the radio mounted. You’ll probably have to remove some plastic from behind the stock radio to get it to fit. (there’s a plastic tab that’ll become self-explanatory) get the radio bolted in its final home so it can’t move.
3. I used a dremel (you can use whatever tool you prefer) to cut away enough of the bezel so that it fit back in place. (cutting away material from the top and bottom) the bezel then should snap back in plase. There will be gaps on the left and right sides of the radio.
4. Using duct tape and cardboard, I made a mold on the back of the bezel. This made adding the Bondo much easier.
5. The next step you’ll have to repeat 4-10 times until it looks correct. Just be patient and careful. Keep adding, sanding, then adding Bondo to form the bezel to match your radio. I think I had 6-7 additions of bondo to get mine correct. BE CAREFUL!!! If you sand too hard, or tweak the bezel, the bondo can crack and you’ll have to start all over.
6. Sand the entire bezel until it’s as smooth as it can be.
7. Prime the bezel using a Rust-oleum filler primer. This primer is thicker, and helps to fill in any inerfections. Spray it, and once it dries sand it all down again. Then repeat. I did this three times.
8. Finally, paint it with a Rust-oleum textured paint. Then it’ll match the rest of your interior body panels and trim. Warning, with the bondo on, it’s not as flexible as it once was. So be careful when installing and removing it.
9. That’s it! take your time, and enjoy! I’m thrilled with how mine turned out, hope yours works out as well!
03-03-2014, 07:41 AM
#7
Teching In
Thread Starter
Join Date: Feb 2014
Location: Chardon Ohio
Posts: 23
Likes: 0
Received 0 Likes
on
0 Posts
If anyone's got pictures of there radio install, post them up! let's see em! When I was trying to do mine I couldn't find any photos to help me. so hopefully this thread will help the next guy.
Trending Topics

 03-06-2014, 07:44 PM
#15
Staging Lane
Join Date: Aug 2013
Posts: 56
Likes: 0
Received 0 Likes
on
0 Posts
I would whole heatedly recommend doing a double din install, really modernized my interior!

 03-17-2014, 06:50 AM
#18
Here's a quick video I did testing my steering wheel controls on my setup. It works well controlling my iPOD as well as my Droid 4. Right now there are ~10 apps that work, but if I root my phone, I'll have access to every app on my phone, but I'm not sure I want to do that yet. I've never rooted a phone before, so I need to do some research on it.
05-07-2014, 06:01 AM
#19
Staging Lane
iTrader: (1)
Join Date: Jan 2008
Location: Mount Airy, MD
Posts: 73
Likes: 0
Received 0 Likes
on
0 Posts

What mounting bracket kit did you guys use? I went to install my DD yesterday and the mounting bracket I have that i thought would work doesnt. Do you have a Metra part#?
05-07-2014, 07:21 AM
#20
Teching In
Thread Starter
Join Date: Feb 2014
Location: Chardon Ohio
Posts: 23
Likes: 0
Received 0 Likes
on
0 Posts
I bought a generic kit from best buy. then I cut, drilled, added spacers, etc. until it fit correctly. To my knowledge, there's no off the shelf kit that will fit without any modification.
I also had to cut some plastic off the back of the slot where the radio goes. the OEM head unit was shorter than my DD aftermarket. hope this helps! I have pictures if you need them.
I also had to cut some plastic off the back of the slot where the radio goes. the OEM head unit was shorter than my DD aftermarket. hope this helps! I have pictures if you need them.