


Backlit power window and lock switches
Thread Starter
Joined: Feb 2002
Posts: 1,843
Likes: 30
From: South Bend , IN
I didn't want to start another project until the OLED module was complete, but I have some downtime there waiting on parts, so what the hell. I started this with a curiousity if I could pull off getting the stock buttons backlit. I'm happy to report my ideas are working well. Heres where im at so far.
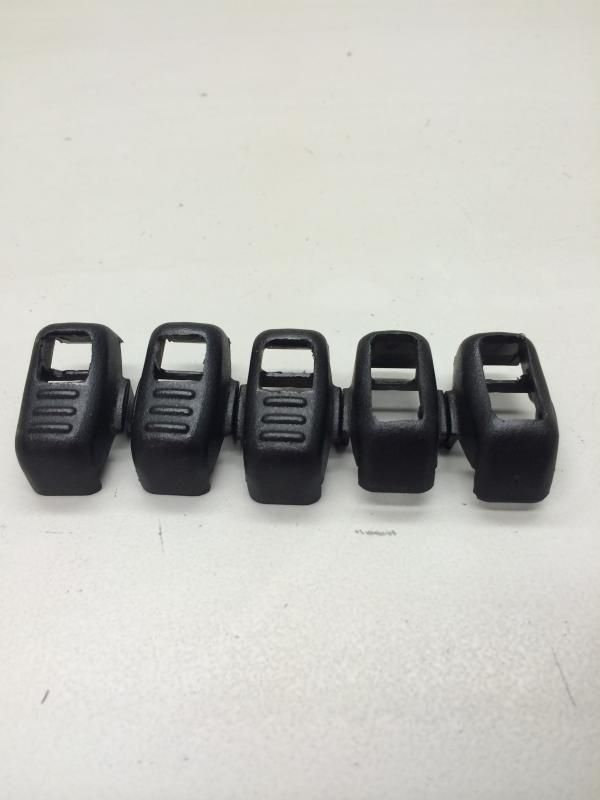
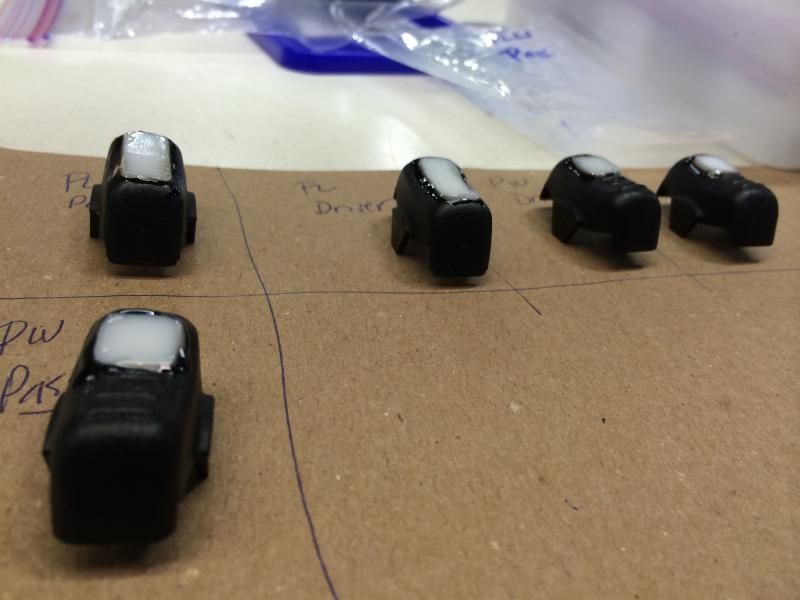
Stock buttons marked out where I want to route out.

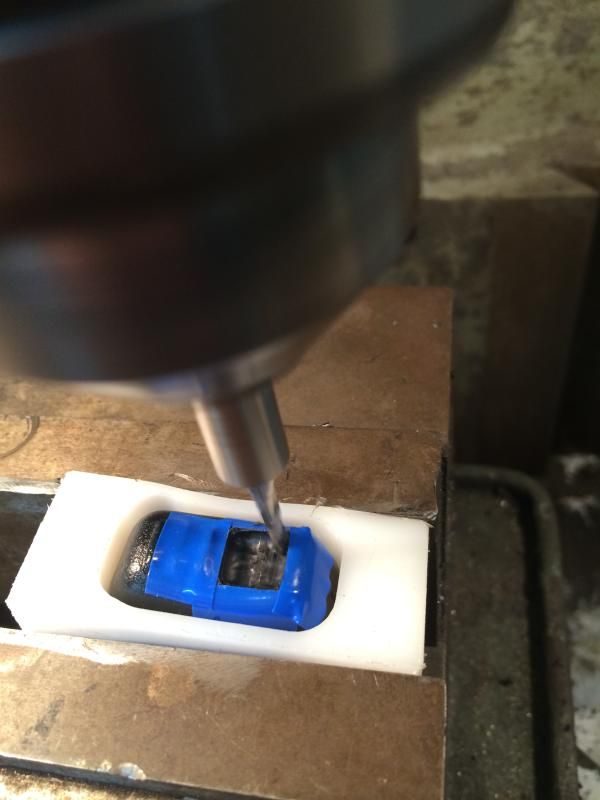
Next I had to make a fixture to hold the button for cutting. Worked out flawlessly.
Then taped out the cutlines
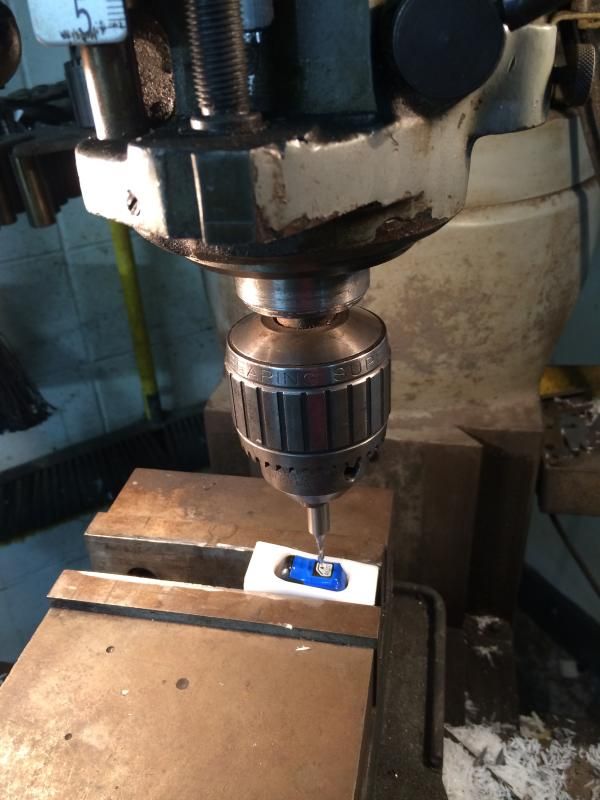
Ready for cutting on the mill
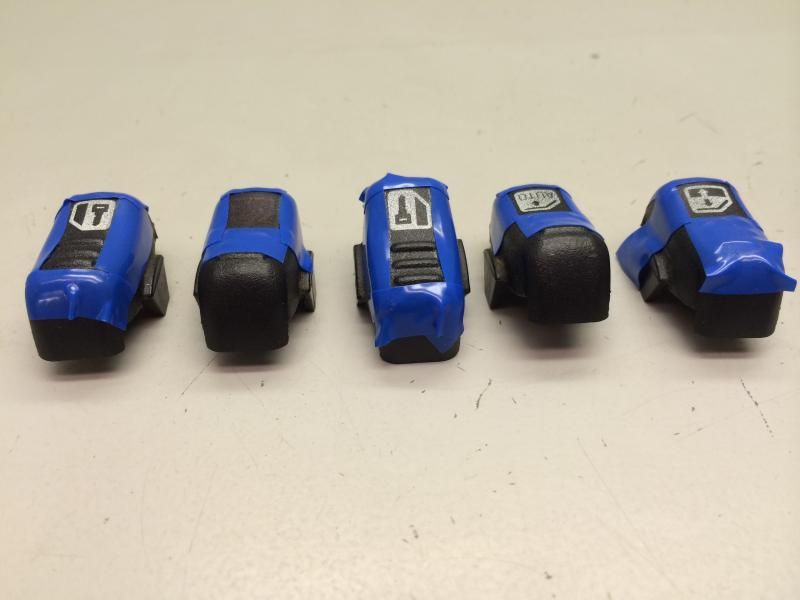
Repeated that process with all buttons. Here they are all cut
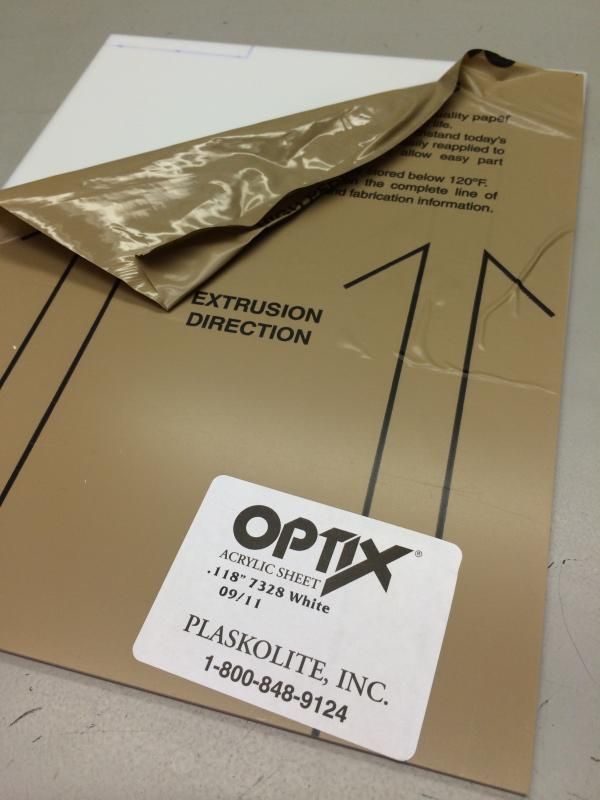
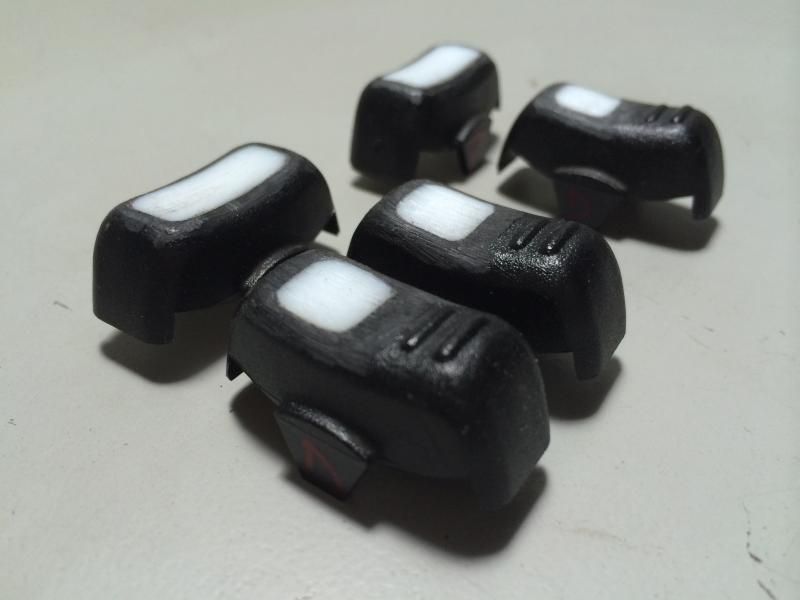
I used a light diffusing acrylic to fill the holes back in.
Cut the squares out and test fit
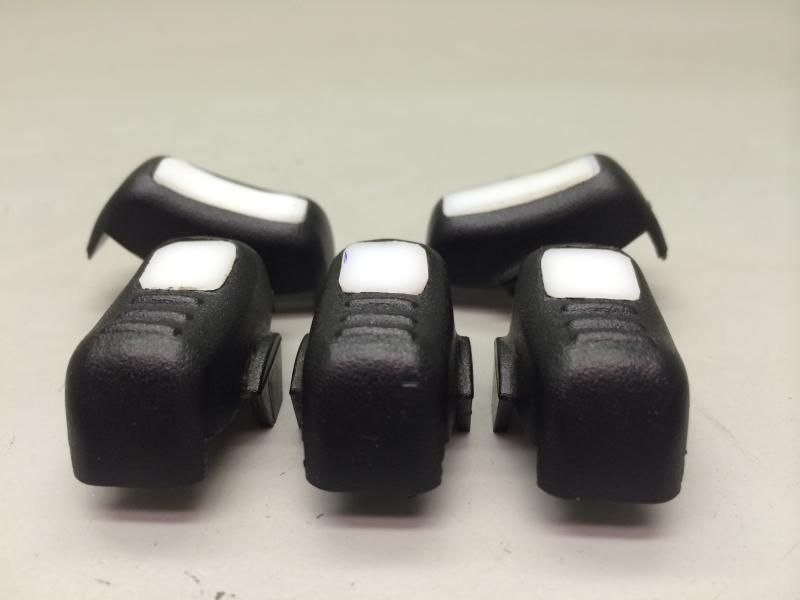
Next epoxied them in
The did surfacing work to match the contour of the button
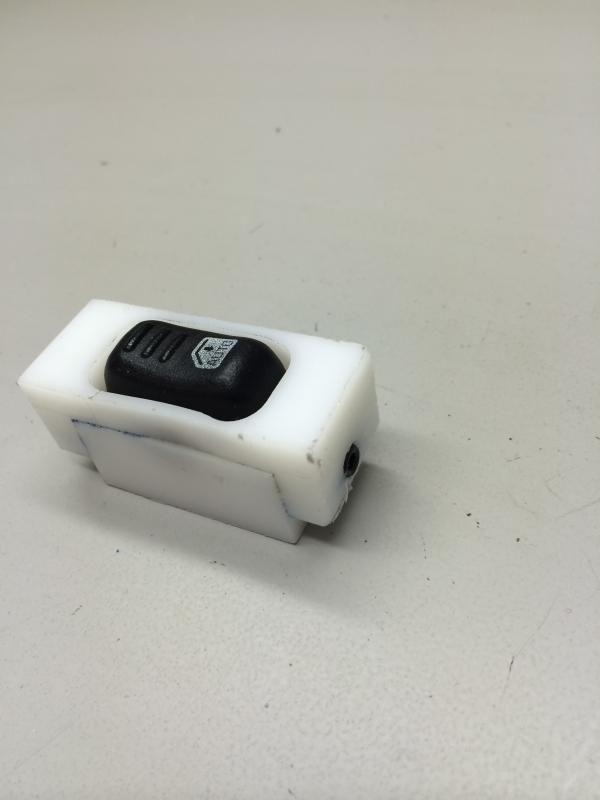
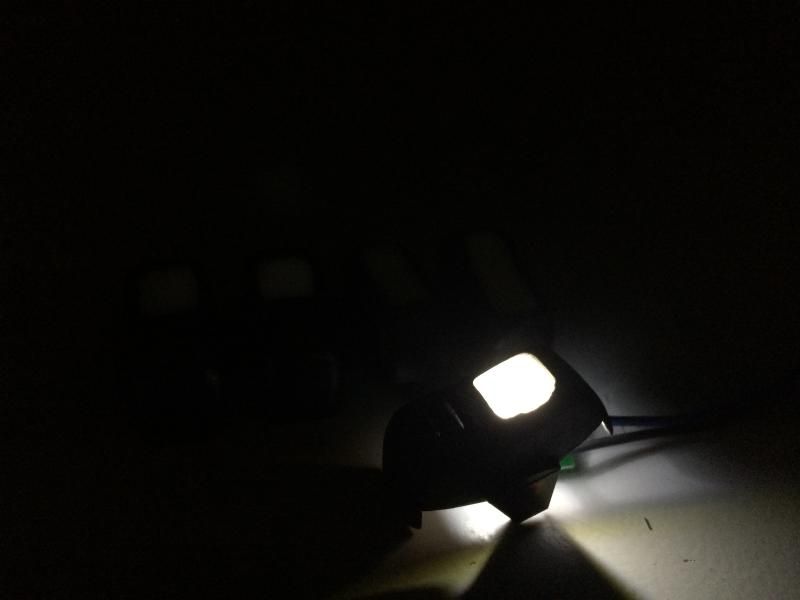
Heres a pic with an led under it.
Thats where Im at at this point. Ive made new window and lock icons in adobe illustrator. I just need to take them friday to get paint templates made. Then paint and coat with a soft touch clearcoat. Fingers crossed that that process goes as planned.
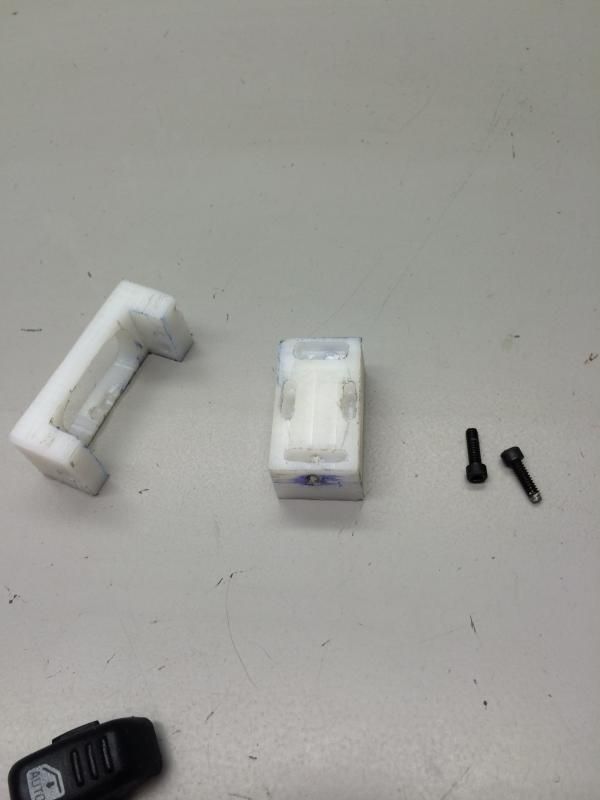
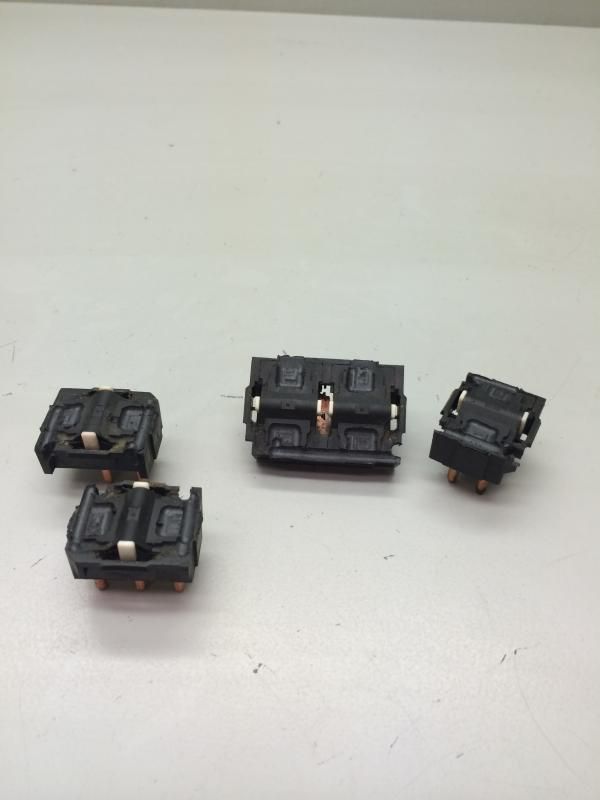
Lastly I had to route out pads and a channel on the stock switch assemblies to facilitate a smd led, resistor and wires.
.... More later, thats all I have done right now.
Stock buttons marked out where I want to route out.

Next I had to make a fixture to hold the button for cutting. Worked out flawlessly.


Then taped out the cutlines

Ready for cutting on the mill


Repeated that process with all buttons. Here they are all cut

I used a light diffusing acrylic to fill the holes back in.

Cut the squares out and test fit

Next epoxied them in

The did surfacing work to match the contour of the button

Heres a pic with an led under it.

Thats where Im at at this point. Ive made new window and lock icons in adobe illustrator. I just need to take them friday to get paint templates made. Then paint and coat with a soft touch clearcoat. Fingers crossed that that process goes as planned.
Lastly I had to route out pads and a channel on the stock switch assemblies to facilitate a smd led, resistor and wires.

.... More later, thats all I have done right now.
Last edited by LT4vert; Nov 27, 2014 at 04:51 PM.
Thread Starter
Joined: Feb 2002
Posts: 1,843
Likes: 30
From: South Bend , IN
 I have alot of freedom at work with my time, which thankfully makes small projects like this quite easy to pull off. I only have about 3 hours work in all that though, so not too time consuming.
 Letsride- no plan at all. This thread will all be here as a guide if anyone wants to try themselves. The holes I cut on the mill could easily be done without the fixture I made and with a drill or dremel. I went overkill on the process because I could and had the materials.
Thanks for the compliments!! Going to a shop tomorrow to have the transfer stickers of the icons made. Hoping the idea to use them as a paint mask works.
Trending Topics
LS1 Tech Stories
The Best V8 Stories One Small Block at Time

6 Common C5 Corvette Failures and What's Involved In Repairing Them
Pouria Savadkouei
Retro Modern Bandit Pontiac Trans AM Comes With Burt Reynolds' Autograph
Verdad Gallardo
Top 10 Greatest Cadillac V Series Performance Models Ever, Ranked
Pouria Savadkouei
Top 10 Most Powerful Chevy Trucks Ever Made!

Hennessey's New Supercharged Silverado ZR2 Has 700 HP
Verdad Gallardo
Coachbuilt N2A Anteros Is an LS2-Powered C6 Corvette In Italian Clothes
Verdad Gallardo
Awesome K5 Blazer Restomod Comes With C7 Corvette Power
Verdad Gallardo
10 Camaros You Should Never Buy

10 LS Engine Myths That Refuse to Die
Verdad Gallardo
Thread Starter
Joined: Feb 2002
Posts: 1,843
Likes: 30
From: South Bend , IN
Its on my desk in the to do pile. The time I had to get the stencils made, my usb stick was having issues at the shop and couldnt pull the files. Ive got a new flash drive and have the files on it, just need the time to get back over to the shop thats going to make them.
Where did you get the acrylic? It could be useful in my custom dimmer setup - was planning on "frosting" (lightly sanding) clear plexi, but this would probably work better.
As for stencils - what's the plan? Use some type of cut vinyl product as a stencil, paint the switch, and carefully remove the vinyl?
As for stencils - what's the plan? Use some type of cut vinyl product as a stencil, paint the switch, and carefully remove the vinyl?
Thread Starter
Joined: Feb 2002
Posts: 1,843
Likes: 30
From: South Bend , IN
Where did you get the acrylic? It could be useful in my custom dimmer setup - was planning on "frosting" (lightly sanding) clear plexi, but this would probably work better.
As for stencils - what's the plan? Use some type of cut vinyl product as a stencil, paint the switch, and carefully remove the vinyl?
As for stencils - what's the plan? Use some type of cut vinyl product as a stencil, paint the switch, and carefully remove the vinyl?