
Trans Am LED Fog Light Install (Morimoto Knockoffs)
 08-03-2017 | 11:47 AM
#281
Going on the car in your signature? I have a 95 and wanted to do the same but hadn't seen anyone with our model post doing it in here

 08-21-2017 | 07:54 PM
#284
 08-25-2017 | 01:50 PM
#285

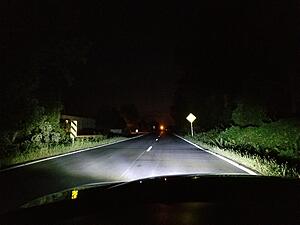
Just wanted to thank you for your write up on the led fog light install. I ended up just doing the same on my car. figured one of the fog lights was burnt out anyways so it was a good time. I did the chrome versions. The amount of light output is huge compared to before. Its to the point i dont even need to use the headlights if i dont want to. They look great at night too. Im just using the LMC truck housings for my headlights but together with both on the amount of light is probably double of stock. ill try to post up a pic soon. thanks again.
08-25-2017 | 01:51 PM
#286
Thread Starter
TECH Fanatic
iTrader: (6)
Joined: Apr 2004
Posts: 1,457
Likes: 12
From: Vinton, Louisiana
Just wanted to thank you for your write up on the led fog light install. I ended up just doing the same on my car. figured one of the fog lights was burnt out anyways so it was a good time. I did the chrome versions. The amount of light output is huge compared to before. Its to the point i dont even need to use the headlights if i dont want to. They look great at night too. Im just using the LMC truck housings for my headlights but together with both on the amount of light is probably double of stock. ill try to post up a pic soon. thanks again.
08-30-2017 | 08:46 PM
#287
Staging Lane
Joined: Jul 2017
Posts: 72
Likes: 2
From: Cocoa, FL
Just an fyi for adjustability. I installed mine today, I took pictures, but they say they're corrupted for some reason. I mounted them just like everyone else by drilling through the stock bracket and the heat sinks. To retain adjustability I put the stock adjustment screw back into the bracket with a wing nut and lock nut on top of it, bent the bracket down almost to a 45* angle, and mounted a spring I got from Ace Hardware to the bracket at the bottom side of the light to keep tension on the light. Super simple and the adjustment portion is pretty easy to access like it always was before. I wish I had pictures to show.
08-31-2017 | 05:20 AM
#288
Thread Starter
TECH Fanatic
iTrader: (6)
Joined: Apr 2004
Posts: 1,457
Likes: 12
From: Vinton, Louisiana
Just an fyi for adjustability. I installed mine today, I took pictures, but they say they're corrupted for some reason. I mounted them just like everyone else by drilling through the stock bracket and the heat sinks. To retain adjustability I put the stock adjustment screw back into the bracket with a wing nut and lock nut on top of it, bent the bracket down almost to a 45* angle, and mounted a spring I got from Ace Hardware to the bracket at the bottom side of the light to keep tension on the light. Super simple and the adjustment portion is pretty easy to access like it always was before. I wish I had pictures to show.
 08-31-2017 | 12:45 PM
#290
Staging Lane
Joined: Feb 2009
Posts: 63
Likes: 0
From: Cleveland, OH
Finally pulled the trigger on ordering the black ones for mine to match all the black accenting. Have a feeling these will sit on my work bench until winter before I get around to being able to install them 
08-31-2017 | 01:12 PM
#291
 09-21-2017 | 09:13 AM
#292
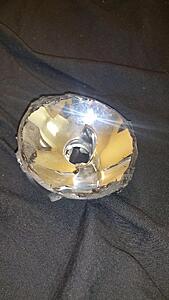
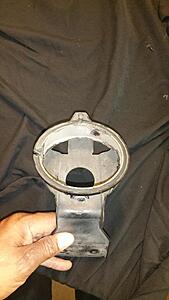
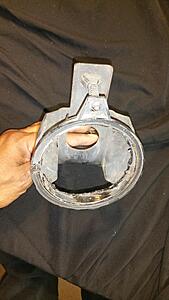
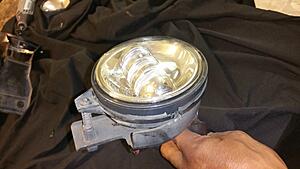
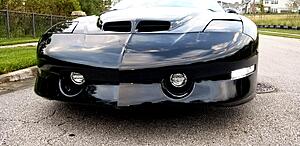
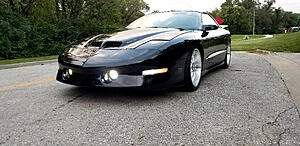
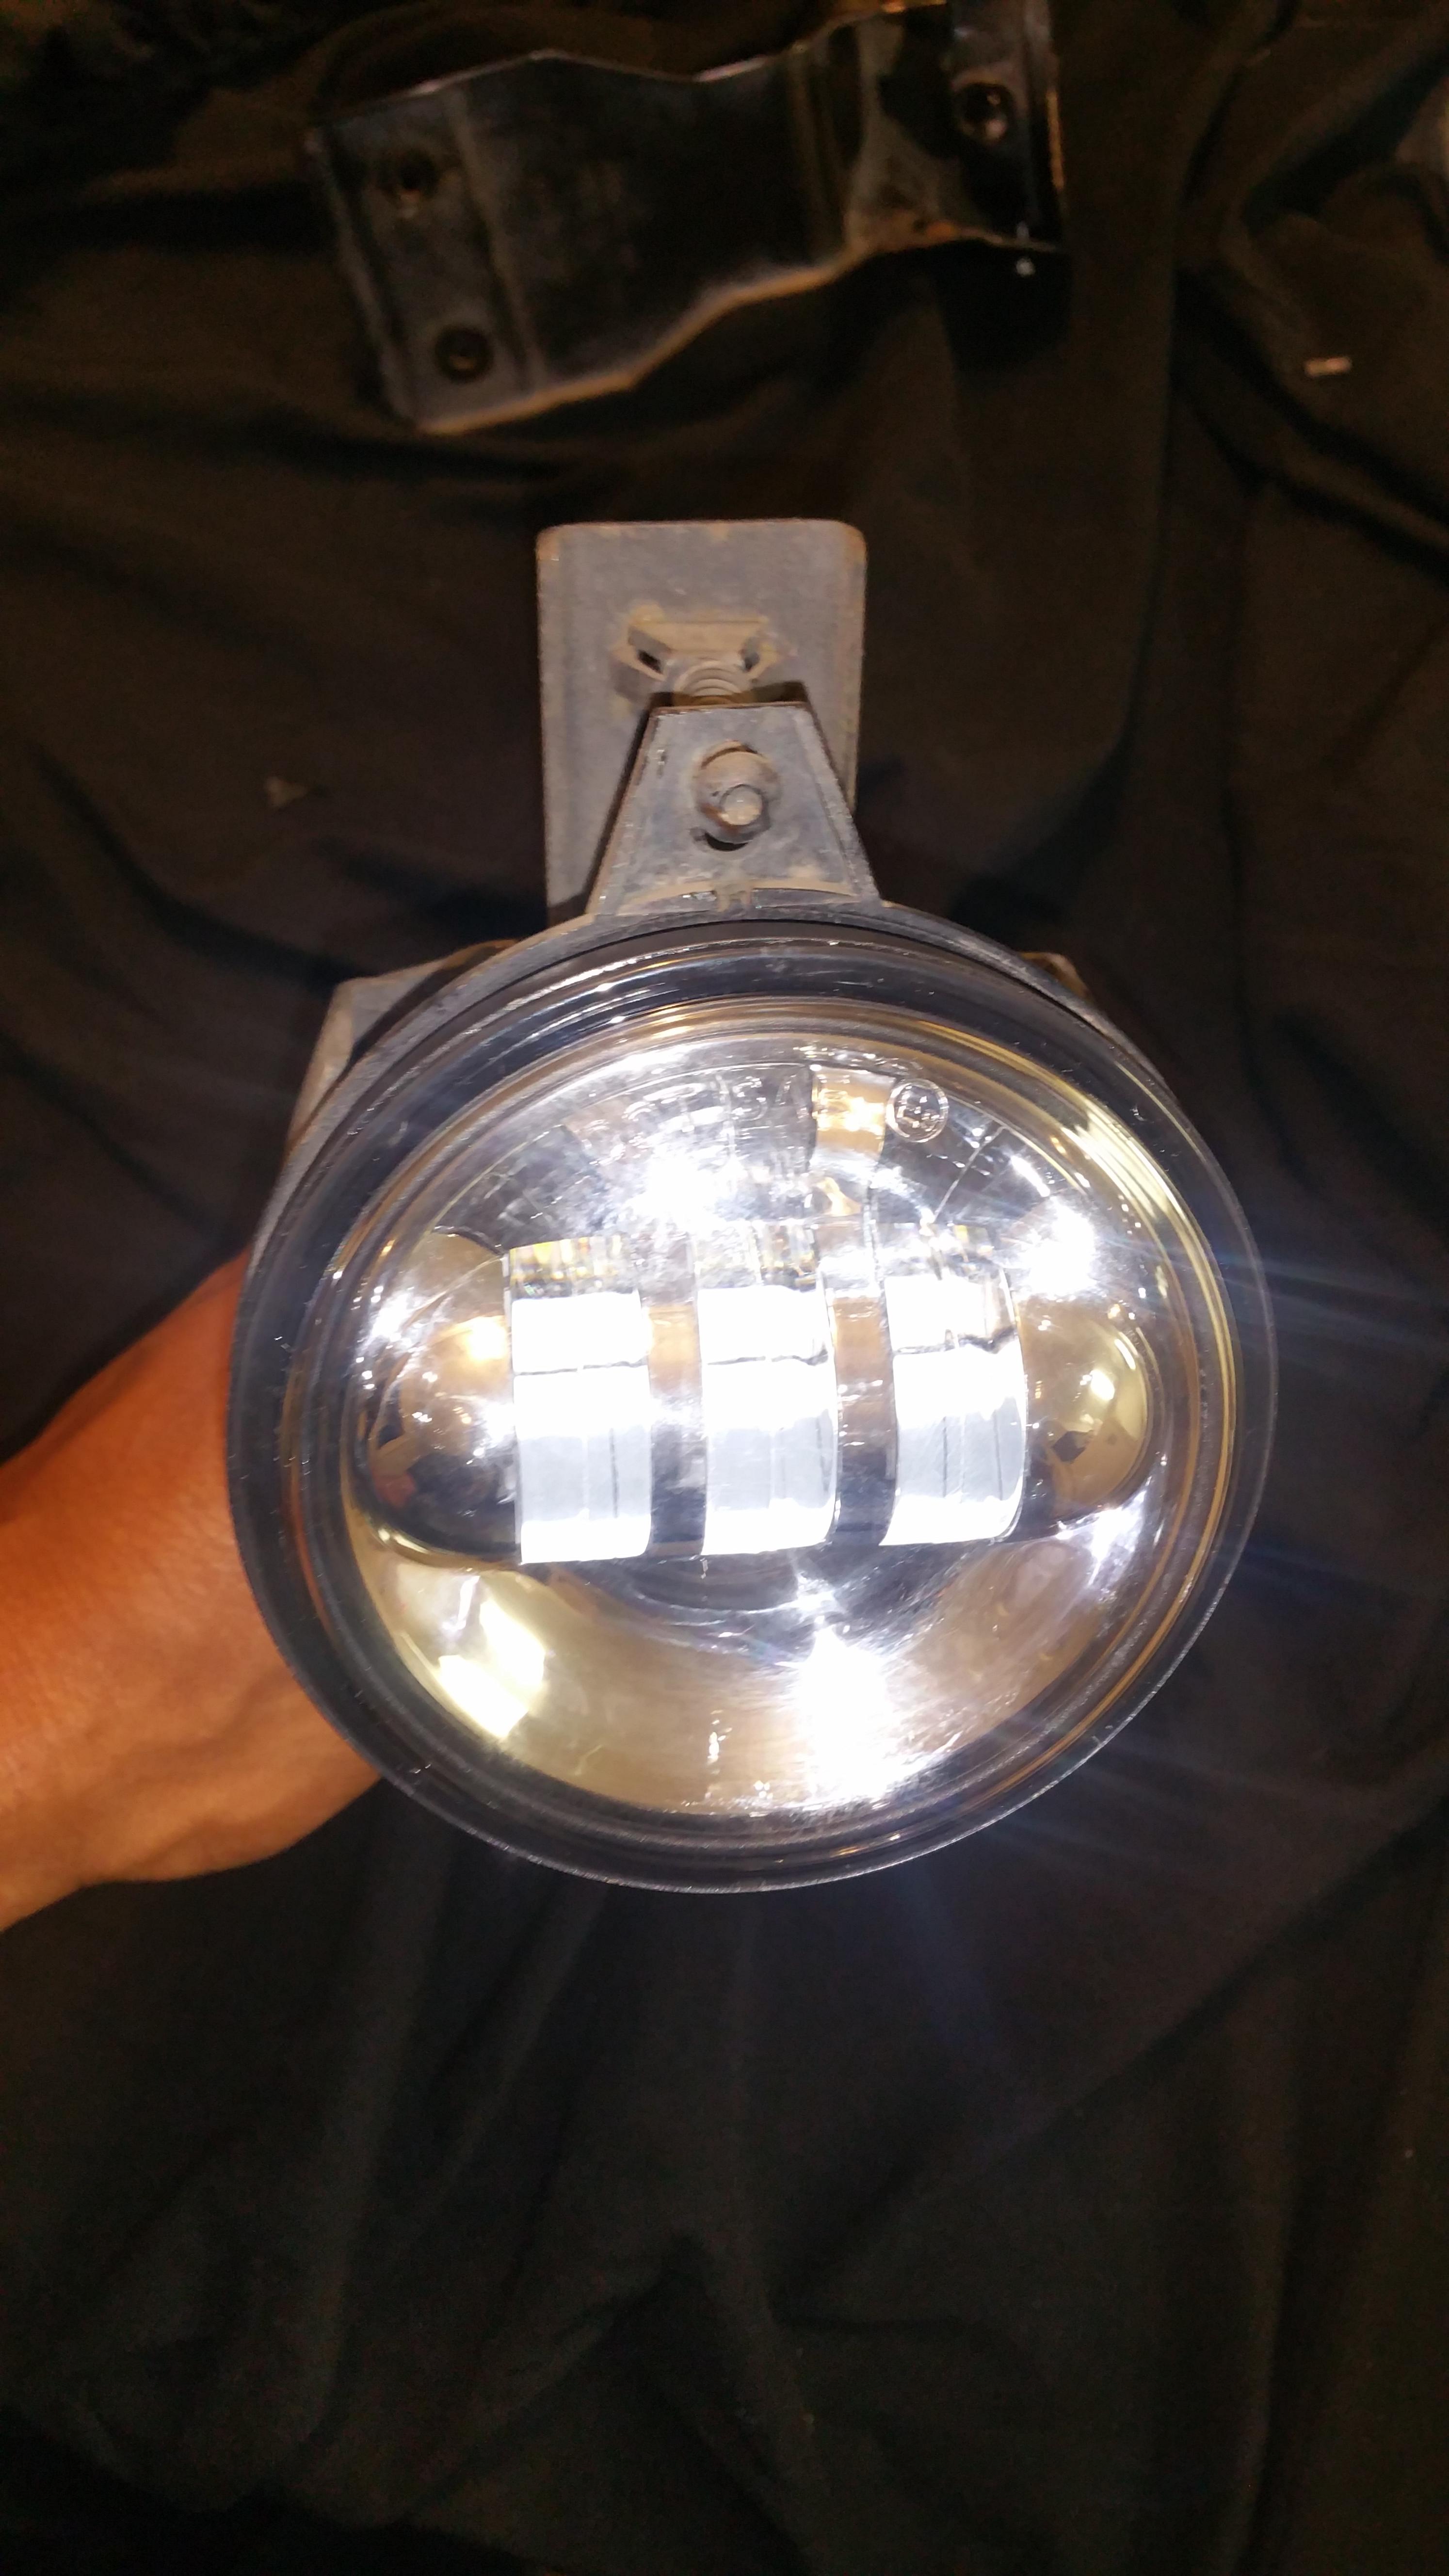
I finished this very nice upgrade the other day, but I kinda went a different route with my setup since I wanted to retain the factory adjustability. I first pried off the glass lenses, then I cut out the lower portions of the fog lamp housings. By doing this, it leaves nice upper rings that the adjusters are attached to, serves as buckets for the L.E.D. fogs to sit in, and also provides new lower pivot points for the adjustability.
The L.E.D. fogs fit perfectly inside of the OEM fog lamp buckets / rings and they're bonded together using 'JB WELD' for plastics. For the new lower pivot points, I drilled a hole on each side of the metal brackets and the rings, then threaded some screws in. In the end, everything functions exactly like the factory fog lamp setup. I started to paint the brackets, but figured that it would be a waste of time on something no one will ever see once they're mounted back on the car.
I'm extremely pleased with the way everything turned out, and the night time lighting is TRULY a night and day difference!


The following users liked this post:
ramairjohn2000 (08-28-2020)
09-21-2017 | 04:35 PM
#295
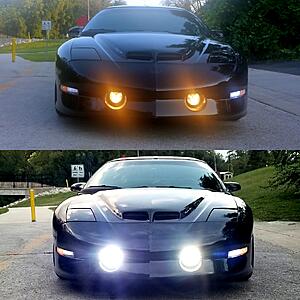
Photos 4 and 5 shows the L.E.D. housing sitting perfectly inside the cut upper OEM fog lamp housing. Once the OEM fog lamp glass is removed, the L.E.D. housing to the OEM's is kinda self-aligning.
 09-30-2017 | 07:46 PM
#299
TECH Regular
Joined: Apr 2013
Posts: 456
Likes: 5
Looks incredible. I am going to settle with LED replacement bulbs for my fog lights, just to make life easy. Eventually my headlights will be treated with LED bulbs in a projector lens housing by a company that makes them for LT1/LS1 f-bodies.
