When you click on links to various merchants on this site and make a purchase, this can result in this site earning a commission. Affiliate programs and affiliations include, but are not limited to, the eBay Partner Network.
Trans Am LED Fog Light Install (Morimoto Knockoffs)
EDIT 1: I'm now running chrome housings with orange LEDS. Chrome just looks better on a white car and I love orange fogs, if anything to be different. For pictures, see page 5
EDIT 2: If you're wanting to do something similar to a Formula, Photochop was kind enough to do a write-up on how to install them, go to his post here: https://ls1tech.com/forums/appearanc...l#post19539005
Figured it was time to update my fog lights, so I started looking for some and they had to be OEM size (4�”) replacements. I was really wanting the Morimoto fog lights, but just didn'’t want to drop $170 plus shipping and still have to figure a way to mount them and wasn't positive my idea to mount would work.
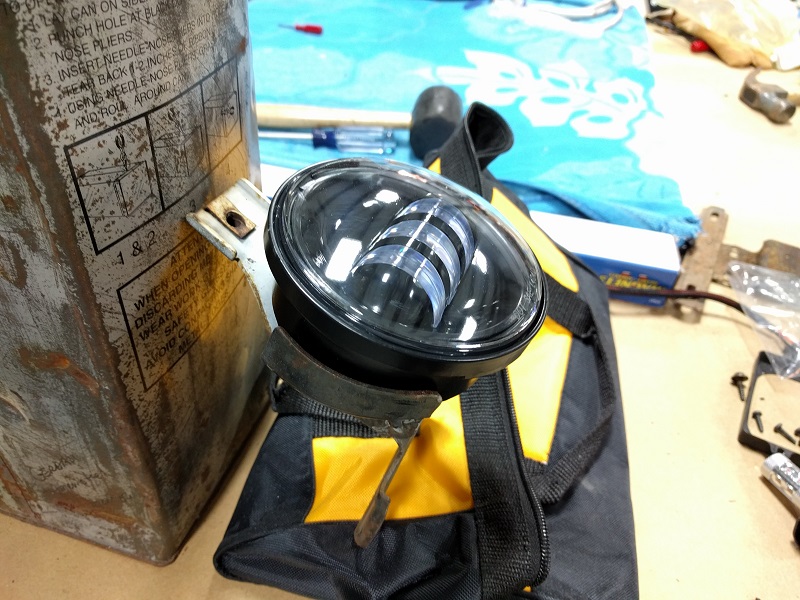
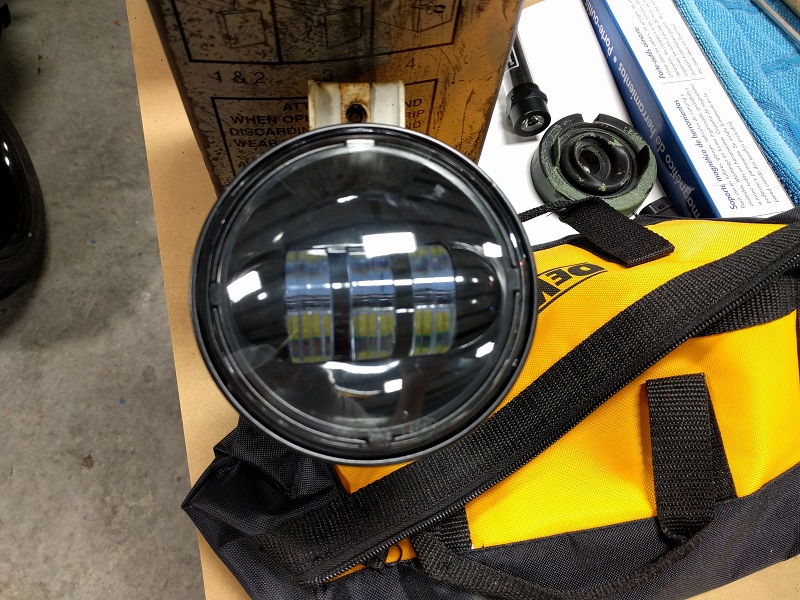
As some know, it's a SOB to find 4�" fog lights in general with only a couple of actual options. In my searching, somehow I found some Chinese fog lights that resemble the Morimoto ones. They’re actually made for a Harley Davidson as auxiliary lights. I have no clue how they mount on the bike, but I came up with an idea how I could possibly mount them on the OEM fog light brackets. I ended up paying $55 shipped for the black variety. They also make all chrome ones as well, but with the price and the black accents on my car figured the black may not look bad. Once they were in my hand, I immediately tested them out and they perform way better than I expected.
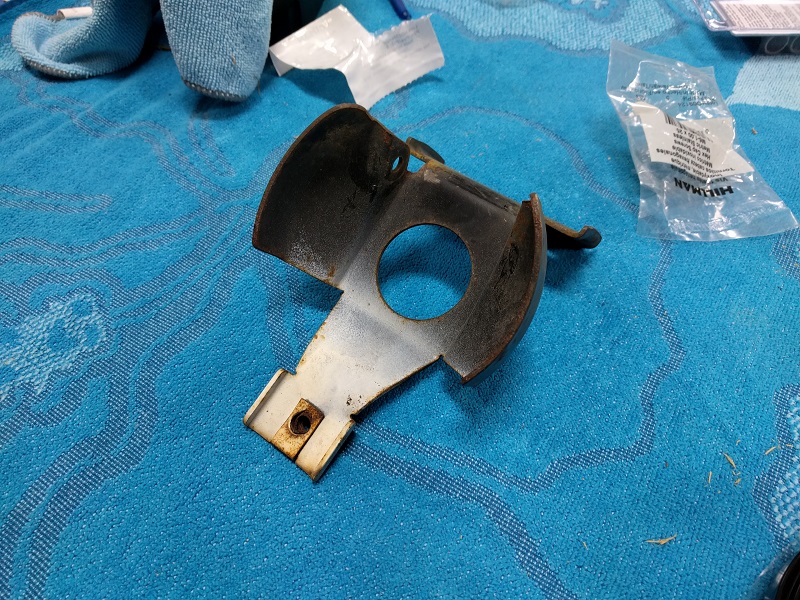
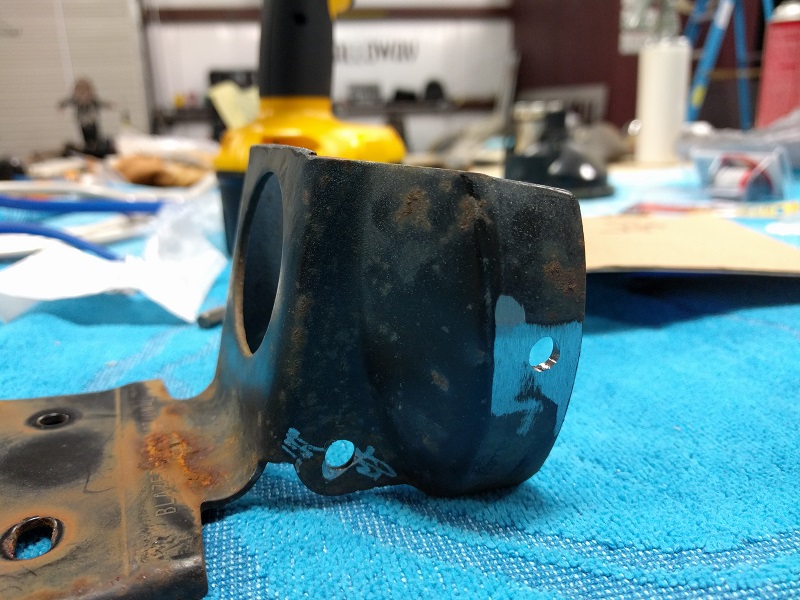
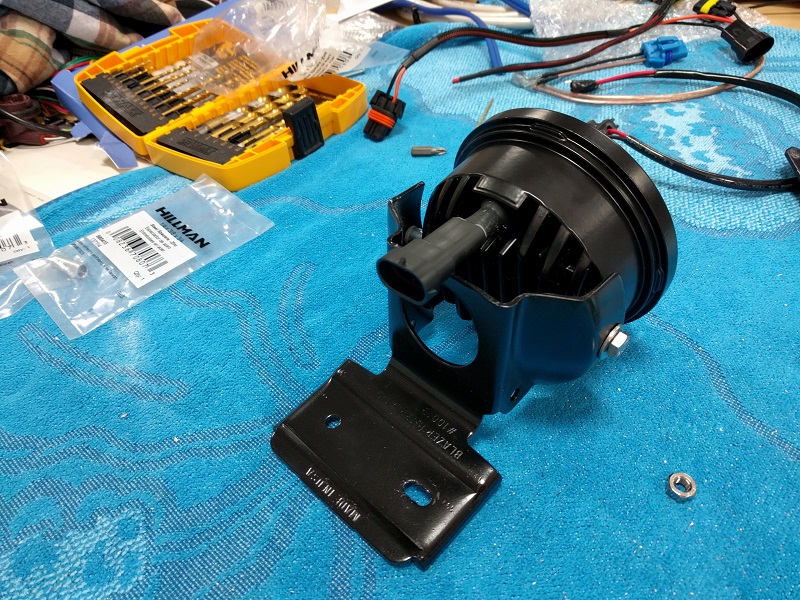
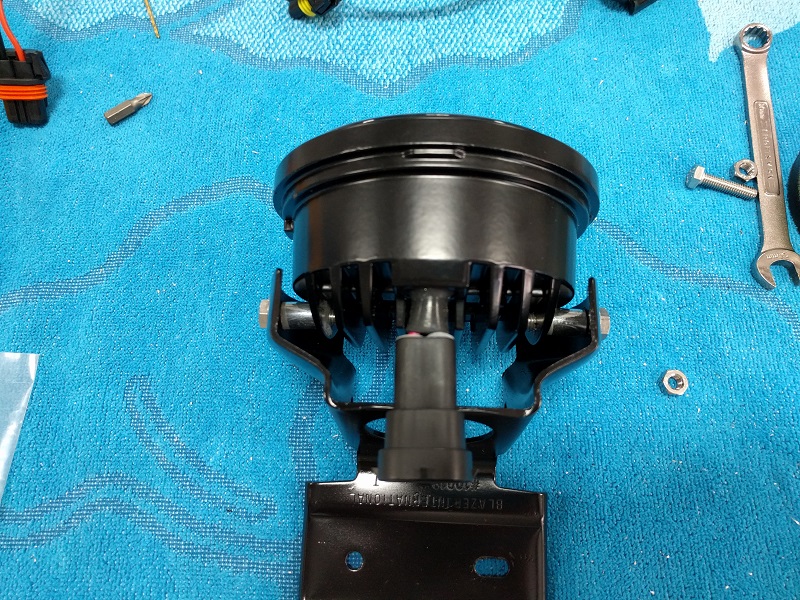
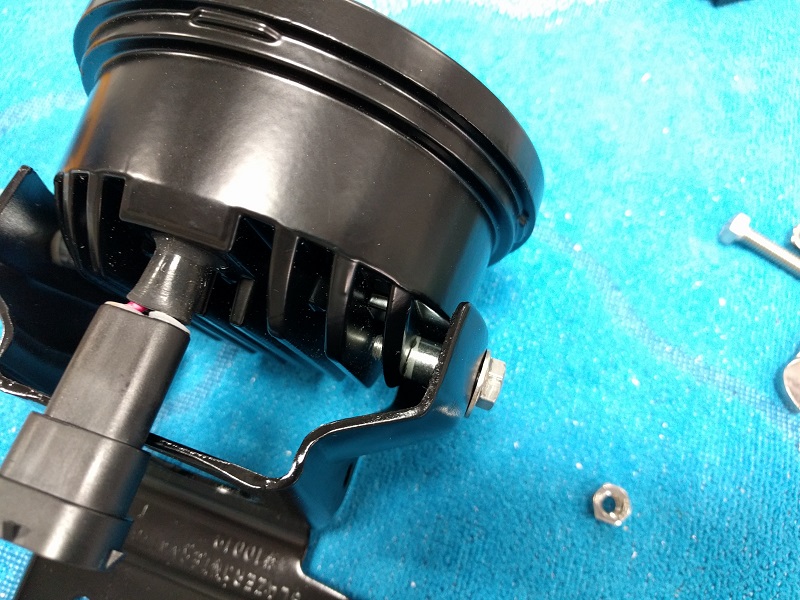
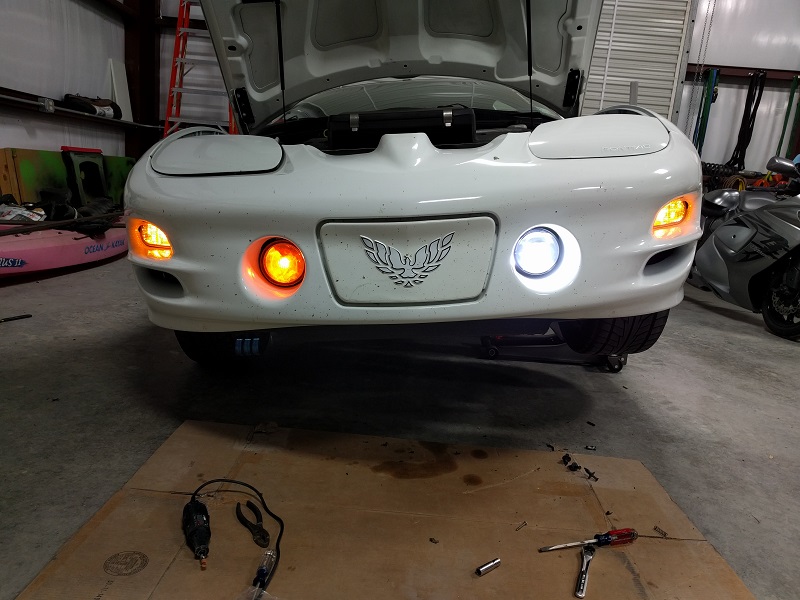
With the OEM fog lights & brackets removed from the car, sure enough my idea looked like it’d work out. I first cut off the top of the bracket where the OEM adjustment screw goes, it’ll make it easier to fit it through the fog light hole. I drilled a �” hole in the center on each side of it and with a smaller drill bit drilled through the outside fins of the fog’s heatsink. Using M6-1.00-25mm SS bolts/washer, I mounted the fog to the bracket. I tapped the hole on the heatsink so I could screw the bolt directly to it. It’s also possible to just use a nut too. I used a �” spacer to go between the OEM bracket and the fog’s heatsink so you can snug it down and lock it in place. I snugged them tight enough so I can barely move it up/down so I can align them when back on the car and won't move while driving. I also used a little blue Loctite for some additional insurance.
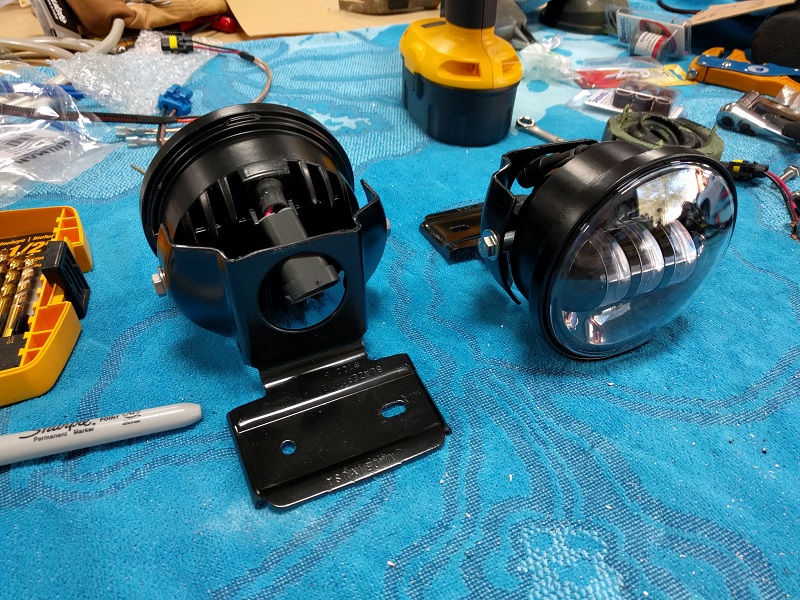
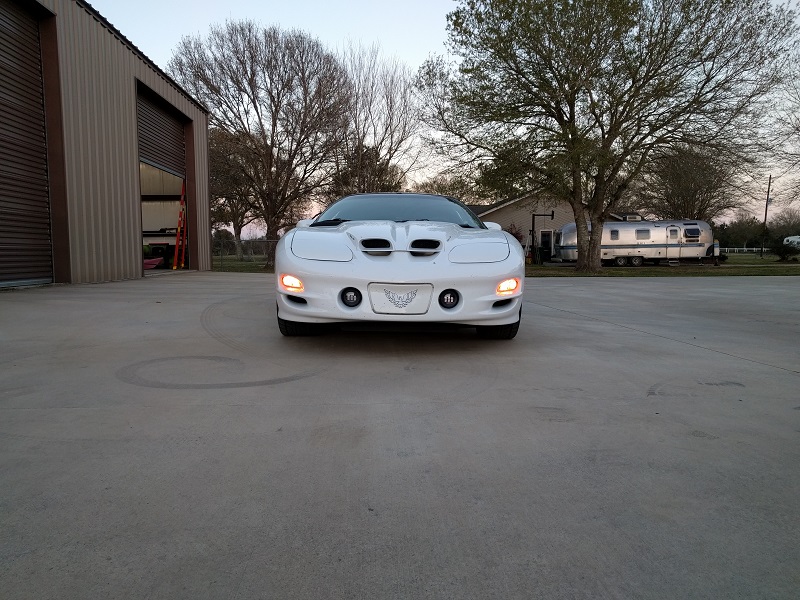
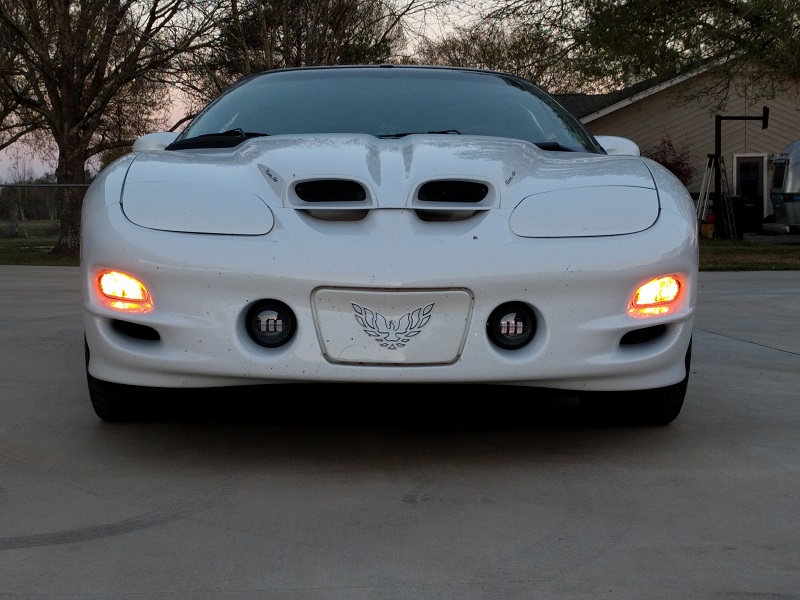
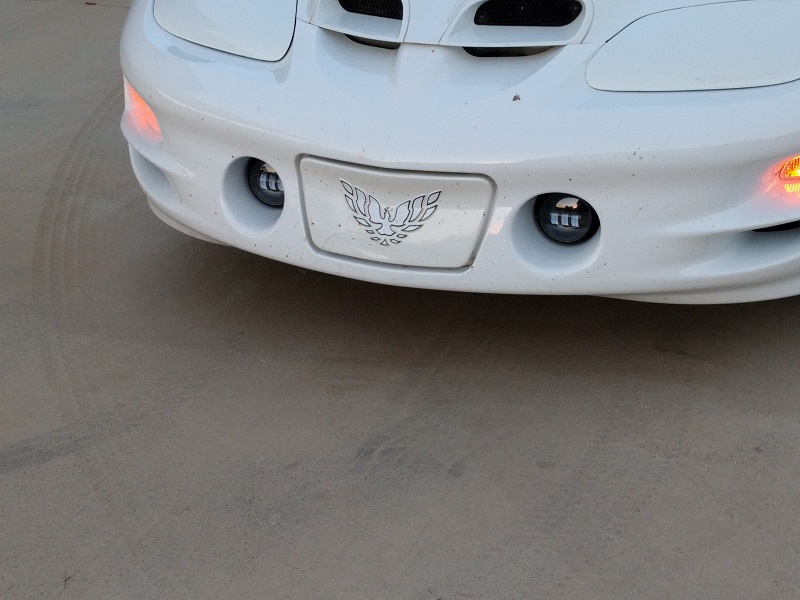
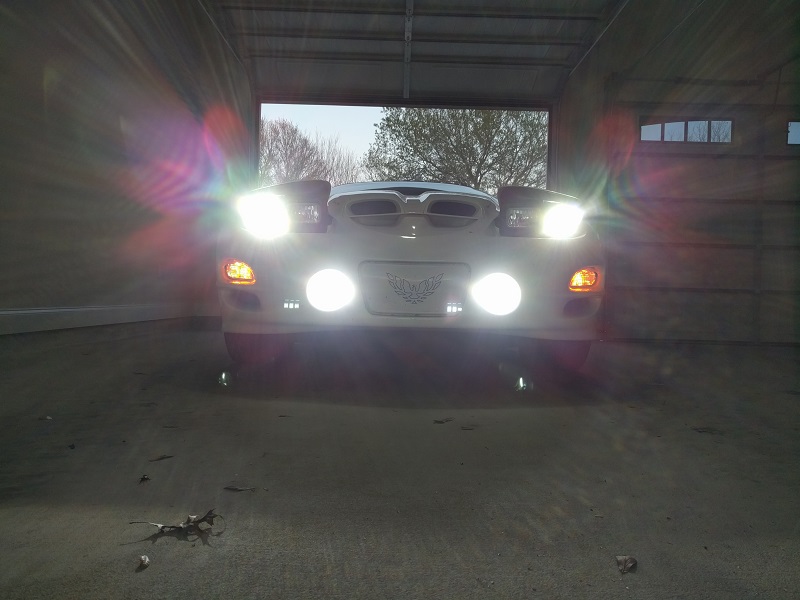
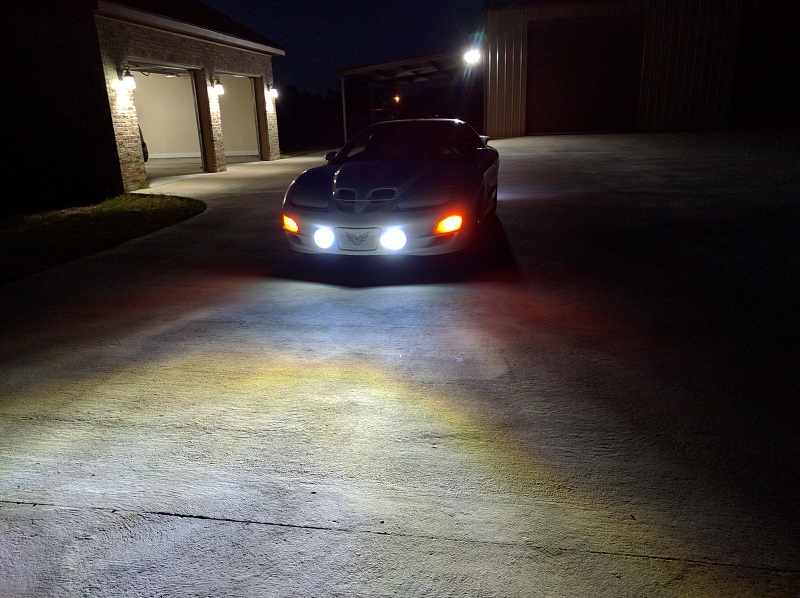
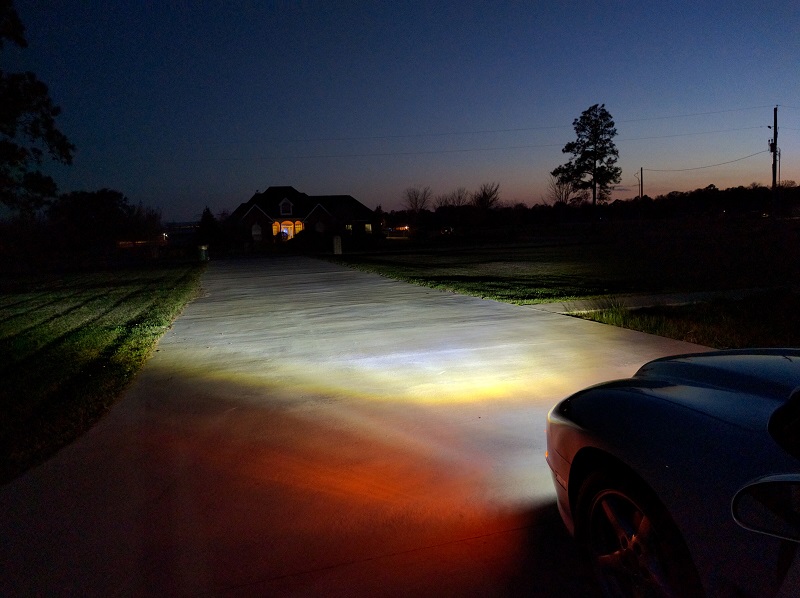
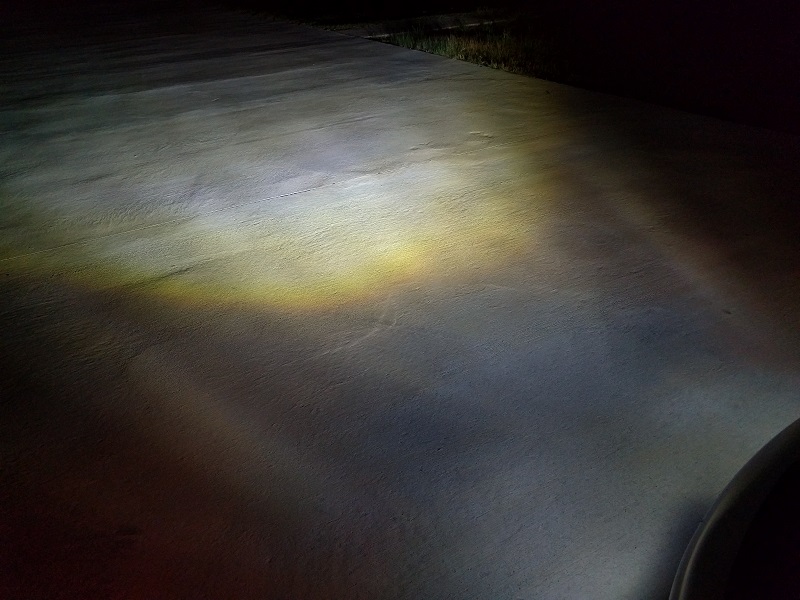
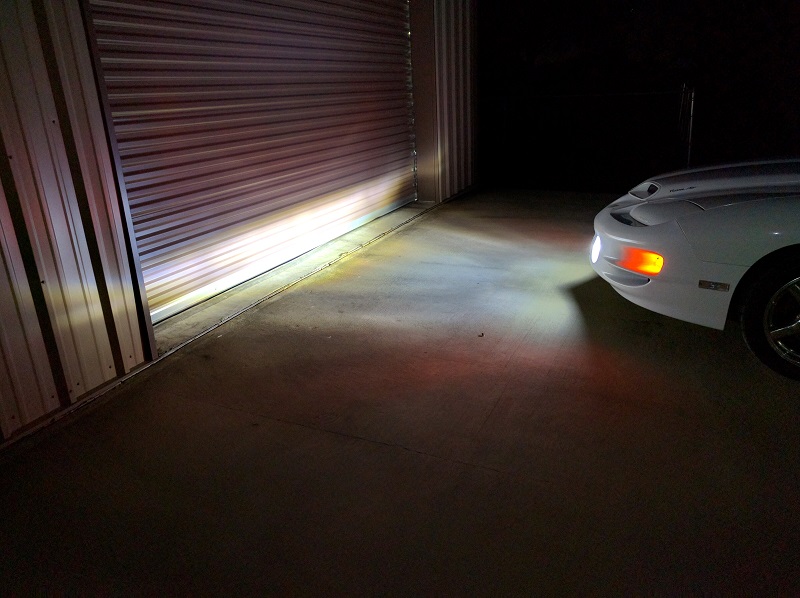
I painted the brackets for kicks. Bonus part is they plug on these fogs plugs right into the OEM connector. Was a fun project, these fog lights worked out WAY better than I anticipated. They have a nice cutoff, TONS of usable light, nice beam pattern and do NOT blind oncoming traffic. For being a complete gamble with some random $55 Harley lights, these thing rock!!!
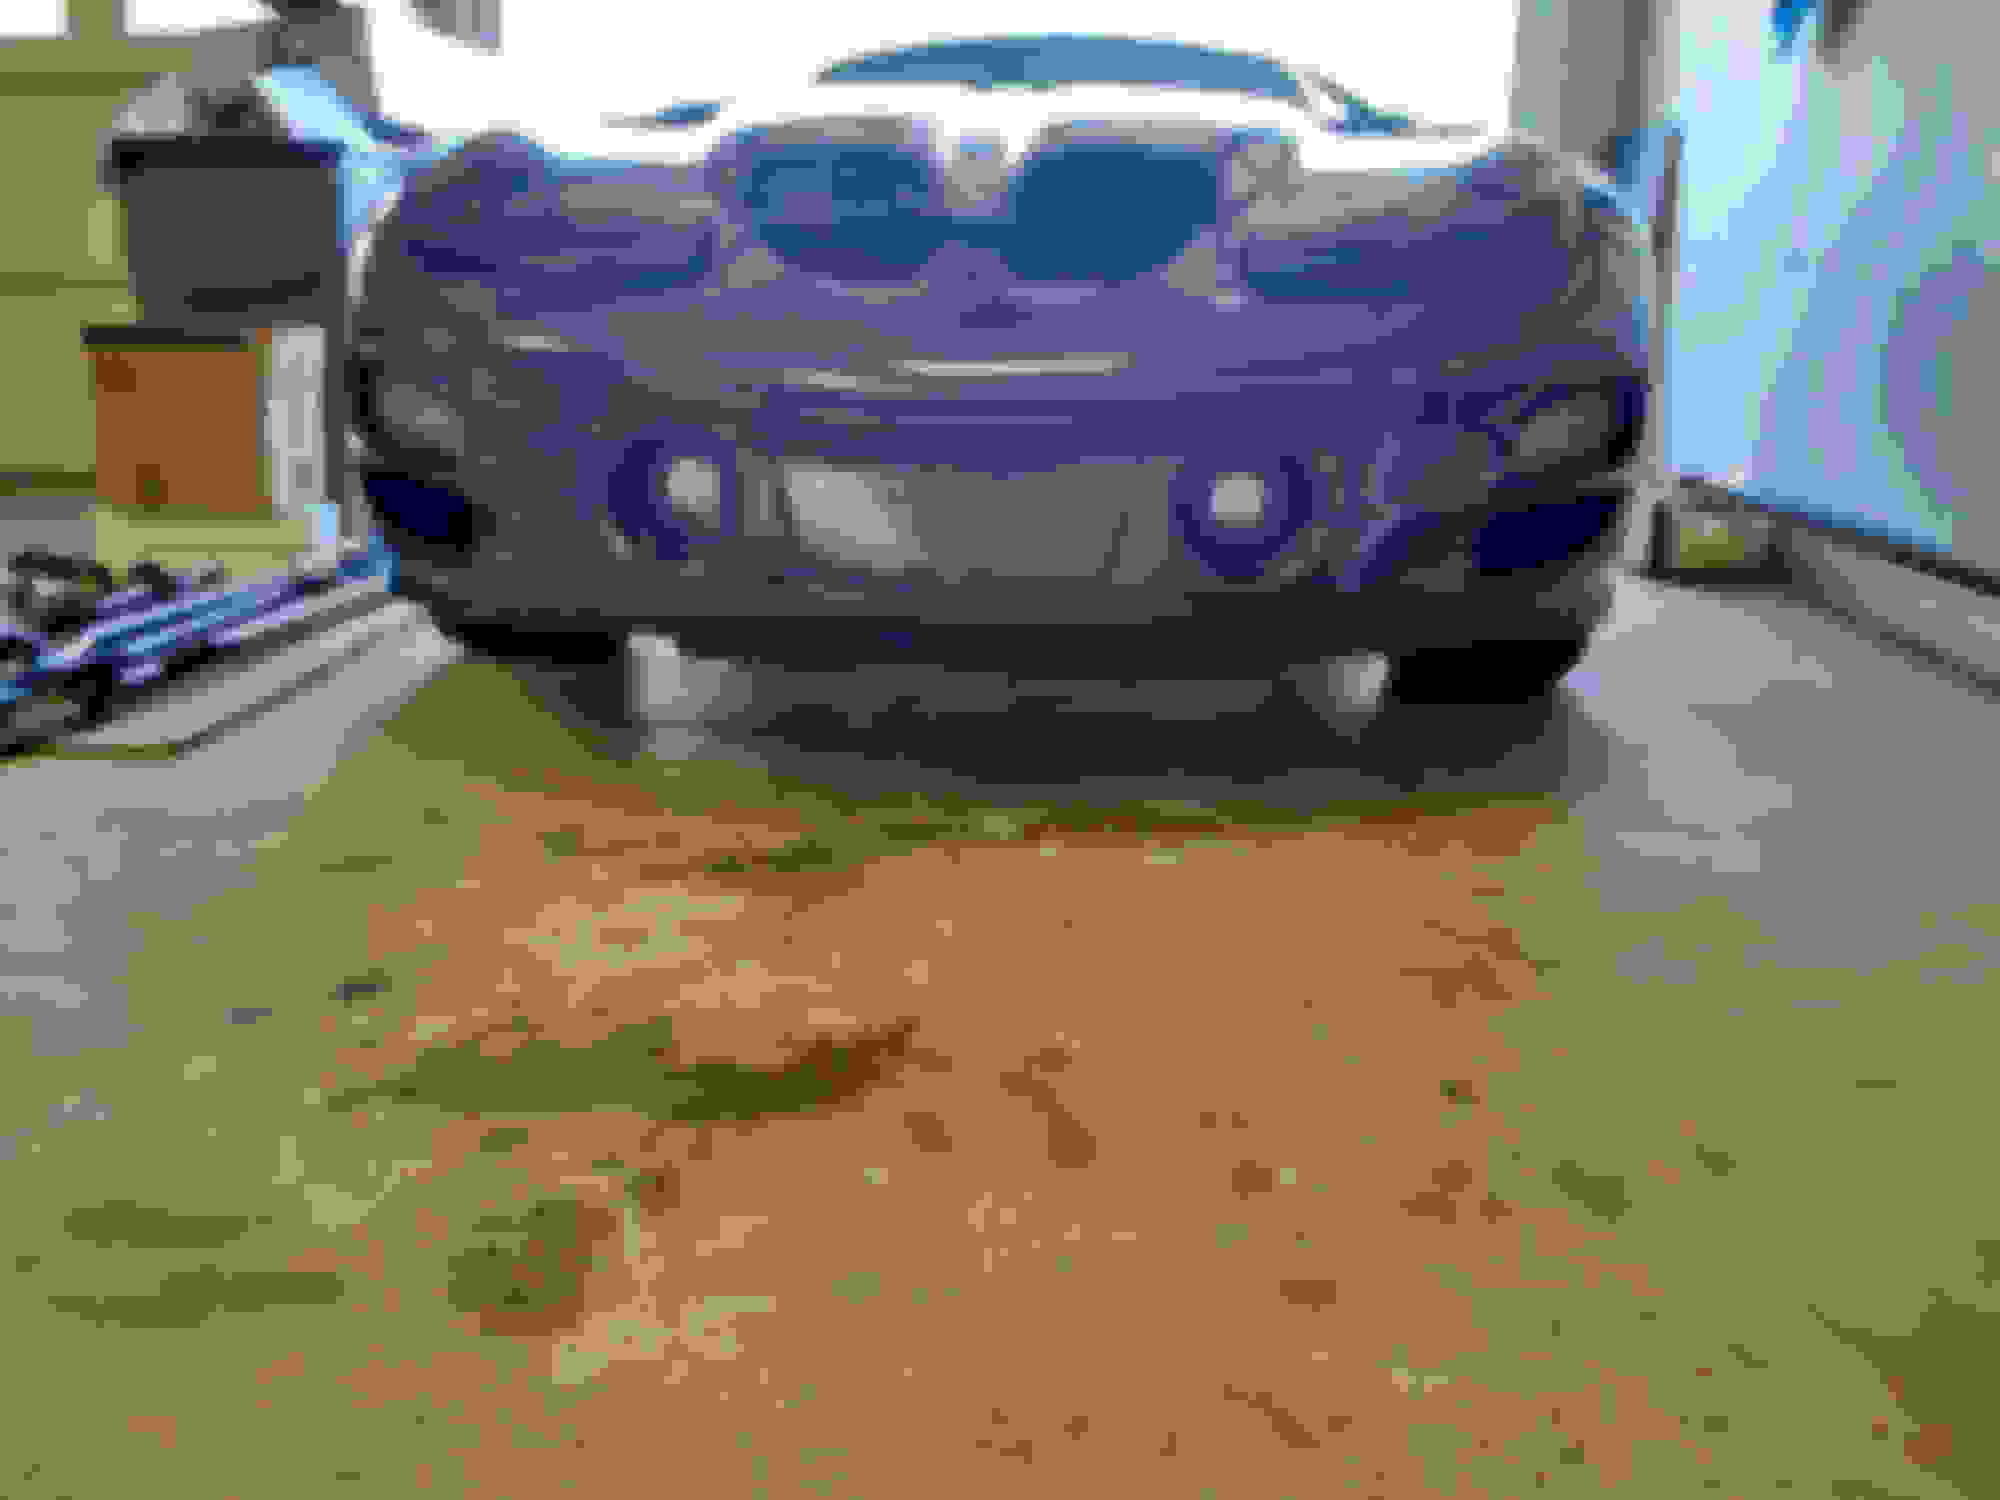
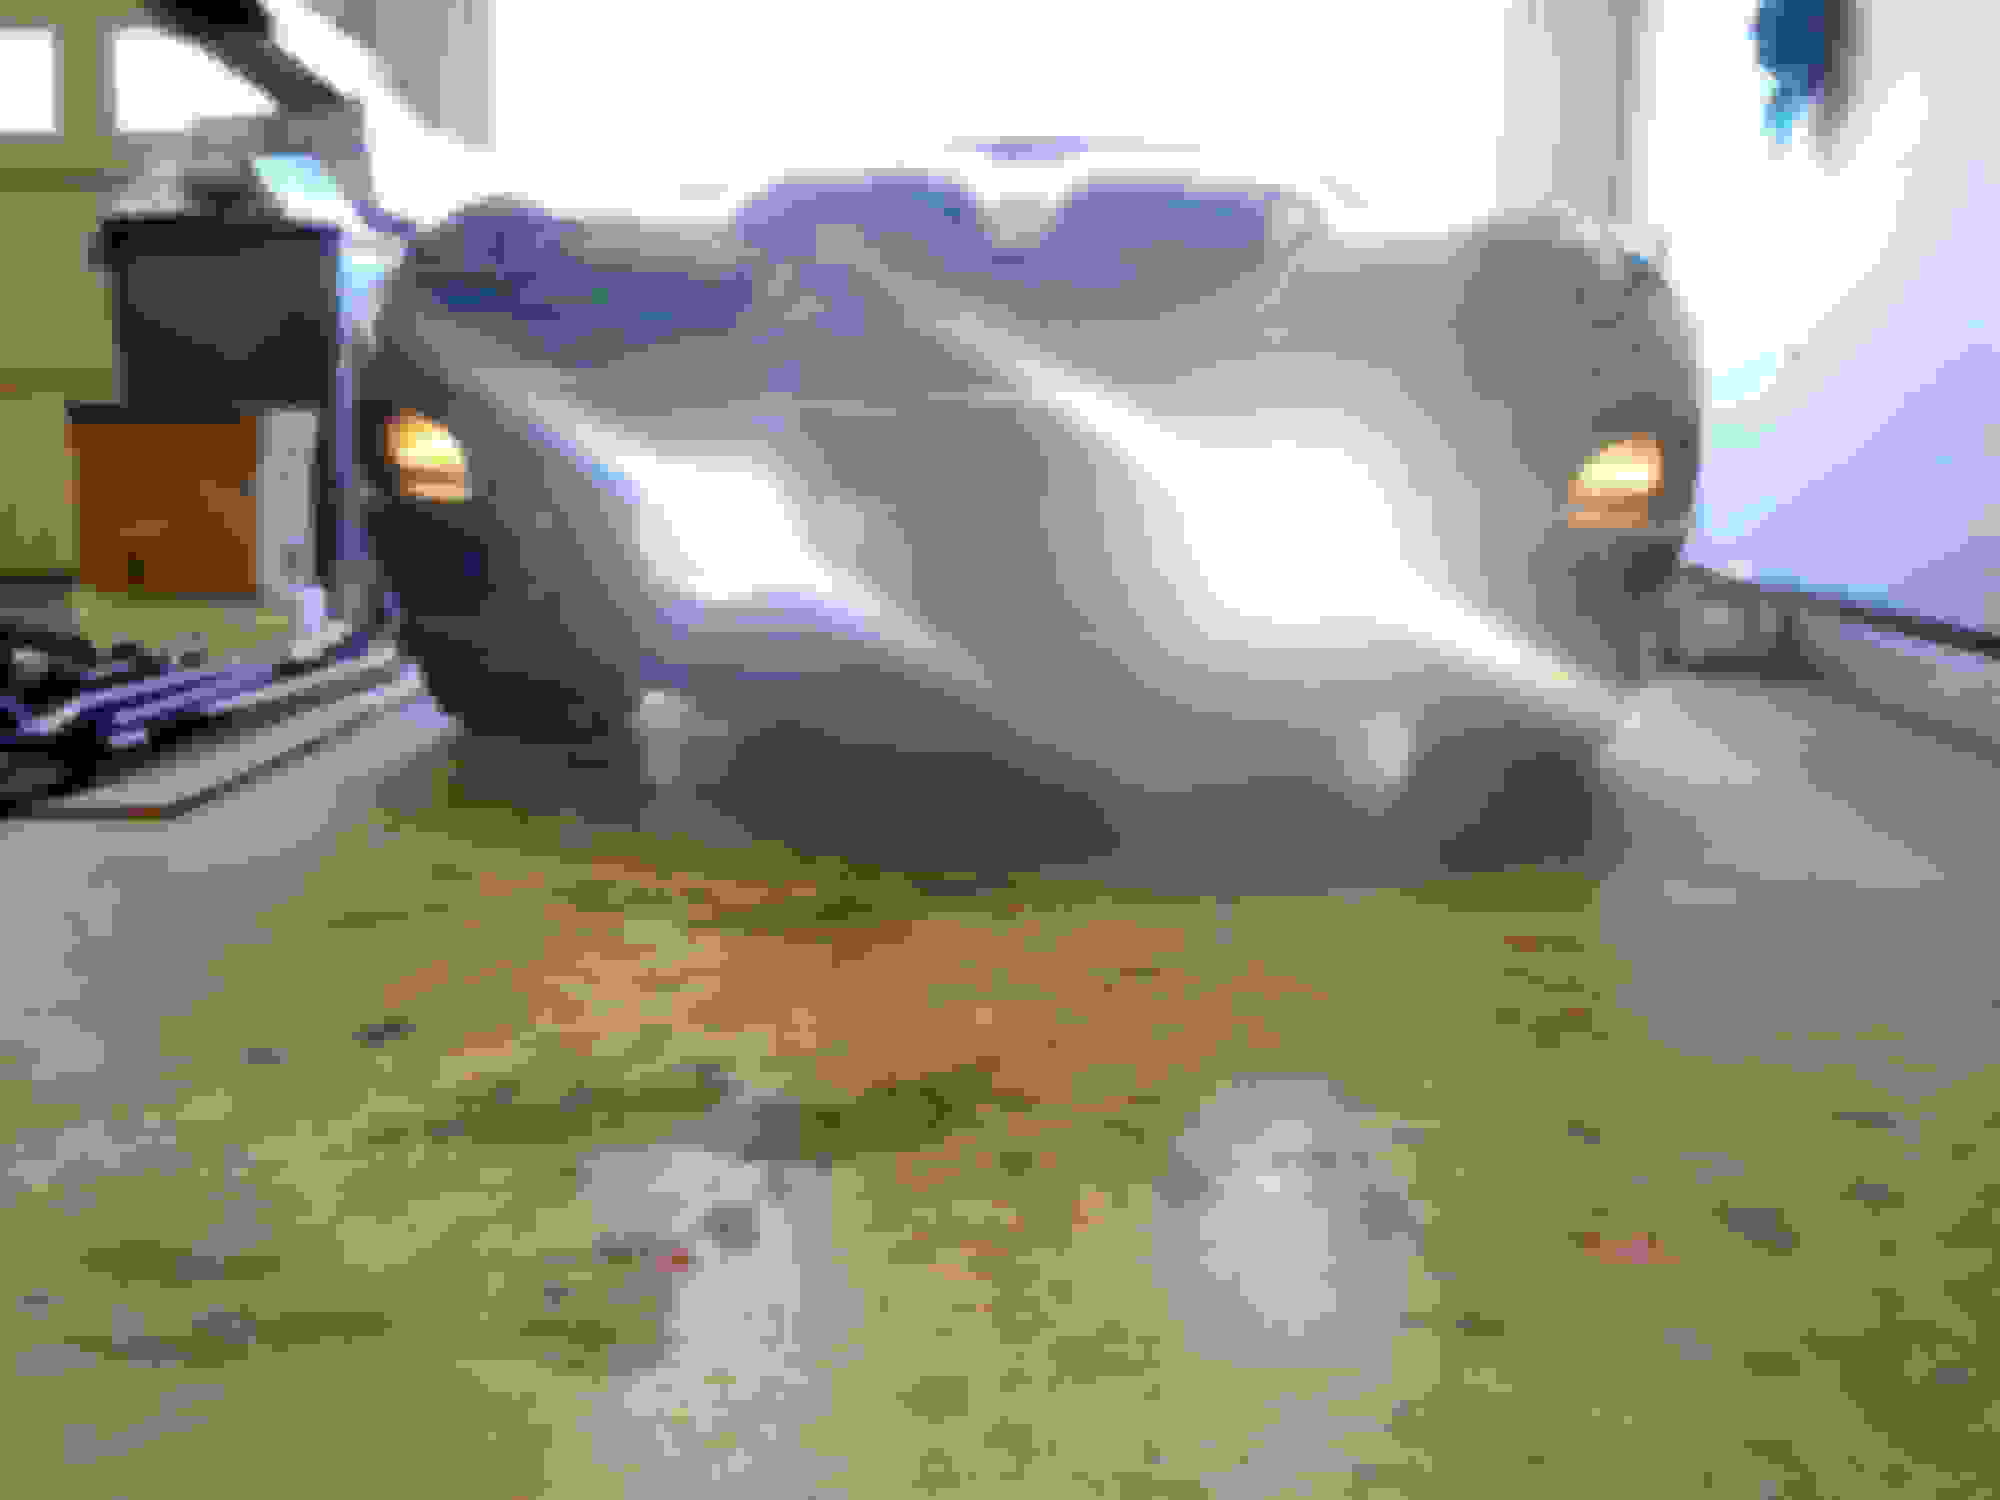
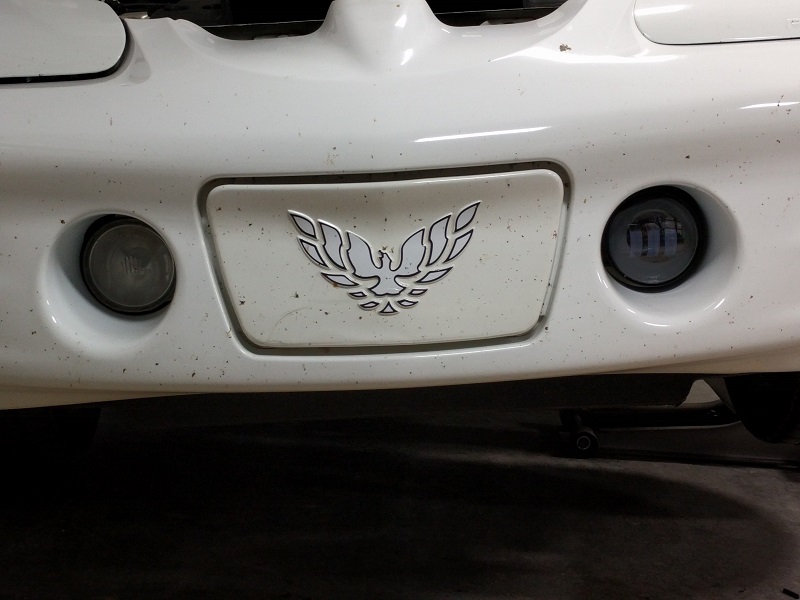
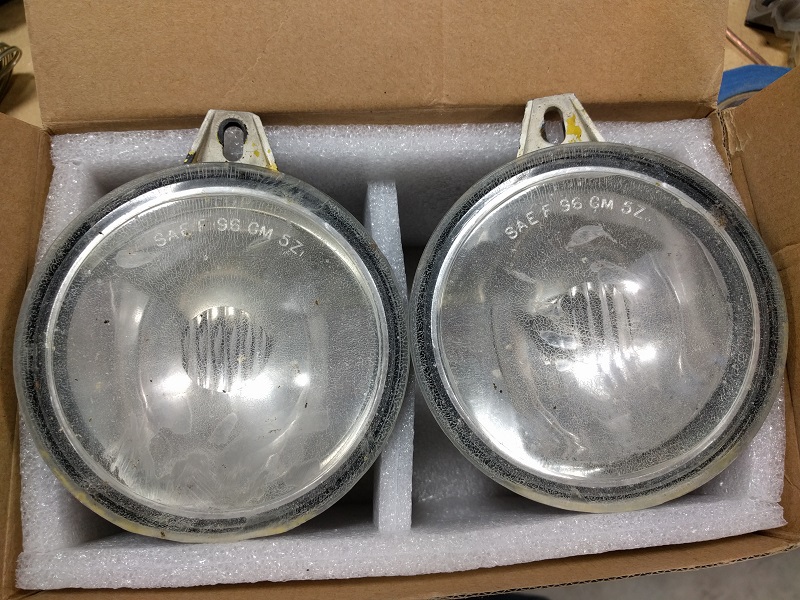
And my OEM fog lights, didn’t realize they looked so horrible. Least they didn’t leak, lol.
Last edited by InfiniteReality; 02-20-2017 at 05:53 AM.
Oh yeah, I was going to mention they are on there but I wasn't sure if I could link amazon on the forum. I originally was going to order them from there, but watched a couple of ebay auctions and ended up paying $55 shipped.
I probably could have got them cheaper too but I'm far to impatient and Amazon Prime has spoiled the **** out of me
Man you're not lying there. I love Prime just as much as these fogs, lol. I wasn't in a hurry, was trying to spend the least amount not knowing if I'd be able to fit them. My brother is looking to get some as well, but going with the chrome ones.
For what it's worth to anyone, I just found out they're actually J.W. Speaker clones.
They look really good! Thank you for sharing this. I'd like to figure out a way to mount aftermarket fogs on my car with the FMIC taking up real estate. Good job OP!
I got them in I used a threaded rood and went all the way the heat sink though. My brackets are probably not quite as nice as yours though.
Looks good! I dig the black on black.
It took me a little bit figure out how to get the factory fogs out too. My brother has some chrome one's on the way and he planned to do just what you did and drill a hole all the way through the heat sink. Did you have to use spacers by using the bolt all the way through?

 03-03-2016, 09:24 AM


 I used a threaded rood and went all the way the heat sink though. My brackets are probably not quite as nice as yours though.