

 good deal, i personally will just stick with my no foglight mod but glad you got it done
Prototype Camaro Fog Light Covers
Thread Starter
Launching!
Joined: Apr 2002
Posts: 224
Likes: 0
From: Southgate, MI
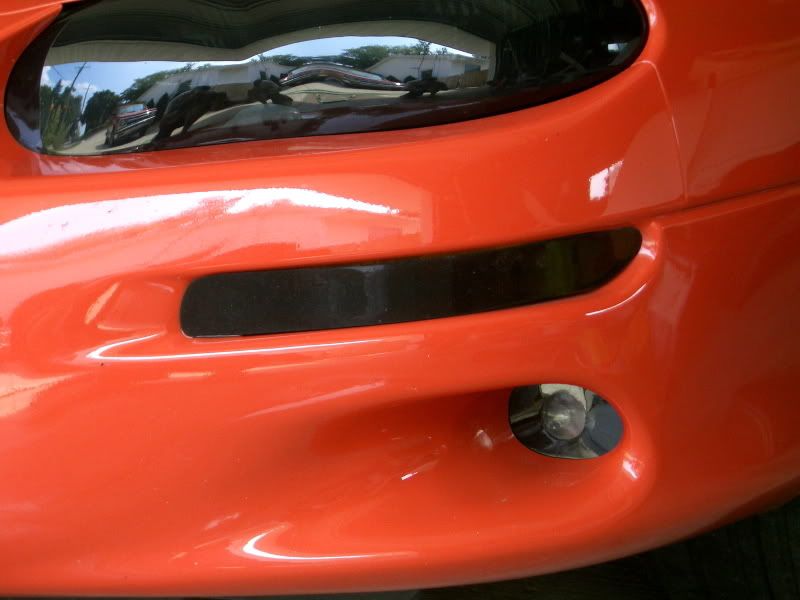
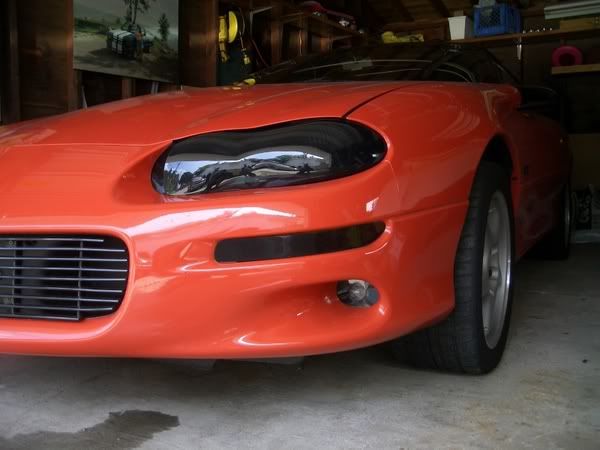
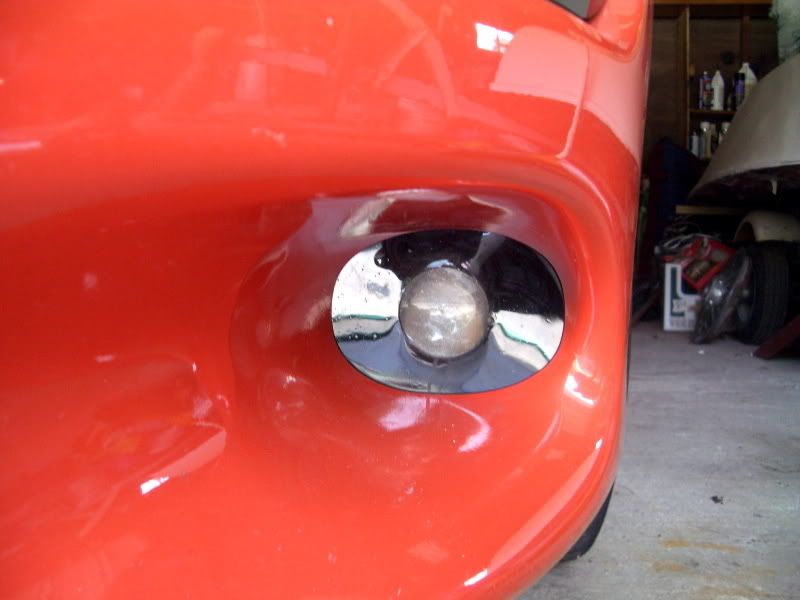
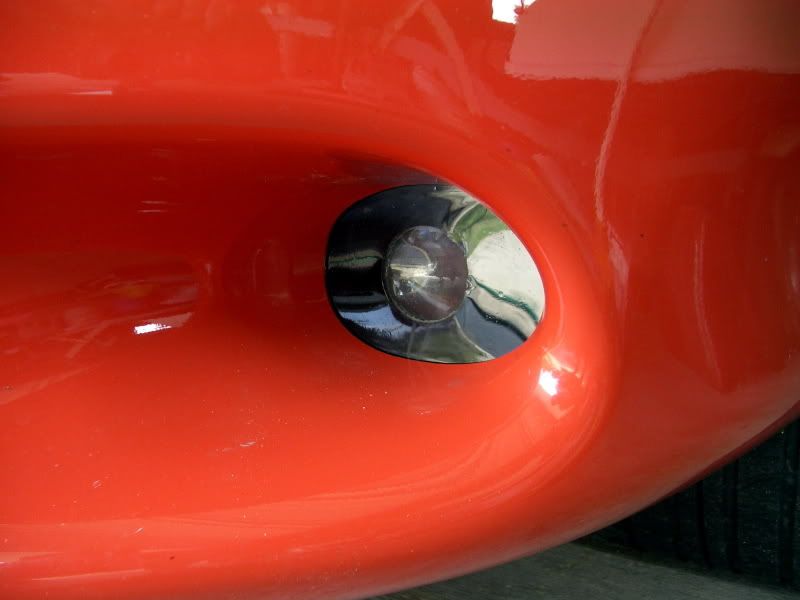
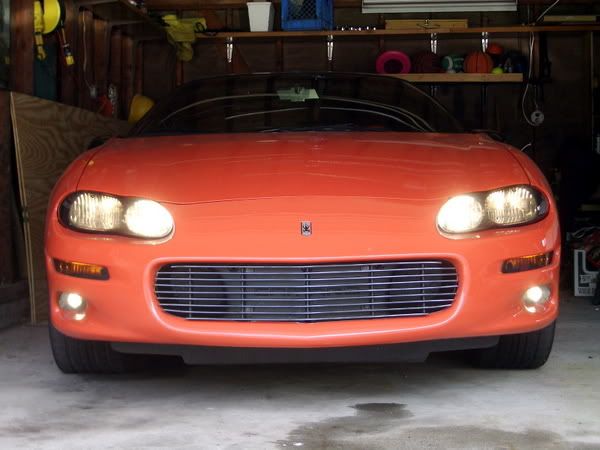
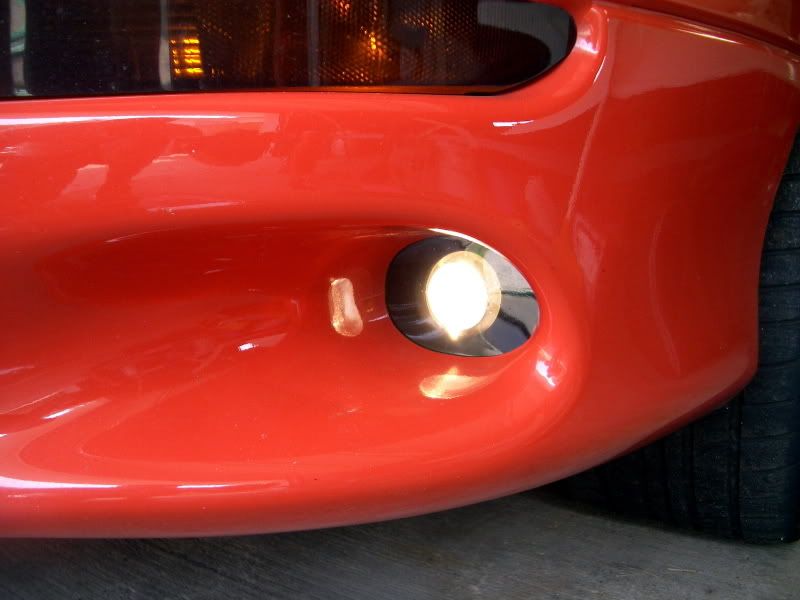
I posted awhile back about creating foglight covers. Well, one of my headlight blackouts had a small crack in it, so I bought a new set and decided to modify the old set to make foglight covers. At first, I just put a hunk of the material between the foglight and the bumper cover. Because the foglight sticks out some, there was plenty enough tension to hold the plastic in place.
Well, the heat of the foglight melted the plastic a small amount. I decided to use a hole saw and cut some holes for the foglight to peer through. When I did this, the curvature of the plastic blackouts prevented them from holding in place tightly. So, I got out my heat gun and heated up the blackouts until they laid down flat on my workbench. Then I put them back in the holes and they fit well and looked pretty good too. I think I will make another set, as I screwed up a bit while heating the plastic. But, overall, I think they look great.
Well, the heat of the foglight melted the plastic a small amount. I decided to use a hole saw and cut some holes for the foglight to peer through. When I did this, the curvature of the plastic blackouts prevented them from holding in place tightly. So, I got out my heat gun and heated up the blackouts until they laid down flat on my workbench. Then I put them back in the holes and they fit well and looked pretty good too. I think I will make another set, as I screwed up a bit while heating the plastic. But, overall, I think they look great.
Thread Starter
Launching!
Joined: Apr 2002
Posts: 224
Likes: 0
From: Southgate, MI
Right, like I said above, when I had it covering the light, it melted the plastic. It didn't look bad, but not great either. It would not be pretty if you tried to create a piece that sat out from the light a bit. It would be pretty hard to do and attaching it would be a big problem. If the darn headlight covers didn't cost 50 bucks a set, I would experiment more. ultimately, I would like to create a small bubble that covers and sticks out from the light. Easier said than done though.
Thread Starter
Launching!
Joined: Apr 2002
Posts: 224
Likes: 0
From: Southgate, MI
I bought the DRL covers from RKSport way back when.
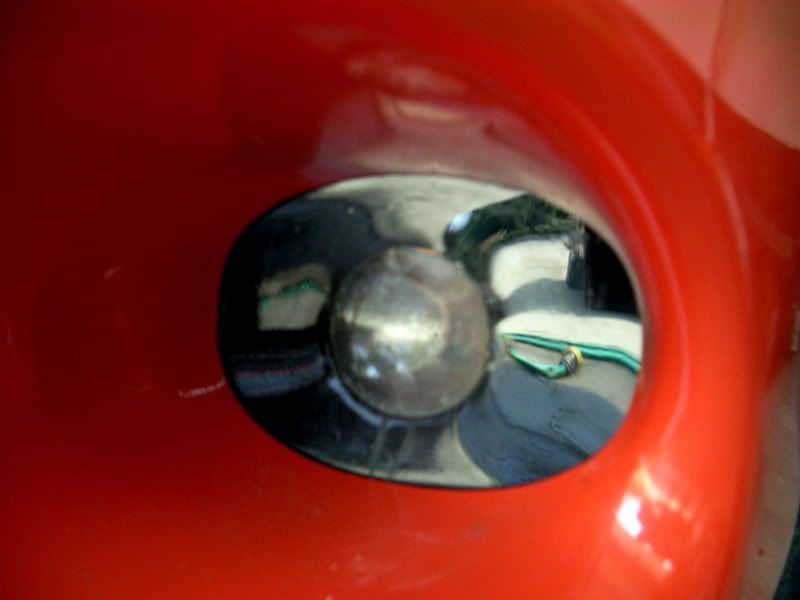
As for cutting, I used a reinforced dremel disk. I cut the holes with a hole saw on a cordless drill. My cutting did not need to be precise. Because I was leaving a lot of extra material on purpose, I did not have to worry about any fancy cutting. Behind the foglight holes, there is a lot of extra blackout surface area. Basically, I just cut a headlight blackout in thirds, disposed of the middle section, and used the two ends for the covers.
As for making your own DRL covers, I suppose its possible, but I would doubt my own skill at cutting that distance straight with a dremel. Perhaps if you flattened the plastic first and then cut it with a jig saw or something, you might be ok.
Be warned about working with the heat gun too. I learned that there is a fine line between making it soft enough to mold or flatten and ruining it. The surface began to sizzle and bubble and it was junk. The way I flattened them was on a work bench that is made out of a laminate countertop, so it is quite smooth. When it got hot enough, it just began to lay down smooth on the work bench. But, the bench was not clean and when I applied a block of wood to put pressure on the top surface, I put marks into the plastic, because of the junk on the work bench. When I make the final real set, I am going to clean the bench and the plastic really well. I will then flatten before cutting my hole, so that it is perfectly round when I am done.
TECH Addict
Joined: May 2005
Posts: 2,245
Likes: 0
From: Top of 4th Gear; Plano, TX
Cool, thanks for the tips. I don't know what kind of tools we have lying around for me to use, but I'll see what I can do tomorrow for the blackouts. How bright are the DRL's/turn signal when blacked out?
Trending Topics
LS1 Tech Stories
The Best V8 Stories One Small Block at Time

Topdon ONE vs. Artidiag 800 BT2: Which is the Diagnostic Tablet For You?
Pouria Savadkouei
Gas Monkey Built a 6-Wheel Ferrari Testarossa With a Corvette LT4 Engine
Verdad Gallardo
7 Most Reliable High-Performance Engines GM Has Ever Built
Verdad Gallardo
Amazing '71 Camaro Restomod Is Modern Muscle Car Under the Skin
Verdad Gallardo
6 Common C5 Corvette Failures and What's Involved In Repairing Them
Pouria Savadkouei
Retro Modern Bandit Pontiac Trans AM Comes With Burt Reynolds' Autograph
Verdad Gallardo
Top 10 Greatest Cadillac V Series Performance Models Ever, Ranked
Pouria Savadkouei
Top 10 Most Powerful Chevy Trucks Ever Made!

Hennessey's New Supercharged Silverado ZR2 Has 700 HP
Verdad GallardoTECH Addict
Joined: May 2005
Posts: 2,245
Likes: 0
From: Top of 4th Gear; Plano, TX
Originally Posted by General Z
Actually, they are pretty bright even through the blackouts.
So they're amber? I don't know if I would trade total functionality for looks...and I believe it's a law that they have to be yellow so we'll see.
