
Homemade mods
 10-14-2005, 10:55 PM
#1
TECH Fanatic
Thread Starter
Join Date: Jul 2005
Location: Dallas
Posts: 1,243
Likes: 0
Received 0 Likes
on
0 Posts

There's obviously been a lot of do-it-yourself appearance mods on here, some of which are actually tasteful. I'd like to see a few of your homebrew mods, aka stuff you actually did yourself on the cheap.
Thanks guys!
Thanks guys!

 10-14-2005, 11:33 PM
#3
My favorite homemade mods would be these:
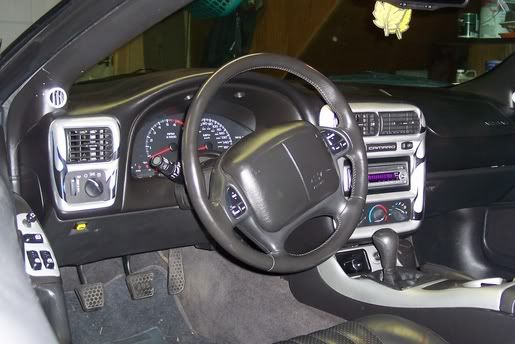
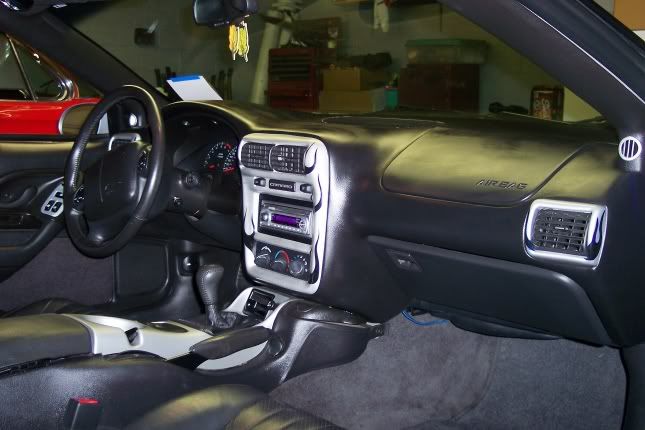
Carbon fiber center console and powerlock bezels:


Reupholstered Door Panels:

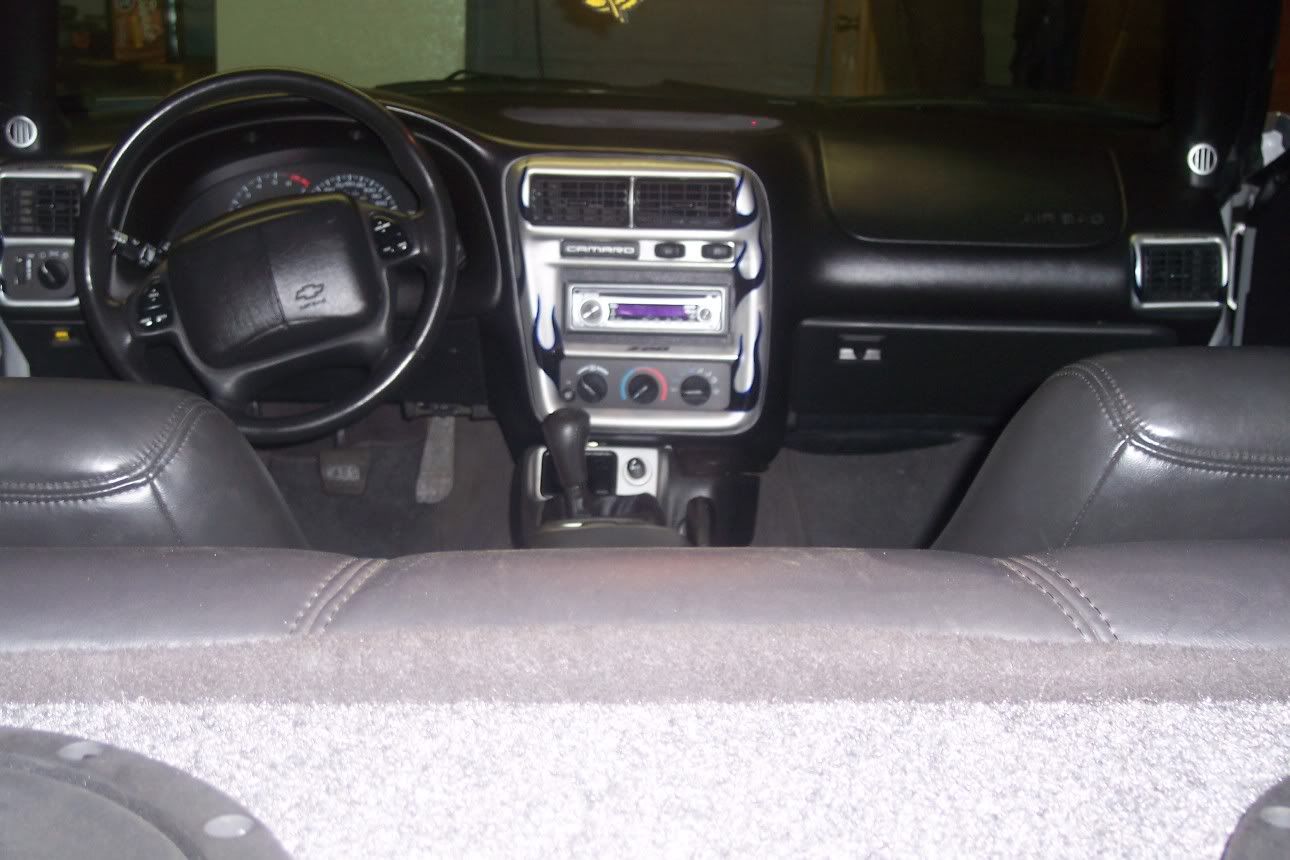
Flamed Dash Pad (Second pic shows the reflection off the windshield that goes with the gauges):


5 LEDs Mounted in Headliner:


And last, but certainly not least... my Faceplate that I wired a 9 foot extension for, so the faceplate is molded right into my sunvisor, while the rest of the CD player is in my glovebox.


But, pretty soon, my favorite homebrew mod will be the custom carPC mounted in my radio bezel. It has my entire mp3 collection, GPS navigation, DVD-rom, wireless internet access, and game emulators. Now if I could just find an OBD-I software for a v6, I could run diagnostics too. I'll have pics of this soon, just started molding the 7" touchscreen into my radio bezel, and then once the power supply comes I'll have it installed.
Carbon fiber center console and powerlock bezels:
Reupholstered Door Panels:
Flamed Dash Pad (Second pic shows the reflection off the windshield that goes with the gauges):
5 LEDs Mounted in Headliner:
And last, but certainly not least... my Faceplate that I wired a 9 foot extension for, so the faceplate is molded right into my sunvisor, while the rest of the CD player is in my glovebox.
But, pretty soon, my favorite homebrew mod will be the custom carPC mounted in my radio bezel. It has my entire mp3 collection, GPS navigation, DVD-rom, wireless internet access, and game emulators. Now if I could just find an OBD-I software for a v6, I could run diagnostics too. I'll have pics of this soon, just started molding the 7" touchscreen into my radio bezel, and then once the power supply comes I'll have it installed.
10-14-2005, 11:51 PM
#4

After having the car tuned and the MAF deleted, I didn't think a piece of hose would go from the TB to the Air Lid without collapsing. So I bought a piece of PVC that was the exact diameter of my MAF Sensor (inside & out). I cut it to the length I needed ( The shortest piece I could buy was 5 ft). Then I filed the edges until they were rounded and smooth. I finished it off with some black spray paint and siliconed it to the air lid.


10-15-2005, 12:01 AM
#5

Originally Posted by meissenation
My favorite homemade mods would be these:
Carbon fiber center console and powerlock bezels:
Reupholstered Door Panels:
Flamed Dash Pad (Second pic shows the reflection off the windshield that goes with the gauges):
5 LEDs Mounted in Headliner:
And last, but certainly not least... my Faceplate that I wired a 9 foot extension for, so the faceplate is molded right into my sunvisor, while the rest of the CD player is in my glovebox.
But, pretty soon, my favorite homebrew mod will be the custom carPC mounted in my radio bezel. It has my entire mp3 collection, GPS navigation, DVD-rom, wireless internet access, and game emulators. Now if I could just find an OBD-I software for a v6, I could run diagnostics too. I'll have pics of this soon, just started molding the 7" touchscreen into my radio bezel, and then once the power supply comes I'll have it installed.
Trending Topics


 10-15-2005, 02:39 AM
#9
TECH Addict
iTrader: (10)
Join Date: Aug 2005
Location: Seminole County, Florida
Posts: 2,803
Likes: 0
Received 1 Like
on
1 Post
i dont have pics yet (cuz i did it today) but ripping off the side molding is way worth 30 minutes. Just make sure its hot out and peel slow and the molding will take most of the glue with it. then you just have to scrub the leftover dirt off. look was better
10-15-2005, 09:59 AM
#10
The headunit in my visor was pretty hard. The worst part is that when you're looking at the back of the faceplate, and looking at the front of the headunit, you gotta remember that the faceplate's wiring goes from right to left, and the headunit's goes from left to right (since you're looking at the back of the faceplate, you gotta flip it around to plug it in!) It took me 4 wiring tries to realize that, lmao I was like "WHY WONT THE WIRING WORK?! IT'S PERFECTLY SOLDERED!" But yeah, I had to move the radio to make room for the carPC, but it was my favorite mod definitely.
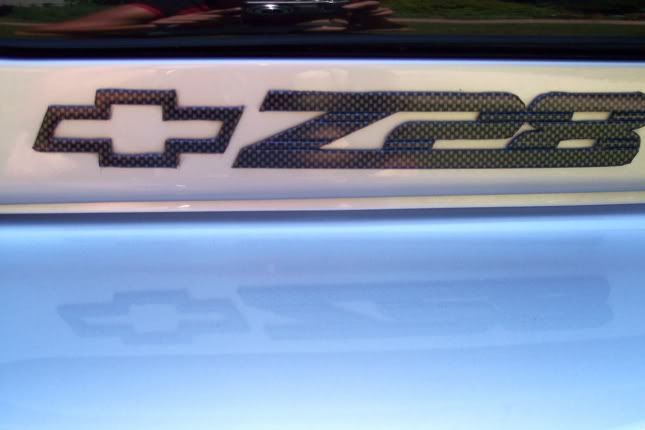
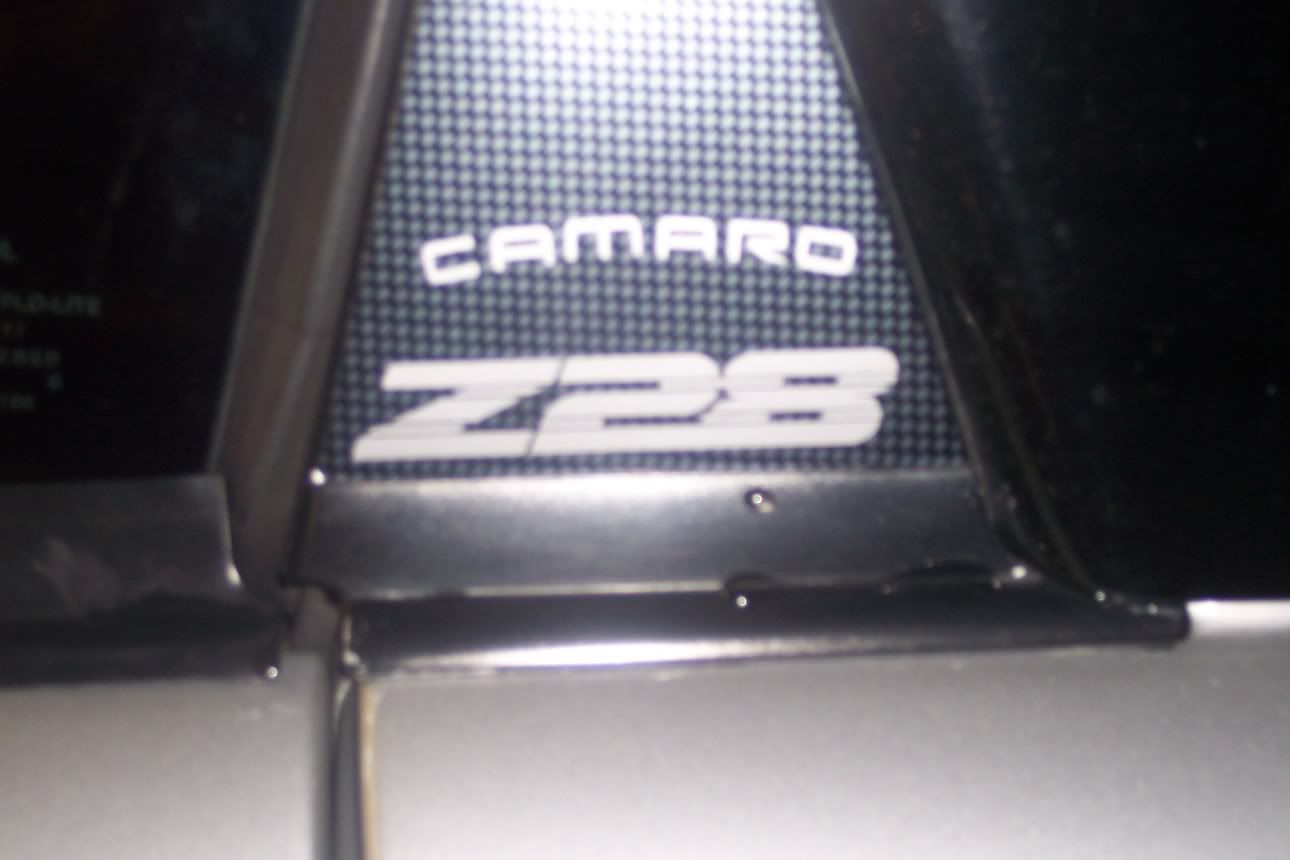
As for wrapping stuff in carbon fiber, do a search because ChevyChad has done the writeup, and I followed his when I did it.
As for wrapping stuff in carbon fiber, do a search because ChevyChad has done the writeup, and I followed his when I did it.
 10-15-2005, 12:08 PM
#12
On The Tree

Join Date: Jul 2005
Location: Burleson, Tx
Posts: 106
Likes: 0
Received 0 Likes
on
0 Posts
I just ripped off that plastic grille and bought vinyl CAMARO decals and some mesh at home depot for $4 and dressed up the front end pretty nicely. I like it because it gives the nose more dimension. Total price, $14. There are a few pics on my site, not any closeups, sorry.


 10-15-2005, 10:14 PM
#19
TECH Enthusiast
Join Date: Apr 2005
Location: Houston/Lubbock
Posts: 594
Likes: 0
Received 0 Likes
on
0 Posts
Originally Posted by ls2 bait


total cost $13. gutter gaurd from home depot and 2 part epoxy. took me a little bit. also did the !side moldings and that looked great. next is caliper paint.
I really like the way that looks. Did a great job.
James
10-15-2005, 10:41 PM
#20
Now, these are very much so *IN PROGRESS* but I'm anxious to show it off...
In this pic, I was testing the monitor to make sure it still works ( it didn't at first! ) You can see the frontend software that will be running when it's installed, it plays my mp3s, has integrated GPS, and a bunch of other sweet goodies that I'll prolly never use, but I really wanted the GPS cause I suck at directions, and the mp3 database is going to be sweet.


It's a 7" Liliput touchscreen monitor custom (obviously) molded into my radio bezel. (Which explains my faceplate being mounted in the sunvisor. )
In this pic, I was testing the monitor to make sure it still works ( it didn't at first!
) You can see the frontend software that will be running when it's installed, it plays my mp3s, has integrated GPS, and a bunch of other sweet goodies that I'll prolly never use, but I really wanted the GPS cause I suck at directions, and the mp3 database is going to be sweet.It's a 7" Liliput touchscreen monitor custom (obviously) molded into my radio bezel. (Which explains my faceplate being mounted in the sunvisor.
)