Firehawk - Dual Processor Computer Installed!! PICS!!!
 12-10-2007, 09:32 PM
#1

This will be a long winded thread I have a feeling so I’m separating in 3 different posts. First one will be the description, 2nd will be custom bezel pictures and finally the 3rd will be how it all looks installed.
First off, I always thought this would be kind of cool idea to pull off, but never put too much thought into it. Then after relocating my old Jensen VM9410 under my seat, extending the cables and making a bezel to fit a cheap 7” LCD I realized that I may just give it a shot. BTW the Jensen flipout screen & custom bezel will be for sale within a week. Now after installing it in the car, it’s definitely the BEST thing I’ve done to the car! It’s so convenient to have 15000+ songs, 500+ music videos and hard drive space left over to put movies or whatever else I want on there….not to mention navigation. I’m not the first one to do this, nor will I be the last but here’s how my install went...
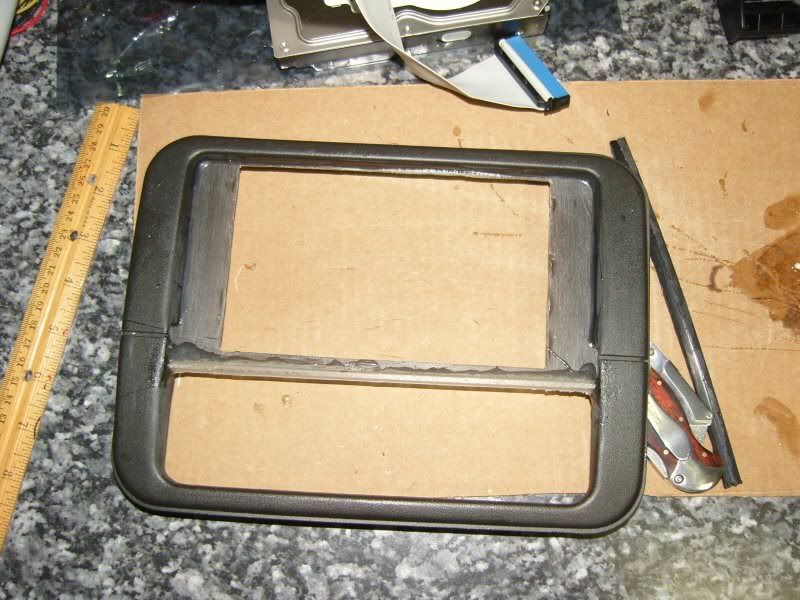
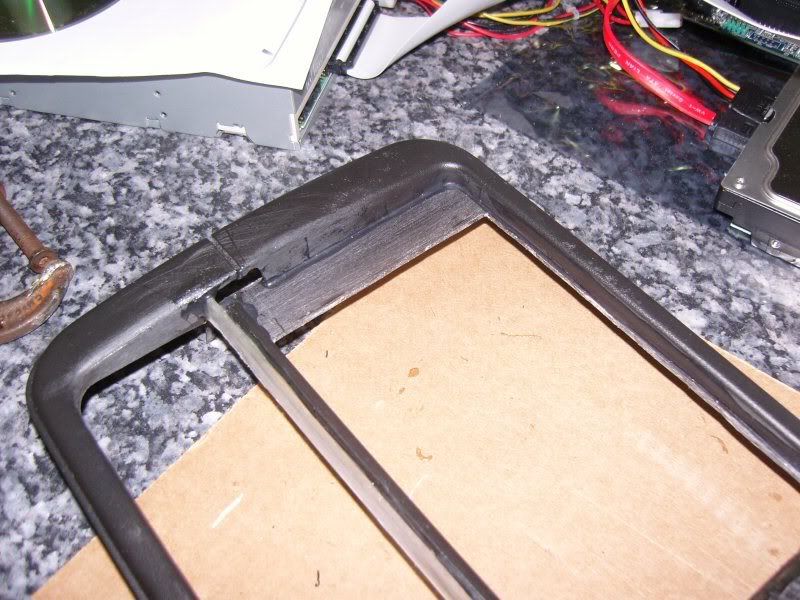
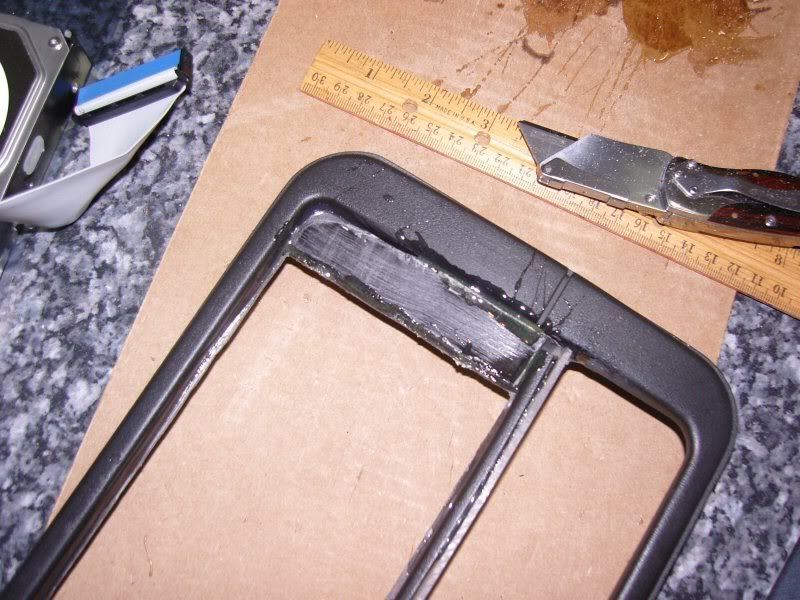
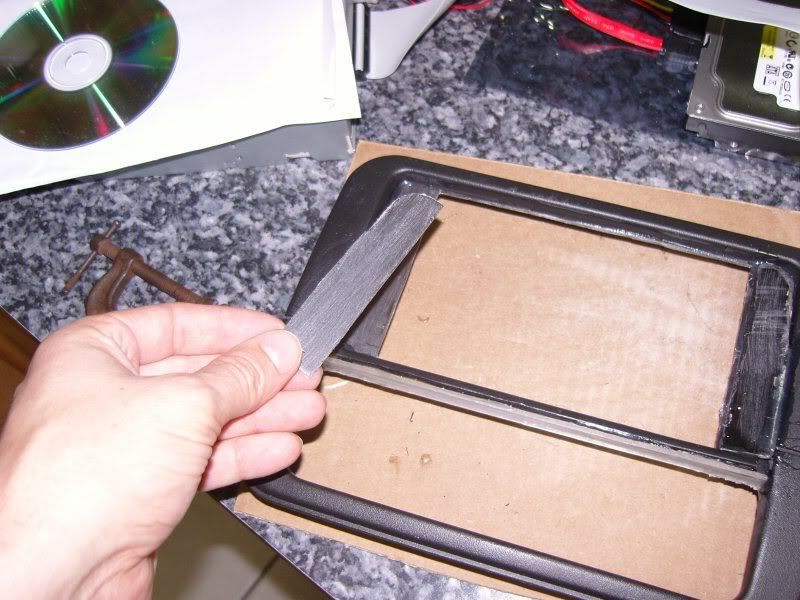
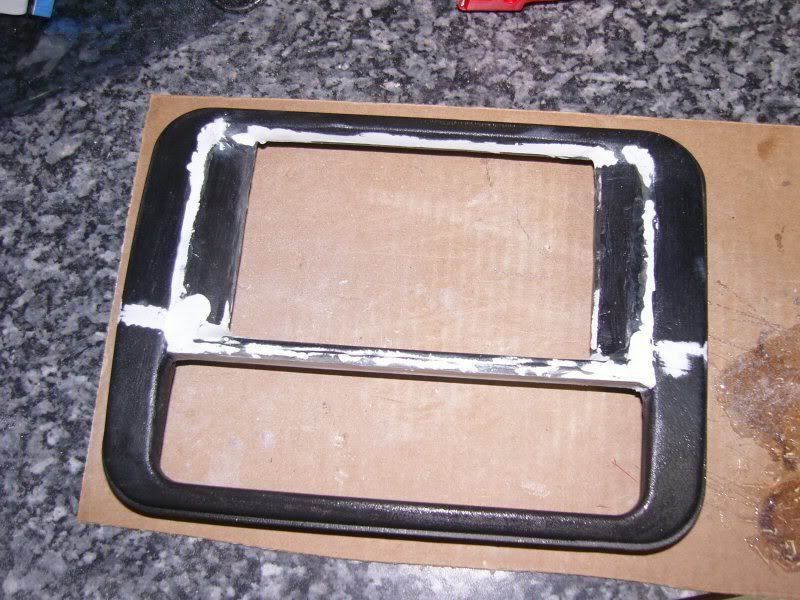
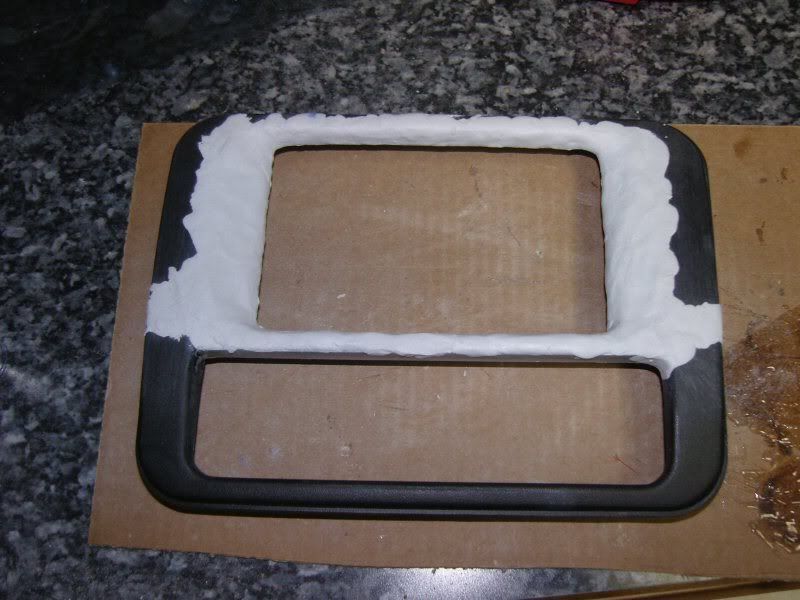
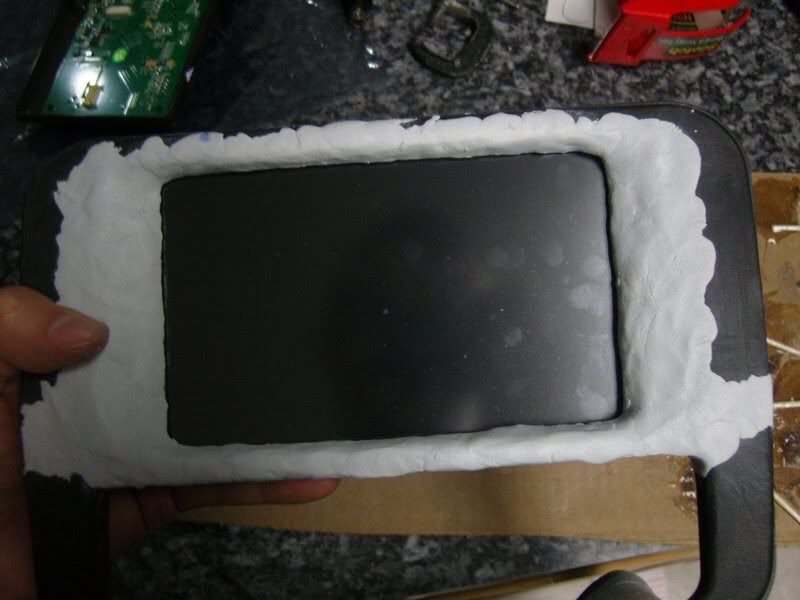
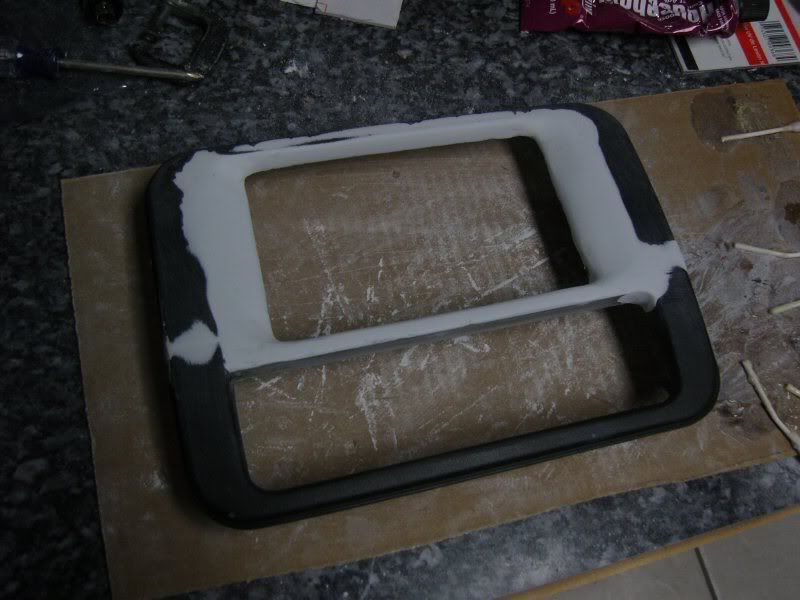
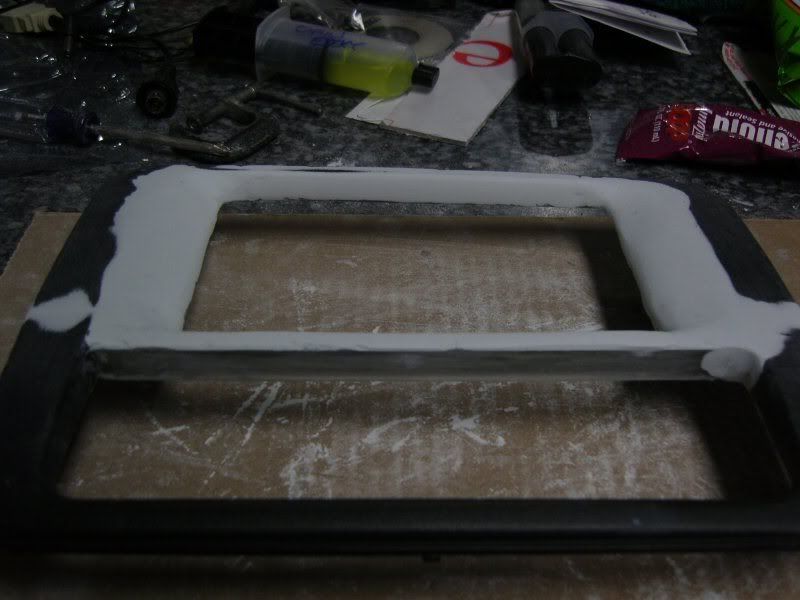
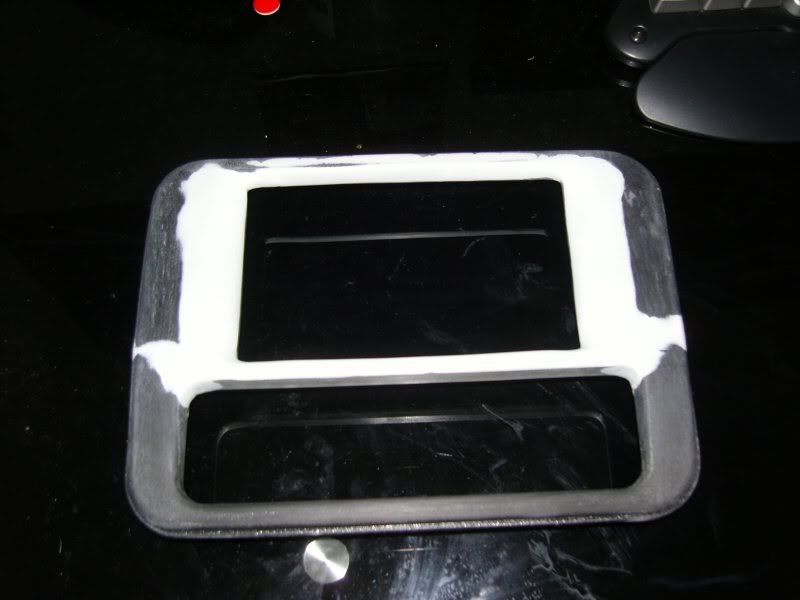
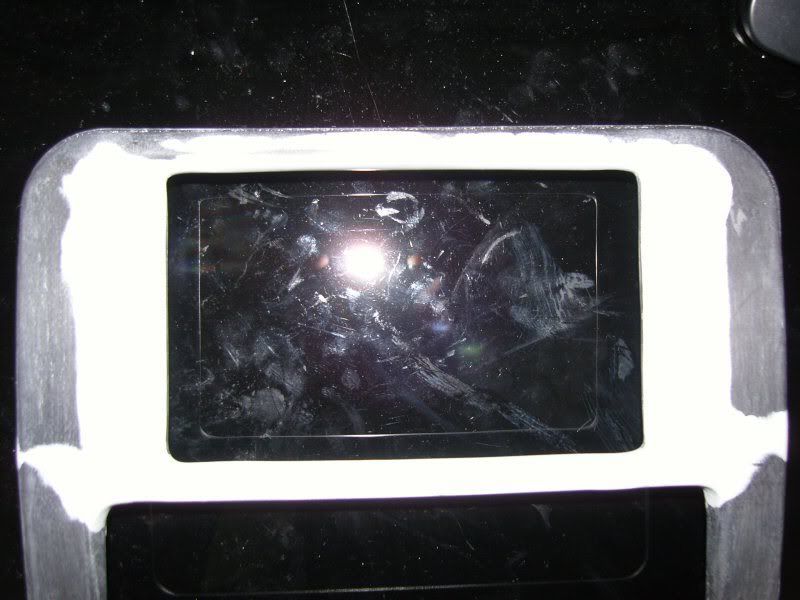
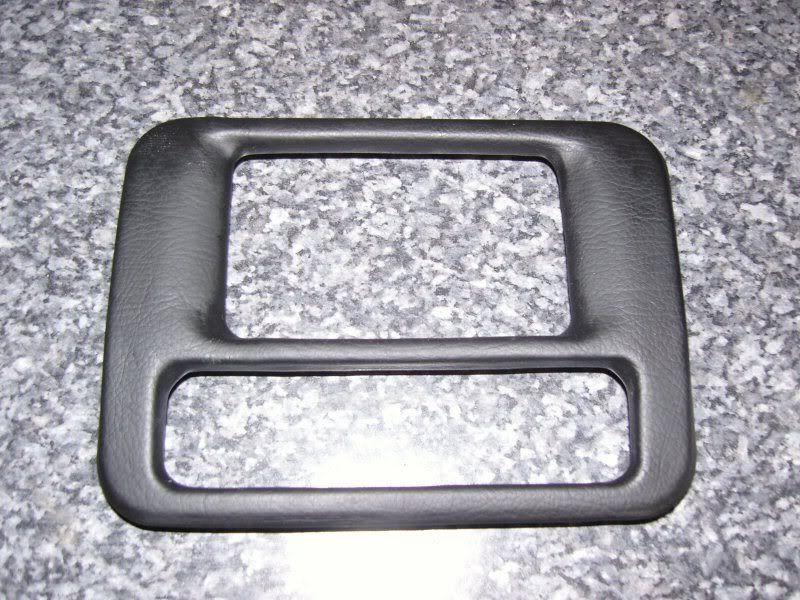
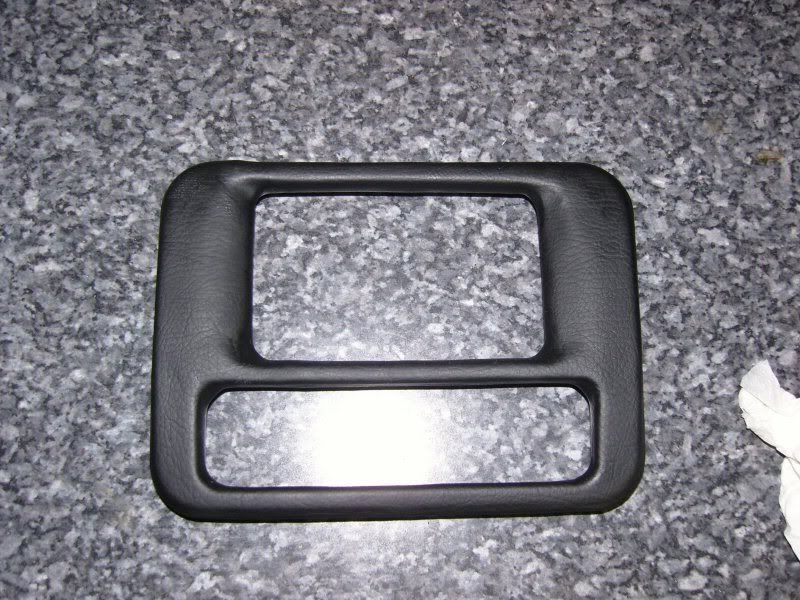
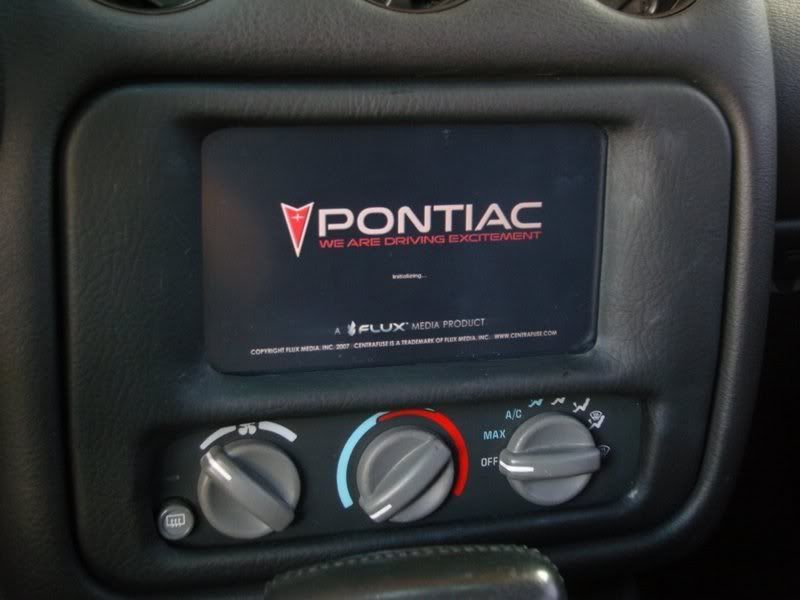
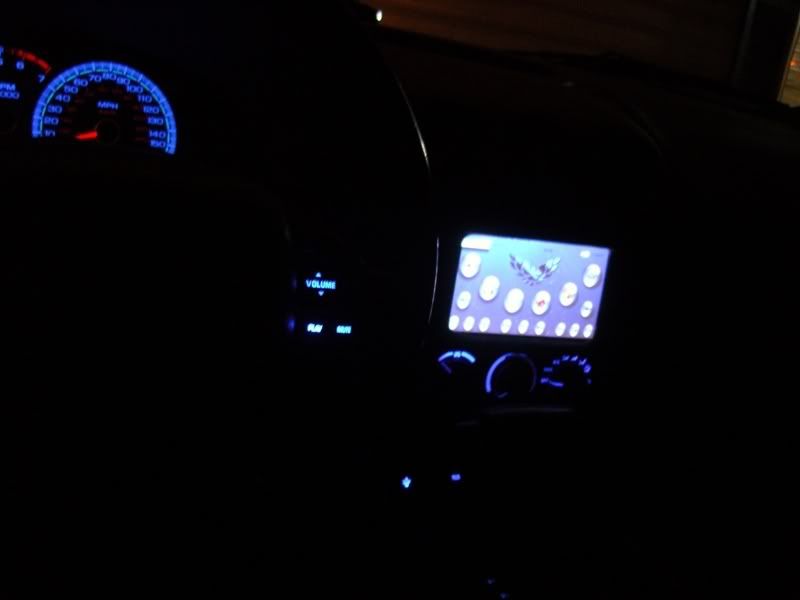
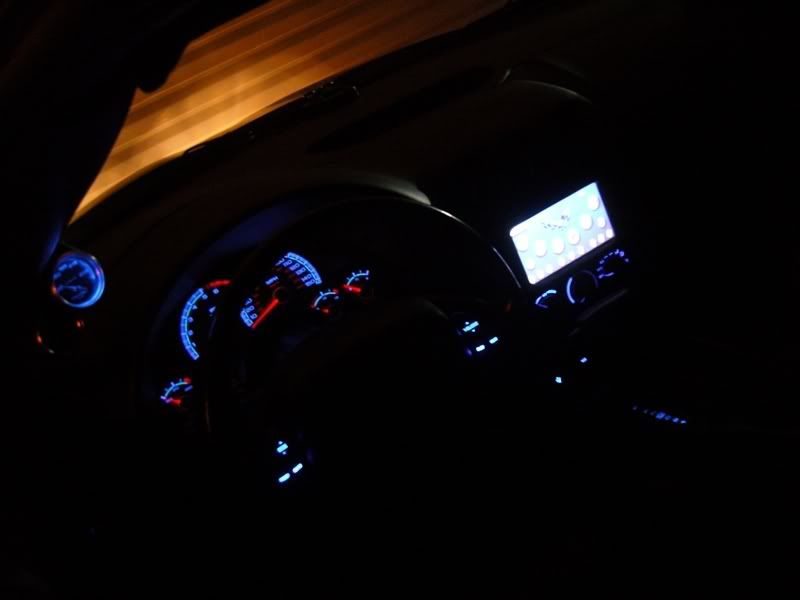
BEZEL
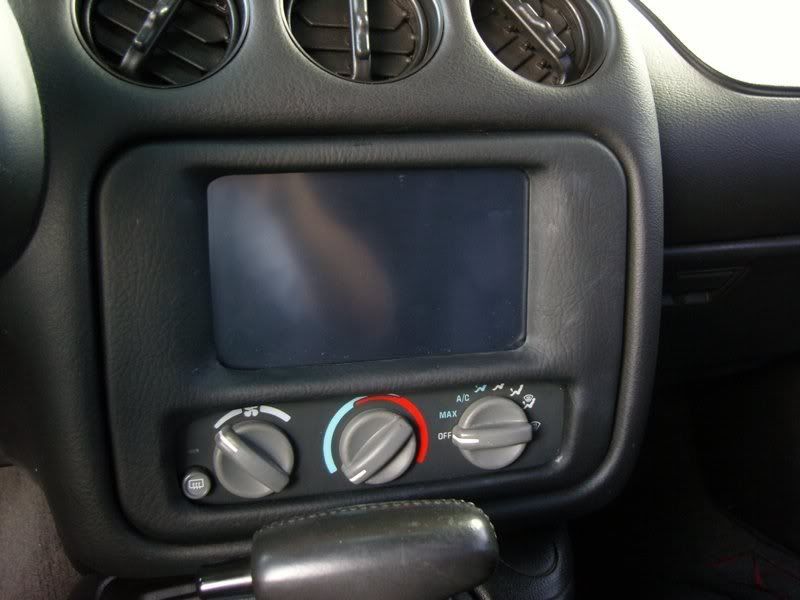
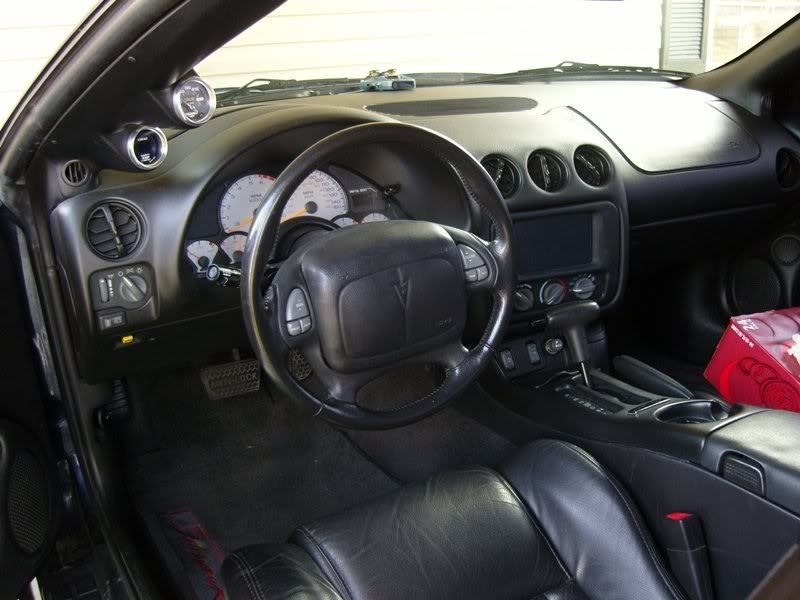
I bought a 7" Lilliput 629GL LCD touch screen monitor off eBay. After receiving it, I took it apart to get dimensions on how I was going to fit it all in the dash. For the bezel, I cut the middle divider off because it was going to have to be relocated further down to compensate for the 1.5DIN opening to close to a 2DIN opening. I used 2 plastic folder trays you can buy from Office Depot or where ever, they’re cheap and exactly what I needed to make my bezel. I cut a back plate to epoxy to the bezel to show where my screen opening will be as well as give me a backing to make it sturdy. I then proceeded to cut the divider out of the paper tray to bring it flush with the bezel. I also used the stock divider to easily give it some “roundness” and match the lines of the bezel. I cut more of the paper tray to give the sides of the bezel about a 45 degree angle, as well as make it 100% sturdy due to the sides being a triangle. After all the epoxy dried, I used Loc-Tite epoxy putty (from Lowe’s), kneaded it together and started filling in the low spots to get my shape. Sanding, sanding and some more sanding got it nice and smooth. I then saw where I need to make it even on both ends and fill in any low spots and repeated it with more epoxy putty and sanding. I planned on covering it in faux leather or vinyl (whatever it actually is, only $5 for 1yd of it), so the surface didn’t need to be 100% smooth, just rough for the spray adhesive to stick. After everything cured and cleaned, I applied the vinyl with spray adhesive and a heat gun. Took me a few tries to get it right, it’s easier said than done to get it contoured and the opening right. This is, IMO is the best looking way to do a bezel as it looks almost stock! I let that cure 100% and then used some plastic spacers at Lowe’s and epoxied them at the 4 corners and used another piece of the plastic tray, drilled 4 holes at the corners, put the screen in position and used this to keep it in place. I’m sorry, I have no pictures of this but if I ever pull the screen out I’ll try and get some. I mounted the control board for the LCD on the back of this piece to keep them separated as well as let them breath a little bit too. To fit this in my dash, but I had to cut the inside plastic on the top, none of which can be seen. I also removed the 9/32” bots for the HVAC and drilled the holes out a bit to lower it a hair. It slides in perfectly!
COMPUTER
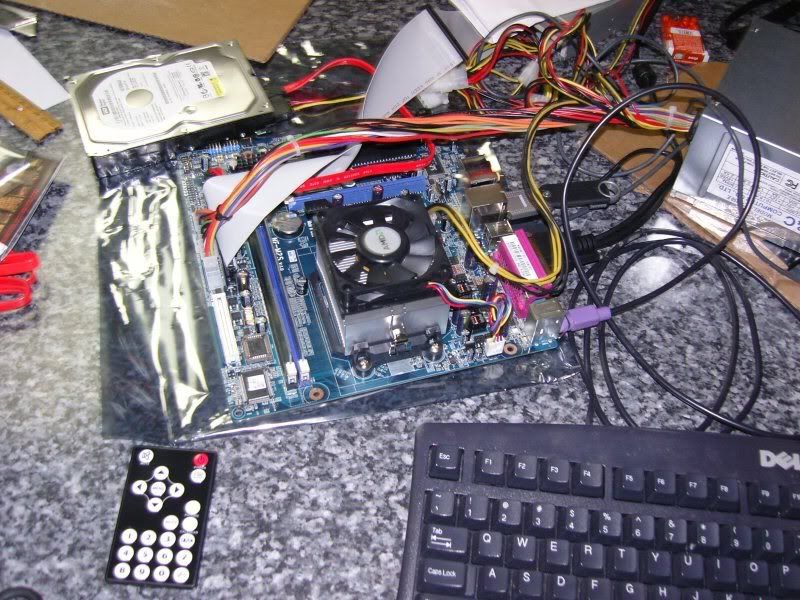
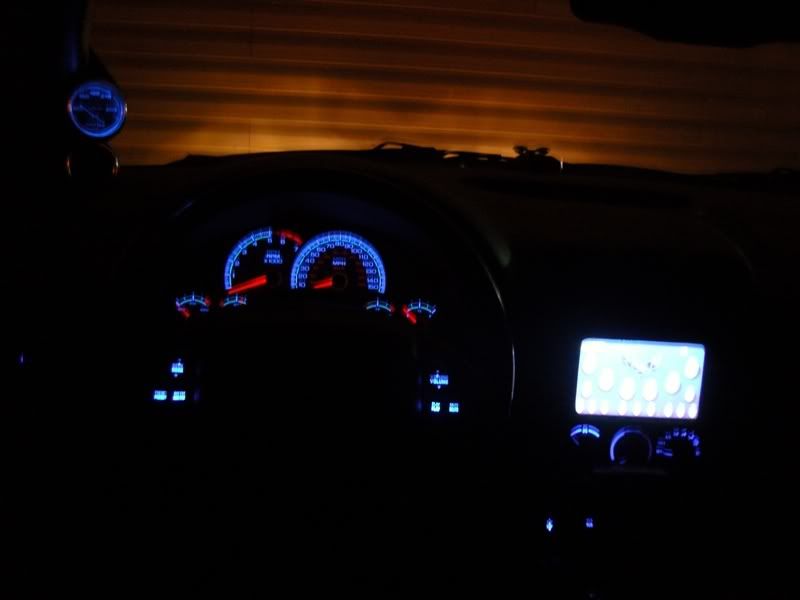
Specs for the computer as well as the whole sound system are below. I ran one Stinger 8ga power from my Stinger fused distribution block in my engine bay through the passanger side firewall down my console and it comes out behind the seatbelt mounting. Yes 8ga is kind of an overkill for power since it calls for a 12ga, but rather have too big than too little. I ran my 6’ USB cable, VGA cable (comes with Lilliput), power wire, ignition wire, regulated 12V power for the Lilliput plus wires for future reset button all down the console and out the same place with wire loom to make it look pretty, IF anyone else ever sees it. I did this for 2 reason…short run of cables which is always good for LCD clarity and USB power. I mounted the micro-ATX motherboard on a piece of Plexiglas with the hard drive mounted on its side vertically which fits underneath the driver seat and sticks out 6”. No one sits behind me anyways and I could have mounted it all in the cubbyhole on the driver’s side in the hatch, but with my SubThump box, it wouldn’t be able to breathe like I wanted, so this was the next alternative plus shorter VGA & wires. Sorry no pictures of it, I didn’t take any but I will soon. I’ve got to make an enclosure for it out of aluminum and make it “pretty”. I’ve researched hard drive mounting and people said it doesn’t matter if you mount it vertical or horizontal, but since the inside of a hard drive resembles a old school record player, I’d rather it vertical with my reason being at least the arm of it doesn’t jump up and down with bumps in the road which could destroy it in the future. I used an AMD X2 BE-2350 (2.1GHz) dual processor for 2 reasons, #1 it’ll be FAST and its power friendly only consuming 45w of power. I have an Autometer digital ammeter in my pillar and after everything was installed, with the sound turned down and running my front end (Centrafuse) running it only pulls 7-8amps. My 320w Opus power supply was also a little bit of an overkill, but since there is no strain on it or even close to maxing it out, it’ll extend the life of it too! I’ve tweaked the boot up just a bit in XP and it boots in 33 seconds, but I can change a few things in the BIOS to make it even faster. Honestly, it doesn’t even matter because I remote start the car 95% of the time so by the time I get in it; it’s already booted and ready to go! I also can make the PSU go into "stand by" for up to 2 hours so if I get in my car before then it'll be up in a matter of seconds. I built the computer myself and went ahead and put 2gigs of RAM, just because it’s cheap. The mobo, HDD and RAM cost $250ish shipped. One last thing I haven’t done is convert my ashtray to an SD card reader, USB port, on/off switch and reset button. I have everything to do it and will within the next couple of weeks. Again, this is the absolute BEST thing I’ve done to the hawk! I love the look, the unique aspect as well and all the custom things I’ve done to make it stand out just a little more from the crowd!
CONCLUSION
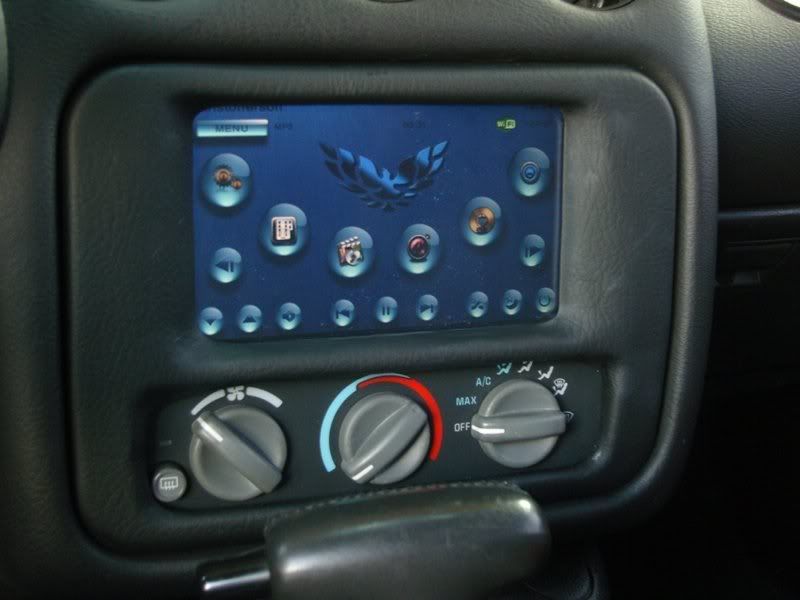
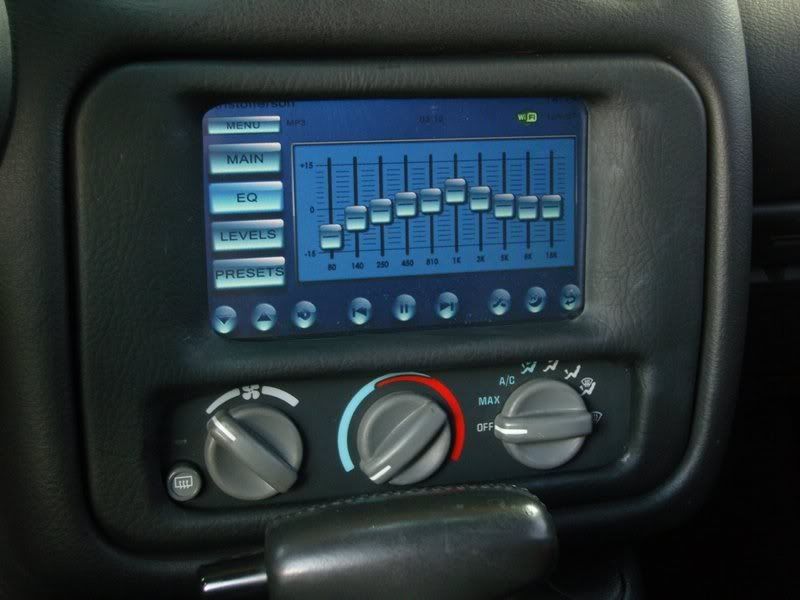
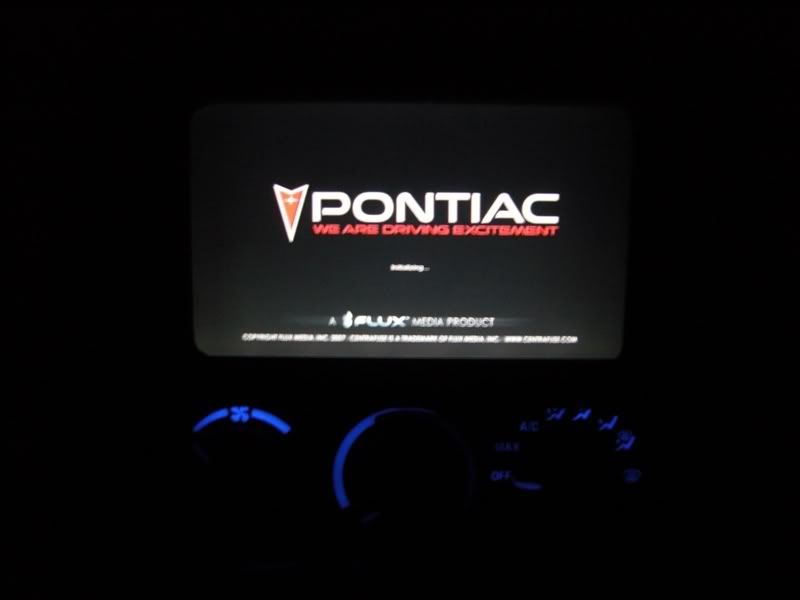
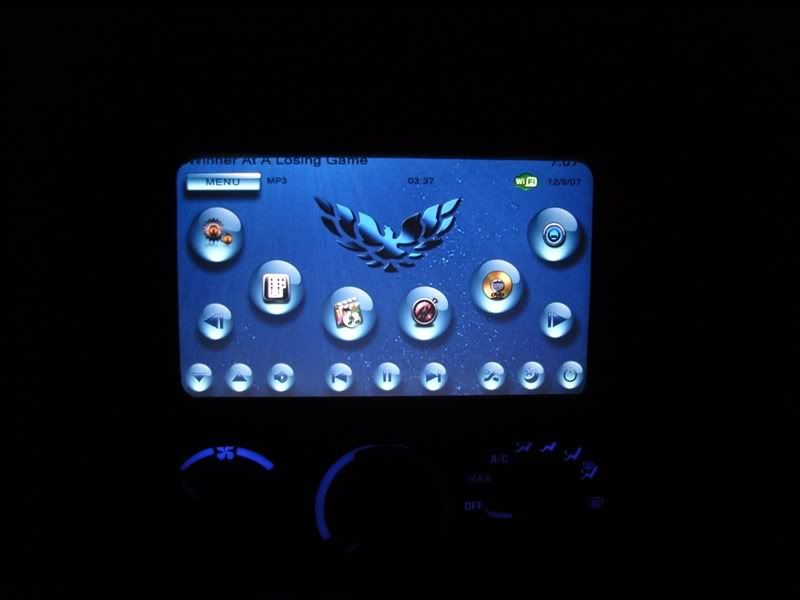
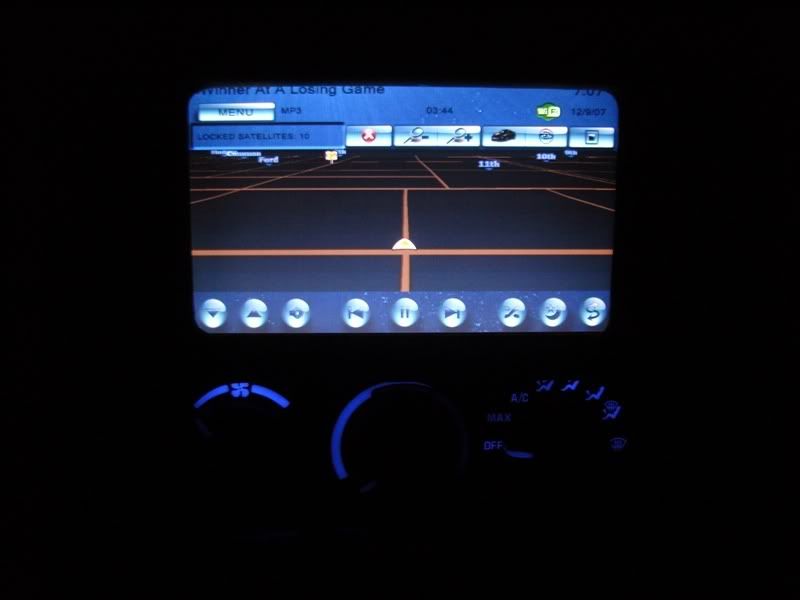
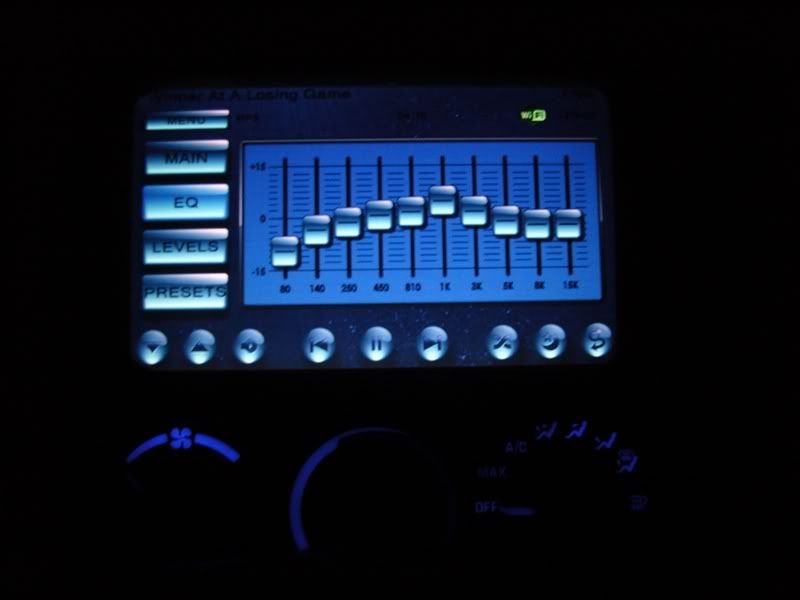
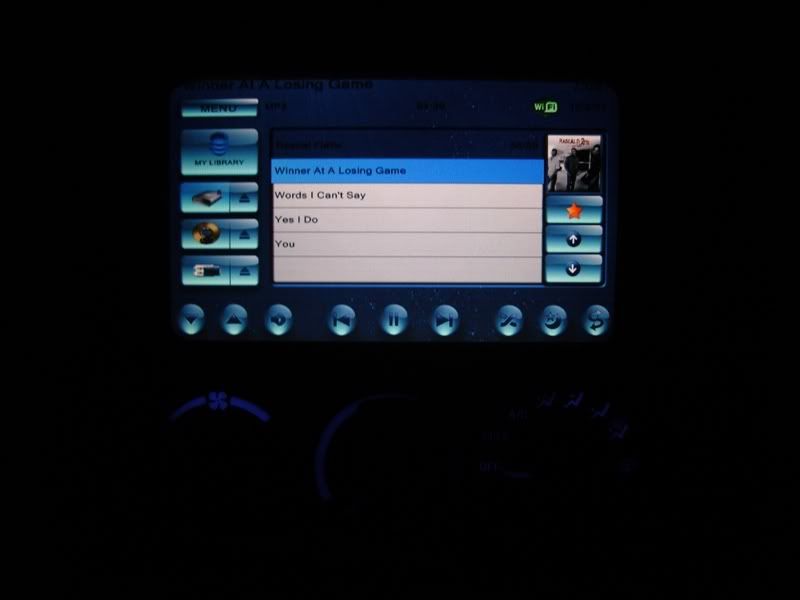
The hardest part of the install was making the bezel. The rest was pretty easy, just a little time consuming. I run Centrafuse as my front end and for those that don’t know what a front end is the program that runs inside XP and allows you do access you music, videos, navigation, Bluetooth (USB adapter needed), internet (WIFI adapter needed), DVD player (can install DVD-ROM or DVD-RW if you want). You can also make your own skins, though not the easiest thing to do. I used FlashNet’s skins and changed a few PNG files to suit my needs (Centrafuse’s boot screen & main menu logo mainly). Centrafuse also has navigation ability as well, all you need is a USB GPS antenna, which was $50 and I mounted it underneath our huge dash covers. I ALWAYS have 11 satellites locked and even in a concrete parking garage, I have signal with 4 satellites locked!
Processor: AMD 64 X2 BE-2350 (Dual Processor)
Motherboard: ABit NF-M2S (Micro-ATX)
Memory: 2GIG Crucial DDR2 667
Hard Drive: WD 160GIG
Monitor: 7" Lilliput 629GL Touch Screen
Front End: Centrafuse With Navigation (www.fluxmedia.net)
2 SoundStream Van Gogh 320.4
1 US Acoustics USX-1000D (1250w RMS)
1 MB Quart RCE Components
2 JL Audio 8W3V2 Mids
3 JL Audio 10W3V2 Subs
ALL Stinger Platinum Wiring
First off, I always thought this would be kind of cool idea to pull off, but never put too much thought into it. Then after relocating my old Jensen VM9410 under my seat, extending the cables and making a bezel to fit a cheap 7” LCD I realized that I may just give it a shot. BTW the Jensen flipout screen & custom bezel will be for sale within a week.
Now after installing it in the car, it’s definitely the BEST thing I’ve done to the car! It’s so convenient to have 15000+ songs, 500+ music videos and hard drive space left over to put movies or whatever else I want on there….not to mention navigation. I’m not the first one to do this, nor will I be the last but here’s how my install went...BEZEL
I bought a 7" Lilliput 629GL LCD touch screen monitor off eBay. After receiving it, I took it apart to get dimensions on how I was going to fit it all in the dash. For the bezel, I cut the middle divider off because it was going to have to be relocated further down to compensate for the 1.5DIN opening to close to a 2DIN opening. I used 2 plastic folder trays you can buy from Office Depot or where ever, they’re cheap and exactly what I needed to make my bezel. I cut a back plate to epoxy to the bezel to show where my screen opening will be as well as give me a backing to make it sturdy. I then proceeded to cut the divider out of the paper tray to bring it flush with the bezel. I also used the stock divider to easily give it some “roundness” and match the lines of the bezel. I cut more of the paper tray to give the sides of the bezel about a 45 degree angle, as well as make it 100% sturdy due to the sides being a triangle. After all the epoxy dried, I used Loc-Tite epoxy putty (from Lowe’s), kneaded it together and started filling in the low spots to get my shape. Sanding, sanding and some more sanding got it nice and smooth. I then saw where I need to make it even on both ends and fill in any low spots and repeated it with more epoxy putty and sanding. I planned on covering it in faux leather or vinyl (whatever it actually is, only $5 for 1yd of it), so the surface didn’t need to be 100% smooth, just rough for the spray adhesive to stick. After everything cured and cleaned, I applied the vinyl with spray adhesive and a heat gun. Took me a few tries to get it right, it’s easier said than done to get it contoured and the opening right. This is, IMO is the best looking way to do a bezel as it looks almost stock! I let that cure 100% and then used some plastic spacers at Lowe’s and epoxied them at the 4 corners and used another piece of the plastic tray, drilled 4 holes at the corners, put the screen in position and used this to keep it in place. I’m sorry, I have no pictures of this but if I ever pull the screen out I’ll try and get some. I mounted the control board for the LCD on the back of this piece to keep them separated as well as let them breath a little bit too. To fit this in my dash, but I had to cut the inside plastic on the top, none of which can be seen. I also removed the 9/32” bots for the HVAC and drilled the holes out a bit to lower it a hair. It slides in perfectly!
COMPUTER
Specs for the computer as well as the whole sound system are below. I ran one Stinger 8ga power from my Stinger fused distribution block in my engine bay through the passanger side firewall down my console and it comes out behind the seatbelt mounting. Yes 8ga is kind of an overkill for power since it calls for a 12ga, but rather have too big than too little. I ran my 6’ USB cable, VGA cable (comes with Lilliput), power wire, ignition wire, regulated 12V power for the Lilliput plus wires for future reset button all down the console and out the same place with wire loom to make it look pretty, IF anyone else ever sees it. I did this for 2 reason…short run of cables which is always good for LCD clarity and USB power. I mounted the micro-ATX motherboard on a piece of Plexiglas with the hard drive mounted on its side vertically which fits underneath the driver seat and sticks out 6”. No one sits behind me anyways and I could have mounted it all in the cubbyhole on the driver’s side in the hatch, but with my SubThump box, it wouldn’t be able to breathe like I wanted, so this was the next alternative plus shorter VGA & wires. Sorry no pictures of it, I didn’t take any but I will soon. I’ve got to make an enclosure for it out of aluminum and make it “pretty”. I’ve researched hard drive mounting and people said it doesn’t matter if you mount it vertical or horizontal, but since the inside of a hard drive resembles a old school record player, I’d rather it vertical with my reason being at least the arm of it doesn’t jump up and down with bumps in the road which could destroy it in the future. I used an AMD X2 BE-2350 (2.1GHz) dual processor for 2 reasons, #1 it’ll be FAST and its power friendly only consuming 45w of power. I have an Autometer digital ammeter in my pillar and after everything was installed, with the sound turned down and running my front end (Centrafuse) running it only pulls 7-8amps. My 320w Opus power supply was also a little bit of an overkill, but since there is no strain on it or even close to maxing it out, it’ll extend the life of it too!
I’ve tweaked the boot up just a bit in XP and it boots in 33 seconds, but I can change a few things in the BIOS to make it even faster. Honestly, it doesn’t even matter because I remote start the car 95% of the time so by the time I get in it; it’s already booted and ready to go! I also can make the PSU go into "stand by" for up to 2 hours so if I get in my car before then it'll be up in a matter of seconds. I built the computer myself and went ahead and put 2gigs of RAM, just because it’s cheap. The mobo, HDD and RAM cost $250ish shipped. One last thing I haven’t done is convert my ashtray to an SD card reader, USB port, on/off switch and reset button. I have everything to do it and will within the next couple of weeks. Again, this is the absolute BEST thing I’ve done to the hawk! I love the look, the unique aspect as well and all the custom things I’ve done to make it stand out just a little more from the crowd! CONCLUSION
The hardest part of the install was making the bezel. The rest was pretty easy, just a little time consuming. I run Centrafuse as my front end and for those that don’t know what a front end is the program that runs inside XP and allows you do access you music, videos, navigation, Bluetooth (USB adapter needed), internet (WIFI adapter needed), DVD player (can install DVD-ROM or DVD-RW if you want). You can also make your own skins, though not the easiest thing to do. I used FlashNet’s skins and changed a few PNG files to suit my needs (Centrafuse’s boot screen & main menu logo mainly). Centrafuse also has navigation ability as well, all you need is a USB GPS antenna, which was $50 and I mounted it underneath our huge dash covers. I ALWAYS have 11 satellites locked and even in a concrete parking garage, I have signal with 4 satellites locked!
Processor: AMD 64 X2 BE-2350 (Dual Processor)
Motherboard: ABit NF-M2S (Micro-ATX)
Memory: 2GIG Crucial DDR2 667
Hard Drive: WD 160GIG
Monitor: 7" Lilliput 629GL Touch Screen
Front End: Centrafuse With Navigation (www.fluxmedia.net)
2 SoundStream Van Gogh 320.4
1 US Acoustics USX-1000D (1250w RMS)
1 MB Quart RCE Components
2 JL Audio 8W3V2 Mids
3 JL Audio 10W3V2 Subs
ALL Stinger Platinum Wiring