Shift Solenoid LED Light Mod
#1
Thread Starter
Joined: Sep 2005
Posts: 739
Likes: 1
From: North Little Rock, Ar
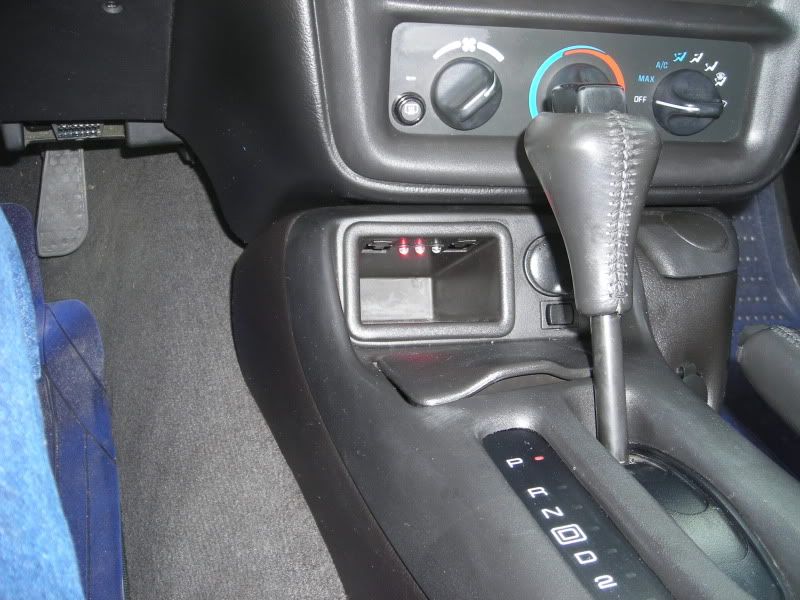
Does anyone have any pictures of their LEDs mounted in thier F-bodies for this mod? (See Below) I have bought the LEDs and was just wanting some ideas of where to mount them. Wanted to keep them somewhere where I can see them while driving. Don't want to have to look down or away from the road.
Thanks.
Parts- all from radio shack cheap
1-Three 12v LEDs They can be different colors(NO LIGHT BULBS WILL NOT WORK)
2-Some sort of bevel to mount them in Or you can mount them in a panel in your car permanent.
3-Three lengths of wire. Perferably different colors to avoid confusion.
4-Blue side wire splicers the type you use pliers to push down the tab to make a splice.
Ok you want to hook the three wires to the following in the harness either at the trans or find them at the PCM
A-Light green wire. This is the 1-2 shift solenoid.
B-Yellow with black stripe. This is the 2-3 shift solenoid
C-Tan wire with black stripe. This is the lockup (TCC)
solenoid.
Do not cut the wires use the slicers and connect your wires one to each and then run them into the car.
Inside the car take each wire and hook up to the negative side of the LEDs choose which ones you want to represent each solenoid.
Tie the POSITIVE side of all the LEDs together and run a wire to a 12v switched source(radio fuse)
Ok now its simple
(1-2)on and (2-3) on is 1st gear
(1-2)off and (2-3) on is second gear
(both off ) is 3rd gear
(1-2)on and (2-3) off is 4th gear
TCC on means your converter should be locked.
"This IMO is cool and helpful no more will you wonder if that 2-3 shift that hit the limiter was tuning or trans related and you will know the time from comand to actual shift watching when the lights iluminate and feeling when the shift happens. This could be usefull when setting shift poits since the time is a constant.
No more wondering wether your converter not being locked is a tuning or transmission issue you will see when and if the PCM comands lockup and this can all be done for less than $10 and 30 minutes setting it up.
Hope someone finds this usefull was thinking I have explained this a dozen times to people trying to solve various lockup and shifting issue and may or may not have scanner tools and its proved invaluable to them so why not just post it for anyone who might wanna make a new toy/gadget."
#2
Thread Starter
Joined: Sep 2005
Posts: 739
Likes: 1
From: North Little Rock, Ar
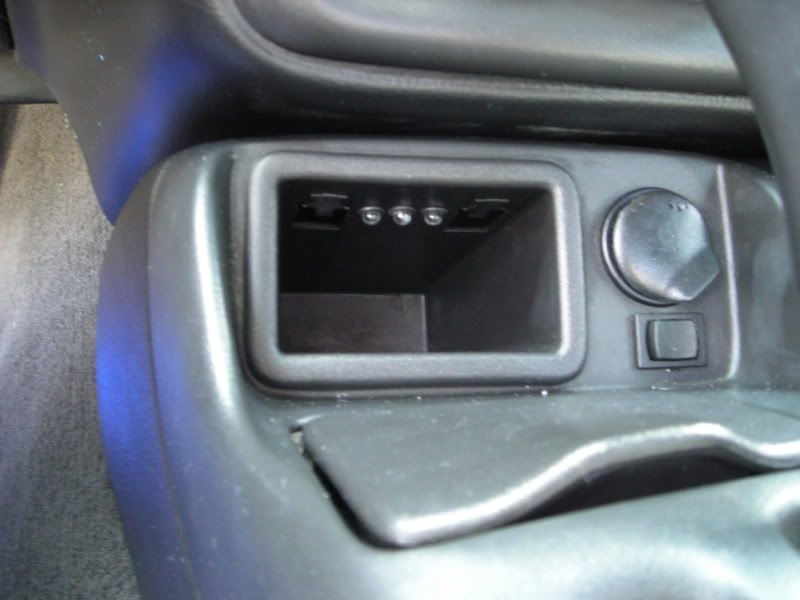
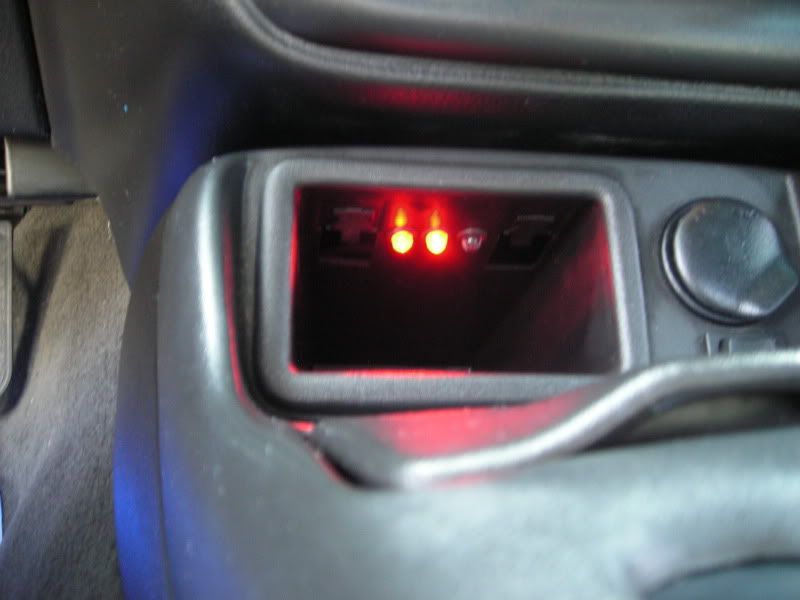
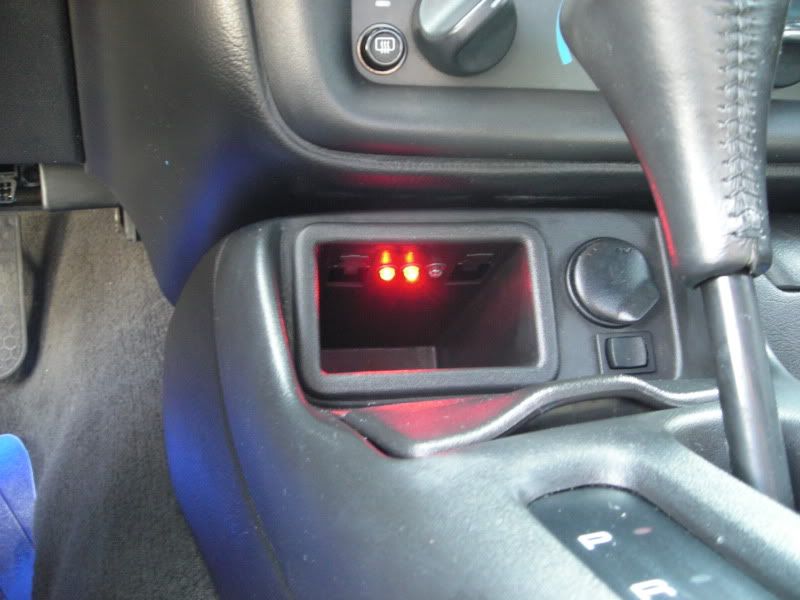
Well since no one seems to have any pics of this mod thought I would post my setup. Basically did as the write up said, except I tied into the wires at the PCM. Here is the pinout for them. On the Red connector (bottom one) you tie into pin 42 for the TCC, 47 for the 2-3 shift, and 48 for the 1-2 shift. Hope this helps someone who wants to do this. It is very handy..  Feel free to ask questions.

[IMG] [/IMG]
Here is the 12v switched source that I have under my dash that I tied into and for other various items.
[IMG] [/IMG]
 Feel free to ask questions.
[IMG]
 [/IMG]
Here is the 12v switched source that I have under my dash that I tied into and for other various items.
[IMG]
 [/IMG]
 Last edited by LeftySS; 01-12-2010 at 10:40 AM.
#4
Looks quiet cool and yes its a very handy tool always knowing what the PCM is really up to.
__________________
Trending Topics
#9
Thread Starter
Joined: Sep 2005
Posts: 739
Likes: 1
From: North Little Rock, Ar
Don't blame you for not wanting to drill holes. I really didn't want to but couldn't come up with any better idea and just thought where they are was pretty clean. Plus they shouldn't be shining in a passengers face either, just for me to see. By the way, I am not taking credit for this mod just did as the write up said.
#10
Yes the write up is from my stickey https://ls1tech.com/forums/automatic-transmission/886087-tech-info-codes-coolers-fluid-levels-cooler-flush-more.html Theres alotta other very cool information there if you care to check it out.
Frank at PerformaBuilt
Frank at PerformaBuilt
__________________
#11
Thread Starter
Joined: Sep 2005
Posts: 739
Likes: 1
From: North Little Rock, Ar
Yes the write up is from my stickey https://ls1tech.com/forums/showthread.php?t=886087 Theres alotta other very cool information there if you care to check it out.
Frank at PerformaBuilt
Frank at PerformaBuilt
Thanks for the link Frank. That sticky should come in very handy this spring when I am tuning at the track. So at the track would you recommended putting the car in D3 or D4 to race?
#12
You should be fine in either if the trans is in good shape and built properly.
__________________
#14
Thread Starter
Joined: Sep 2005
Posts: 739
Likes: 1
From: North Little Rock, Ar
What makes it better to do this? If you don't mind explain why? Is it harder on the Tranny to leave it in D or does it not shift as well? I will say that the only times I have been to the track I have always left it in D and when it goes to shift to 3rd it seems to shift later than it does on the highway when I leave it in OD. Is there something to this?
Thanks.
Thanks.
#15
Well actually there is a pro and a con to each.
The pro is with the trans in the D position the overun clutch is on which provides additional support and strength to the sprag.
The con is that in the 60e the overun clutch is turnoff during second gear then turns back on in 3rd gear at the same time as the 3-4 clutch is being applied. So you have agiven amount of fluild to fill two chambers rather than 1 which can delay the 2-3 shift a little and the apply presure during the apply of the clutch.
Now And ideal scenaro is launch in manual low then move the shifter dorectly to the overdrive position, which sorta gives the best of both worlds.
Generally though with a well built unit and we advise with our units just to leave in the OD position and let the computer do its thing. Since most built transmissions have upgraded input sprags to handle this.
__________________
#16
Thread Starter
Joined: Sep 2005
Posts: 739
Likes: 1
From: North Little Rock, Ar
Ok. By what you said I will probably just start leaving it in OD. When I had it rebuilt I feel that the parts were good quality parts and should take the abuse. That is if the dealer that did the work actually installed what I brought them. I wish I would've just bought a Tranny instead of having it rebuilt, at least then I would know what is in it, for sure. I guess if it goes out I know who I will be calling. Thanks.
#18
Thread Starter
Joined: Sep 2005
Posts: 739
Likes: 1
From: North Little Rock, Ar
#19
Well its all done. Here are a couple of pics. As you can see I went with all red. Mainly cause I found a three pack with bases. Wasn't too bad to hook up but there are two yellow w/ black tracer wires. Got the right one on the second try.


