


Novice 4L60E Rebuild
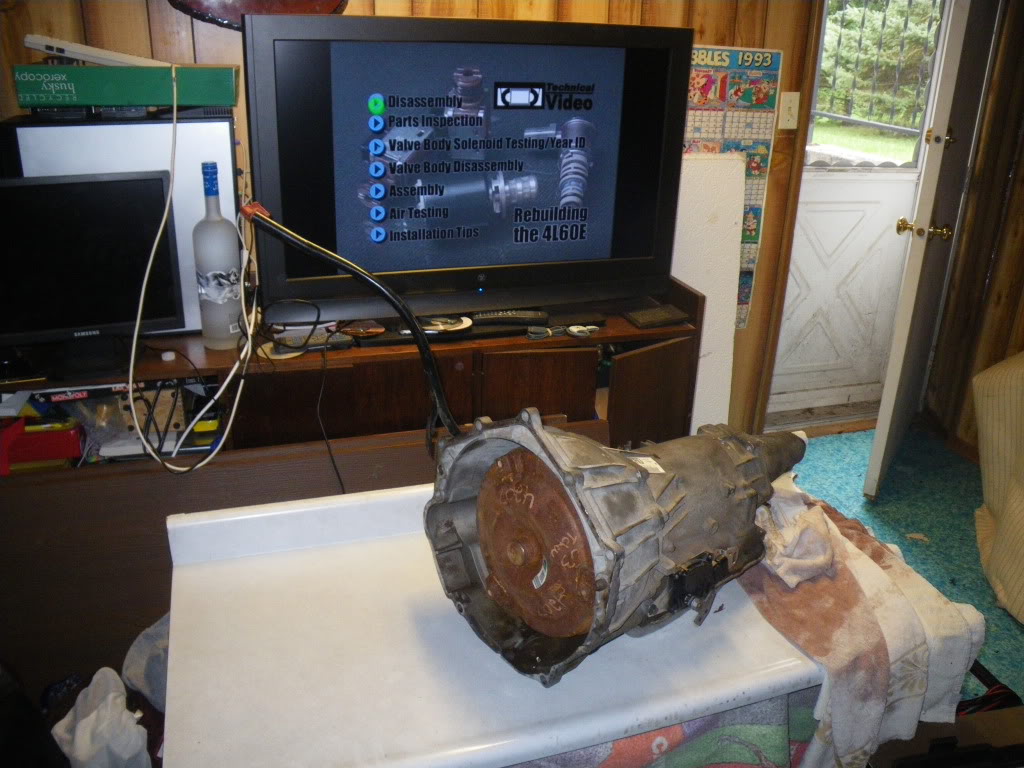
Well, after debating what to do after messing up my transmission (for some reason I was too busy to spend 15 minutes to undo the bolts of the transmission pan to find that a filter hadn't been installed) I settled on attempting a rebuild. At this point, I've picked up the Technicalvideos.com DVD and ATSG Manual to learn what needs to be done just to get it apart, and I must say I'm very impressed with the DVD.
So for a little background, I'm swapping a 2005 5.3l and 2003 4l60e into a ~3000lb car. Car was running decent except the transmission. Finally got it out of the car on Saturday. So after watching the DVD and reading through the manual, I ripped apart the transmission. I don't have a clutch spring compressor, and am probably going to just weld something up.
Enough type, on with the pics.
~~~
Here's the "workshop", an old counter top on a couple tables...baller!
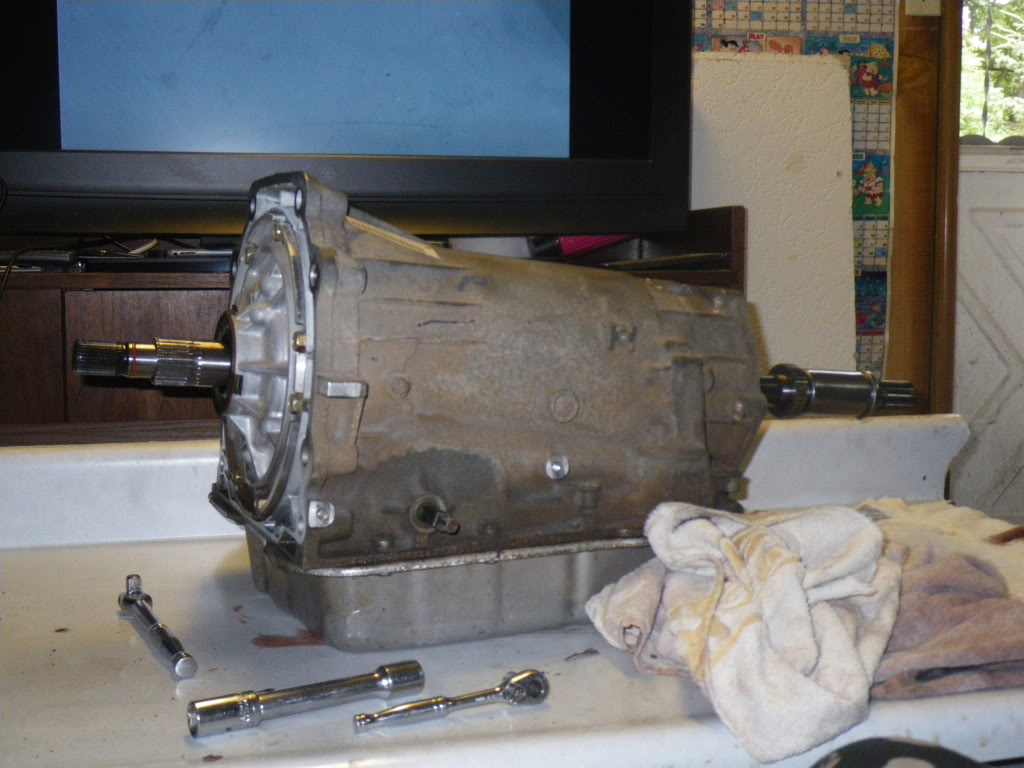
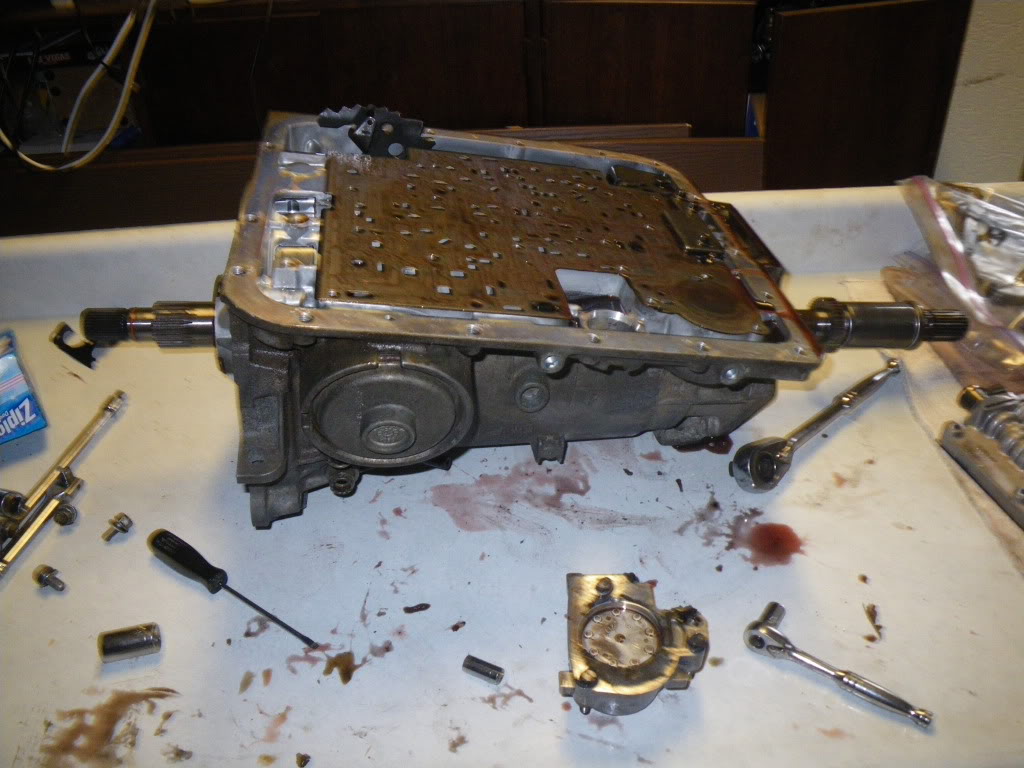
Removed all the external stuff, I didn't need to use a blowtorch on the bellhousing bolts.
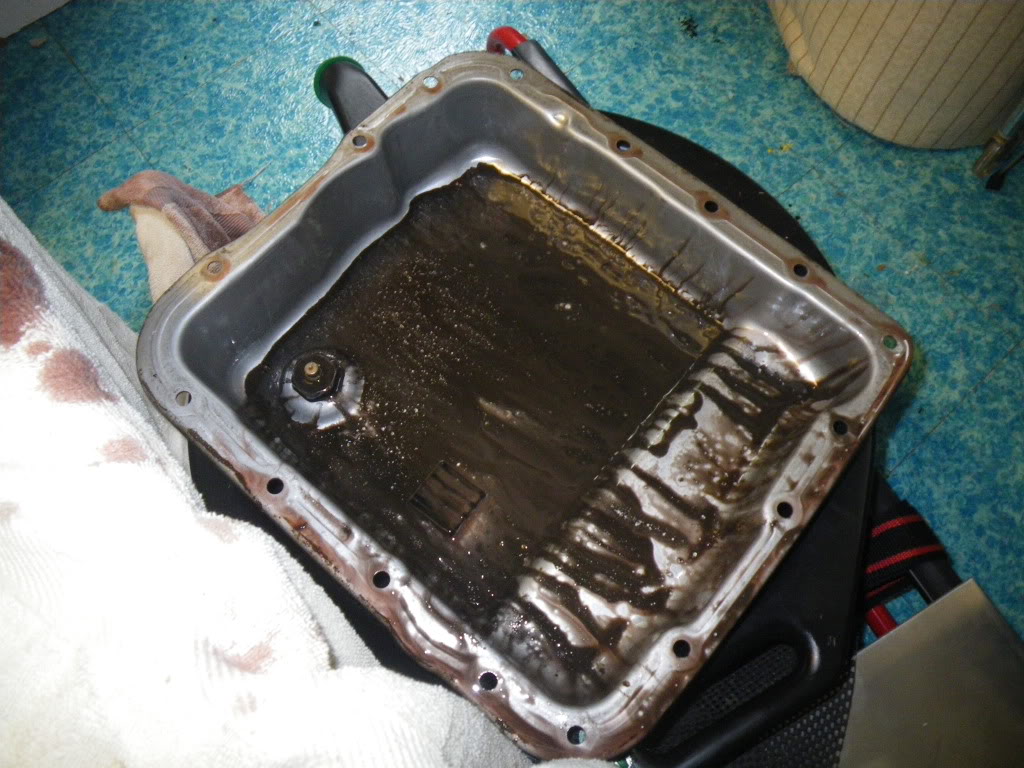
So this is what I'm guessing used to be friction material. BIG lesson learned here.
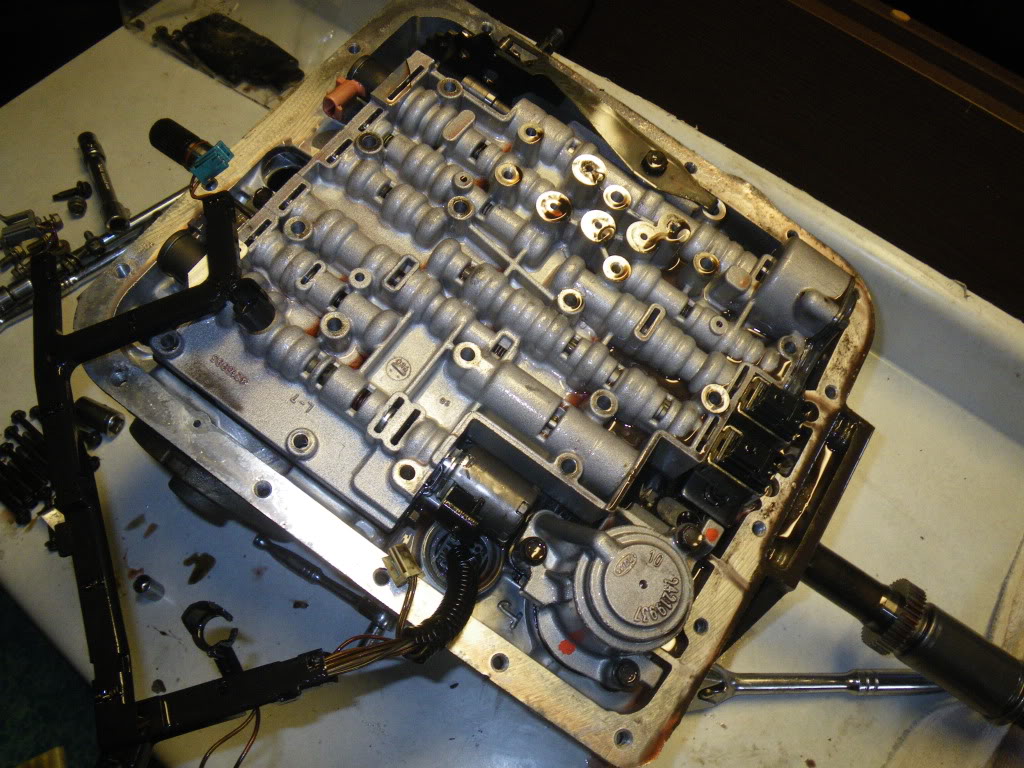
Things look pretty clean on the valve body.

Once I removed the pressure switch manifold, it seemed like there was some water under it, you can see where the manifold used to be.
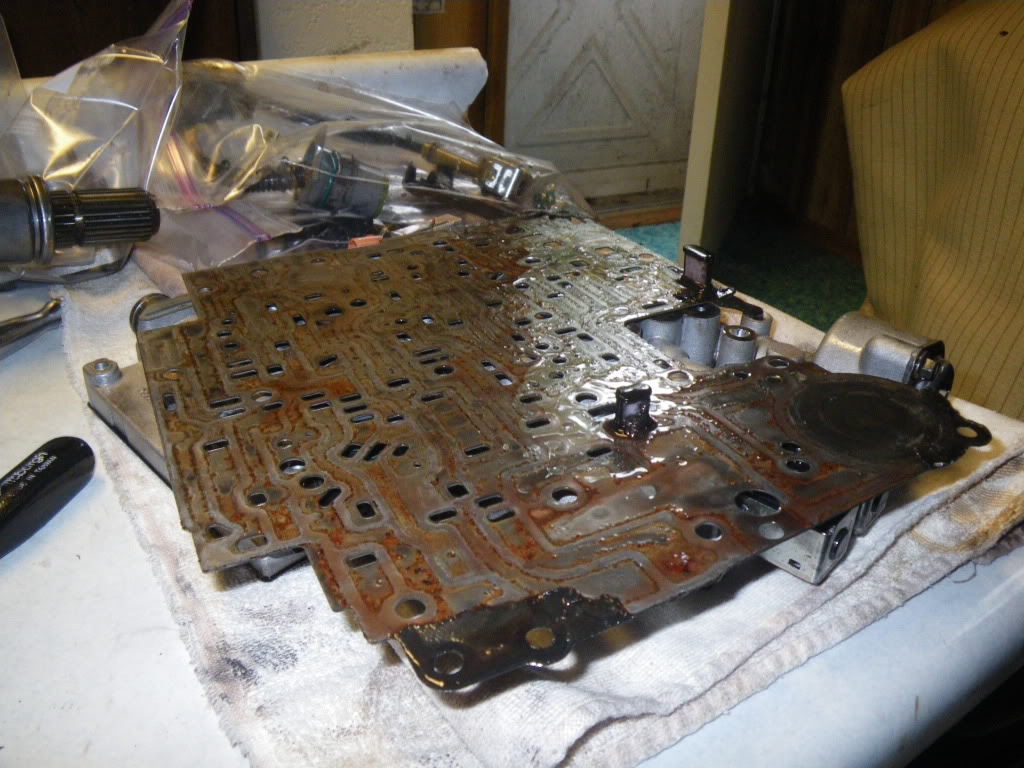
Finally got all that stuff off, and was down to the separator plate. Anyone have any thoughts on that junk?
Detail Shot-
Servo holder, more gunk coming out of it and bad oil.
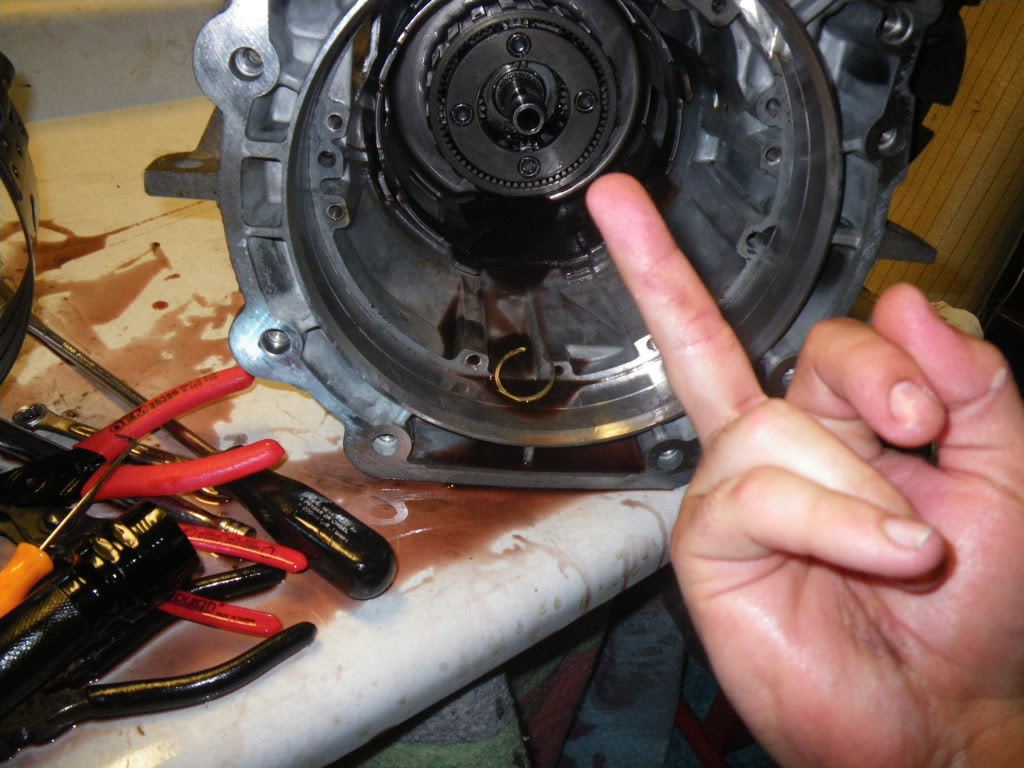
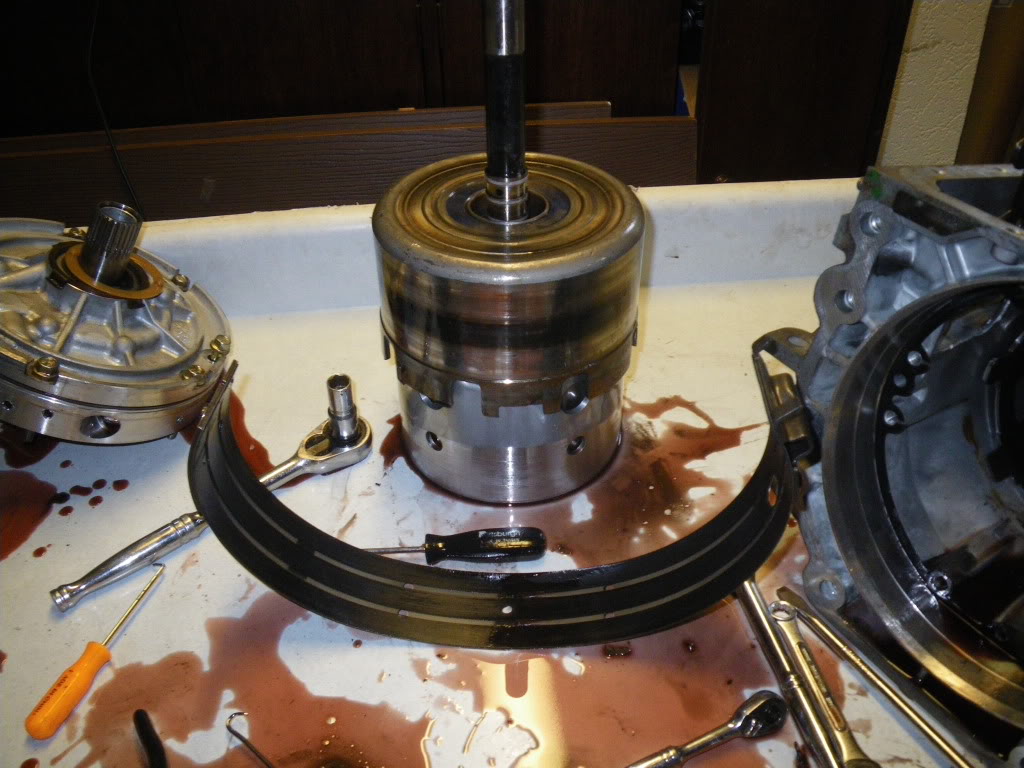
Emotions shown in picture. Could not get that snap ring off for the life of me.
Got the prize out, wierd burn mark. Seems to be flat where the old band used to be, I've yet to check it with a straight edge.
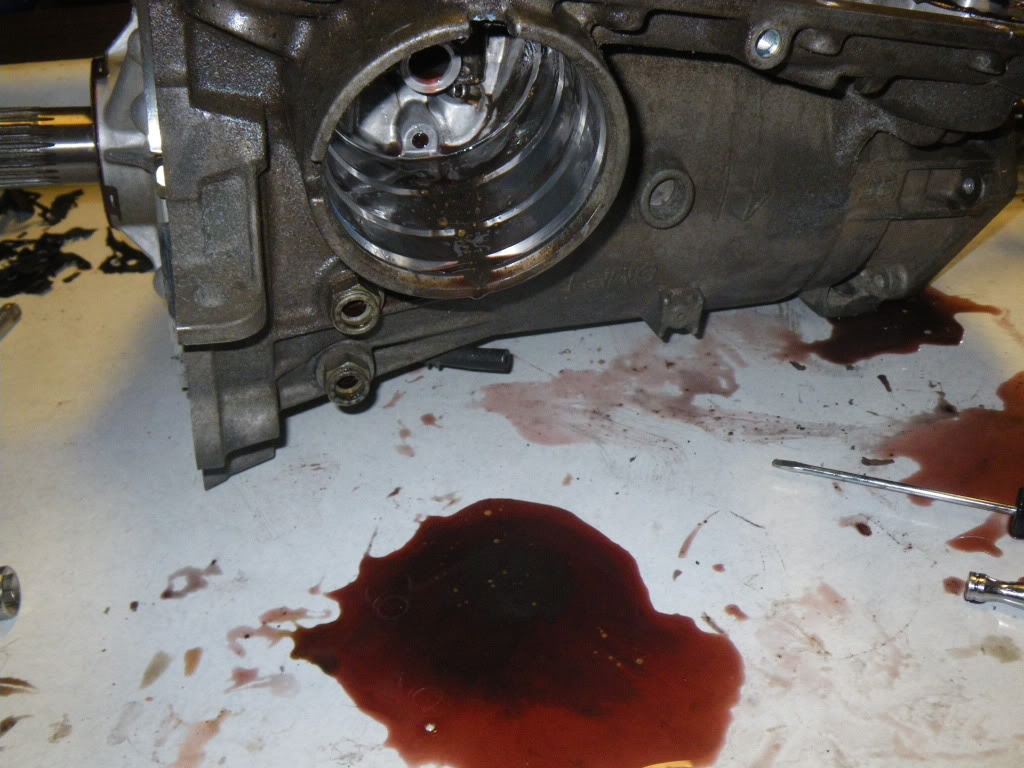
There's all this random red stuff throughout the transmission. I have no clue what it is. It seems to clean off, but I have no idea what it could be.
This is the pump housing, the pump seems to be good. No gouges, and I can still see the machinist markings.

I've yet to get into the valve body or valves in the pump, and much of the actual transmission. At this point just basic disassembly and cleaning. Any tips for getting off old valve body gasket?
Current plans are to install a cam and necessary valvetrain components in the winter. This will dictate stall selection, but other than that I'm hoping to get somewhere in the 350-400whp range.
As for the rebuild, I've decided to use PATC for all the parts I need. They seem very knowledgable, as well as have a good selection of parts. I'll copy/paste the stuff I'm planning on getting tomorrow.
If anyone has any suggestions or thoughts, please share. This is my first time rebuilding a transmission, but not my first time using my hands. I should be asking for help soon once I get everything torn apart and it's time for inspection.
So for a little background, I'm swapping a 2005 5.3l and 2003 4l60e into a ~3000lb car. Car was running decent except the transmission. Finally got it out of the car on Saturday. So after watching the DVD and reading through the manual, I ripped apart the transmission. I don't have a clutch spring compressor, and am probably going to just weld something up.
Enough type, on with the pics.
~~~
Here's the "workshop", an old counter top on a couple tables...baller!
Removed all the external stuff, I didn't need to use a blowtorch on the bellhousing bolts.
So this is what I'm guessing used to be friction material. BIG lesson learned here.
Things look pretty clean on the valve body.
Once I removed the pressure switch manifold, it seemed like there was some water under it, you can see where the manifold used to be.
Finally got all that stuff off, and was down to the separator plate. Anyone have any thoughts on that junk?
Detail Shot-
Servo holder, more gunk coming out of it and bad oil.
Emotions shown in picture. Could not get that snap ring off for the life of me.
Got the prize out, wierd burn mark. Seems to be flat where the old band used to be, I've yet to check it with a straight edge.
There's all this random red stuff throughout the transmission. I have no clue what it is. It seems to clean off, but I have no idea what it could be.
This is the pump housing, the pump seems to be good. No gouges, and I can still see the machinist markings.
I've yet to get into the valve body or valves in the pump, and much of the actual transmission. At this point just basic disassembly and cleaning. Any tips for getting off old valve body gasket?
Current plans are to install a cam and necessary valvetrain components in the winter. This will dictate stall selection, but other than that I'm hoping to get somewhere in the 350-400whp range.
As for the rebuild, I've decided to use PATC for all the parts I need. They seem very knowledgable, as well as have a good selection of parts. I'll copy/paste the stuff I'm planning on getting tomorrow.
If anyone has any suggestions or thoughts, please share. This is my first time rebuilding a transmission, but not my first time using my hands. I should be asking for help soon once I get everything torn apart and it's time for inspection.
good luck on the build but it looks like there was some water in there?
__________________
Thanks guys, I'm sure I'll need all the luck I can get. I'm pretty certain some water got in here, just no clue how. My guess is that the transmission was sitting outside or something like that at the place I bought it from. It was kept in a heated garage after it came into my possession.
Has anyone seen anything at this point that make them say don't rebuild this unit? I'm looking at about $1000 after all is said and done (including TC), and if this unit is no good for a rebuild, I'd rather just buy another transmission.
Has anyone seen anything at this point that make them say don't rebuild this unit? I'm looking at about $1000 after all is said and done (including TC), and if this unit is no good for a rebuild, I'd rather just buy another transmission.
I agree, it looks like that red stuff you are talking about is rust from water intrusion. You say you will have about $1000 into the trans? Are you using any upgraded parts (clutches, wide band, servos, shift kit, etc) or is it going to go back together as a stock trans? What about the converter? Stock or upgraded stall? It sounds like you are doing ok depending on what parts are going back in it.
Teching In

Joined: Mar 2005
Posts: 19
Likes: 0
From: Charleston SC
I am about to embark on this same project myself.I found this helpfull.
http://www.amazon.com/Automatic-Over...3889203&sr=8-3
http://www.amazon.com/Automatic-Over...3889203&sr=8-3
Good luck D00z28, it seems like this is gonna be quite the job, but very do-able. That book looks interesting, and you can't argue with that price.
lt1pwr1- I'm still not 100% on my plan for the rebuild, but here's a very rough plan-
Alto red eagle clutches
29 element sprag
new reverse-input drum
wide carbon fiber band
beast sunshell
new seals, o-rings, etc
new molded pistons
transgo separator plate (pre-drilled, not to be done by me)
www.transmissioncenter.com "wake up kit"
The new reverse-input is due to the current one being in sad shape.
I had originally planned to go with www.transmissioncenter.com for all the supplies I needed, but have since been taking a look at pro-built automatics. Right now the big reason against them is the fact that I'd like the alto clutches, but I'm going to look through and weigh out the options.
Yes, new torque converter as well, I figured it'd be a great idea to help make sure there's no contamination from the old junk oil, but also because I plan on upgrading the engine a little bit (new cam and tune).
Regardless, I tore into the pump to check everything out. Enjoy another load of pictures...
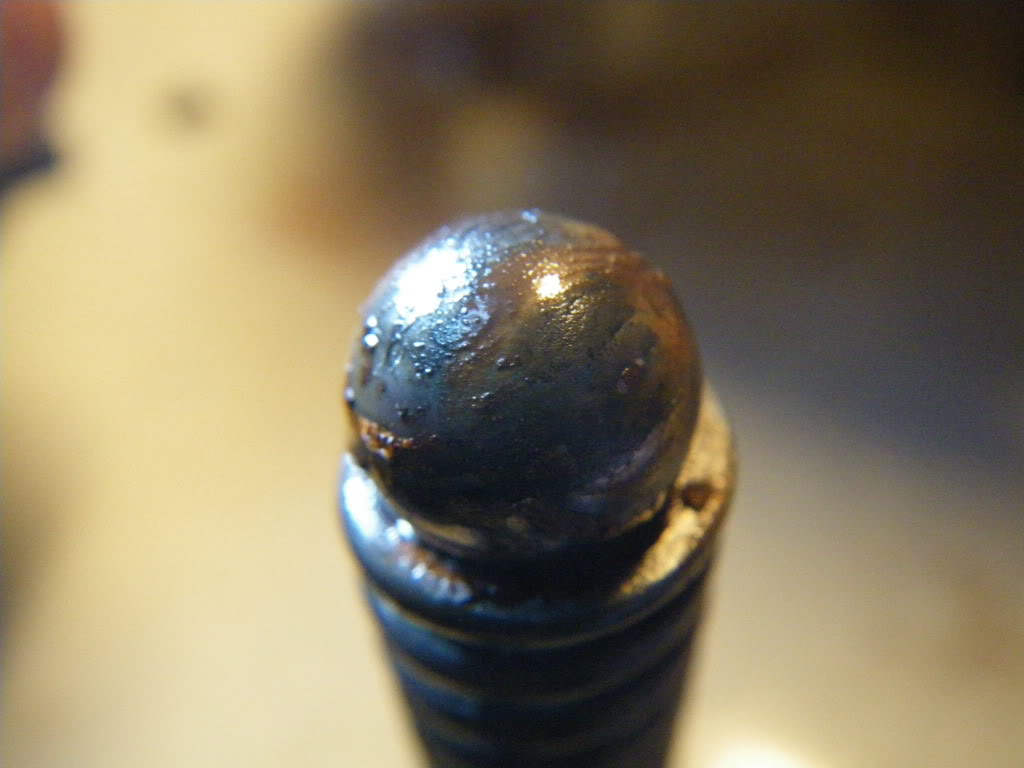
The check ball in the pump, just after I pulled it out
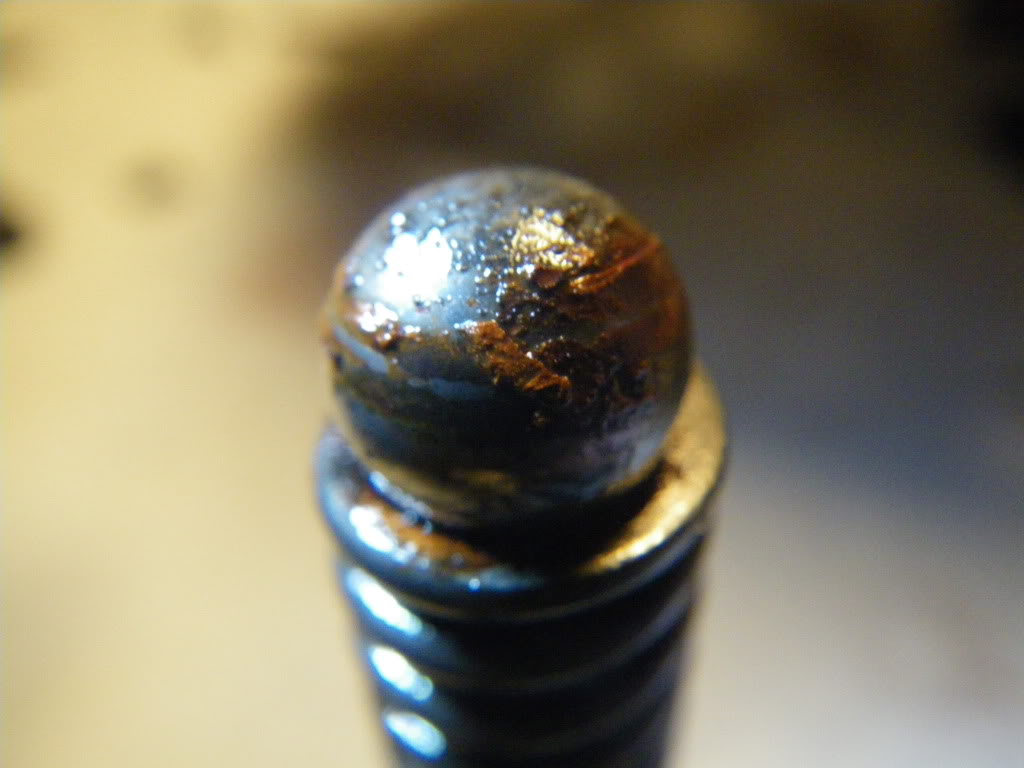
I tried getting the crap off, and it seems to scrub off. I tried a little bit in the spot on the right side of the picture
Front half of the pump. Pump surface looks good, and I can't feel any scratches when I run my finger nail on it. bushing seems to be good too, very smooth.
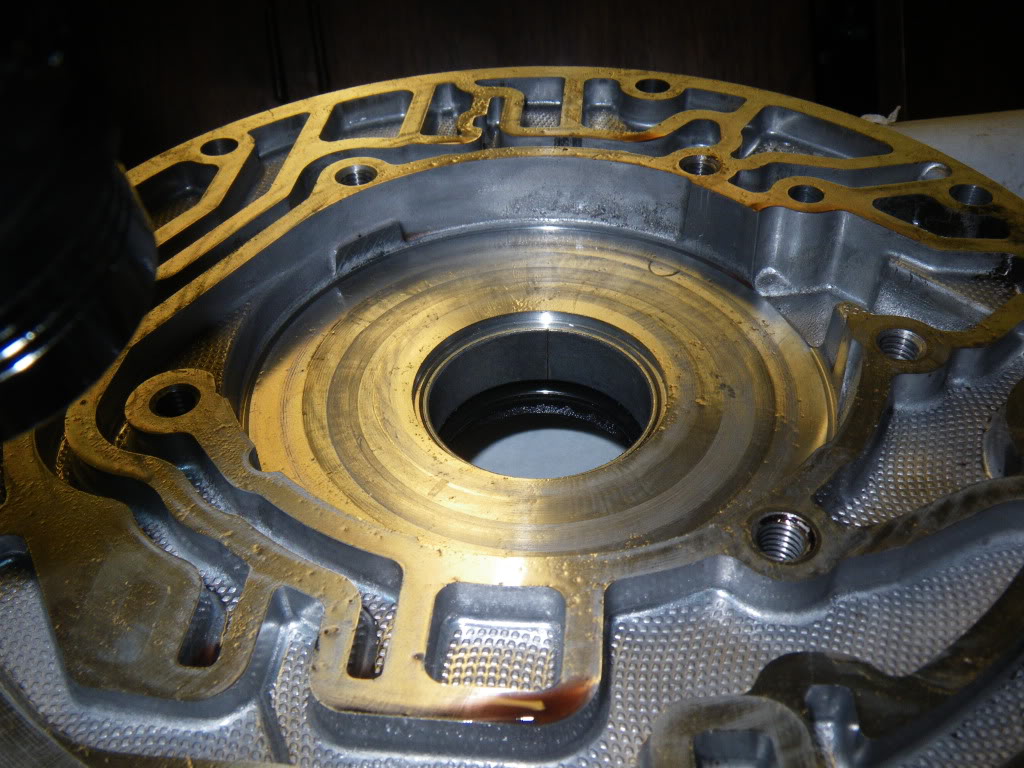
Inside of pump, bearing surfaces look great and the bushing seems to still be good, everything is very smooth.
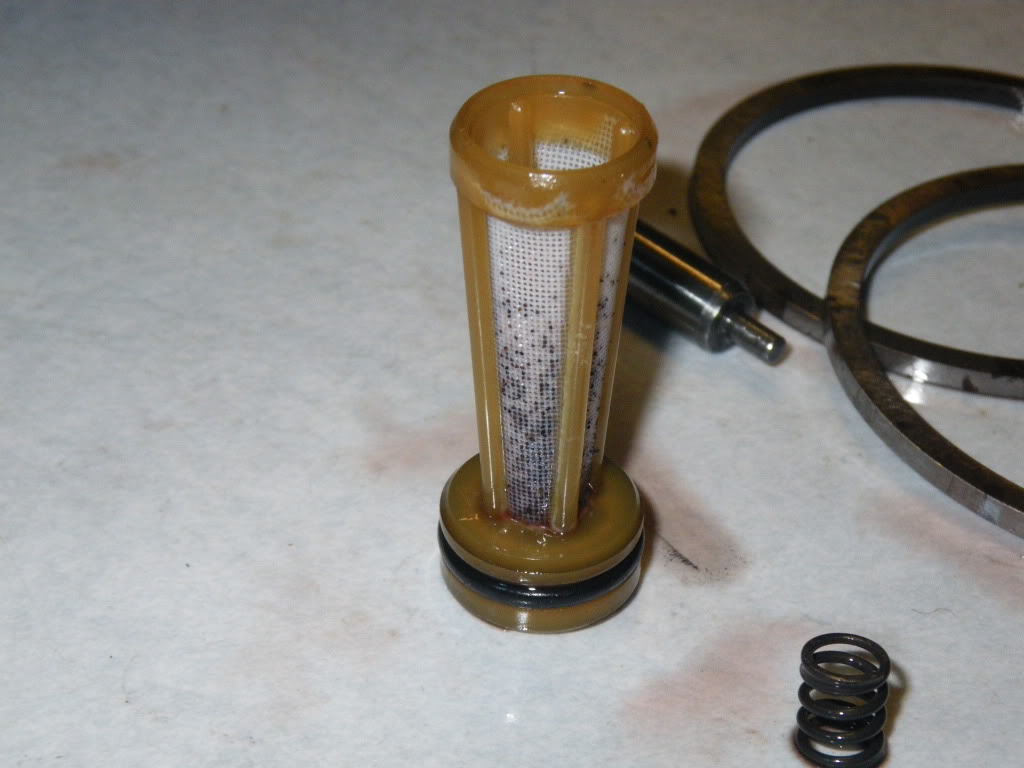
The little cone filter in the pump...tons of random crap
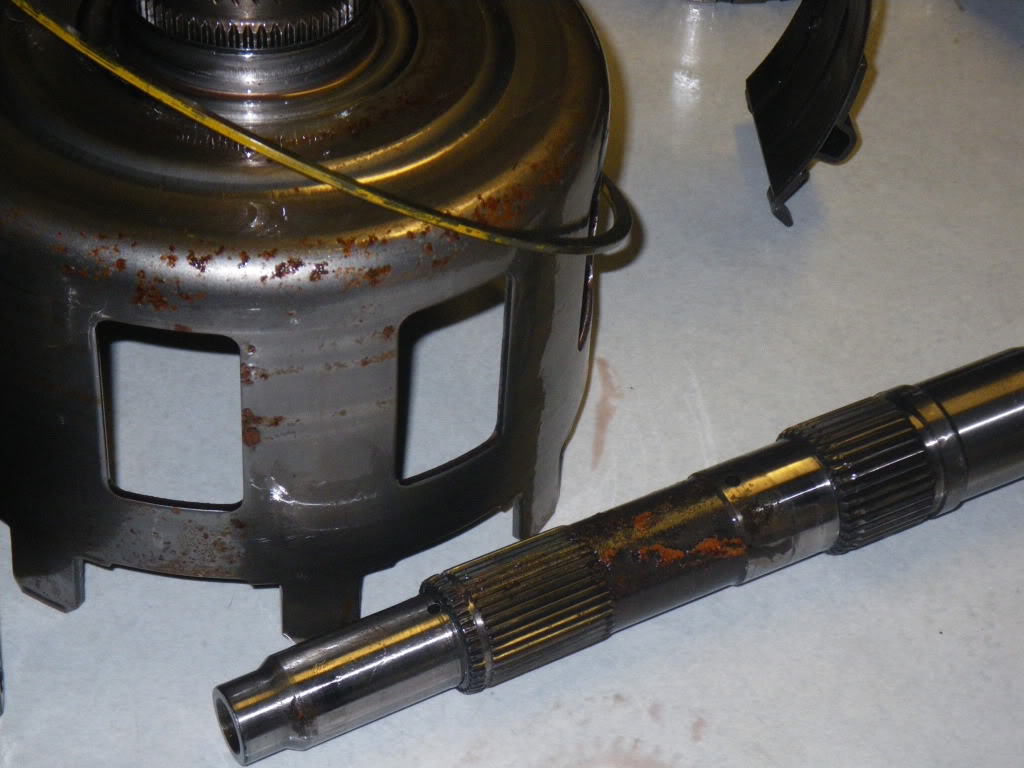
Front shaft, splines look great, bearing surfaces and bushing are nice and smooth.
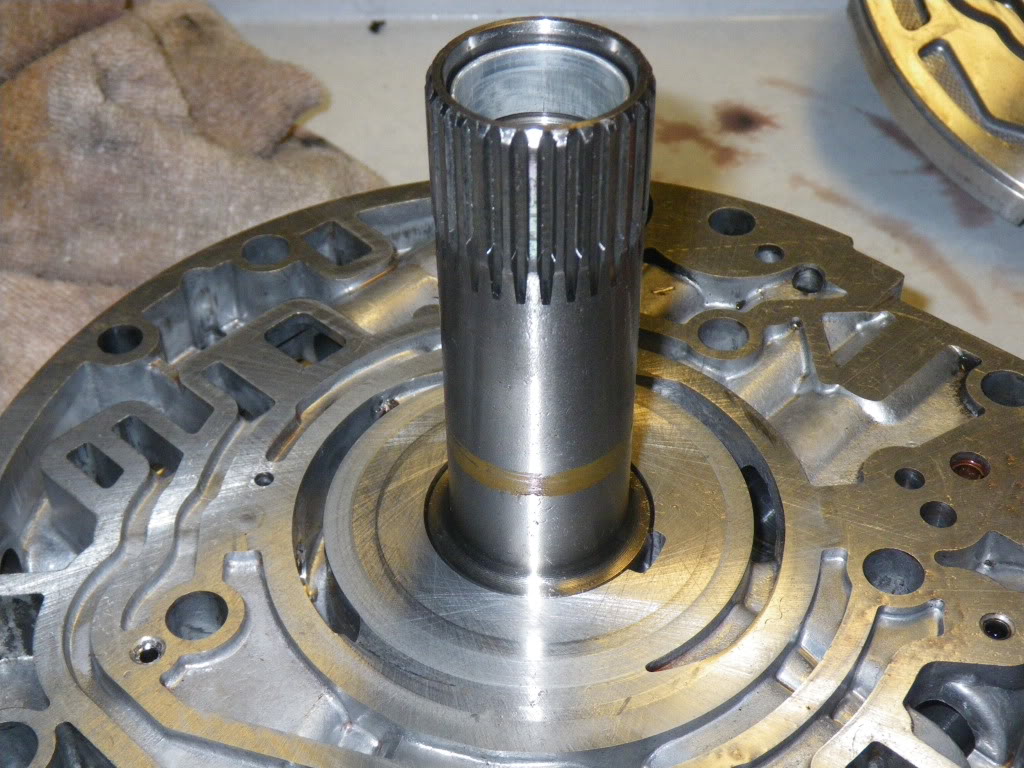
Close-up of the bushing
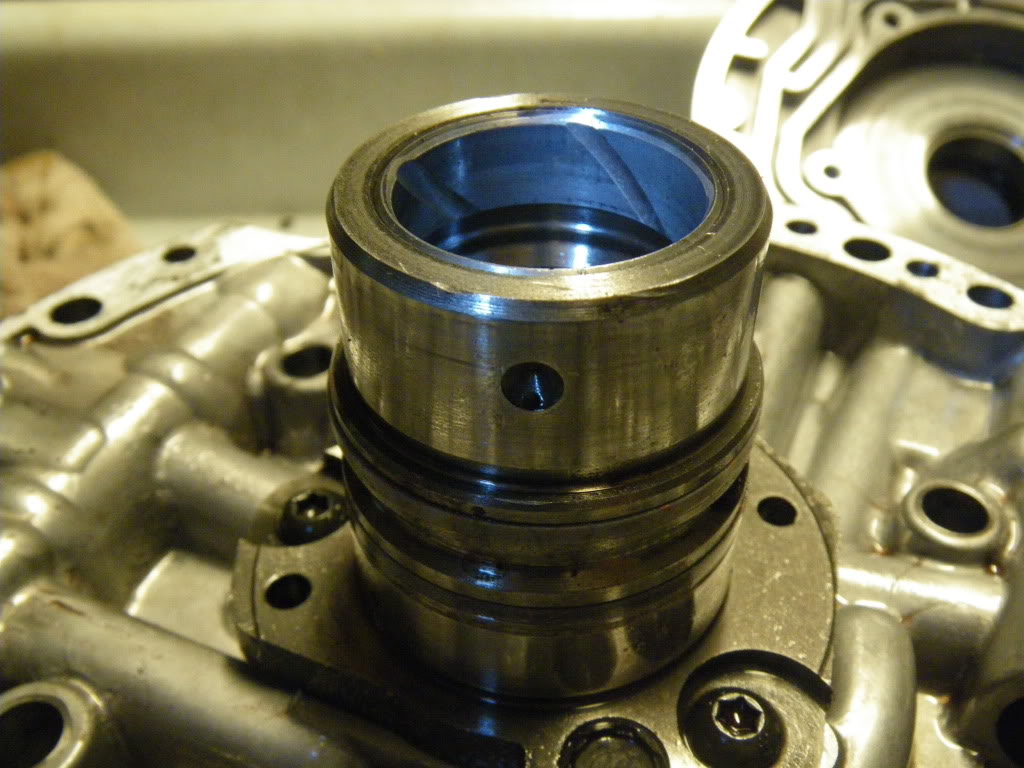
Pump components, all are nice and smooth with no gouges or anthing.
More of the ?rust? crap.
close up after I tried to remove some with a little scraping.
So if anyone sees anything that shouldn't be re-used, please speak up. I haven't cleaned anything up yet, but that's next. All the valve components look great and fit in the bores really well as well.
I still haven't got into the case components or removed the springs from the case or drums, but that'll be tomorrow or thursday.
lt1pwr1- I'm still not 100% on my plan for the rebuild, but here's a very rough plan-
Alto red eagle clutches
29 element sprag
new reverse-input drum
wide carbon fiber band
beast sunshell
new seals, o-rings, etc
new molded pistons
transgo separator plate (pre-drilled, not to be done by me)
www.transmissioncenter.com "wake up kit"
The new reverse-input is due to the current one being in sad shape.
I had originally planned to go with www.transmissioncenter.com for all the supplies I needed, but have since been taking a look at pro-built automatics. Right now the big reason against them is the fact that I'd like the alto clutches, but I'm going to look through and weigh out the options.
Yes, new torque converter as well, I figured it'd be a great idea to help make sure there's no contamination from the old junk oil, but also because I plan on upgrading the engine a little bit (new cam and tune).
Regardless, I tore into the pump to check everything out. Enjoy another load of pictures...
The check ball in the pump, just after I pulled it out
I tried getting the crap off, and it seems to scrub off. I tried a little bit in the spot on the right side of the picture
Front half of the pump. Pump surface looks good, and I can't feel any scratches when I run my finger nail on it. bushing seems to be good too, very smooth.
Inside of pump, bearing surfaces look great and the bushing seems to still be good, everything is very smooth.
The little cone filter in the pump...tons of random crap
Front shaft, splines look great, bearing surfaces and bushing are nice and smooth.
Close-up of the bushing
Pump components, all are nice and smooth with no gouges or anthing.
More of the ?rust? crap.
close up after I tried to remove some with a little scraping.
So if anyone sees anything that shouldn't be re-used, please speak up. I haven't cleaned anything up yet, but that's next. All the valve components look great and fit in the bores really well as well.
I still haven't got into the case components or removed the springs from the case or drums, but that'll be tomorrow or thursday.
Trending Topics
oh forgot to mention, but I'd like to keep all the transmission stuff under $1000. The more under $1000 the better, but I'm assuming $800+ at this point, including a torque converter. I was planning on trying the PATC converters, but that's for another thread.
LS1 Tech Stories
The Best V8 Stories One Small Block at Time

Top 10 Greatest Cadillac V Series Performance Models Ever, Ranked
Pouria Savadkouei
Top 10 Most Powerful Chevy Trucks Ever Made!

Hennessey's New Supercharged Silverado ZR2 Has 700 HP
Verdad Gallardo
Coachbuilt N2A Anteros Is an LS2-Powered C6 Corvette In Italian Clothes
Verdad Gallardo
Awesome K5 Blazer Restomod Comes With C7 Corvette Power
Verdad Gallardo
10 Camaros You Should Never Buy

10 LS Engine Myths That Refuse to Die
Verdad Gallardo
Five Reasons the Camaro Was the Most Pivotal Player in the Pony Car Wars 2.0
Brett Foote
10 Reasons the LS7 Is GM's Most Extreme Naturally Aspirated V8 Engine Ever
Verdad GallardoOn The Tree
Joined: Jul 2008
Posts: 142
Likes: 0
From: st paul, mn
When removing the old valve body gasket(I'm assuming off the seperator plate/valve body because both those were a pita) when I did it it just took my plenty of brakewash, a gasket romover tool. It's kinda like a paint scrapper but with a razorblade on the end. I also used this plastic sponge like stuff, just can't remember the name right now.
As far as choosing a good kit to go with I just got my pro-built street strip ruild kit in the mail yesterday.
As far as choosing a good kit to go with I just got my pro-built street strip ruild kit in the mail yesterday.
OK, so I dove into all the clutches...
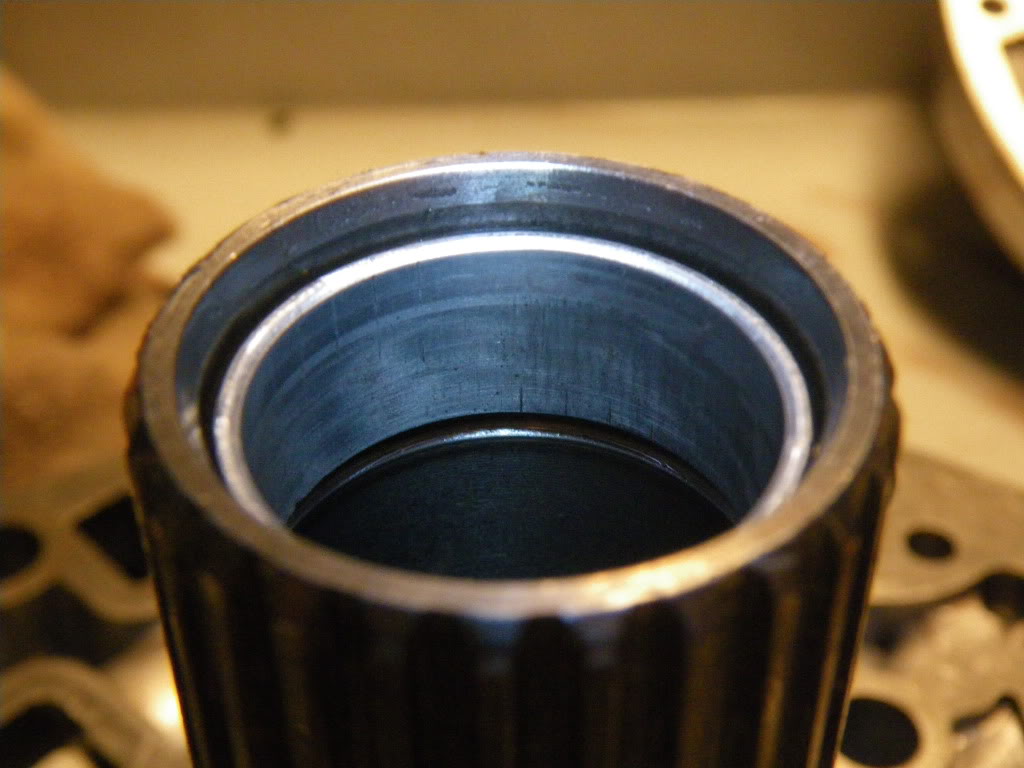
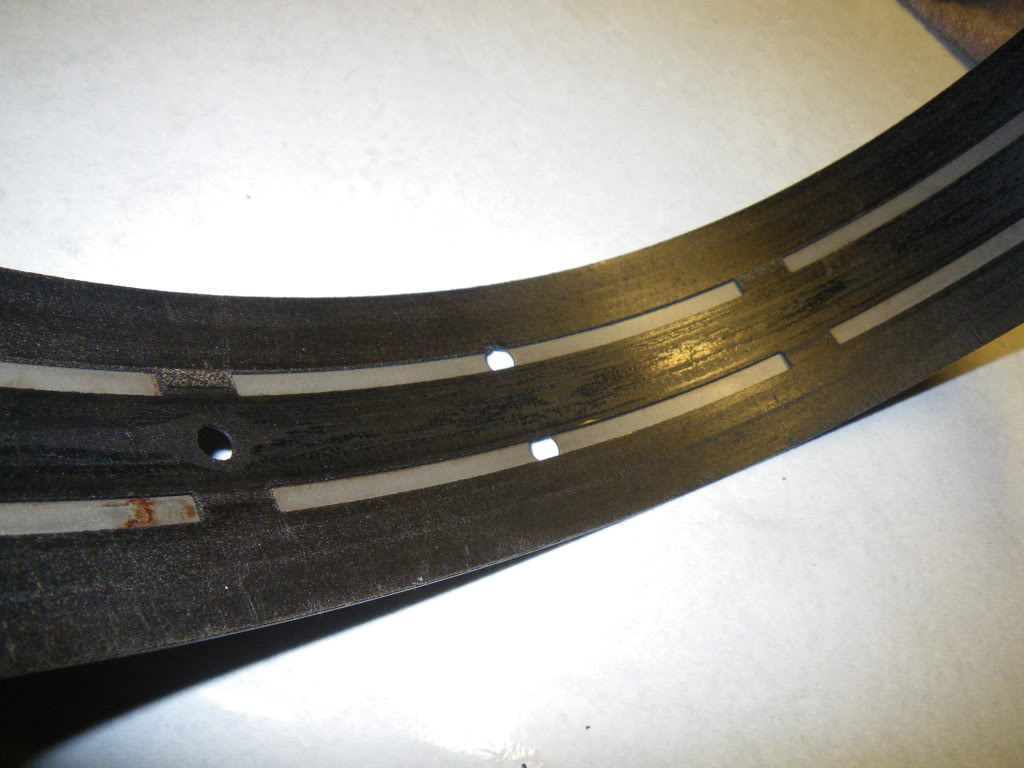
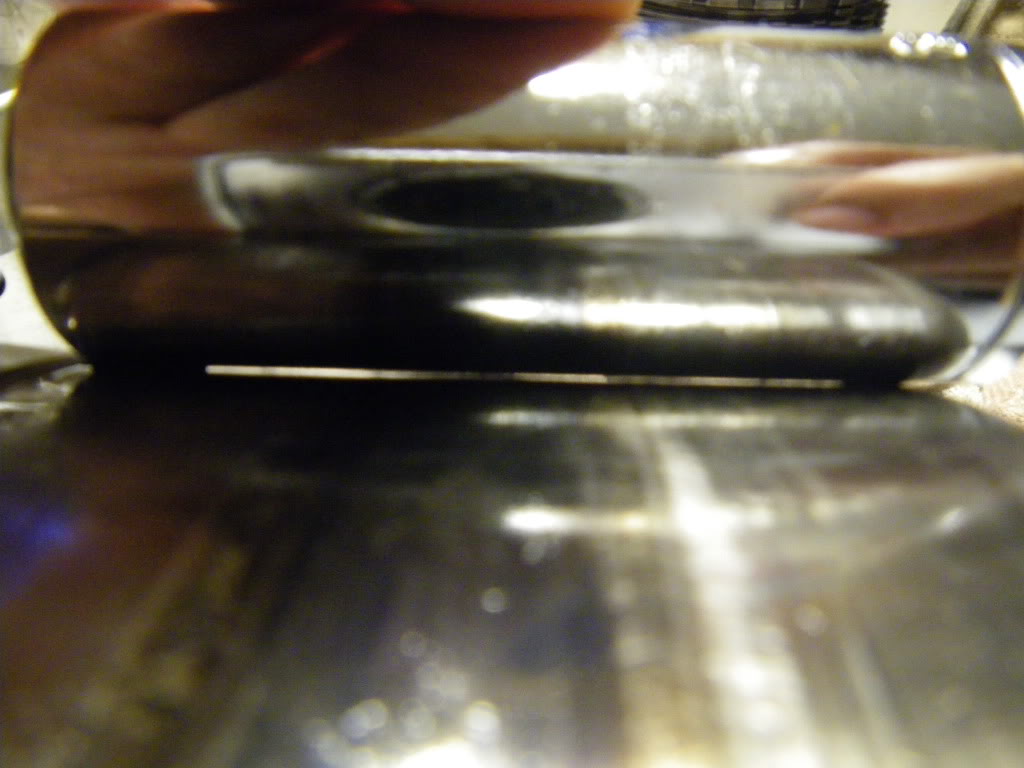
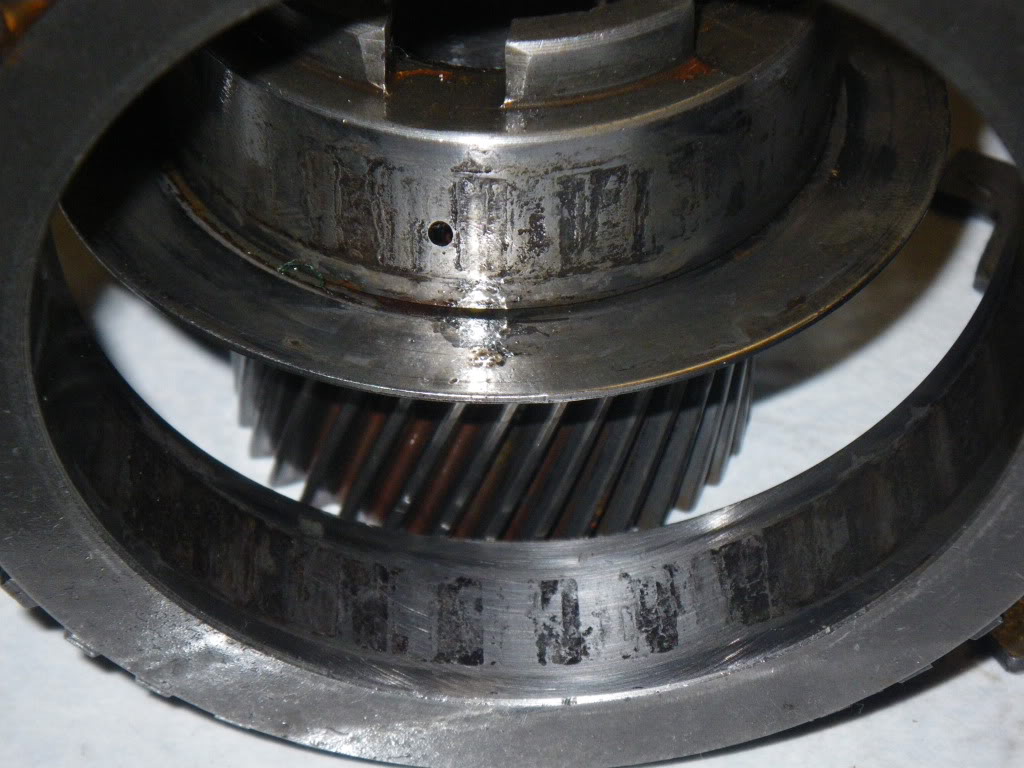
Here's a closeup of the band, a little ?glazing? but otherwise decent
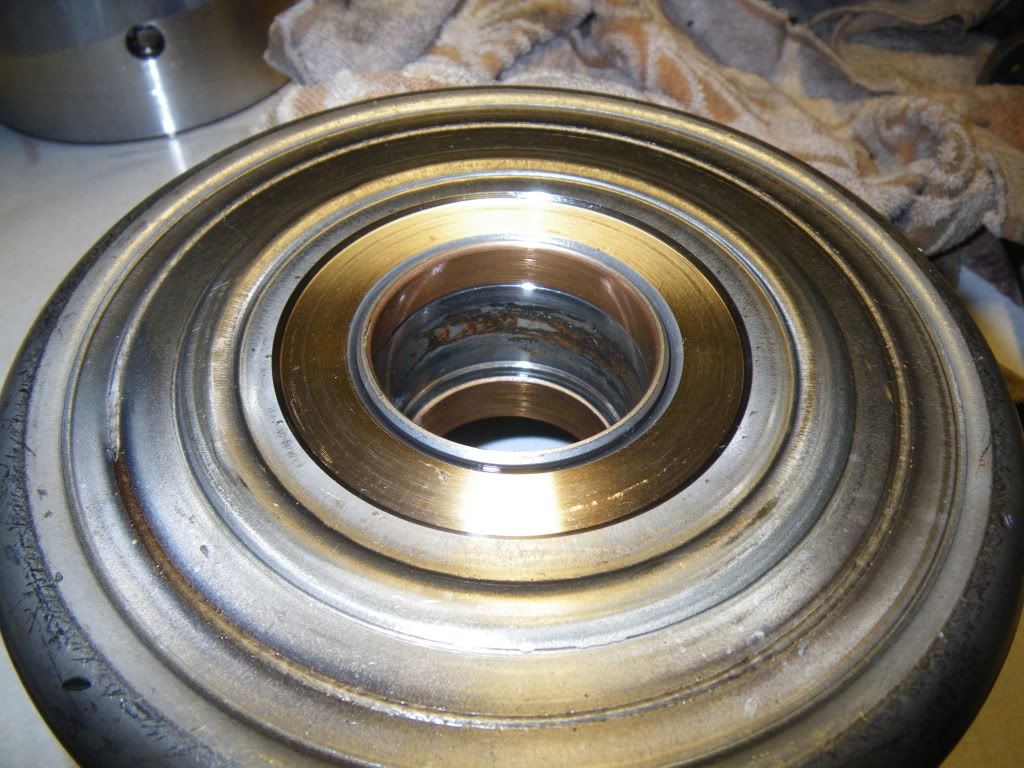
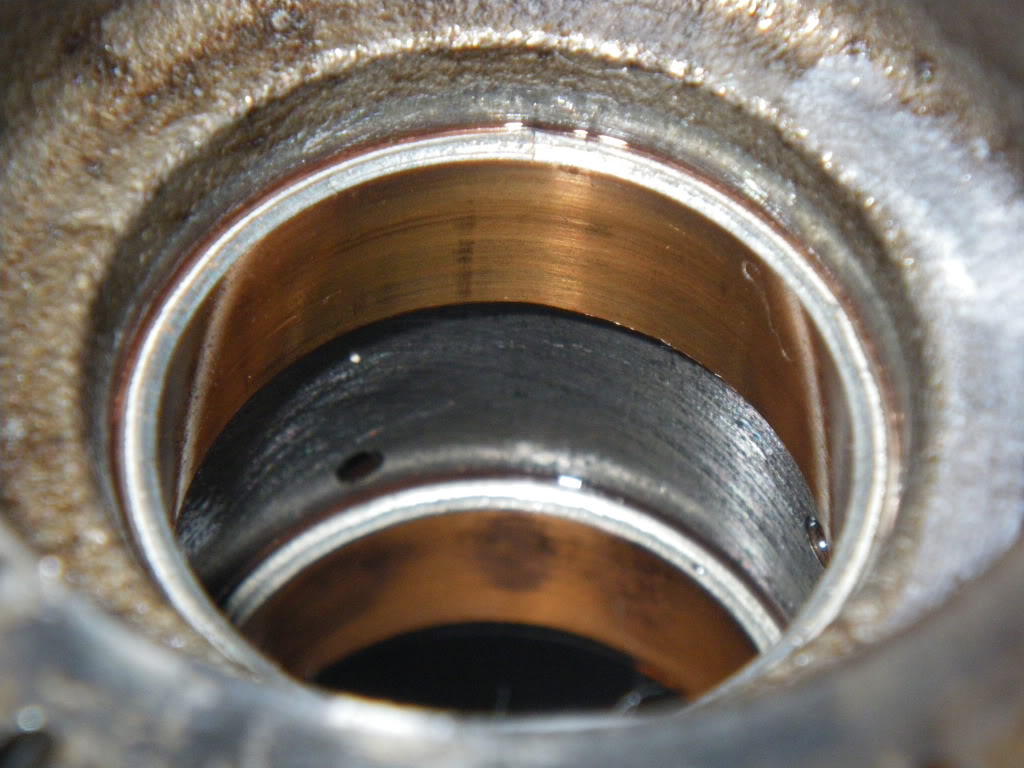
Reverse input drum seems to be normal, good smooth bushings, except something by the cir-clip
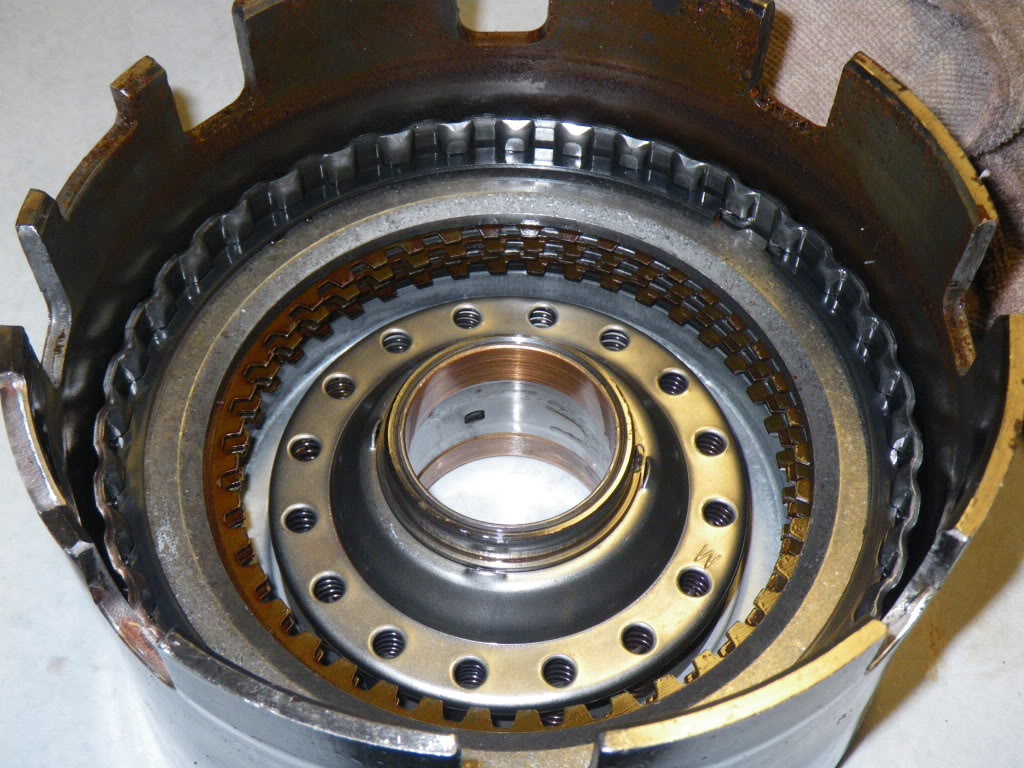
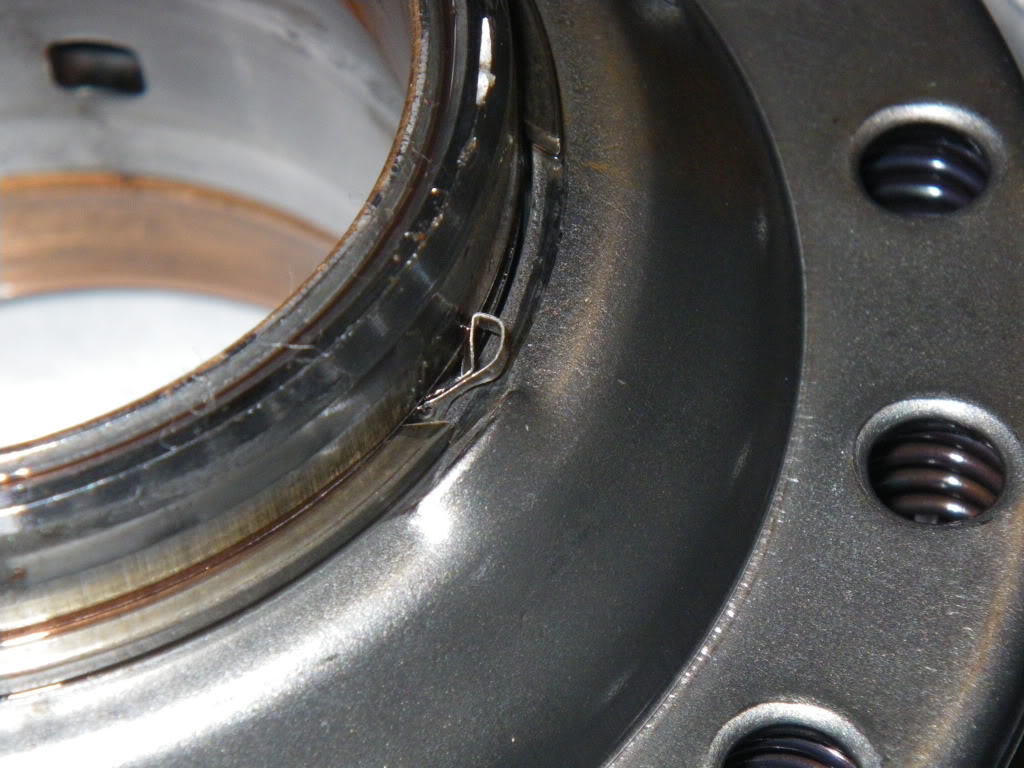
closup of something by the cir-clip
Bearing surface looks good, as do bushings
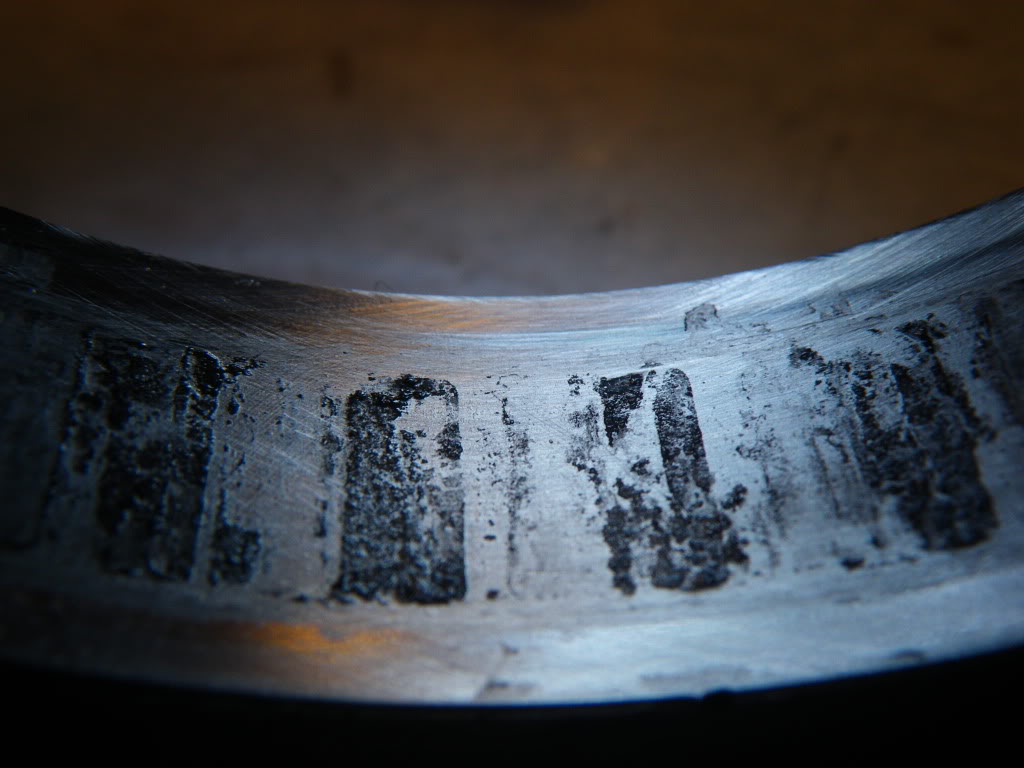
WOAH! band surface is a bit warped. I would bet this means the band surface is no good. I kinda knew this already, but figured I'd show the other pictures to give people an idea what to look for
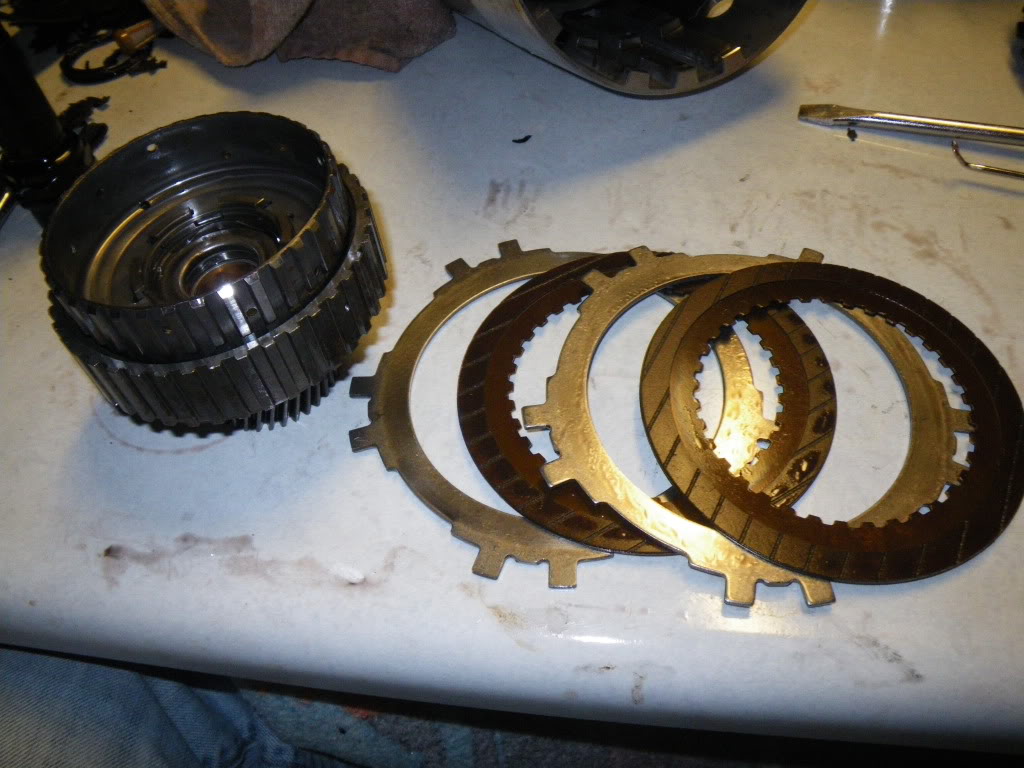
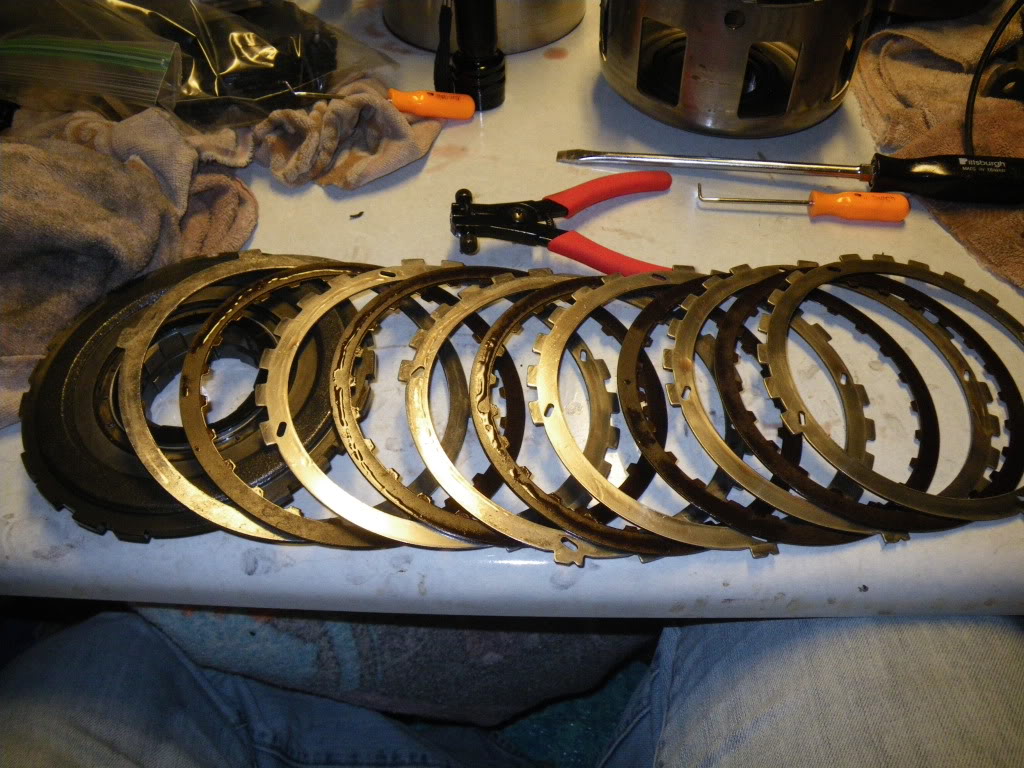
Reverse input clutches look fine, steels are still good
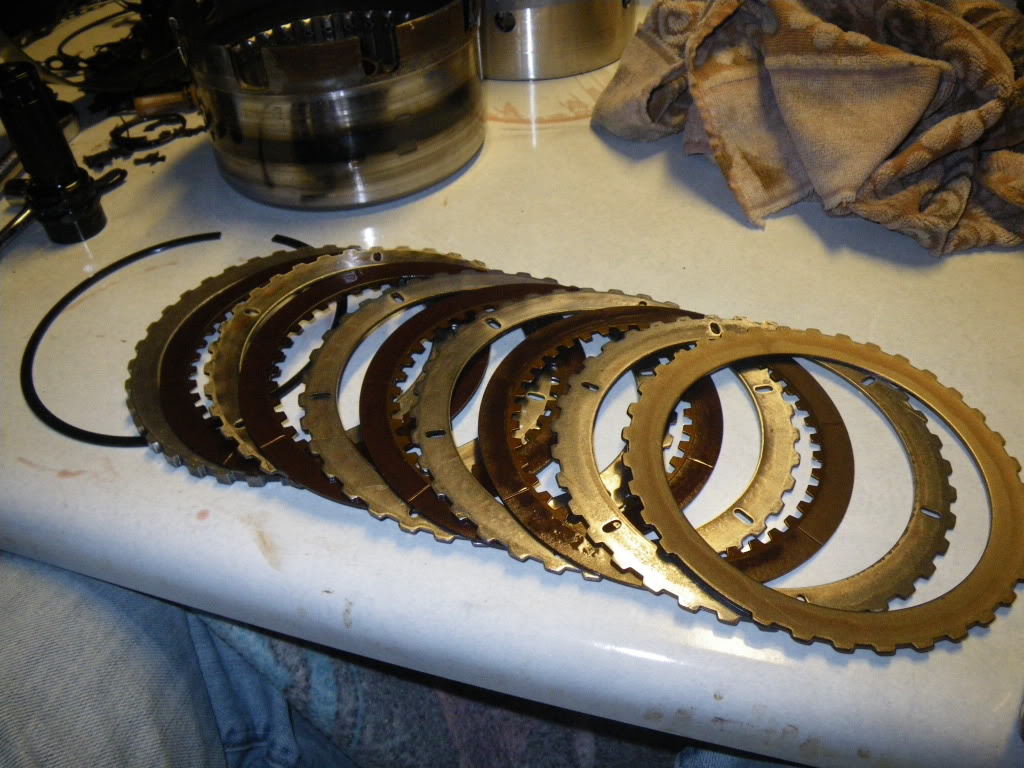
Teeth where the steels ride have little ridges in them, which seem to be ok
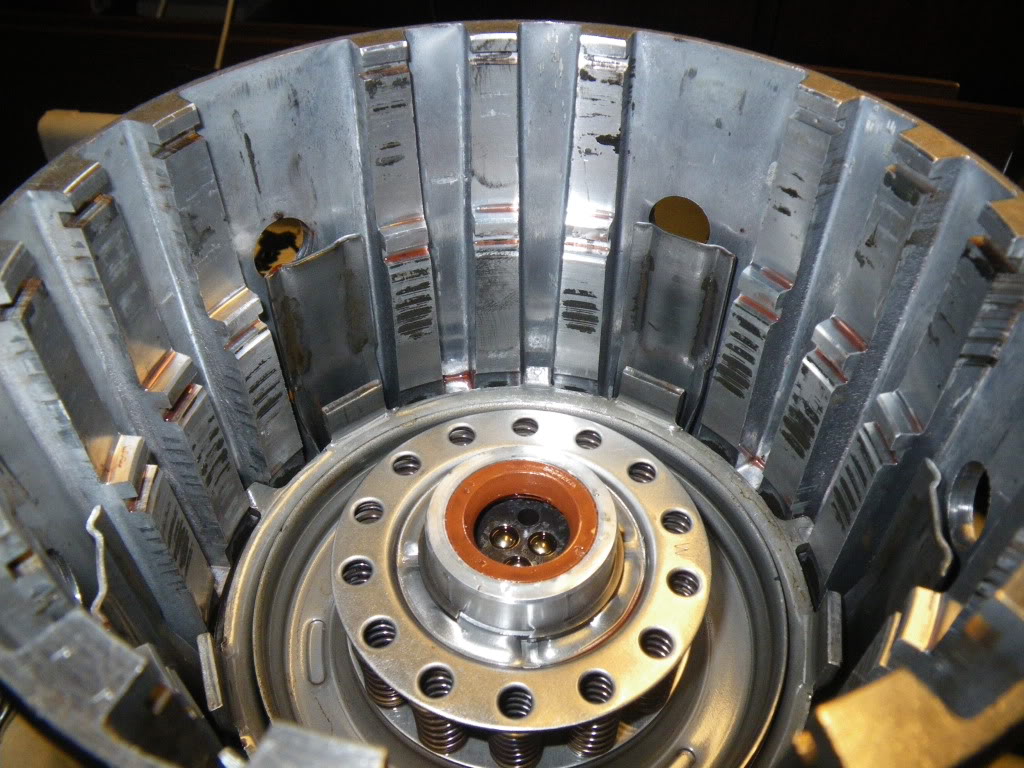
Overall shot of input drum. teeth for the clutches show nearly no wear, bearing surfaces are good, torrington is good, splines are good

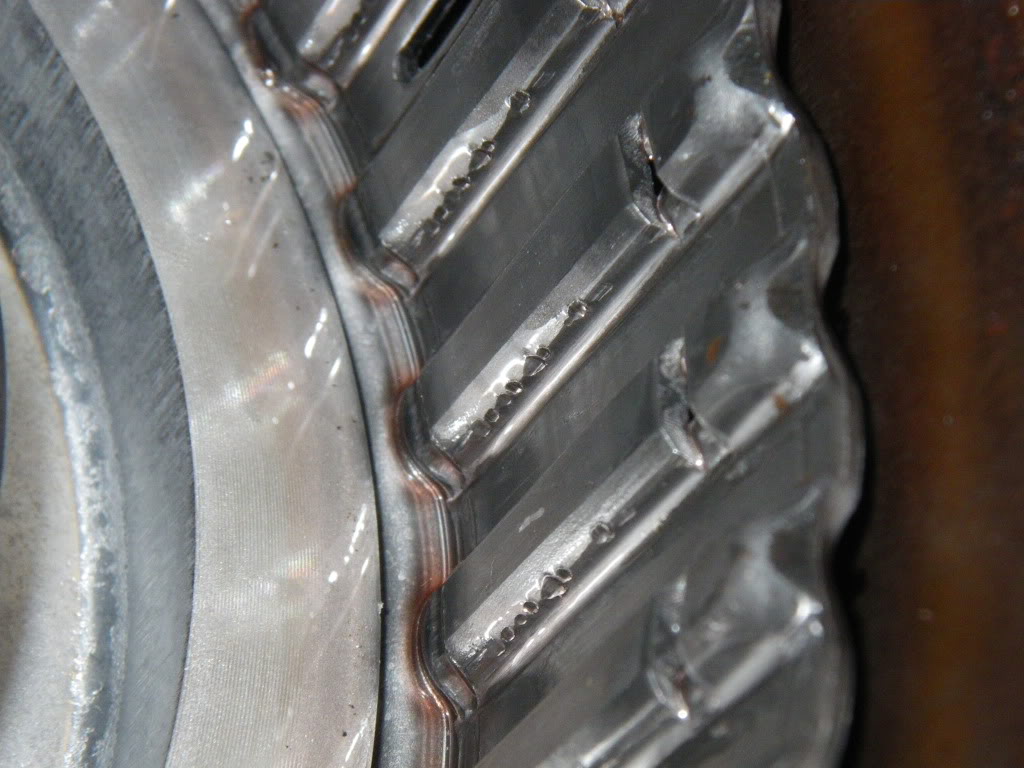
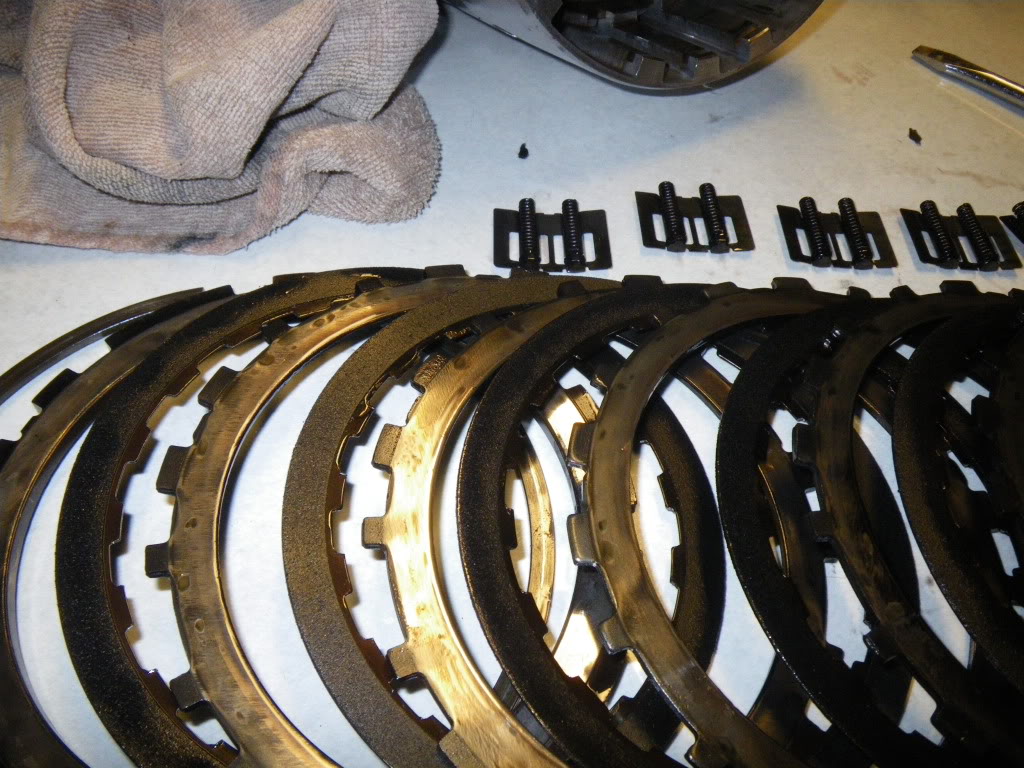
Haha the 3-4 clutches!

Closeup of the damage
Forward clutches, all look pretty good
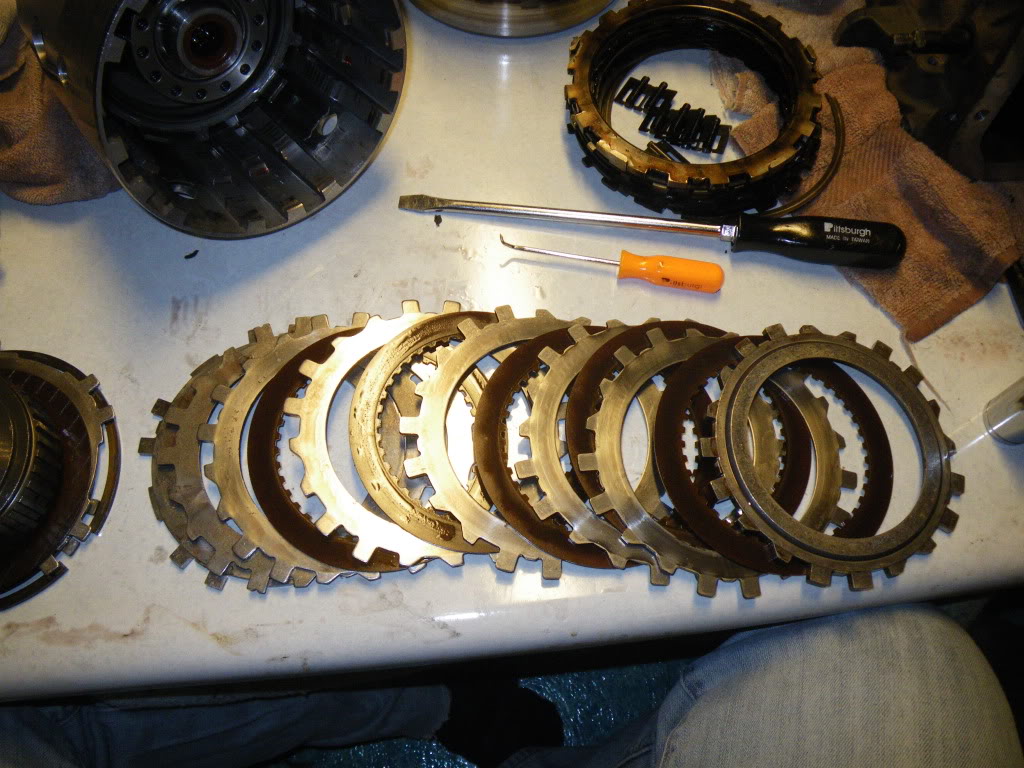
Overrun clutches, again good
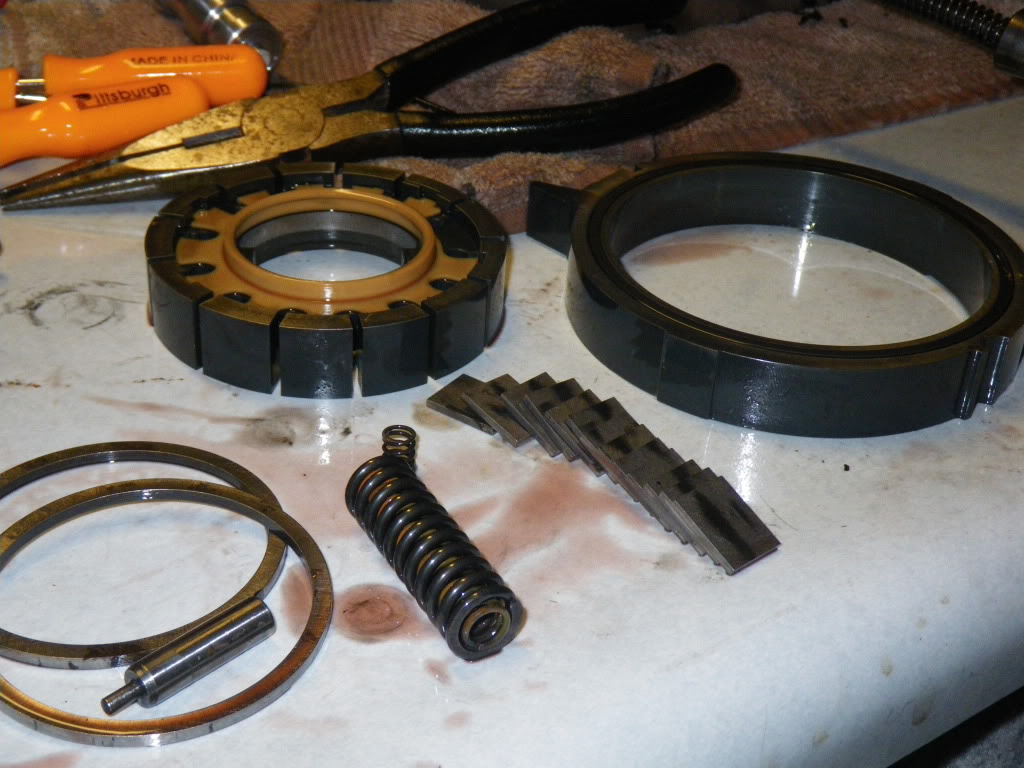
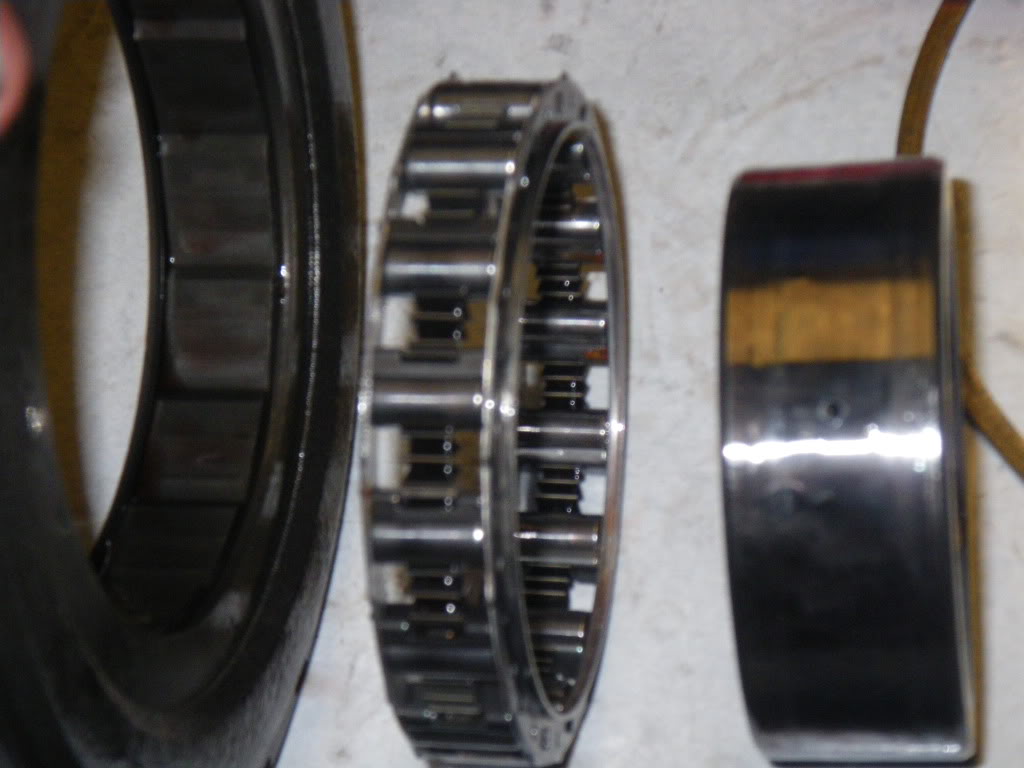
And on to the forward sprag, all looks good on the outside
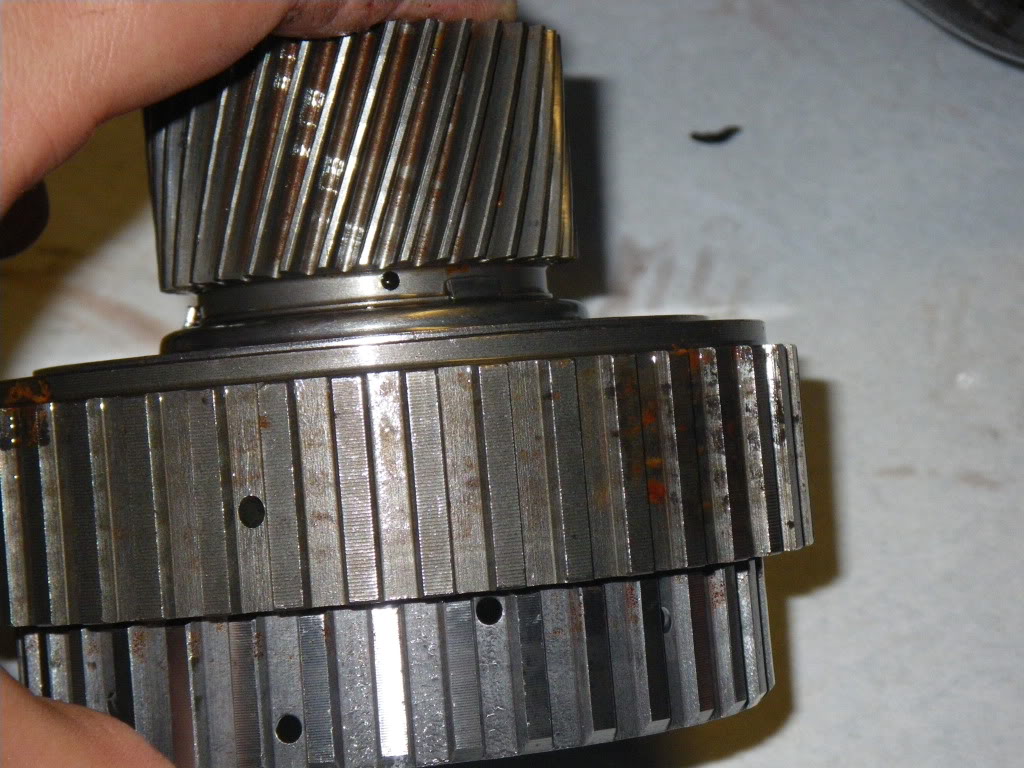
Bushings look a little worn, but feel smooth
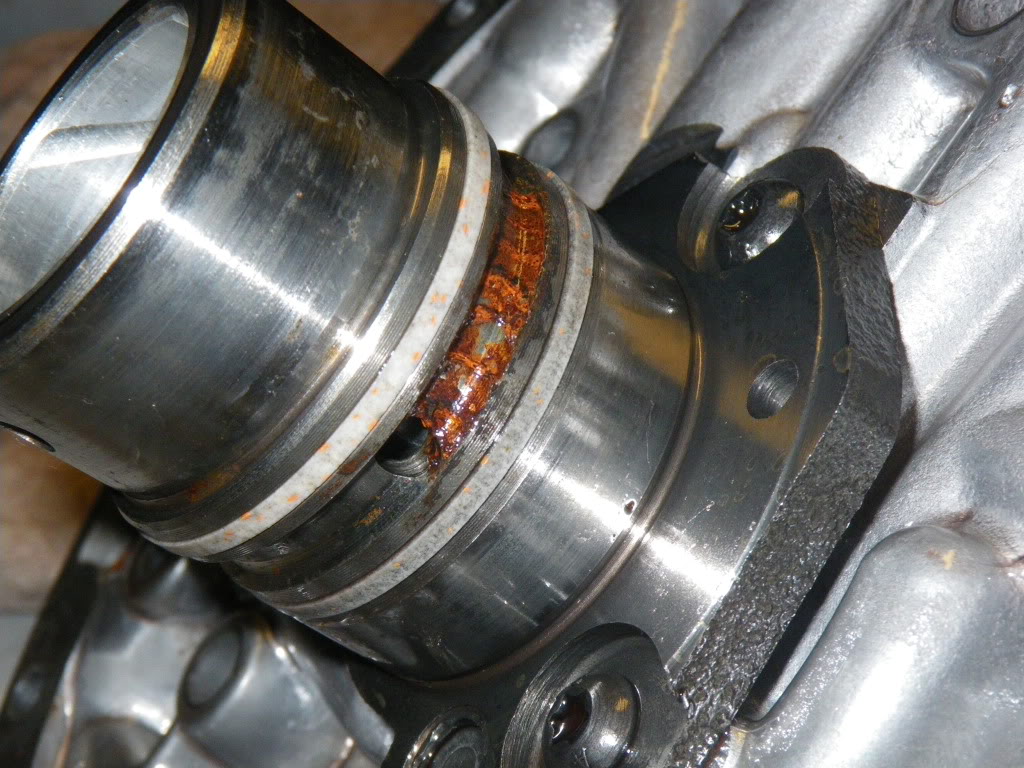
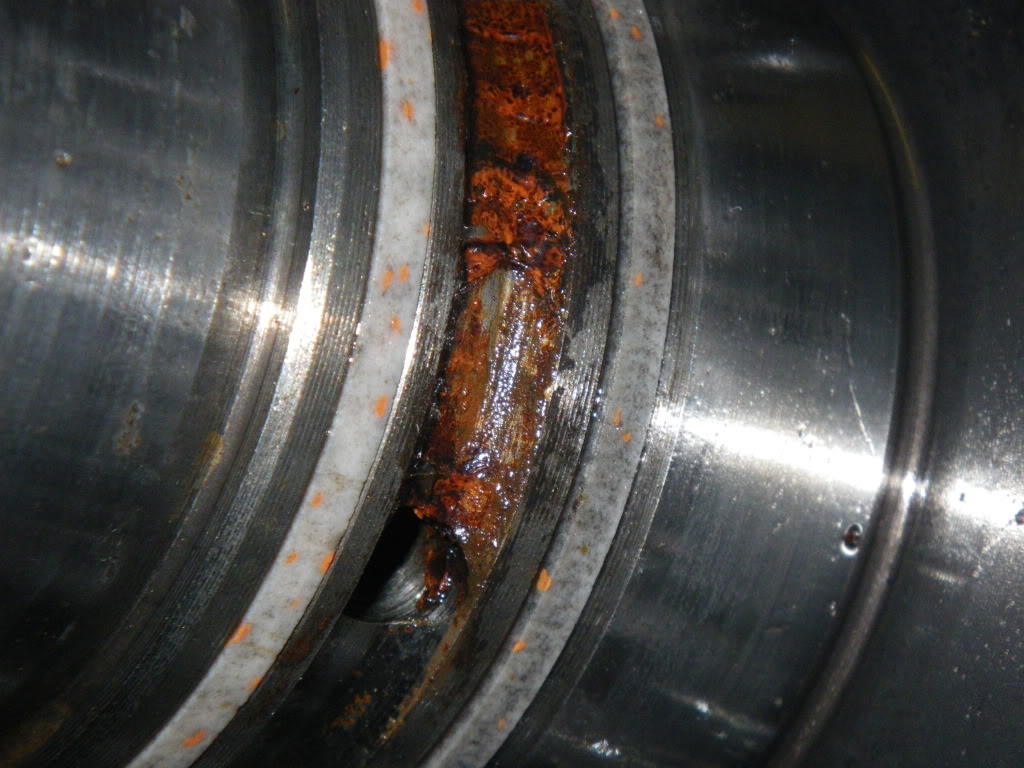
took it apart, and WOAH!
tried cleaning up the bearing surfaces with some scotch-brite pads, and no luck. Turns out, they're pitted. wonderful.
Input drum is a little dirty from the 3-4's burning up, but otherwise seems to be in good condition.
Low-roller clutch seems to be in great shape
and finally, the low/reverse clutches, all in good shape
So at this point I still need to remove the clutch springs (going to make a tool, have an idea for a very simple one) and dive into the valve body. After that, I can finally order up parts. It appears that at the very least, I need a new input drum as well as a new input sprag assembly.
I talked with a co-worker, and he believes all the red crap in there is a trans-fix type stuff, and it makes sense to me as this stuff has a definite red color and just doesn't seem to be rust. I'm not saying there wasn't water in the case, just guessing at the random crap.
As usual, if I'm wrong with any of my assessments, please blatantly tell me. I'm going on what I've learned from the book & video.
Here's a closeup of the band, a little ?glazing? but otherwise decent
Reverse input drum seems to be normal, good smooth bushings, except something by the cir-clip
closup of something by the cir-clip
Bearing surface looks good, as do bushings
WOAH! band surface is a bit warped. I would bet this means the band surface is no good. I kinda knew this already, but figured I'd show the other pictures to give people an idea what to look for
Reverse input clutches look fine, steels are still good
Teeth where the steels ride have little ridges in them, which seem to be ok
Overall shot of input drum. teeth for the clutches show nearly no wear, bearing surfaces are good, torrington is good, splines are good
Haha the 3-4 clutches!
Closeup of the damage
Forward clutches, all look pretty good
Overrun clutches, again good
And on to the forward sprag, all looks good on the outside
Bushings look a little worn, but feel smooth
took it apart, and WOAH!
tried cleaning up the bearing surfaces with some scotch-brite pads, and no luck. Turns out, they're pitted. wonderful.
Input drum is a little dirty from the 3-4's burning up, but otherwise seems to be in good condition.
Low-roller clutch seems to be in great shape
and finally, the low/reverse clutches, all in good shape
So at this point I still need to remove the clutch springs (going to make a tool, have an idea for a very simple one) and dive into the valve body. After that, I can finally order up parts. It appears that at the very least, I need a new input drum as well as a new input sprag assembly.
I talked with a co-worker, and he believes all the red crap in there is a trans-fix type stuff, and it makes sense to me as this stuff has a definite red color and just doesn't seem to be rust. I'm not saying there wasn't water in the case, just guessing at the random crap.
As usual, if I'm wrong with any of my assessments, please blatantly tell me. I'm going on what I've learned from the book & video.

Thats a shitty core for a first time rebuild.
How are you going to check the planetary bearings? I bet they look just like the fwd sprag- pitted. I bet the 3rd checkball capsule looks just like the relief ball in the pump, if not replaced 3rd will burn up again.
I know you're not using the rev/input drum but you refer to the bushings looking good, did you notice the area where the sealing rings ride? Bushings can be changed, pitted up sealing ring surfaces can't.
And your list says you need a new input drum, I think you mean reverse input drum, little price difference there, and no sense in ordering a bunch of wrong parts.
Frictions all in good shape? (out of the rev/input), no, they may look ok but once they get water on them the glue starts to let go.
The red stuff you're seeing is trans fluid and water, it never separates unless it's heated.
Did you get a warranty with this? I guarantee if the seller would have cleaned the pan and put a filter in it this would have worked long enough to get past a 30 day warranty, maybe even 90 days.
If you order parts from Pro Built ask Dana why he uses Borg Warner rather than Alto. You end up with the BW, it's no BS sales tactic.
Thats a shitty core for a first time rebuild.
How are you going to check the planetary bearings? I bet they look just like the fwd sprag- pitted. I bet the 3rd checkball capsule looks just like the relief ball in the pump, if not replaced 3rd will burn up again.
I'll check that one when I get home, I haven't yet.
I know you're not using the rev/input drum but you refer to the bushings looking good, did you notice the area where the sealing rings ride? Bushings can be changed, pitted up sealing ring surfaces can't.
If I remember correctly there was some crap there, but I didn't try to remove or do anything to it, I'll check it again tonight
And your list says you need a new input drum, I think you mean reverse input drum, little price difference there, and no sense in ordering a bunch of wrong parts.
lol, yeah, quite a bit of a difference, I meant reverse input
Frictions all in good shape? (out of the rev/input), no, they may look ok but once they get water on them the glue starts to let go.
The red stuff you're seeing is trans fluid and water, it never separates unless it's heated.
I was just going by look, none of the clutches will be re-used, all will be replaced with a rebuild kit
Did you get a warranty with this? I guarantee if the seller would have cleaned the pan and put a filter in it this would have worked long enough to get past a 30 day warranty, maybe even 90 days.
I believe I did get a warranty, but it was quite a while ago. I bought the trans and then it sat for quite a bit. The lesson learned was to save money and then buy everything as close to the time you'll be using it as possible.
If you order parts from Pro Built ask Dana why he uses Borg Warner rather than Alto. You end up with the BW, it's no BS sales tactic.
I'll have to talk to Dana as I assumed the alto clutches were better.
Then you could either use it for parts, or put your input shaft/drum and pump in that trans and inspect it while it's apart.
The trans you have needs a forward sprag assembly, maybe some other rusty parts, but most of all your planetaries. Theres no way to tell if the inside bore of the gears look just like your forward sprag race.
So you could take the chance of these parts being good in the 4.3 trans and save from buying new or good used parts.
FWIW I used to buy core transmissions from my local junkyard for $40 to $100, I've taken a lot of 700R4's apart that had worn clutches, etc, and the hardparts still looked brand new. I wish to pass that luck to you if you do buy that transmission.
I'm sorry everyone but this journey is over. I found a good deal on a 4L60E that would match my engine (05 w/ ~20k miles). As much as I hated doing this, at this point it seems to be the most logical decision. I can't say how much I appreciate all the help I've received. If this new transmission does need to be rebuilt though (hopefully not for a long time) I know which way I'll be going with it.
Thanks again for all the help everyone, sorry for the disappointing ending. And just so this doesn't turn into a "rebuilding transmissions is too hard" type thread, it's not. Everything that needs to be done should be something any capable mechanic could do. I called it quits because at this point it looked like in the end it would be costing me more to go this route, and that's still assuming I did everything right the first time.
Thanks again for all the help everyone, sorry for the disappointing ending. And just so this doesn't turn into a "rebuilding transmissions is too hard" type thread, it's not. Everything that needs to be done should be something any capable mechanic could do. I called it quits because at this point it looked like in the end it would be costing me more to go this route, and that's still assuming I did everything right the first time.


