
Where to Buy & How to install the GTO/Holden/Monaro/Commodore shift knob/boot (pics!)
 03-14-2009 | 06:07 PM
#1
Thread Starter
TECH Fanatic
iTrader: (1)
Joined: Jan 2008
Posts: 1,249
Likes: 0
From: West Chester, PA
I'm going to post a lot of pictures and details of this process - exactly what I would have liked to see when I was deciding on whether to order the ****.
TO BUY: From Australia:
The company doesn't have an online store so it has to be ordered via email and you can pay with paypal.
http://www.nvu.com.au/products_singl...ge=3§ion=1
My contact was Chris Milis: cmilis@motorfield.com.au
It cost $110 AUD shipped, which was about $71 US at the time I ordered.
Here is what you are looking to get:
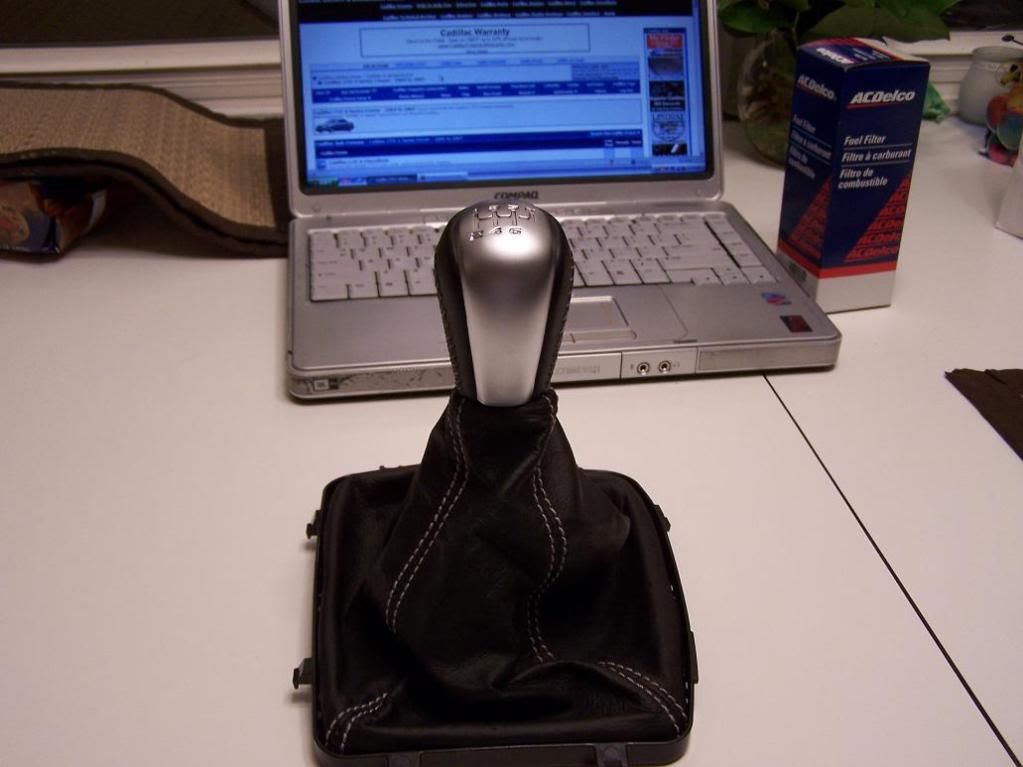
.
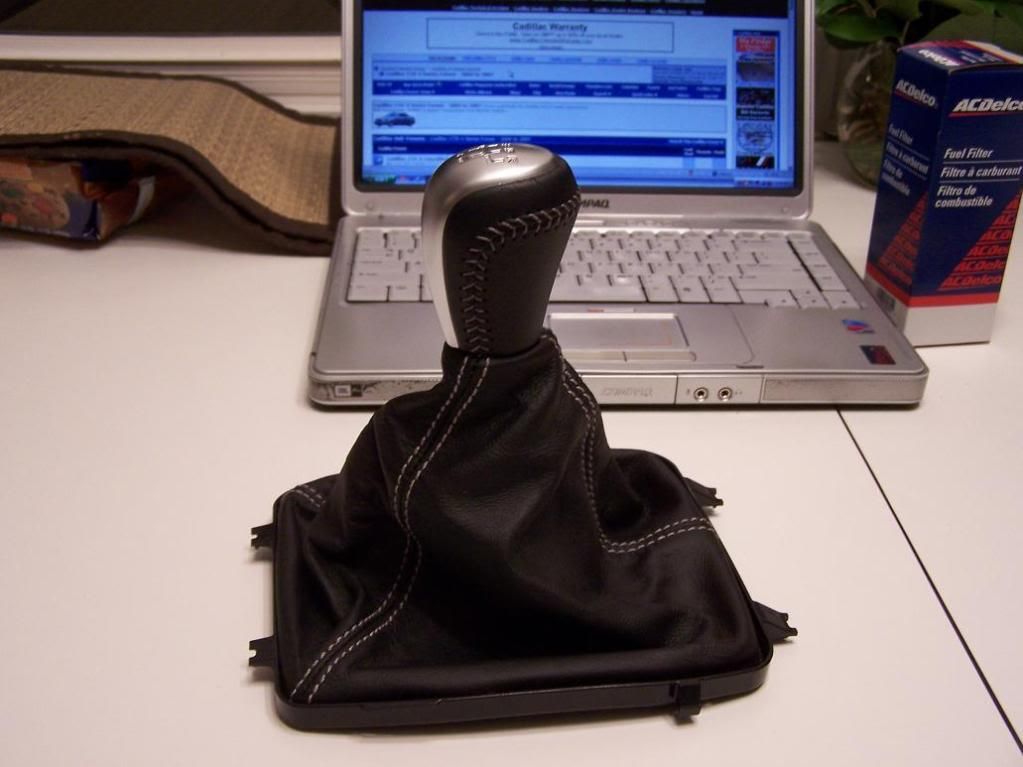
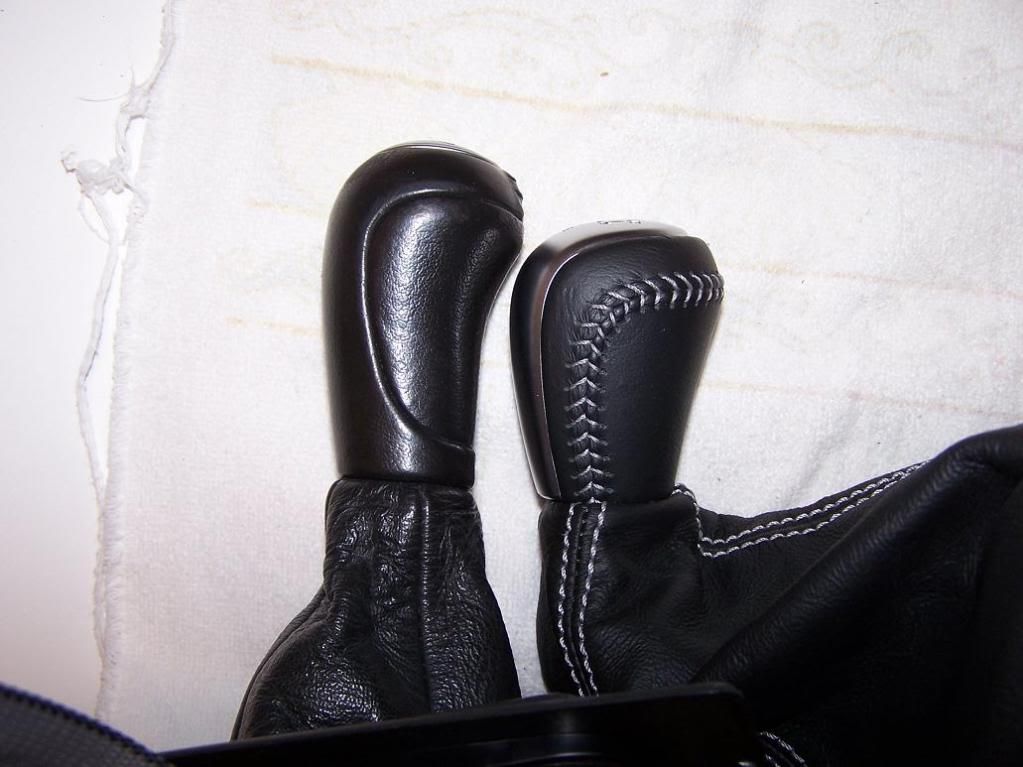
Here are some pics next to the stock shift ****:

.
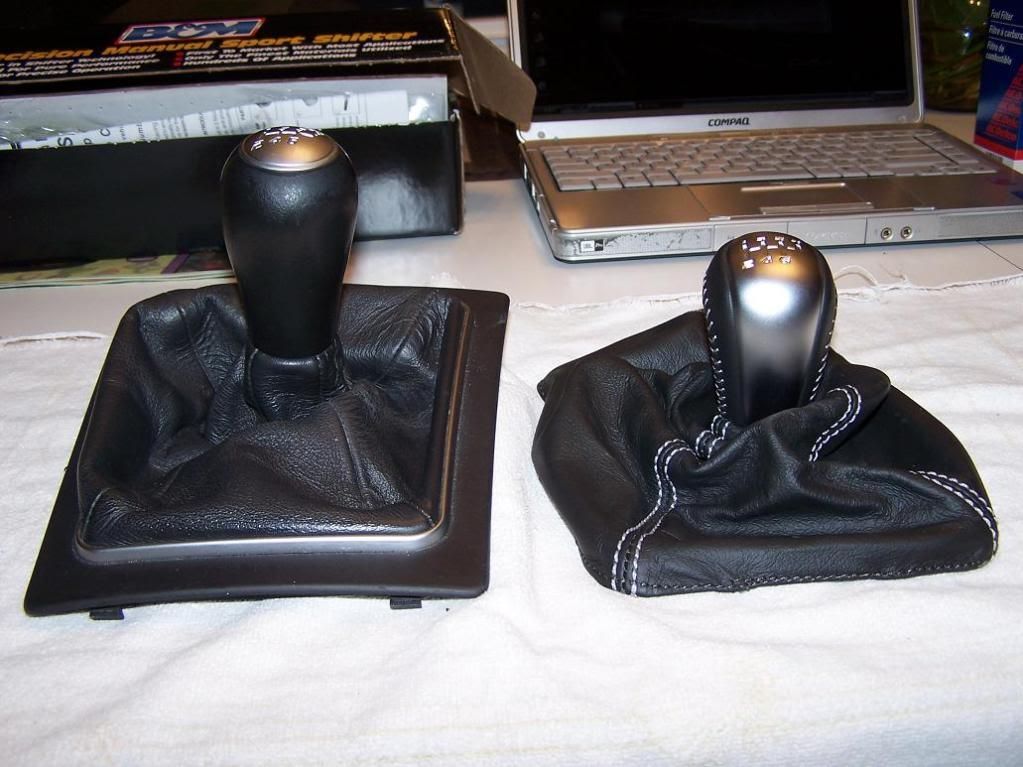
.
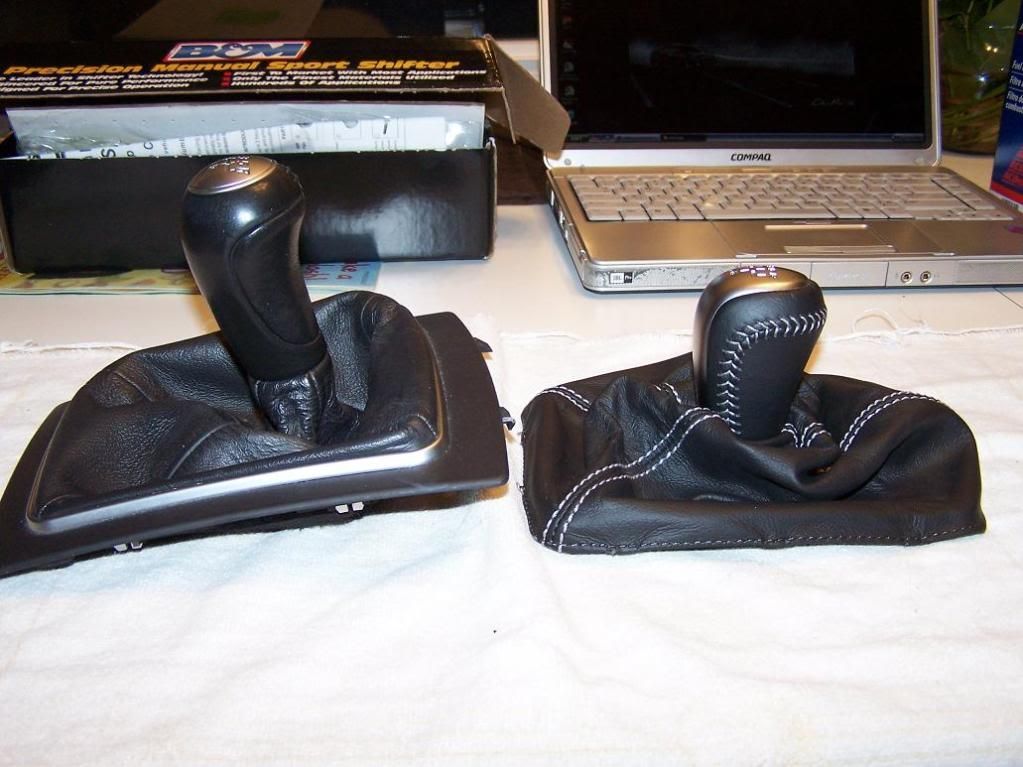
.
TO INSTALL:
Set aside an hour or two to do this.
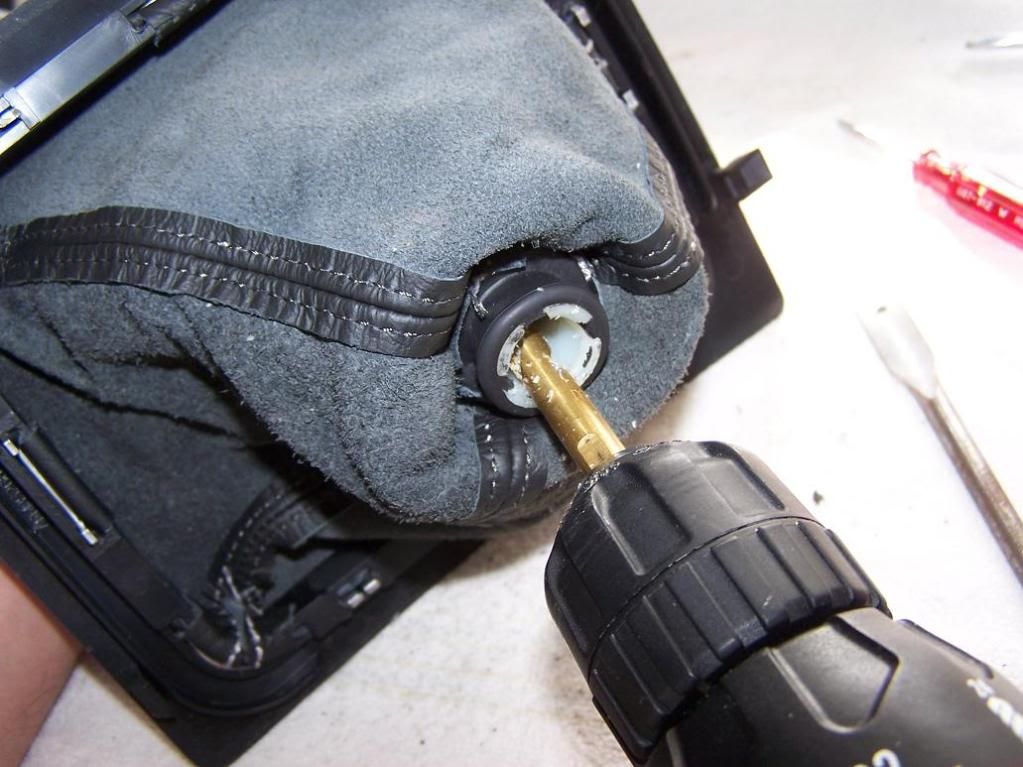
We'll start with removing the shaft that comes attached to the bottom of the ****.
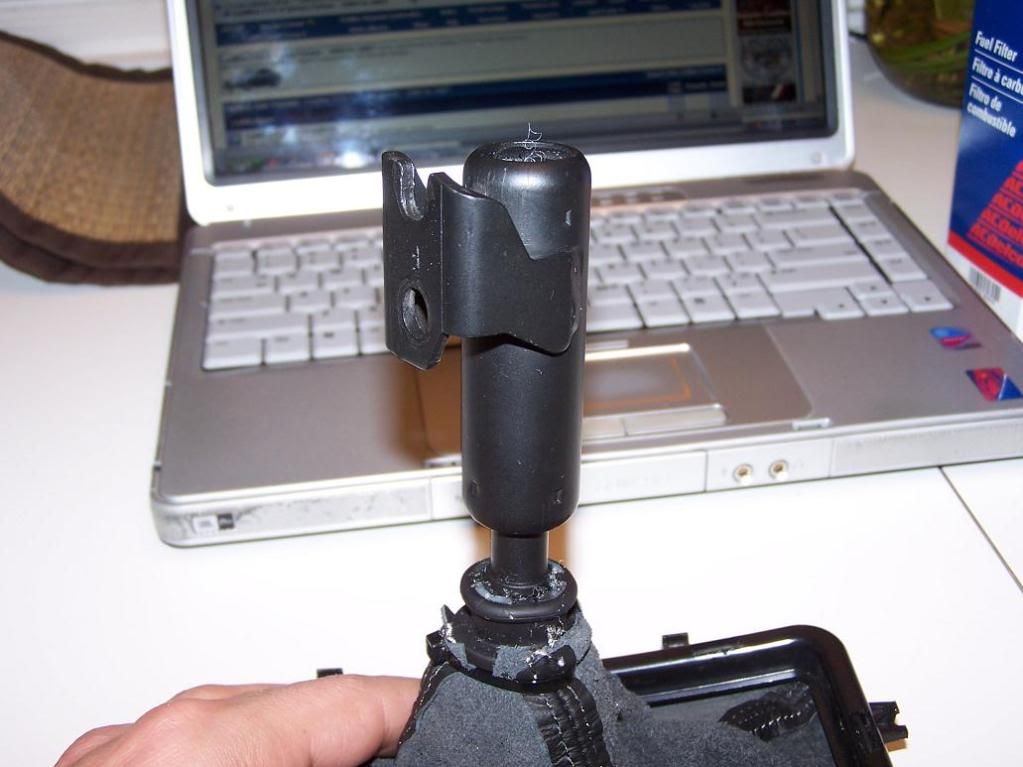
My best friends throughout this mod were these baby sized screwdrivers. I pulled and pulled at this shaft, but it didn't want to budge. It is held on by 4 retaining edges of white plastic. I stuck 3 of these baby screwdrivers in between the shaft and the clips, and the shaft pulled right out with barely any effort.
.
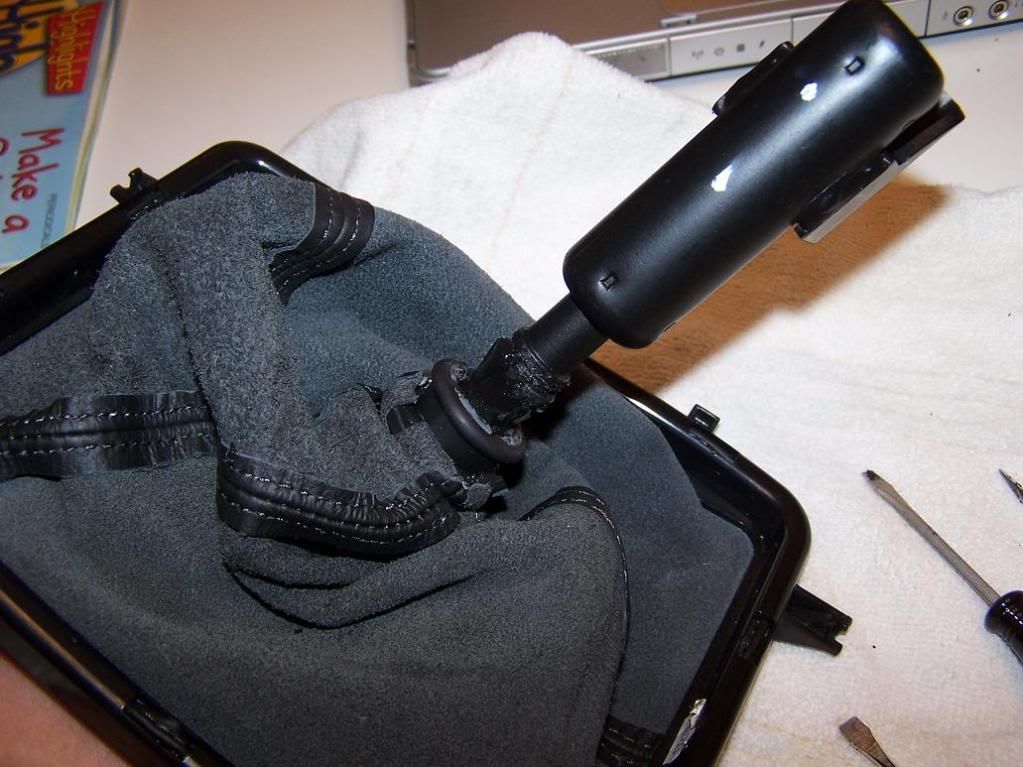
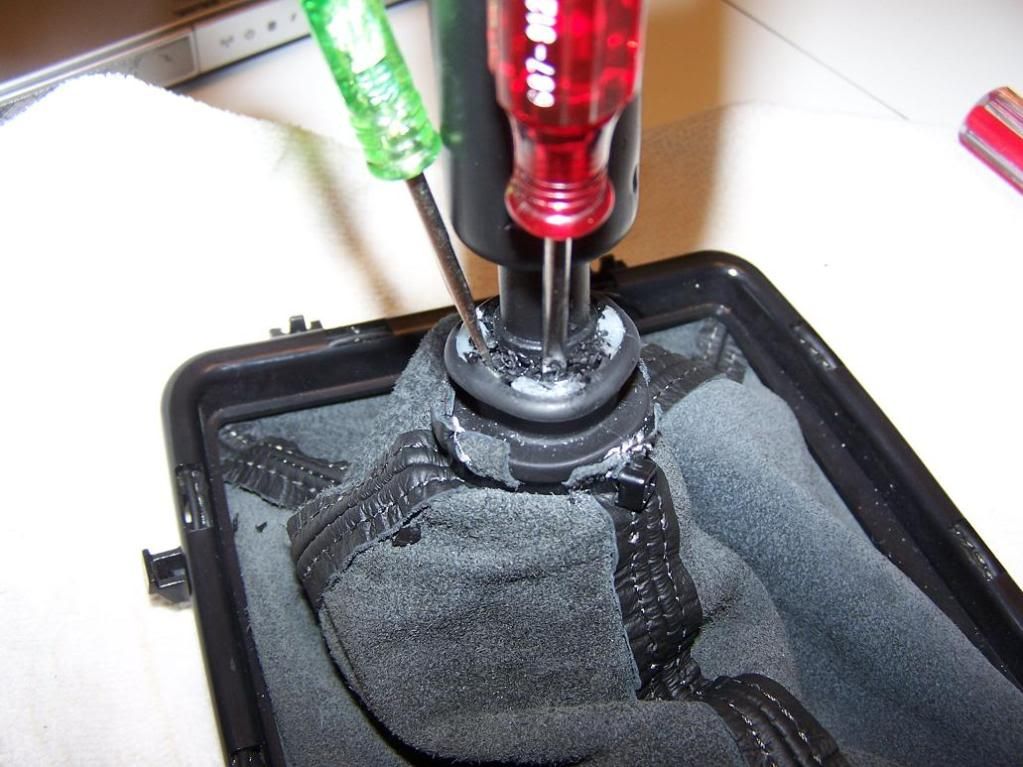
Next you'll have to remove the plastic trim that is attached to the base of the new shifter boot. Here is what is holding it on, and once again, I used baby screwdrivers to push the boot out from each spot it was held to the trim.
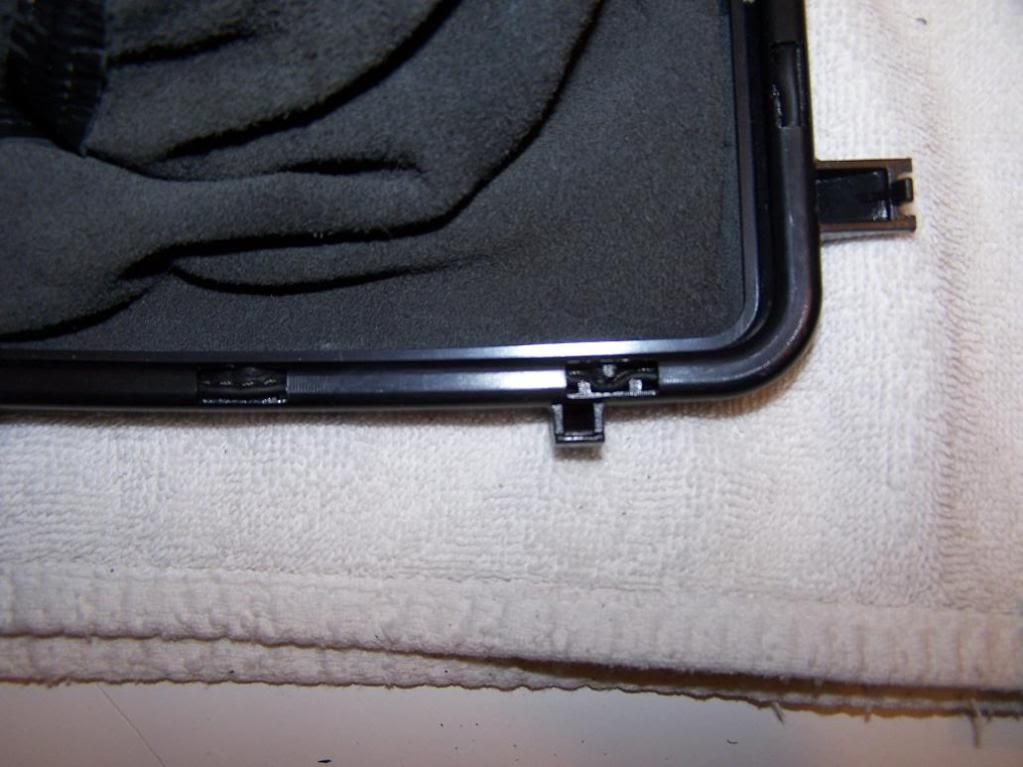
And when you're done...trash the plastic.
.
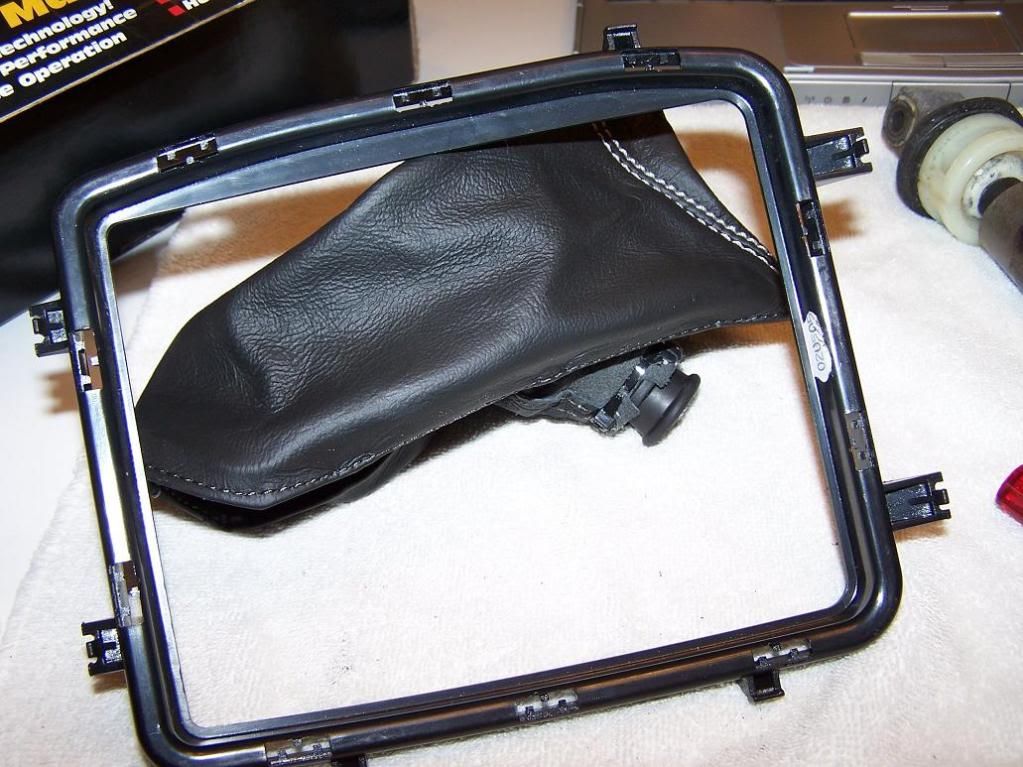
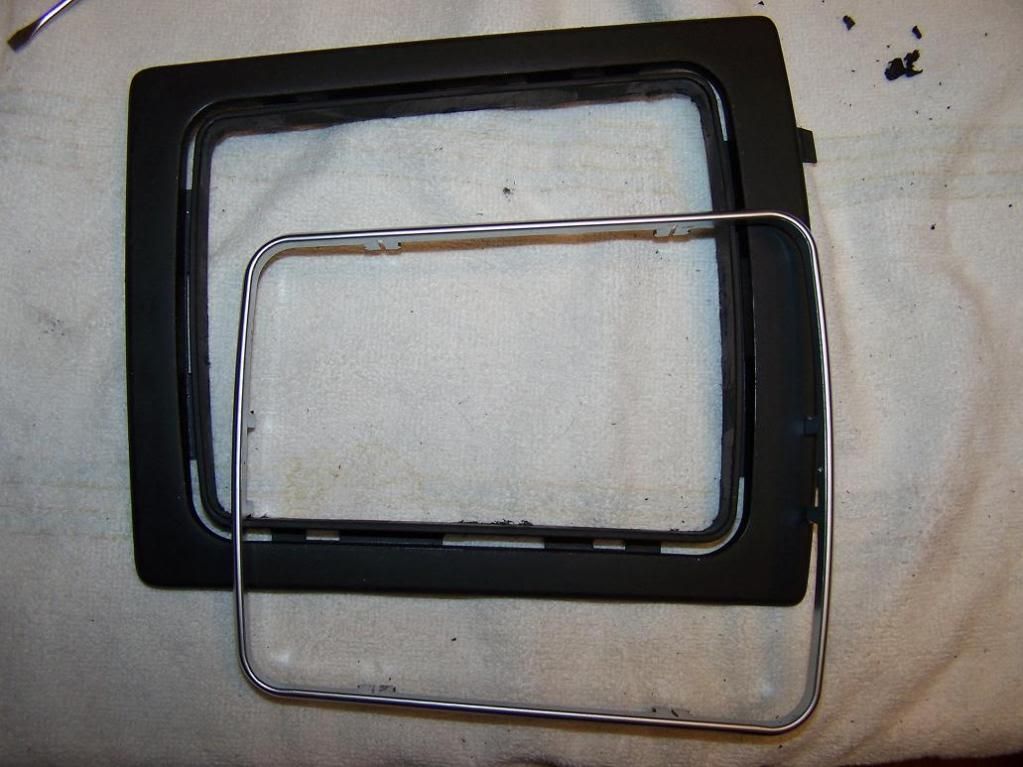
Now you need to remove the stock boot from the plastic trim. From underneath you can just pull the boot off where it is glued, then remove the silver piece that holds it in.
Be careful of the tabs on the trim, I broke one off and had to glue it back on. Super glue held it well enough.
.
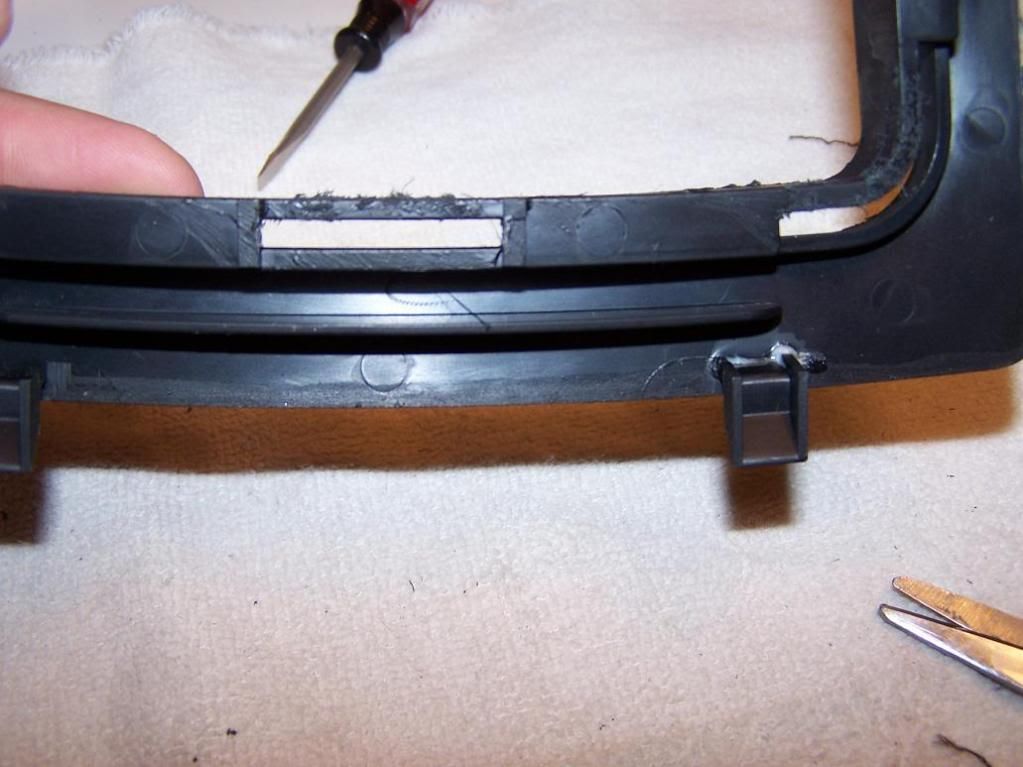
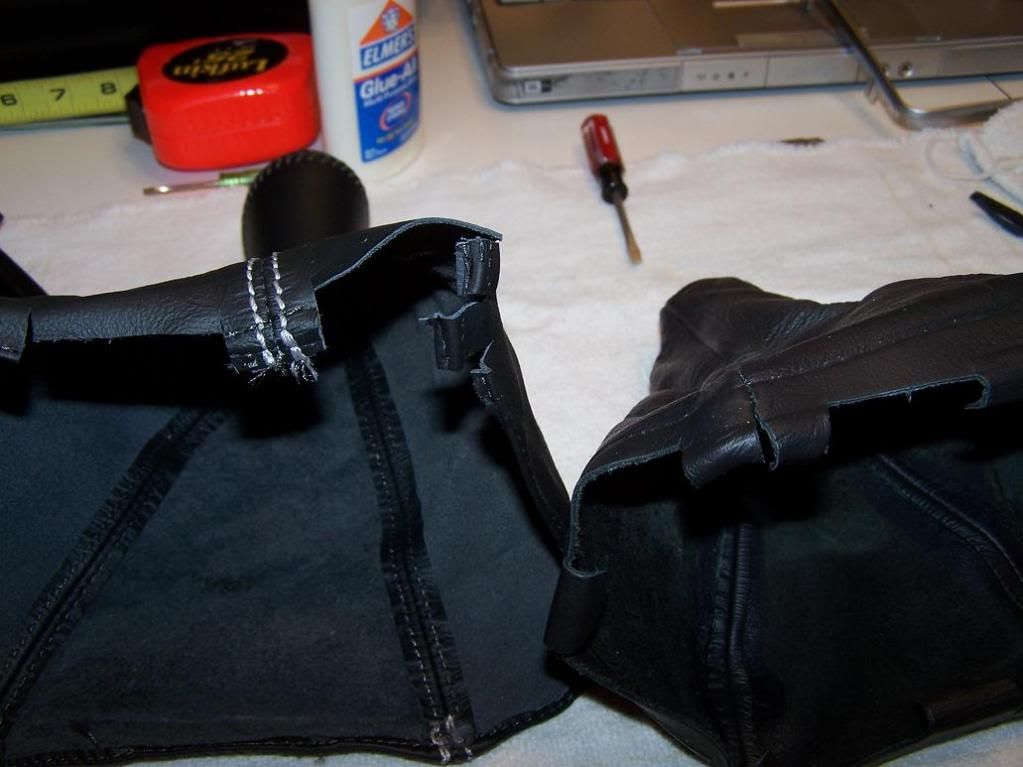
Now you've got to start cutting the new boot in the same way that the stock boot is cut. These tabs are used to fold under the plastic trim piece and are then glued to the plastic to keep it in place.
TO BUY: From Australia:
The company doesn't have an online store so it has to be ordered via email and you can pay with paypal.
http://www.nvu.com.au/products_singl...ge=3§ion=1
My contact was Chris Milis: cmilis@motorfield.com.au
It cost $110 AUD shipped, which was about $71 US at the time I ordered.
Here is what you are looking to get:
.
Here are some pics next to the stock shift ****:
.
.
.
TO INSTALL:
Set aside an hour or two to do this.
We'll start with removing the shaft that comes attached to the bottom of the ****.
My best friends throughout this mod were these baby sized screwdrivers. I pulled and pulled at this shaft, but it didn't want to budge. It is held on by 4 retaining edges of white plastic. I stuck 3 of these baby screwdrivers in between the shaft and the clips, and the shaft pulled right out with barely any effort.
.
Next you'll have to remove the plastic trim that is attached to the base of the new shifter boot. Here is what is holding it on, and once again, I used baby screwdrivers to push the boot out from each spot it was held to the trim.
And when you're done...trash the plastic.
.
Now you need to remove the stock boot from the plastic trim. From underneath you can just pull the boot off where it is glued, then remove the silver piece that holds it in.
Be careful of the tabs on the trim, I broke one off and had to glue it back on. Super glue held it well enough.
.
Now you've got to start cutting the new boot in the same way that the stock boot is cut. These tabs are used to fold under the plastic trim piece and are then glued to the plastic to keep it in place.
03-14-2009 | 06:07 PM
#2
Thread Starter
TECH Fanatic
iTrader: (1)
Joined: Jan 2008
Posts: 1,249
Likes: 0
From: West Chester, PA
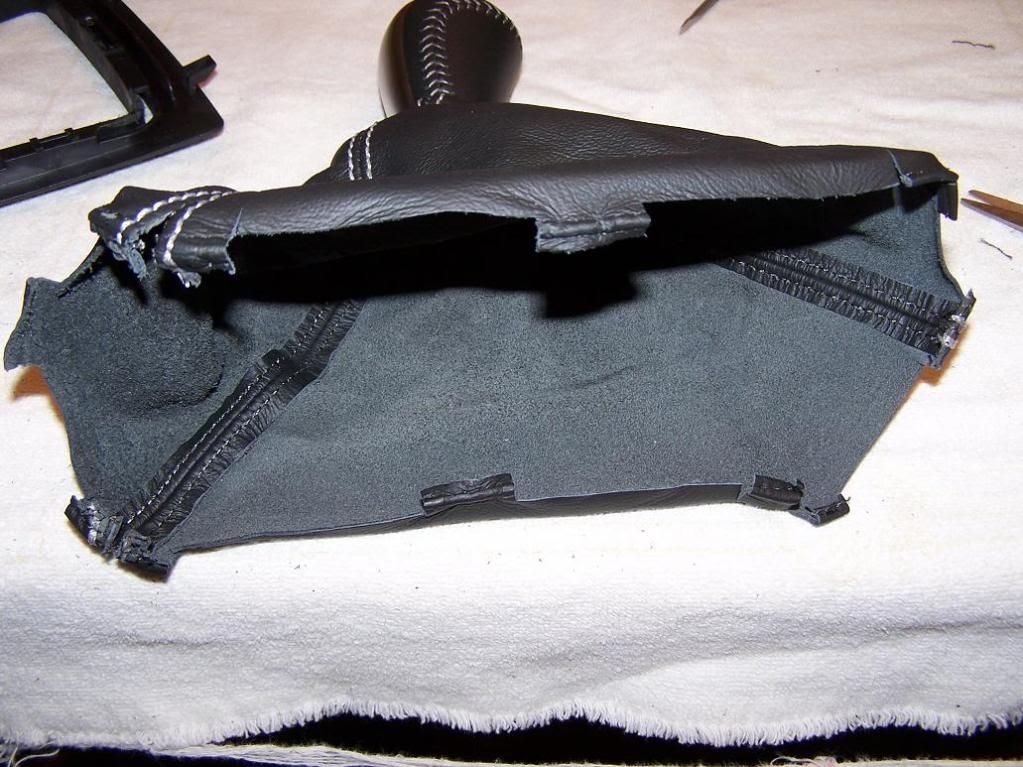
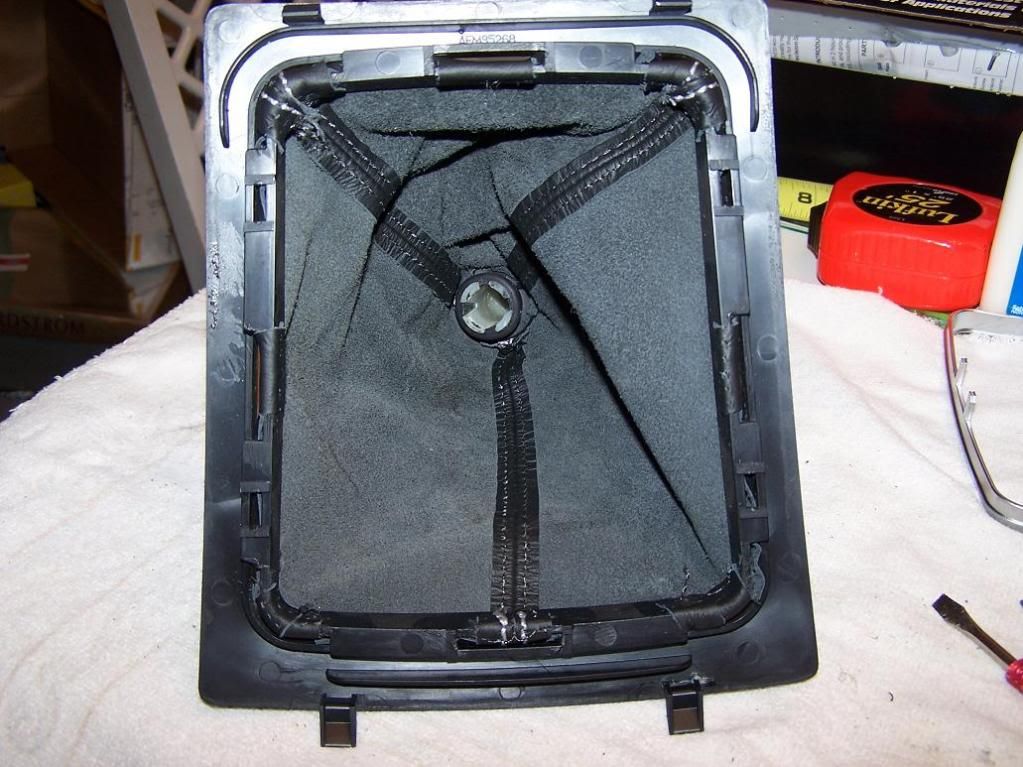
Here is the new boot all cut and ready to go:
The **** needs to be drilling/bored out a bit to accomodate the girth of the V's shifter (stock, B&M, uuc, etc.) I recommend doing the drilling/boring of the new **** before you attach the plastic trim to the new boot.
Stock on top, new **** on bottom:
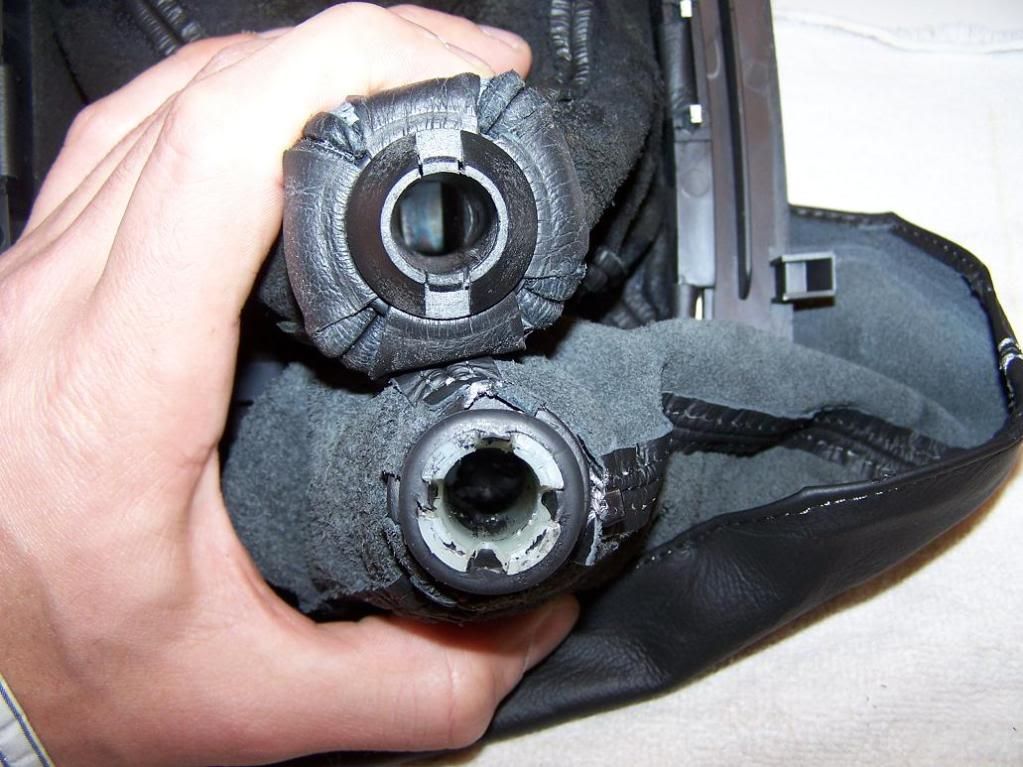
I used a big bit and worked it around inside the **** to remove some of the white plastic.
I measured the depth of the hole in the new shift **** and then used that measurement to mark the V shifter so I knew how far to push it on.
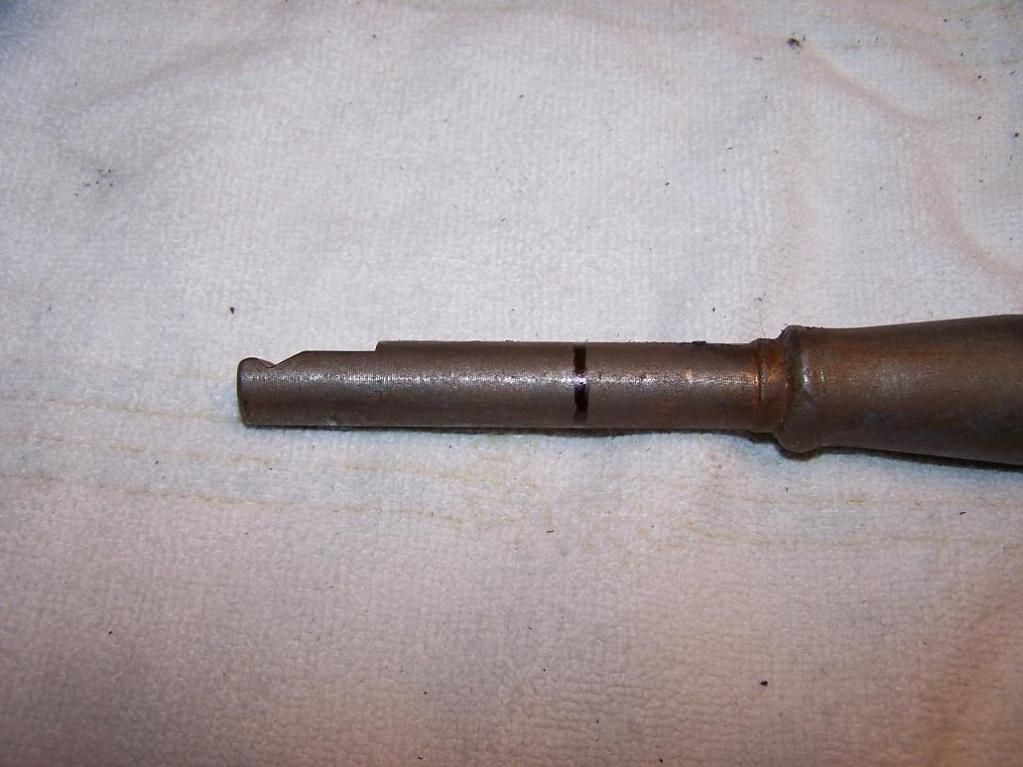
Just keep drilling/boring the hole out with whatever method and tools you have available until you can get the shifter in almost to your marking line. It will take plenty of effort to get it all the way on, but wait until the **** & boot are attached to the plastic trim before you go doing that. It's going to be on real tight so it'll be a pain to get back off.
Time to attach the new boot to the V's plastic trim. Just feed the tabs through the holes, bend them in and around, and put a bit of super glue there to hold them.
The boot has three seams of stitching - the single seam goes toward the front of the car (attach to the WIDER part of the plastic trim), and the double seams will attach to the rear corners of the plastic trim.
Snap the silver piece down over the edges of the boot and voila:
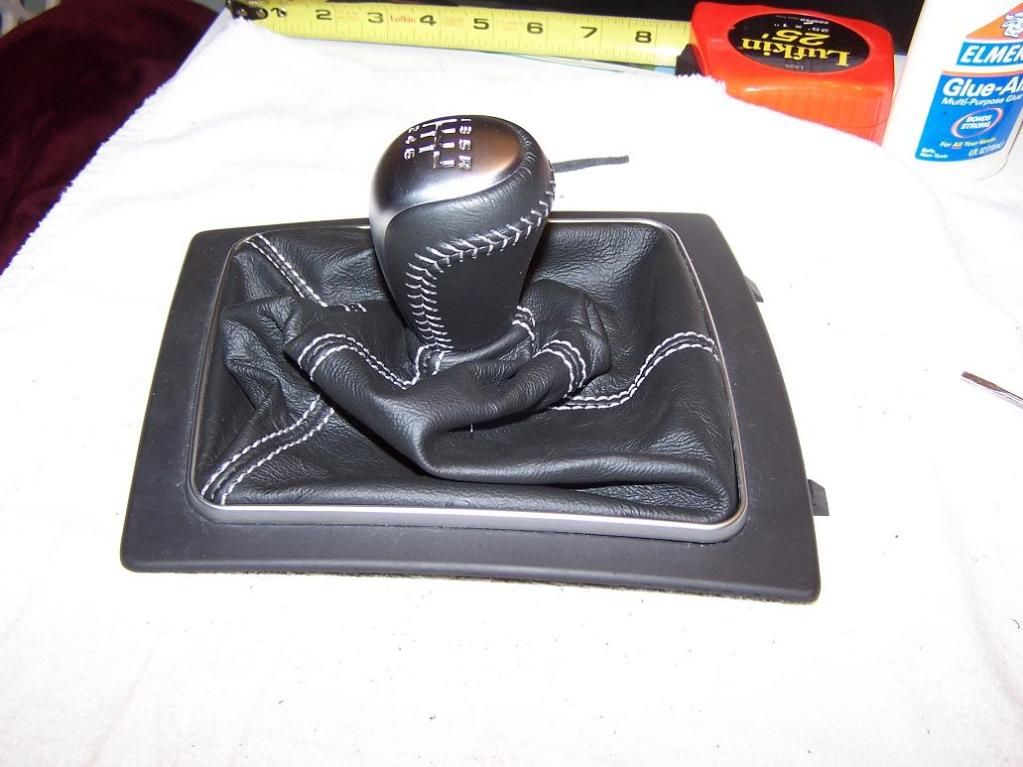
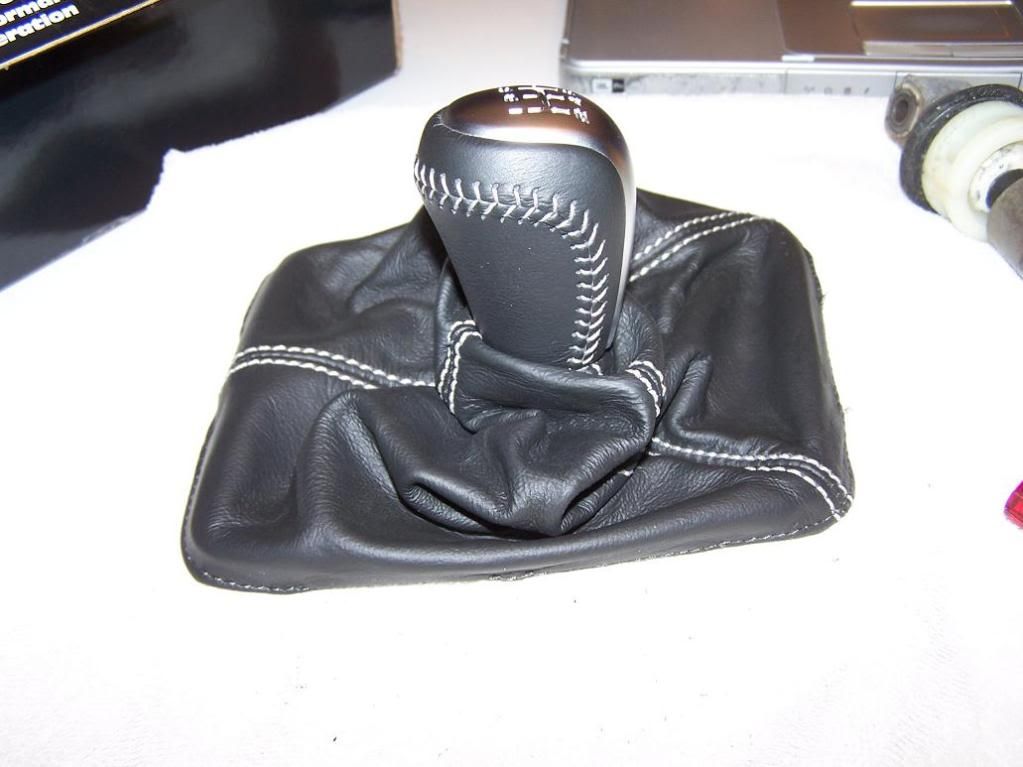
Final Product:
Overall, I'm VERY happy with the weight, feel, and look of the ****. Get yours today!
The **** needs to be drilling/bored out a bit to accomodate the girth of the V's shifter (stock, B&M, uuc, etc.) I recommend doing the drilling/boring of the new **** before you attach the plastic trim to the new boot.
Stock on top, new **** on bottom:
I used a big bit and worked it around inside the **** to remove some of the white plastic.
I measured the depth of the hole in the new shift **** and then used that measurement to mark the V shifter so I knew how far to push it on.
Just keep drilling/boring the hole out with whatever method and tools you have available until you can get the shifter in almost to your marking line. It will take plenty of effort to get it all the way on, but wait until the **** & boot are attached to the plastic trim before you go doing that. It's going to be on real tight so it'll be a pain to get back off.
Time to attach the new boot to the V's plastic trim. Just feed the tabs through the holes, bend them in and around, and put a bit of super glue there to hold them.
The boot has three seams of stitching - the single seam goes toward the front of the car (attach to the WIDER part of the plastic trim), and the double seams will attach to the rear corners of the plastic trim.
Snap the silver piece down over the edges of the boot and voila:
Final Product:
Overall, I'm VERY happy with the weight, feel, and look of the ****. Get yours today!


Trending Topics
03-17-2009 | 10:02 PM
#10
Thread Starter
TECH Fanatic
iTrader: (1)
Joined: Jan 2008
Posts: 1,249
Likes: 0
From: West Chester, PA
I ordered the shifter on a Thursday night (it was Friday morning in Australia) and it arrived at my door in PA on the following Friday.
03-18-2009 | 09:35 AM
#11
 05-22-2009 | 02:55 PM
#14
Thread Starter
TECH Fanatic
iTrader: (1)
Joined: Jan 2008
Posts: 1,249
Likes: 0
From: West Chester, PA
The **** itself is about 3/4" to 1" shorter than the stock one, but since it is shorter, the shifter stalk can't go into the **** as far, so you end up with about the same height. It feels WAY better in my hand and the throws feel better with the little extra weight.
05-22-2009 | 03:12 PM
#15
This was apart of my first mod, B&M shifter. The weight and feel of that **** is what should've been on a $50k+ car like this. The stock setup is an abortion compared to the looks and feel of this setup.
05-22-2009 | 04:36 PM
#17

TECH Fanatic
iTrader: (1)
Joined: Jan 2005
Posts: 1,392
Likes: 0
From: In Front of You/Broward County, FL
The only thing more pathetic on a V other than the glass jaw rear is the cheesy shift ****. I have the ***** metal one from UUC, it is nice, but damn heavy. I should have gone the Monaro route, should have married a stripper, should have went to Med School, should have gone 440ci N/A, should have voted for McCain---JFWY on that last one.
05-22-2009 | 04:44 PM
#18
Thread Starter
TECH Fanatic
iTrader: (1)
Joined: Jan 2008
Posts: 1,249
Likes: 0
From: West Chester, PA
Difficulty = 2
Only because it is kind of a pita drilling out the shift **** to the right size to accept the shifter stalk. I didn't have any better tool to use than a regular drill, but maybe with a dremel tool with an extension it would have been easier.
Oh man! I just looked at today's exchange rates and $110 AUD = $86 US!
That's $15 more expensive than when I bought mine 2 and a half months ago.
05-22-2009 | 07:04 PM
#19
Very nice!!! It sucks that I cant do anything with my car yet because of my son about to be born in about 7 more weeks We are on crunch time with getting everything ready for his arrival.... I for sure will be doing this when I get a chance!!
We are on crunch time with getting everything ready for his arrival.... I for sure will be doing this when I get a chance!!
05-22-2009 | 07:19 PM
#20
Thread Starter
TECH Fanatic
iTrader: (1)
Joined: Jan 2008
Posts: 1,249
Likes: 0
From: West Chester, PA
No, the shifter doesn't have to come out. I used my stock shifter that I had laying around as a tester while I was drilling the new **** out. It made it easier to just sit at a table and work on it instead of being out at the car and climbing in every other minute to see if it fit yet.
