When you click on links to various merchants on this site and make a purchase, this can result in this site earning a commission. Affiliate programs and affiliations include, but are not limited to, the eBay Partner Network.
Oh snap, non issue for me since I have the grey interior V! That is grey on all the cars?
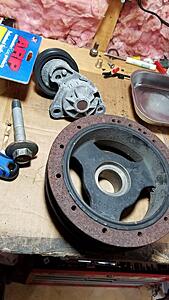
P.S. New ATI super damper rocks. Highly recommend, Would buy again. Here is the old one. Rubber starting to chunk off about 60-90 degrees around the pulley. Tensioner was probably good, pulley was done.
Last edited by kra86; 03-22-2019 at 08:39 AM.
Reason: added image
Refilled with Dex 3 H spec and Ford synthetic 75w140 plus additive for the diff.
Third fill on the trans, 1 tranzilla oil, one Dex 3 h and again Dex 3 h as it shifts the best so far with all the different fluids I've tried including redline and amsoil.
Running the Ford stuff in the 8.8 because it's very quiet compared to amsoil in the diff.
Car is blessedly silent again.
The trans fluid looked the same coming out as it looked going in.
This change the diff fluid looked wayyyyyyyy better than either amsoil fills I've run in it.
-Byron
What did you like about it? Was there a noticeable difference?
Originally Posted by kra86
Oh snap, non issue for me since I have the grey interior V! That is grey on all the cars?
P.S. New ATI super damper rocks. Highly recommend, Would buy again. Here is the old one. Rubber starting to chunk off about 60-90 degrees around the pulley. Tensioner was probably good, pulley was done.
What did you like about it? Was there a noticeable difference?
There was....a huge discernable difference. My OEM damper was slightly wobbly, began to chunk and split. The tensioner was negatively affected, as was the idler pulley and all wobbly. All three components have now been replace. Prior, I have only driven my V for ~12 or 13k miles and i bought the ATI super damper almost immediately and awaited the day for when it would give up the ghost.
The engine is much smoother, more responsive, the driveline lash is quietly adjusted slightly towards a better direction. Clutch engagement and disengagement is more trustworthy and confident. The shifter feels better. I swear I had to find out what else I had done or waht happened. I am using OEM mounts that are not blown up yet and before I had problems with clutch engagement, shifting into some gears was just weird. I purchased a short shifter and have abstained from installing since I really want to see if other parts can be addressed easily, while maintaing as much OEM stuff that I can while not going full ham on replacing everything that brakes or falls into disrepair.
This is on my 2006 V1. All stock besides an electronic tune to remove some of the nanny stuff and kill that throttle blade suppressor device aka the torque limiting program.
ATI super damper demonstrated to me....
-More responsive engine
-Less vibrations, aka Smoother driving experience inside the space where people occupy (this really is a SUPER DAMPER)
-Faster revving up and down engine
-Driveline components feel tighter I really dunno how else to explain this. It feels like the engine and transmission got on the same page finally..... if that makes sense? I have an all stock setup, all original from factory. (I have an LS7 kit waiting)
-Shifter feels better (I had problems getting into 4th and 6th before. Now I do not. Never have had a problem with reverse. Mount for transmission is OEM and in good condition.
Finally put some loctite on my shifter stalk bolts and attempting to put my sunroof **** back on
Has anyone actually done this? I am at a loss on how anyone could loop a piece of fishing line around the spring and housing to get it to compress while putting the **** back on?
1. Place the spring back between the plastic housing and the little white plastic piece.
2. Compress the spring by finger or small flat screwdriver.
3. Have a pre-looped piece of fishing line nearby and place it over the compressed spring/plastic. It is much easier to have another set of hands for this part.
4. Carefully place the **** and it's spring past the retained piece. 5. Cut or break the fishing line at the knot, releasing the spring.
Last edited by BaMaDuDe87; 03-31-2019 at 04:04 PM.
Got new axle inner stubs machined on my Gforce 9" to the new style (old one had tiny leak) , so why I had the diff out I decided to change my cradle bushings over to Creative Steel. It was a major pain in the ***, but that tool they let you rent is really quite slick and made the job so much easier.
My old shifter bushings fell apart (awesome) so I replaced those with CS shifter bushing as well. Changed the trans fluid while I was there.
Put a DW300 fuel pump in since I was running out of fuel too. I might still be high from all the gas fumes
Has anyone actually done this? I am at a loss on how anyone could loop a piece of fishing line around the spring and housing to get it to compress while putting the **** back on?
I wasn't aware the **** could come off, so I'm afraid I'm no help. Only thing I've done is replace that whole ****/switch assembly, which was enough of a pain in the ***.
Originally Posted by Tramminc
Installed front and rear D3 sway bars. Yes it was a royal pain in the ***. have not tested them yet.
Where's you come across those? I didn't think D3 had much of anything for the V1 anymore.
swapped in the creative steel black poly motor mounts and then put in the revshift trans mount insert. while i was under there i swapped out the royal purple trans fluid and went with the redline combo. does anyone else notice that the all poly mount combo transmits much more engine and trans noise into the car or is it just me?
swapped in the creative steel black poly motor mounts and then put in the revshift trans mount insert. while i was under there i swapped out the royal purple trans fluid and went with the redline combo. does anyone else notice that the all poly mount combo transmits much more engine and trans noise into the car or is it just me?
Yes, they do a little since you are going from soft rubber to urethane. Small price to pay for the performance upgrade you are getting though.
swapped in the creative steel black poly motor mounts and then put in the revshift trans mount insert. does anyone else notice that the all poly mount combo transmits much more engine and trans noise into the car or is it just me?
this is why I sent them back and installed OEM wish I could go back to OEM rear cradle bushings
Have ya'll never put polyurethane in a car before? I have used.........
polyu 40a, 60a, 75a, 90a, delrin, solid aluminum, and solid nylon.
Many of them are bone rattling, you feel the engine in your rib cage, but if you dont want the engine to move..... some of them are really good choices.
If you guys want to upgrade over stock, you are going to have to take a compromise. Look at the rockwell hardness scale and inquire from manufacturers about various shores they may or may not be willing to make different ones for you. Most of the time people do not want to mess around with tooling polyu cause it becames a noodly, stringy mess. Pouring in molds is expensive when doing one offs may not be the most profitable way so most companies will simply balk at your request.
Lastly, you can pour your own. Remove the worn mount, replace that with another one if you NEED the car ASAP or pour your own. I have done this before with pretty good success. Just like paint, key to that working is 90% prep work.
KNowning that i am a much older person versus the last time I was fooling around with stiffer engine mounts, I would want something soft and comfy. Because Cadillac. and I am old(er) than previous years.
p.s. New starter solenoid connector installed and replaced the dang starter again..... I had four days with the eletric motor whirring and zero engagement. Other one broke from previous work. The previous starter also was not engaging the flywheel so that was removed and I purchase d abrand new AC Delco unit. My Father used to work for GM from 1964-1977 in the Research Engineer group and he specifically commented the the noise now reminds him very much of how all the Chevy's started back in the day sounded exactly like the AC delco starter that is now installed. Don't use Wilson reman'd starters.
Replaced the front rotors and rear rotors and pads. (I had previously done the brembo pads up front)
I also finally got my suspension almost perfectly dialed in.
Swapped the rear springs for 15k springs and adapters from KW Technical team and set the ride height for exactly 36cm.
The car is now smooth as glass and doesn't jar me like it used to with expansion joints and rumble strips on the highway.
I'm wondering if the slightly taller 16k springs I had previously were somehow making the car sit at 3/8" slightly less up front. I made zero adjustments up front, purely in the rear and now I clear speed bumps I previously would slightly tap my cats on.
Even with the full poly bushings and stiffer springs, it's now officially Cadillac smooth. Previously it was a bit jarring on highway imperfections.
I have not adjusted the bump or rebound settings at all. I pretty much fell into the right settings as I did the simplistic adjustment in the rear of exactly matching the height of the previously installed springs on the bench and I ended up at exactly 360mm ride height measured center of the hub to top of the wheel arch.
I had 3.5 full turns left for safe engagement. I set the car down and after giving it the business and bedding the brakes in on the way home, it's settled slightly to where it is in these pics.
So brakes are now new all the way around, bedded in nicely and the suspension honestly feels better than it ever has.
I'm now ready to add power with the suspension and brakes sorted out.
Hopefully my heads and cam will get delivered soon and I can begin the final phase of modding.
So now 2010 Camaro SS rotors all the way around, stock rear pads and the brembo hp2000 compound pads up front, stainless lines front and rear from agency power. Pedal feel is awesome.
Nice picture from across the highway by my place with the previous stance for comparison. Not a vast visual difference, but the can now has a slight forward rake in it's stance.
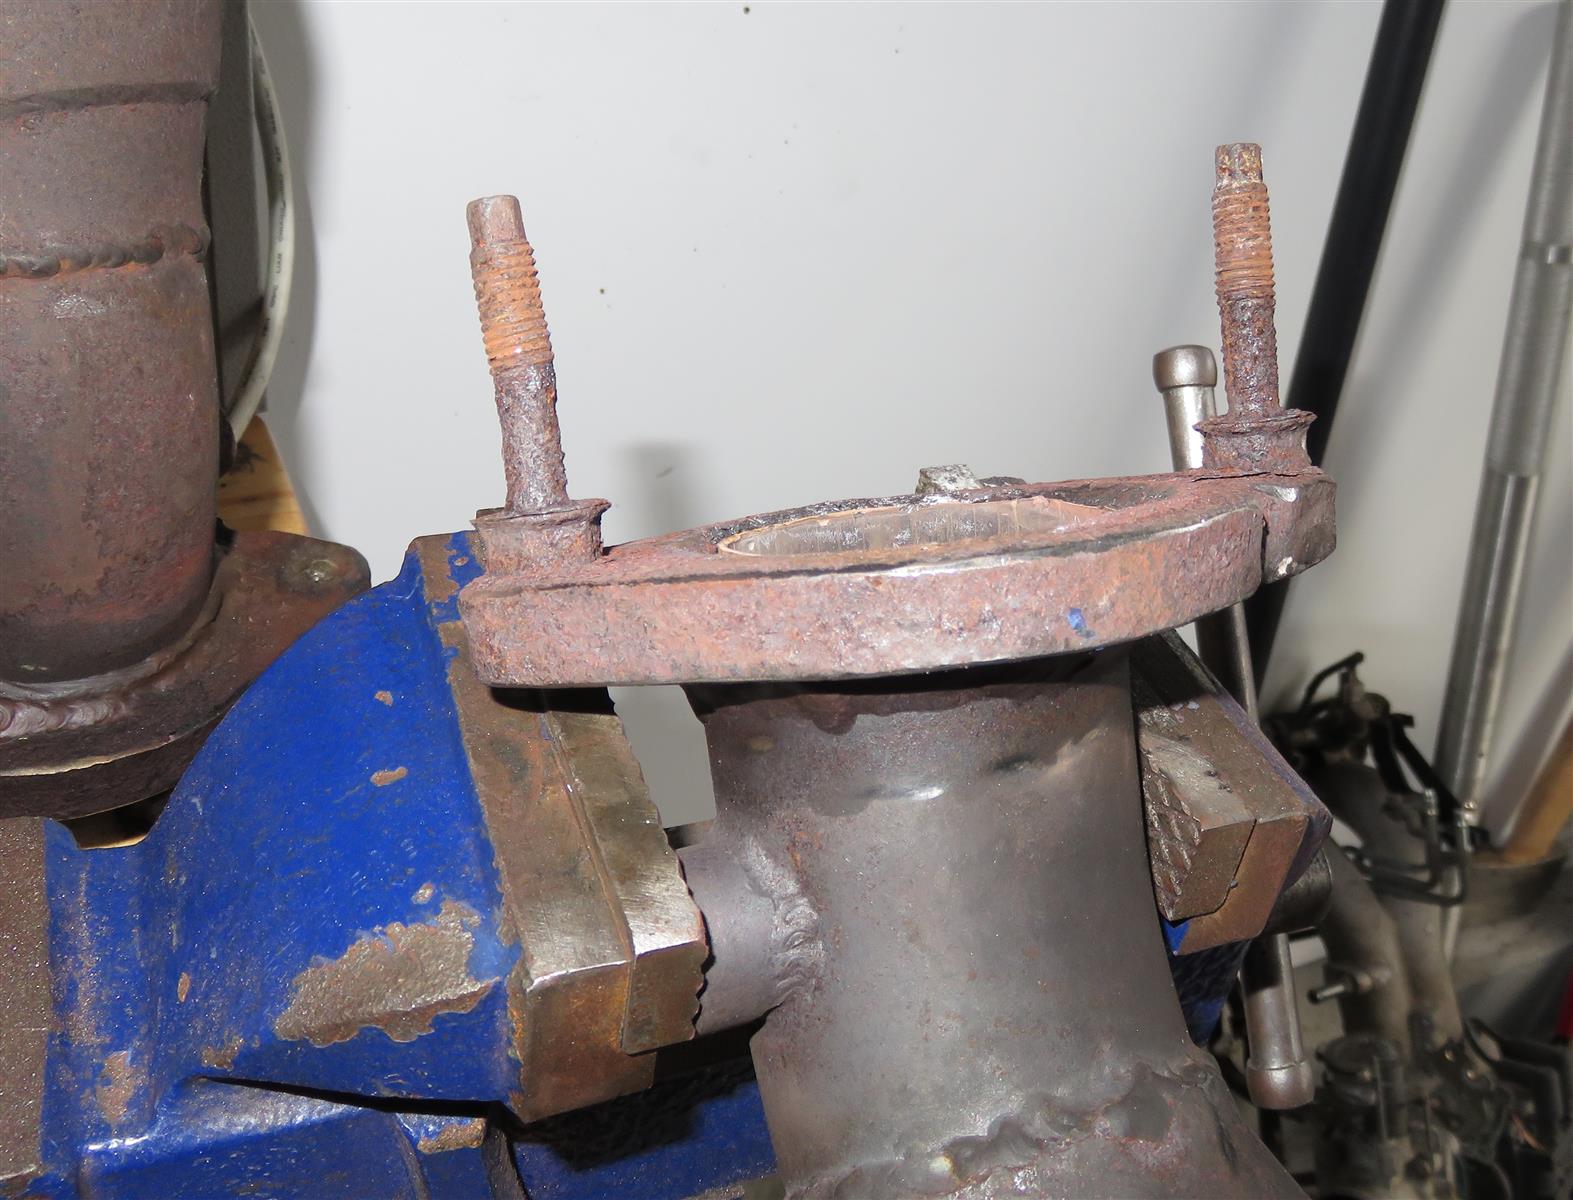
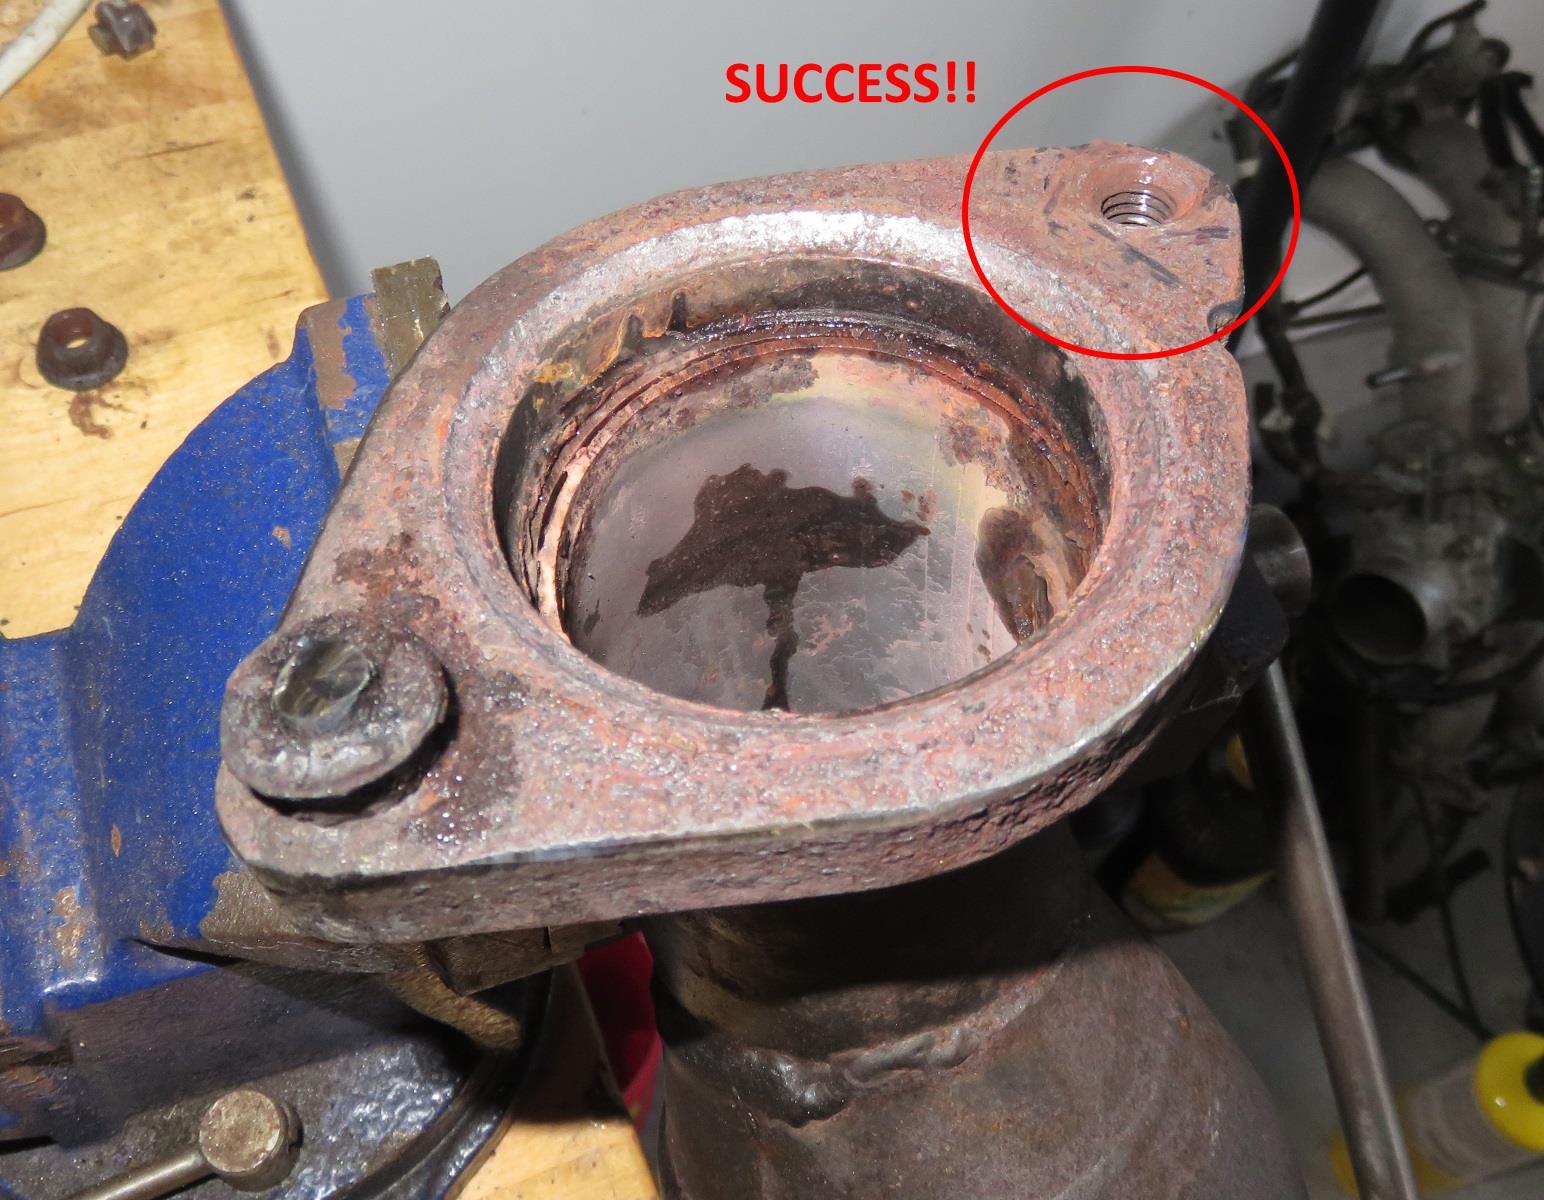
Fought with my cat pipes to remove the downstream studs so I can replace them before getting the headers and cat pipes coated. The studs were very rusty, bent, and the threads were gradually disappearing.
I tried a couple different techniques to get them out of the flanges. Double-nutting the studs to try to remove them didn't accomplish anything - they were rusted in there damn good, and with the threads in such bad shape I don't think they could get the job done. I tried heat, heat and melted wax (youtube suggestion), soaking in PB Blaster for a while, all with no luck. So then I used my angle grinder to lop the studs off so I could get my cordless impact on the nuts that are part of the studs. But the nuts are flanged, so I had to carefully grind off the flanges without screwing up the faces of the nuts, so that the impact socket would go on there. On the first one I tried just using heat before hitting the nuts with the impact, but that didn't work - snapped off both. Bummer. On the good side, they snapped off pretty clean, and below the surface of the flange, so that helps for drilling them out.
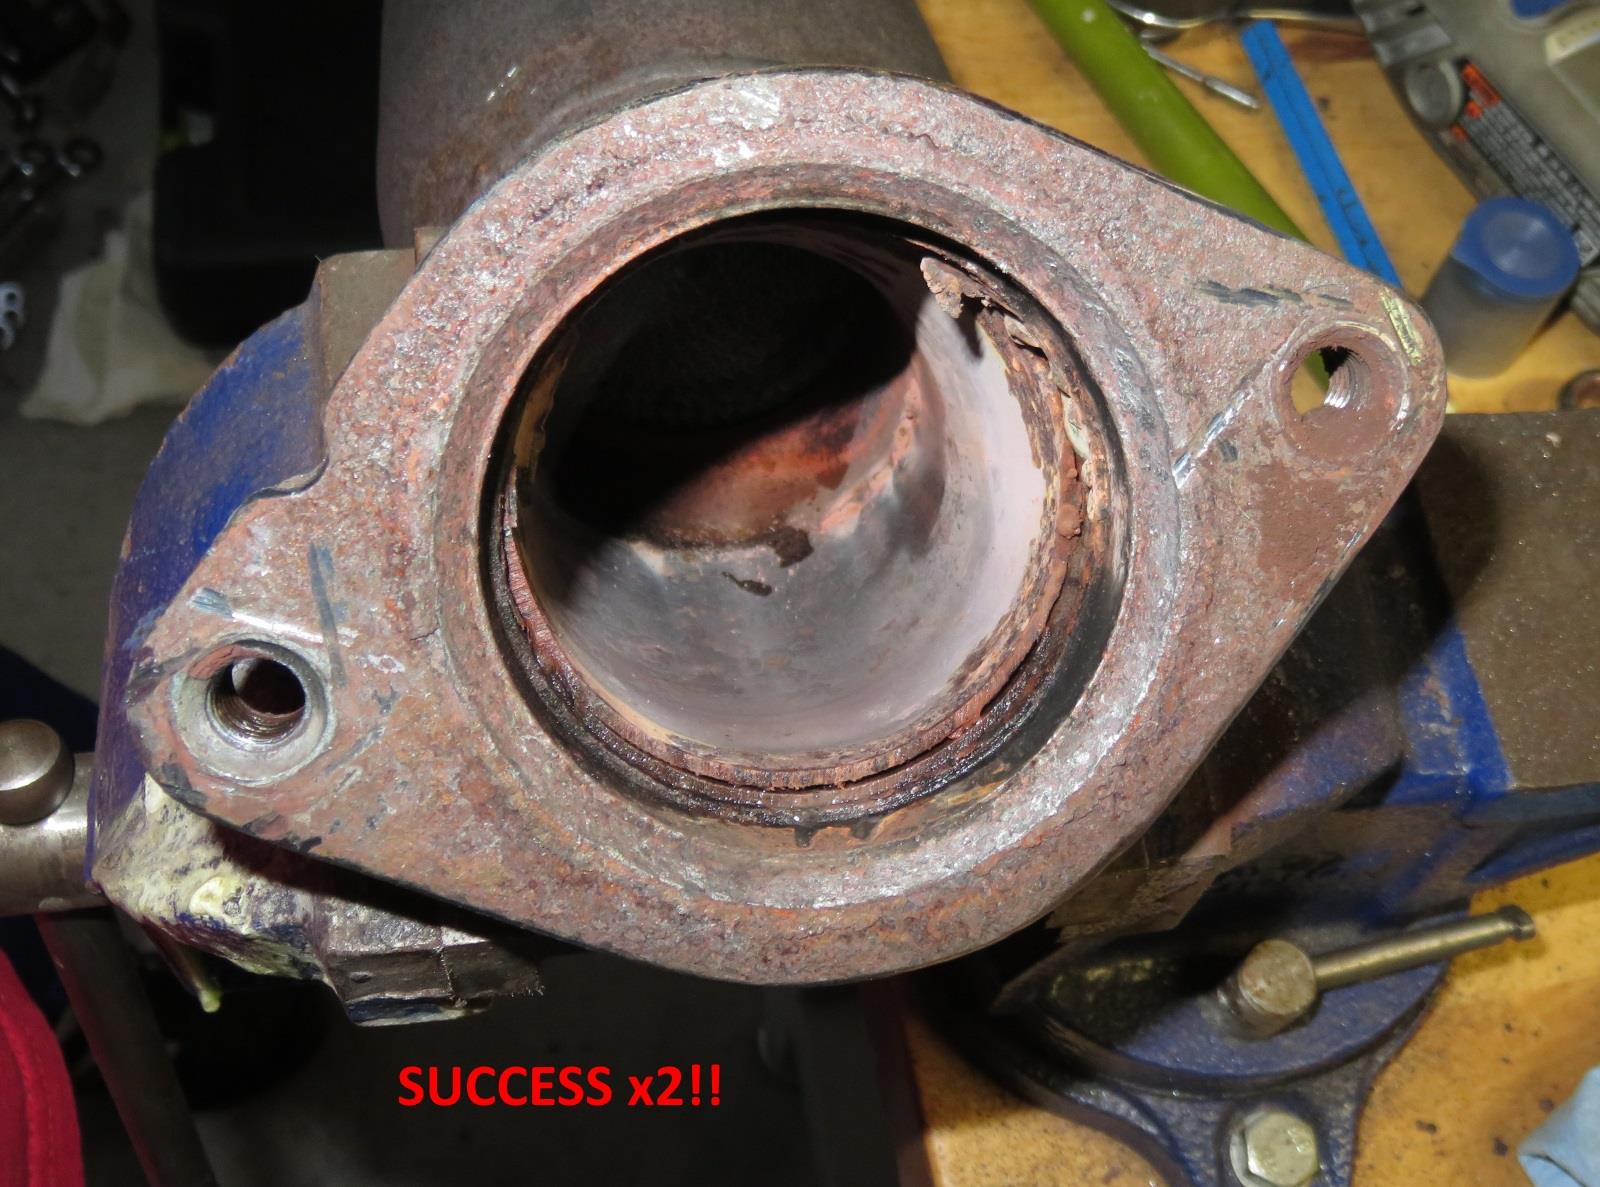
For the other cat pipe, I used another youtube suggestion - heat, then dunk it in water, then hit it with the impact. Success!!
So, was that one just not as rusted in there as the two that I snapped off on the first flange, or did the heat-and-dunk thermal shock actually work? Well, it worked on the last stud, so I think it's legit:
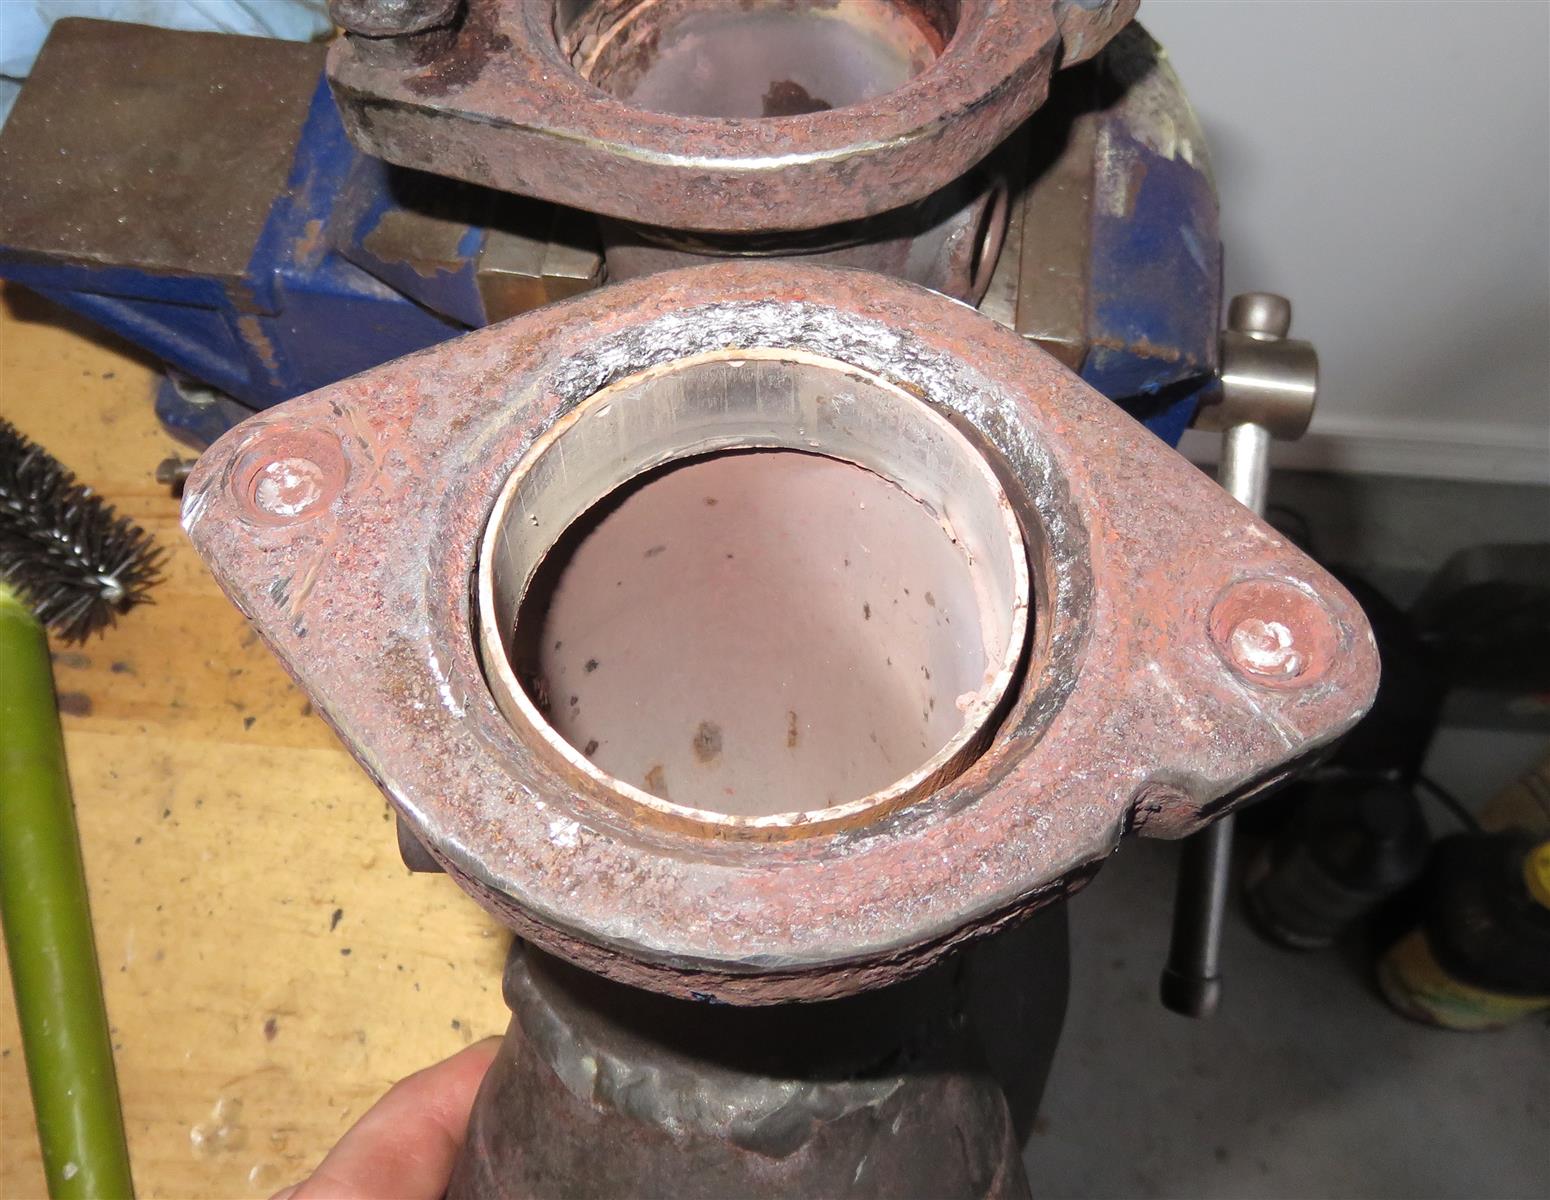
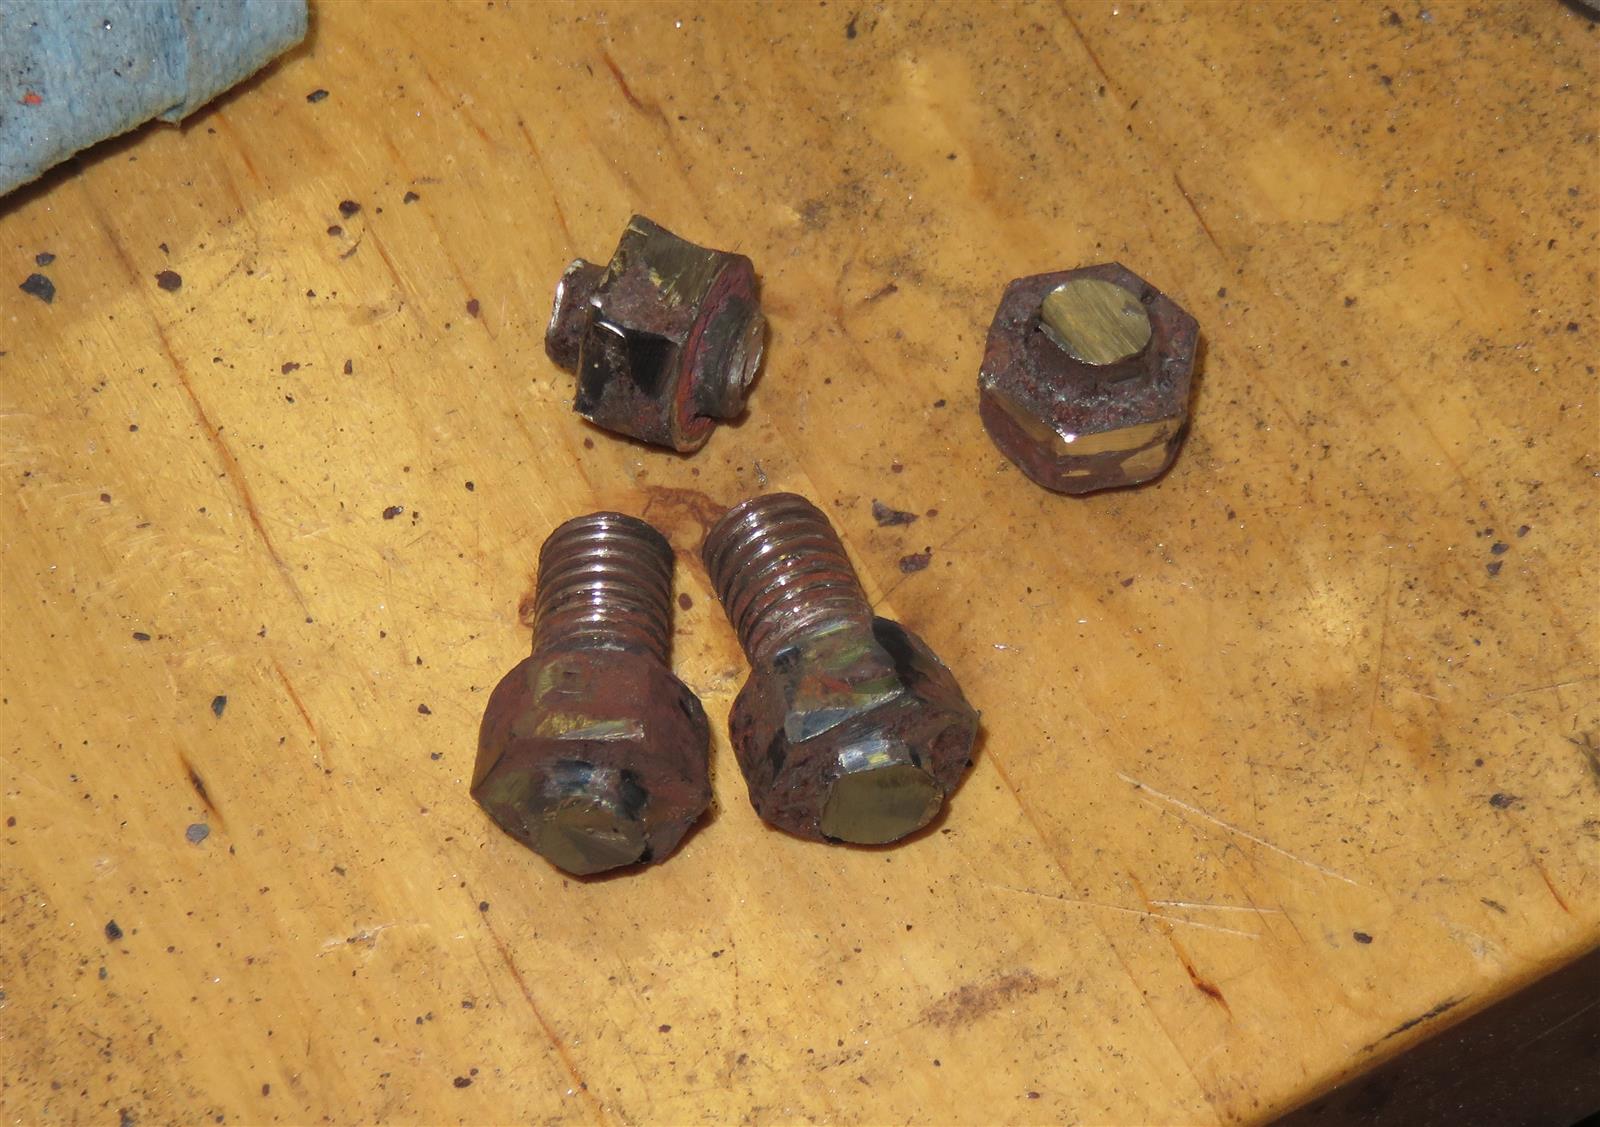
The remains of the studs:
I've made pretty good progress drilling through the snapped off studs - got one drilled pretty clean through the center, the other is a little bit off. I got up to a 1/4" bit and tried using an EZ-out with no joy. I'm always wary of trying too much torque with those, having snapped them off on more than one occasion (thereby making the situation worse). At this point I think I'm just going to buy a 10mm-1.5 tap and redo the threads in that flange.
AAIIIC...mind me asking where you are getting your headers coated? I am planning on mine done within the next couple of months as well, feel free to shoot me a DM with the info.

 03-22-2019, 08:17 AM


 Because Cadillac. and I am old(er) than previous years.