
What did you do to your V today?
 10-05-2019, 04:27 PM
#2621
TECH Addict
iTrader: (19)
Join Date: Aug 2007
Location: Where the Navy tells me to go
Posts: 2,407
Received 107 Likes
on
89 Posts

- Finally finished checking pushrod length and got some shorter ones on order.
- Reinstalled the battery tray.
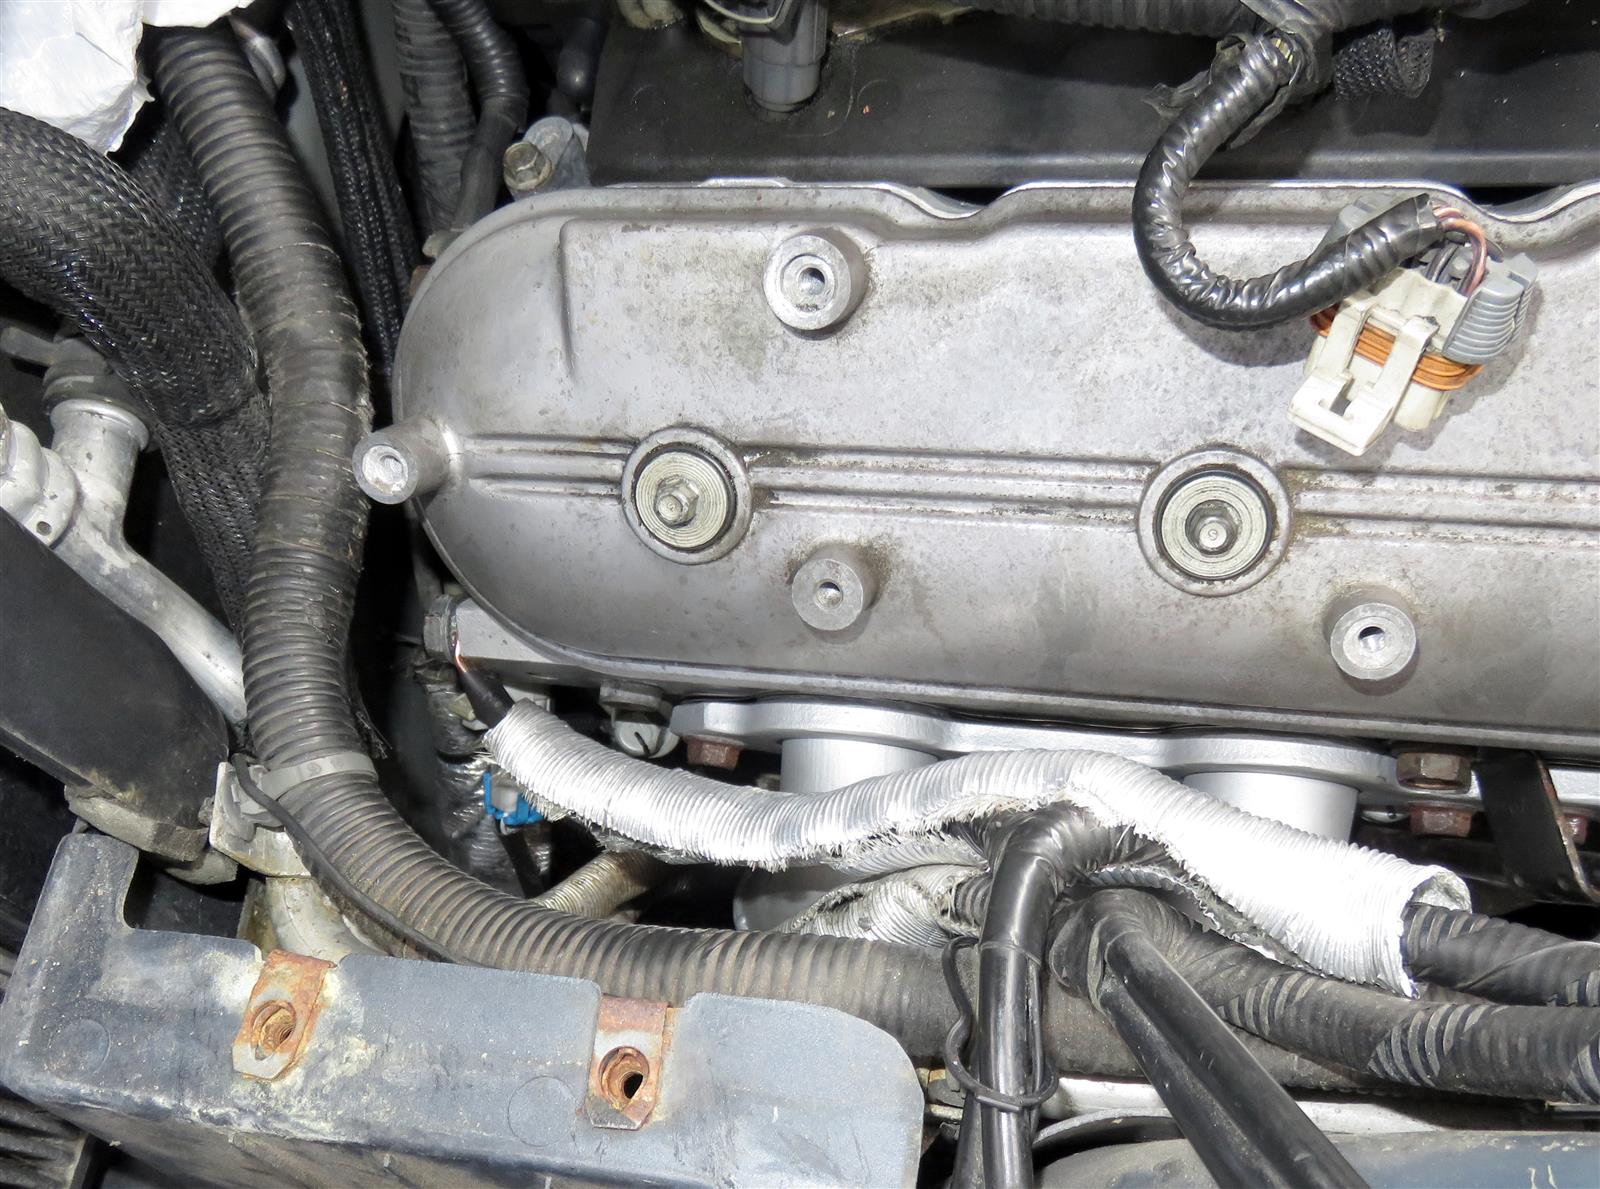
- In doing that, realized I had never connected the main ground cable to the back of the passenger head. When I had disassembled things, I had found that where the cable attaches to the head the shrink-wrap / insulation had pulled back a bit, allowing the copper to get corroded.
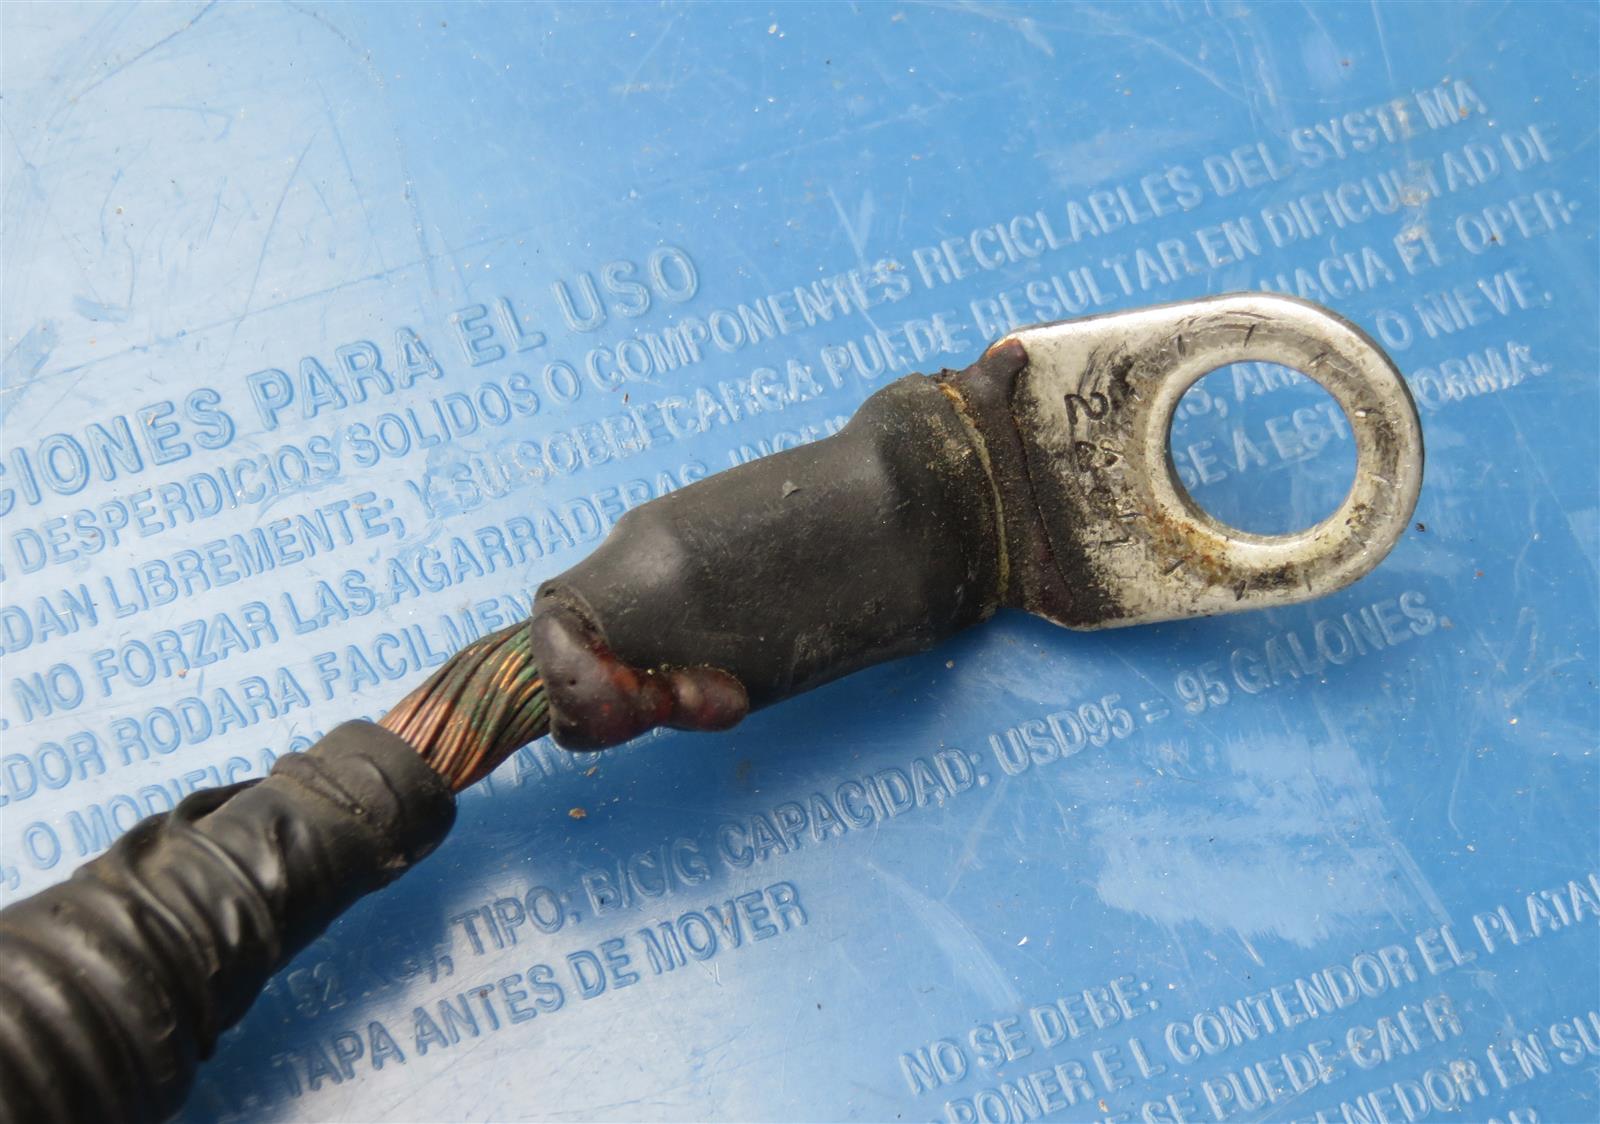
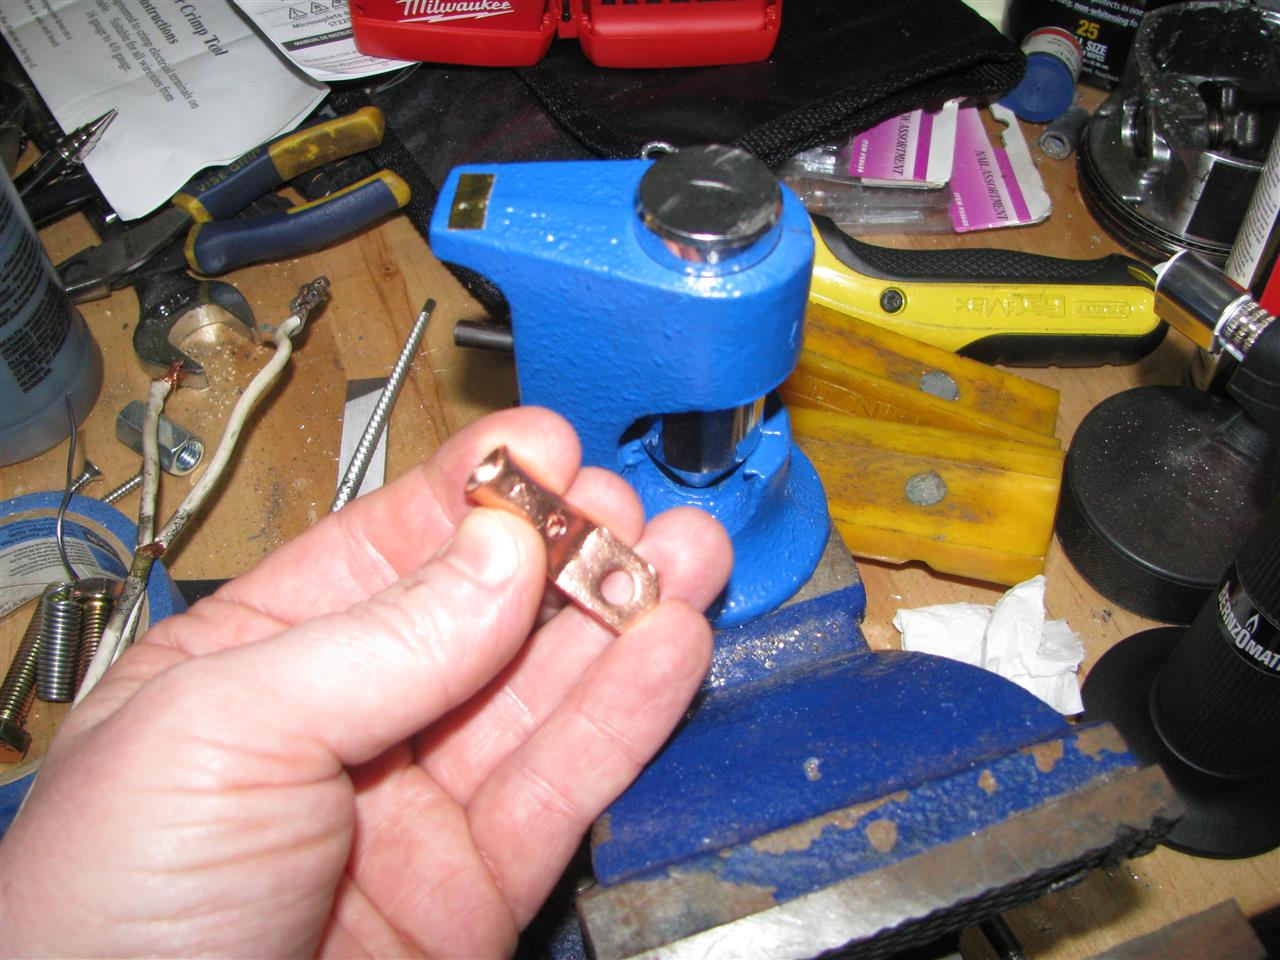
Of course, the negative battery cable is no longer available from GM. I decided there's enough play in the cable that I could cut off the terminal and put a new one on there. I have some crimp-on brass terminals and a hammer crimper. I drill a small hole in the terminal, so after I crimp it I can melt a bunch of solder in there, then shrink-wrap it.
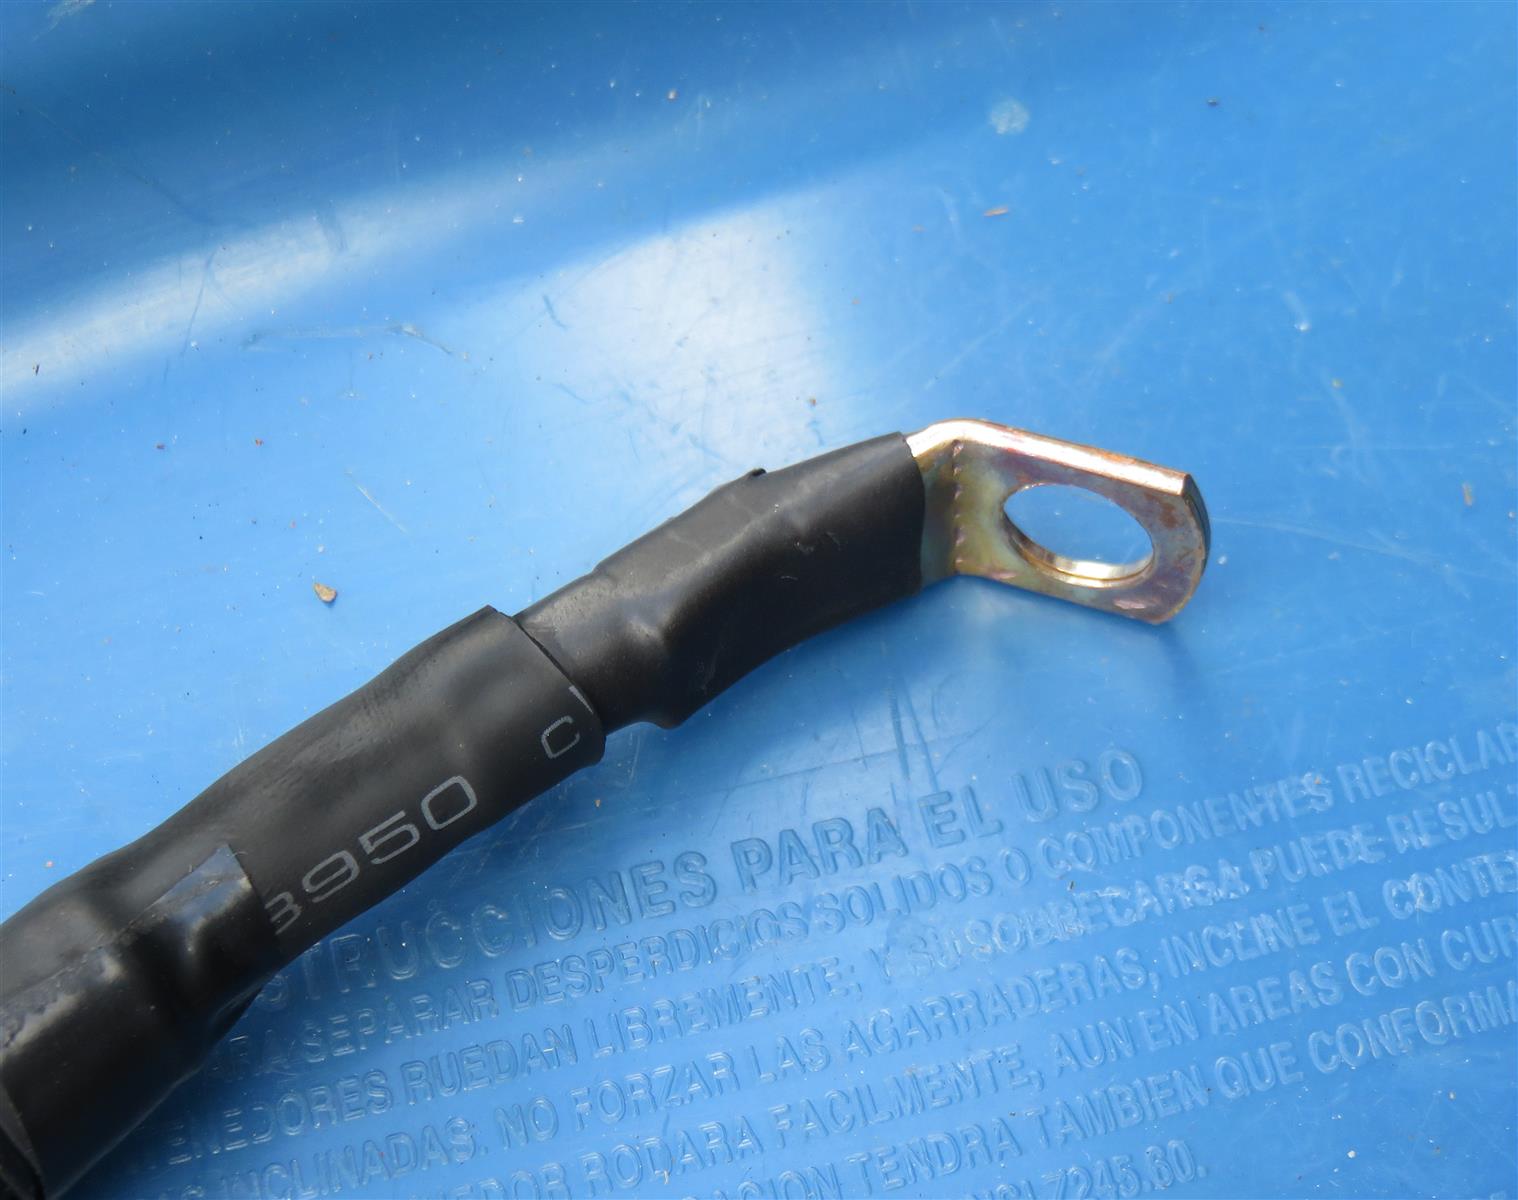
It's a bit of a tighter fit to the negative terminal on the battery than I thought it would be, but it's good to go.
- Reinstalled the battery tray.
- In doing that, realized I had never connected the main ground cable to the back of the passenger head. When I had disassembled things, I had found that where the cable attaches to the head the shrink-wrap / insulation had pulled back a bit, allowing the copper to get corroded.
Of course, the negative battery cable is no longer available from GM. I decided there's enough play in the cable that I could cut off the terminal and put a new one on there. I have some crimp-on brass terminals and a hammer crimper. I drill a small hole in the terminal, so after I crimp it I can melt a bunch of solder in there, then shrink-wrap it.
It's a bit of a tighter fit to the negative terminal on the battery than I thought it would be, but it's good to go.

The following users liked this post:
Byron (10-05-2019)

The following users liked this post:
Byron (10-08-2019)
10-08-2019, 07:39 AM
#2623

sorted out installing some new V badges to replace the faded old ones. Also got a replacement tensioner pulley on which sorted 75% of my whine/squeak on throttle. Damn thing sounded like it had a maggie.
10-08-2019, 08:36 PM
#2625
TECH Addict
iTrader: (19)
Join Date: Aug 2007
Location: Where the Navy tells me to go
Posts: 2,407
Received 107 Likes
on
89 Posts
- Tomorrow I'll reinstall the spark plugs, get the coil packs installed, and install the plug wires. I need to hit Autozone for some PAG oil so I can install a new condenser that's been standing by for months. (New compressor was already installed earlier in this marathon process.) Then I think I'll be able to install the condenser and radiator and fans and work on wrapping things up.
- Oh, and changed the oil in my daily beater '96 Impreza.

The following users liked this post:
Byron (10-08-2019)
10-08-2019, 08:50 PM
#2626

Get her back on the road!!!! I've been the only V at the local car meet
- Received the new pushrods from Summit today, finished installing them in the driveway in the dark about 9:15pm. Valve covers are installed with new seals and shouldn't need to come back off.
- Tomorrow I'll reinstall the spark plugs, get the coil packs installed, and install the plug wires. I need to hit Autozone for some PAG oil so I can install a new condenser that's been standing by for months. (New compressor was already installed earlier in this marathon process.) Then I think I'll be able to install the condenser and radiator and fans and work on wrapping things up.
- Oh, and changed the oil in my daily beater '96 Impreza.
The following users liked this post:
Byron (10-08-2019)
10-08-2019, 11:48 PM
#2627


Finished up wrapping the new to me kooks. Hoping to get them installed this afternoon or tomorrow.
The dei ti wrap is much easier to work with than the eBay ****, and way less itchy. Make sure you use a good set of sharp scissors when you do it.
-Byron
 10-09-2019, 09:47 AM
#2630
That's cool and all regarding the wrap videos, and your welcome to your opinion.
I have had mine wrapped for 2 years previously and never had an issue with it at all. I live in the middle east, its a bit warmer than stateside, so anything to reduce the under hood temps even a little bit is a good thing.
DEI titanium is made from basalt fiber, not fiberglass. Fiberglass wrap is garbage and I agree with you, but the higher end stuff is much better. 1/4" overlap is all you need. I had the Chinese wrap on my previous set of DNA headers, both of which have aged well. You just need to get the higher end wraps, and the cerakote most likely does a good bit of the work also.
I will take the added protection of both the ceramic coating that has been proven, by myself on the same car plus DEI wrap over the top of the kooks.
The problems come when you use cheap fiberglass wrap and plain steel such as with pacesetters, not good quality stainless. And of course you should never wrap titanium exhaust components.
-Byron


 10-09-2019, 05:35 PM
#2633
Not 1:1, but DEI Titanium wrap plus 7 years all-season driving (east coast) = totally rusted through headers.
I don't know where I put the pictures where I removed the wrap, but the welds were almost completely gone.
Attachment 714572
The worst part about wrap is having to replace it every year; over 3-4 years the cost is greater than White Lightning.
I don't know where I put the pictures where I removed the wrap, but the welds were almost completely gone.
Attachment 714572
The worst part about wrap is having to replace it every year; over 3-4 years the cost is greater than White Lightning.
10-09-2019, 11:27 PM
#2634
For the first time in 2 years I cleared every speed bump on my way into work.
Very happy with the fitment compared to the chinasetters/dna motoring/pacesetter.
Car is quieter also, but 90% sure it's the addition of the cats. I'll measure sound levels with my phone from the trunk lid and from quartering angle and see the difference.
Uncatted chinasetters and gmpp/borla was 95 db range
-Byron
10-10-2019, 03:24 PM
#2635
Not 1:1, but DEI Titanium wrap plus 7 years all-season driving (east coast) = totally rusted through headers.
I don't know where I put the pictures where I removed the wrap, but the welds were almost completely gone.

The worst part about wrap is having to replace it every year; over 3-4 years the cost is greater than White Lightning.
I don't know where I put the pictures where I removed the wrap, but the welds were almost completely gone.
The worst part about wrap is having to replace it every year; over 3-4 years the cost is greater than White Lightning.

 10-12-2019, 07:37 AM
#2638
Being here in Abu Dhabi, it's quite humid and was a concern I thought about with the wrap on the headers. It will pass vehicle inspection wrapped and may not unwrapped.
I have 2 inspections to pass, one for the modifications and one for registration. I've not known anyone with wrapped headers who failed, and plenty with unwrapped who did.
The wrap also serves as an additional barrier to the cerakote coating, which is what I wanted. I'll be doing some heat extraction vents at some point to further combat under hood temps in the spring, after the race season here.
Ultimately in my opinion I combined the two methods, coating and wrap to achieve what is a compromise between potential longevity and function.
I was able to get a reasonable quality flyby video with the new setup. It's super mellow now.
It's still plenty loud when you get aggressive with it, but with no resonance of major note in the car, and it's reduced at the tail pipe by 5db with the cats as measured with my unscientific smartphone app.
https://byronsworld.smugmug.com/2006...r9v2/i-cg8K4tL
Sounds absolutely perfect and was better than I was expecting, super happy with the results.
Kooks 1 7/8" into kooks cats and GMPP/borla catback with x pipe. My neighbors are much happier, I clear the speed bumps finally and everything fit perfectly. No complaints about it beyond a clamp or two that rattles a bit.
When I installed the back half, I had to re-tighten after a week or so and it never rattled again after that, so I'll be doing the same with these and reseating the cats on the ball flange slightly on the passenger side.
-Byron
Last edited by Byron; 10-12-2019 at 09:57 PM.
10-14-2019, 06:17 PM
#2639
TECH Addict
iTrader: (19)
Join Date: Aug 2007
Location: Where the Navy tells me to go
Posts: 2,407
Received 107 Likes
on
89 Posts
^^^ That does sound good!
I continue my ridiculously slow restoration of my car. Got the plugs, wires, and coil packs installed a couple days ago. Today I was working on getting the new condenser installed, along with the radiator and fans. Condenser mounting brackets didn't want to line up with the mounts on the radiator. I've been through this same BS with a different condenser on a different radiator - not sure if I just have shitty luck or what, but I definitely can't get all 4 holes to line up, even after hogging out one of the condenser brackets. So, it's going to go on with just 3 bolts and that will be good enough.
So as I was finishing up ******* with the condenser mounting, I realized that like a dumbass I didn't put the belts on before I slid the radiator into position. Out comes the radiator. On goes the A/C belt. Then I remembered that the PS pulley is removed, and I don't have the pulley installer tool. *sigh*
 I'll go get that from Autozone this evening.
Basically, I accomplished jack and **** over the course of a 3-day weekend. Nobody to blame but myself ... well, and my girlfriend.
I continue my ridiculously slow restoration of my car. Got the plugs, wires, and coil packs installed a couple days ago. Today I was working on getting the new condenser installed, along with the radiator and fans. Condenser mounting brackets didn't want to line up with the mounts on the radiator. I've been through this same BS with a different condenser on a different radiator
- not sure if I just have shitty luck or what, but I definitely can't get all 4 holes to line up, even after hogging out one of the condenser brackets. So, it's going to go on with just 3 bolts and that will be good enough.So as I was finishing up ******* with the condenser mounting, I realized that like a dumbass I didn't put the belts on before I slid the radiator into position.
Out comes the radiator. On goes the A/C belt. Then I remembered that the PS pulley is removed, and I don't have the pulley installer tool. *sigh* I'll go get that from Autozone this evening.Basically, I accomplished jack and **** over the course of a 3-day weekend. Nobody to blame but myself ... well, and my girlfriend.
10-15-2019, 10:25 PM
#2640
TECH Addict
iTrader: (19)
Join Date: Aug 2007
Location: Where the Navy tells me to go
Posts: 2,407
Received 107 Likes
on
89 Posts
- Got the PS pump pulley installed. I have a larger Vette pulley on there to slow the pump down a bit, but I guess due to the Vette's different accessory alignment, the pulley has to be recessed onto the pump shaft a little bit.
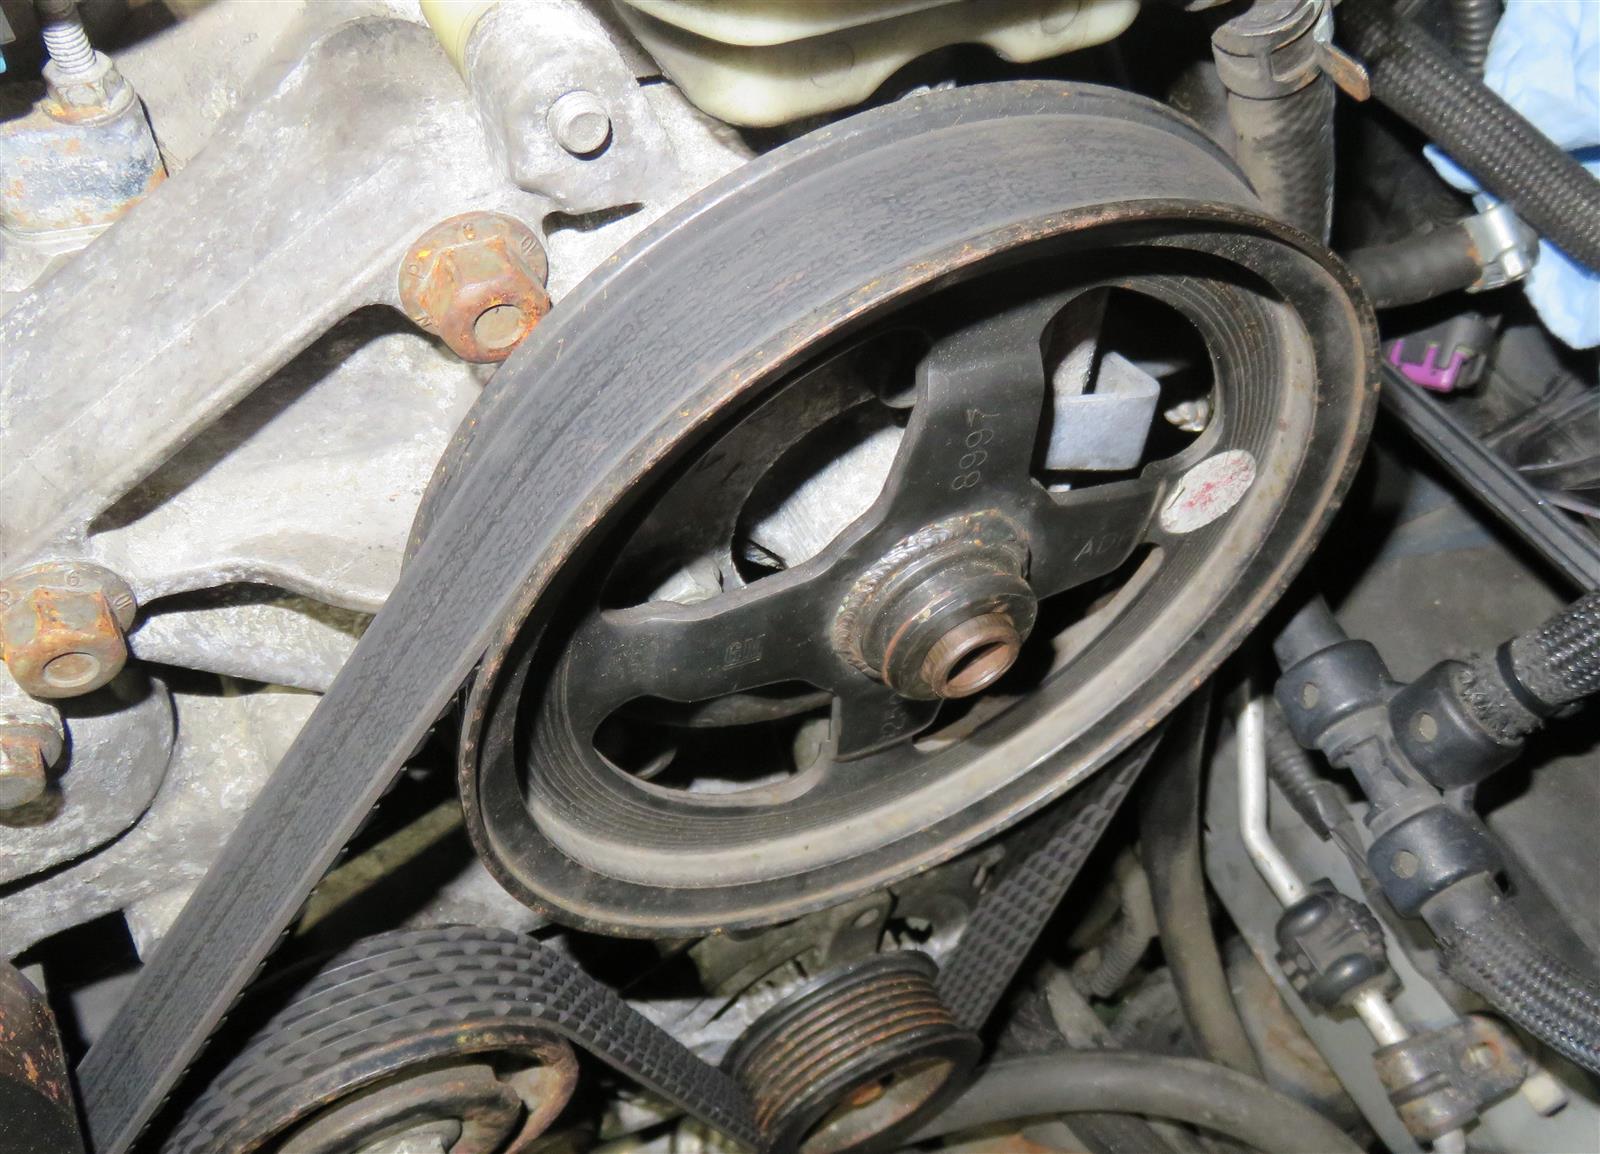
Since the pulley installer will only get the pulley flush with the end of the shaft, I put a 19mm socket on there to push it back the required amount. I used a straight edge to check the pulley alignment vs the alternator pulley.
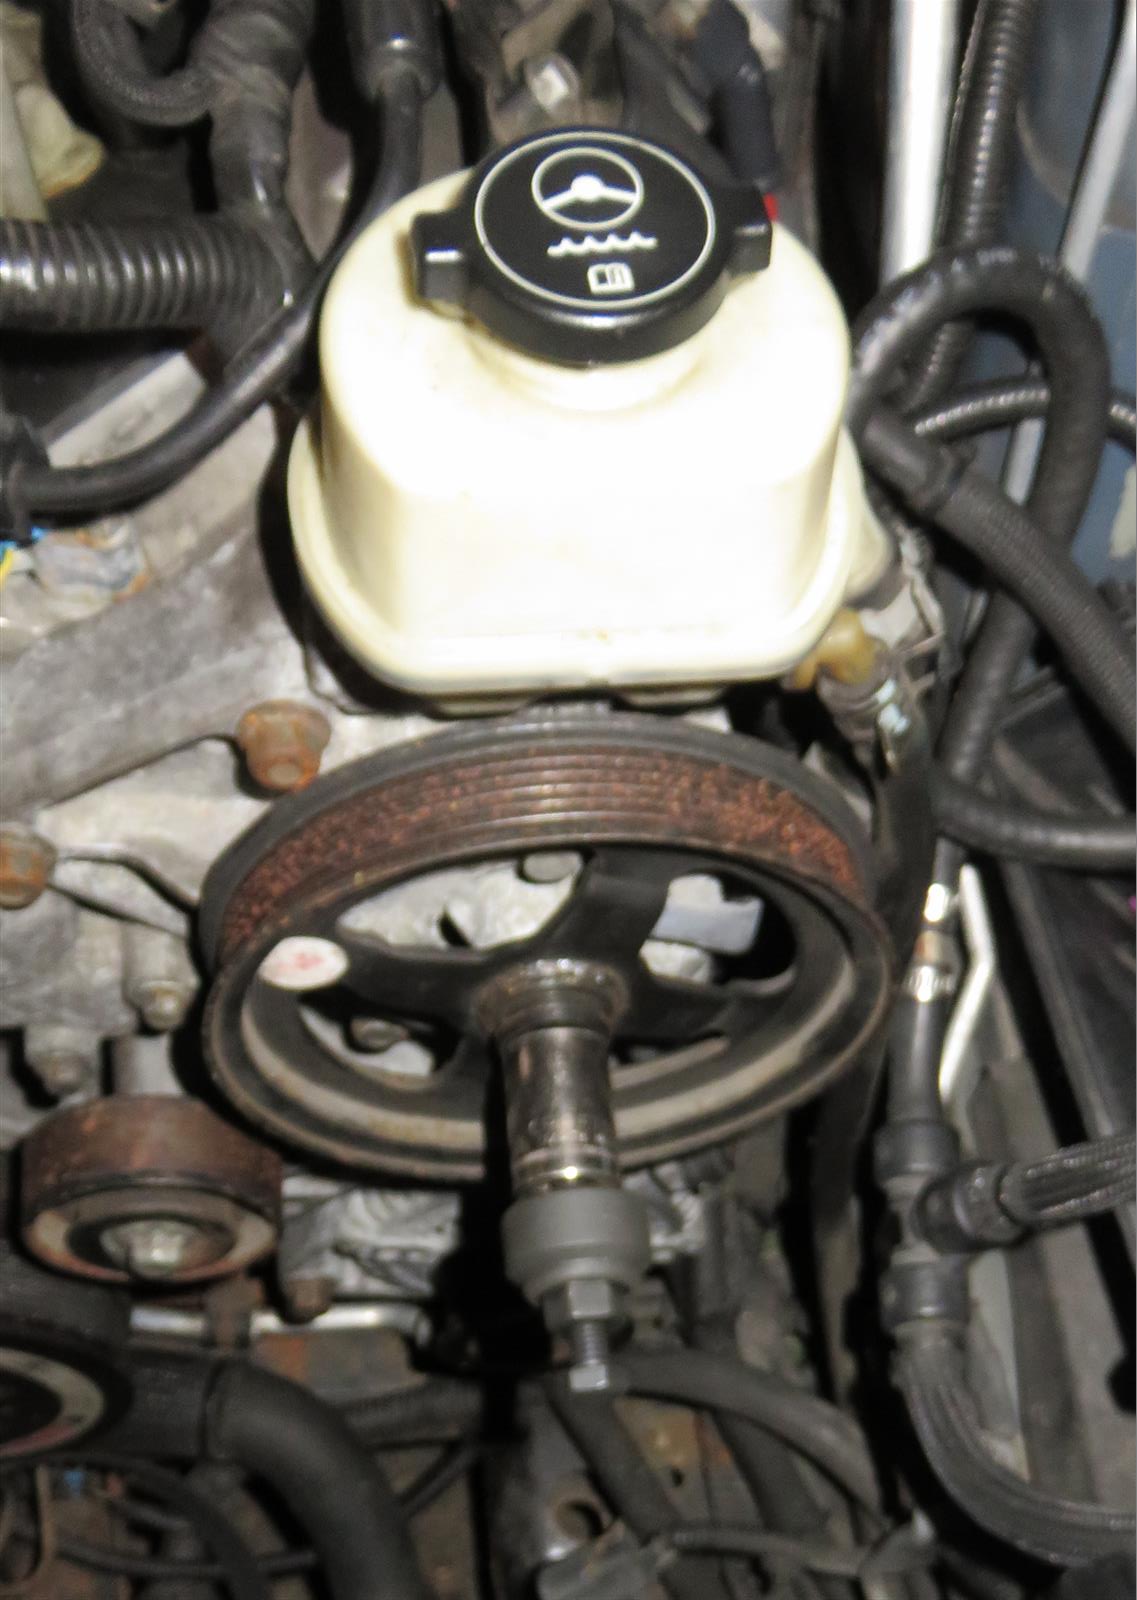
[Note that I had to have the back of the Vette pulley machined to remove the raised section in the center, otherwise the pulley would drag against the pump housing, something I discovered way back in 2010 when I put the pulley on originally.]
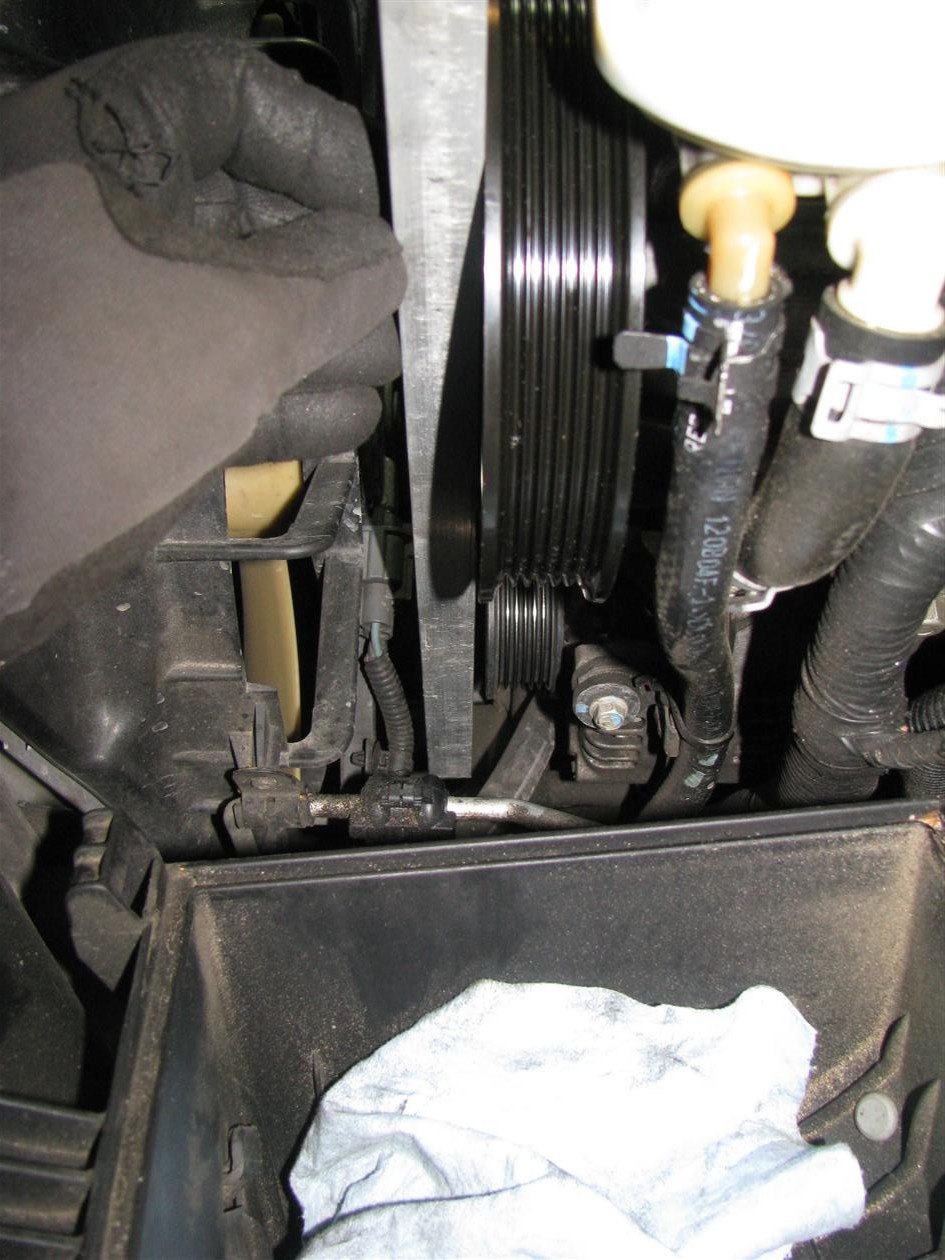
- Installed the serpentine belt.
- Installed the radiator and fans.
- Got the condenser successfully bolted in with all 4 mounts. I ended up getting 3 bolts loosely in place, then put a floor jack under the condenser and gently pushed it up to get the 4th hole to line up. All good now!
Since the pulley installer will only get the pulley flush with the end of the shaft, I put a 19mm socket on there to push it back the required amount. I used a straight edge to check the pulley alignment vs the alternator pulley.
[Note that I had to have the back of the Vette pulley machined to remove the raised section in the center, otherwise the pulley would drag against the pump housing, something I discovered way back in 2010 when I put the pulley on originally.]
- Installed the serpentine belt.
- Installed the radiator and fans.
- Got the condenser successfully bolted in with all 4 mounts. I ended up getting 3 bolts loosely in place, then put a floor jack under the condenser and gently pushed it up to get the 4th hole to line up. All good now!
The following users liked this post:
Byron (10-15-2019)