Sound Proofing/Deadening/Barrier - pics!
 04-10-2015, 11:01 PM
#1
I wanted an even more quiet interior so I decided to sound proof the V. There is a science to it but it's pretty simple (click the links):
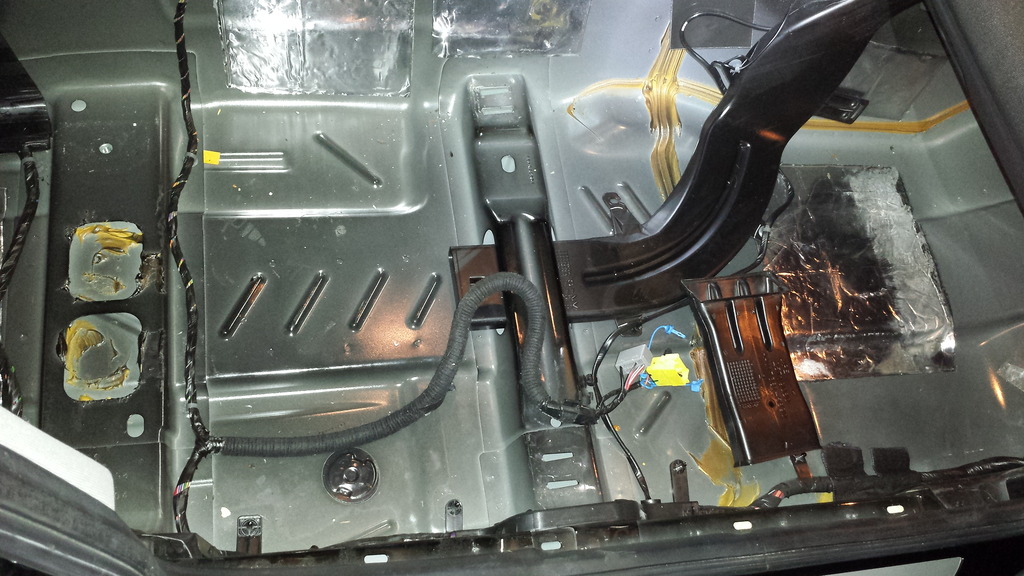
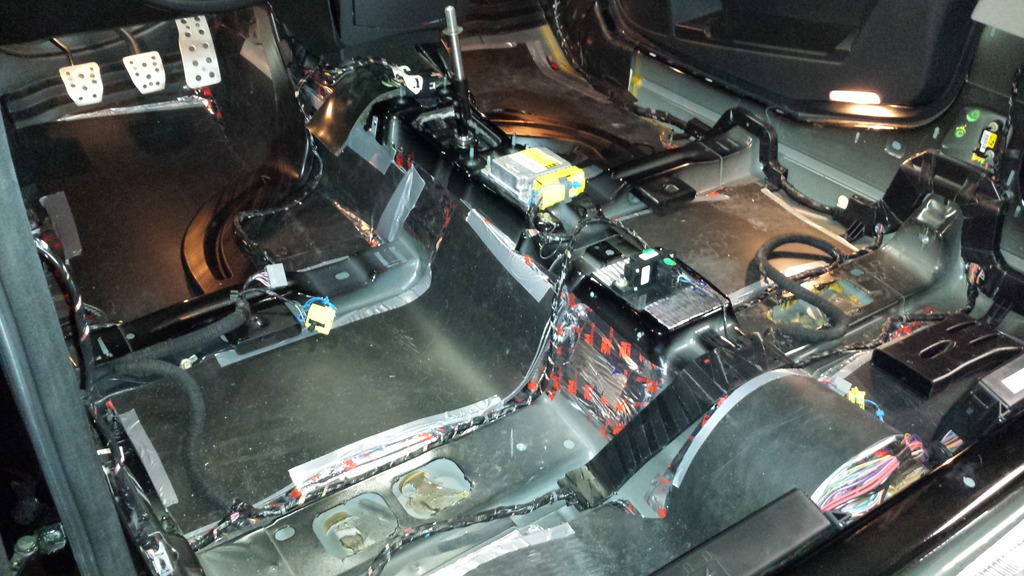
You have to install the layers in the order above for maximum results. Here are some pics with the carpet removed that shows what you get from the factory:
The basic floorboard.
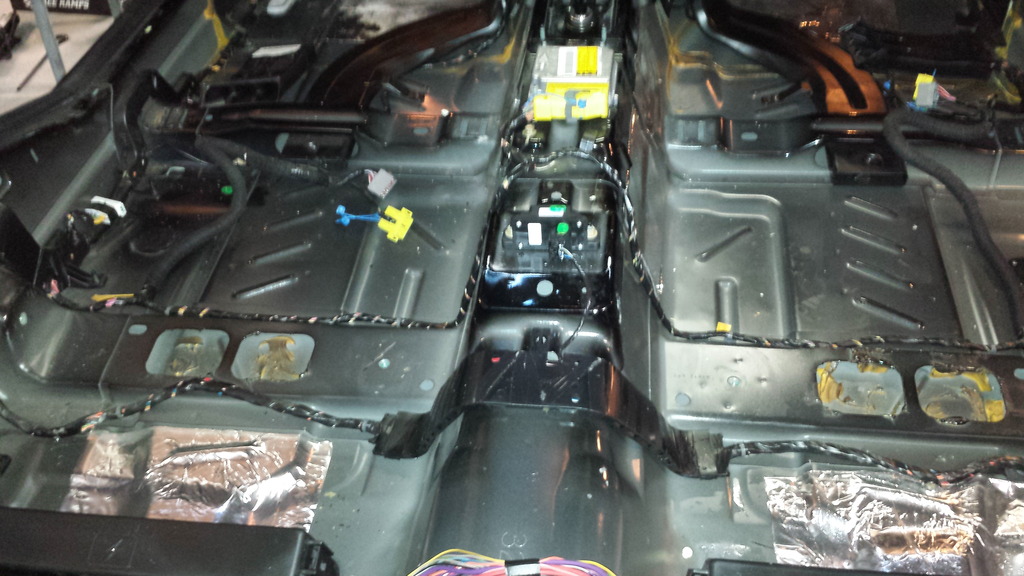
Driver's Side.
Driver's Side.
Passenger's Side.
Passenger's Side.
Passenger's Side.
Here is where I apply the resonance barrier (1. vibration dampening). I tape the seams with 3M Tape that is available at Lowe's or Home Depot:
Another pic of the resonance barrier:
The next step is the decoupling. This is cellfoam. This works in conjunction with the sound barrier which is MLV. You can apply adhesive or simply tape the seams - you just need to make sure the cellfoam and MLV are joined. Here are some pics:
Cut the cellfoam and lay it over the MLV.
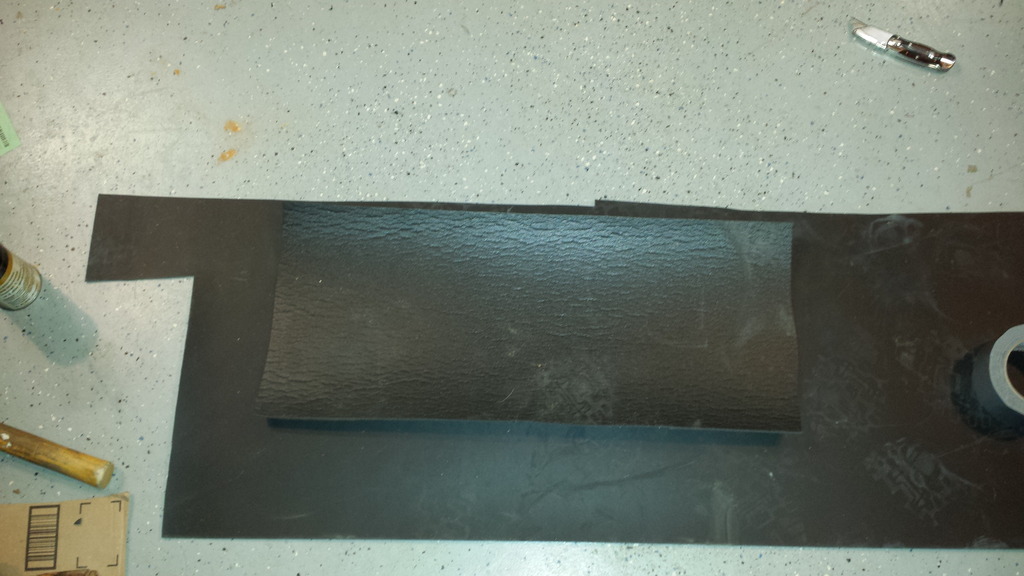
Cut/trace over the MLV and tape as you go.
Here is the basic lamination of the cellfoam and MLV.
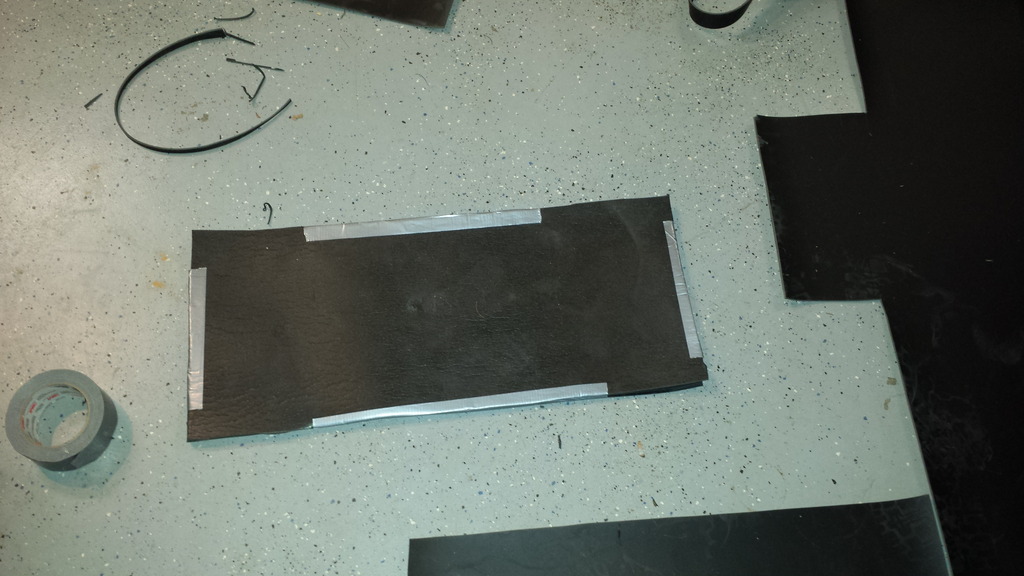
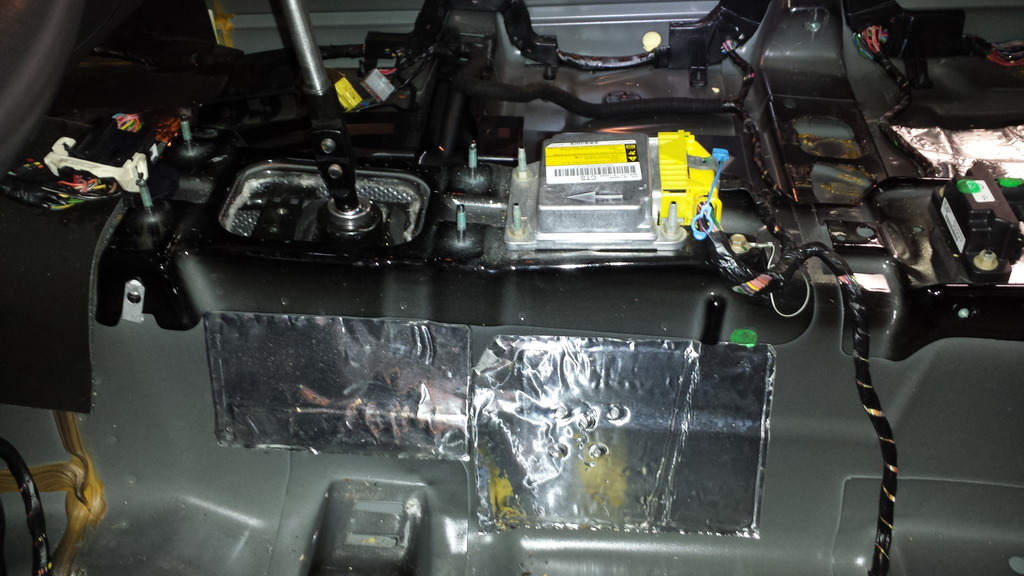
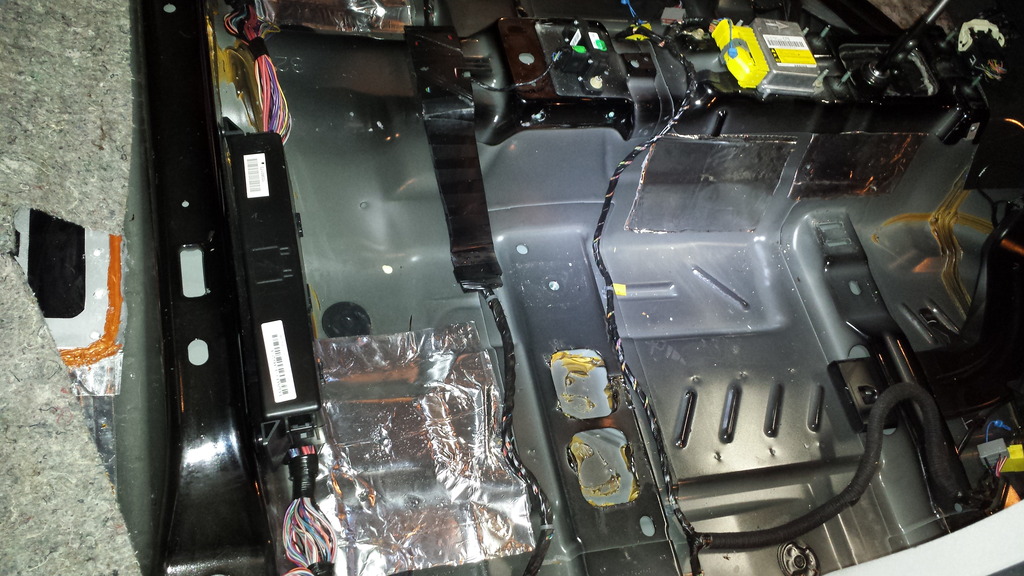
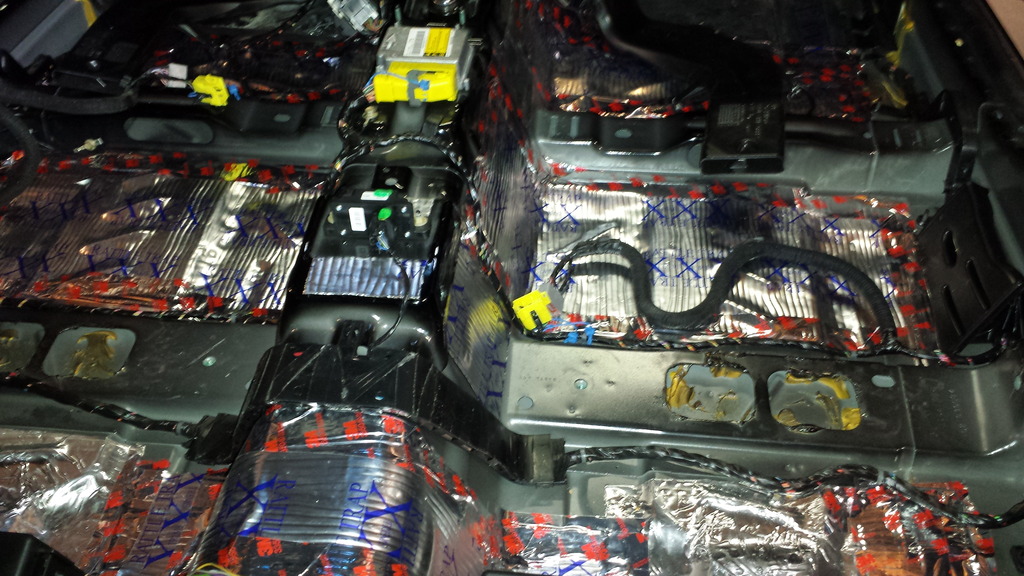
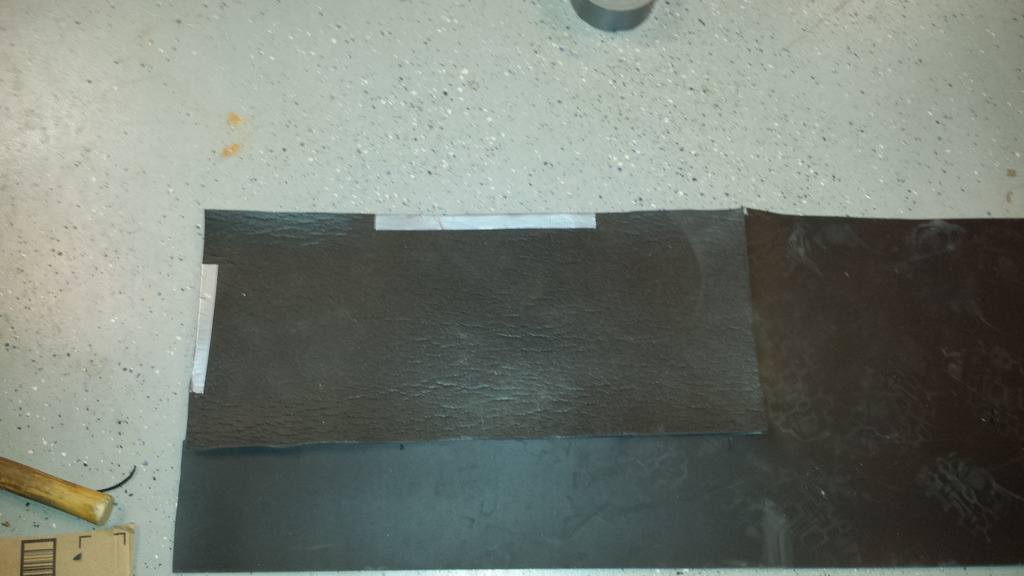
After you measure and make your next layers for the decoupling (#2) and barrier (#3), lay it in place and tape it to secure it in place. Here are some pics:
Passenger's Side.
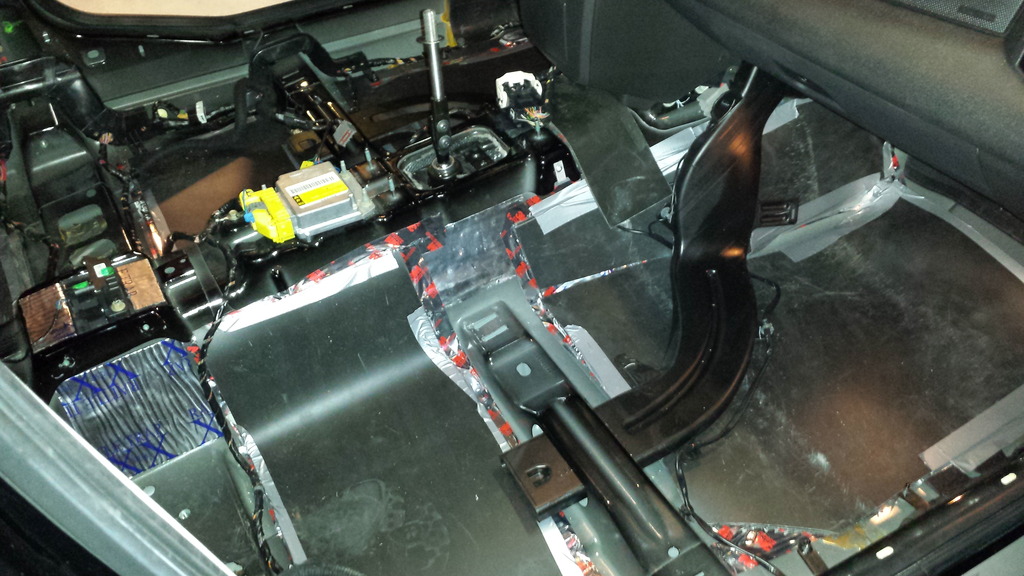
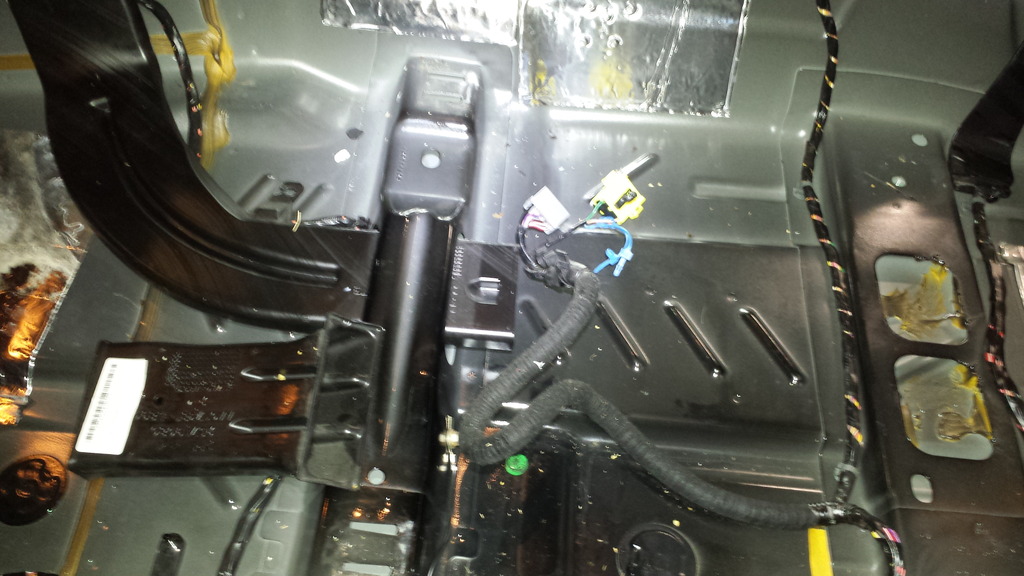
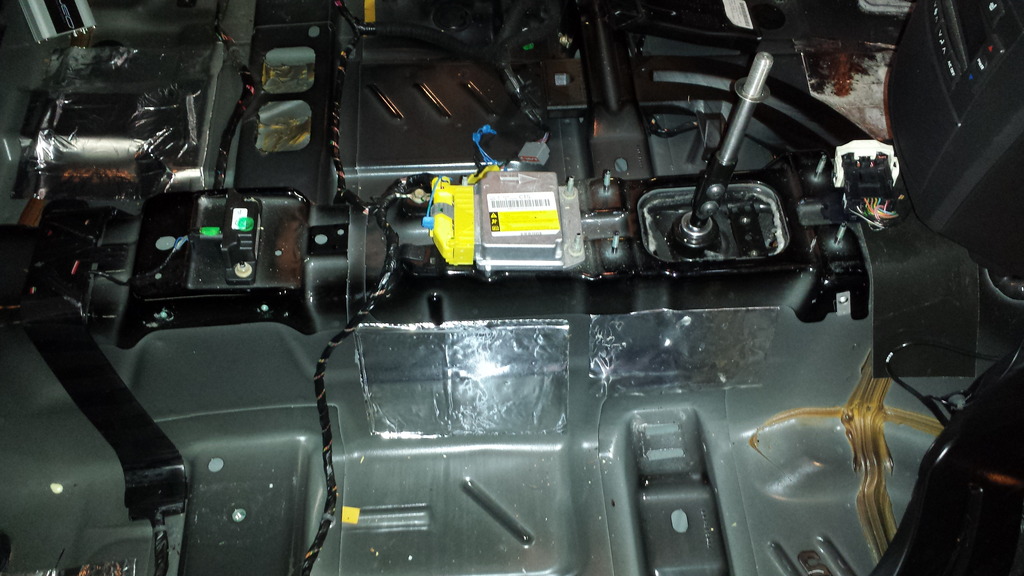
The console and shifter area is next. Here are some pics showing how I applied a sound barrier:
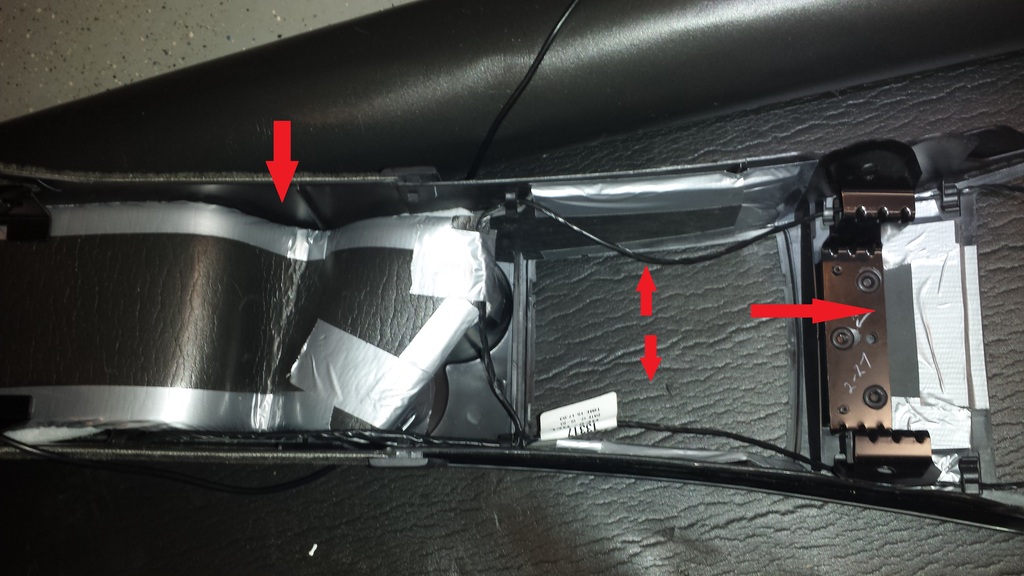
Apply the decoupling (#2) and MLV (#3) to the console where the red arrows are pointing.
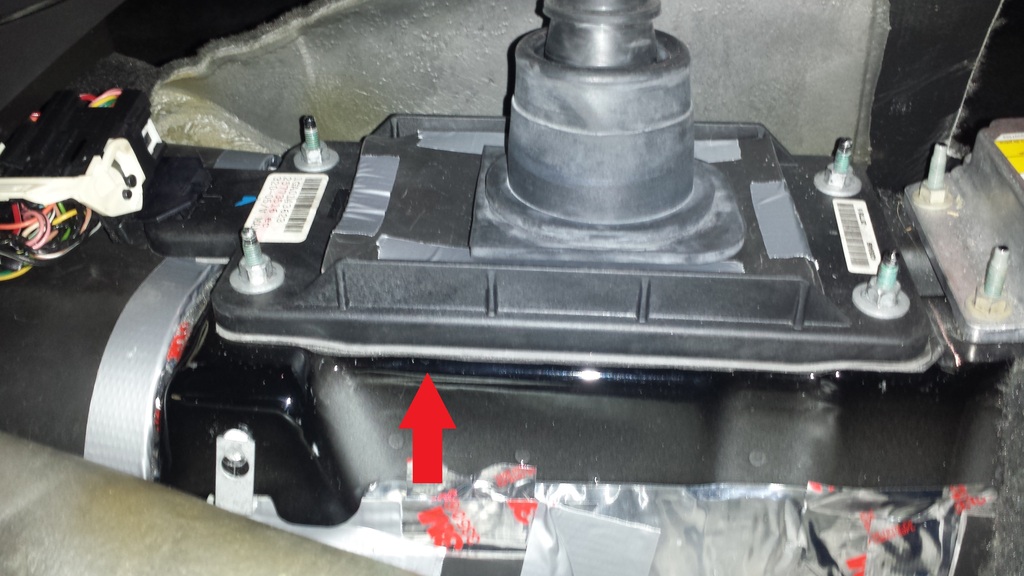
Carefully cut out a gasket for the shifter using the same process - decoupling (#2) and MLV (#3).
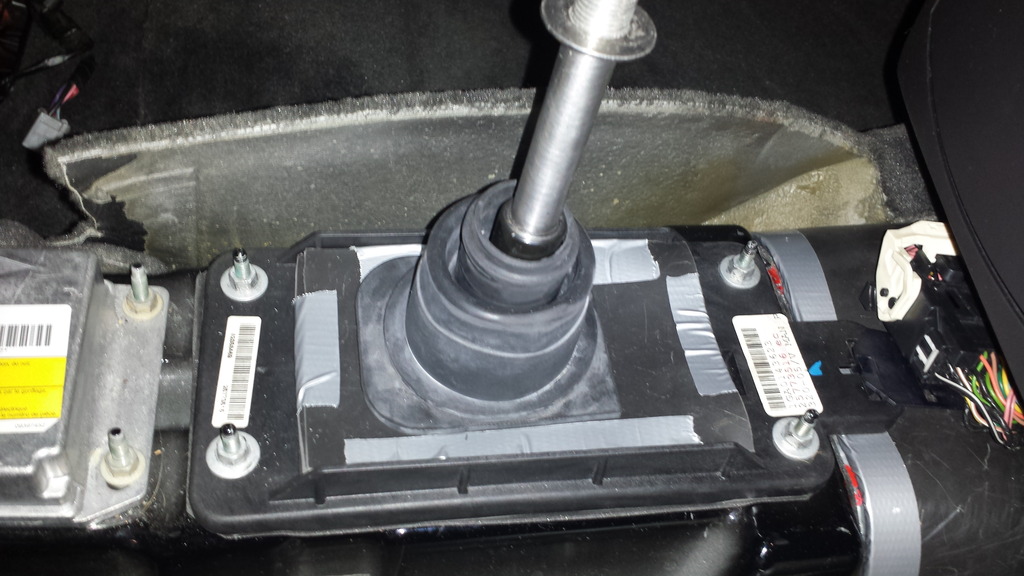
Another pic of the shifter.
Another good idea is to cover the spare tire area. Here is a pic:

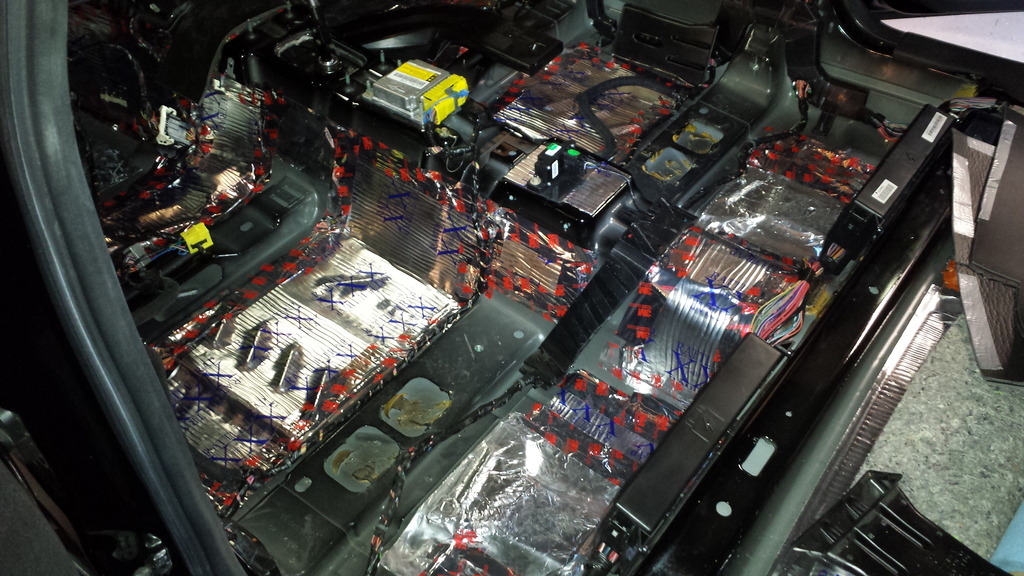
In every pic you see, there were no issues reinstalling the carpet and associated components with this sound barrier treatment. The results for me are pretty amazing. The resonance barrier in the spare tire area (#1) eliminated the little drone I had from the Stainless Works exhaust. The added material around the shifter (including gasket) SILENCED the shifter - huge difference there which is amazing! The added material to the floorboards removed the remaining road noise and I have a very quiet cabin with zero rattles, drone, or any other unwanted noise.
This proved to be very meaningful for my goals. Hopefully others can find this information useful.
Enjoy!
- vibration dampening -
- decoupling - http://www.ebay.com/itm/161225495525?_trksid=p2057872.m2749.l2649&var=460491150615&ssPageName=STRK%3AMEBIDX%3AIT
- sound barrier -
You have to install the layers in the order above for maximum results. Here are some pics with the carpet removed that shows what you get from the factory:
The basic floorboard.

Driver's Side.

Driver's Side.

Passenger's Side.

Passenger's Side.

Passenger's Side.

Here is where I apply the resonance barrier (1. vibration dampening). I tape the seams with 3M Tape that is available at Lowe's or Home Depot:

Another pic of the resonance barrier:

The next step is the decoupling. This is cellfoam. This works in conjunction with the sound barrier which is MLV. You can apply adhesive or simply tape the seams - you just need to make sure the cellfoam and MLV are joined. Here are some pics:
Cut the cellfoam and lay it over the MLV.

Cut/trace over the MLV and tape as you go.

Here is the basic lamination of the cellfoam and MLV.

After you measure and make your next layers for the decoupling (#2) and barrier (#3), lay it in place and tape it to secure it in place. Here are some pics:

Passenger's Side.

The console and shifter area is next. Here are some pics showing how I applied a sound barrier:
Apply the decoupling (#2) and MLV (#3) to the console where the red arrows are pointing.

Carefully cut out a gasket for the shifter using the same process - decoupling (#2) and MLV (#3).

Another pic of the shifter.

Another good idea is to cover the spare tire area. Here is a pic:

In every pic you see, there were no issues reinstalling the carpet and associated components with this sound barrier treatment. The results for me are pretty amazing. The resonance barrier in the spare tire area (#1) eliminated the little drone I had from the Stainless Works exhaust. The added material around the shifter (including gasket) SILENCED the shifter - huge difference there which is amazing! The added material to the floorboards removed the remaining road noise and I have a very quiet cabin with zero rattles, drone, or any other unwanted noise.
This proved to be very meaningful for my goals. Hopefully others can find this information useful.
Enjoy!
Last edited by philistine; 04-10-2015 at 11:08 PM.
 04-11-2015, 08:47 AM
#2

Thanks for posting this. Really nice work. What thickness did you use for the foam? I want to add the 2 and 3 layers to my trunk to help with the B&B drone. Just a layer of 1 didn't help a ton. The console and shifter area look easy enough to add to the task as well. I'm not pulling the seats and carpet just yet though.
04-11-2015, 08:56 AM
#3

Nice work!
This is a worthwhile project and I too had good results out of doing this but I didn't use the foam. I was able to leave the seats in car and plugged in, just kept moving them in the car and worked around them...plenty of length on the harnesses to move the seats enough to get the carpet out of the car and do to the entire floor and tunnel areas. Took me an afternoon without much heavy lifting.
I run a full size spare...think there would be any benefit of doing the spare tire well or would the spare tire be enough back there?
Any plans to do the doors?
04-11-2015, 10:37 AM
#4
Launching!

Join Date: Oct 2014
Posts: 205
Likes: 0
Received 0 Likes
on
0 Posts
Good thinking to put some material in the trunk to help with drone. I will have to do that.
My V has dynomat in the cabin and has that cell foam stuff in the doors too. Although nothing in the trunk. All that sound deadening material also makes the heating and cooling system not work as hard. In winter the heat doesn't escape so easily either.
My V has dynomat in the cabin and has that cell foam stuff in the doors too. Although nothing in the trunk. All that sound deadening material also makes the heating and cooling system not work as hard. In winter the heat doesn't escape so easily either.
04-11-2015, 11:48 AM
#5
Thanks for posting this. Really nice work. What thickness did you use for the foam? I want to add the 2 and 3 layers to my trunk to help with the B&B drone. Just a layer of 1 didn't help a ton. The console and shifter area look easy enough to add to the task as well. I'm not pulling the seats and carpet just yet though.
Not shown is the rear seat area. I wrapped that area with the same treatment - resonance barrier, cellfoam, and MLV. I added double MLV to the rear seats and rear seat floor board. The front is single cellfoam and single MLV layer - any thicker in those areas and there would be fitment issues routing the heating/cooling duct and carpet.
The major difference I noticed was the shifter/console area - I had major road/gear noise from that area and it's completely silent now! I have to roll down the windows to hear the exhaust now it's so damn quiet in the cabin.
Nice work!
This is a worthwhile project and I too had good results out of doing this but I didn't use the foam. I was able to leave the seats in car and plugged in, just kept moving them in the car and worked around them...plenty of length on the harnesses to move the seats enough to get the carpet out of the car and do to the entire floor and tunnel areas. Took me an afternoon without much heavy lifting.
I run a full size spare...think there would be any benefit of doing the spare tire well or would the spare tire be enough back there?
Any plans to do the doors?
This is a worthwhile project and I too had good results out of doing this but I didn't use the foam. I was able to leave the seats in car and plugged in, just kept moving them in the car and worked around them...plenty of length on the harnesses to move the seats enough to get the carpet out of the car and do to the entire floor and tunnel areas. Took me an afternoon without much heavy lifting.
I run a full size spare...think there would be any benefit of doing the spare tire well or would the spare tire be enough back there?
Any plans to do the doors?
I don't have any plans to do the doors. I've never noticed any vibrations or road noise coming from the doors on this platform. I've done it in the past on other platforms but the caddy seems pretty solid with the doors.
04-11-2015, 11:56 AM
#6
The V already has some sound deadening material attached to the outer door skins. I treat the doors in all my cars, for audio reasons, and noticed less of a change in the door thunk noise on the V after adding more than say in my last Subaru. The rear passenger seat and trunk areas are your biggest return on investment for this car, in my opinion. I did not touch the trans tunnel or the shifter assembly, and will definitely be doing so next time the center console comes out after hearing your results.
Nice work. It's always easy to spot who has kids and who doesn't on the forums...
Nice work. It's always easy to spot who has kids and who doesn't on the forums...
Trending Topics
04-11-2015, 01:06 PM
#8
Don't get your hopes up. I have a resonance layer all through the trunk and spare tire well. I'm going to do that to the trunk lid also and then add the foam and vinyl layers to the tub and trunk, back seats and maybe the rear floor. That B&B is a boomer at 1800 rpm.
04-12-2015, 08:05 AM
#9
I wanted an even more quiet interior so I decided to sound proof the V. There is a science to it but it's pretty simple (click the links):
You have to install the layers in the order above for maximum results. Here are some pics with the carpet removed that shows what you get from the factory:
The basic floorboard.

Driver's Side.

Driver's Side.

Passenger's Side.

Passenger's Side.

Passenger's Side.

Here is where I apply the resonance barrier (1. vibration dampening). I tape the seams with 3M Tape that is available at Lowe's or Home Depot:

Another pic of the resonance barrier:

The next step is the decoupling. This is cellfoam. This works in conjunction with the sound barrier which is MLV. You can apply adhesive or simply tape the seams - you just need to make sure the cellfoam and MLV are joined. Here are some pics:
Cut the cellfoam and lay it over the MLV.

Cut/trace over the MLV and tape as you go.

Here is the basic lamination of the cellfoam and MLV.

After you measure and make your next layers for the decoupling (#2) and barrier (#3), lay it in place and tape it to secure it in place. Here are some pics:

Passenger's Side.

The console and shifter area is next. Here are some pics showing how I applied a sound barrier:
Apply the decoupling (#2) and MLV (#3) to the console where the red arrows are pointing.

Carefully cut out a gasket for the shifter using the same process - decoupling (#2) and MLV (#3).

Another pic of the shifter.

Another good idea is to cover the spare tire area. Here is a pic:

In every pic you see, there were no issues reinstalling the carpet and associated components with this sound barrier treatment. The results for me are pretty amazing. The resonance barrier in the spare tire area (#1) eliminated the little drone I had from the Stainless Works exhaust. The added material around the shifter (including gasket) SILENCED the shifter - huge difference there which is amazing! The added material to the floorboards removed the remaining road noise and I have a very quiet cabin with zero rattles, drone, or any other unwanted noise.
This proved to be very meaningful for my goals. Hopefully others can find this information useful.
Enjoy!
- vibration dampening - FATMAT
- decoupling - HIGH DENSITY CELLFOAM
- sound barrier - MASS LOADED VINYL (MLV)
You have to install the layers in the order above for maximum results. Here are some pics with the carpet removed that shows what you get from the factory:
The basic floorboard.
Driver's Side.
Driver's Side.
Passenger's Side.
Passenger's Side.
Passenger's Side.
Here is where I apply the resonance barrier (1. vibration dampening). I tape the seams with 3M Tape that is available at Lowe's or Home Depot:
Another pic of the resonance barrier:
The next step is the decoupling. This is cellfoam. This works in conjunction with the sound barrier which is MLV. You can apply adhesive or simply tape the seams - you just need to make sure the cellfoam and MLV are joined. Here are some pics:
Cut the cellfoam and lay it over the MLV.
Cut/trace over the MLV and tape as you go.
Here is the basic lamination of the cellfoam and MLV.
After you measure and make your next layers for the decoupling (#2) and barrier (#3), lay it in place and tape it to secure it in place. Here are some pics:
Passenger's Side.
The console and shifter area is next. Here are some pics showing how I applied a sound barrier:
Apply the decoupling (#2) and MLV (#3) to the console where the red arrows are pointing.
Carefully cut out a gasket for the shifter using the same process - decoupling (#2) and MLV (#3).
Another pic of the shifter.
Another good idea is to cover the spare tire area. Here is a pic:
In every pic you see, there were no issues reinstalling the carpet and associated components with this sound barrier treatment. The results for me are pretty amazing. The resonance barrier in the spare tire area (#1) eliminated the little drone I had from the Stainless Works exhaust. The added material around the shifter (including gasket) SILENCED the shifter - huge difference there which is amazing! The added material to the floorboards removed the remaining road noise and I have a very quiet cabin with zero rattles, drone, or any other unwanted noise.
This proved to be very meaningful for my goals. Hopefully others can find this information useful.
Enjoy!
