When you click on links to various merchants on this site and make a purchase, this can result in this site earning a commission. Affiliate programs and affiliations include, but are not limited to, the eBay Partner Network.
Had the stretch gauge all hooked up and practiced a bit..then I realized how dang hard it was to get ~40lbs on a 10mm 12-point bolt. Eventually had vice-grips on a box end and the ratcheting mechanism kept jumping. I also have the "Max Axess" ratchets with the hole in the middle but they are all 6-point sockets!! So I declared this something I would try "next time" and went with ARP's alternate 40ft-lbs. I did 30 on each rod then went to 40. They had already been through multiple cycles so were seated well.
Improved indicates that you should wash all parts and blow dry before use. I rarely follow instructions but am real glad I did this time. I was about the declare the thing "clean enough" then realized my hand looked like the tin man's. I literally had to suds the thing up and wash it to get all the aluminum bits and dust off it. Then the windage tray had some pretty dangerous looking bits on it as well that I knocked out with a screwdriver.
The "pinch" lock nuts were interesting but even they produced some shavings. Glad I was watching there! Moral of the story..be careful and real **** if you install these. Nice once done and only a few extra minutes to be safe, but the most "extra metal" I've had installing an INTERNAL engine part...ever.
Most of this I could chalk up to getting some of the first parts of the newer designs but I think Improved should be expected to at least wash the parts before sending out. Am I wrong?
I got lucky on first try... .020-.025 clearance on every rod and throw so I finished tightening the scraper. Manual says min. .020.
The nuts called for something like 15-20 ft-lbs and the tray screws like 5 or so? I don't have anything handy anymore that measures that low so these all got "spark plug tight."
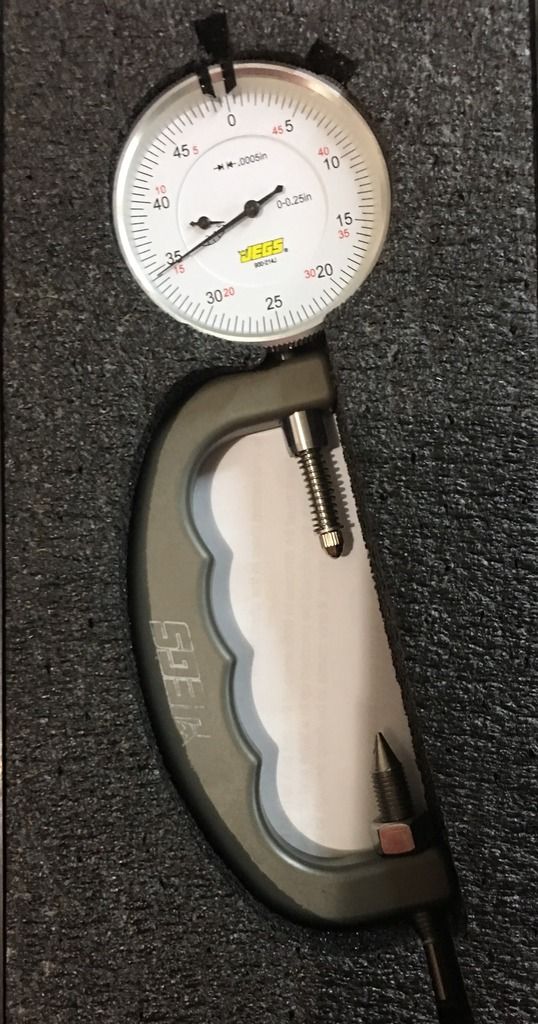
That scrapper looks awesome. Wish I would have seen that a few years ago. I've got that same stretch gage and I added a spring and washer on mine so it stays engaged a little better. I'll take a pic of it as soon as I get home. Made using it a lot better! That said, I never got the proper stretch out of my ARP 2000 bolts in my Compstar rods. Compstars torque to 75 or .004-.005" stretch. I went up to 85lbs and still didn't get the stretch it called for so I went back to 75lbs and left it there. The rods where checked for out of round at 75 and they where all perfect so I didn't want to mess that up.
Had the wife take a pic lol I turned the washer down to make it look and fit better. That little spring is pretty stout though. Makes it so you don't have to hold the gage on. Unless they changed the springs in the new gages, mine was really weak and wouldn't stay on if I let go.
Had the wife take a pic lol I turned the washer down to make it look and fit better. That little spring is pretty stout though. Makes it so you don't have to hold the gage on. Unless they changed the springs in the new gages, mine was really weak and wouldn't stay on if I let go.
Great idea! That was a big part of the frustration with the (stock)spring not strong enough to hold the thing on. I thought about turning the engine upside down and trying that way and shortly after realized how silly the proposition was. My stretch gauge and I are not on speaking terms currently but next time I decide to give it a go, I am definitely modding it as you did, and then I suppose welding up a 10mm, 12-point, breaker-length, non-ratcheting, box end wrench.
Silly ARP should have left the 8740 bolts with hex heads. Or heck; sell a reusable cap/adapter that makes the bolt head 11mm hex.
Also came across a video indicating that while the bolt diameter and thread is metric, the damn head is actually 3/8.This makes sense of the 10mm wrench slipping.
Improved indicates that you should wash all parts and blow dry before use. I rarely follow instructions but am real glad I did this time. I was about the declare the thing "clean enough" then realized my hand looked like the tin man's. I literally had to suds the thing up and wash it to get all the aluminum bits and dust off it. Then the windage tray had some pretty dangerous looking bits on it as well that I knocked out with a screwdriver.
The "pinch" lock nuts were interesting but even they produced some shavings. Glad I was watching there! Moral of the story..be careful and real **** if you install these. Nice once done and only a few extra minutes to be safe, but the most "extra metal" I've had installing an INTERNAL engine part...ever.
Most of this I could chalk up to getting some of the first parts of the newer designs but I think Improved should be expected to at least wash the parts before sending out. Am I wrong?
I got lucky on first try... .020-.025 clearance on every rod and throw so I finished tightening the scraper. Manual says min. .020.
The nuts called for something like 15-20 ft-lbs and the tray screws like 5 or so? I don't have anything handy anymore that measures that low so these all got "spark plug tight."
Thanks for the post! Believe me, we would ideally like to wash all of them as well, but it would increase the cost of the kit due to the labor involved. Since these kits are expensive as it is, we were trying to keep costs down, and we figured the washing step was something relatively simple that the end user could do and most customers do anyway.
We just recently switched to a trident style top-lock nut that's a little less aggressive than the original distorted thread lock nut. We found the ones we were using originally to have a little too much locking power. Once it's already installed, don't remove them, but for anyone who hasn't installed them and wants to use the less aggressive nuts, let us know and we'll send you some.
__________________ Call Us: 407-705-3054MON-FRI 10am-6pm EST
Thanks for the post! Believe me, we would ideally like to wash all of them as well, but it would increase the cost of the kit due to the labor involved. Since these kits are expensive as it is, we were trying to keep costs down, and we figured the washing step was something relatively simple that the end user could do and most customers do anyway.
We just recently switched to a trident style top-lock nut that's a little less aggressive than the original distorted thread lock nut. We found the ones we were using originally to have a little too much locking power. Once it's already installed, don't remove them, but for anyone who hasn't installed them and wants to use the less aggressive nuts, let us know and we'll send you some.
Noted. Your prerogative. I'm not used to washing everything so much as I've only assembled a handful of engines from scratch so far. Should probably make that habit as even just sitting around the shop the parts collect "stuff."
Even if the parts were pre-washed, it would still be good practice to rewash them before install. As mentioned, they'd probably collect "stuff" anyway between manufacture and final install. Also glad to see a vendor providing some info regarding their products!
Man wash wash wash. After I put my engine together and being **** about keeping everything clean....I was wildly depressed after cutting open my oil filter at 500 mile check so see what was in there. I mean, it looked like I didn't even try and keep it clean. SMH. If I was a full time engine builder I would legit have a clean room to work in. No joke.
Even if the parts were pre-washed, it would still be good practice to rewash them before install. As mentioned, they'd probably collect "stuff" anyway between manufacture and final install. Also glad to see a vendor providing some info regarding their products!
Originally Posted by NIKDSC5
Man wash wash wash. After I put my engine together and being **** about keeping everything clean....I was wildly depressed after cutting open my oil filter at 500 mile check so see what was in there. I mean, it looked like I didn't even try and keep it clean. SMH. If I was a full time engine builder I would legit have a clean room to work in. No joke.
I don't disagree with you guys. And my filter will probably be worse. I washed the block and all and dried everything out but forgot the barbell in all that..so took it out much later and cleaned in there. But I'm trying to leave my paranoia in my pocket and just get the thing done.
Something inside of me still doesn't like soaping up metal--especially ferrous stuff. But I get it. Brake cleaner doesn't give you the same scrubbing power that suds do. There's a dangerous product idea--foaming brake cleaner.
Thanks Ryan! Have a bunch more to report but trying to take advantage of all the attention on shopping to get more work done! Will update this weekend.
Managed to work a deal with Steve(05CTSV for everyone else) to go a little over the top on the rockers..so more grinding before I can permanently bolt them on. That's first task today.
Making some progress. New valve covers from "Behind Bars Race Cars." They are stout, tall, and look to provide clearance and (hopefully!) require less grinding for shaft rockers to fit. Really interesting how the rocker bolt sleeves thread into the cover. These are thick pieces. Could easily use as a baseball bat and still bolt on and seal.
TD rockers shown above are badass. I still like my orange Harland Sharps and will run those on the Jeep but these just scream tough.
New main side bolts. They are only about $3 at GM so I went ahead and bought them. Got a couple extra as at least one had some of the sealant work/damaged under the bolt head. The sealant is what's important - these holes are open the the crankcase and can leak oil. Alternative is to RTV them but I decided to do this "right."
New bling from Cam Motion. Finally got a big-boy cam install handle....my magic wand. Doing it just like the grown-ups. :-P
New barbell and oil/coolant plugs. Barbell is a nice billet piece from Sac City Corvette. Much tighter clearance for improved filtering and a nice threaded hole in the rear to make later removal a breeze.
To remove the old plastic barbell, I drilled diagonally with a 1/8" bit just a little ways and then used the same bit to pop it out.
Lubes the new one with 5w-30 and popped it in.
Some more goodies from Cam Motion - New GM cam sprocket and Hinson C7R single chain. Beefy piece for sure. Confidence-inspiring.
Don't forget your ARP lube on the threads and under the head!
I decided to go back with the stock late LS2/LS3 chain damper. I almost opted for the early LS2 style(simple piece in the middle of the chain) but this thing holds it so tight. Going to watch this guy for wear but looks like it is holding up for now so using it again.
DTD...it's like the automotive version of DTF.
We are lined up DOT to DOT. Cam is NOT coming out again until we make noise with this thing.
Melling 10296. Looks like Melling got some new casting equipment. "New" style 10296 on top; "old" style on bottom. We'll be running the "new" style with the red(high pressure) spring.
Originally, I thought this was a going to be a "light upgrade" thread and now it's more like a "max effort/***** to the wall" thread.
When did that change, or did I completely miss something? Looking good, by the way--I'm not sure I would invest this heavily in that shortblock, but it'll be interesting to see how far you can take it.
I would advice that you DO NOT use the red spring. I used the red spring and have too much oil pressure. While its not necessarily a bad thing, after talking with other engine builders it does rob power. A few circle track engine builders told me that is can be 5-10 crank hp too! Engine trying to push all that fluid. Anyway, once its in and together you cant change it. Easily.
Take also into consideration that your bearing tolerances are tighter than mine. If I remember correctly you're at 15 thousands for the rods? We built mine at 25-30 IIRC. I know that we were at 15 and wanted to open it up more for a more free floating engine. Which revvs crazy fast BTW! The LS isn't lacking on oiling so we wnt that route and I do not regret it. My single regret is using that red spring. Im at 95+ PSI at 6500 rpm. 45-54psi at HOT idle.
I would advice that you DO NOT use the red spring. I used the red spring and have too much oil pressure. While its not necessarily a bad thing, after talking with other engine builders it does rob power. A few circle track engine builders told me that is can be 5-10 crank hp too! Engine trying to push all that fluid. Anyway, once its in and together you cant change it. Easily.
Agreed. If you want a little extra pressure, put a small shim behind the white spring. You're already going to maintain better pressure for the reasons Nik identified plus the fact that the high volume pump may start to outflow the pressure relief above a certain RPM.

 11-06-2016 | 11:01 PM