

1973 RS Camaro LSX Swap


 06-26-2010, 10:42 PM
#48
TECH Fanatic

Great info here, and you do good work! Can you tell me what the stock springs are good for lift, and seat psi? Thinking of adding a Z06 cam, and use stock springs, and push rods in my 2002 LQ4.
06-26-2010, 10:46 PM
#49
On The Tree
Join Date: Mar 2009
Location: Commiefornia
Posts: 133
Likes: 0
Received 0 Likes
on
0 Posts


What color are you going to paint it when you're done?
06-26-2010, 10:58 PM
#50
Thanks! I'm not really sure what the stock springs are rated at lift or pressure wise. But I do know that there were Z06 specific springs that were better than the regular production springs. I'd look into picking up a set of them at at minumum. As far as the pushrods go, I don't think the Z06s had anything different (better) than regular production, but I'm not sure. So, you'd probably get away with running the Z06 cam with stock pushrods, but I wouldn't turn it too high. Good luck with your build!
Last edited by GC99TA; 07-01-2010 at 12:47 PM.
06-26-2010, 11:05 PM
#51
I know that feeling, I'm in the buying process now for my 70. Figured I'd try buying everything before I do anything else so that I can keep it drivable until then. Until then I'll keep checking back on your thread to see what ideas I can steal from you
What color are you going to paint it when you're done?
What color are you going to paint it when you're done?
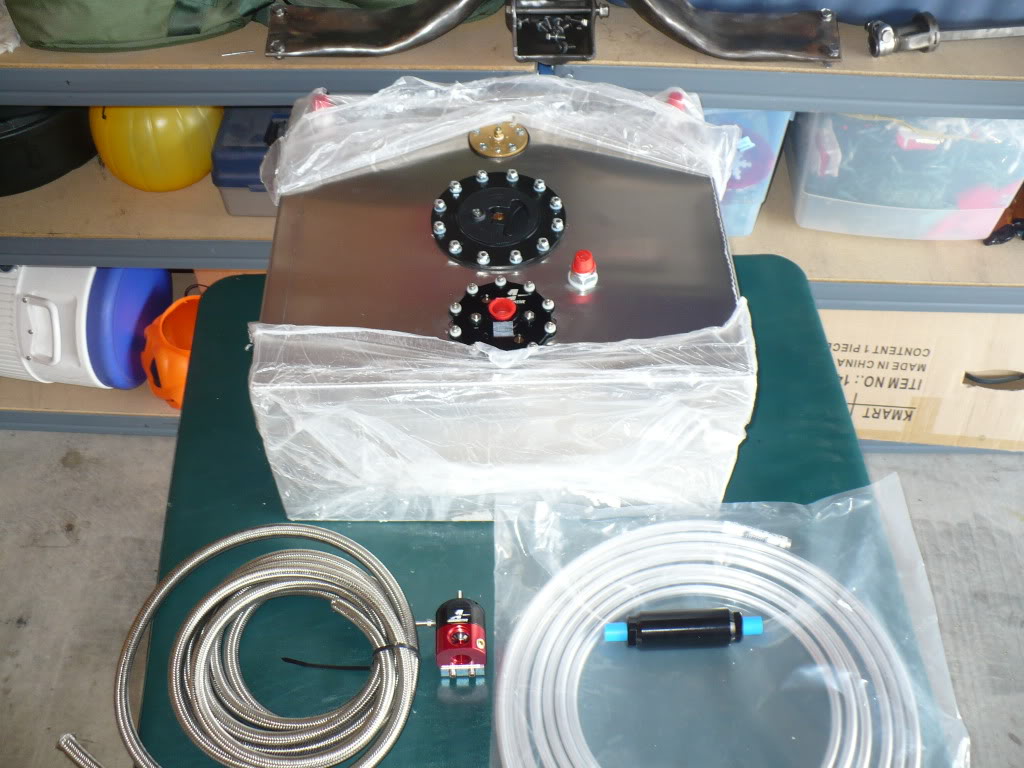
Yeah, I stockpiled some parts at tax time, but they're quickly running out. I have pretty much everything for my fuel system (cell with internal pump, lines, filter, regulator, misc fittings) so I'll probably start on some of that pretty soon until my bank account recovers.
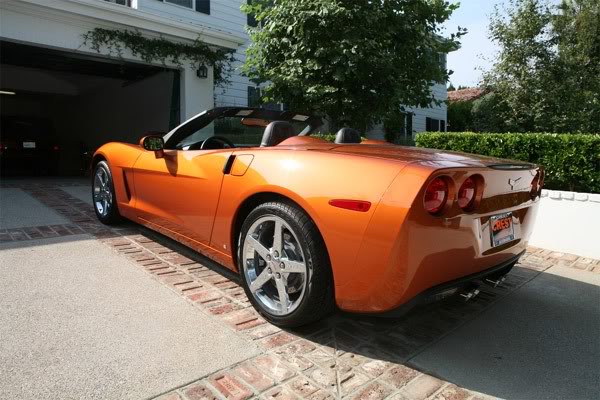
I'm about 95% sure that it'll get painted Atomic Orange Metallic with black Z28 stripes, but that seems so far away that I'm liable to change my mind by then...LOL. Here's an AOM Vette if you're not familiar with the color.
 06-28-2010, 02:19 PM
#52
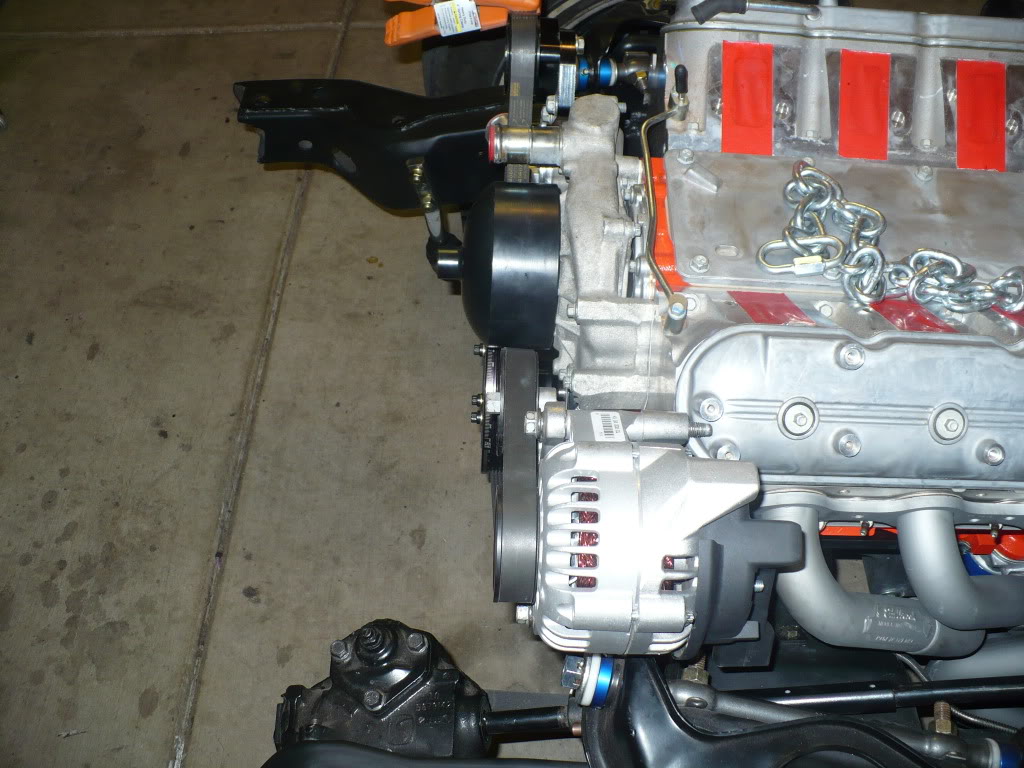
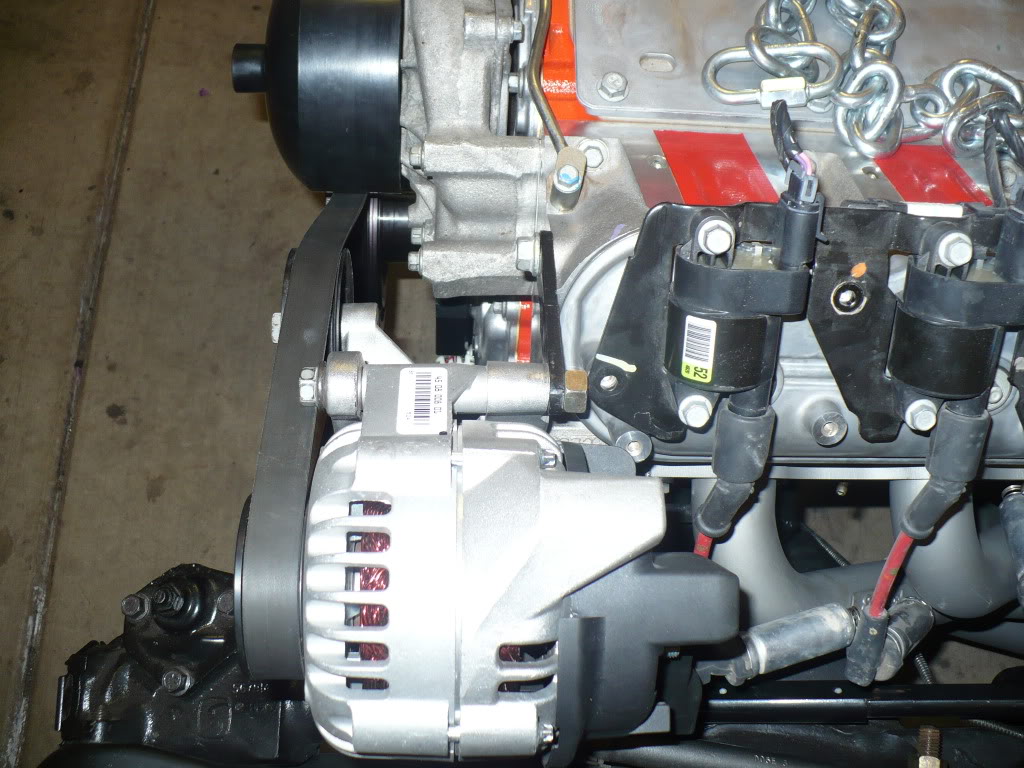
Last night I borrowed the alternator off my LS1 TA for mock up purposes so I could check the pitman arm to alternator clearance. This is a known issue for some when using the F-body front drive accessories on a 2nd Gen Camaro. Pontiacs used a dropped pitman that I believe usually provides enough clearance. Here it is bolted in place with my longer TA belt showing the proposed belt routing. Note the orange-handled clamp on the belt taking up the extra length.
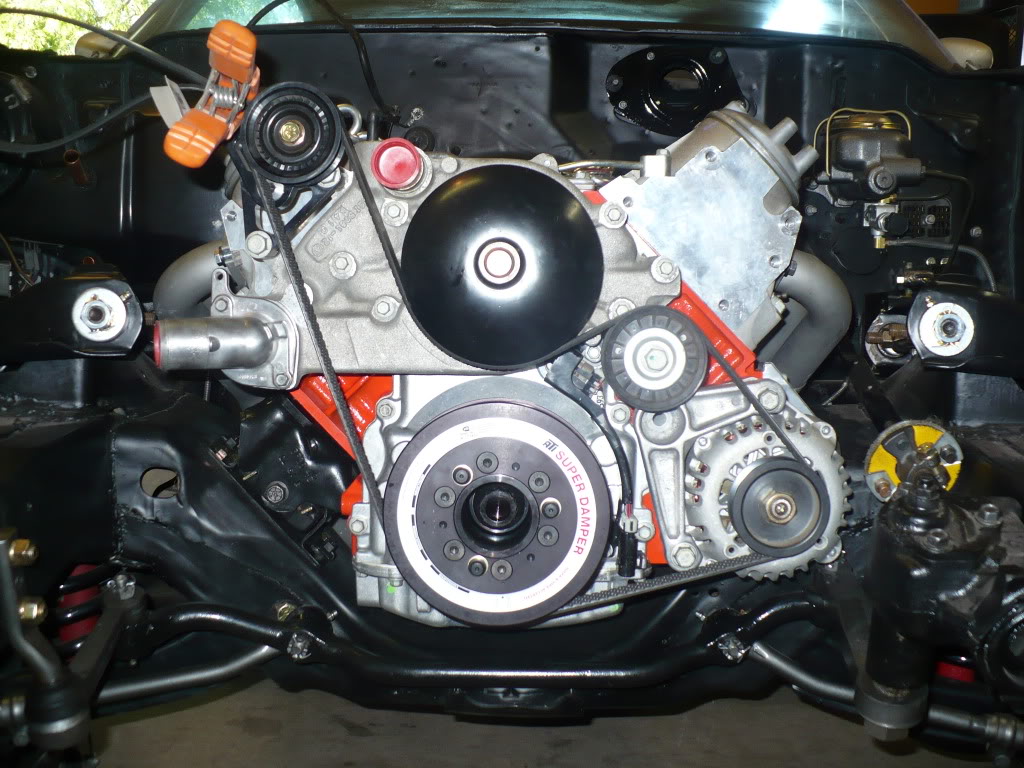
I really wanted to run the alternator in the factory F-body position for the clean appearance, but unfortunately for me, I have significant interference between my pitman and alternator.

I have seen some guys get around this issue by grinding the castle nut and ball stud, but I pre-ground mine in anticipation of this issue and still have contact. Others have shimmed their motor higher, but I really don’t want to go much higher for CG reasons and besides, this isn’t an area where “just barely” is good enough for me. Others have solved the problem by swapping to the dropped Firebird pitman arm. This is a good option if you’re running power steering, but this isn’t a good option for me. I’ve swapped to a manual steering box but I’m still using the “power” DS829 center link, so I’ve got a non-standard pitman set up. If I were to swap to a Firebird manual dropped pitman, I’d also have to swap to a hard to find DS830 center link. So the final way to cure this is to relocate the alternator. I think I’ve come up with a pretty decent way to relocate the alternator to the drivers side head with very little trouble.
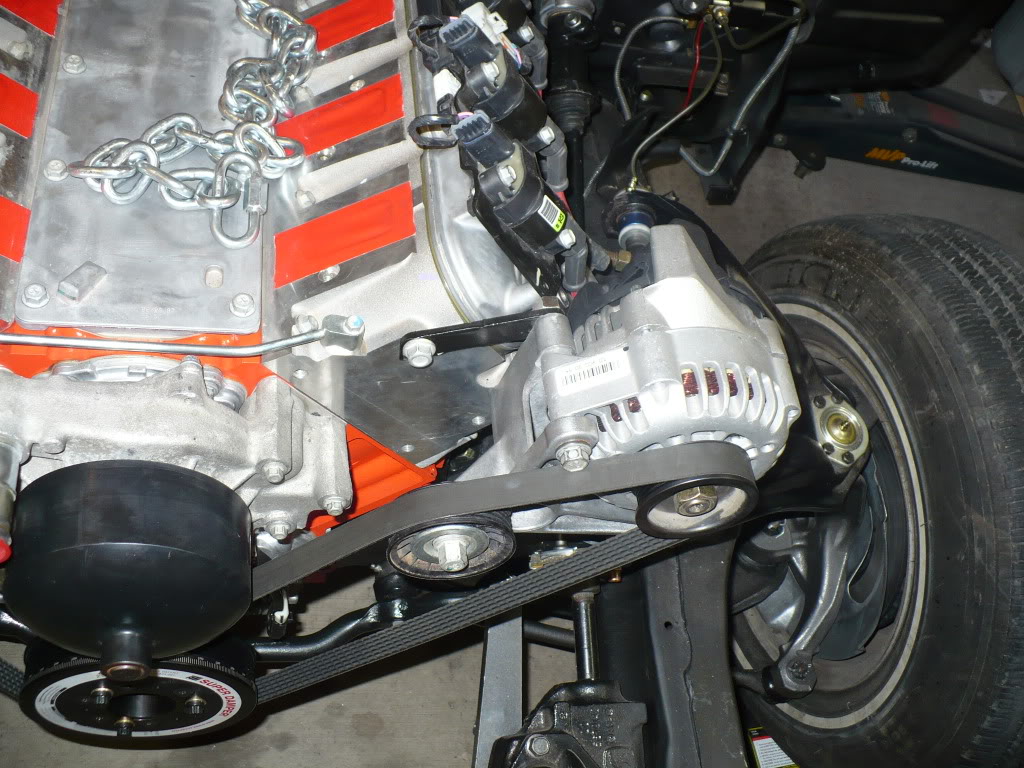
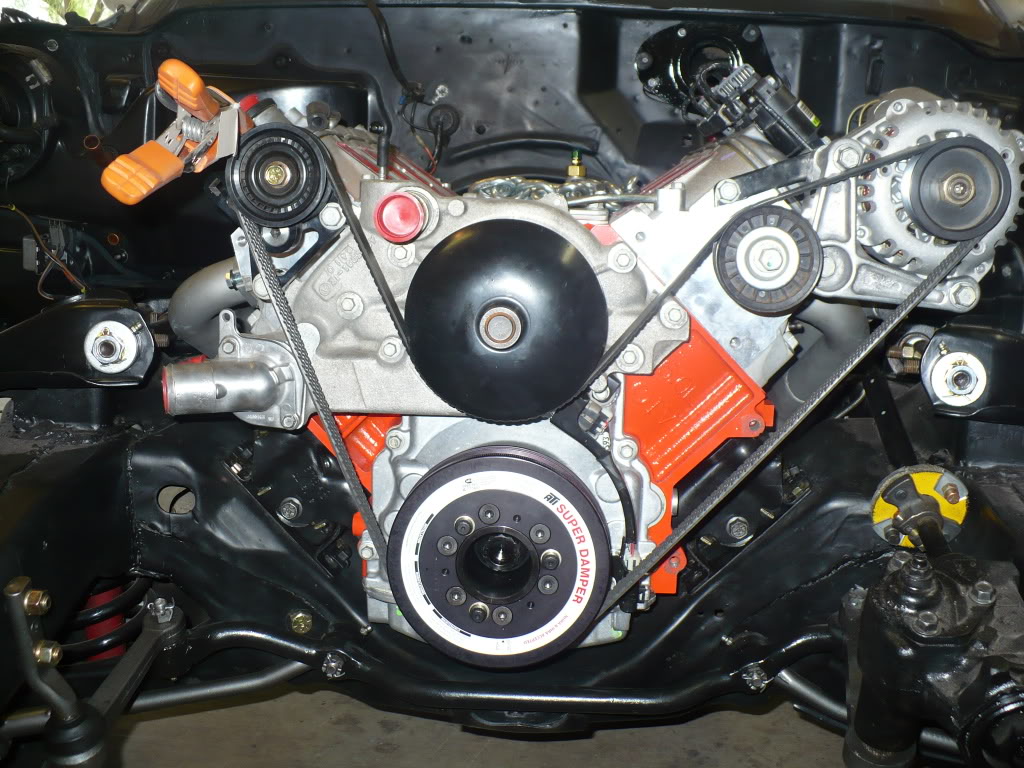
All I’ll need to do is slightly modify my F-body alternator bracket (minor grinding) and build a very simple flat bar bracket as an additional support. I also swapped the idler pulley on the bracket for an actual ribbed pulley to maintain better belt alignment. Here’s what the set up should look like. The only thing I have left to check is my inner fender clearance, but I think I’ll be fine there. There are some belt/mounting bolt interference issues right now, but those will be taken care of with a swap to the factory alternator pulley. The one pictured is a larger underdrive piece.
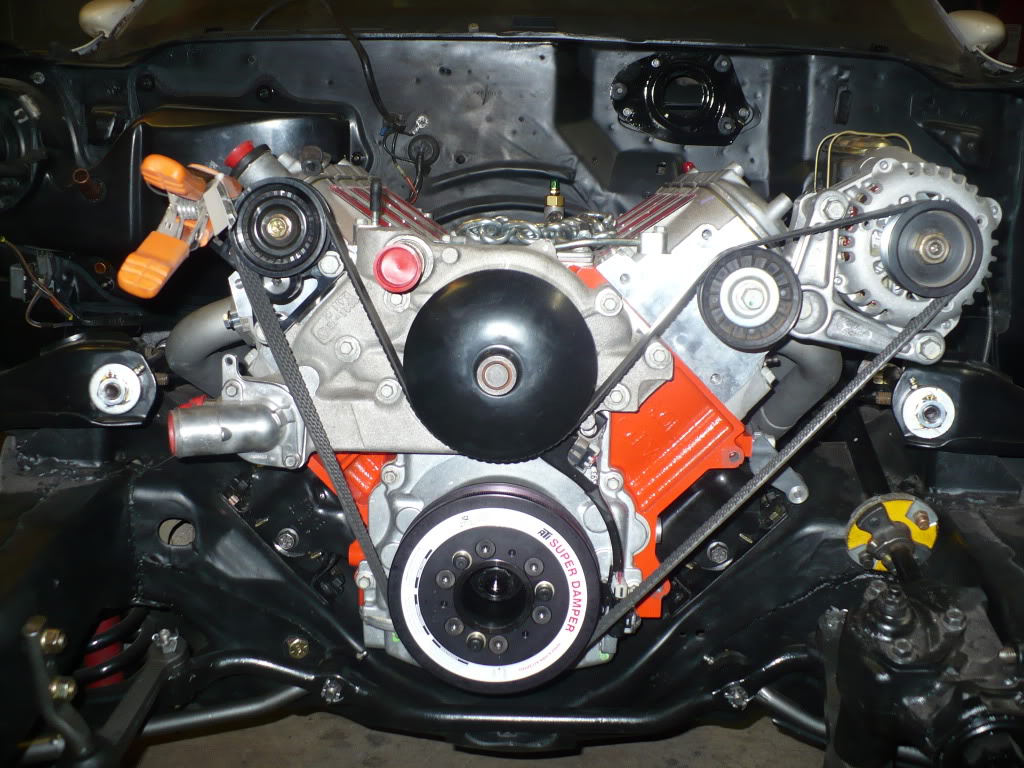
Everything lines up fine with no shimming because the head (new mounting location) and the block (original mounting location) are perfectly inline with one another. Obviously this wouldn’t be a good option for someone wanting to retain power steering, but should work great for me. Beats paying $168.00 for a Kwik Performance alt relocation bracket that does the same thing.
I really wanted to run the alternator in the factory F-body position for the clean appearance, but unfortunately for me, I have significant interference between my pitman and alternator.
I have seen some guys get around this issue by grinding the castle nut and ball stud, but I pre-ground mine in anticipation of this issue and still have contact. Others have shimmed their motor higher, but I really don’t want to go much higher for CG reasons and besides, this isn’t an area where “just barely” is good enough for me. Others have solved the problem by swapping to the dropped Firebird pitman arm. This is a good option if you’re running power steering, but this isn’t a good option for me. I’ve swapped to a manual steering box but I’m still using the “power” DS829 center link, so I’ve got a non-standard pitman set up. If I were to swap to a Firebird manual dropped pitman, I’d also have to swap to a hard to find DS830 center link. So the final way to cure this is to relocate the alternator. I think I’ve come up with a pretty decent way to relocate the alternator to the drivers side head with very little trouble.
All I’ll need to do is slightly modify my F-body alternator bracket (minor grinding) and build a very simple flat bar bracket as an additional support. I also swapped the idler pulley on the bracket for an actual ribbed pulley to maintain better belt alignment. Here’s what the set up should look like. The only thing I have left to check is my inner fender clearance, but I think I’ll be fine there. There are some belt/mounting bolt interference issues right now, but those will be taken care of with a swap to the factory alternator pulley. The one pictured is a larger underdrive piece.
Everything lines up fine with no shimming because the head (new mounting location) and the block (original mounting location) are perfectly inline with one another. Obviously this wouldn’t be a good option for someone wanting to retain power steering, but should work great for me. Beats paying $168.00 for a Kwik Performance alt relocation bracket that does the same thing.
06-28-2010, 06:09 PM
#53
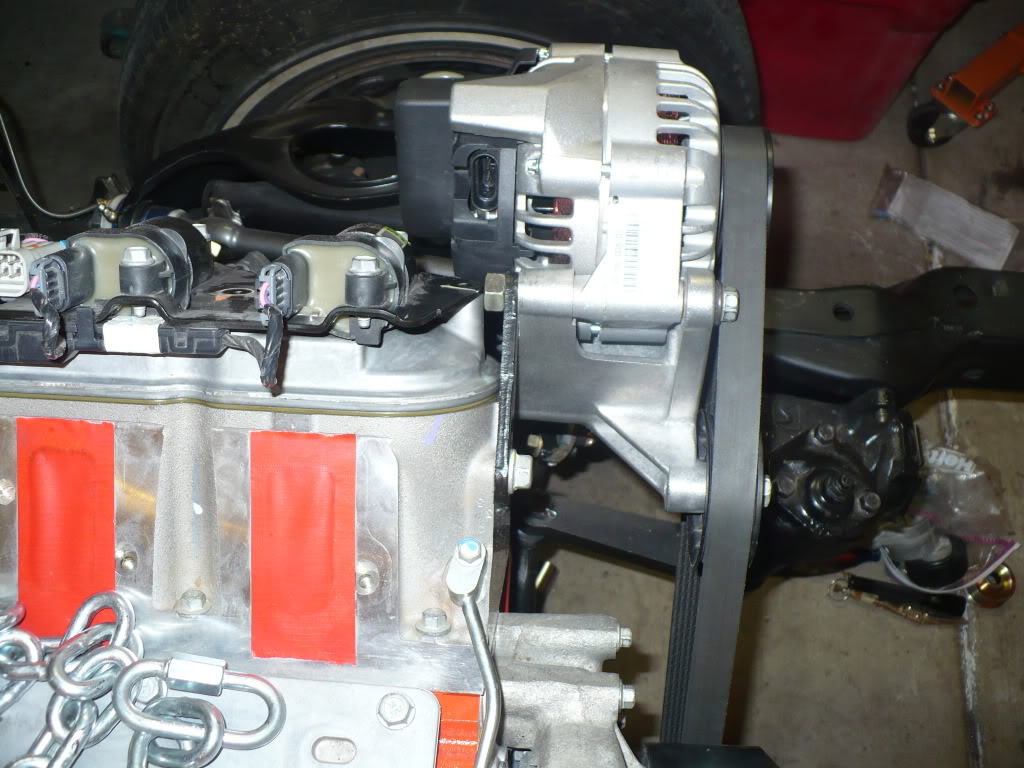
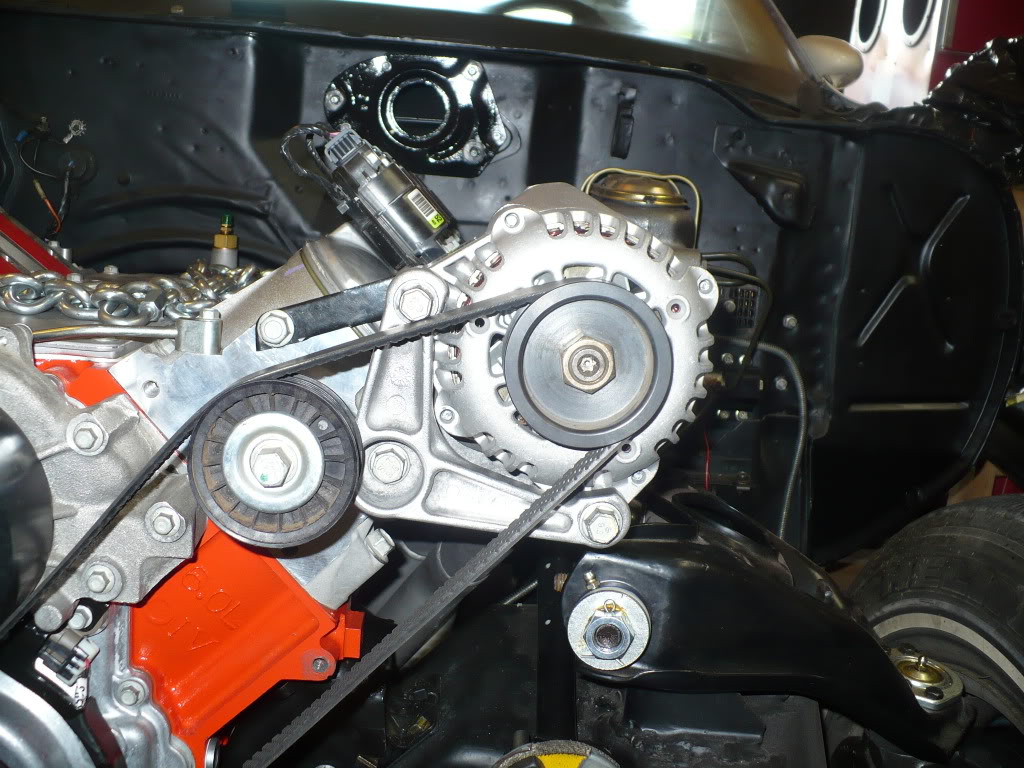
I finished up my alternator relocation project this afternoon and I think it turned out really well. Here are some pictures of it bolted in place with the really simple flat bar bracket I made. I had to clearance the back of the stock aluminum bracket so the new steel bracket could align behind it. It’s mounted solid as a rock now. Once I had it mounted I mocked up the driver’s side inner fender and it’s not even close to being an issue. I’m not sure why I was even concerned there. The driver’s side coil pack bracket was very, very close, but ended up not needing any clearancing to fit properly either.
06-28-2010, 10:19 PM
#55
Where did you hear you should replace it with the early sprocket? Just curious cause I could be wrong but I was pretty confident with the one I used. I have a brand new early LS2 timing set on the shelf if I need it but I'm pretty sure they're only compatible with a 24X crank reluctor set up. Thanks.
 06-29-2010, 05:14 PM
#58
06-29-2010, 05:19 PM
#59
I know if you're swapping a Gen IV motor into an LS1 car, most guys will swap in (or have it built with) a 24X crank reluctor and use an early 1X LS2 timing set so they can still run their LS1 PCM. That may be what you're thinking about, or like you said, I know they also make the control boxes that translate the 58X/4X signals into a 24X/1X signals for the LS1 PCMs.