
L33 Valkyrie, 1800 LBS 310 horse 330 FPT death machine


 06-25-2012, 01:19 AM
#42
On The Tree
Thread Starter

Join Date: Jun 2012
Posts: 191
Likes: 0
Received 0 Likes
on
0 Posts
hmm a Valkyrie on Valkyrie l33 powered reverse trike?
No, but I do want the gas tank emblems off one of those pretty bad cut the Honda parts off them and attach them to the tops of a pair of smoothed valve covers, Or make some custom brackets and mount them to the thre ugly plug looking protuberances on the sides of the truck intake.
I never considered the confusion it might cause, as few enough people know about the Valkyrie kit cars.
I gave up on fabbing my own motor mounts and spent a bill on a universal set from trans-adapt.
If I had more tools, I am sure I could make my own, but Ive rarely gotten something like this right on the first try, and machine shop rates are killers.
 06-25-2012, 11:13 AM
#44
On The Tree
Thread Starter
Join Date: Jun 2012
Posts: 191
Likes: 0
Received 0 Likes
on
0 Posts
I am no expert. but what I've come to understand is on the original Corvair the input shaft ran through the diff first and then into the trans putting the motor behind the rear axle and the transmission in front of it.
The Corv-8 style conversions mounts the motor to the front of the tranny with a custom input shaft and puts a cover plate over the original engine mounting point and input shaft.
As far as I can tell the Corvair box always ran the "right way" only the engine was reverse rotation so that it could be put in the "wrong" spot.
Kelmark made a kit that simply flipped the Corvair diff so that the motor and trans all ran the right way but the rear gears ran on the wrong side of the pinion leading to a lower power load capability and excessive wear, not to mention reusing the hollow input shaft.
In 66 and later versions the Corvair used the same low-mid output saginaw trans that Gm used in all its non performance vehicles and the same rear trailing arm and axle set up as the corvette.
One of the greatest Ironies of the consumer safety world is A: the criticisms that Nader leveled at the Corvair were false, when run at factory designated tire pressure the Corvair was an extremely safe stable and a super handling machine WAY ahead of its time. and B: in 66 GM "fixed" the corvair, so that peoples stupidity and inability to follow instructions would no longer cause accidents, but it was to late, in 1971 Naders organisation tested and cleared the ORIGINAL design of the Corvair as safe... about two years to late.
The really sucky part is for the locost-kit car world, as the next version of the Corvair that was in development and was scrapped was a much improved version that would hold a lot more torque.
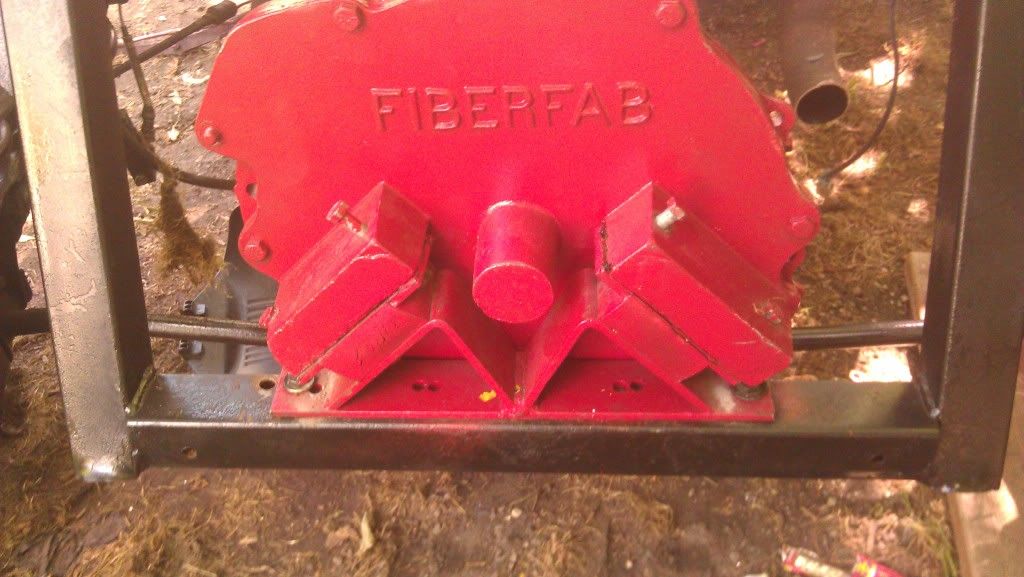
Here you can see Fiberfab's plate covering the original engine mouning area, the nose that sticks out there covers up the original input shaft.
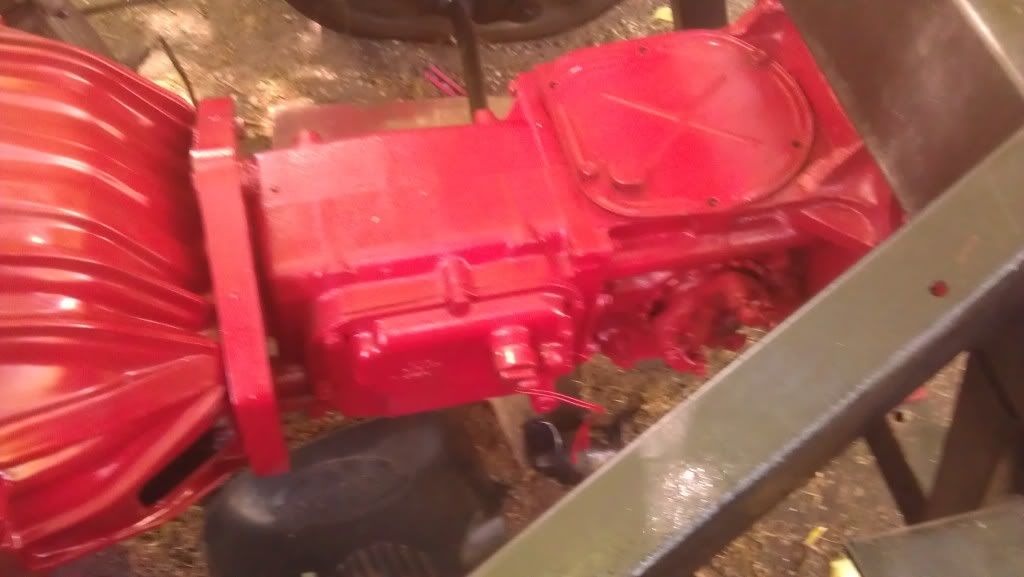
full length view of the trans and diff.
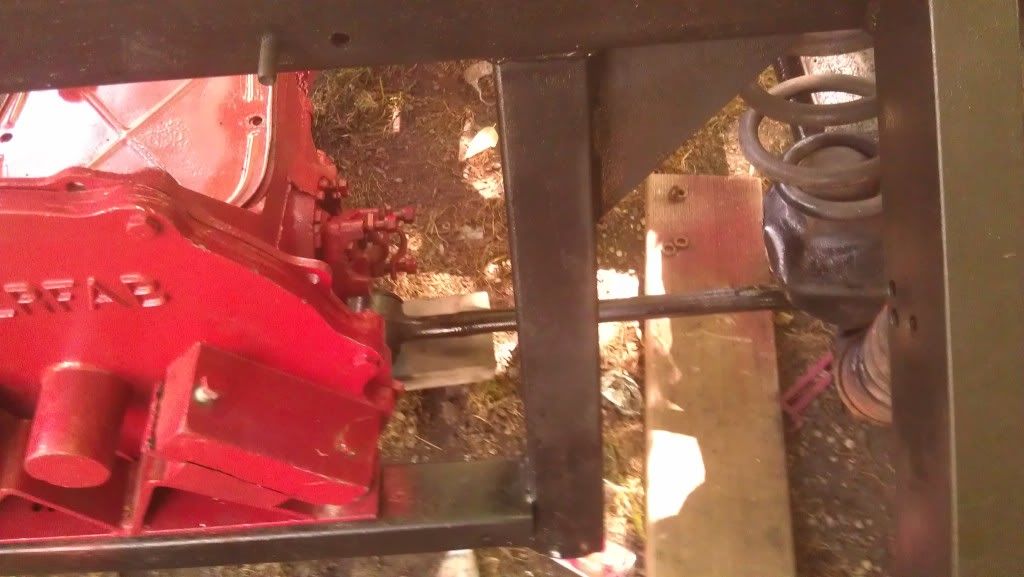
tried to get a pic of the trailing arm and axle mounting area, haven't tried to hook those up yet, wont till I am read to do the final mounting (this weekend I hope)
The Corv-8 style conversions mounts the motor to the front of the tranny with a custom input shaft and puts a cover plate over the original engine mounting point and input shaft.
As far as I can tell the Corvair box always ran the "right way" only the engine was reverse rotation so that it could be put in the "wrong" spot.
Kelmark made a kit that simply flipped the Corvair diff so that the motor and trans all ran the right way but the rear gears ran on the wrong side of the pinion leading to a lower power load capability and excessive wear, not to mention reusing the hollow input shaft.
In 66 and later versions the Corvair used the same low-mid output saginaw trans that Gm used in all its non performance vehicles and the same rear trailing arm and axle set up as the corvette.
One of the greatest Ironies of the consumer safety world is A: the criticisms that Nader leveled at the Corvair were false, when run at factory designated tire pressure the Corvair was an extremely safe stable and a super handling machine WAY ahead of its time. and B: in 66 GM "fixed" the corvair, so that peoples stupidity and inability to follow instructions would no longer cause accidents, but it was to late, in 1971 Naders organisation tested and cleared the ORIGINAL design of the Corvair as safe... about two years to late.
The really sucky part is for the locost-kit car world, as the next version of the Corvair that was in development and was scrapped was a much improved version that would hold a lot more torque.
Here you can see Fiberfab's plate covering the original engine mouning area, the nose that sticks out there covers up the original input shaft.
full length view of the trans and diff.
tried to get a pic of the trailing arm and axle mounting area, haven't tried to hook those up yet, wont till I am read to do the final mounting (this weekend I hope)
 06-25-2012, 01:30 PM
#47
On The Tree
Thread Starter
Join Date: Jun 2012
Posts: 191
Likes: 0
Received 0 Likes
on
0 Posts
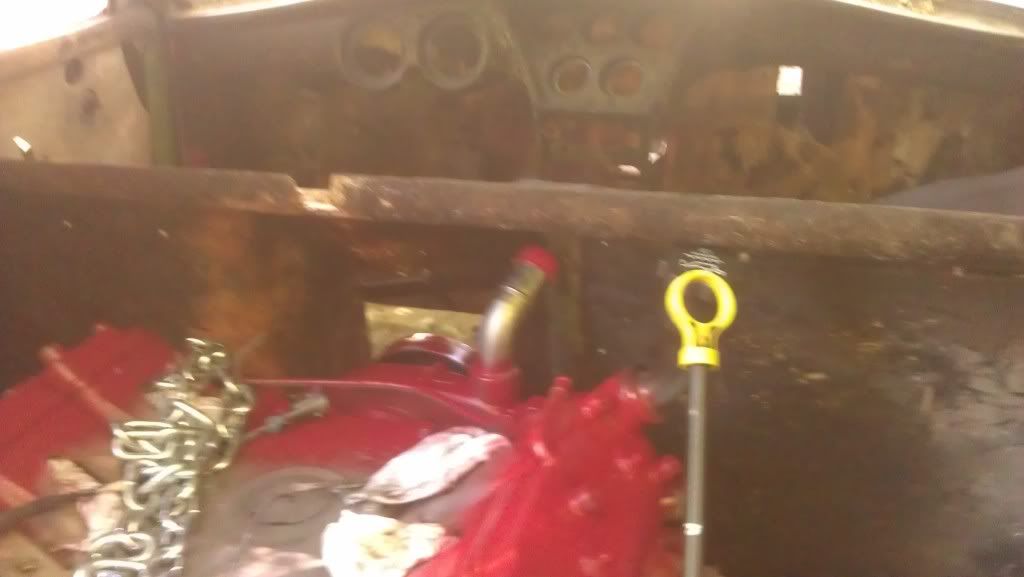
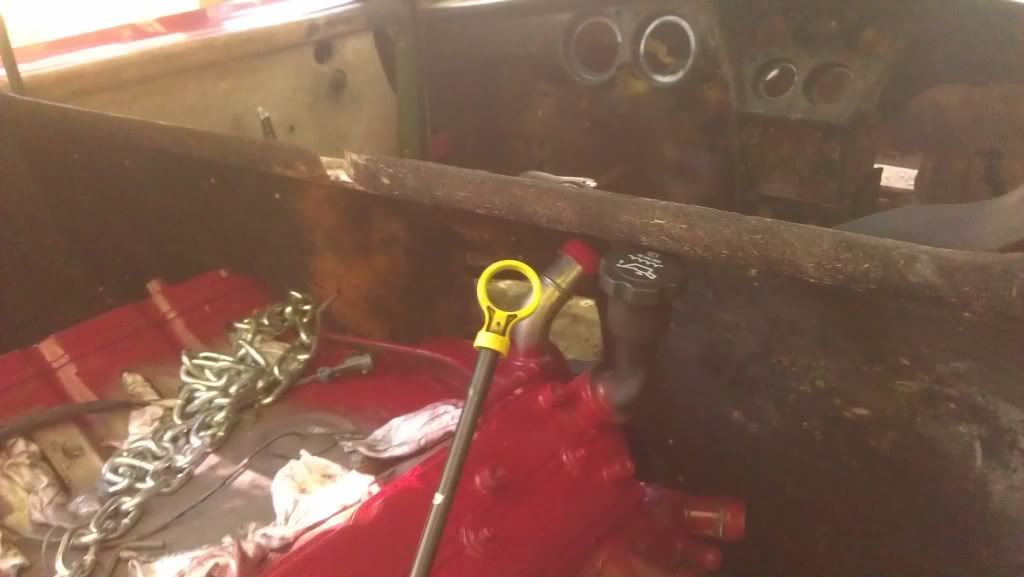
The engine needs to go up about an inch and the body needs to come down anouther 2 or three. as yo ucan see thre are significant clearence problems with the water pump and oil filler cap.
I wanted to spin the valve covers to put the oil fill in the front anyhow, and get a new cap, but the water pump seems to be a real problem.
the truck intake wont fit and I am not sure the car one will fit either. can anyone get me a measurement of the rear of the car intake from the neds of the runners to the highest point?
and I am not seeing any possible place to mount the alternator either, unless I relocate an electric water pump and mount the alternator in the water pump position.
06-25-2012, 03:49 PM
#49
On The Tree
Thread Starter
Join Date: Jun 2012
Posts: 191
Likes: 0
Received 0 Likes
on
0 Posts
20.5 inches
I thought about trying that, but even if it fits, it would be a lot of fab work that I couldnt do.
At the moment I am kinda screwed. I am not sure any intake will fit. I have 3 inches from the valley pan to the, uh.. I am going to call it the cowl.
In fact the vavlve covers wont fit either. I think I can cut the nipple off from the drivers side and make it fit, but I ma not sure what that hose goes to.
A carb style intake might fit, but then that changed everything.
Last edited by Crazier; 06-25-2012 at 04:10 PM.
06-25-2012, 07:59 PM
#50
On The Tree
Thread Starter
Join Date: Jun 2012
Posts: 191
Likes: 0
Received 0 Likes
on
0 Posts
I am very very frustrated and discouraged right now.
I think I can run two passenger side valve covers to eliminate the one issue, but that eliminates the PCV valve I think.
I may have to clearance a cross member to get a low mount alternator to fit.
Not sure what to do about the water pump, maybe make an old school thermostat housing type of a set up.
HOWEVER, that motor looks BADASS under that big back window, my son and brother want me to put lights in there that turn on with the ignition acsesories.
06-25-2012, 09:58 PM
#53
On The Tree
Thread Starter
Join Date: Jun 2012
Posts: 191
Likes: 0
Received 0 Likes
on
0 Posts
Oil fill tube isnt the problem, its the valve cover opposite of that that I assume is the PCV valve fitting. The "cowl" nearly touches the valve cover, even the oil fill cap sticks up to far. I have always intended to reverse the intake and relocate the coils.
there is no room between the motor and the "firewall" for the forward faceing water pump outlet. I am looking for that AN fitting conversion but haveing no luck so far
The heads extend three inches under the "cowl" I didn't realize the intakes ran the entire length of the head.
I am hopeing to be able to fit a carb style manifold under it, but then that leaves me with sthe stupid looking elbow, and wondering if I can even hook my stock TB to it.
If I do the front mount drivers side alternator do i need to swap to the F body crank pully? and I assume the f body water pump?
Last edited by Crazier; 06-25-2012 at 10:11 PM.
06-25-2012, 11:41 PM
#56
On The Tree
Join Date: Sep 2010
Location: San Luis Obispo CA
Posts: 155
Likes: 0
Received 0 Likes
on
0 Posts

Looks like it's going to be scary fast, glad I clicked!
06-26-2012, 12:15 AM
#57
On The Tree
Thread Starter
Join Date: Jun 2012
Posts: 191
Likes: 0
Received 0 Likes
on
0 Posts
IF I ever get it running.....
People keep asking me what the top speed will be.... I have NO intention of ever finding out, top speed will be faster then I care to drive.
People also ask me what 1/4 mile time I think I will hit, and the answer is likely however fast my safety equipment will let me go before I get kicked off the track.
Production version of this car in 1966 had a 427 big block with 450 HP and went 180 mph (though ive no idea what gearing it used)
I will be significantly lighter with more modern components and an aluminum small block at 300 HP. Should be an interesting ride.
06-26-2012, 09:26 AM
#58
On The Tree
Thread Starter
Join Date: Jun 2012
Posts: 191
Likes: 0
Received 0 Likes
on
0 Posts
http://www.retrorat.com/2012/05/lsx-...nator-diy.html
This is pure sex... saves me so much time money and trial and error, I am going to find that guy and kiss him.
Anyone needing this swap, don't use anyone online, call your stealership, they can special order, total is $22.95 after tax no shipping.
I may have to make a kit to sell online, buy the parts, make some spacers and sell them for $100 on eBay.
Last edited by Crazier; 06-26-2012 at 09:45 AM.
06-26-2012, 11:32 AM
#59
On The Tree
Thread Starter
Join Date: Jun 2012
Posts: 191
Likes: 0
Received 0 Likes
on
0 Posts
Ordered my trans-dapt motor mounts from Jeggs on eBay Sunday at like 1 am, got them Tuesday at 11 am.... that's some fast shipping
Paint on these is worse then terrible, its flaking right off in 100 spots, going to have to clean them all down to bare metal before i can repaint them, never seen such a crap job.
The parts themselves are a lot sturdier then they look in the pictures (I was worried) welds look pretty straight and solid too. I wouldn't trust them to a real high HP build, but for my stocker they should work, and maybe later on I can beef them up as I upgrade.
*update* parts are defective, with bushings totally pressed in, the bottom mounts wont fit into the top mounts, Jegs return policy says that I can ship them back to them, and then have them ship new ones to me, takeing 4-6 days, or i can buy new ones and then get a credit when i ship the old ones back.... I bought new ones so i hopefully can get them to install them this weekend.
Last edited by Crazier; 06-26-2012 at 12:17 PM.
06-26-2012, 10:11 PM
#60
On The Tree
Thread Starter
Join Date: Jun 2012
Posts: 191
Likes: 0
Received 0 Likes
on
0 Posts
Oh ****, My son dosent know lefty from loosey, or righty from tighty....
The other day he helped me take the valve covers off, I just realized today that he broke two of the bolts off inside the head. a little bit sticks up, but not sure I can get visegrips on them. I have never used easy outs on something that small, going to have to go and see if they even make them that small.
Its my own fault for never teaching the boy anything before he was big enough to break stuff.