

LQ4/T56 into 2001 BMW 540i
 03-02-2013, 11:33 AM
#141
That is bad news on the driveshaft. I am going to call Drivelines Northwest to see what they can do for me. Based on what you have experienced, I may have to do a custom driveshaft to solve around this.
 03-02-2013, 03:58 PM
#142
I started my own thread. I am not nearly where you are currently, but felt I should share:
https://ls1tech.com/forums/conversio...-ls1-swap.html
https://ls1tech.com/forums/conversio...-ls1-swap.html
03-02-2013, 05:25 PM
#143

I started my own thread. I am not nearly where you are currently, but felt I should share:
https://ls1tech.com/forums/conversio...-ls1-swap.html
https://ls1tech.com/forums/conversio...-ls1-swap.html
looks great! subscribed! the wagon styling from the 90s is timeless.
the last i'll see of the internals, hopefully for a while.
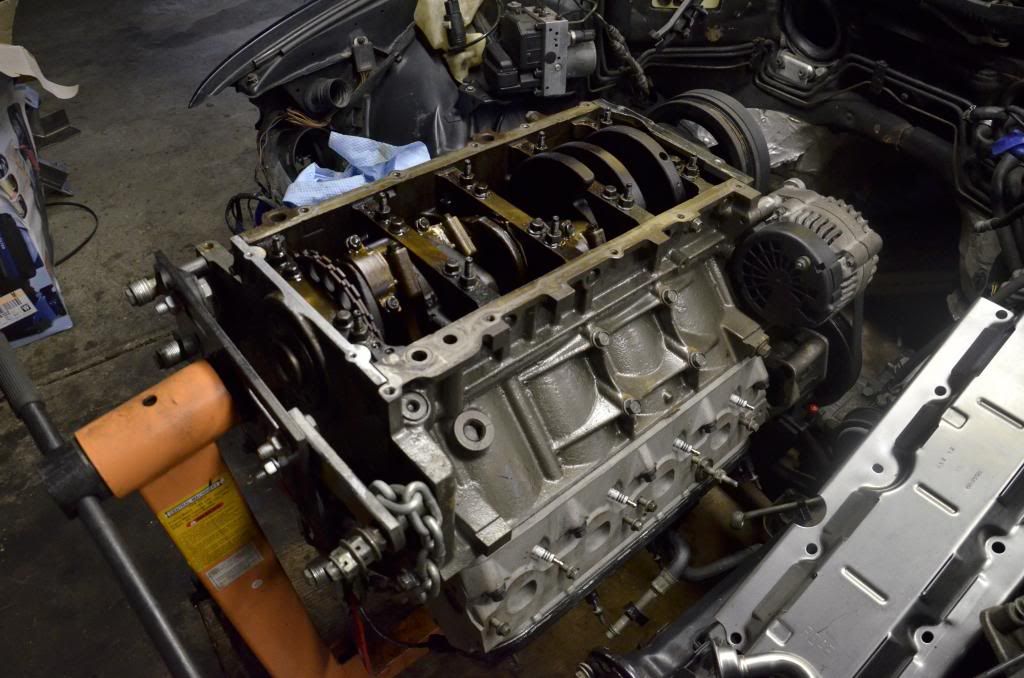
brand new from GM, 2004 LS1 GTO deflection tray and oil pickup tube installed
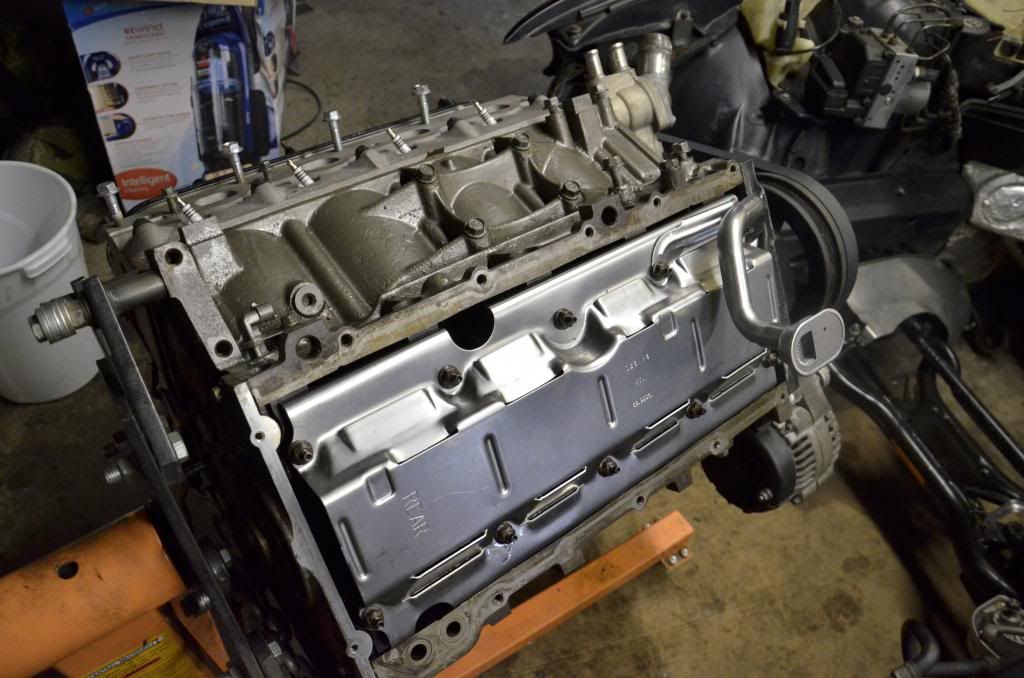
i also pressed in the freeze plug to block off the original van dipstick hole, which is cast into the block. the new GTO dipstick pokes through a hole machined in the oil pan. i would have installed the dipstick too, but it goes on after the exhaust, which Breetime is still welding up for me.

 03-05-2013, 07:32 PM
#145
TECH Resident

Join Date: Oct 2009
Location: Michigan
Posts: 793
Likes: 0
Received 0 Likes
on
0 Posts

Looking great! And BTW, I checked all over and I can't find any prices better than what you paid for those clutches and plates... So I'm still shocked and appalled! Haha
Having said that, I'm still thinking of doing this to mine:
http://www.bimmerdiffs.com/collectio...-kit-40-lockup
Having said that, I'm still thinking of doing this to mine:
http://www.bimmerdiffs.com/collectio...-kit-40-lockup
03-05-2013, 07:44 PM
#146
Launching!
I was considering the same thing. But then you have to machine the case to fit the extra clutch and dog plate. And everything starts to become much more complicated. Doesn't seem like anyone is having trouble with the OEM setup on bf.c either. That being said, if I had the budget for it now I would totally go for it. I was quoted $1200 for the work with parts included. Just have to provide the M5 diff and 3.62 gearset. If my friend who is going to build my diff wants to tackle the extra clutch, I will definitely order the triple setup. Regardless, I am ordering all my parts from Jonathan at bimmerdiffs.
03-05-2013, 08:51 PM
#147
TECH Resident
Join Date: Oct 2009
Location: Michigan
Posts: 793
Likes: 0
Received 0 Likes
on
0 Posts
Damn $1200! 
If you look at Jon's (5mall5nail5) video, the work doesn't look difficult in the least once the diff is out of the car, and the machine work is pretty simple... Have you seen the video, I can get the link up here?
Why are you guys going with the 3.62 gears with all of the torque you'll have?
If you look at Jon's (5mall5nail5) video, the work doesn't look difficult in the least once the diff is out of the car, and the machine work is pretty simple... Have you seen the video, I can get the link up here?
Why are you guys going with the 3.62 gears with all of the torque you'll have?
03-06-2013, 06:27 PM
#148
because racecar.
no really, James stated that with 3.15 gears and his T56, 6th gear is useless under 65. i used to use my BMW 6th gear around town at like 40 mph. you never really realize how much you use it until you can't have it anymore.
okay, who am i kidding, i just want to go fast(er).
no really, James stated that with 3.15 gears and his T56, 6th gear is useless under 65. i used to use my BMW 6th gear around town at like 40 mph. you never really realize how much you use it until you can't have it anymore.
okay, who am i kidding, i just want to go fast(er).

 03-08-2013, 01:10 PM
#151
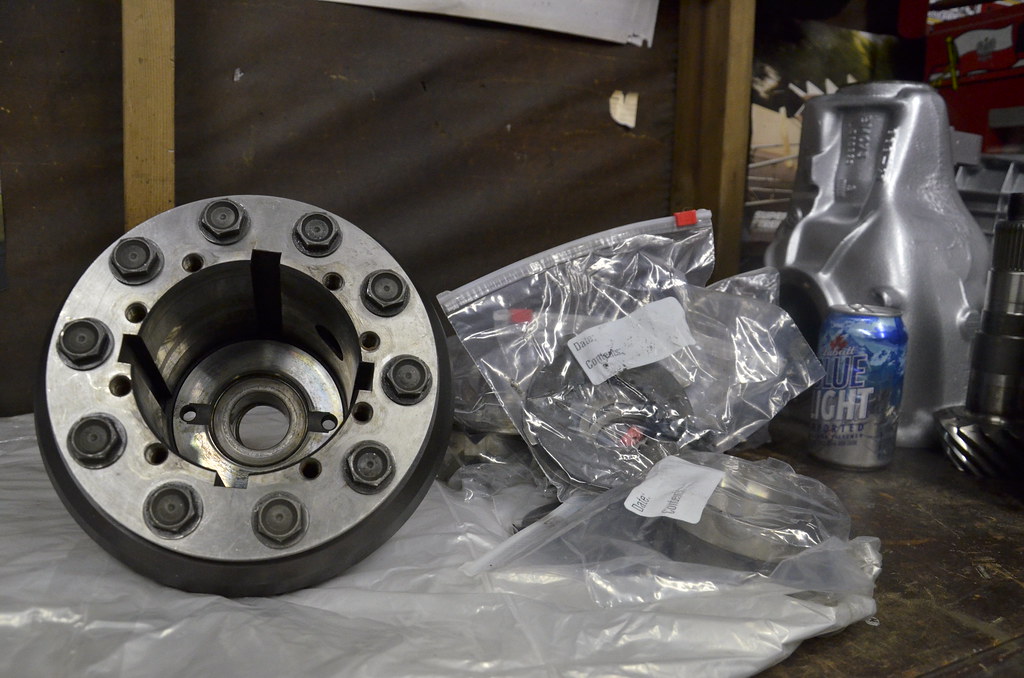
Reassembled the spool yesterday.
Let�s get started.
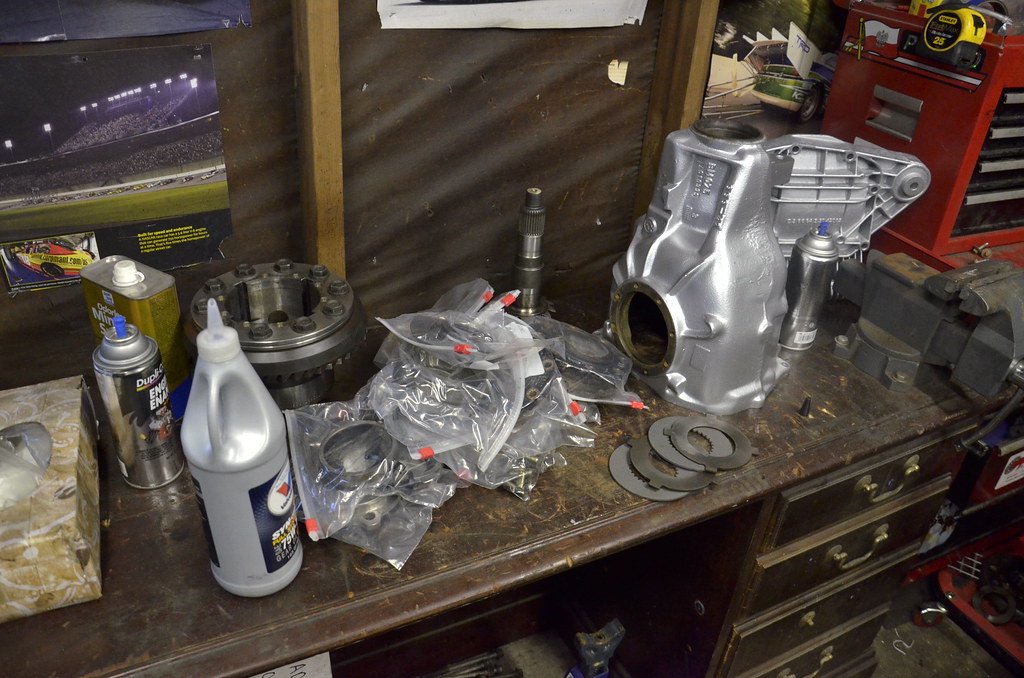
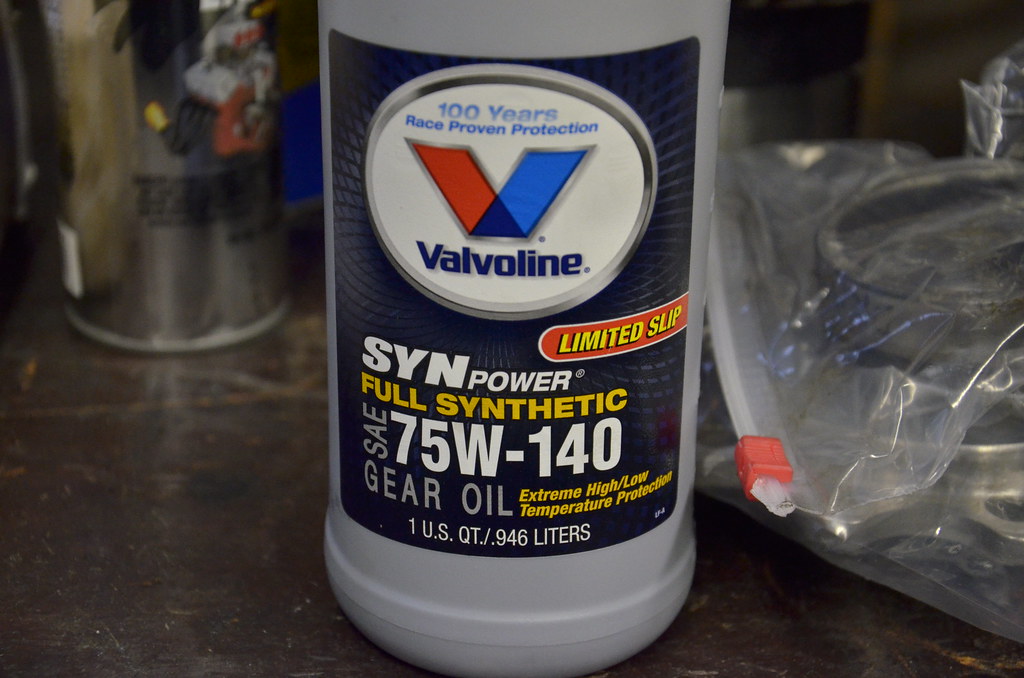
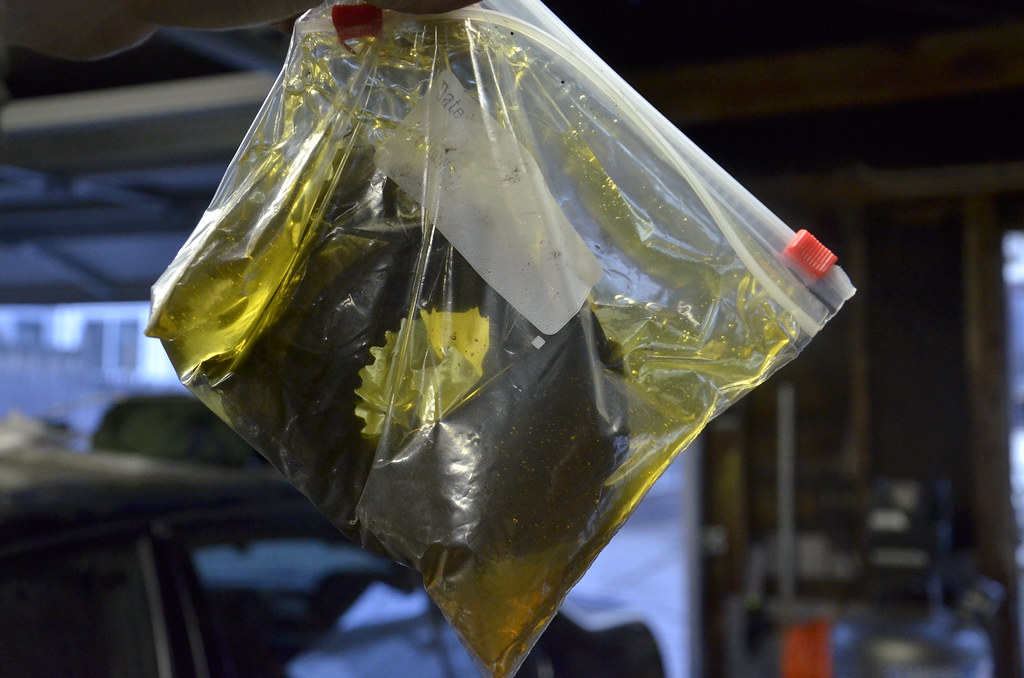
I�ll be using this stuff for break-in. It was the cheapest stuff. I�ll probably run Redline or Royal Purple when I change the oil in it a few weeks in.
Soaked clutches and discs (double bagged it)
I assembled everything with the ring gear bolts facing up, obviously. That will be the way I refer to �up� and �down� while assembling.
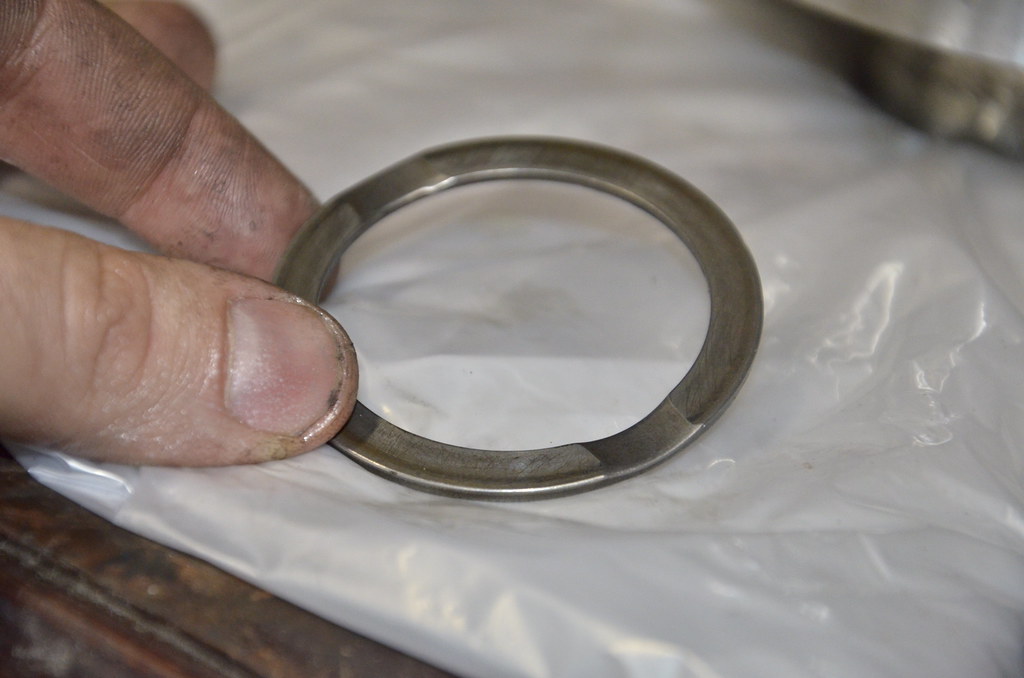
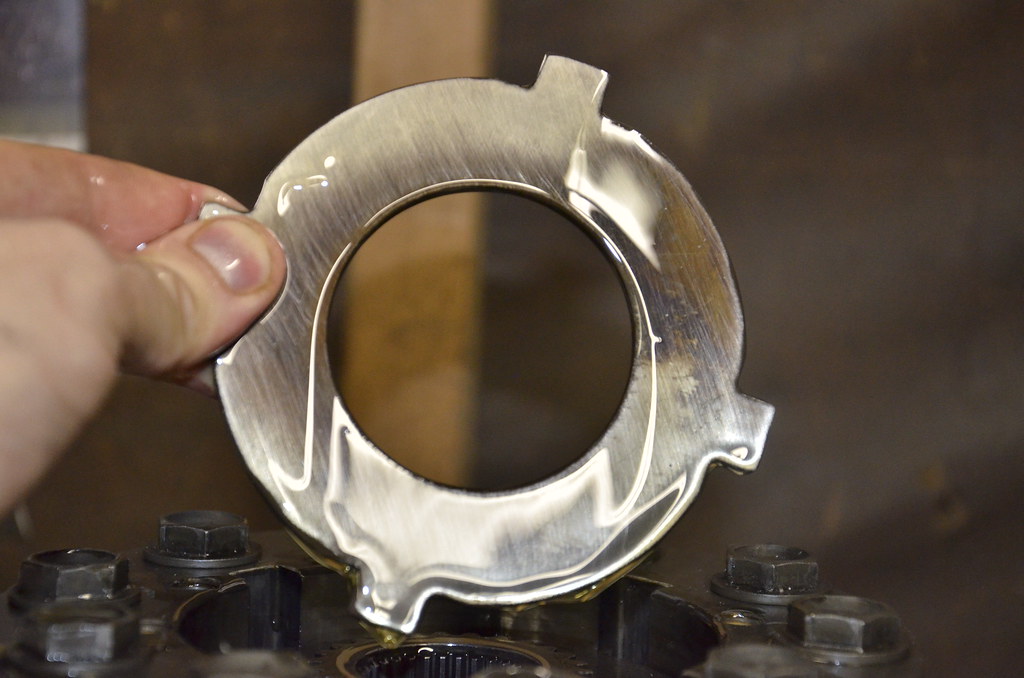
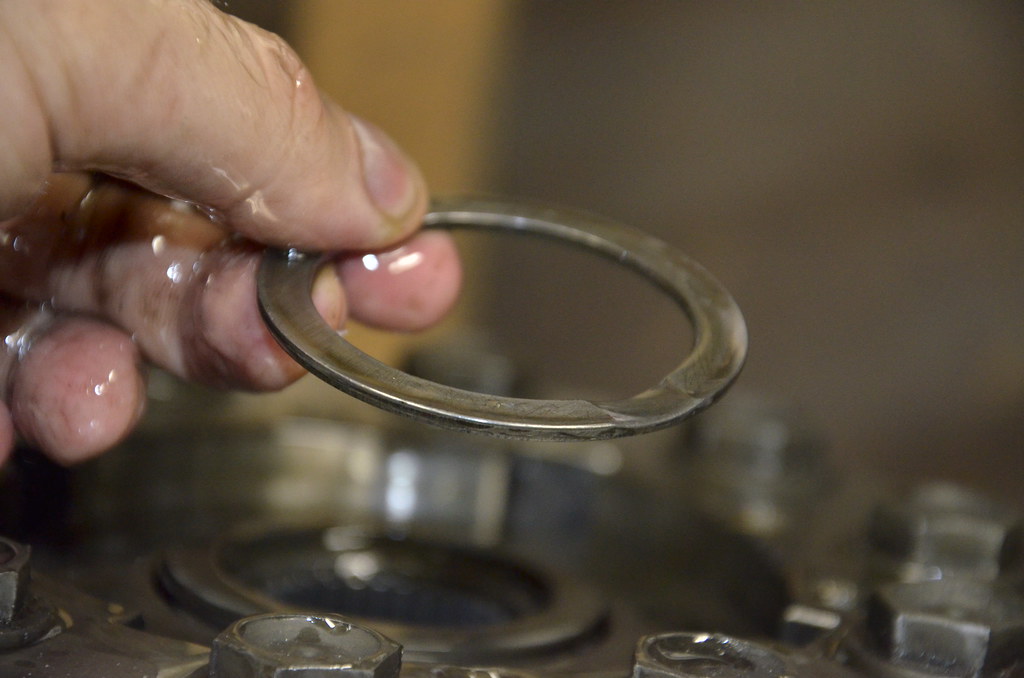
First inserted the oil control ring, with these ridges facing down.
Small diameter spring washer, with the narrow cone end facing down.
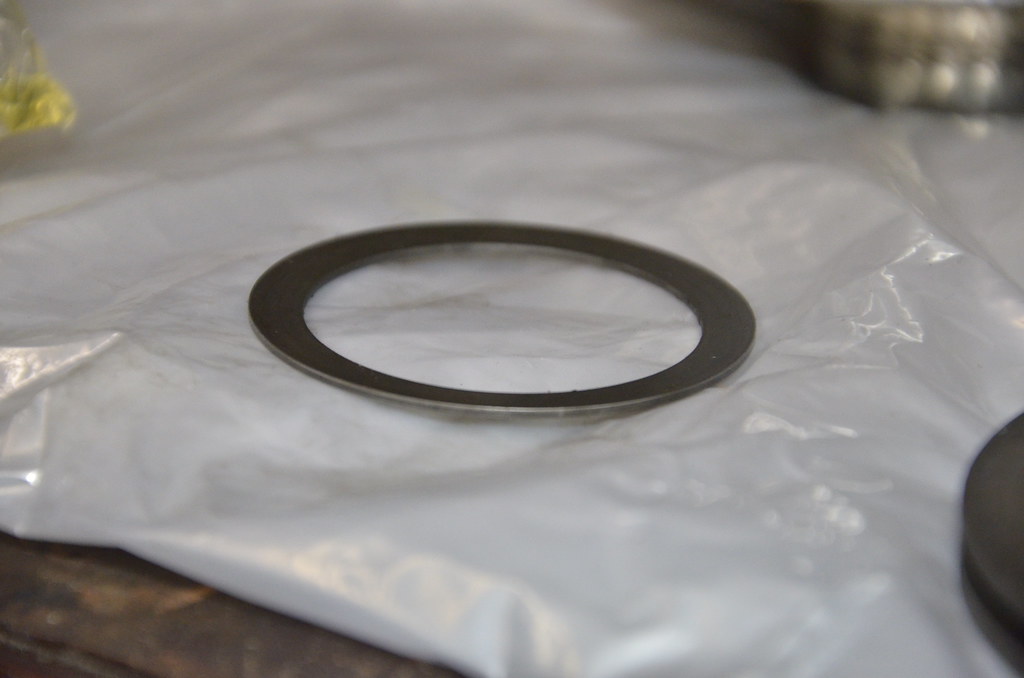
Another oil control washer, with the ridges facing up this time.

Bellevue washer, narrow cone end facing down.
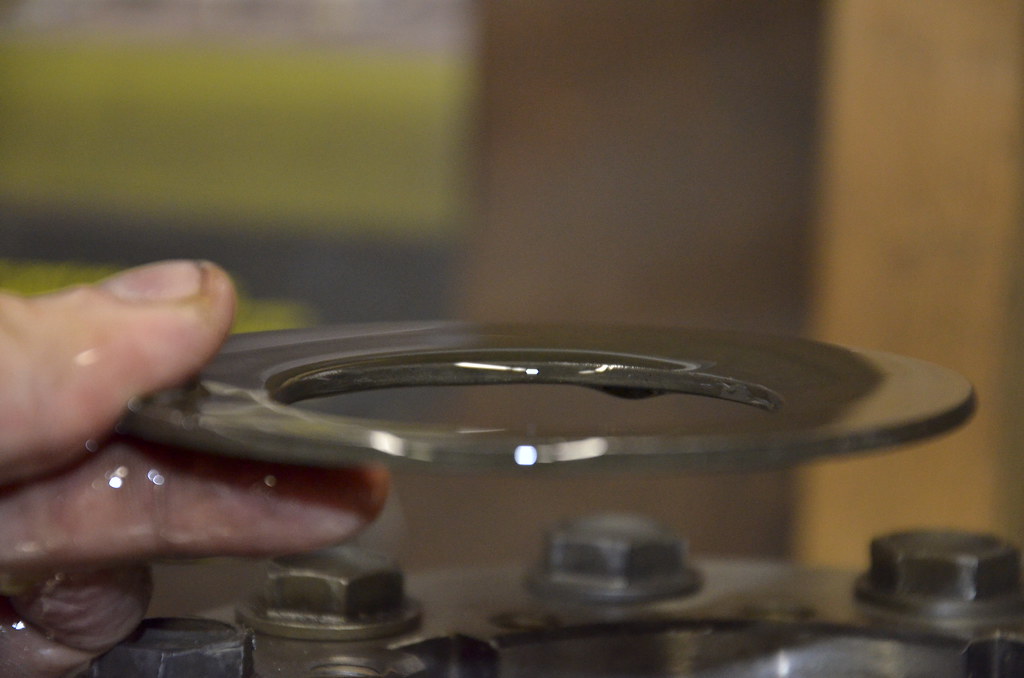
Next, a clutch.
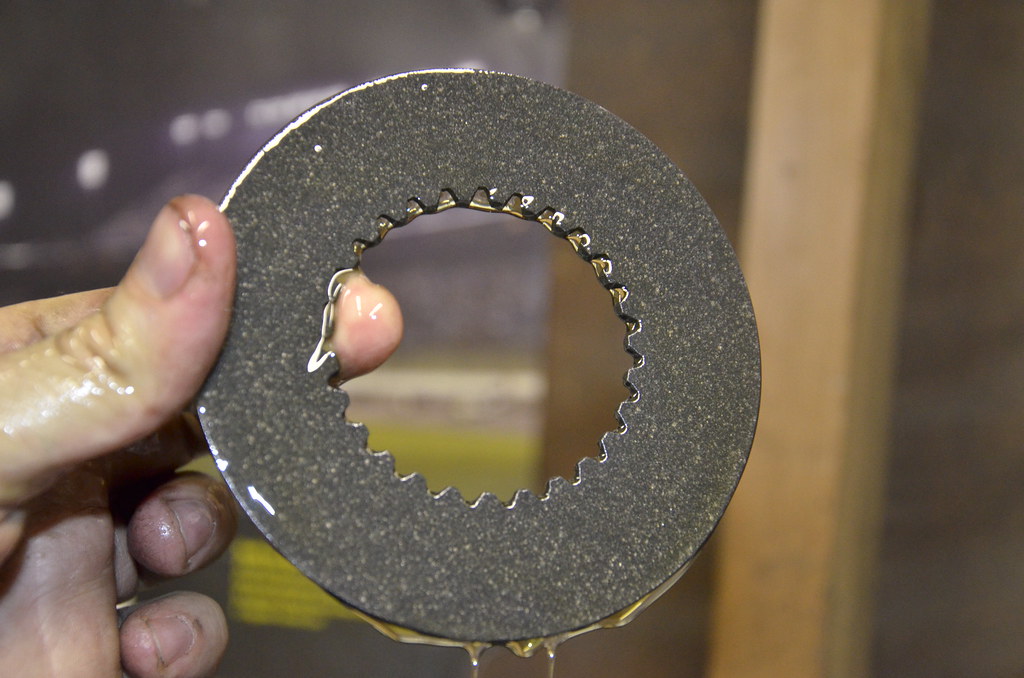
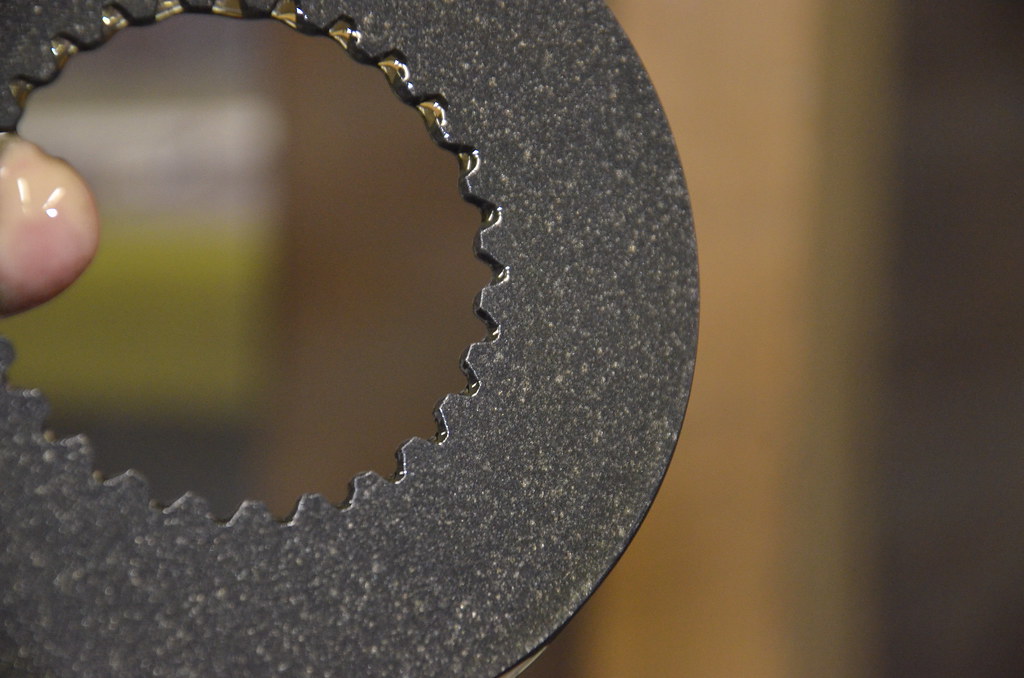
A detail of the friction surface.
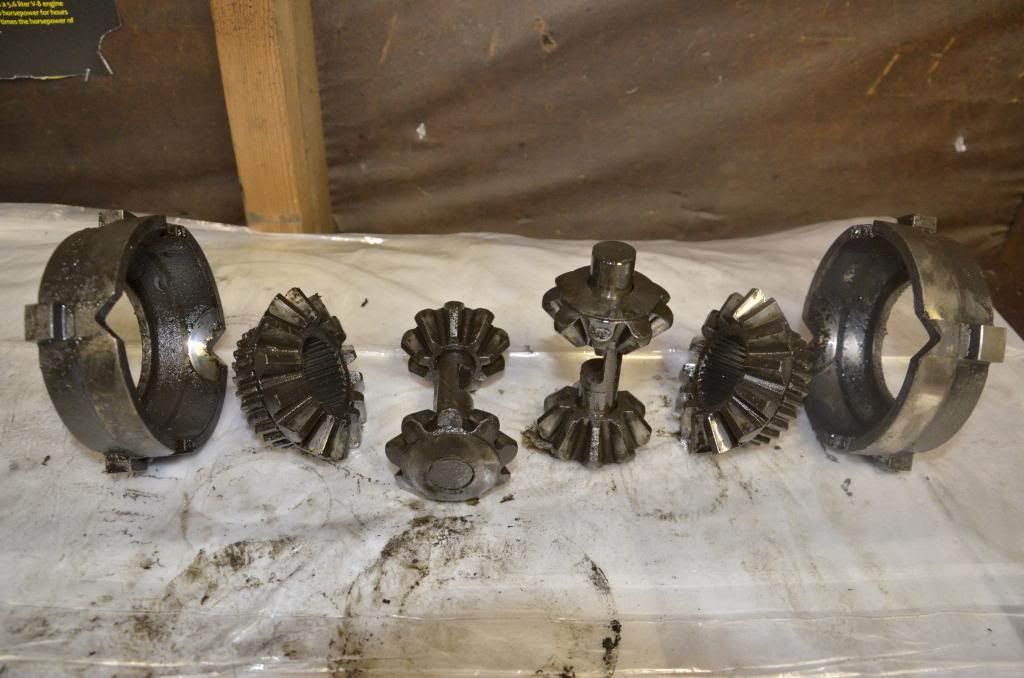
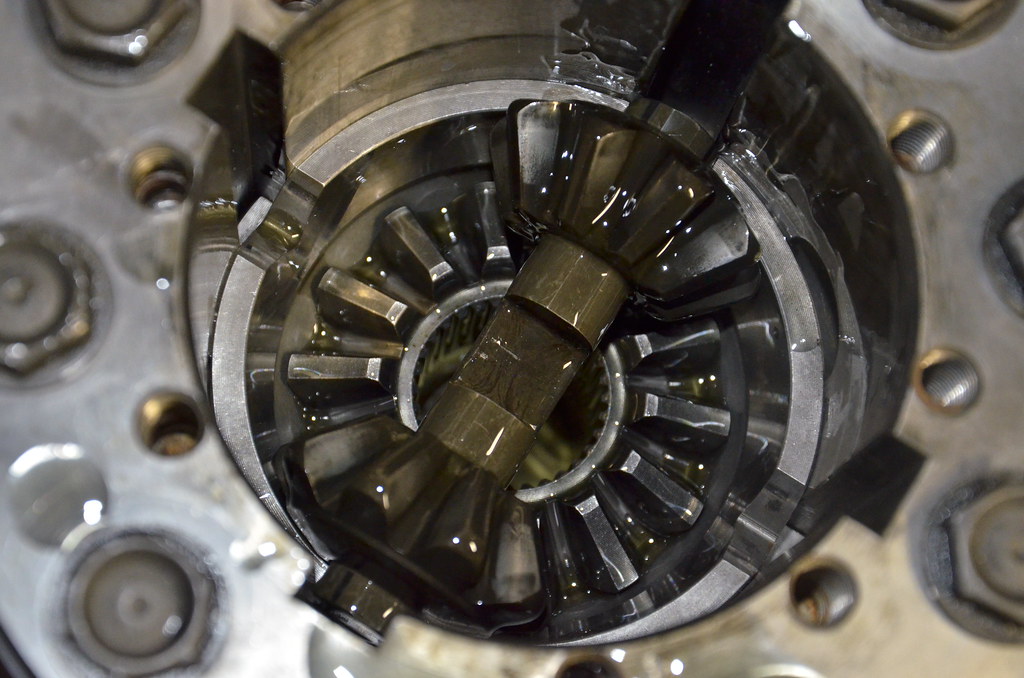
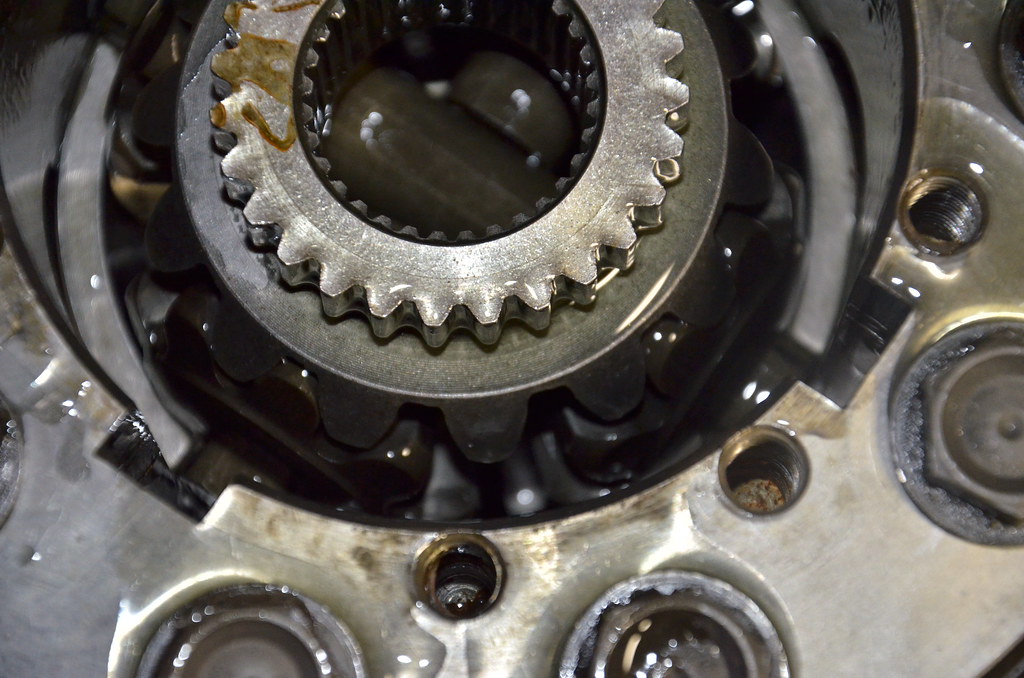
Now we install the center spool rotating assembly. I took this picture during disassembly, but it�s a good illustration of how it all goes together.
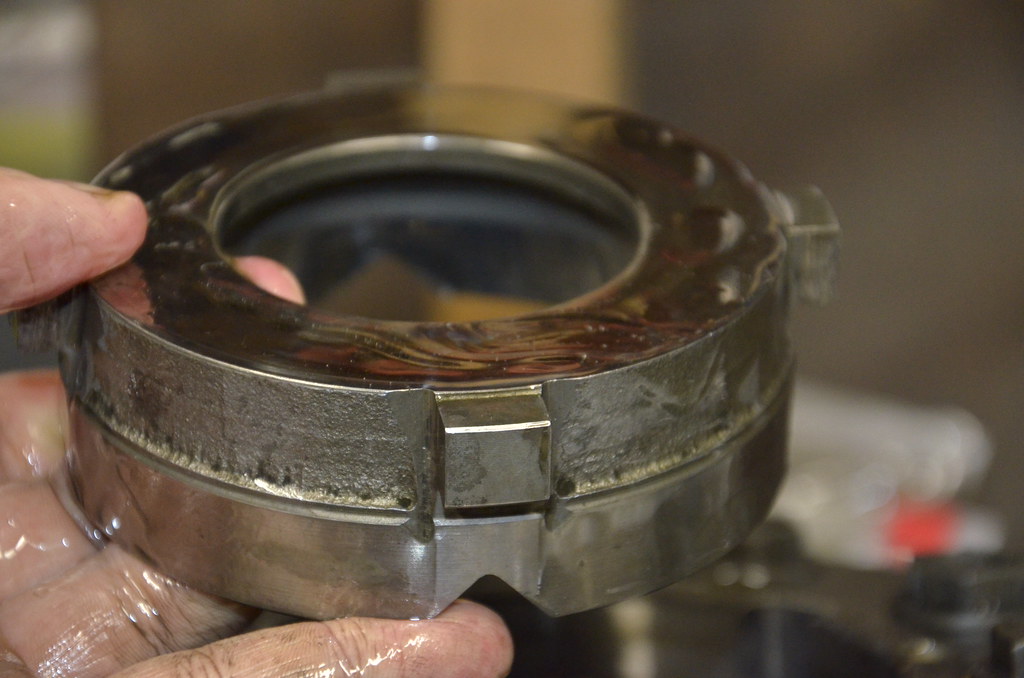
Then, a �crown cap�, with the friction surface facing down, and the V notches facing up (exactly as I have it in this photo).
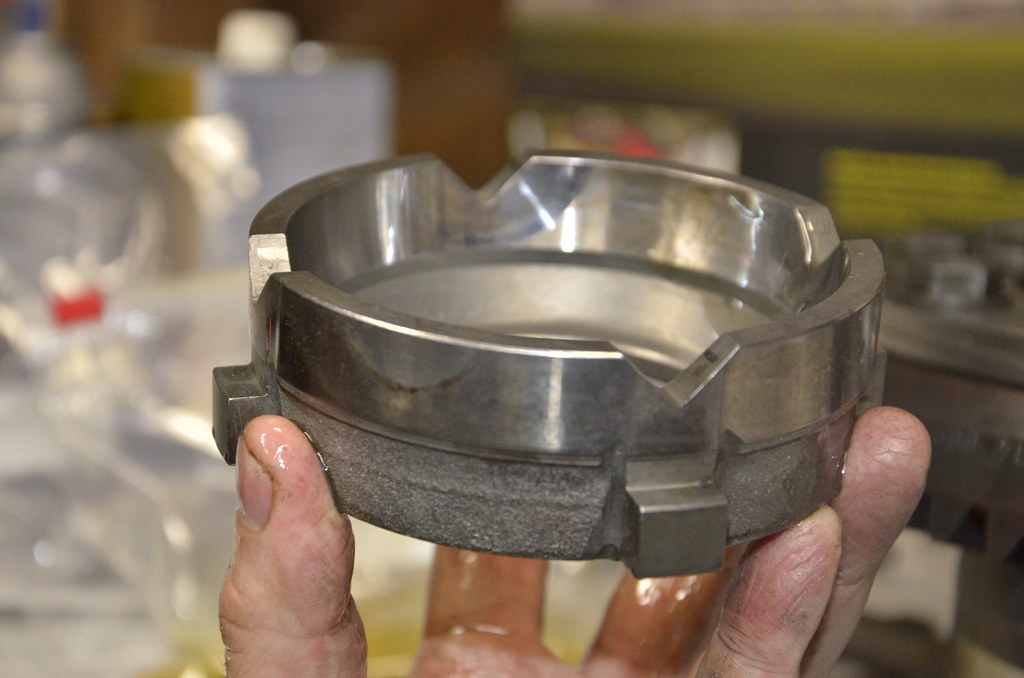
Slide the dog ears into the grooves, and make sure it�s seated down all the way. You can see the teeth of the clutch disc poking out underneath the crown cap.

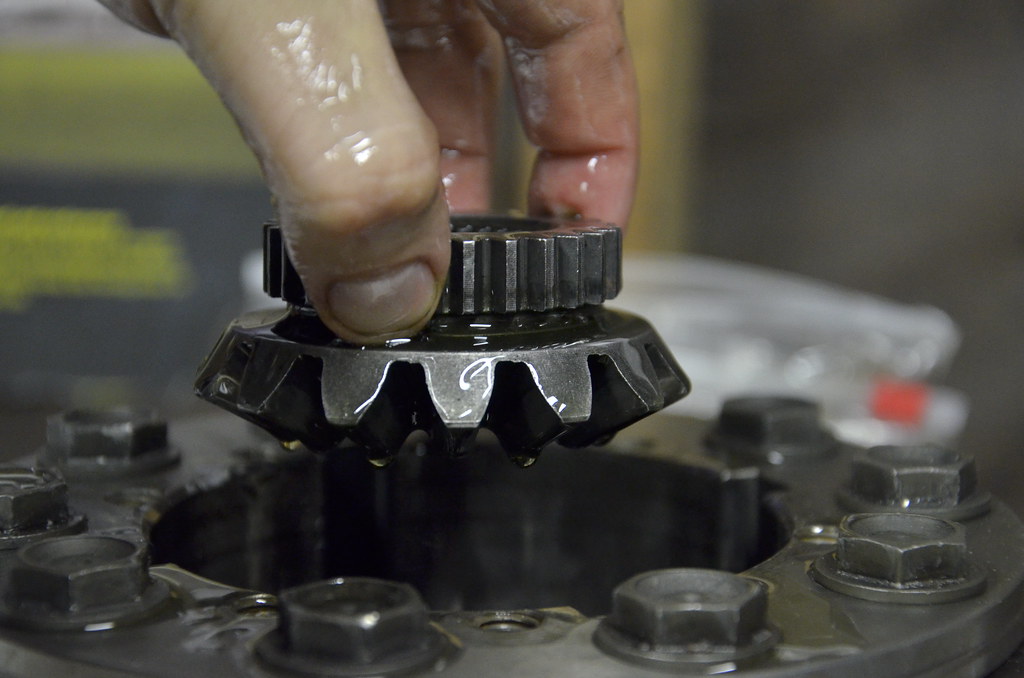
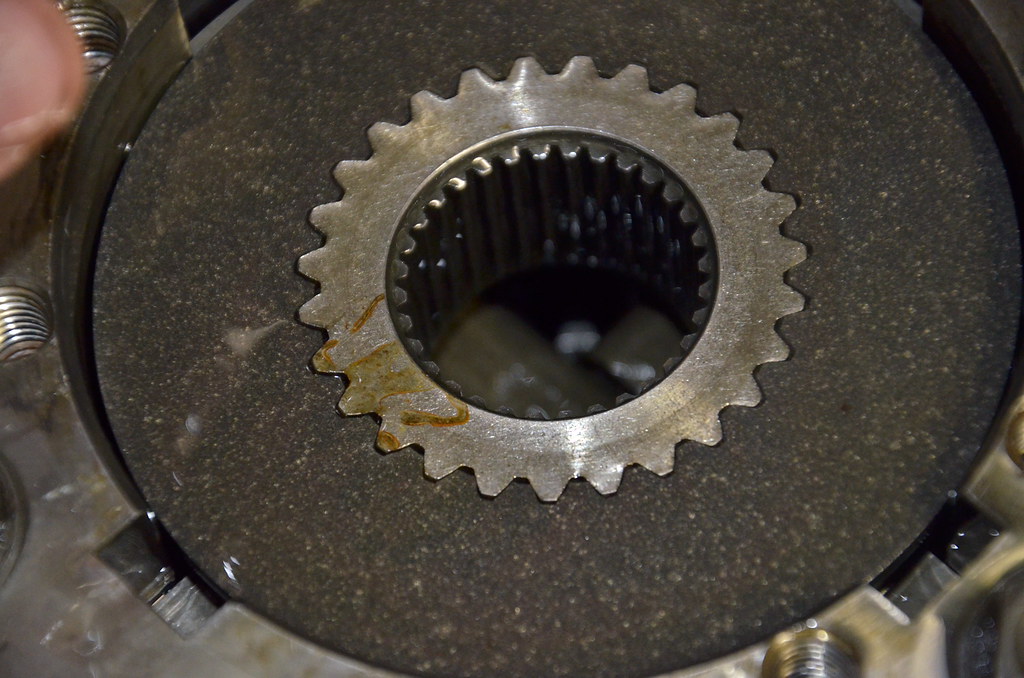
Inserted one of the main side drive gears, just as shown.
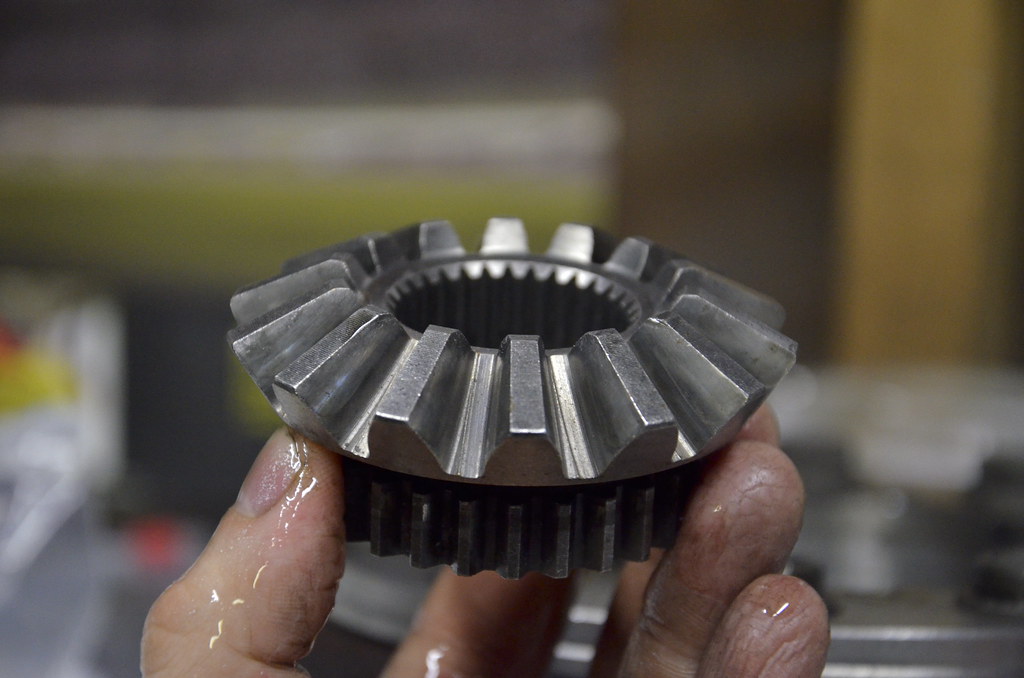
It slides in on a film of gear oil.
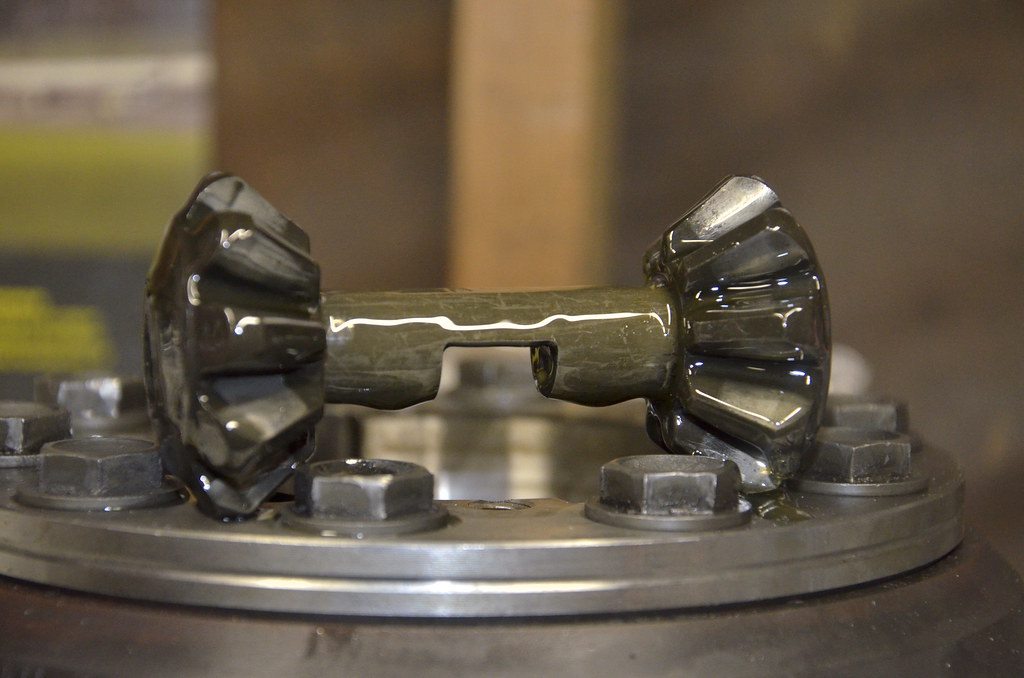
Assembled one of the �dog bones� with planet gears. Tough to keep together as the gears want to slide off on that film of oil.
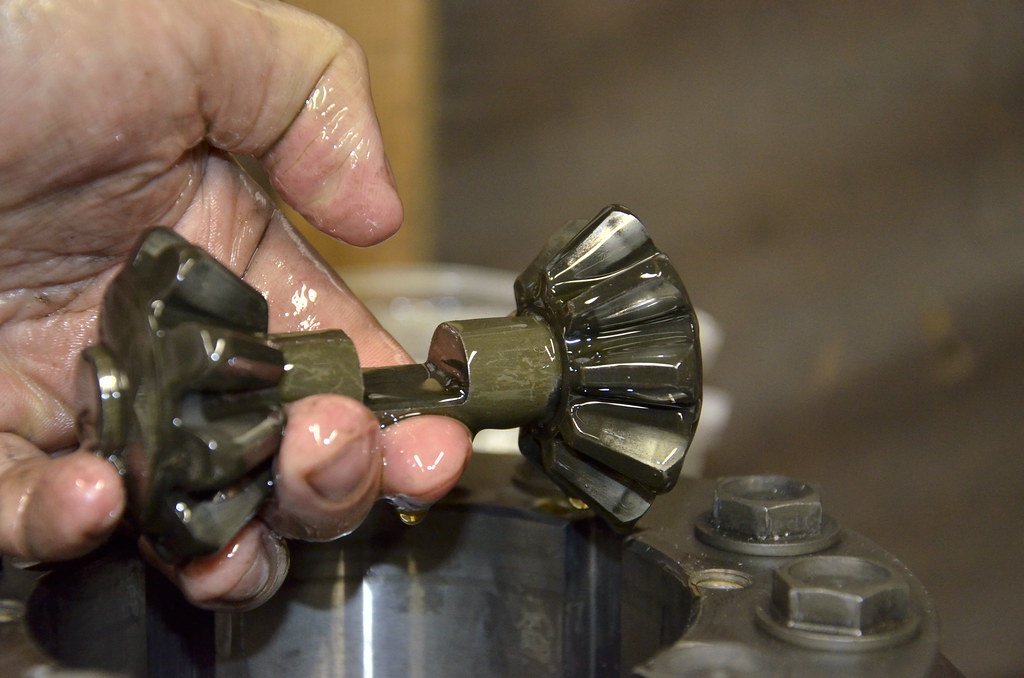
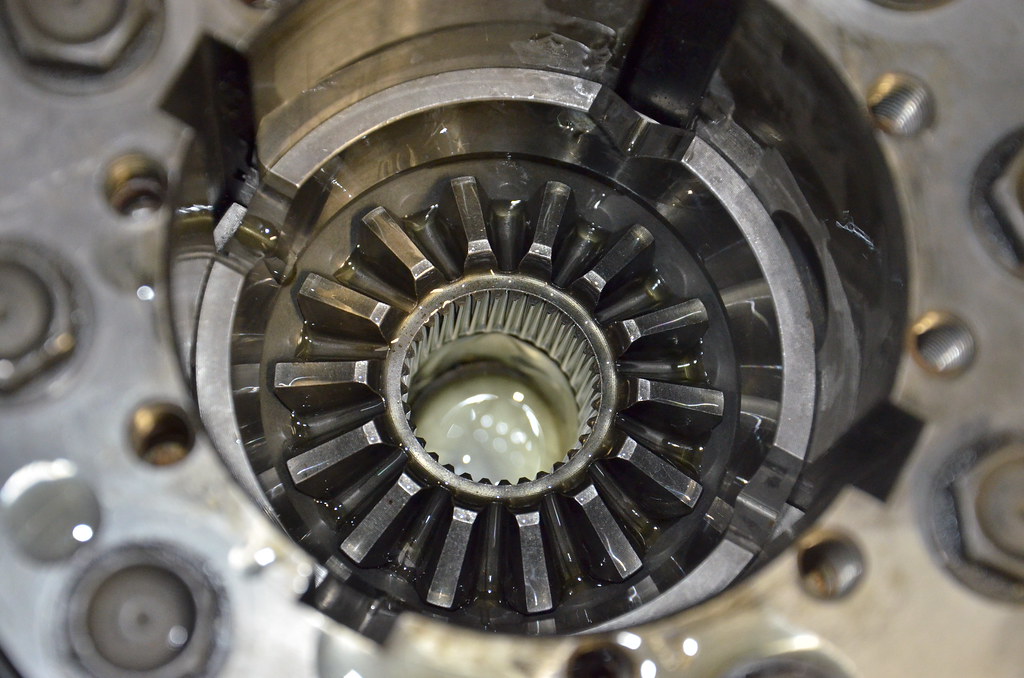
The teeth mesh nicely with the main side drive gear, and it all self-aligns.
Same goes for the next dog bone, just upside down.
Let�s get started.
I�ll be using this stuff for break-in. It was the cheapest stuff. I�ll probably run Redline or Royal Purple when I change the oil in it a few weeks in.
Soaked clutches and discs (double bagged it)
I assembled everything with the ring gear bolts facing up, obviously. That will be the way I refer to �up� and �down� while assembling.
First inserted the oil control ring, with these ridges facing down.
Small diameter spring washer, with the narrow cone end facing down.
Another oil control washer, with the ridges facing up this time.
Bellevue washer, narrow cone end facing down.
Next, a clutch.
A detail of the friction surface.
Now we install the center spool rotating assembly. I took this picture during disassembly, but it�s a good illustration of how it all goes together.
Then, a �crown cap�, with the friction surface facing down, and the V notches facing up (exactly as I have it in this photo).
Slide the dog ears into the grooves, and make sure it�s seated down all the way. You can see the teeth of the clutch disc poking out underneath the crown cap.
Inserted one of the main side drive gears, just as shown.
It slides in on a film of gear oil.
Assembled one of the �dog bones� with planet gears. Tough to keep together as the gears want to slide off on that film of oil.
The teeth mesh nicely with the main side drive gear, and it all self-aligns.
Same goes for the next dog bone, just upside down.
03-08-2013, 01:41 PM
#152
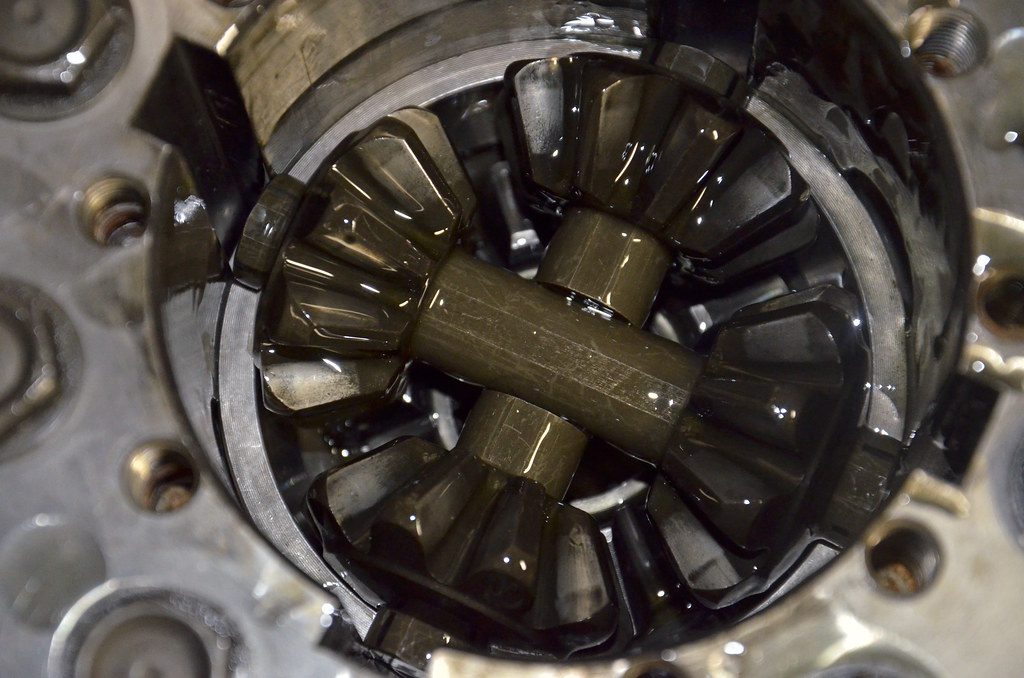
Everything is a mirror image from now on, starting with that second dog bone assembly. The “line of symmetry” is between the dog bones.
After the dog bones are together and in, the next main side drive gear goes in, teeth down.
You can see the drive gear teeth meshing with the dog bone planet gear teeth.
“Crown cap” goes next, notched V side down.
The ears of the crown cap fall nicely into the slots machined in the main spool case. Very tight tolerances so it all slides down slowly on a film of oil.

Another clutch disc

And the teeth line up nicely with the end of the main side drive gear.
Followed by a dog ear friction disc, which slides nicely into the slots.
Bellevue washer, narrow cone end up
It probably didn’t matter but I kept all oil control washers and spring/Bellevue washers side specific.
Oil control washer, groove down
Small diameter spring washer, narrow cone end up

Followed by the last oil control washer, groove end up.
After the dog bones are together and in, the next main side drive gear goes in, teeth down.
You can see the drive gear teeth meshing with the dog bone planet gear teeth.
“Crown cap” goes next, notched V side down.
The ears of the crown cap fall nicely into the slots machined in the main spool case. Very tight tolerances so it all slides down slowly on a film of oil.
Another clutch disc
And the teeth line up nicely with the end of the main side drive gear.
Followed by a dog ear friction disc, which slides nicely into the slots.
Bellevue washer, narrow cone end up
It probably didn’t matter but I kept all oil control washers and spring/Bellevue washers side specific.
Oil control washer, groove down
Small diameter spring washer, narrow cone end up
Followed by the last oil control washer, groove end up.
03-08-2013, 01:56 PM
#153
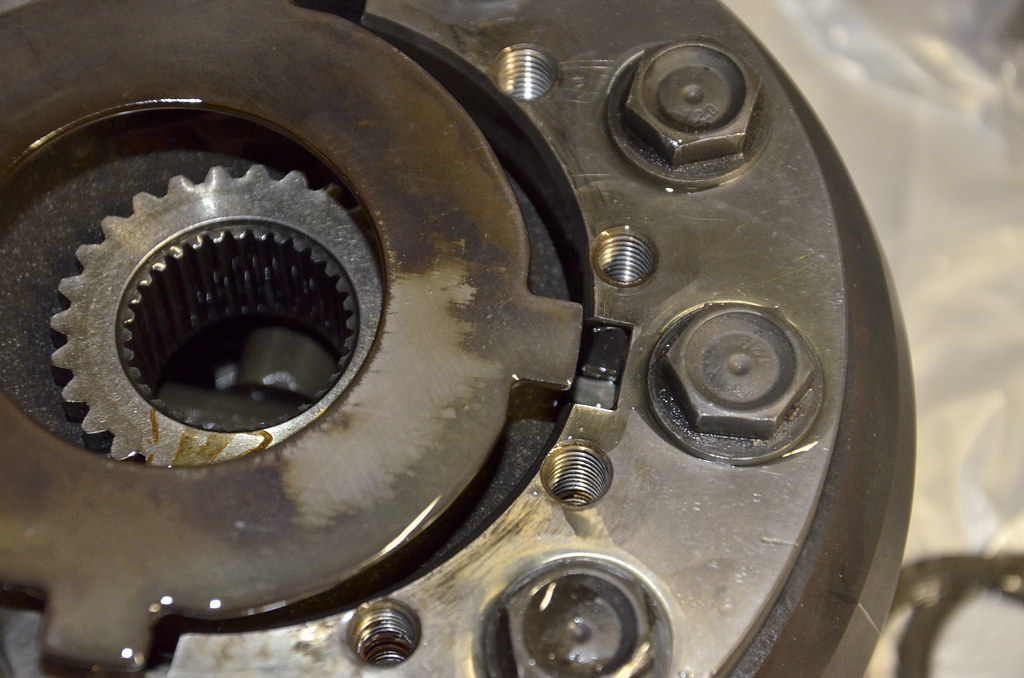
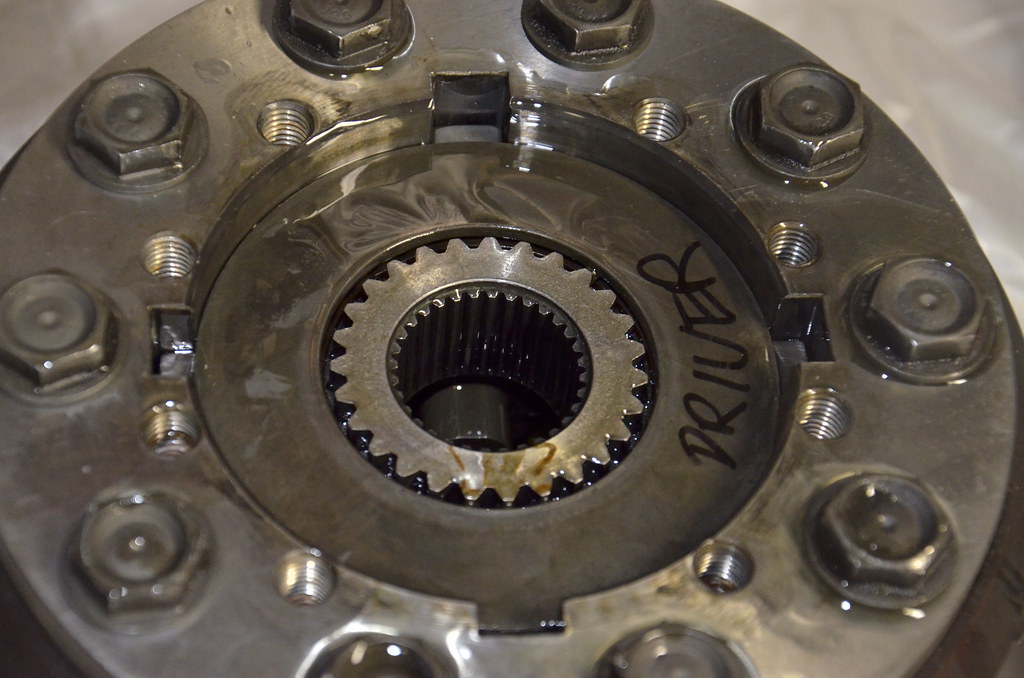
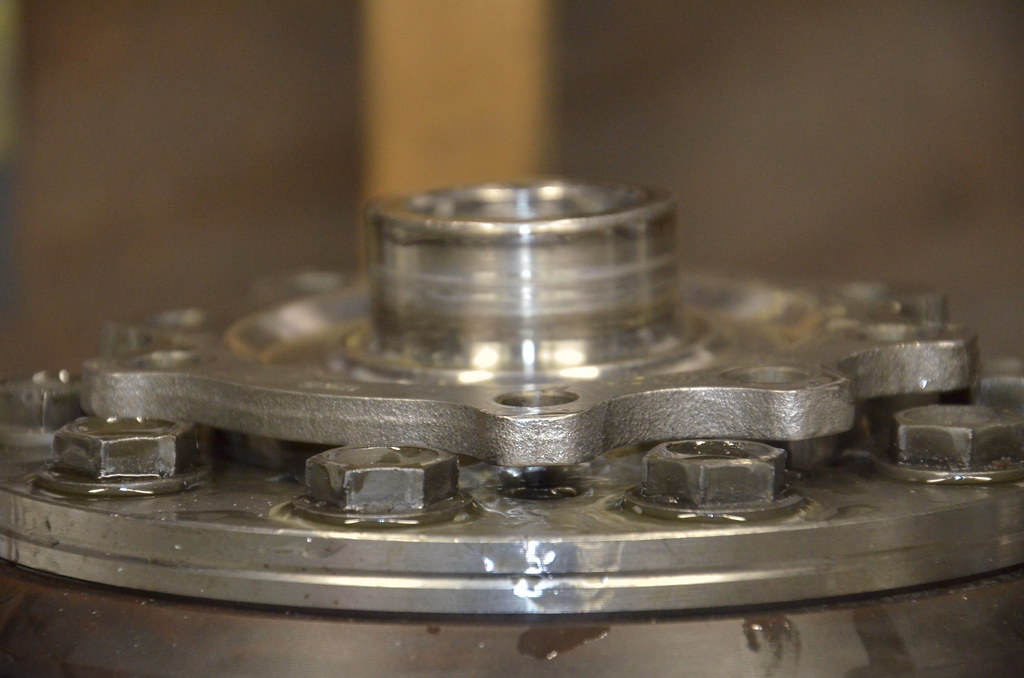
Finally the spool lid can be put back on. It took me a few tries to align it with the bolt holes in the spool case, all while making sure the I used the same method that I did installing the ring gear. Use bolts to get it started a few threads in, then remove bolts. The friction of the spool lid is so great that it won’t go anywhere once you remove the bolts. The key was to tighten them all equally (1 turn at a time or so) to make sure each end of the lid came down roughly at the same rate.

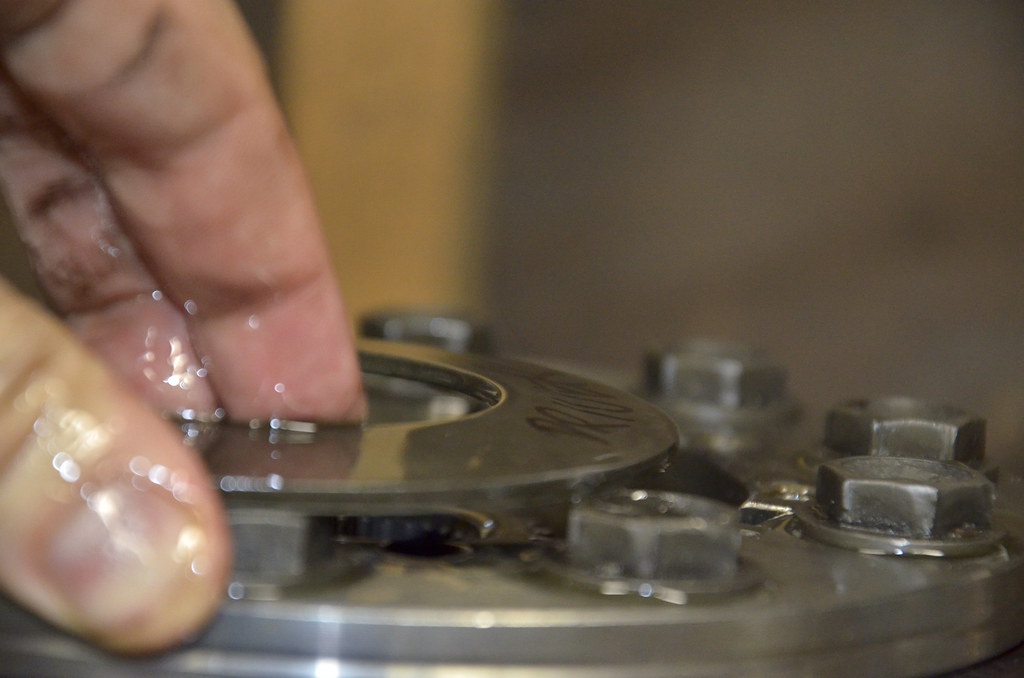
The cover is cocked in this picture, one of about a half dozen attempts to get it aligned perfectly. Once it’s close rotationally I used a rubber mallet to further seat the cover. It won’t ever fully seat without the bolts because the tension of the Bellevue washers resists that.
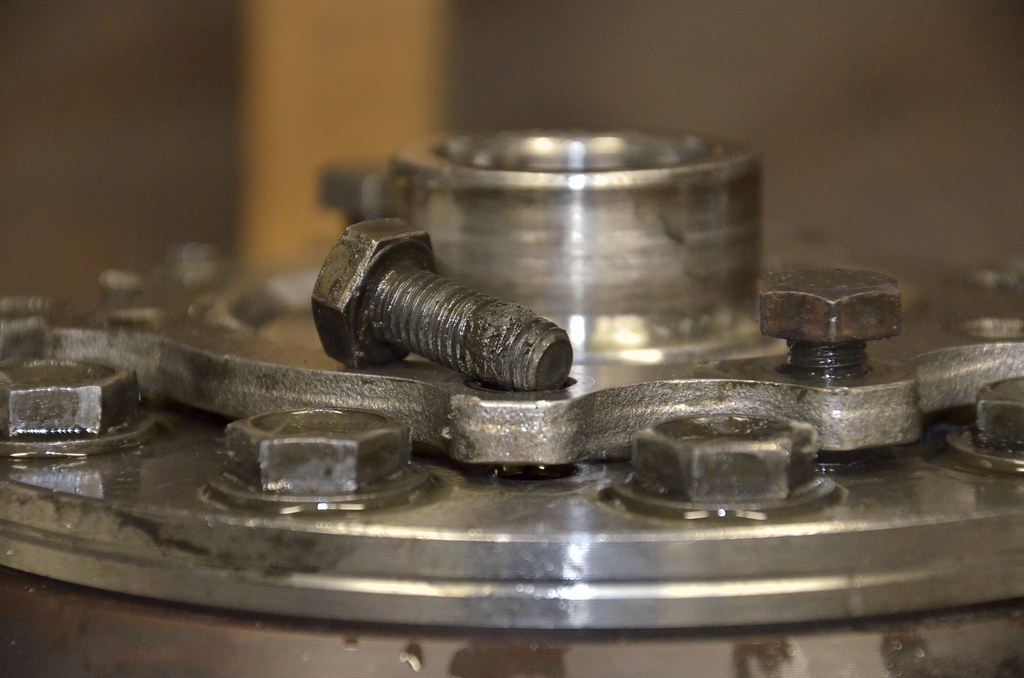
The bolts were pretty nasty. Remember, these were inside the spool lid, which is inside the main diff case, and somehow **** still got in there (in a bath of oil as well). I cleaned the threads with a fingernail, rag, and brake cleaner.
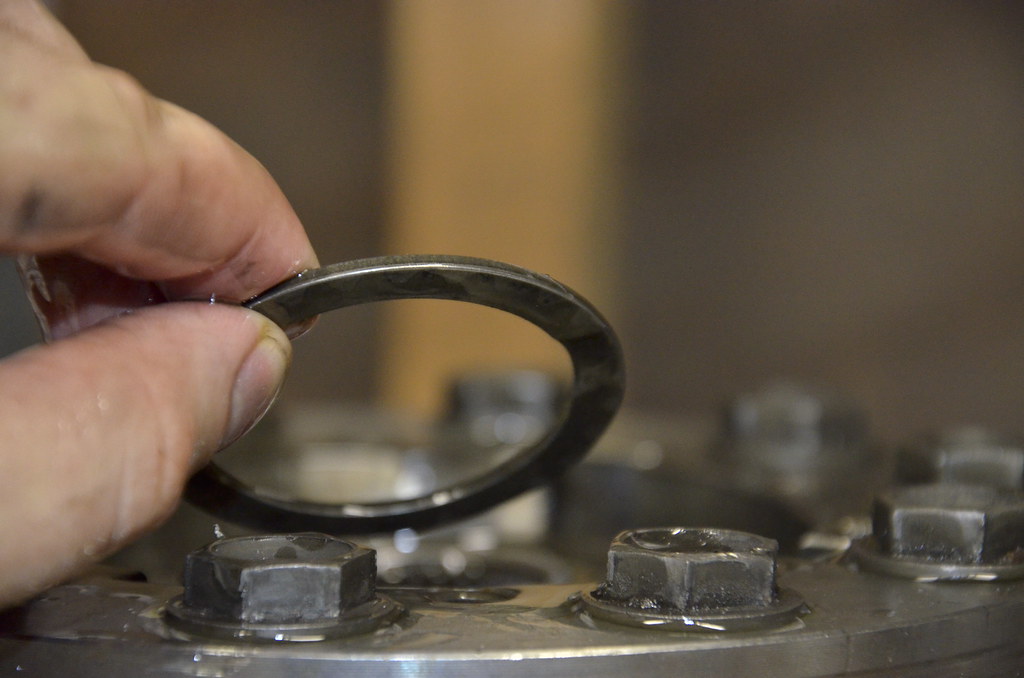
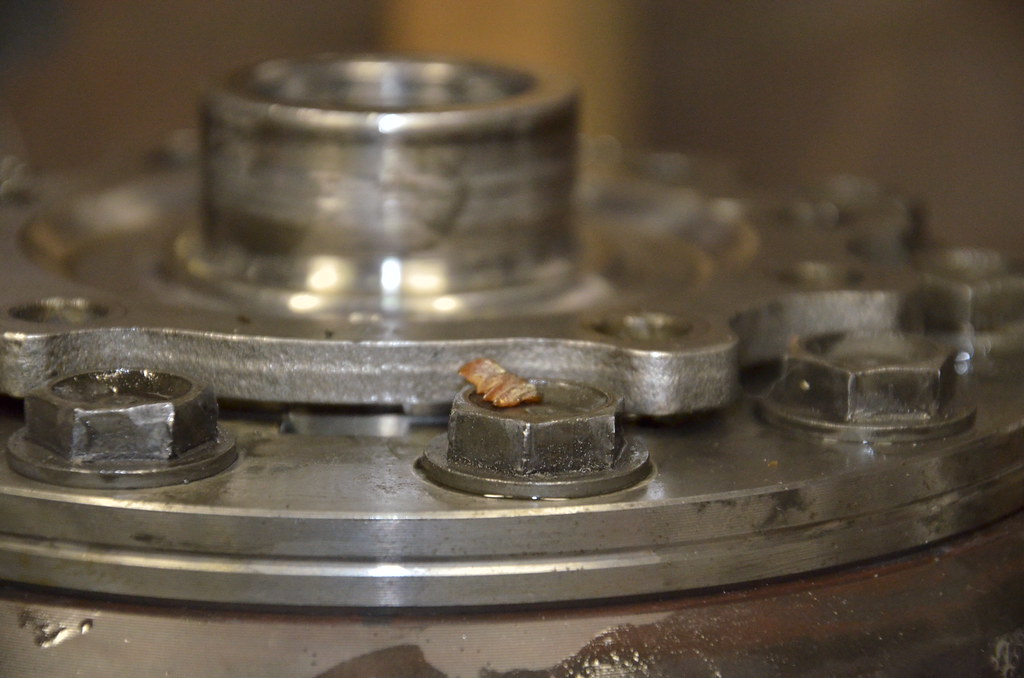
Before reinstalling the bolts, I blew out the threaded blind holes with compressed air and found a nice little specimen of OEM threadlocker.
Bolts partially snugged down, about 25 ft-lbs with Red Loctite.
[img]https://farm9.staticflickr.com/8521/8540184786_4a43a85d9d_b.jpg/img]
It really takes some torque on the bolts (evenly of course) to bring the cover down and compress the spring washers.

I torqued to 25 ft-lbs first pass, then about 60 ft-lbs second pass.
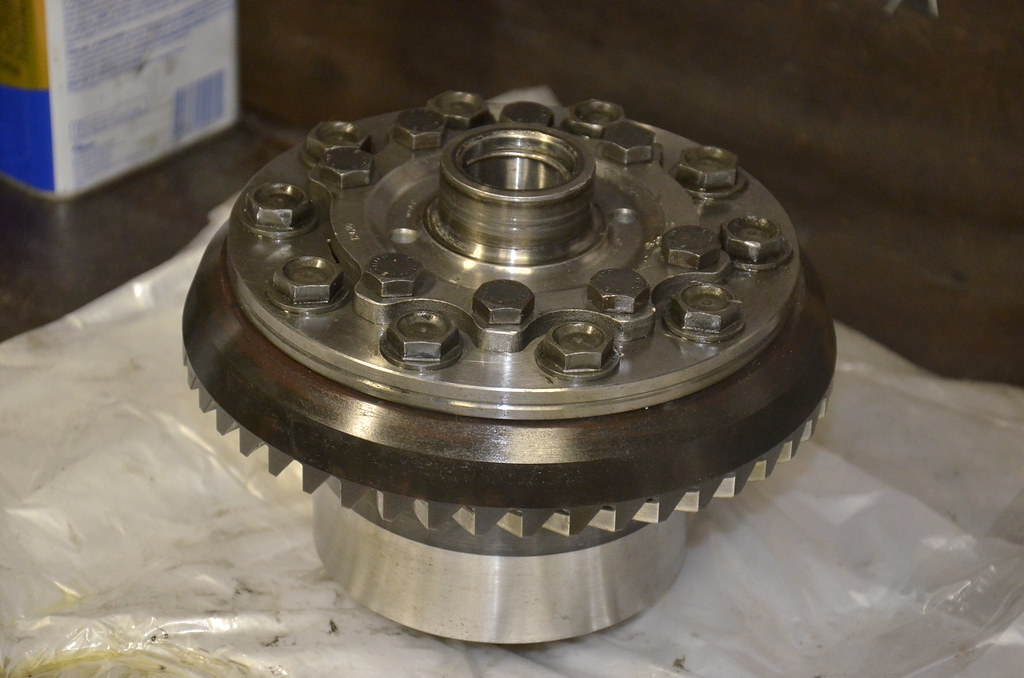
At this point it’s all ready for new races and bearings, that’s happening tomorrow morning.
The cover is cocked in this picture, one of about a half dozen attempts to get it aligned perfectly. Once it’s close rotationally I used a rubber mallet to further seat the cover. It won’t ever fully seat without the bolts because the tension of the Bellevue washers resists that.
The bolts were pretty nasty. Remember, these were inside the spool lid, which is inside the main diff case, and somehow **** still got in there (in a bath of oil as well). I cleaned the threads with a fingernail, rag, and brake cleaner.
Before reinstalling the bolts, I blew out the threaded blind holes with compressed air and found a nice little specimen of OEM threadlocker.
Bolts partially snugged down, about 25 ft-lbs with Red Loctite.
[img]https://farm9.staticflickr.com/8521/8540184786_4a43a85d9d_b.jpg/img]
It really takes some torque on the bolts (evenly of course) to bring the cover down and compress the spring washers.
I torqued to 25 ft-lbs first pass, then about 60 ft-lbs second pass.
At this point it’s all ready for new races and bearings, that’s happening tomorrow morning.
 03-12-2013, 09:25 PM
#156
weather is getting nicer. was able to work on the car with the door open for the first time in months.

exhaust is done. CTS-V manifolds, stainless 2.25" mandrel piping

oil pan is on. it was warm out so my fiancee decided to help out.

exhaust is done. CTS-V manifolds, stainless 2.25" mandrel piping
oil pan is on. it was warm out so my fiancee decided to help out.
