


LM7/Range Rover

Thread Starter
Launching!
Joined: Feb 2010
Posts: 276
Likes: 1
From: Mid Mo via Lancs. England
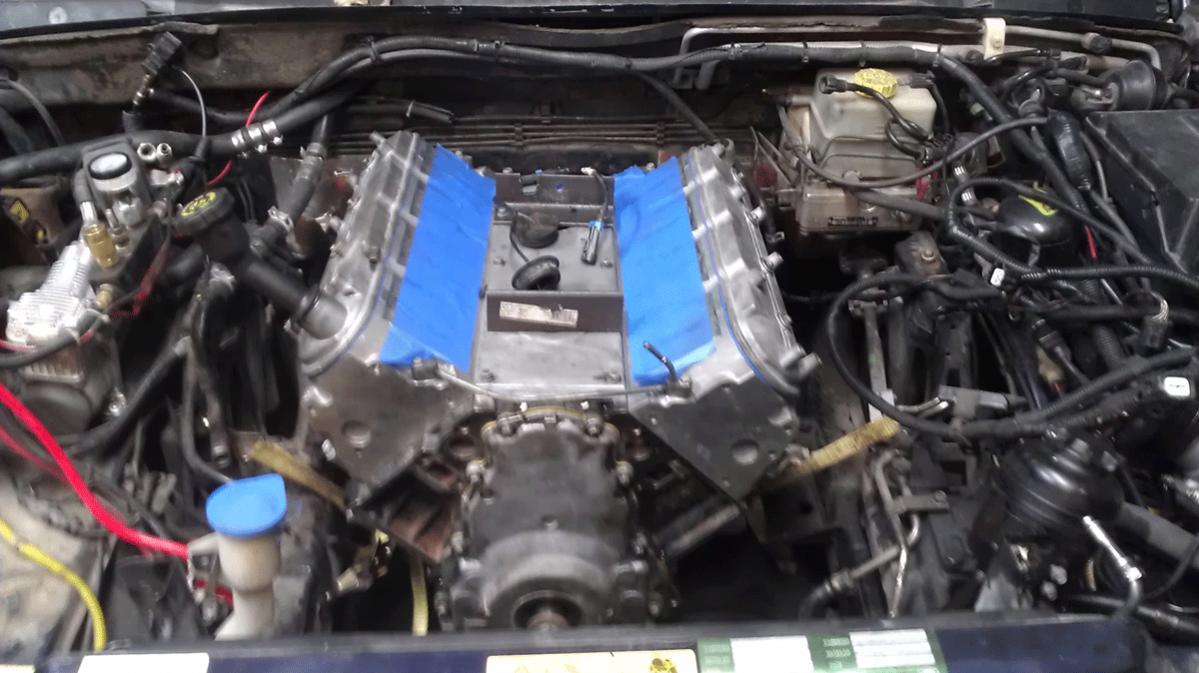
Putting a LM7 from a Tahoe into a 1998 Range Rover.
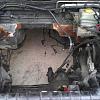
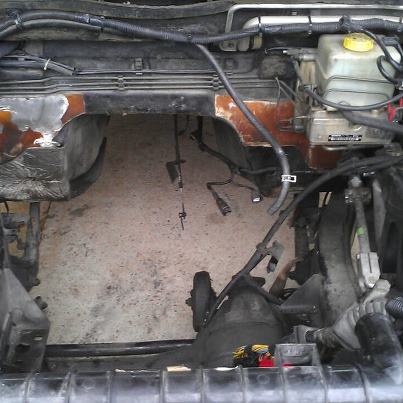
Made adapters etc, and the engine and tranny are resting in place. Tranny bolted up to the OEM mount, meaning no driveshaft, parking brake (rear of transfer case), wiring, etc issues.
Here are a few issues....
Oil pan hits the tie rod, which is behind the front axle, when lowered enough.
OK, grab Holley oil pan, good to go!
Nope, EGR part of the passenger side exhaust manifold will hit the top of the frame rail!
Truck intake hits the hood, and wont go far enough back. Needs @3 inches to get low enough to fit back to the firewall.
The Holley oil pan would allow me to lower the motor a couple of inches, except for the EGR part of the manifold hitting the frame rail!
Here are some measurements with the LM7 truck oil pan etc:
Right now,
1" gap between EGR take off on manifold to frame rail in height.
1" gap, rear of oil pan to tie rod in height
3.25" gap, center of oil pan to front axle in height
@18.5" from the pulley bolt to the underside of the hood when closed (Need @20-21" for intake height).
Would prefer not to make another wheeling rig, as we already have a XJ on 37's for that! And if we raised the rig, the EGR would be into the frame rail before the manifold cleared. Insert brick wall here......
So, options as I can see them:
Get the Holley pan.
Get an OEM manifold that does not have EGR.
Lower engine and raise rig a little, then bumpstop accordingly. Allowing height clearance for the intake.
Anyone else have ideas, preferably ones that wouldn't cost another grand or so....
Cut and weld manifold with Holley oil pan?
Just lift the thing and be done with it?
Sorry for the long winded post, just wanted to give the experts the numbers they needed for a decent answer etc.
Many thanks
Martin
Thread Starter
Launching!
Joined: Feb 2010
Posts: 276
Likes: 1
From: Mid Mo via Lancs. England
Quick update,
The tie rod got disconnected for now, and the EGR fitting got cut off and a plate welded over it.
Will figure the tie rod out when the time comes closer, but a bent tie rod will handle the DD duties no problem, and when/if I get a different oil pan (Holley I think) it will be a little better still.
Motor mounts got made off the block to meet the Range Rover mounts, so that was easy enough, kinda. one mount on the frame was a few inches higher, so it got cut off and rewelded a little lower, making room for the drivers side manifold.
Martin
Thread Starter
Launching!
Joined: Feb 2010
Posts: 276
Likes: 1
From: Mid Mo via Lancs. England
Well, progress is being made.
Harness will be sent to BP Automotive for a redo, ECM got reprogrammed locally.
Fuel line and tranny lines are being sorted (I hope), just found the metric to AN fittings from Earls.
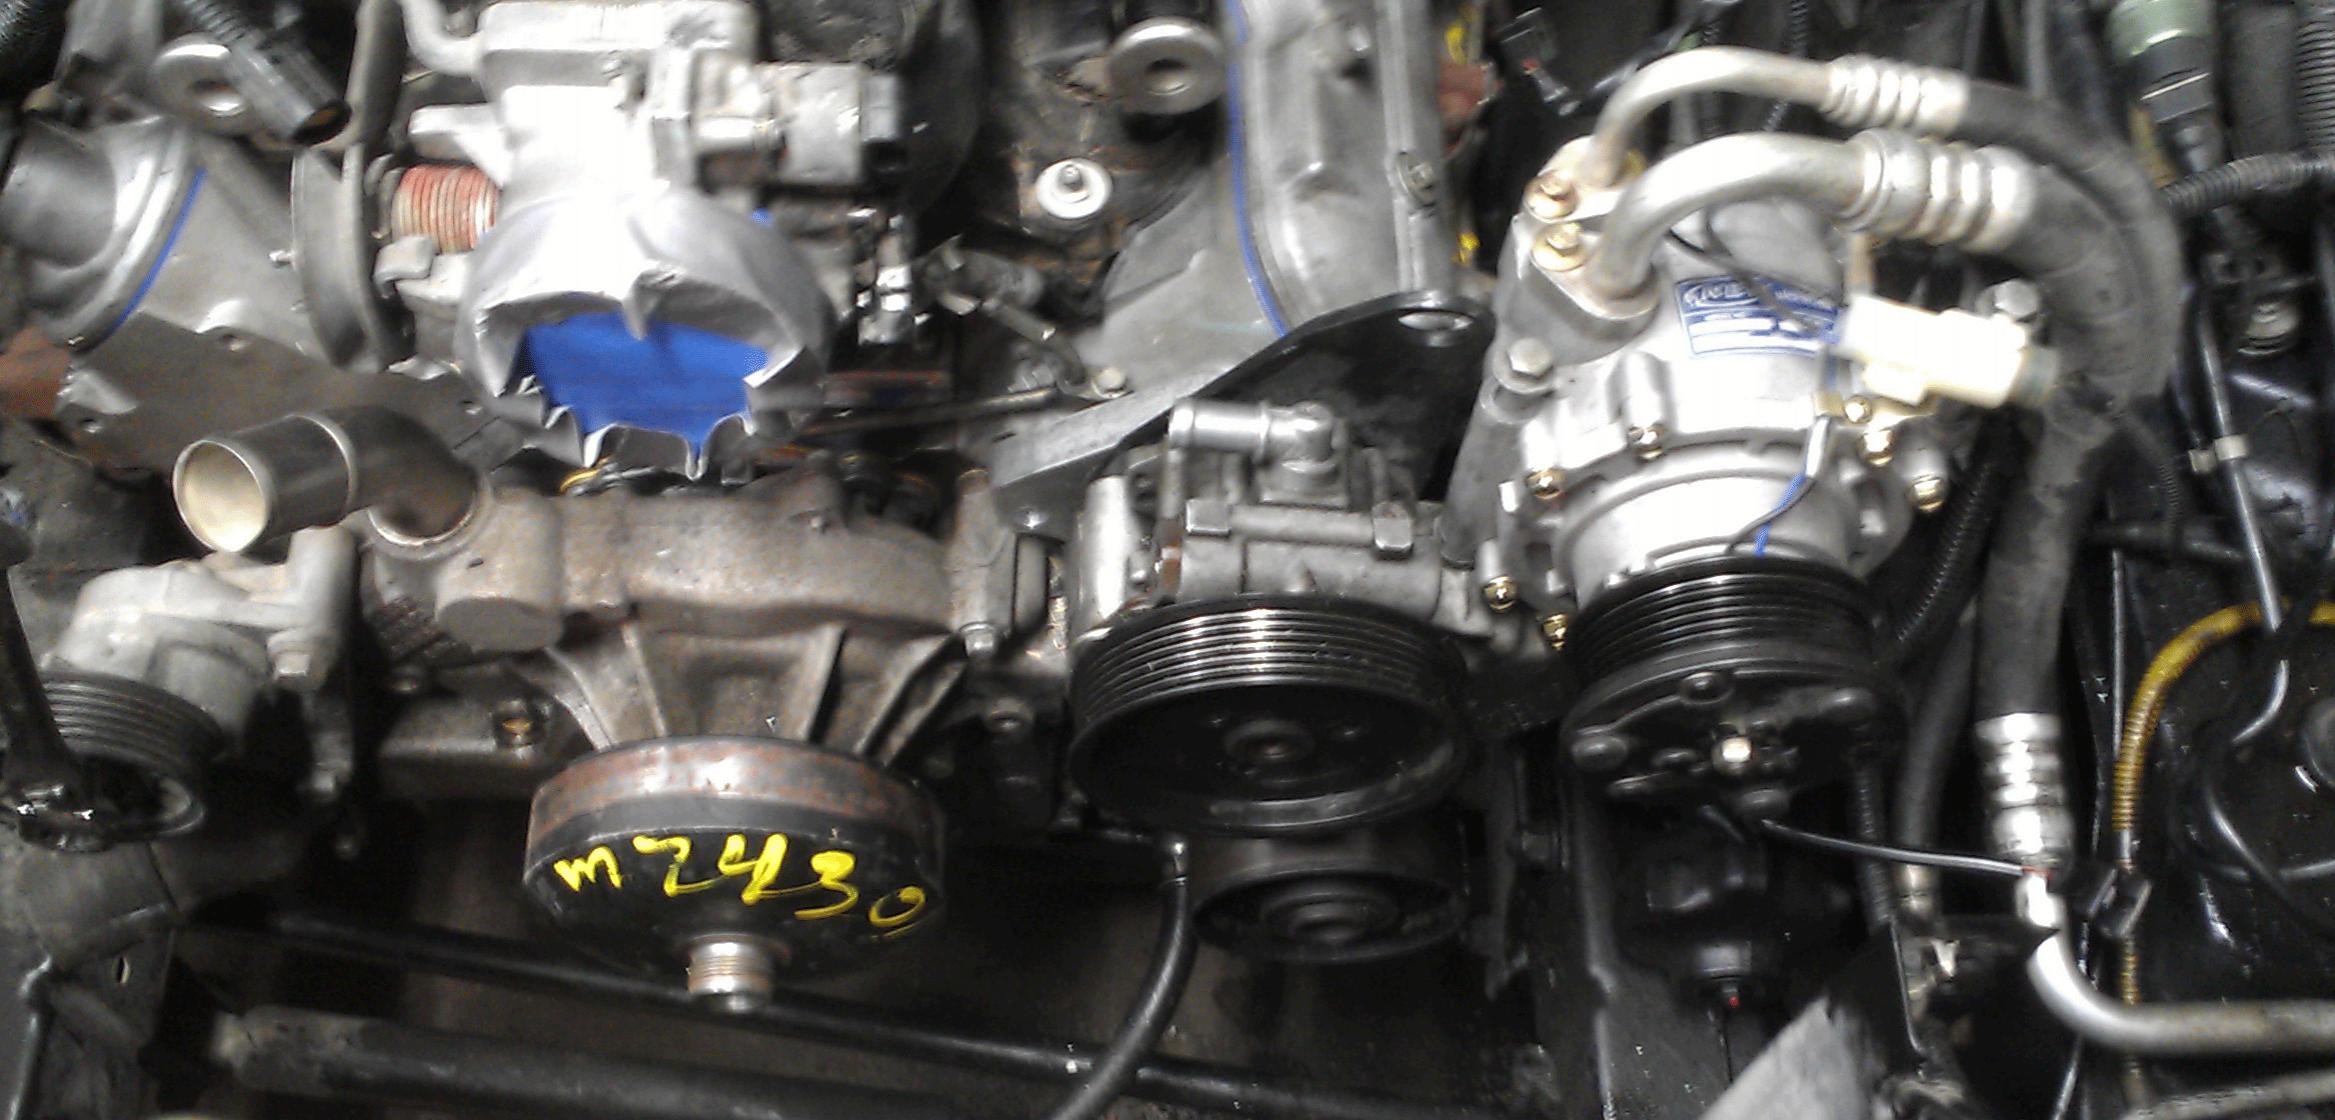
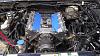
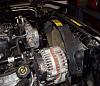
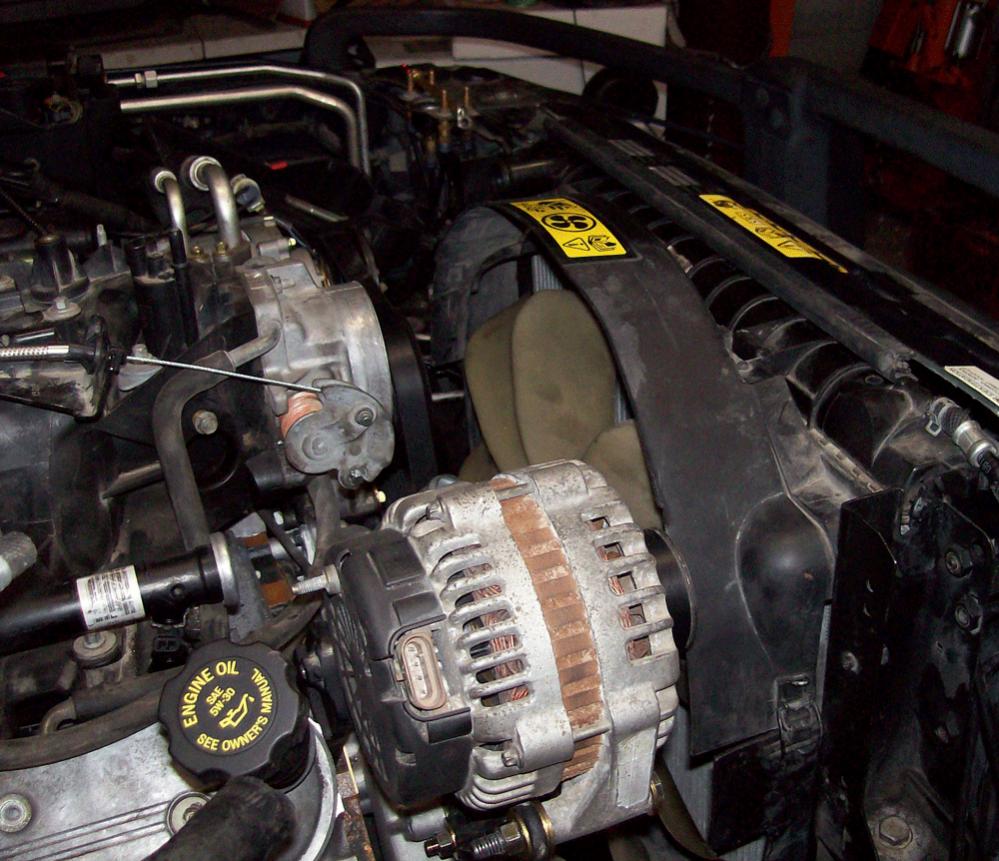
Removed the LM7 alternator and power steering pump, to use the RR ac compressor and ps pump in its place. Made an adapter to do that, and will make one for the alternator to be mounted on the passenger side head.
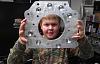
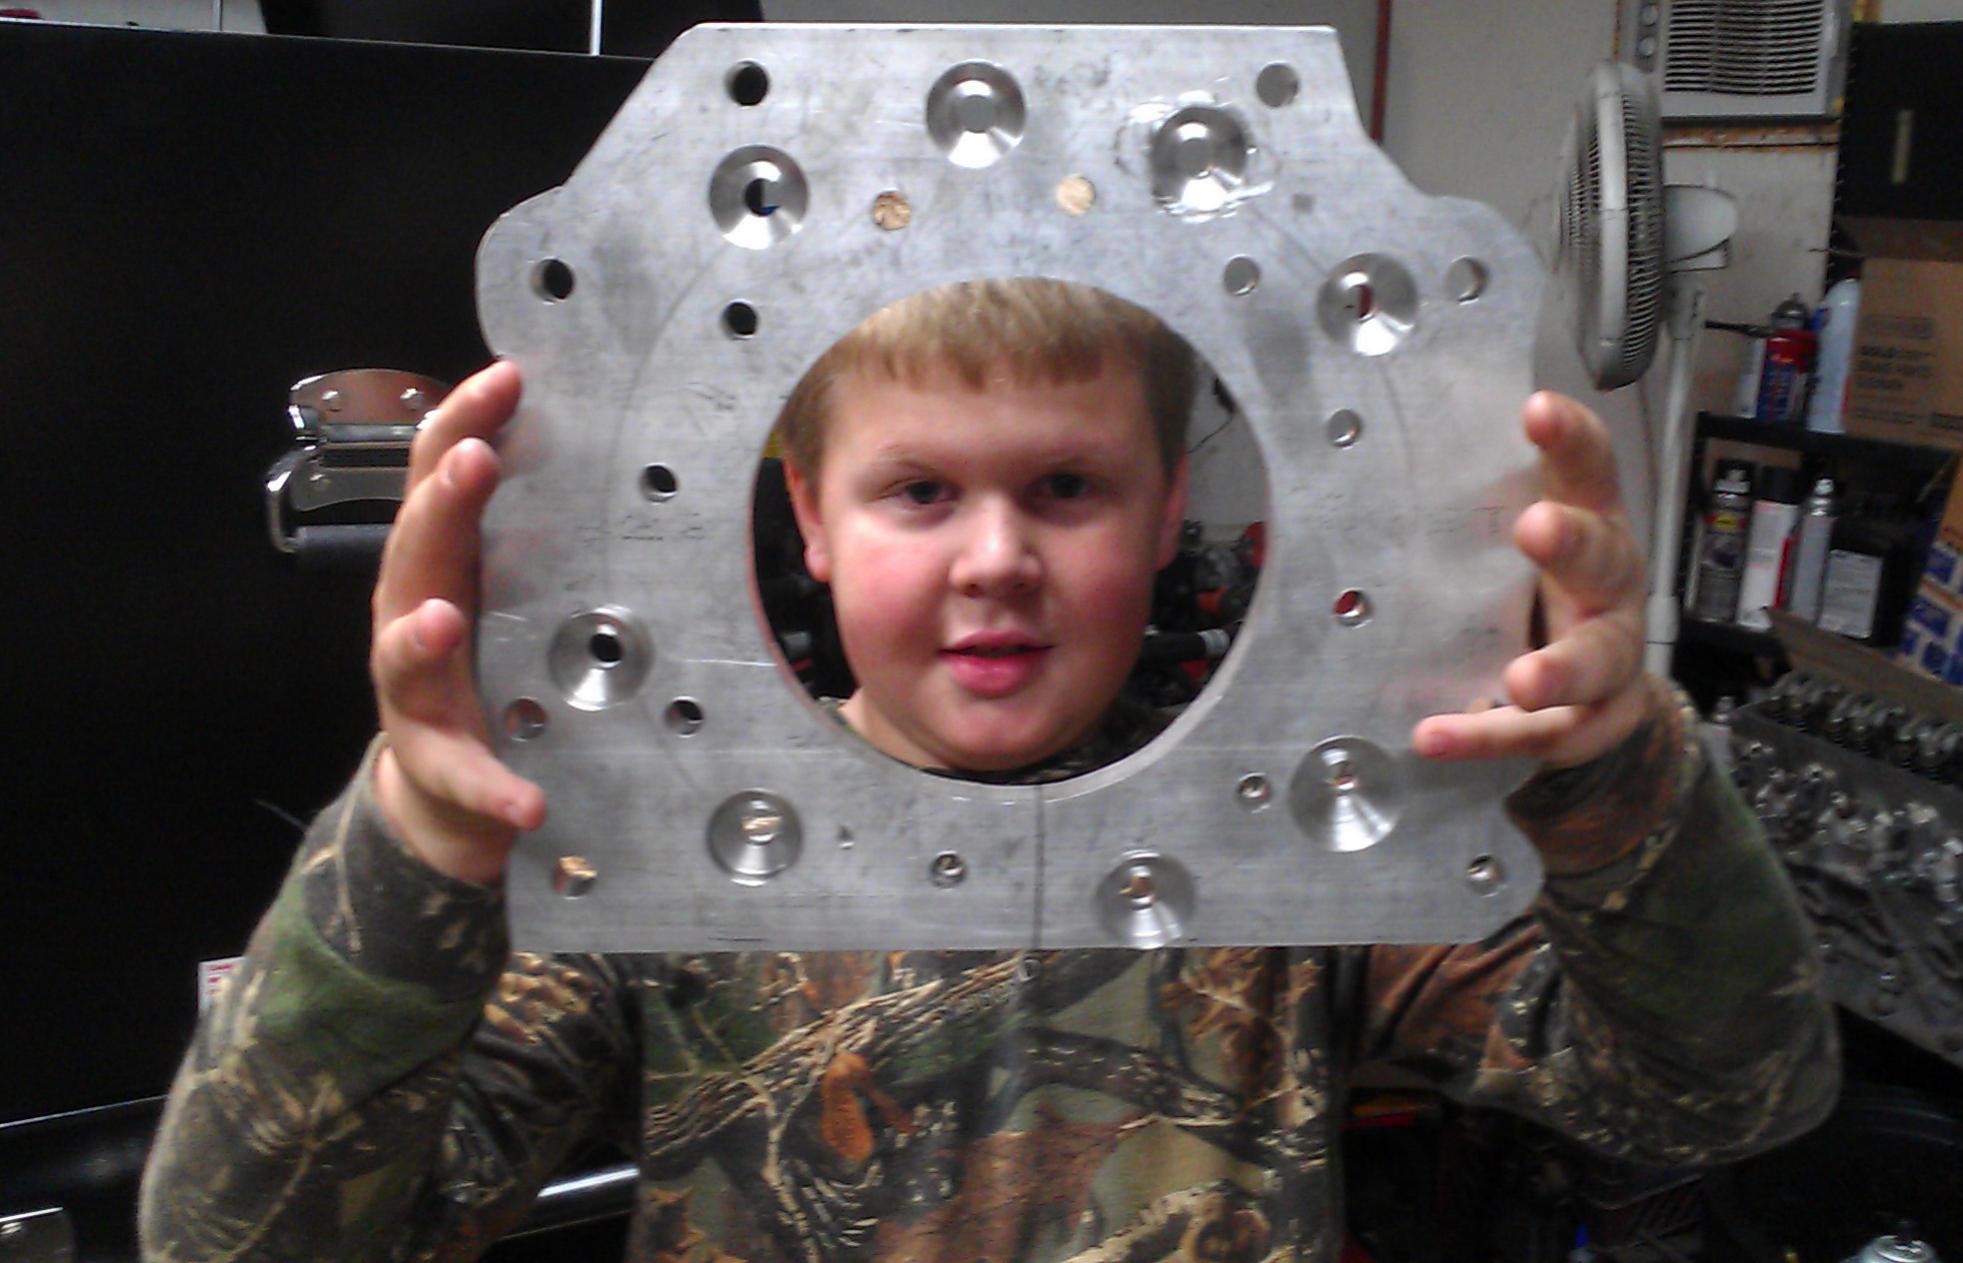
The adapter pictured is the one I made to go from the 4L60E bell housing to the ZF4 tranny. Alo had to make an adapter flexplate to bolt the tq up to the LM7 flywheel. The machined a piece of tube to make sure the tq stayed running 100% in the center and didnt go out of round while turning etc.
A few random pics for anyone who is interested:

Martin
Harness will be sent to BP Automotive for a redo, ECM got reprogrammed locally.
Fuel line and tranny lines are being sorted (I hope), just found the metric to AN fittings from Earls.
Removed the LM7 alternator and power steering pump, to use the RR ac compressor and ps pump in its place. Made an adapter to do that, and will make one for the alternator to be mounted on the passenger side head.
The adapter pictured is the one I made to go from the 4L60E bell housing to the ZF4 tranny. Alo had to make an adapter flexplate to bolt the tq up to the LM7 flywheel. The machined a piece of tube to make sure the tq stayed running 100% in the center and didnt go out of round while turning etc.
A few random pics for anyone who is interested:


Martin
LeftLane
Cool project man! Glad to see the are finding solutions to your issues. there are a couple options that may aid your hood clearance issue.
1. Swap the truck intake for a car intake. They are several inches lower. Of course swapping intakes mean you will also have to make some changes to the accessory routings...Prenty of threads on here you with details.
2. Do not use the stock intake beauty cover and cut all the unnecessary standoffs, supports and ports off the top of the intake. Shaving the ugly truck intakes is prety common practice for a swap.
3. Graft a cowl into the RR hood.
Also, get some more pictures! We are Americans and hate to read to much!
Thread Starter
Launching!
Joined: Feb 2010
Posts: 276
Likes: 1
From: Mid Mo via Lancs. England
Thanks Taylor!
I finally managed the hood/tie rod issue, by making a lift kit for the SOB mate!
It is going to retain the OEM air ride, which is excellent and easy to work on when you know it, like any long term owner better know it!
I made the lift kit, and an additional 2" of bump stop. Now, with a piece of 1/2" wood on the front bump stops, not touchy on the oil pan.
I will eventually go with the Holley oil pan, so I can lower the bump stops a little, but that $400 can go elsewhere right now.
I was hesitant at switching intakes due to the issues you mentioned, plus the truck intake has the fuel regulator built in, saving me some more coin. I replaced the RR fuel pump a year or so back with an aftermarket one that myself and a few others "modify" to fit inside the RR tank, and it was putting out 90psi at the fuel filter when I tested it after the install. So the fuel system is up to par and done, IF I use the truck intake.
Think I sourced adapter (Earls) fittings for the fuel system too, so that is hopefully covered. My other headache, which may be bad planning on my part I dont know, is that the tranny cooler line fitting on one side is directly below an adapter plate nut and some bolt thread! No real way of moving that bolt, as it HAS to go where it goes for the 4L60 bell housing. But what I could have done is recessed the damn hole some, if it wasnt recessed on the opposite side already that is. I will get around it though.
Cooling will have to be electric unfortunately. I like mechanical fans (and I have one for the LM7 already), but there is not enough room. So looking for slimline fans @25" wide, 19" tall, 2.5-3" deep. It's only money right?
To be honest, I haven't taken foto's of every step, but here are a few more random ones for your enjoyment...


Martin
I finally managed the hood/tie rod issue, by making a lift kit for the SOB mate!
It is going to retain the OEM air ride, which is excellent and easy to work on when you know it, like any long term owner better know it!
I made the lift kit, and an additional 2" of bump stop. Now, with a piece of 1/2" wood on the front bump stops, not touchy on the oil pan.
I will eventually go with the Holley oil pan, so I can lower the bump stops a little, but that $400 can go elsewhere right now.
I was hesitant at switching intakes due to the issues you mentioned, plus the truck intake has the fuel regulator built in, saving me some more coin. I replaced the RR fuel pump a year or so back with an aftermarket one that myself and a few others "modify" to fit inside the RR tank, and it was putting out 90psi at the fuel filter when I tested it after the install. So the fuel system is up to par and done, IF I use the truck intake.
Think I sourced adapter (Earls) fittings for the fuel system too, so that is hopefully covered. My other headache, which may be bad planning on my part I dont know, is that the tranny cooler line fitting on one side is directly below an adapter plate nut and some bolt thread!
No real way of moving that bolt, as it HAS to go where it goes for the 4L60 bell housing. But what I could have done is recessed the damn hole some, if it wasnt recessed on the opposite side already that is. I will get around it though.Cooling will have to be electric unfortunately. I like mechanical fans (and I have one for the LM7 already), but there is not enough room. So looking for slimline fans @25" wide, 19" tall, 2.5-3" deep. It's only money right?
To be honest, I haven't taken foto's of every step, but here are a few more random ones for your enjoyment...

Martin
Thread Starter
Launching!
Joined: Feb 2010
Posts: 276
Likes: 1
From: Mid Mo via Lancs. England
Been away from home working, but trying to get it together when I head home tomorrow.
Got a trigger wheel made for behind the front pulley, to allow the use of the RR crank sensor, which in turn will work the tach etc.
Made brackets to mount the RR ac compressor and PS pump to the front of the LM7, instead of using the Chevy stuff, which wouldnt work on the RR.
Need to make another bracket for the alternator, with a belt tensioner turnbuckle built in for belt tension.
Sent the wiring harness off to bp automotive from on here, but cant get a reply to emails or pm's, so not sure what the deal is there.
Hoping to have "fire in the hole" before leaving out again for work.
Still need an exhaust system made, and decided to move the OEM radiator forward so I can use the LM7 mechanical fan.
Will update when I get the chance.
Cheers
Martin
Thread Starter
Launching!
Joined: Feb 2010
Posts: 276
Likes: 1
From: Mid Mo via Lancs. England
been plodding away at it for a few days, getting the small stuff figured out.
Moved radiator forward @2" to make room for the mechanical fan.Made throttle linkage etc, made brackets for front accessories, and so on. Waned to use the Range Rover ac comp and ps pump, so made brackets to make it so. Alternator is on the passenger side now, near the battery. Anyways, got a few fotos on this laptop, so here they are. More foto' on my "shop" laptop, seeing as Best Buy had to replace the screen on this 6 month old POS already!

Bill at BP Automotive has the harness for a rework, so when that gets back, will see what happens! Made a trigger wheel and mounted it to the back of the front pulley for a crank signal for the RR tach etc.
Martin
Moved radiator forward @2" to make room for the mechanical fan.Made throttle linkage etc, made brackets for front accessories, and so on. Waned to use the Range Rover ac comp and ps pump, so made brackets to make it so. Alternator is on the passenger side now, near the battery. Anyways, got a few fotos on this laptop, so here they are. More foto' on my "shop" laptop, seeing as Best Buy had to replace the screen on this 6 month old POS already!


Bill at BP Automotive has the harness for a rework, so when that gets back, will see what happens! Made a trigger wheel and mounted it to the back of the front pulley for a crank signal for the RR tach etc.
Martin
Trending Topics
Thread Starter
Launching!
Joined: Feb 2010
Posts: 276
Likes: 1
From: Mid Mo via Lancs. England
Did some searching, but here goes anyways..
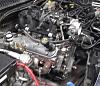
The exhaust flanges, that bolt to the downpipe, are either close to, or are just hitting the frame rail. Need something that tucks tighter to the block, especially the flange area. Can't go with center output due to the motor mounts.
The motor HAD to go where it is due to interference issues on the opposite side etc.
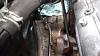
I believe that the manifolds are off a '02 Tahoe that I have on it.
Many thanks
Martin
The exhaust flanges, that bolt to the downpipe, are either close to, or are just hitting the frame rail. Need something that tucks tighter to the block, especially the flange area. Can't go with center output due to the motor mounts.
The motor HAD to go where it is due to interference issues on the opposite side etc.
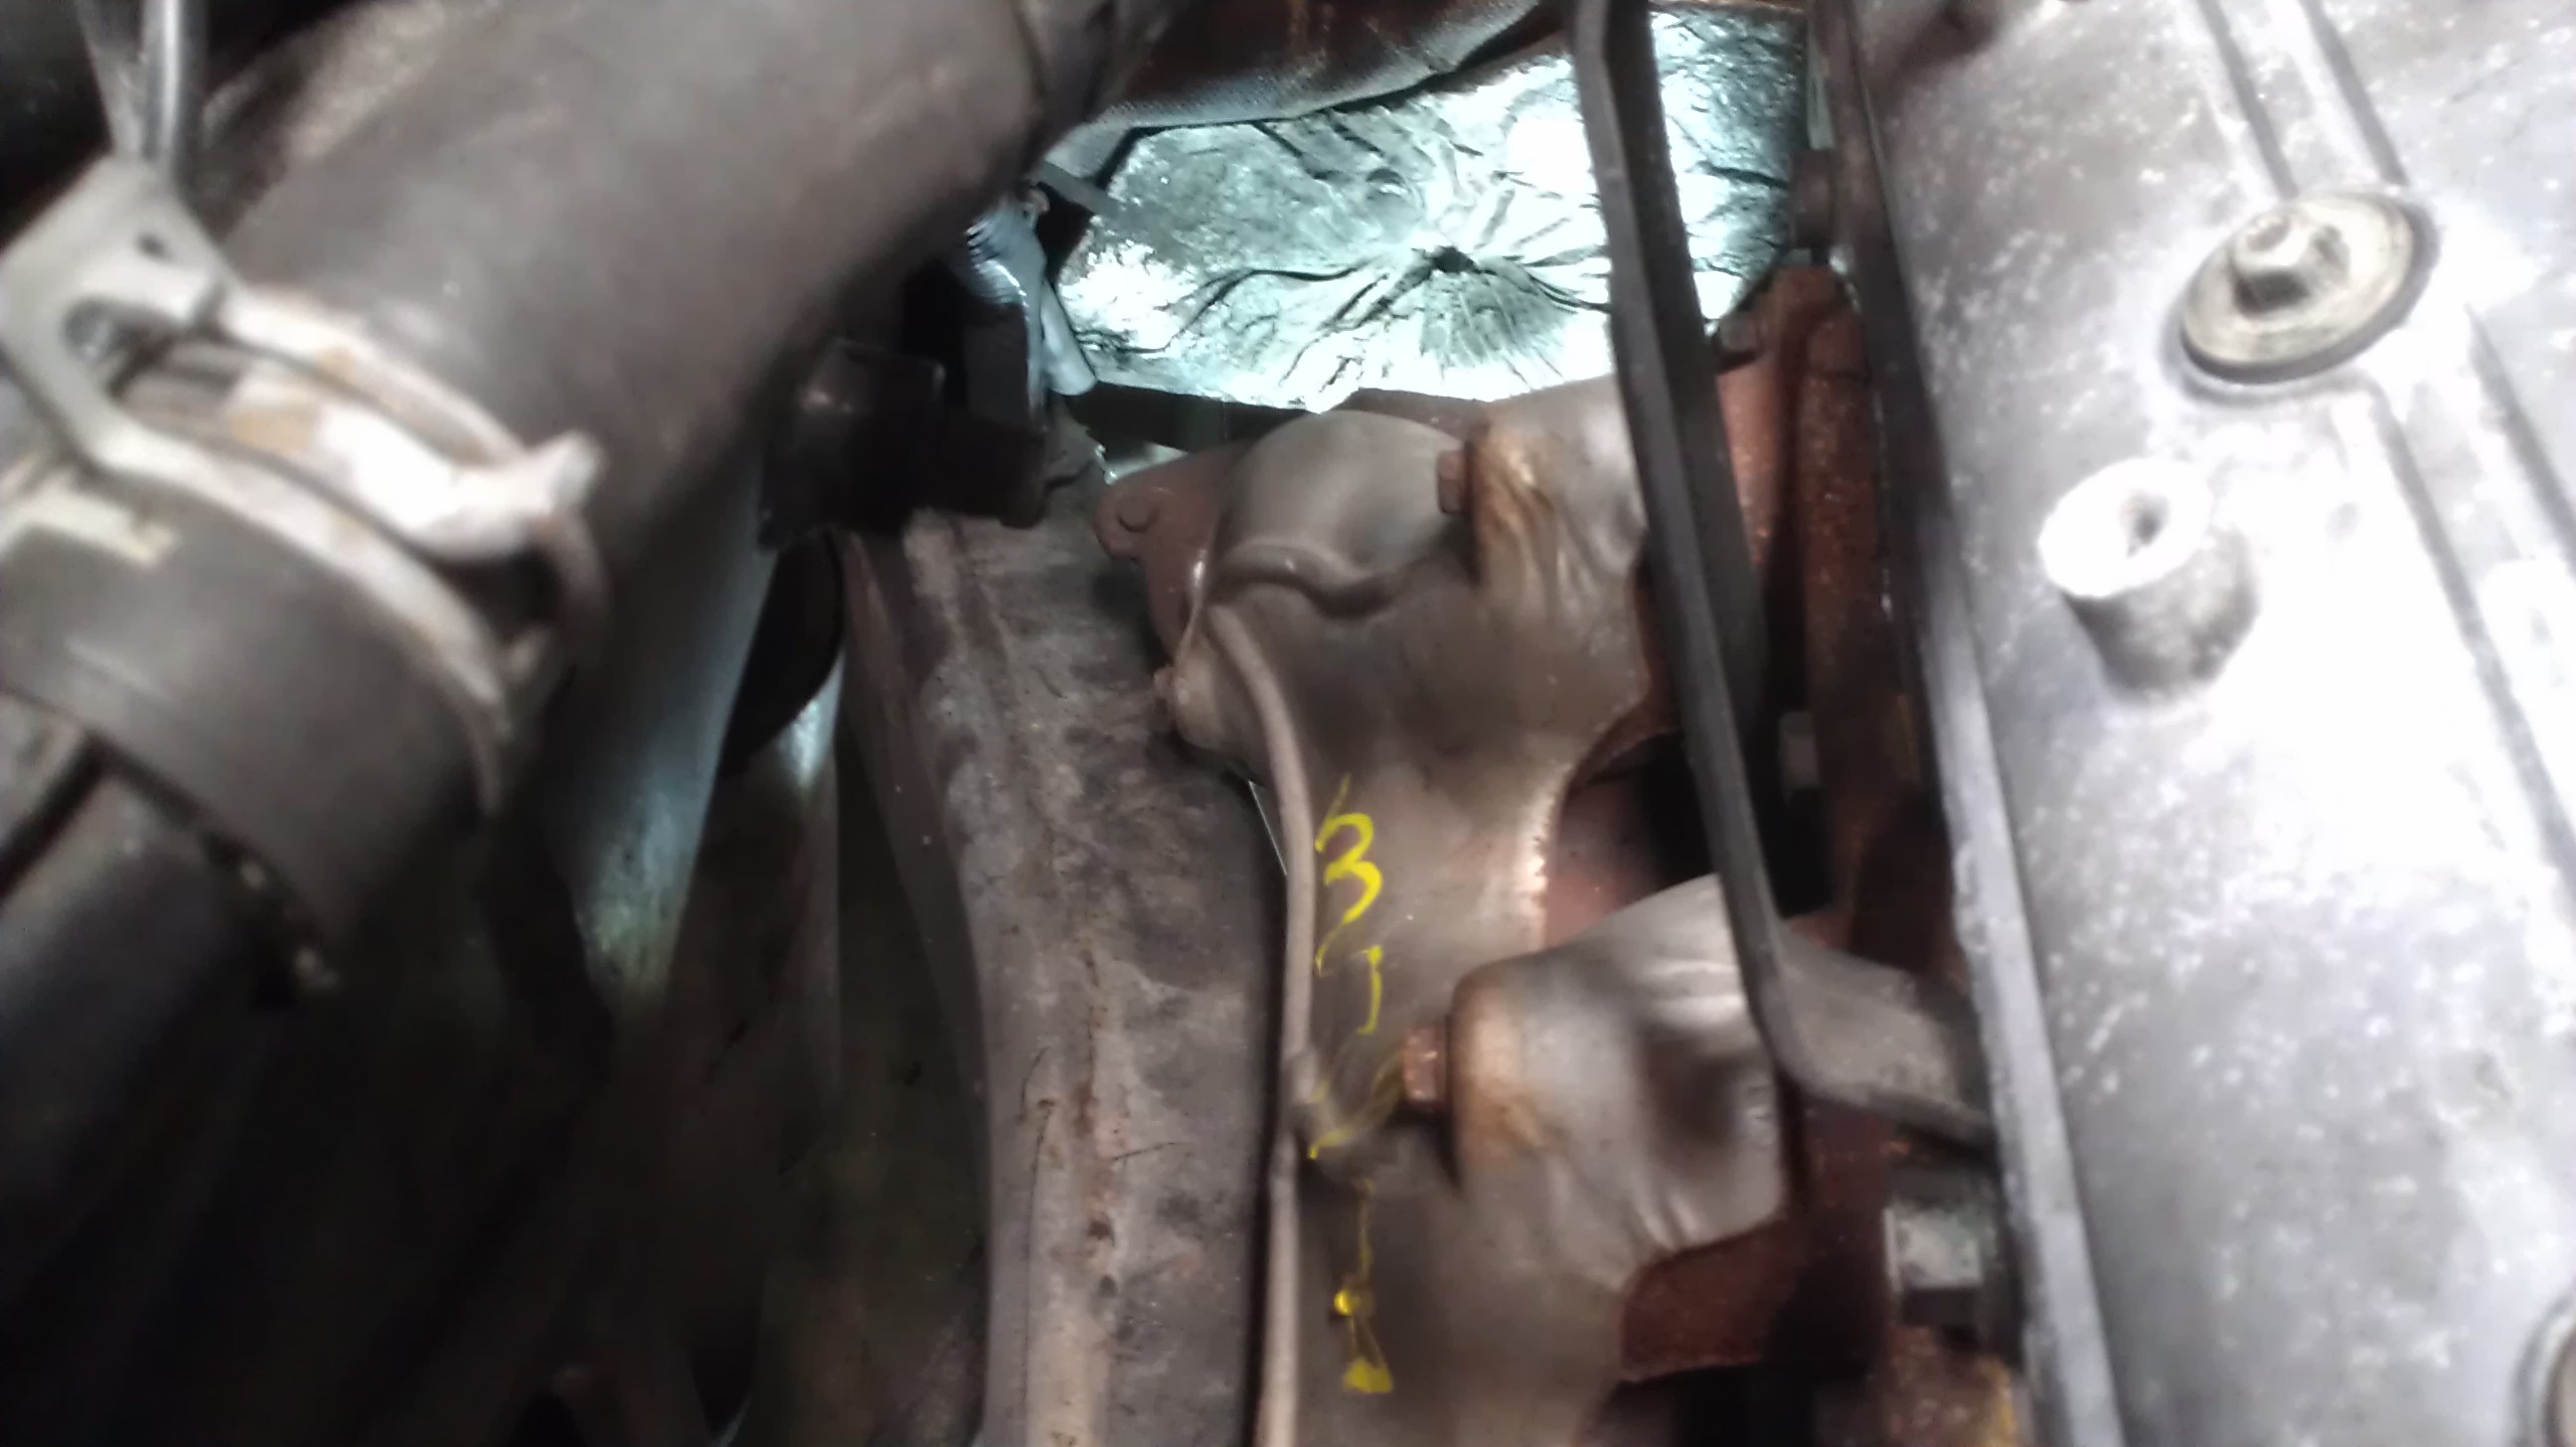
I believe that the manifolds are off a '02 Tahoe that I have on it.
Many thanks
Martin
Last edited by leftlanetruckin; Mar 21, 2013 at 04:14 PM.
LS1 Tech Stories
The Best V8 Stories One Small Block at Time

Gas Monkey Built a 6-Wheel Ferrari Testarossa With a Corvette LT4 Engine
Verdad Gallardo
7 Most Reliable High-Performance Engines GM Has Ever Built
Verdad Gallardo
Amazing '71 Camaro Restomod Is Modern Muscle Car Under the Skin
Verdad Gallardo
6 Common C5 Corvette Failures and What's Involved In Repairing Them
Pouria Savadkouei
Retro Modern Bandit Pontiac Trans AM Comes With Burt Reynolds' Autograph
Verdad Gallardo
Top 10 Greatest Cadillac V Series Performance Models Ever, Ranked
Pouria Savadkouei
Top 10 Most Powerful Chevy Trucks Ever Made!

Hennessey's New Supercharged Silverado ZR2 Has 700 HP
Verdad Gallardo
Coachbuilt N2A Anteros Is an LS2-Powered C6 Corvette In Italian Clothes
Verdad Gallardo


Did some searching, but here goes anyways..
The exhaust flanges, that bolt to the downpipe, are either close to, or are just hitting the frame rail. Need something that tucks tighter to the block, especially the flange area. Can't go with center output due to the motor mounts.
The motor HAD to go where it is due to interference issues on the opposite side etc.
Attachment 395940
I believe that the manifolds are off a '02 Tahoe that I have on it.
Many thanks
Martin
In my experience Fbody manifolds hug the block the tightest and are rear outlet. Maybe those will do it for ya? Your harness will be finished this weekend.

Hell, with your bad *** fab skills just make you a set of headers!
__________________

Standalone LS Swap Harnesses IN STOCK!
LSX, LTX Stand alone swap harnesses. S10 LSX conversion PLUG AND PLAY harnesses, 24x conversion PLUG AND PLAY harnesses. LT1 to LSX PLUG AND PLAY Harnesses.
sales@bp-automotive.com
www.bp-automotive.com
1-888-467-4491
Standalone LS Swap Harnesses IN STOCK!
LSX, LTX Stand alone swap harnesses. S10 LSX conversion PLUG AND PLAY harnesses, 24x conversion PLUG AND PLAY harnesses. LT1 to LSX PLUG AND PLAY Harnesses.
sales@bp-automotive.com
www.bp-automotive.com
1-888-467-4491
Thread Starter
Launching!
Joined: Feb 2010
Posts: 276
Likes: 1
From: Mid Mo via Lancs. England
I also saw the 8501 headers from Hooker, that seem to stay really close to the block, but add $$$ to the job!
I looked at the Camaro manifolds, but look about the same as the ones I have? Hell, the ones I have may not be Tahoe ones for all I know.....
Martin

Thread Starter
Launching!
Joined: Feb 2010
Posts: 276
Likes: 1
From: Mid Mo via Lancs. England
Thanks.
The flange itself is hitting the frame rail though, or is too damn close for comfort anyways.
I already cut off and welded shut the EGR port, but the flange is in the way still....Open to suggestions!
I am even trying to find manifold kits for me to make myself, but not having a lot of luck there neither.
Martin


Teching In
Joined: Mar 2011
Posts: 44
Likes: 0
From: hampton,mn
I had the same exhaust flange issue installing a truck engine in my 40 ford(narrow frame rails) I bought a set of camaro manifolds and problem solved. They do look close to the same as truck manifolds, but worked for me.
Thread Starter
Launching!
Joined: Feb 2010
Posts: 276
Likes: 1
From: Mid Mo via Lancs. England
What year Camaro were the manifolds from?
I need to remove the ones that are on it and measure them, so I can compare accurately etc.
Thank you!
Martin


Teching In
Joined: Feb 2011
Posts: 45
Likes: 0
From: Sydney Australia
Most RR swaps have trouble with the tight frame rails.
I have a Lexus engine in my Rover and they have the same problem and I keep telling people to go LSx as they are so much smaller (physically), and a better fit.
Have you looked at taking the headers forward then under the engine mounts.
I moved my chassis rail mounts forward about 6"to give me room for my headers. Not hard to do and well worth it.
Thread Starter
Launching!
Joined: Feb 2010
Posts: 276
Likes: 1
From: Mid Mo via Lancs. England
Cheers Zuffen.
Will have a look at doing that before anything else mate.
I used the frame mounts for the P38, then made an adapter mount for the motor side.
Is your a P38 or Classic?
Martin
Will have a look at doing that before anything else mate.
I used the frame mounts for the P38, then made an adapter mount for the motor side.
Is your a P38 or Classic?
Martin
Thread Starter
Launching!
Joined: Feb 2010
Posts: 276
Likes: 1
From: Mid Mo via Lancs. England
Measuring these headers from Hooker, they look like they will clear everything with no other modifications
http://www.holley.com/data/products/...Dimensions.jpg
Anyone heard anything about them?
The circular flange vs triangular saves some room for sure, but it looks like tehy tuck in closer too.
Not seen any OEM type manifolds that do the same thing so far.
Can't reverse the manifolds neither due to other stuff being in the way, cant move the motor mounts any due to height restrictions with the truck intake manifold etc, so any other ideas before I drop the coin on these Hooker manifolds?
Not too bad I guess, as these and the stacked plate tranny cooler will be about the only things I had to buy for the swap vs making.
Martin