
My homemade ac comp. brackets a body ls 2
 08-20-2008, 01:41 PM
#1
TECH Enthusiast
Thread Starter

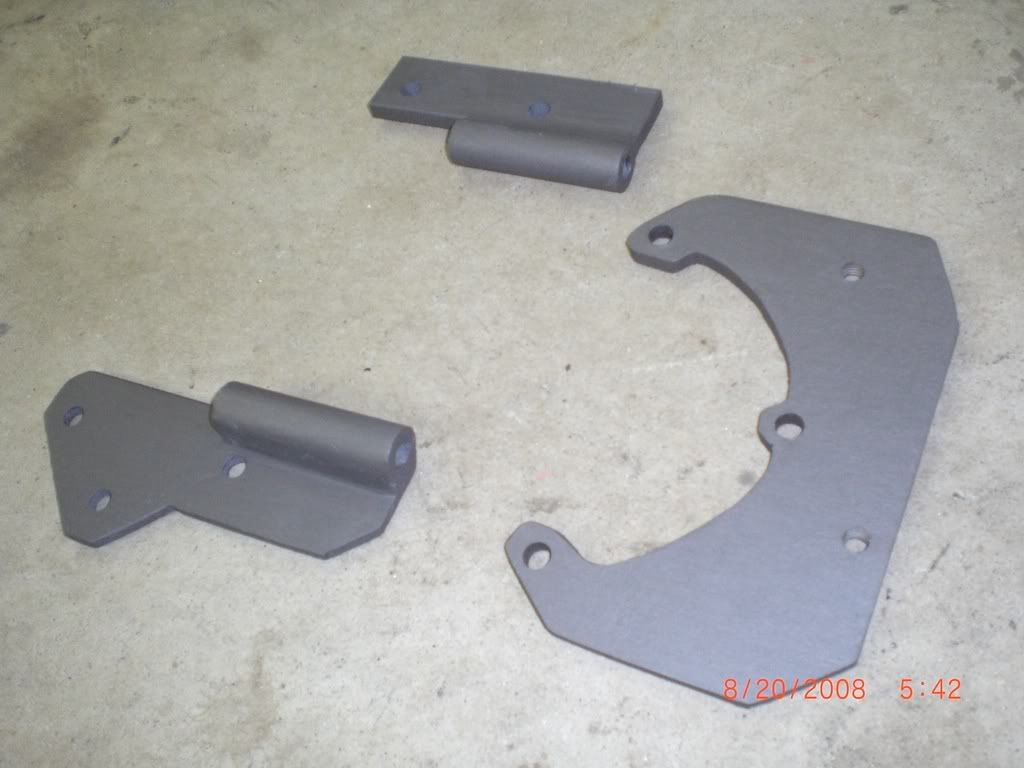
After a few trial and errors I have completed my ac relocation brackets .I had to use the main belt to drive the compressor.Initially i wanted to use the stock single ac belt but it wouldnt allow the compressor to be installed without notching the chasis. Clearence is about 1/4" by the back of the compressor. I used March Performance idler pulleys. 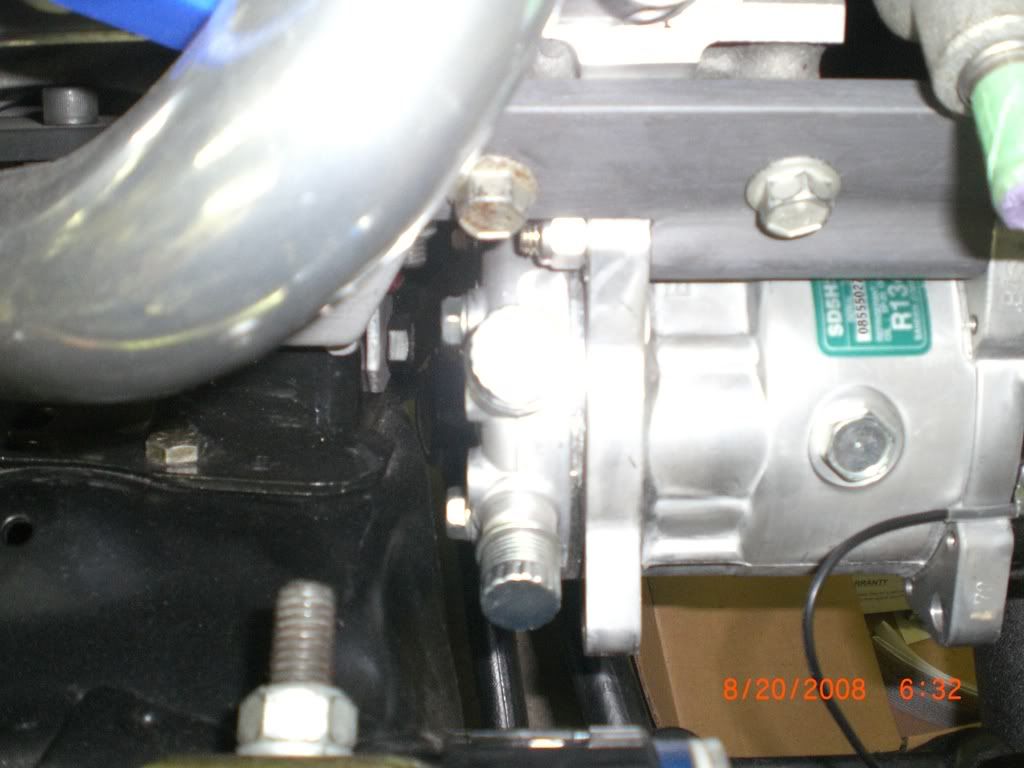
 08-21-2008, 02:42 PM
#4
Teching In
iTrader: (2)
Join Date: Nov 2006
Location: green cove springs ,florida
Posts: 39
Likes: 0
Received 0 Likes
on
0 Posts
wow
those turned out great....do you have templates available ?or could you?
could you show a pic of the whole motor and what you did with the alternator....
great job
radrambler
those turned out great....do you have templates available ?or could you?
could you show a pic of the whole motor and what you did with the alternator....
great job
radrambler
 08-21-2008, 05:23 PM
#6

Very impressive!
What chassis is that in? I know you said 'A-body'
Is that the stock compressor? You stated LS2, so are the other accessories ls2 as well?
Very nice work! I would have loved to have gone that route with my ac swap.... maybe next time for my Sonoma swap!
-jason
What chassis is that in? I know you said 'A-body'
Is that the stock compressor? You stated LS2, so are the other accessories ls2 as well?
Very nice work! I would have loved to have gone that route with my ac swap.... maybe next time for my Sonoma swap!
-jason
08-21-2008, 06:48 PM
#7
TECH Enthusiast
Thread Starter
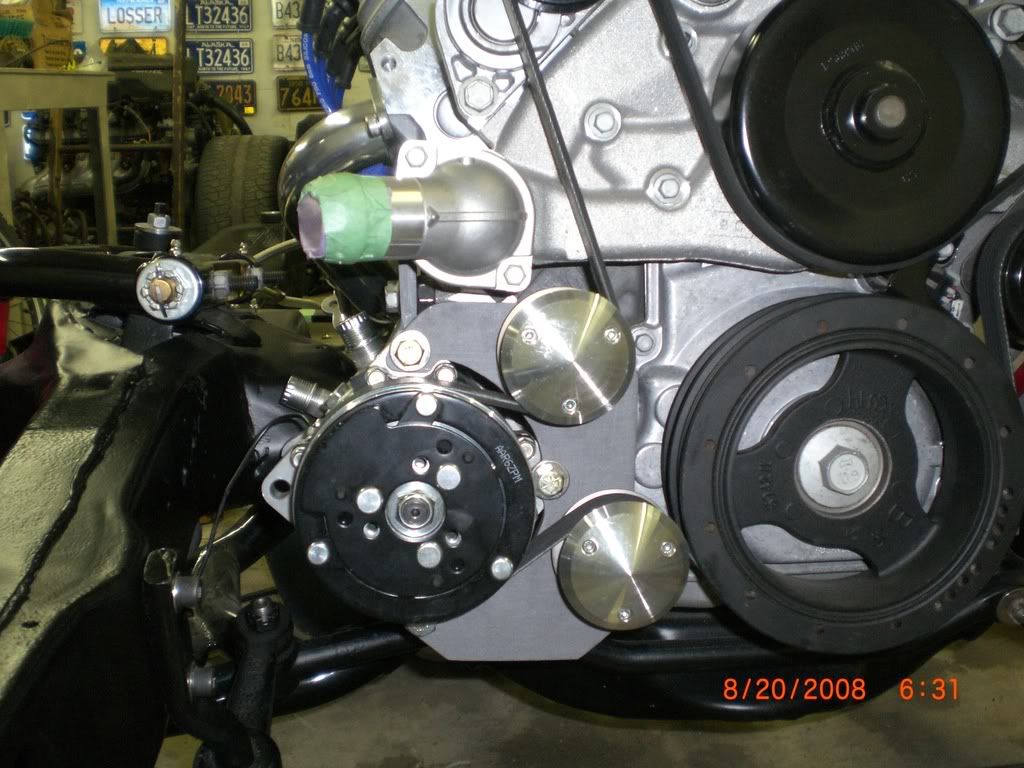
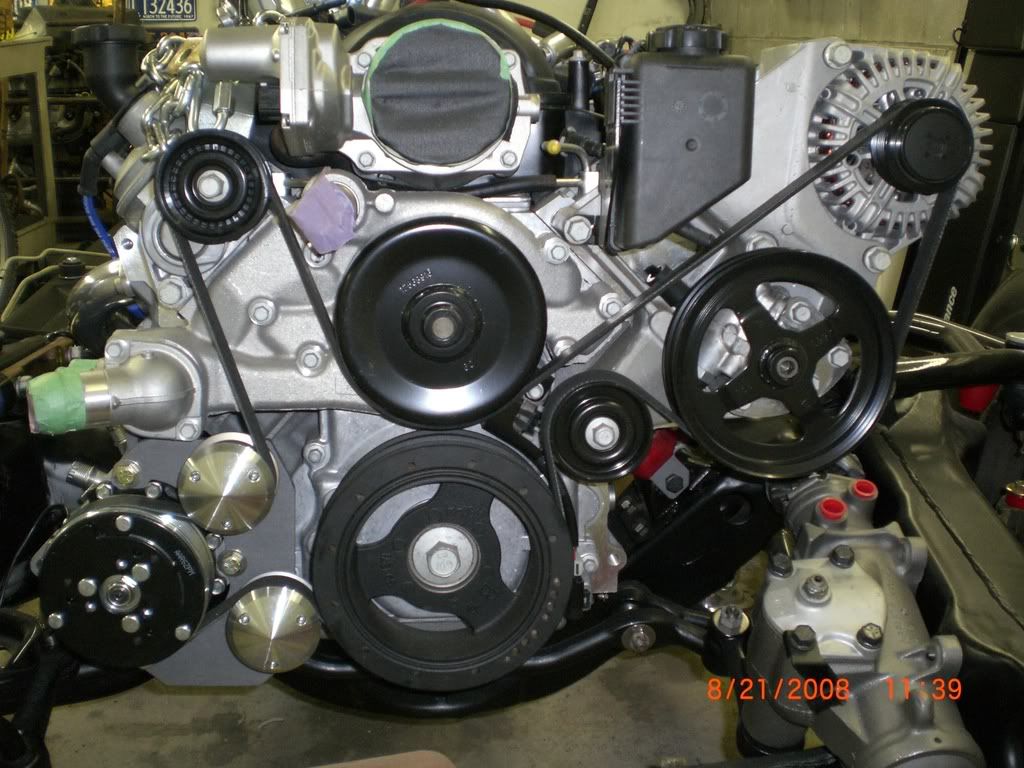
here's a pic of the complete drive. its an 06 vette drive . i could trace the templates but as far as getting the tubing part of it on paper , i dont know. i guess the hardest one was the one that holds the idler pulleys , i cut some of it myself then i had a friend of a friend cut the rest .it would definitley be something for someone that had a machine shop could make in quanity in mass, and cheap.the car isnt running yet but the alignment seems o k ( i used a flat piece of aluminum that fit into the main pulley snugly then held the compressor in line with the aluminum , then tacked the tubing to the steel that was bolted onto the block ) the chasis is a 67 chevelle conv. the compressor is a sanden 508 for a vintage air unit . thanks for the compliments, JOHN
Trending Topics
08-21-2008, 06:54 PM
#8
TECH Resident
iTrader: (3)

Join Date: Sep 2005
Location: Edmond, Oklahoma
Posts: 796
Likes: 0
Received 0 Likes
on
0 Posts

I thought that looked like an S&P thats a bummer for me I am using the stock f-body so it would still be hitting the crossmemeber. Still thats very nice work though.
08-21-2008, 07:07 PM
#9
TECH Enthusiast
Thread Starter
I did use the s & p catalog for some of my idea . Is the f body acc.drive closer to the block? if so i dont thint this would work.It's clears the front crossmember by about 1/4". JOHN
 08-21-2008, 08:48 PM
#11
TECH Resident
iTrader: (3)
Join Date: Sep 2005
Location: Edmond, Oklahoma
Posts: 796
Likes: 0
Received 0 Likes
on
0 Posts
No I was saying that I have an F-body oil pan so my engine is sitting back a couple inches further than yours so probably not as much room on the from. I do have F-body accessories as well.
08-21-2008, 10:33 PM
#13
TECH Enthusiast
Thread Starter
Pete my pass. side head is about 3/4" from the firewall if i remember correctly. Where does yours sit? As far as the wrap it is pretty close to the original location. I could move the bottom idler up a bit if needed.
08-22-2008, 08:48 AM
#14

That turned out very nice. Way to spend the time and effort to not notch the frame! I figured you would get it done and am very happy you got it done. I thought about doing something similar but did not want to invest that much time into it.
Ben-
Ben-
08-22-2008, 09:09 AM
#15
Teching In
iTrader: (2)
Join Date: Nov 2006
Location: green cove springs ,florida
Posts: 39
Likes: 0
Received 0 Likes
on
0 Posts
thanks
for showing the full engine pic. your steup looks great.
if you could trace the templates or brackets and measure the two tube lengths that would give a huge headstart on my setup.i cant use the factory brackets so i have to make mine. if you can do this let me know and ill pm you my address....
thanks for the help
radrambler
08-22-2008, 09:23 AM
#16
On The Tree
iTrader: (7)
Join Date: Sep 2004
Location: Illinois
Posts: 187
Likes: 0
Received 0 Likes
on
0 Posts
Very nice, I want to use the same style of compressor but I was thinking of rear straight outlets, not the 90� style. Thought that might give me more clearance, Clarence.
How much were the idlers? Any reason you didn't use stock ones other than looks?
And I'm down for a set of the paper traced templates. If you do trace them on paper, could you put a ruler measurement on them so I don't goof up with the scaling? Or if you had someone laser/waterjet them, do they still have the program to whip us out a set?
08-23-2008, 09:38 PM
#17
TECH Enthusiast
Thread Starter
yes I'll get a set of templates going , I'll need a few days so I can get all the measurements correct. I searched for days for stock style idler pulleys but there were none that were smooth and had "keepers" on them . The March pullers are really nice. the plate that holds the idlers was cut with a sawzall, a holesaw and a plasma cutter ( the open part between the compressor bolt holes ), and finally a grinder.It would be nice if someone around here had a weterjet or some other tool to make up some of these with a little less time than all the cutting. Also may I add this has not been tested .JOHN
08-24-2008, 08:30 PM
#19
TECH Resident
iTrader: (3)
Join Date: Sep 2005
Location: Edmond, Oklahoma
Posts: 796
Likes: 0
Received 0 Likes
on
0 Posts
I ended up with about 1/4" to 3/8" between the back of the head and the firewall. Looks like you have the corvette front drive setup and I have the F-body. If I recall correctly the F-body accessories are a bit further away from the block than the vette setup, if so this setup may actually work for me.