
1973 RS Camaro LSX Swap
 04-14-2012, 11:08 PM
#761

Thanks, that may be a good option with the 30 spline diff. I really don't want to loose the 2-3% power loss with the nine inch, but then again, I'd pick it right back up and then some with a new, more optimal gear and ability to run a 28" tire.
Isn't it great seeing the looks on people's faces when they find out they got beat by a cargo van motor?
Isn't it great seeing the looks on people's faces when they find out they got beat by a cargo van motor?
 04-14-2012, 11:15 PM
#762

Thanks, that may be a good option with the 30 spline diff. I really don't want to loose the 2-3% power loss with the nine inch, but then again, I'd pick it right back up and then some with a new, more optimal gear and ability to run a 28" tire.
Isn't it great seeing the looks on people's faces when they find out they got beat by a cargo van motor?
Isn't it great seeing the looks on people's faces when they find out they got beat by a cargo van motor?
 05-16-2012, 10:27 AM
#763

Do you remember if your TH400 dipstick & tube were just standard OEM style or are they specific for the LSx? Looking at the cheapo chrome tube I had on my TH400 with the small block, it looks like it will interfere with the back of the head, but yours seems to route around it just fine.
Also did you summarize in the thread someplace what your engine/trans/rear/tire/suspension specs are? I'm curious what your formula was for lifting front tire and covering the 1/4 in the 11 second range in your signature photo.

Also did you summarize in the thread someplace what your engine/trans/rear/tire/suspension specs are? I'm curious what your formula was for lifting front tire and covering the 1/4 in the 11 second range in your signature photo.
05-16-2012, 07:37 PM
#764
Do you remember if your TH400 dipstick & tube were just standard OEM style or are they specific for the LSx? Looking at the cheapo chrome tube I had on my TH400 with the small block, it looks like it will interfere with the back of the head, but yours seems to route around it just fine.
 . I'll check for you though when I get home on Memorial Day weekend.
 ENGINE
2008 mostly stock LY6 longblock
Katech rod bolts
VVT Deleted
231/239 .598/.610-110 LSA cam
PRC Extreme Dual Springs/Hardened Pushrods
Vic Jr. Intake
Pro Systems 950HP carb
Edelbrock 1 3/4 to 1 7/8 stepped headers
3inch X-pipe dual exhaust w/2-Chamber Flowmasters
TRANS
Rossler "Terminator 2" TH400
Full manual reverse pattern VB
Ross-Lock Transbrake
Billet forward drum
JW Ultrabell
PTC 8inch 5000 stall converter
REAR END/TIRES
Stock 8.5 10 bolt
Stock 28 spline c-clip axles (living on borrowed time)
Stock Posi
4.10 gears
28X11.50-15 Hoosier Quick Time Pros
FRONT SUSPENSION
Stock a-arms with GW Del-A-Lum bushings
Moroso 212lb Trick Springs (1 coil cut)
Cheapo CE 3-way adjustable shocks
REAR SUSPENSION
Calvert split mono leaf springs (-1inch ride height)
Caltrac bars
Cheapo CE 3-way adjustable shocks
Let me know if you have any questions. It's a pretty basic set up that's begging for an upgraded rear and driveshaft (yeah, that's stock too with solid body 1310 u-joints added).
05-17-2012, 02:59 PM
#765
Teching In
iTrader: (1)
Join Date: Apr 2010
Location: Lake Havasu City
Posts: 47
Likes: 0
Received 0 Likes
on
0 Posts
Great Thread!
Any thoughts on replacing the leaf springs in the rear and add a comp. rear axle? Having replaced mine in an early Mustang the launch is much better, and the ride is more adjustable.
Any thoughts on replacing the leaf springs in the rear and add a comp. rear axle? Having replaced mine in an early Mustang the launch is much better, and the ride is more adjustable.
05-17-2012, 04:32 PM
#766
Thanks.
I'm not sure what you mean by a "comp. rear axle" but my plans are to install a built Strange 9 inch sometime this fall. The current leaf springs are brand new Calvert Split Mono Leafs that I just installed less than a year ago. I'm real happy with how they work so far so I won't be replacing them anytime soon. I would eventually like to get a better set of rear shocks for the car (maybe something double adjustable), but for now the cheap 3-way CE's are doing the job fairly well so I'll probably stick with them until they outlive their usefullness.
I'm not sure what you mean by a "comp. rear axle" but my plans are to install a built Strange 9 inch sometime this fall. The current leaf springs are brand new Calvert Split Mono Leafs that I just installed less than a year ago. I'm real happy with how they work so far so I won't be replacing them anytime soon. I would eventually like to get a better set of rear shocks for the car (maybe something double adjustable), but for now the cheap 3-way CE's are doing the job fairly well so I'll probably stick with them until they outlive their usefullness.
 05-17-2012, 08:04 PM
#768
That's a mighty generous offer Tony!! I'll be up next weekend to pick it up! You think you can have it pulled by then? 
I'm still in southern AL for now but I'm getting fired up about the house hunting trip next month. I've got my eye on a place with a 3-stall garage. I just hope it's still there next month. Once I get all that behind me I'll feel a lot better about breaking some stuff!
Hows your odometer looking? You getting some good miles on the 408?
I'm still in southern AL for now but I'm getting fired up about the house hunting trip next month. I've got my eye on a place with a 3-stall garage.
I just hope it's still there next month. Once I get all that behind me I'll feel a lot better about breaking some stuff!Hows your odometer looking? You getting some good miles on the 408?
05-17-2012, 11:38 PM
#769
Thanks for the run down on your setup. It's amazing you can run in the 11s with such a modest setup. Awesome!
I have been looking into the Katech rod bolts that you used. Something I find interesting about the Katechs - they neck down considerably compared to the stock bolts. I'm sure that has something to do with the design (more neck down = less stiff = less fatigue for the bolt). For $200 it's a lot to pay, but I've gotta wonder how a stock PM rod with the Katech bolts compares to aftermarket forged rods with ARPs. You've got me thinking about an upgrade - but first I need to be convinced the rod really doesn't require resizing.
I have been looking into the Katech rod bolts that you used. Something I find interesting about the Katechs - they neck down considerably compared to the stock bolts. I'm sure that has something to do with the design (more neck down = less stiff = less fatigue for the bolt). For $200 it's a lot to pay, but I've gotta wonder how a stock PM rod with the Katech bolts compares to aftermarket forged rods with ARPs. You've got me thinking about an upgrade - but first I need to be convinced the rod really doesn't require resizing.
Last edited by -TheBandit-; 05-18-2012 at 12:08 AM.
05-18-2012, 04:06 AM
#770
I hope the house in question works out for you. With the market down, there is a good possibility it will be there.
Man it will trailer the same with an engine or without!! Unless your going to drive it all the way across the country. Just messin with ya!
The Camaro has sat there while I have worked on everyone elses vehicles. I sort of got a little behind while I was in process of swapping engines. I have spent the better part of this past week installing the 3pt seat belts in the rear of the car and also mounting the 2002 SS Camaro leather front buckets. All of that is complete, now for the front 3pts and I will be on the road again.
http://youtu.be/Gdlyi5mckg0
Once I get all that behind me I'll feel a lot better about breaking some stuff!
Hows your odometer looking? You getting some good miles on the 408?
http://youtu.be/Gdlyi5mckg0
05-18-2012, 11:37 AM
#771
I have been looking into the Katech rod bolts that you used. Something I find interesting about the Katechs - they neck down considerably compared to the stock bolts. I'm sure that has something to do with the design (more neck down = less stiff = less fatigue for the bolt).
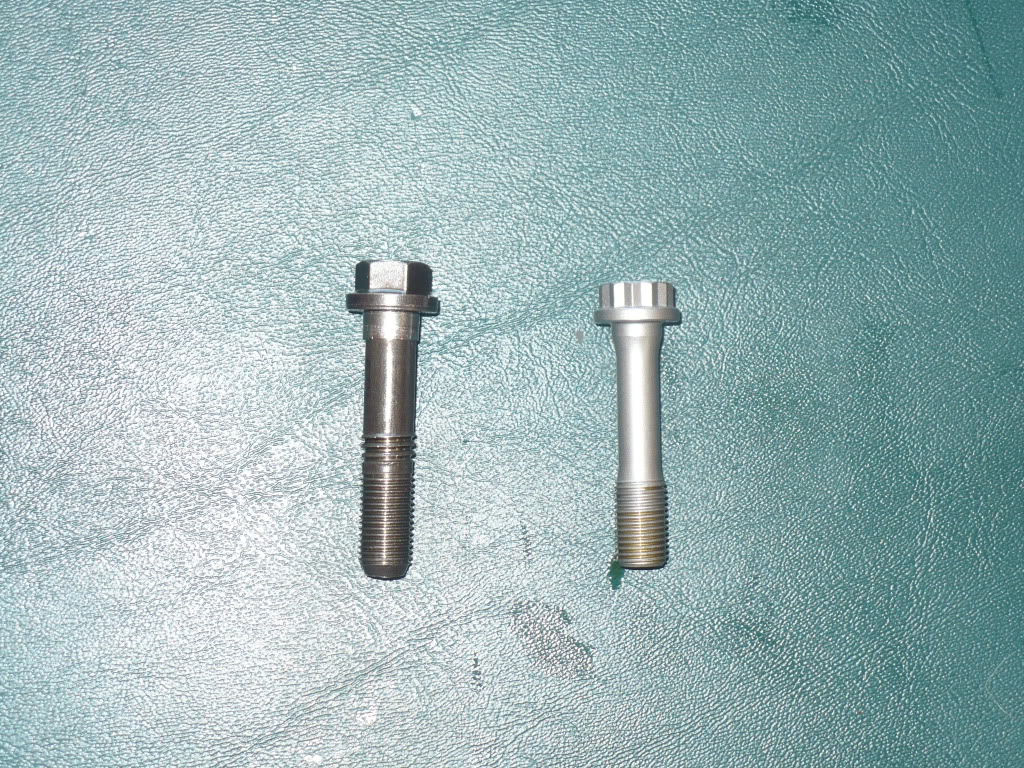
My personal theory on the size difference was that the material the Katechs are made out of is more dense so they necked it down and slightly shortened it to equalize the mass with the factory bolt (balance issues) but I could be wrong.
Katech’s racing engines have won many races and championships in IROC, Trans-Am, IRL, ALMS, SCCA Pro, Grand-Am, FIA GT, including winning the NASCAR “Engine Builder of the Year” award from 1995 to 1997 and the “Global Motorsports Engine of the Year” in 2006.
Katech’s engines have also powered the famous GM Corvette Racing team which has dominated the U.S. and global GT racing circuit by capturing six championships and won the legendary 24 Hours of LeMans six times over enormous competition from Aston Martin, BMW, Dodge, Ferrari, Ford, Lamborghini, etc. Their engines have powered many champions including, A.J. Foyt, Dale Earnhart, Dale Earnhart Jr., Jimmy Johnson, Johnny O’Connell, and Ron Fellows. Their experience and knowledge gained in motorsports have allowed them to perfect their street performance product line.
Basically, from what I understand, they've used their bolts as a direct replacement for the factory bolts in all of the LS powered factory Corvette race cars that were required to run stock power plants, and they do so without disassembling the engine; ie direct 1 for 1 replacement. I believe those race drivers put more sustained high-RPM abuse on those motors in one race than I ever will at the dragstrip in 10 years. So if it's good enough for them.......
Just my thoughts.
05-18-2012, 12:49 PM
#772
I am a mechanical engineer (MSME Cal Poly SLO) and have a reasonable grasp on fastener theory, but honestly couldn't know enough details on the application and materials used here to know exactly why the dimensions are what they are. I find it very strange that resizing isn't required - to me it implies the initial clamp load of the bolt would have to be the same or close, which would also imply similar tightening specifications given the thread pitch. Increasing the proof strength of a fastener does help, but from what I remember the gain is less substantiated if you don't also increase the initial clamp force. It's quite possible I am amiss in the theory and Katech knows things I don't know. It would be great to hear their thoughts on the matter and understand the failure mode(s) of the stock bolts.
Heck, I am really getting off on a thread hijack here, so let me just wrap up by saying I fully agree with your rationale and have really enjoyed reading your thread piece wise as I have time.
Heck, I am really getting off on a thread hijack here, so let me just wrap up by saying I fully agree with your rationale and have really enjoyed reading your thread piece wise as I have time.
05-18-2012, 12:49 PM
#773
The Camaro has sat there while I have worked on everyone elses vehicles. I sort of got a little behind while I was in process of swapping engines. I have spent the better part of this past week installing the 3pt seat belts in the rear of the car and also mounting the 2002 SS Camaro leather front buckets. All of that is complete, now for the front 3pts and I will be on the road again.
Oh, and as a side note.......I had never noticed what a short little dude ***** Nelson is until you posted that vid. Do you suppose all the weed has stunted his growth?
 05-18-2012, 01:06 PM
#774
You lost me at this point^^^............that's how very little I know about engineering.....LOL. But I find all this stuff extremely interesting.
No problem at all. Like I said, I find these coversations very interesting and if it takes place inside my thread, it makes it easier for me to come back and find it again later! Thanks for checking out my thread. I've enjoyed yours as well. You've done some really cool work on your Nova.
.....that's how very little I know about engineering.....LOL. But I find all this stuff extremely interesting.No problem at all. Like I said, I find these coversations very interesting and if it takes place inside my thread, it makes it easier for me to come back and find it again later! Thanks for checking out my thread. I've enjoyed yours as well. You've done some really cool work on your Nova.
05-21-2012, 10:40 AM
#775
The new seats and belts should be pretty cool. Are you having the front seats reupholstered to match the back seats or leaving them as is? My buddy with a 68 Camaro wants to do 4th Gen Camaro seats in his but have them reupholtstered in houndstooth. I personally dig the late 60's factory low-back buckets for looks but the newer style seats offer a huge comfort benefit.
Oh, and as a side note.......I had never noticed what a short little dude ***** Nelson is until you posted that vid. Do you suppose all the weed has stunted his growth?
Oh, and as a side note.......I had never noticed what a short little dude ***** Nelson is until you posted that vid. Do you suppose all the weed has stunted his growth?
PS I am probably short due to the fact of all the weed I smoked back in and around 1988.
06-07-2012, 08:09 AM
#776
Reduction of bolt shank cross section this is standard pratice in high quality hardware. And Clint you are right on the money; it is done to combat fatique failure by equalization of tensile load and stress through out the bolt.
When a bolt is in tensile loading, the smaller the cross sectional area the higher the stress. This means that the highest stresses are seen at the minor diameter of the threads while the large full cross section of the unthreaded shank experiences much lower stress. This creates a stress differnetial, making the minor thread diameter a stress riser! Now this is the part that is a little tough to comprehend. By decreasing the shank diameter, you are increasing the load and stress in the shank and equalizing the stress between the shank and the minor diameter. Thus reducing the stress differential and *hopefully* eliminating the stress riser at the minor diameter.
Manufacturers of high quality fasteners also incorporate a lot of other stress reducing features like forging from billets, rolled threads, large rolled radi, and centerless ground shanks. Not to mention massive metalurgical technology!
Sorry to be so long winded, but it is interesting information. Well at least to us nerds...
06-10-2012, 11:41 AM
#777
Thanks for the information cruisin'73. I find all this stuff very interesting and it makes me feel better about the technology I paid for when buying the Katechs.
It’s been a while since I’ve updated this thread with anything about the car. And truth be told……..I still don’t have much to update in the way of progress. But this thread is just on a break until I can get back to serious work on the car and is hopefully not completely dead. So I figured what better way to keep it alive than to post some pics.
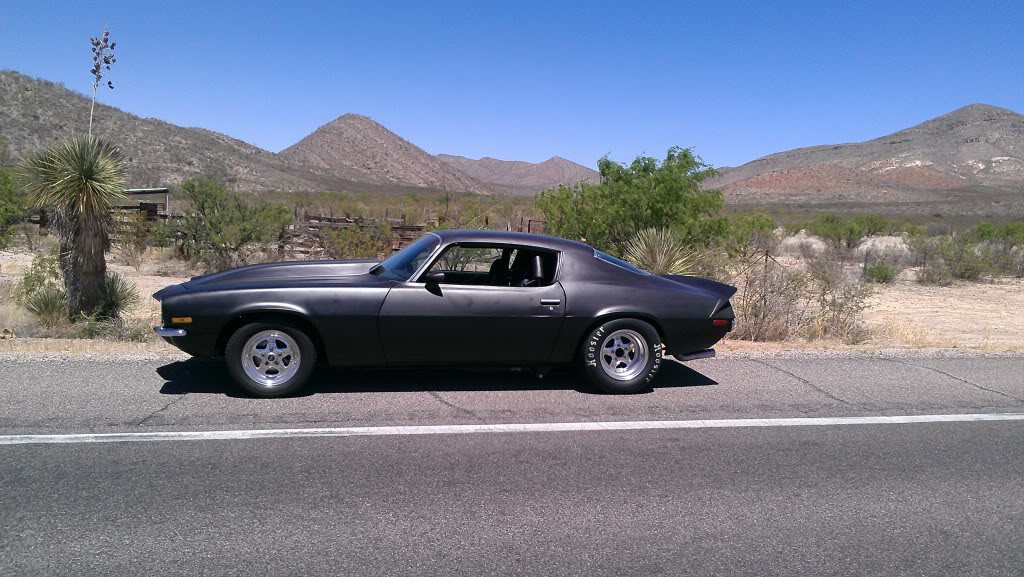
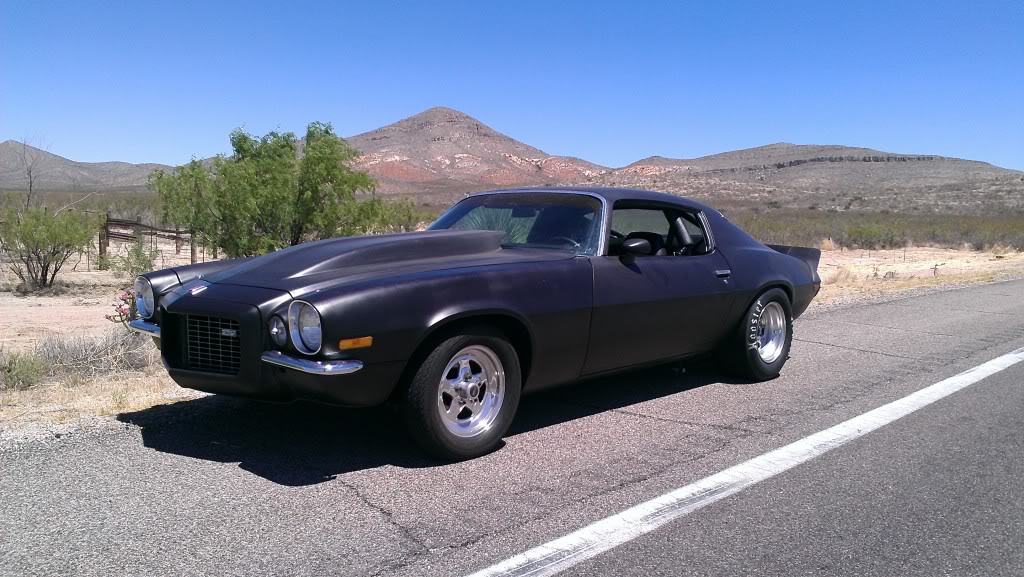
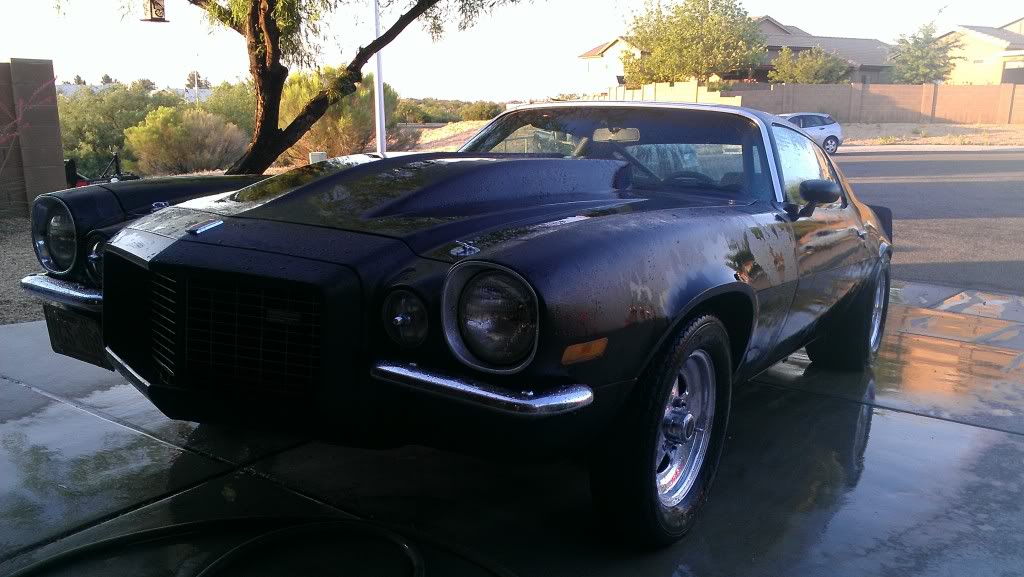
I was away for five weeks so when I got back I really wanted to get out and drive the car. So I took it out on what ended up being a 52 mile cruise. That may not seem like much to the manual trans or tight converter crowd, but on a car like this with an 8-inch 5000 stall converter and 4.10 gears, I wasn’t exactly sure how it would do and needed to earn some “street cred”…..LOL. I’m happy to report that the car did great. It was a beautiful 80-degree day with lots of sunshine. The engine never got above 170 and the trans stayed at or below 160. I was especially impressed by that considering all the constant terrain changes around here (lots of hills to climb). Not to mention.....anyone who has followed this thread for a while should know I don't go on a cruise like that without stopping for a few aggressive launches off the brake and a few full 1/4 mile passes.....so I wasn't easy on it. The worst result of the day was a trucker’s tan (OK, burn) on my left arm from hanging it out the window. The only stop I made was to snap a couple pics just outside of Tombstone, AZ.
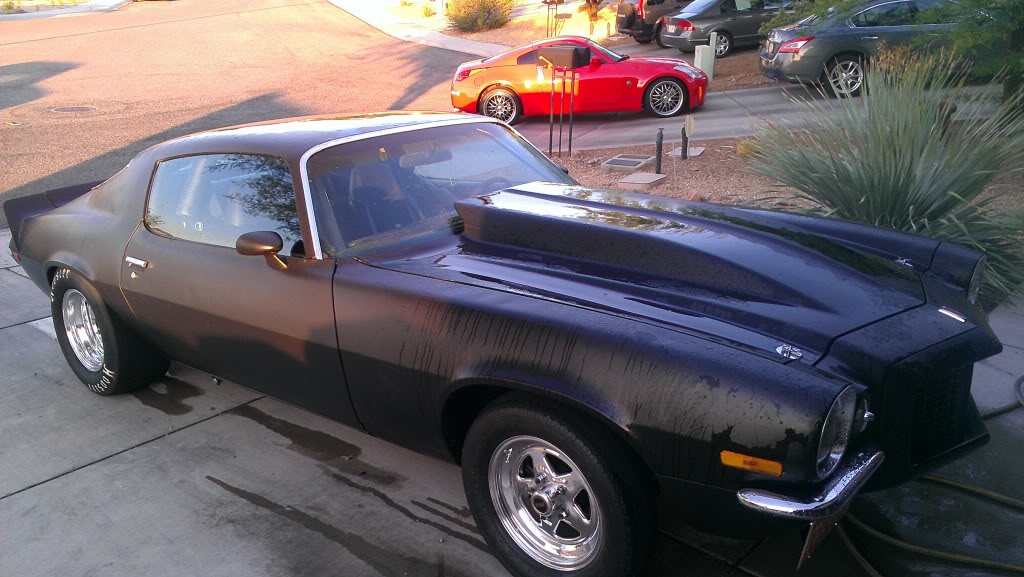
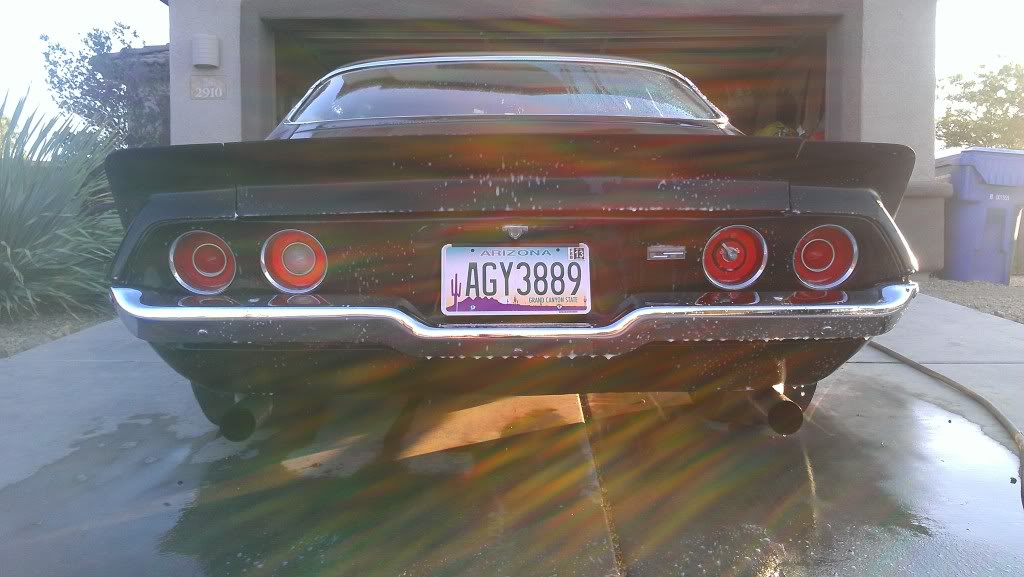
Other than the cruise on Memorial Day weekend, I’ve just been farting around and addressing small issues that have been bugging me for a while. These were just some small things like removing the top fender moldings that I’ve since decided not to use, installing a new wiper switch and blades to make them fully functional, and touching up some of the dye on my dash pad that I’ve scuffed up from having the aluminum gauge bezel in and out of the car way to many times. Then yesterday…….I did the unthinkable. I actually washed the car for the first time since I bought it in Aug/Sep 09. I figured it had seen enough abuse and deserved a bath by now, but the real motivation was to check the car for leaks since it hasn’t been wet since I’ve owned it. On the 1st of August it’s getting loaded on the trailer for a cross-country ride to it’s new home in VA. All told it will probably spend close to two weeks outside without shelter so I want to be sure it holds water. Good thing I did. Turns out there are two seams where the quarters meet the trunk hinge area that I forgot to seam seal. Needless to say, the trunk took on water during the wash job. Here’s some more gratuitous pics to prove I actually washed it.
It’s been a while since I’ve updated this thread with anything about the car. And truth be told……..I still don’t have much to update in the way of progress. But this thread is just on a break until I can get back to serious work on the car and is hopefully not completely dead. So I figured what better way to keep it alive than to post some pics.
I was away for five weeks so when I got back I really wanted to get out and drive the car. So I took it out on what ended up being a 52 mile cruise. That may not seem like much to the manual trans or tight converter crowd, but on a car like this with an 8-inch 5000 stall converter and 4.10 gears, I wasn’t exactly sure how it would do and needed to earn some “street cred”…..LOL. I’m happy to report that the car did great. It was a beautiful 80-degree day with lots of sunshine. The engine never got above 170 and the trans stayed at or below 160. I was especially impressed by that considering all the constant terrain changes around here (lots of hills to climb). Not to mention.....anyone who has followed this thread for a while should know I don't go on a cruise like that without stopping for a few aggressive launches off the brake and a few full 1/4 mile passes.....so I wasn't easy on it. The worst result of the day was a trucker’s tan (OK, burn) on my left arm from hanging it out the window. The only stop I made was to snap a couple pics just outside of Tombstone, AZ.
Other than the cruise on Memorial Day weekend, I’ve just been farting around and addressing small issues that have been bugging me for a while. These were just some small things like removing the top fender moldings that I’ve since decided not to use, installing a new wiper switch and blades to make them fully functional, and touching up some of the dye on my dash pad that I’ve scuffed up from having the aluminum gauge bezel in and out of the car way to many times. Then yesterday…….I did the unthinkable. I actually washed the car for the first time since I bought it in Aug/Sep 09. I figured it had seen enough abuse and deserved a bath by now, but the real motivation was to check the car for leaks since it hasn’t been wet since I’ve owned it. On the 1st of August it’s getting loaded on the trailer for a cross-country ride to it’s new home in VA. All told it will probably spend close to two weeks outside without shelter so I want to be sure it holds water. Good thing I did. Turns out there are two seams where the quarters meet the trunk hinge area that I forgot to seam seal. Needless to say, the trunk took on water during the wash job. Here’s some more gratuitous pics to prove I actually washed it.
06-11-2012, 09:44 AM
#778
There is a good looking car under all that dust!
I got a question for ya from back a long time ago in your build, like post # 52-53 (pg 3) retrofitting your alternator. I copied your mounting system, with a small change to allow the use of a truck water pump and crankshaft pulley:

Just like your setup, I am considering adding a ribbed pulley to the alternator bracket to help increase water pump pulley wrap.
My questions are:
-Any slippage issues do to lack of crank pulley wrap?
-Any belt slap on the long run from the crank to the alt?
-Does the belt contact the bolt head on the alternator bracket? It looks pretty close!
-Did you run into any other issues with this routing?
Thanks for the input!
I got a question for ya from back a long time ago in your build, like post # 52-53 (pg 3) retrofitting your alternator. I copied your mounting system, with a small change to allow the use of a truck water pump and crankshaft pulley:
Just like your setup, I am considering adding a ribbed pulley to the alternator bracket to help increase water pump pulley wrap.
My questions are:
-Any slippage issues do to lack of crank pulley wrap?
-Any belt slap on the long run from the crank to the alt?
-Does the belt contact the bolt head on the alternator bracket? It looks pretty close!
-Did you run into any other issues with this routing?
Thanks for the input!
06-11-2012, 11:57 AM
#779
Gary the car is looking great! What an awesome background to drive around in. I bet mama is glad to have you home. So your definately heading our way in August?! I have to see this car in person maybe even take a ride in it, hint hint!!!
Cruisin- use an 08 Corvette alternator with the clutch pulley if the belt slaps too much. It will almost eliminate the slapping.
Cruisin- use an 08 Corvette alternator with the clutch pulley if the belt slaps too much. It will almost eliminate the slapping.
06-11-2012, 12:36 PM
#780
Thanks man! It deserved a bath after all that abuse.
I'll answer below in red. BTW, I love your adaptation of the idea. That bracket to space out the alternator for the truck accessories is very nice!
I got a question for ya from back a long time ago in your build, like post # 52-53 (pg 3) retrofitting your alternator. I copied your mounting system, with a small change to allow the use of a truck water pump and crankshaft pulley:
Just like your setup, I am considering adding a ribbed pulley to the alternator bracket to help increase water pump pulley wrap.
Just like your setup, I am considering adding a ribbed pulley to the alternator bracket to help increase water pump pulley wrap.
My questions are:
-Any slippage issues do to lack of crank pulley wrap?
None whatsoever. There has been no cooling issues, no high RPM charging issues and no "belt dust" detected anywhere. This was an initial concern of mine so I've watched it very closely. MANY trips to and past 7K and all is good. Some of what may have helped though is that I am running a manual belt tensioner rather than a factory spring loaded one. This keeps much more constant and consistent tension on the belt.
-Any belt slap on the long run from the crank to the alt?
None that I'm aware of. But I don't make a habit of free-reving my motor very high. So there may be some at 7K while I'm driving, but if there has been, it hasn't hurt anything (ie. I've never lost a belt) and I've never seen any while reving to lower RPMs under the hood. Say maybe 4K at most. Again, my manual tensioner may be a factor here.
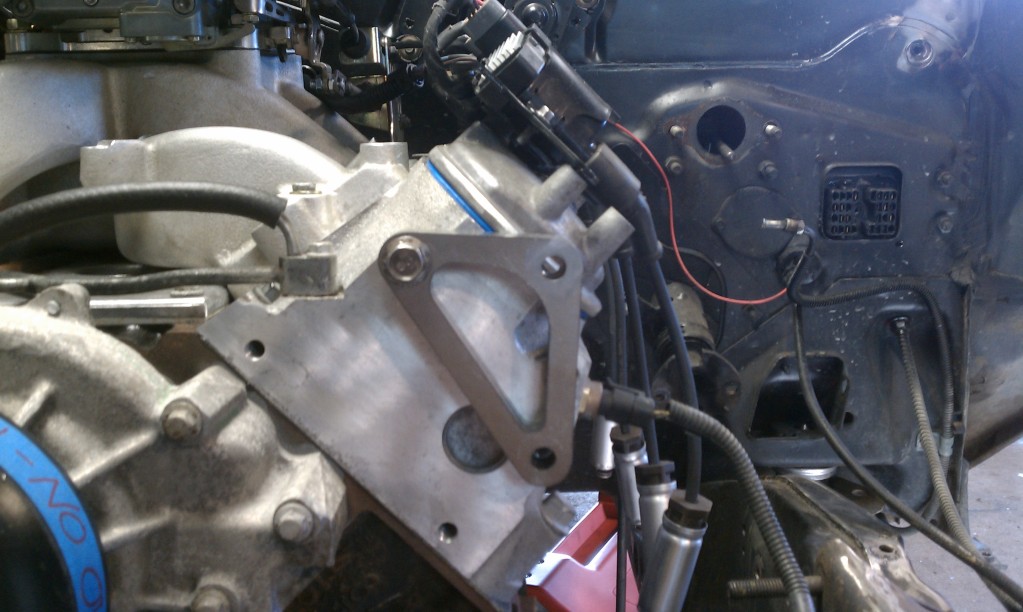
-Does the belt contact the bolt head on the alternator bracket? It looks pretty close!
It's DAMN close.......but far enough away to have zero contact. This was another place I had concern but when viewed/photographed from the right angle, you can see it clears just fine. There are no rub marks or other indications that there has been any contact at all. Now if my ribbed idler pulley were much larger in diameter.......there would probably be an issue. Also, it this pic, I was mocking it up with a larger underdrive alt pulley which brought the belt close to the bolt

But in this pic you can see a standard size alt pulley keeps it away from the bolt better.
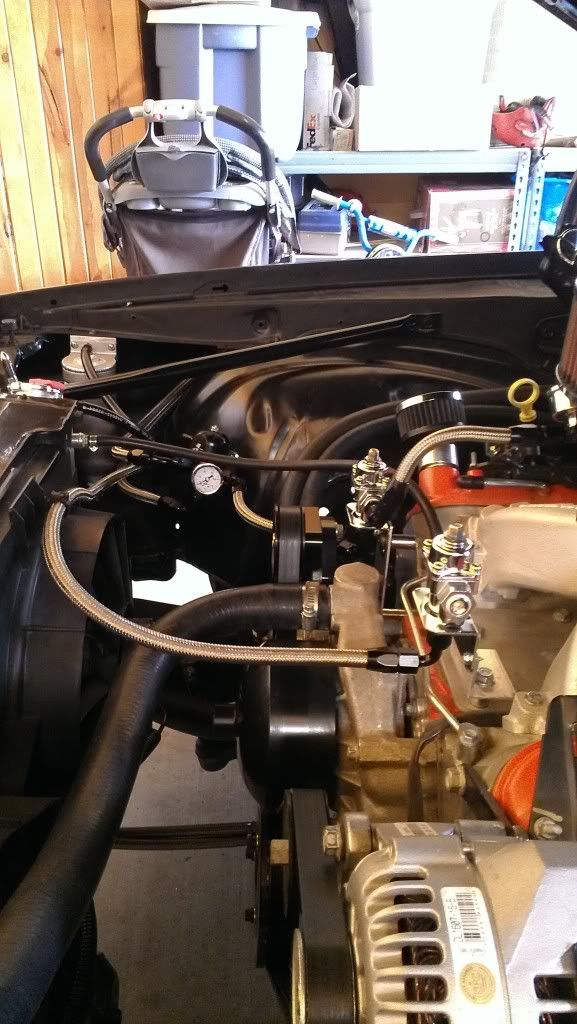
-Did you run into any other issues with this routing?
None that I can think of off hand. It almost seemed too simple and I couldn't figure out why other guys hadn't thought of this before me. Then I quickly realized it's because most LS-swappers don't ditch things like AC and certainly not power steering. This isn't such an great solution for anyone wanting to turn more than an alternator and water pump.....LOL.
Thanks for the input!
No problem....I hope it helps you out.
-Any slippage issues do to lack of crank pulley wrap?
None whatsoever. There has been no cooling issues, no high RPM charging issues and no "belt dust" detected anywhere. This was an initial concern of mine so I've watched it very closely. MANY trips to and past 7K and all is good. Some of what may have helped though is that I am running a manual belt tensioner rather than a factory spring loaded one. This keeps much more constant and consistent tension on the belt.
-Any belt slap on the long run from the crank to the alt?
None that I'm aware of. But I don't make a habit of free-reving my motor very high. So there may be some at 7K while I'm driving, but if there has been, it hasn't hurt anything (ie. I've never lost a belt) and I've never seen any while reving to lower RPMs under the hood. Say maybe 4K at most. Again, my manual tensioner may be a factor here.
-Does the belt contact the bolt head on the alternator bracket? It looks pretty close!
It's DAMN close.......but far enough away to have zero contact. This was another place I had concern but when viewed/photographed from the right angle, you can see it clears just fine. There are no rub marks or other indications that there has been any contact at all. Now if my ribbed idler pulley were much larger in diameter.......there would probably be an issue. Also, it this pic, I was mocking it up with a larger underdrive alt pulley which brought the belt close to the bolt
But in this pic you can see a standard size alt pulley keeps it away from the bolt better.
-Did you run into any other issues with this routing?
None that I can think of off hand. It almost seemed too simple and I couldn't figure out why other guys hadn't thought of this before me. Then I quickly realized it's because most LS-swappers don't ditch things like AC and certainly not power steering. This isn't such an great solution for anyone wanting to turn more than an alternator and water pump.....LOL.
Thanks for the input!
No problem....I hope it helps you out.
Last edited by GC99TA; 06-11-2012 at 01:11 PM.