
1973 RS Camaro LSX Swap


 11-11-2012, 07:05 PM
#823
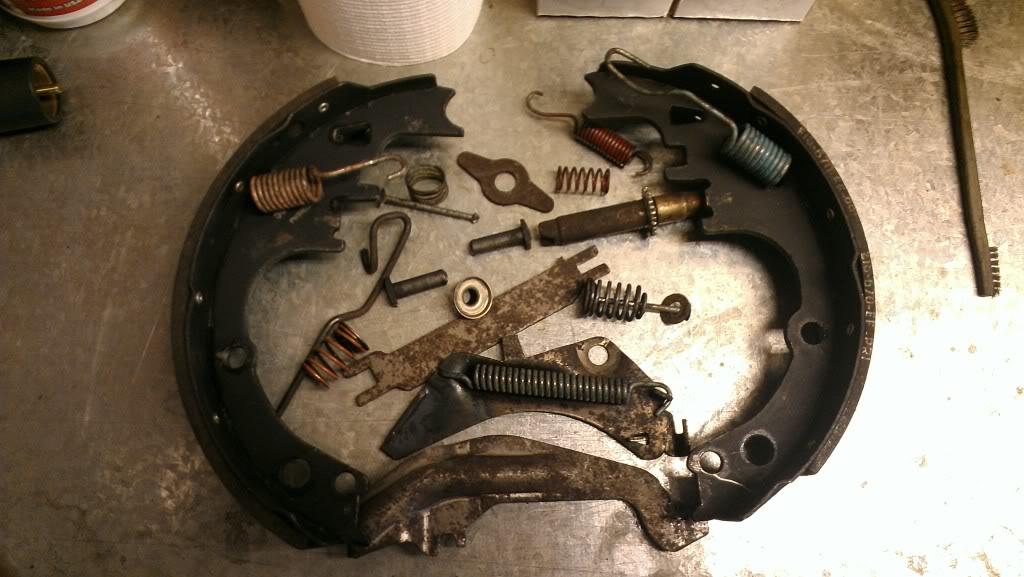
Work continues on the rear end swap at a snail’s pace but I managed to get a few things done this weekend and a little last weekend. Most of my time was focused on tackling the brake backing plate issue. The center holes on the backing plates started out at around 2.70 inches and needed to be opened up to around 3.25 to allow the 3 inch axle bearings to pass through them with a little extra clearance all around.
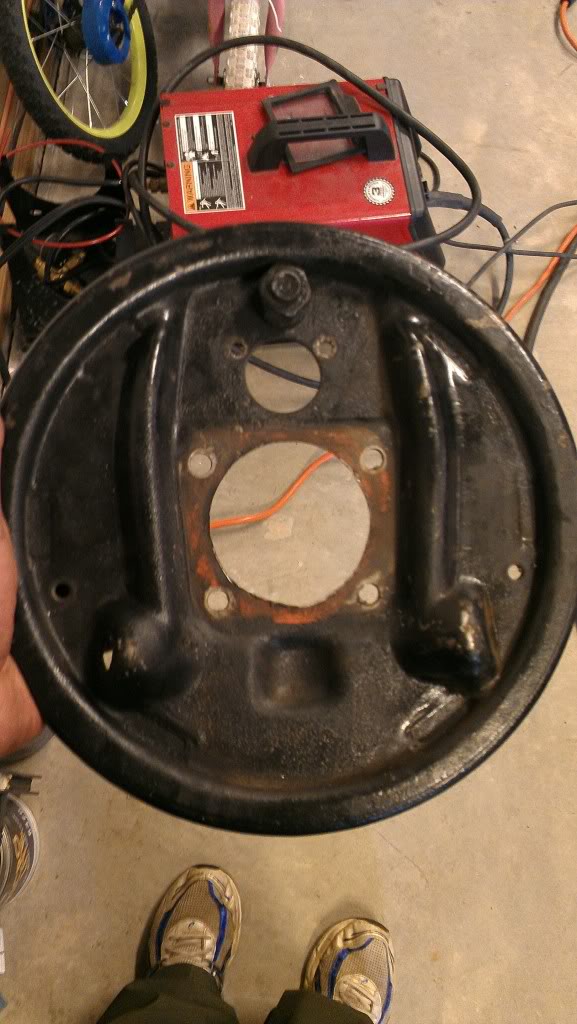
The backing plates are 1/8 inch thick so after exhausting all of my grinding options and getting nowhere fast, I decided to resort to a 3.25in hole saw. The problem with that idea is that there is nothing in the center for the bit to pilot into. So I tacked a piece of angle iron to the backing plate to give me something the drill into. The other part of the angle gave me a way to hold the piece in the vice for drilling.

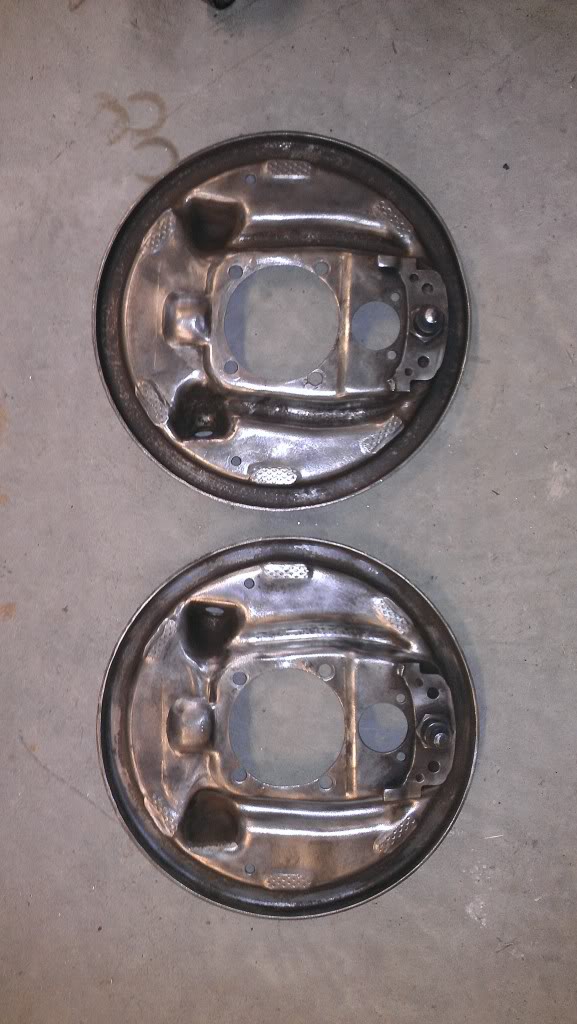
Unfortunately my drill press doesn’t have enough reach to be able to set the backing plate up in it and still hit the center so I had to drill them by hand. That made it pretty tough to keep the hole saw square with my work and led to more than a couple busted Ľ drill bits. I also found that a hole saw that large in diameter (even a good quality one) seems to flex a lot and wants to walk around. My cure for that (learning as I go) was to drill through a 2x4 with it leave the wooden “plug” inside . It was surprising how much that stabilized the blade. Here’s the first one after it was opened up.
I still have to finish cutting the second one cause I ran out of Ľ in drill bits before I could finish. I think instead of using the brittle bits as a pilot, I’ll pick up some Ľ in bar stock instead. Hopefully it’ll work a little better for what I need it to do. Once complete both backing plates will be cleaned up, repainted, and reassembled with new wheel cylinders.
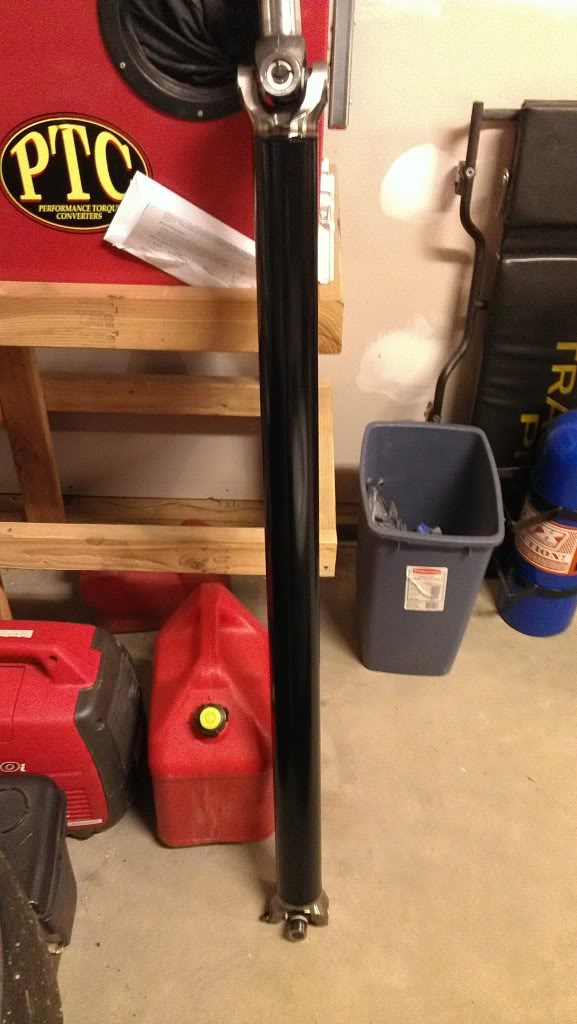
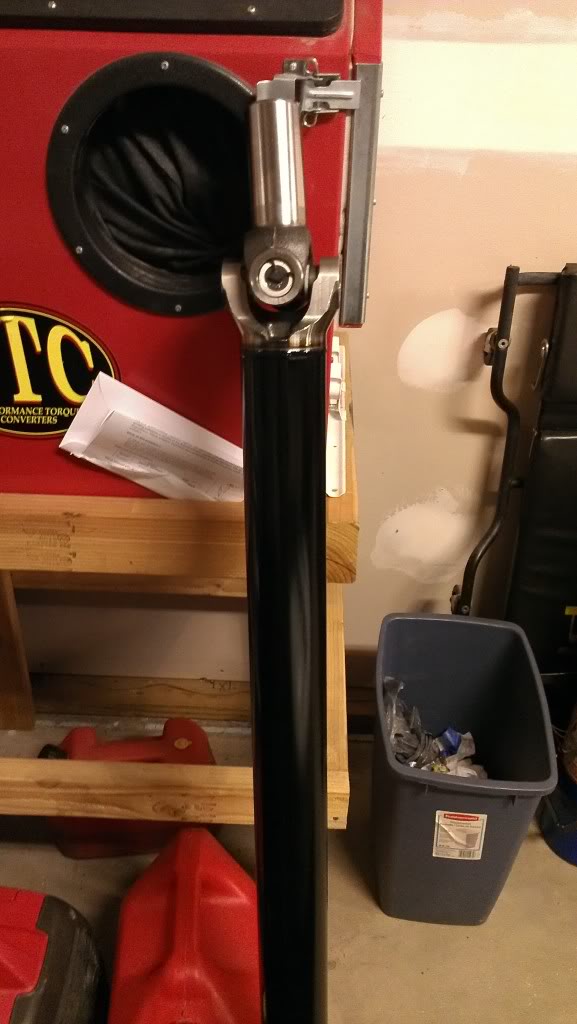
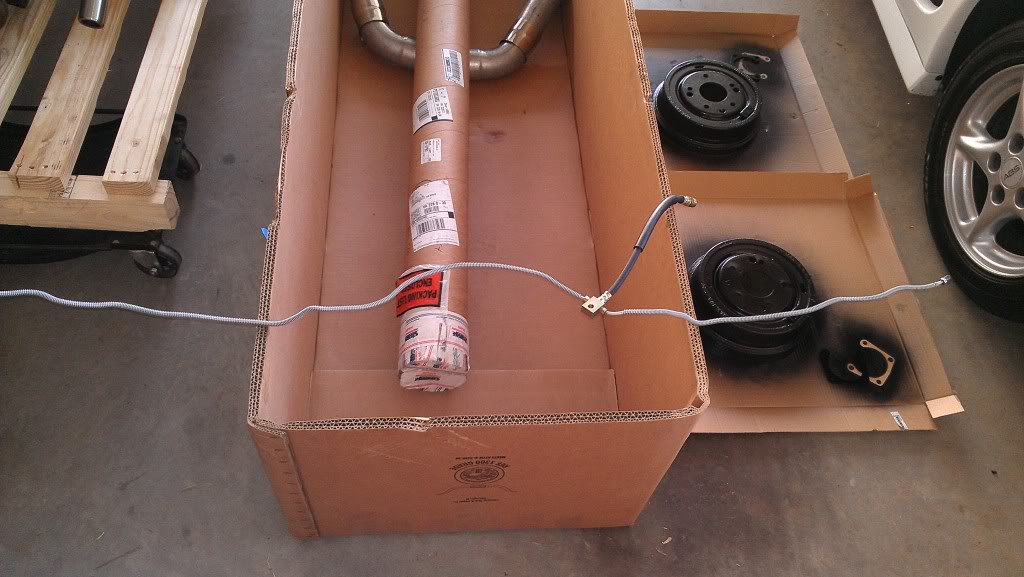
I also got some painting done on a few other parts. First up was the driveshaft. The original plan was to remove the u-joints and slip yoke so I could paint the whole shaft black and clear coat the slip yoke to prevent rust. But after fighting with the u-joints a little bit, I decided it would look pretty cool if I cleared both weld yokes along with the slip yoke and just painted the tubing of the shaft black. Here’s how it turned out.
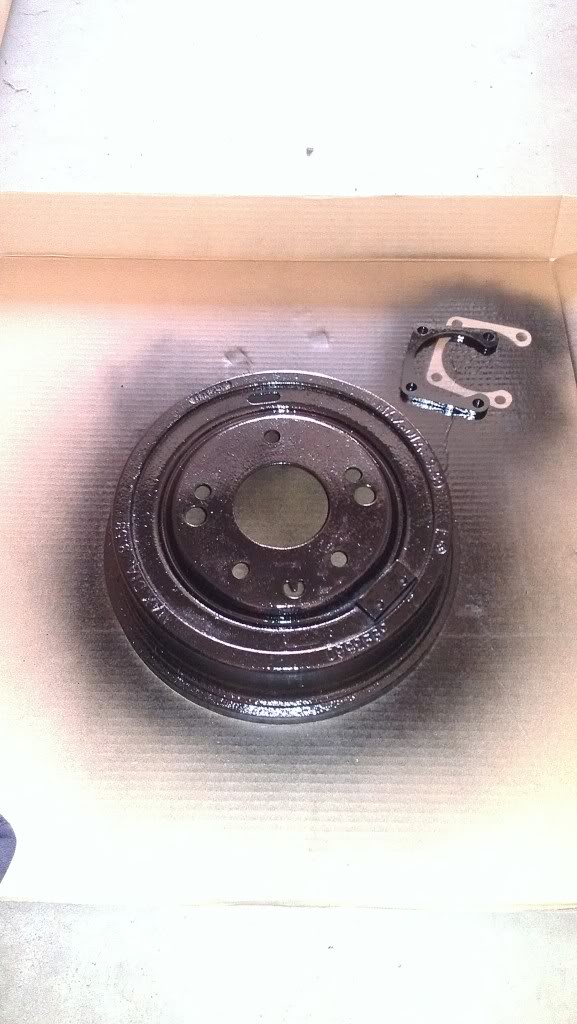
Next I opened up the holes on the brake drums to accommodate the larger ˝ in wheel studs and repainted them along with the axle retainer rings.
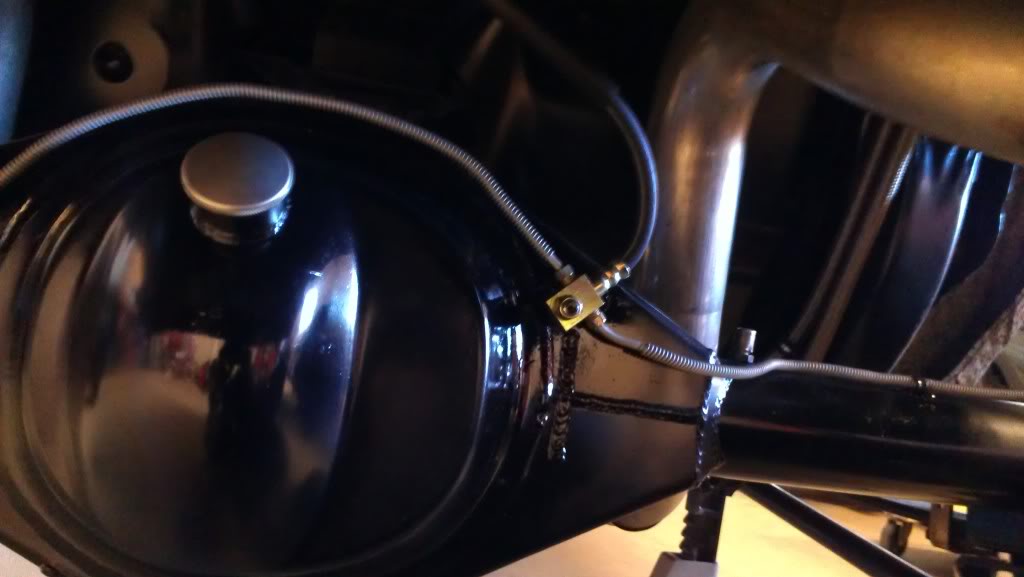
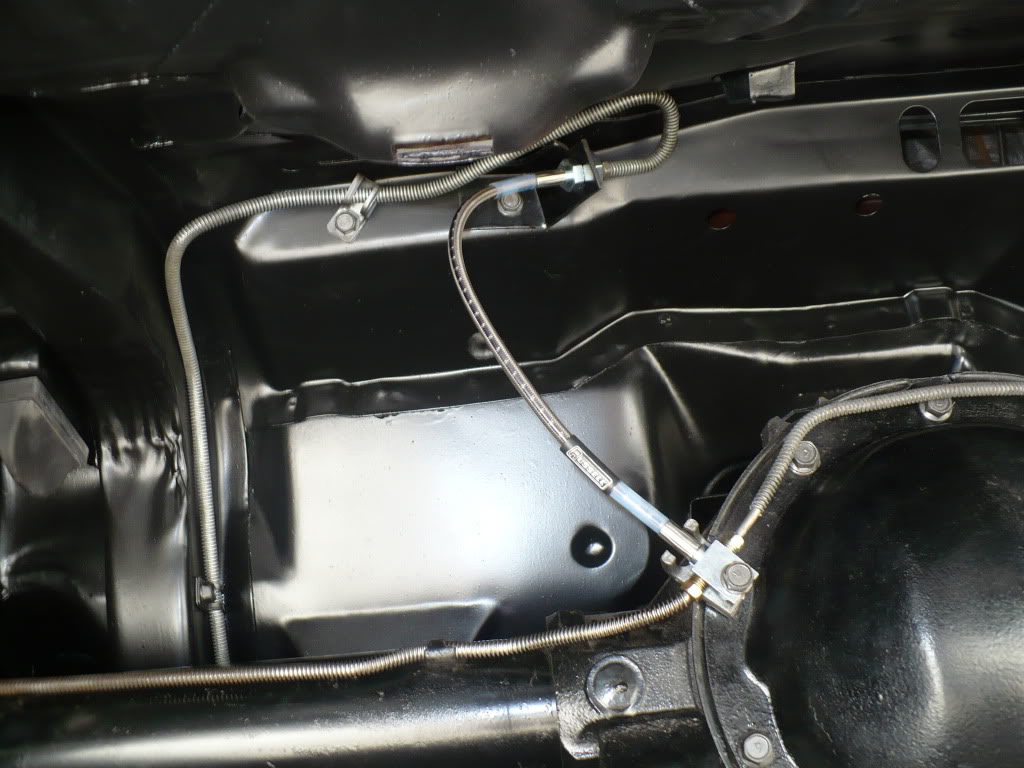
I also took my stock brake lines and re-bent them to better fit the contour of the new rear end and then I hit it with some silver paint to deter rusting. It’s amazing how good of shape it’s in for an original piece (the rubber line is a replacement, the steel lines are original).
Since the 9 inch is a front load design there is nowhere to bolt the brass t-union for the rear brake line. So I’m thinking about welding a small stud to the rear of the housing to serve that purpose. More on that over the next couple weeks I guess.
The backing plates are 1/8 inch thick so after exhausting all of my grinding options and getting nowhere fast, I decided to resort to a 3.25in hole saw. The problem with that idea is that there is nothing in the center for the bit to pilot into. So I tacked a piece of angle iron to the backing plate to give me something the drill into. The other part of the angle gave me a way to hold the piece in the vice for drilling.
Unfortunately my drill press doesn’t have enough reach to be able to set the backing plate up in it and still hit the center so I had to drill them by hand. That made it pretty tough to keep the hole saw square with my work and led to more than a couple busted Ľ drill bits. I also found that a hole saw that large in diameter (even a good quality one) seems to flex a lot and wants to walk around. My cure for that (learning as I go) was to drill through a 2x4 with it leave the wooden “plug” inside . It was surprising how much that stabilized the blade. Here’s the first one after it was opened up.
I still have to finish cutting the second one cause I ran out of Ľ in drill bits before I could finish. I think instead of using the brittle bits as a pilot, I’ll pick up some Ľ in bar stock instead. Hopefully it’ll work a little better for what I need it to do. Once complete both backing plates will be cleaned up, repainted, and reassembled with new wheel cylinders.
I also got some painting done on a few other parts. First up was the driveshaft. The original plan was to remove the u-joints and slip yoke so I could paint the whole shaft black and clear coat the slip yoke to prevent rust. But after fighting with the u-joints a little bit, I decided it would look pretty cool if I cleared both weld yokes along with the slip yoke and just painted the tubing of the shaft black. Here’s how it turned out.
Next I opened up the holes on the brake drums to accommodate the larger ˝ in wheel studs and repainted them along with the axle retainer rings.
I also took my stock brake lines and re-bent them to better fit the contour of the new rear end and then I hit it with some silver paint to deter rusting. It’s amazing how good of shape it’s in for an original piece (the rubber line is a replacement, the steel lines are original).
Since the 9 inch is a front load design there is nowhere to bolt the brass t-union for the rear brake line. So I’m thinking about welding a small stud to the rear of the housing to serve that purpose. More on that over the next couple weeks I guess.
11-11-2012, 10:54 PM
#824

Thanks Gary for your service to our country! My family appreciates all men and women that have served so that we may have the freedom to do the things we like and live out our lives according to our plan. It is people like yourself that make that possible!!! Thanks again
Man you have been busy! Way to go on the backing plates. Most people would have given up but not you. That is what makes your car one of a kind. I like what you did to the driveshaft.
Man you have been busy! Way to go on the backing plates. Most people would have given up but not you. That is what makes your car one of a kind. I like what you did to the driveshaft.
11-12-2012, 10:58 AM
#825


I really like the painted DS & cleared yokes. It looks like I'm gonna have to barrow (steal) another idea from you Gary. lol. But to make it "my own" , I won't be able to do nearly as nice of a job. Seriously. LOL
Jim
Jim
11-12-2012, 07:07 PM
#827
Thanks Gary for your service to our country! My family appreciates all men and women that have served so that we may have the freedom to do the things we like and live out our lives according to our plan. It is people like yourself that make that possible!!! Thanks again
Man you have been busy! Way to go on the backing plates. Most people would have given up but not you. That is what makes your car one of a kind. I like what you did to the driveshaft.
Man you have been busy! Way to go on the backing plates. Most people would have given up but not you. That is what makes your car one of a kind. I like what you did to the driveshaft.

 11-12-2012, 07:10 PM
#830
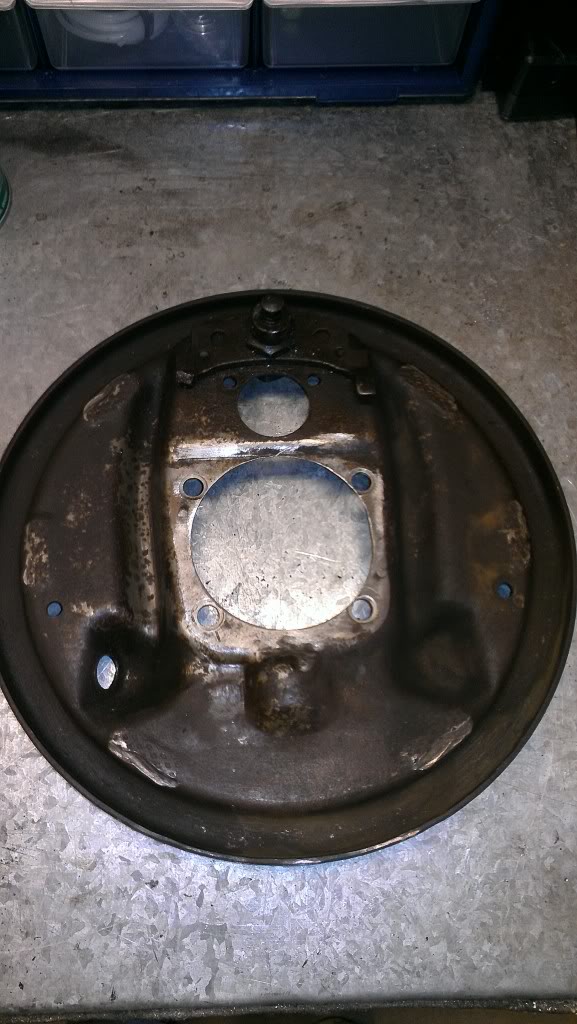
Today I had a little more free time so I finished cutting the second backing plate. After that I cleaned them both up and hit them with some paint.
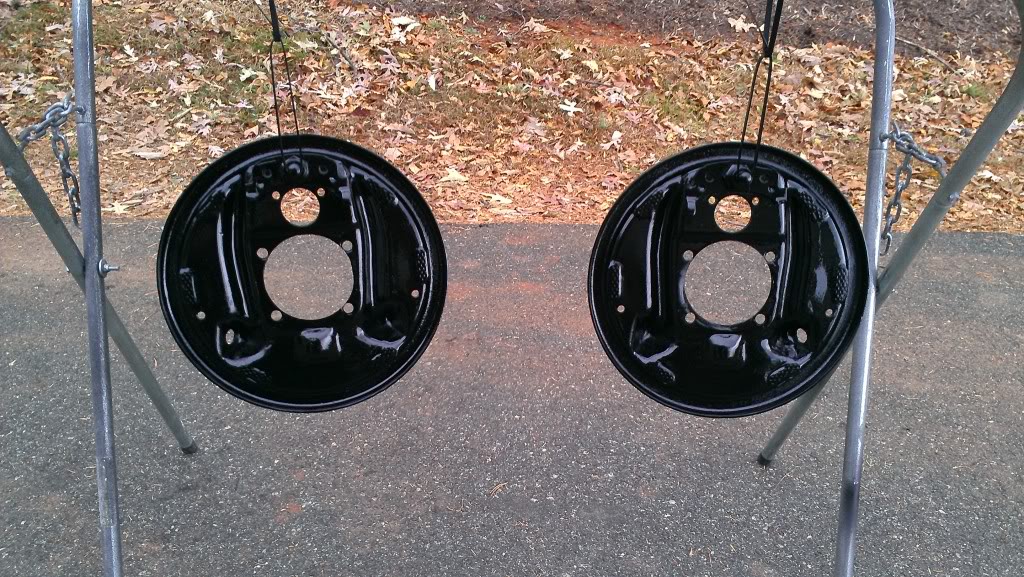
Now does anyone know how all this goes back together……..? LOL, thank God for plenty of pictures and Haynes manuals.
Now does anyone know how all this goes back together……..? LOL, thank God for plenty of pictures and Haynes manuals.
11-12-2012, 07:23 PM
#831
TECH Fanatic
iTrader: (26)

Join Date: Mar 2010
Location: Milledgeville, GA
Posts: 1,909
Likes: 0
Received 0 Likes
on
0 Posts
Yeah, you'll get it back together pretty quick. Drum brakes aren't nearly as hard to put together as all these young guys make them out to be. They just never see anything besides discs. LOL That being said, when I first started messing with cars I would do one side at the time so I can run around and look at the other if I forget how something went.
11-13-2012, 02:59 AM
#832
Yeah, you'll get it back together pretty quick. Drum brakes aren't nearly as hard to put together as all these young guys make them out to be. They just never see anything besides discs. LOL That being said, when I first started messing with cars I would do one side at the time so I can run around and look at the other if I forget how something went.
11-13-2012, 07:34 PM
#833
Yeah, I usually do it one side at a time but I still take "before" pictures, just so I don't have to go to the other side of the car and get confused by the "mirror image" effect....LOL. How bad is that?
I'm just hoping the weather holds out long enough for me to get this thing back together and put some break in miles on it before that white stuff starts falling. We shouldn't see any until late December or so but weather has been weird this year.
I'm just hoping the weather holds out long enough for me to get this thing back together and put some break in miles on it before that white stuff starts falling. We shouldn't see any until late December or so but weather has been weird this year.
11-18-2012, 03:29 PM
#834
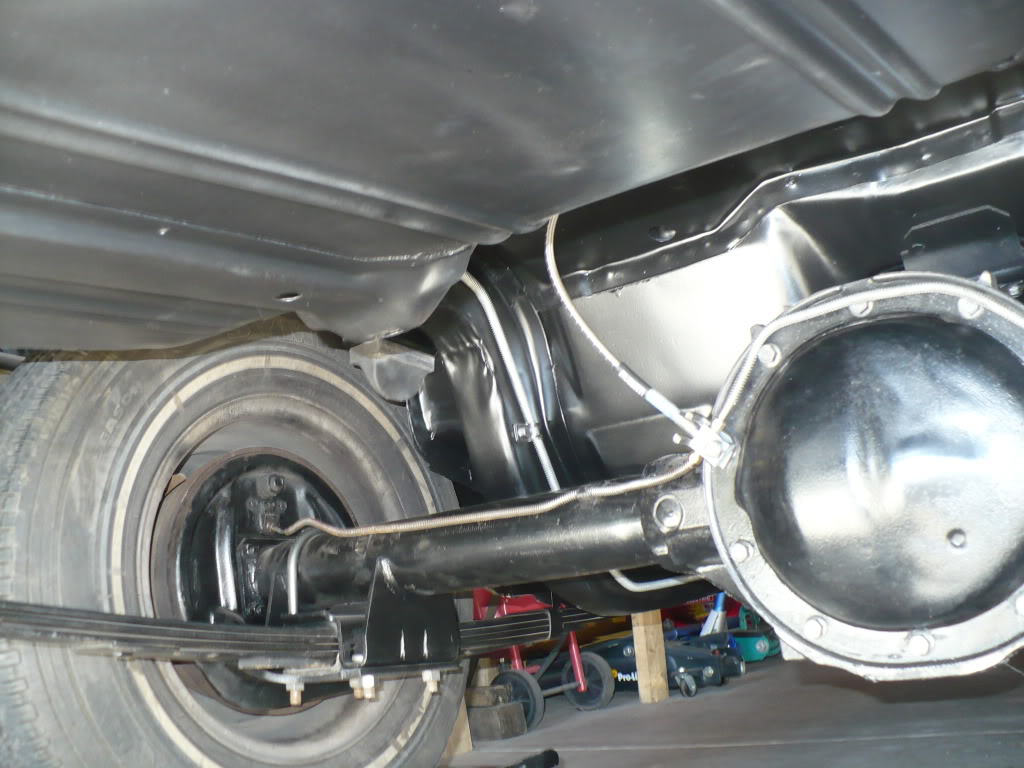
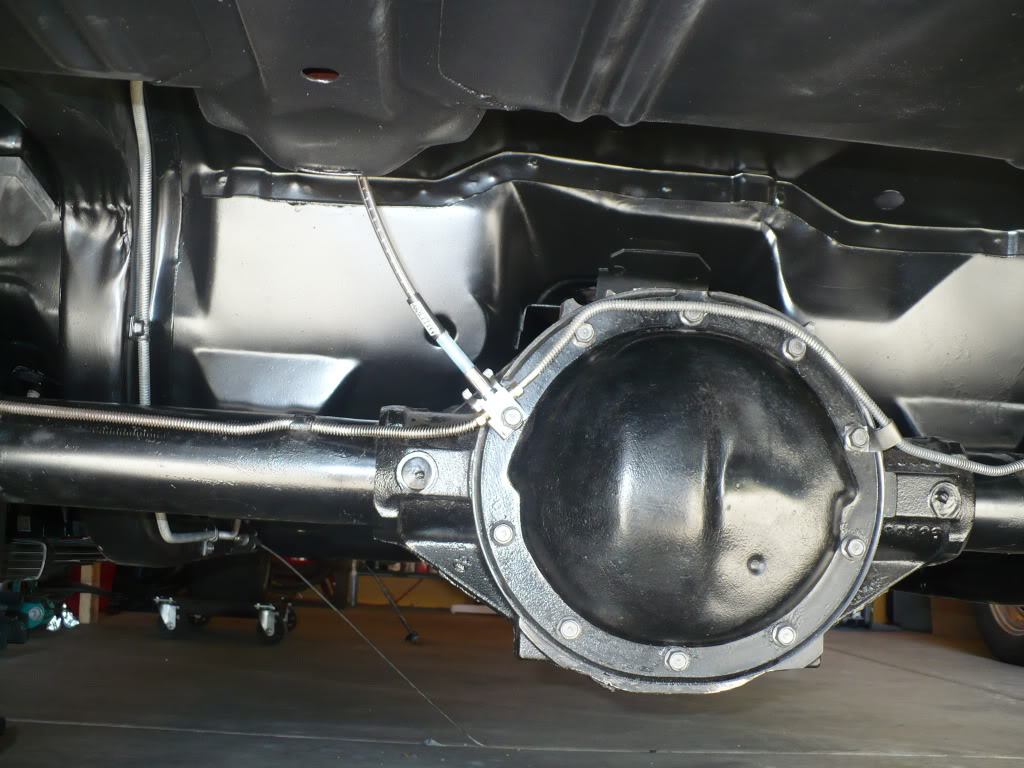
Well I guess I can finally call the 9 inch install complete. The only thing left to do now is put some break in miles on it and chage the gear lube.
I ran into two issues during final assembly and testing and both revolved around the overall rear end width being just a little too narrow. First I found that there isn't quite enough space between the axle flange and the break backing plates. So when I installed the drums and spun the rear over it turned just fine but when the wheels were torqued in place the drums would bottom out on the backing plates and bind everything up. Luckily I had some nice thin "custom" wheel spacers (shims really) on hand that my buddy had laser cut for me. So I used one shim between the flange and the drum face and fixed that issue with no problem. Next I found that the overall width of this rear is just slightly narrower that my stock rear. With the stock rear my 10 inch Pro Stars with 5.5in backspace fit good with about .150in worth of shim on each side. Now they require one store bought 5/16th (.312) wheel spacer on each side to fit without rubbing. So the rear is probably somewhere over 5/16in overall wider that the stock one. I'm sure that's within Strange's margin of error, and possibly even GM's.
One simple final touch that I added was to weld a stud to the rear of the housing in order to mount my stock brake's line brass T-junction. It was one of those simple little things that just made everything fit up a little better.
11-18-2012, 04:15 PM
#835
Great job on the rear install! Looks good under the Camaro. I am a little jealous though!
How did the center brake hose hook up to your 10 bolt? I just had the hose shop make up some braided lines and need a way of hooking the center line to my rear before I buy hard lines. You wouldn't happen to have a pic of the factory bracket would ya?
Looking forward to seeing some hard launches and wheels toting from the '73!!!!
11-18-2012, 06:30 PM
#836
How did the center brake hose hook up to your 10 bolt? I just had the hose shop make up some braided lines and need a way of hooking the center line to my rear before I buy hard lines. You wouldn't happen to have a pic of the factory bracket would ya?
Looking forward to seeing some hard launches and wheels toting from the '73!!!!
Looking forward to seeing some hard launches and wheels toting from the '73!!!!
Last edited by GC99TA; 11-18-2012 at 06:41 PM.
12-06-2012, 12:14 PM
#838

Everything looks great. It's amazing to have a 40 year old car that is basically brand new. I just received a care package and am curious to know if your new driveshaft is shorter or longer than the old one.
12-06-2012, 03:35 PM
#839
Thanks Dan. The new driveshaft is 1 7/8 longer than the old one. It seems the 9 inch is a bit "stubbier" on the nose than the 10-bolt was. What might that care package be
 ?
?I've actually been driving the car a lot lately on the weekends and pretty much have the gears broken in and ready for a gear lube change. Last Sunday alone I put 151 miles on the car with an hour-long cool down period after the first 54 miles. I was pretty proud that I used my headlights, heater, and windshield wipers simultaneously during this cruising session! Yeah, getting caught out in the rain at night time with full slicks and skinnies is a bitch, but the street-cred earned with my buddies is priceless......


Last edited by GC99TA; 12-06-2012 at 05:03 PM.