

'70 Nova LY6/TH400 6.0VVT

Thread Starter


Joined: Apr 2010
Posts: 2,816
Likes: 86
From: Instagram @chevyhotrodder
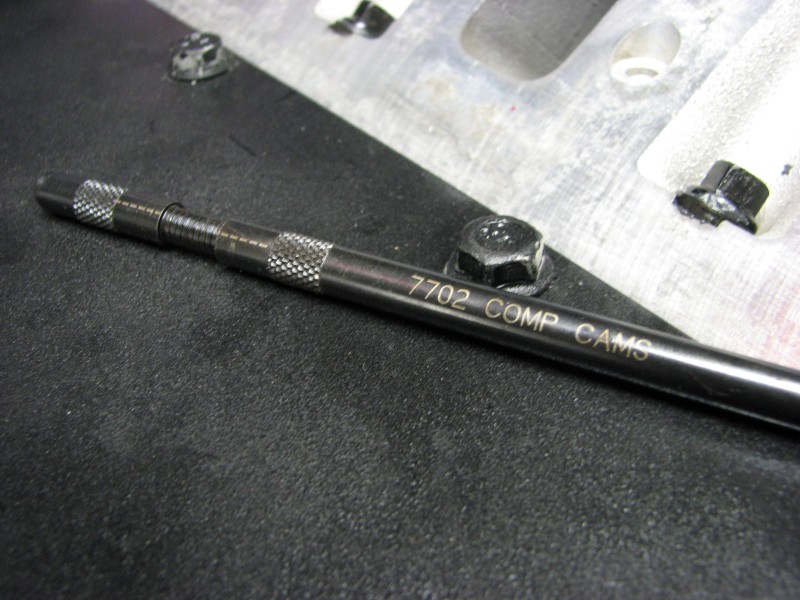
Once the head bolts were torqued down properly (ARP lube, sequence, multiple steps), I knew I was getting close but there were a few more things to do. I needed to check the pushrod length to make sure I would have an appropriate amount of preload. For this I bought the Comp Cams PR length checker. It has a collapsed gauge length of 6.800. Each turn of the end produces 0.050in additional length. Unfortuntely they do not put graduations on it, just one line to mark each turn so below 0.050 it is only as accurate as you can eyeball rotation. I figure the best accuracy I could hope for is 0.00625 because I can't really eyeball better than 1/8 turn without some kind of marking.
Using the PR checker is fairly straightforward. When I was doing piston-valve clearance, I put the PR checker in place then turned it out to extend it. That was really tough because there is almost no access to grip it. This time instead I just set the length, installed it, checked for lash, pulled it, changed the length and repeated. This was much much easier and surely more accurate.
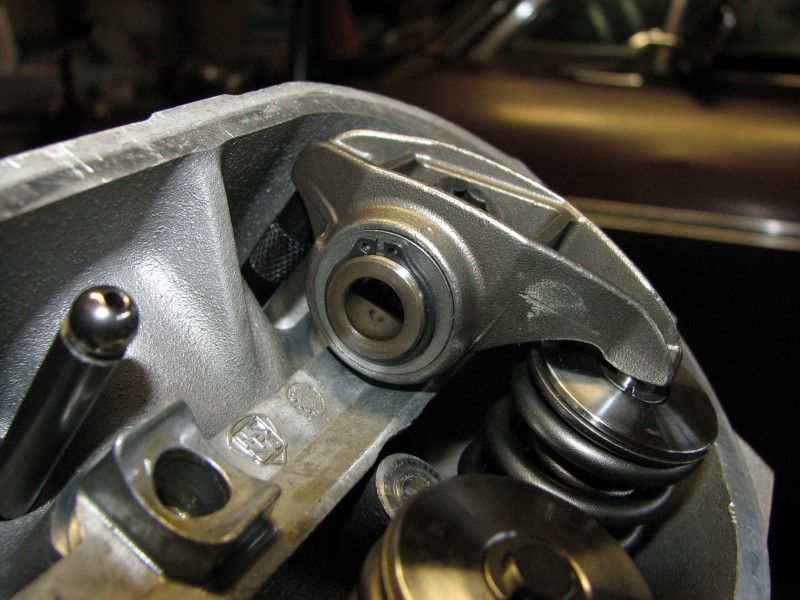
I did lash / no lash checks at 0.050 increments from 7.300 to 7.400. When I found the transition, I dialed down to 0.025 increments to more finely find the transition and eventually dialed down to 0.00625. I found the transition point corresponded to somewhere between 7.31875 and 7.3125. With the 7.400 length pushrods I have, this would produce somewhere between .08125 and 0.08750in of lifter preload. From what I've read this is a pretty good place to be for a quiet valvetrain.
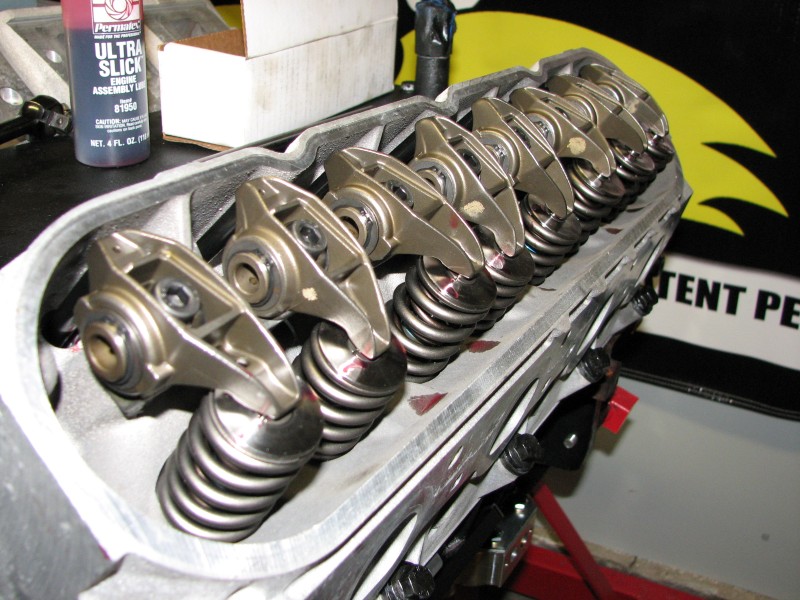
So I dropped in all the pushrods.
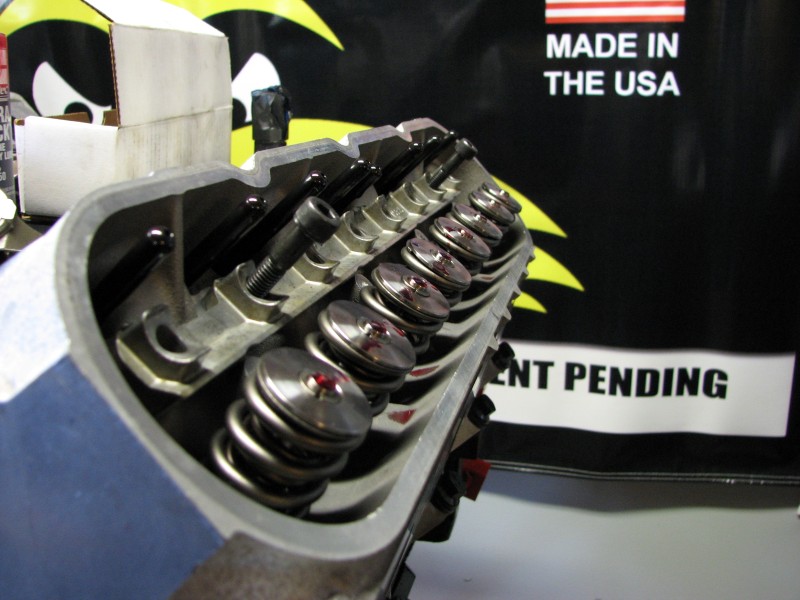
Then I followed the firing order and installed all the rocker arms, making sure I was on the cam base circle for each cylinder. These are supposed to be torqued to 22ft-lb, but I have a gap in coverage with my torque wrenches going from 250in-lb (20.8ft-b) and 25ft-lb. So I torqued them to 20.8ft-lb for now and will have to go back later and retorque them. Don't let me forget! I would have bought another torque wrench, but it was Thanksgiving and nothing was open.
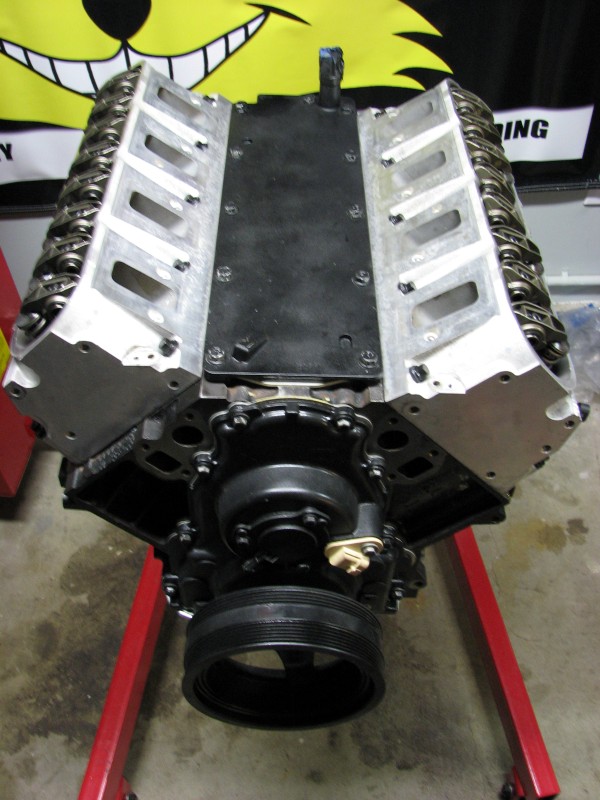
Finally the valve covers went back on, still with the old seals which I plan to replace after retorquing the rocker arms. Something I discovered here was after removing the oil cap extension tube from the valve covers, I found the oil cap threaded right into the valve cover with no adapters/extensions. Much better!
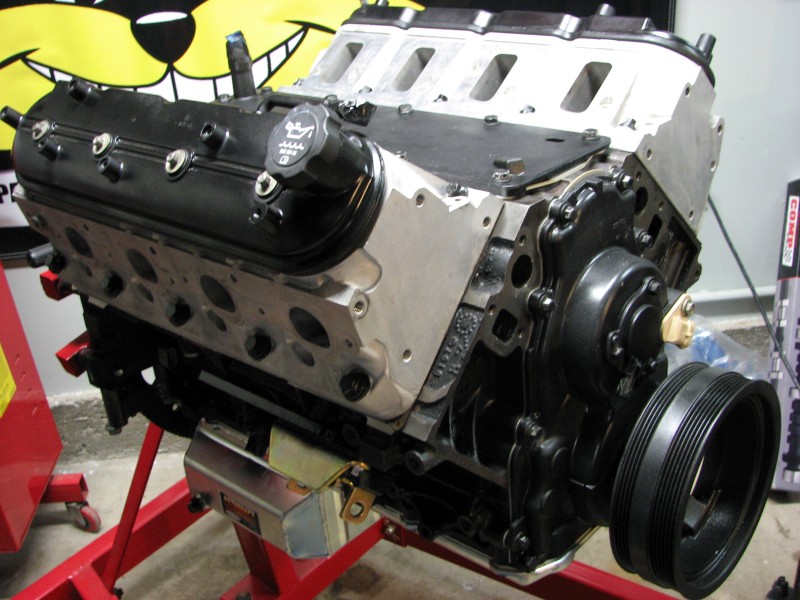
Finally... and I mean finally... I got the engine up on the hoist and put it back its righful place.


That's where she sits as of today. I couldn't be happier with the progress over the last couple of weeks. Hopefully I can keep it up!
Using the PR checker is fairly straightforward. When I was doing piston-valve clearance, I put the PR checker in place then turned it out to extend it. That was really tough because there is almost no access to grip it. This time instead I just set the length, installed it, checked for lash, pulled it, changed the length and repeated. This was much much easier and surely more accurate.
I did lash / no lash checks at 0.050 increments from 7.300 to 7.400. When I found the transition, I dialed down to 0.025 increments to more finely find the transition and eventually dialed down to 0.00625. I found the transition point corresponded to somewhere between 7.31875 and 7.3125. With the 7.400 length pushrods I have, this would produce somewhere between .08125 and 0.08750in of lifter preload. From what I've read this is a pretty good place to be for a quiet valvetrain.
So I dropped in all the pushrods.
Then I followed the firing order and installed all the rocker arms, making sure I was on the cam base circle for each cylinder. These are supposed to be torqued to 22ft-lb, but I have a gap in coverage with my torque wrenches going from 250in-lb (20.8ft-b) and 25ft-lb. So I torqued them to 20.8ft-lb for now and will have to go back later and retorque them. Don't let me forget! I would have bought another torque wrench, but it was Thanksgiving and nothing was open.
Finally the valve covers went back on, still with the old seals which I plan to replace after retorquing the rocker arms. Something I discovered here was after removing the oil cap extension tube from the valve covers, I found the oil cap threaded right into the valve cover with no adapters/extensions. Much better!
Finally... and I mean finally... I got the engine up on the hoist and put it back its righful place.
That's where she sits as of today. I couldn't be happier with the progress over the last couple of weeks. Hopefully I can keep it up!
Last edited by -TheBandit-; Nov 27, 2012 at 12:00 PM.


Thread Starter
Joined: Apr 2010
Posts: 2,816
Likes: 86
From: Instagram @chevyhotrodder
You've got that right! I am stoked.
I was going to touch up the paint before it went it, but when I cracked open the can of POR-15 black engine enamel from National Parts Depot, it had Ford blue inside! WTF? That is some kind of sick joke I think. I plan to take a brush and touch up the rust spots when I get a replacement can.
I had a nice plan laid out for getting the engine back together, but now that its in the car, I have no idea what to do next. The list is long. I need to start parsing it and set some goals. Transmission mounting is next, I know that much.
Thread Starter
Joined: Apr 2010
Posts: 2,816
Likes: 86
From: Instagram @chevyhotrodder
Today I got under the car to see what was needed to mount the transmission. Becuase the drivetrain is a bit further forward than with the old SBC, the transmission mount holes were just a tad too far forward on the crossmember to bolt up; I could see about half of each hole after loosening bolts and shifting everything. So I decided to take off the mount and see what I could do to slot it. To my surpise, I discovered the mount itself had offset holes. All I had to do was flip it around and the lower holes shifted backward. With no mods whatsoever I had it bolted in in less than ten minutes.
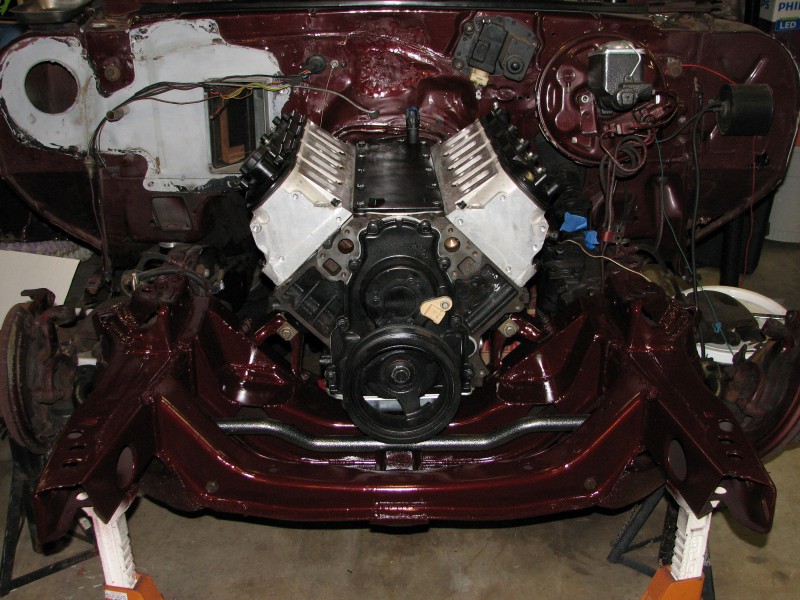
That left me with a lot of time to think about stuff. I figured I should get to enjoy the fruits of my labor. The engine was looking naked and I wanted to get the accessories on it. This would help complement all the engine sounds I've been making in the garage. The first thing to do was a lingering need to remove the lower rear A/C compressor mounting boss.

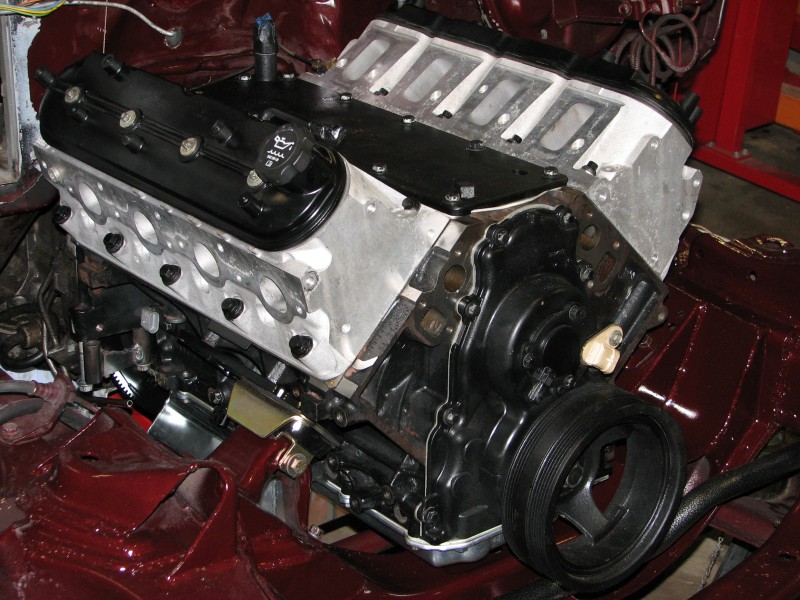
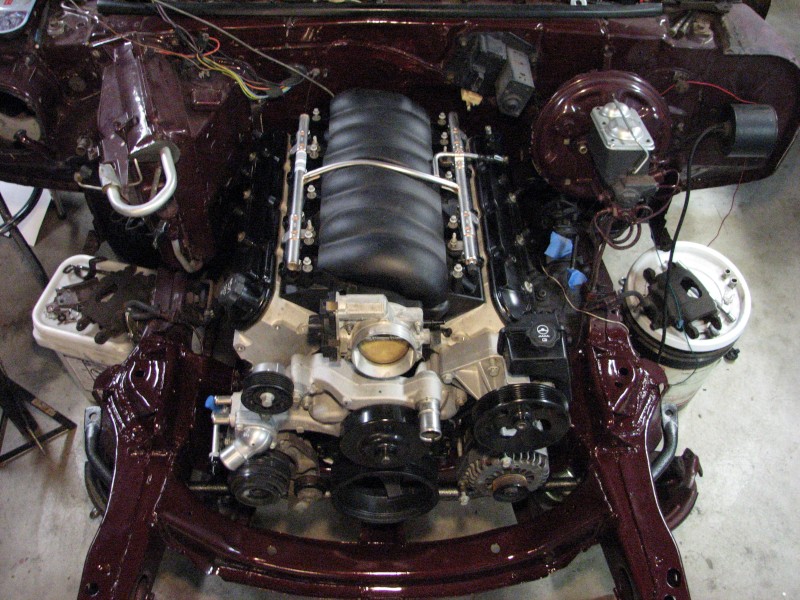
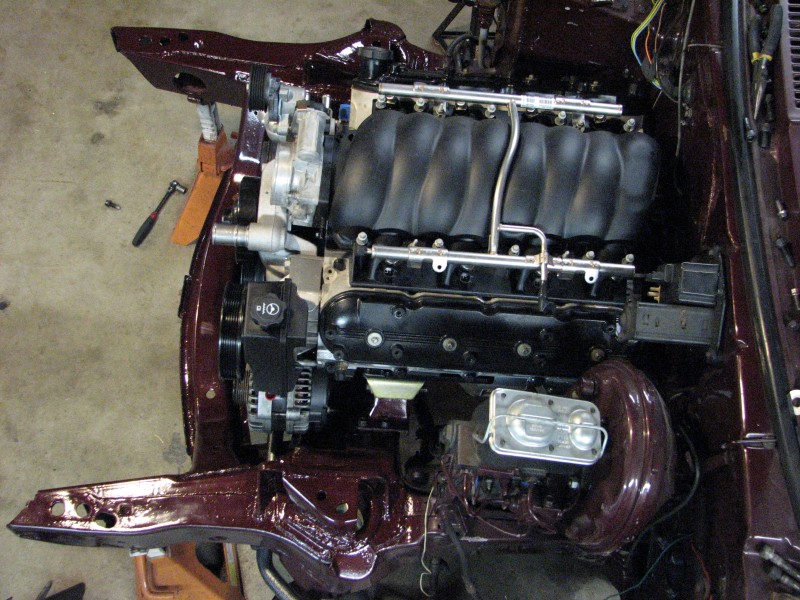
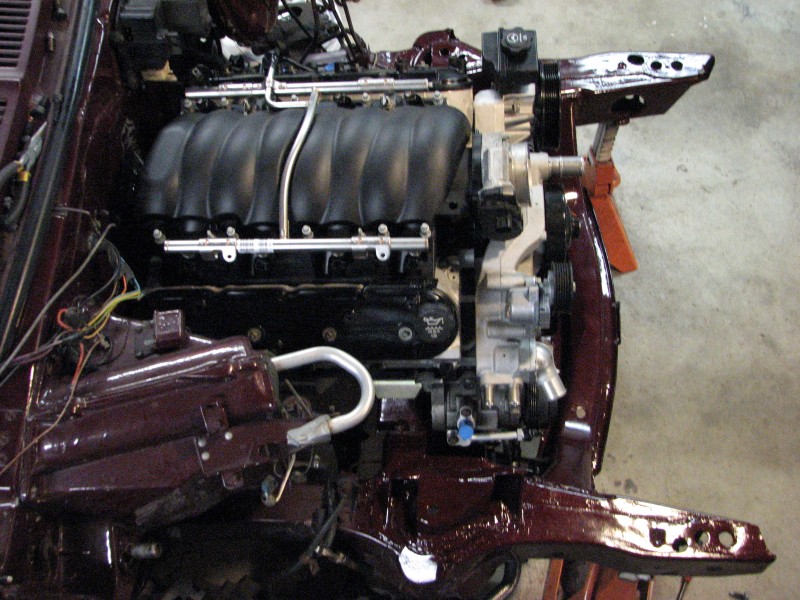
Once that was done I was able to bolt it on and mock up the rest of the FEAD. I also remounted the evaporator case to get an overall picture of what the engine bay will eventually look like. Here are some shots from around the engine.


I have decide before I go off wiring this thing, I want to move the coil packs off the valvecovers to somewhere more hidden. I know this is going to be another one of those things I spend a bunch of unnecessary time on so I appologize in advance. But I think the end results will be worth the effort.
That left me with a lot of time to think about stuff. I figured I should get to enjoy the fruits of my labor. The engine was looking naked and I wanted to get the accessories on it. This would help complement all the engine sounds I've been making in the garage. The first thing to do was a lingering need to remove the lower rear A/C compressor mounting boss.
Once that was done I was able to bolt it on and mock up the rest of the FEAD. I also remounted the evaporator case to get an overall picture of what the engine bay will eventually look like. Here are some shots from around the engine.
I have decide before I go off wiring this thing, I want to move the coil packs off the valvecovers to somewhere more hidden. I know this is going to be another one of those things I spend a bunch of unnecessary time on so I appologize in advance. But I think the end results will be worth the effort.


first of all ,i would like to congratulate you on your 6 six year anniversary... that being said this is an amazing build and I like the fact that you have had this car since highschool! awesome, i bought my son a car a couple years back when he was 10 in hopes to start him on this sort of path (and get the car bug to bite him)...
keep up the great work, I enjoyed reading the entire thread... was worried after the machine shop messed up the block, but I am glad they stood up to it and took care of business, they look like they do good work...
coils under the header?
keep up the great work, I enjoyed reading the entire thread... was worried after the machine shop messed up the block, but I am glad they stood up to it and took care of business, they look like they do good work...
coils under the header?
Thread Starter
Joined: Apr 2010
Posts: 2,816
Likes: 86
From: Instagram @chevyhotrodder
first of all ,i would like to congratulate you on your 6 six year anniversary... that being said this is an amazing build and I like the fact that you have had this car since highschool! awesome, i bought my son a car a couple years back when he was 10 in hopes to start him on this sort of path (and get the car bug to bite him)...
keep up the great work, I enjoyed reading the entire thread... was worried after the machine shop messed up the block, but I am glad they stood up to it and took care of business, they look like they do good work...
coils under the header?
keep up the great work, I enjoyed reading the entire thread... was worried after the machine shop messed up the block, but I am glad they stood up to it and took care of business, they look like they do good work...
coils under the header?
You got it right, they are under the header.
Yeah, I did the diesel conversion while you weren't looking.
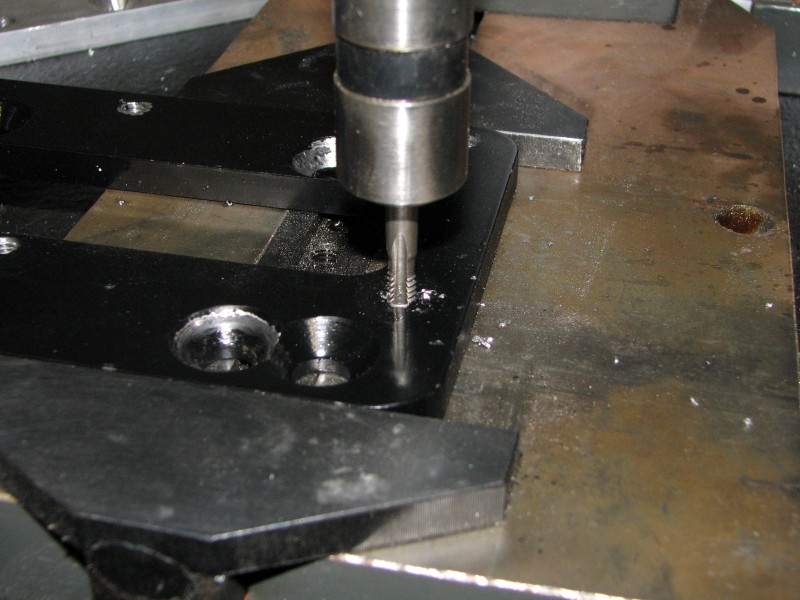
Okay, so here is the mock-up for the coil mounting. I drilled and tapped four 1/4-20 holes into the engine mount adapters. Vertical spacing is 72mm for the hole center-to-center on these coils. The two pairs of holes are separated by 3.5" and I located the lower holes 3/8" from the bottom of the plate. The rearmost holes are 1/2" from the rear edge (forward most holes 4" from the rear edge).
Then I added 4" long bolts with SAE washers and temporary steel spacers. Because one pair of coils is flipped compared to the other, the spacers nearest the block are two different sizes. So one pair of coils has 1/2" and 1-1/2" spacers while the other has 3/4" and 1-1/2" spacers. There is just enough room between the coils to get their wire connectors on and they are as close to the motor mount as I felt comfortable.

Here's what they look like loosely in place while the engine was still supported by the hoist. You can see one of the coils broke as I was removing the plug wire. I think it must have already been cracked before I got it because the wire pulled off like normal with the missing piece of plastic left inside the boot. I'll have to pickup a replacement.


And here is what they look like with the header installed.


There is a surprising amount of room around these things in this position. The nearest primary tube is about 2" away and they are fully accessible from under the car. I was a little worried at first about having these overhung two stacked, but they don't look too bad. I do need to replace the thin steel tube spacers with something thicker so I plan to pick up some aluminum spacers. I wonder if I need to build any heat shield or splash guards. What do you think?
Thread Starter
Joined: Apr 2010
Posts: 2,816
Likes: 86
From: Instagram @chevyhotrodder

I think you should.....the header heat will bake them and road grime & water will soak them. Hope that doesn't sound like I don't think they look awesome. I think you can get this to work just fine.

Thank you! I appreciate the kind words. Being six years beyond cancer has been a blessing. I can't count the number of great things that have happened in my life since - it's just unthinkable that I might not be here.
You got it right, they are under the header.
Here's what they look like loosely in place while the engine was still supported by the hoist. You can see one of the coils broke as I was removing the plug wire. I think it must have already been cracked before I got it because the wire pulled off like normal with the missing piece of plastic left inside the boot. I'll have to pickup a replacement.
as far as the cracked coil, I believe I have several extra coils laying around, the square type and the round type, if so, and if you could verify that i have what you need, after i make a quick video... i will GIVE you the coil for the cost of shipping, it should fit in a priority envelope and will be packaged carefully to avoid damage, if you are interested, shipping would be around $5ish

Thread Starter
Joined: Apr 2010
Posts: 2,816
Likes: 86
From: Instagram @chevyhotrodder
your welcome, i thought about putting them there also, and it was the first place i looked and thought i could see them peeking a little bit...
as far as the cracked coil, I believe I have several extra coils laying around, the square type and the round type, if so, and if you could verify that i have what you need, after i make a quick video... i will GIVE you the coil for the cost of shipping, it should fit in a priority envelope and will be packaged carefully to avoid damage, if you are interested, shipping would be around $5ish
as far as the cracked coil, I believe I have several extra coils laying around, the square type and the round type, if so, and if you could verify that i have what you need, after i make a quick video... i will GIVE you the coil for the cost of shipping, it should fit in a priority envelope and will be packaged carefully to avoid damage, if you are interested, shipping would be around $5ish