When you click on links to various merchants on this site and make a purchase, this can result in this site earning a commission. Affiliate programs and affiliations include, but are not limited to, the eBay Partner Network.
Because it looks silly with the front wheels dangling at droop and I want to get the car out where I can take some proper photos of it for Donk magazine. It wont be too long. Hang tight!
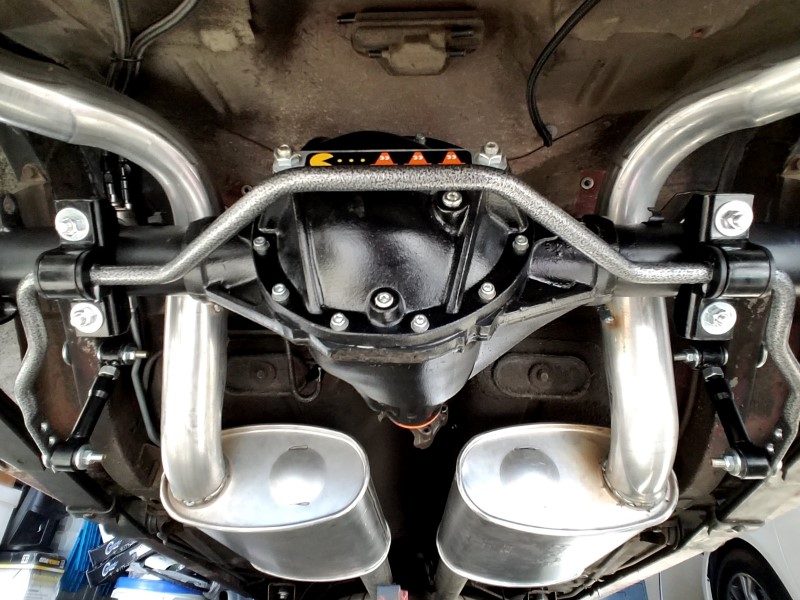
Finally got to install the Hellwig sway bar I bought 6 months ago. It required drilling some holes through the frame rails. The holes a reinforced with a through-sleeve. I did not think I could fit the drill on the inside of the rail, so I used an extra long bit and did my best to align it by eye.
Once the holes were drilled it was just a matter of lubing all the bushings and assembling the hardware. I had to drill the hole pretty low on the rail to provide clearance between the end link and the fuel line.
I would have liked to put the swaybar directly under the axle, but to get a good position for the end links I had to rotate it back a bit, so the brackets are on the tube at about 45 degrees instead of level. Hopefully that doesn't cause any problems.
My next project is parking brake cables. I have seen a number of write-ups where people modified the "LS1" brake cables to work with these cars, but I haven't seen people modify the stock Nova cables. Why not? I picked up a couple of turnbuckles from the hardware store and dropped them in vinegar to remove the zinc plating.
Here's a video of my son helping me clean up the workbench and work on our little chemistry experiment. You can't see much - just little bubbles forming.
I had to leave them overnight because vinegar is a very weak acid, but it seemed to do the trick.
I found a 3/16" turbuckle fits perfectly over the parking brake lever and the screw hole is very close diameter to the stock parking cable. My plan is to remove the original swaged end from the cable and weld this on in it's place.
Once that was figured out, I whipped up a bracket from angle iron.
The bracket mounts to the u-bolts and angles the cable (5deg out, 10deg upward) to work inline with the lever. I just need to make the mirror image of it for the other side before I finish cut the cables and weld the ends on.
A friend on another forum said he's had a lot of trouble with welding wire cable because the welding makes the alloy brittle and it can sometimes break. That got me rethinking my plan for welding the turnbuckle bodies onto the cable. So I picked up some 1/8" wire cable stops at the hardware store. They only had aluminum ones and prior to crimping they are way too big to fit into the turnbuckle. But I figured I'd give them a try anyway using a new length of cable for testing.
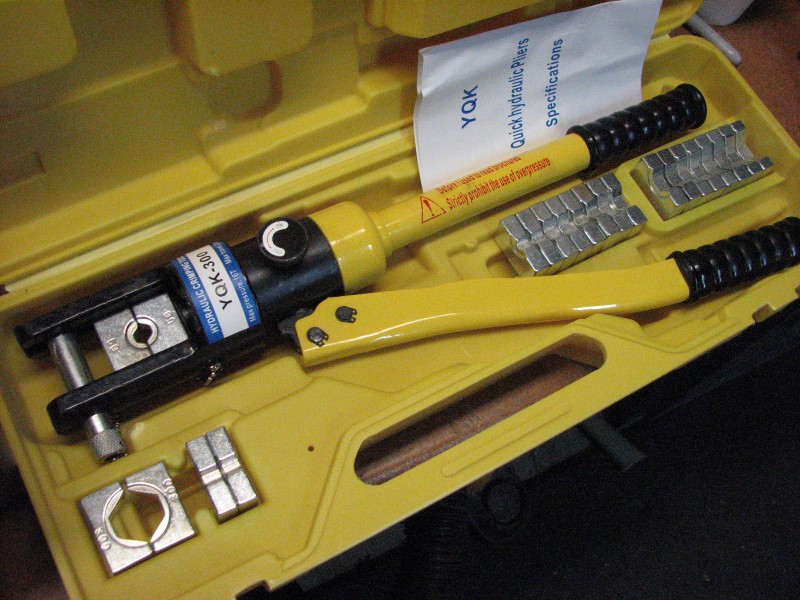
I used my hydraulic hex crimper (usually used for battery cable terminals) to attach the end. Due to the narrow width of the dies, I had to make a series of crimps along the length of the cable stop until the whole thing was crimped down. There was significant elongation and diameter reduction, so I am confident the aluminum flowed between the wires as it's supposed to, but I had to reduce the size so much to fit into the turnbuckle - I'm not sure if it will cause any problems with the performance. These ends are rated to 340lb. Hopefully that is enough for what I'm doing. If not, I can probably take the cables to a rigging house and get steel ends put on later.
I went ahead and did a test pull with my spring gauge. No issues at 55 lb. I might try to put more weight on it to test capacity later.
The cable stop took up about half the length I had inside the turnbuckle and I was really worried about getting it on and off the lever hook for the parking brake. I eventually figured out that if I fed the cable out a little, I could bend it out of the way and get it over the hook.
So it looks like that will work and if it fails I have a backup plan to get steel ends put on. I think this is a better, more conventional solution than welding and it cost less than $3 per cable for the hardware. Fingers crossed it will work on the actual cables!
I like the crimping idea far more than the welding idea for sure. I could see with repeated use that single crimp potentially working loose.. imagine the regular foot pedal force required to work the parking brake, then upscale that by the pedal/cable leverage ratio to what the cable tension is, and divide by two for the pair of parking brakes. You daily drive your car lots, and I would hate to see the parking brake have issues and you have to take the car off the road for improvements during prime father-son summer driving time!
What about looping the cable thru the turnbuckle hole, then back on itself and using a double crimp? It would likely have a less "direct" feeling tension action at the pedal since the loop would stretch/straighten a bit as it's tensioned, but if you pre-kink the end of the loop it may minimize that "soft" stretching feel to be hardly noticeable. Upside is that with the loop design, the crimp has to hold at most half the cable tension, and if you give the loop a good kink/notch to "cradle" the turnbuckle, the crimp could be holding even less force.
EDIT #1: I just noticed the point about the single-crimp taking up some physical space once installed and holding the turnbuckle on the engagement finger.. that is really slick. It'd have to be a very strange series of events to have the cable slacken enough to have the crimp flop out of the way, then slacken even more to let the turnbuckle jiggle off the finger. Nice!
EDIT #2: I added a sketch showing the "kinks" I'm talking about. I mistakenly drew the cable going around the turnbuckle (remembered you were going thru the tunbuckle hole after it was too late), but replace that with the cable going thru the hole in the turnbuckle and you get the idea about the "double kink".
The double crimp ends for looping cable have their place, but you still have the same amount of force on the single wiring coming in. The crimp has to hold just as much on one side, even though it's split in half on the other side. I have not done any calculations on the actual cable force in use, but the original cable had a swaged end on it so i can't be too far off. If it does break, I will still have the internal parking mechanism in the transmission as a backup.
Regarding keeping the turnbuckle end on the hook, I will also be installing a return spring which will maintain tension on the system, just like the factory has it. I haven't taken any photos of that yet. I still need to make the side-2 bracket. The springs are going to make installation more difficult so I plan to add those last.
*EDIT1* I just noticed your edits 1 & 2. Good ideas I can consider if things go wrong with this setup. One cool thing about it is the cable itself is a standard size (1/8"), so if something doesn't work out, I can get cable from a local hardware or rigging supply and re-wire the existing parking brake sleeves with whatever end style is needed.
Last edited by -TheBandit-; 02-21-2018 at 11:55 AM.
Ah I didn't realize there was some swage feature on the cable, beyond just the crimp. It's true that you also have the transmission Park feature as well.. give it a go and see how it works!


 02-20-2018, 09:35 AM