

LS3/4L65E Swap into '67 Chevelle Completed!


Thread Starter


Joined: Nov 2001
Posts: 4,399
Likes: 5
From: Lubbock, Texas
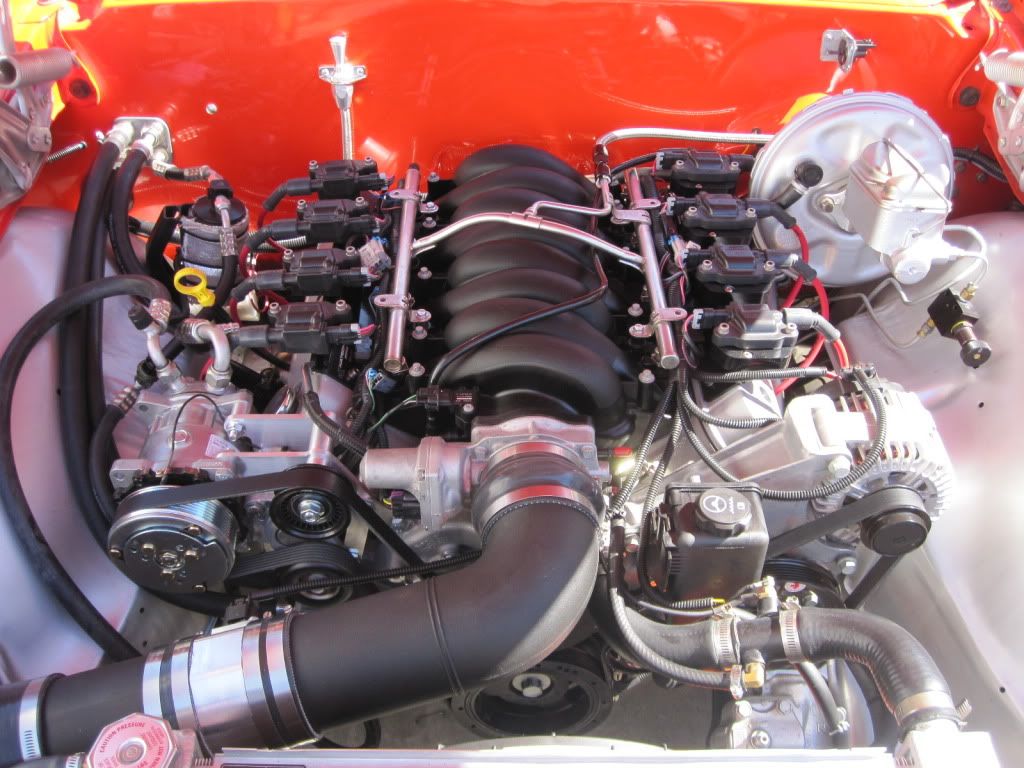
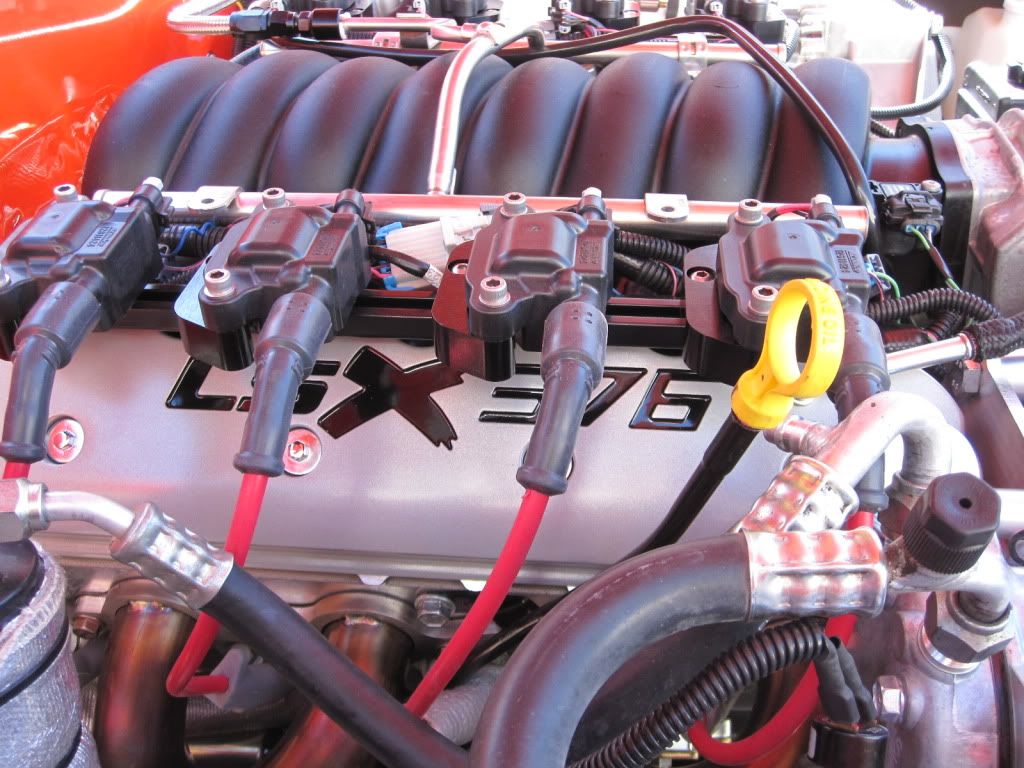
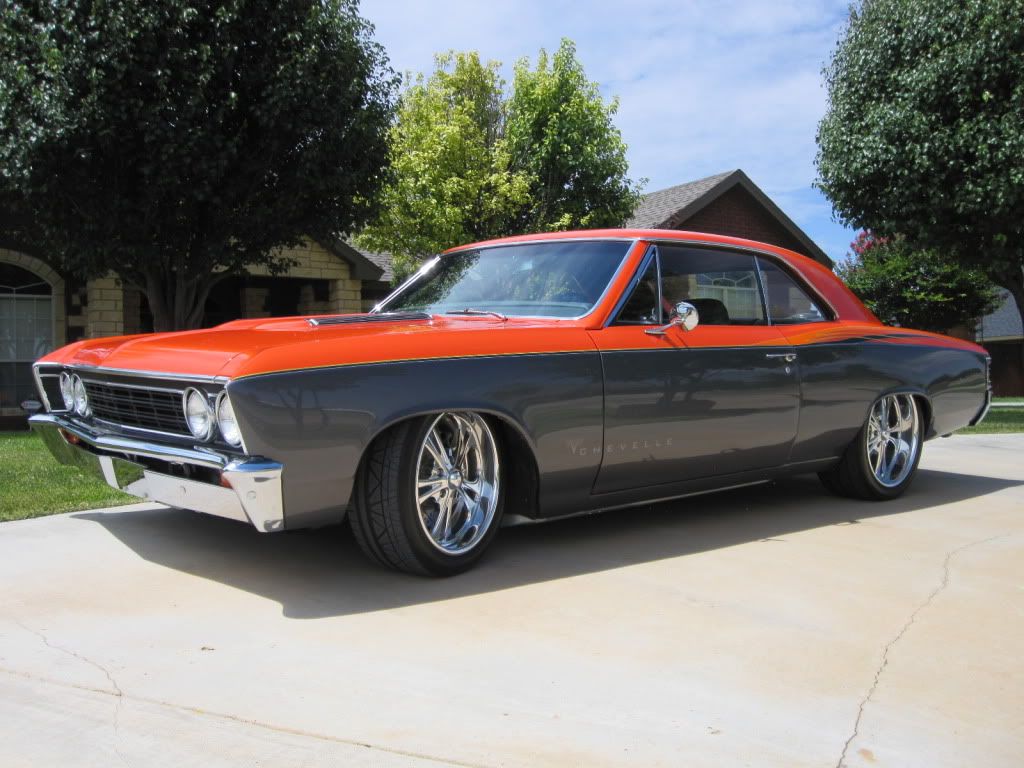
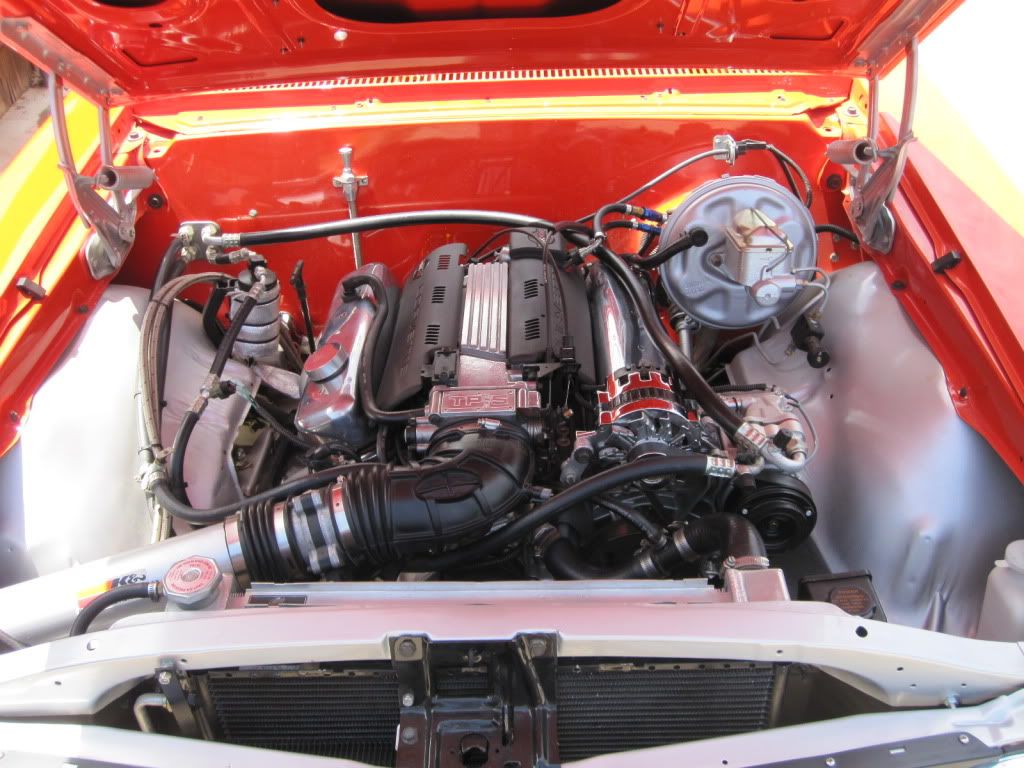
We were able to complete the LS3 and 4L65E swap into my '67 Chevelle just in time for the Goodguy's show at Texas Motor Speedway this past weekend. It was wrenching to the last minute to the point that we were bolting the hood back on at 5:00 p.m. as we were loading it into the trailer! Now that the show is over, we got it back to the shop to get the a/c installed and do some fine-tuning on the car. It previously had an LT4/700-R4 setup, and while it was great to drive it really dated the car. Everything else on the car has been redone, and all that was left to really complete the update was the engine and trans.
Below is a list of some of the parts used for the swap:
*Speartech Custom Wiring Harness
*Trailblazer SS PCM & TCM
*GM LS3 Engine
*Precision Race Components Ported LS3 Cylinder Heads
*TSP 224R Camshaft
*Yank 2600 Torque Converter
*GM 4L65E Transmission
*Milodon Oil Pan, Pickup Tube, and Remote Filter Kit
*Kwik Performanc A/C Bracket
*AirAid UBuildIt Induction Kit
*GM C6 Corvette Accessory Drive Kit
*Kooks LSx Chevelle Retrofit Headers
We first tried using a GM LS1 f-body oil pan, but it wasn't even close to fitting. After a few attempts, we pulled it off and installed a Milodon kit. It helped immensely on clearance with the cradle. We also had a few attempts at getting the motor mount brackets to work. We had to go back to a stock-style, but it still needed some slight modification.
The goal with the car was to keep it super streetable, so the 2600 stall speed torque converter and 224R camshaft worked perfect. It's just enough cam to hear some lope at idle, but it drives really well. The car sits on AirRide, and you can see a pic below of the pan to ground clearance with the car dropped all of the way down. The car used to sit on the trans pan with the LT4/700-R4 setup. Now, I still have some clearance with it slammed down, albeit not much.
Feel free to ask questions! FYI, you will see a new website in the upcoming months, and we will have a retrofit engine section for those looking for a turn-key setup. It will offer quite a few different engine choices that are complete from intake to oil pan, PCM & TCM (if applicable) completely programmed, and other related parts to complete the swap!
FYI, the LT4 and 700-R4 are already sold.
New Setup with LS3

OLD SETUP WITH LT4
Below is a list of some of the parts used for the swap:
*Speartech Custom Wiring Harness
*Trailblazer SS PCM & TCM
*GM LS3 Engine
*Precision Race Components Ported LS3 Cylinder Heads
*TSP 224R Camshaft
*Yank 2600 Torque Converter
*GM 4L65E Transmission
*Milodon Oil Pan, Pickup Tube, and Remote Filter Kit
*Kwik Performanc A/C Bracket
*AirAid UBuildIt Induction Kit
*GM C6 Corvette Accessory Drive Kit
*Kooks LSx Chevelle Retrofit Headers
We first tried using a GM LS1 f-body oil pan, but it wasn't even close to fitting. After a few attempts, we pulled it off and installed a Milodon kit. It helped immensely on clearance with the cradle. We also had a few attempts at getting the motor mount brackets to work. We had to go back to a stock-style, but it still needed some slight modification.
The goal with the car was to keep it super streetable, so the 2600 stall speed torque converter and 224R camshaft worked perfect. It's just enough cam to hear some lope at idle, but it drives really well. The car sits on AirRide, and you can see a pic below of the pan to ground clearance with the car dropped all of the way down. The car used to sit on the trans pan with the LT4/700-R4 setup. Now, I still have some clearance with it slammed down, albeit not much.
Feel free to ask questions! FYI, you will see a new website in the upcoming months, and we will have a retrofit engine section for those looking for a turn-key setup. It will offer quite a few different engine choices that are complete from intake to oil pan, PCM & TCM (if applicable) completely programmed, and other related parts to complete the swap!
FYI, the LT4 and 700-R4 are already sold.
New Setup with LS3
OLD SETUP WITH LT4
__________________

My wife saw it out there and got some pretty good pictures of it, she was excited to see another local car at the show. It looked great  LSx cars are REALLY starting to become a common sight at that show.
LSx cars are REALLY starting to become a common sight at that show.
__________________

800-456-0211 / PM / Facebook
WHIPPLE Superchargers, Procharger, Magnuson, Powerbond Sale, HPTuners packages!, Trickflow, AFR, PRC, CHE Trunion upgrade, $100 7.400" pushrod set, Custom Cam of your choice
800-456-0211 / PM / Facebook
WHIPPLE Superchargers, Procharger, Magnuson, Powerbond Sale, HPTuners packages!, Trickflow, AFR, PRC, CHE Trunion upgrade, $100 7.400" pushrod set, Custom Cam of your choice
Thread Starter
Joined: Nov 2001
Posts: 4,399
Likes: 5
From: Lubbock, Texas
Yeah, there were definitely quite a few LSx cars at the show! The most awesome one was the LS9 C2 Corvette. It was one of the show winners. It got me motivated again to try to complete my '69 Camaro LS7/T-56 setup over the winter!


Teching In
Joined: Aug 2016
Posts: 7
Likes: 0
From: Canyon country ,ca
What did or what would it run to get that done to a 65 ElCamino ?
Just the motor trans and instal with new wire harness also
Thanks and cheers Rackster1315@gmail.com
Just the motor trans and instal with new wire harness also
Thanks and cheers Rackster1315@gmail.com
Trending Topics
Thread Starter
Joined: Nov 2001
Posts: 4,399
Likes: 5
From: Lubbock, Texas
Rackster1315 - Email sent!
Jim - The air intake is from AirAid. It's their "U-Build-It" kit. Super nice for custom builds like this where you need a variety of straights and elbows, along with the couplers. I've included a link below for you:
http://www.texas-speed.com/p-4287-ai...ction-kit.aspx
Let me know if you have any other questions.

Trevor
Texas Speed & Performance
Jim - The air intake is from AirAid. It's their "U-Build-It" kit. Super nice for custom builds like this where you need a variety of straights and elbows, along with the couplers. I've included a link below for you:
http://www.texas-speed.com/p-4287-ai...ction-kit.aspx
Let me know if you have any other questions.
Trevor
Texas Speed & Performance
__________________
TECH Apprentice


Joined: Jan 2015
Posts: 313
Likes: 127
From: Austin area
Thanks Trevor. My other question was wether or not you needed tunnel modifications for the 4l65
Rackster1315 - Email sent!
Jim - The air intake is from AirAid. It's their "U-Build-It" kit. Super nice for custom builds like this where you need a variety of straights and elbows, along with the couplers. I've included a link below for you:
http://www.texas-speed.com/p-4287-ai...ction-kit.aspx
Let me know if you have any other questions.
Trevor
Texas Speed & Performance

I definitely needed some clearancing for the 4L65 in my '65 Skylark. No cutting mind you, but had to stretch out the the sides of the tunnel for the solenoid and linkage as well as for the coolant lines. Lastly there was some more stretching done to clearance the bellhousing.
If you make your own mounts and weld to the frame you can get it to sit lower and forgo most of this. I Used's edgy suspension motor mounts on chevelle frame stands (Buick frame stands didn't work) with dirty dingo sliding adapters.
The adapters were placed all the way back for me with the help of the Holley 302-2 oil pan. So I could have just gotten single hole set back adapters which could have lowered the engine slightly more.
It's a compromise, you can run into issues with too tall of an intake, not enough room for accessory drive components, oil pan, trans tunnel and bell housing, while you are moving all of that stuff around you'll then need to consider and figure out the trans crossmember and driveline angle that just changed on you next and rethink it all over again.
Short story, do some measuring and you'll be able to get it in there with out cutting, but you will then need to factor in an adjustment to your trans crossmember and get a new driveshaft.
So for an Epcot it might be easier to cut it out when you have less interior space to consider for passengers. Your call.


Thread Starter
Joined: Nov 2001
Posts: 4,399
Likes: 5
From: Lubbock, Texas
Yes, we had to clearance the tunnel for the 4L65E. We did this swap six years ago, so I'm trying to go off of my bad memory. LOL I think our biggest clearance issue was the seam at the top of the tunnel. It stuck down quite a bit and required trimming. There were some other tight spots that didn't require trimming but did need some clearancing. So, it can be made to fit.
Thanks!
Trevor
Thanks!
Trevor
__________________
