
Stans 1968 camaro LS swap and other upgrades!
 03-01-2011, 05:32 PM
#161

I am good on the pictures. Steve may want some. You have a double pass I am certain of it. Thats what you will want to cool better. The old radiators like what came in these cars were a crossflow and dint cool as good or should I say as efficient. We have run the double pass radiators in our circle track car for years with great success that is until you smash into the *** end of the competition and jar the electric fan into the core. Then a double pass isnt that great nor would any radiator at that point. A trick we use in circle track that we might could use here is this. We are not allowed to run antifreeze at the track so we use either water wetter or a cap full of Downy. Yes the fabric softener!!! It allows the water to somehow adhere to the internals to pull the heat out and it does cool better. I had thought about using this mix in my car until I am sure there are no leaks and that the coolant will not need to be drained as antifreeze is messy, toxic, and expensive. Once everything has the green light I will just drain out a gallon or so and add the green antifreeze. Yes the good ol green antifreeze is better as the pink crap will eventually eat away at the rubber seals. If that sounds crazy ask your local mechanic and see how many intake gaskets in GM have had to be replaced due to a leaking gasket. 95 and up vortecs were the worst.
 03-01-2011, 08:03 PM
#163
One thing most people dont know is any time you have an aluminum part on your engine especially heads or a block you must use alot of grounds. The old SBC didnt seem to mind ionization (hope I am using the right word and I hope I spelled it right) as bad as the LS engines. Several grounds will be required along the chassis and even from the rear end to the chassis. Any time there is a break in solid metal such as a body bushing a ground will need to be added to adjoin the two back. Such as a subframe to body or engine to subframe, radiator support to subframe etc etc.... I bought a couple of packs of the original style copper ground straps and will use them and probably more. The water will need to be distilled that you put into the radiator. You can buy the 50/50 mix or do it yourself. If you fail to use distilled water and avoid using proper grounding the aluminum will begin to corrode from the inside out. I was also told that for the engine to run properly it will need these grounds to prevent some oddball running conditions. Safe bet is to add as many grounds as you see fit and then three more. Paint and rust will prevent a good ground so as pretty as it may be it might just pay off to take it to bare metal and repaint after the ground is secure. They make kits for some of the newer cars to add grounds it might be a sales gimmick but I know several Mustang owners that buy them. Just food for thought.

 03-07-2011, 10:33 PM
#166
TECH Fanatic
Thread Starter

Join Date: Nov 2010
Posts: 1,679
Likes: 0
Received 0 Likes
on
0 Posts
well progress on the car has been slow,my wife had back surgery a couple of days ago and i have been busy taking care of her.i did get my fuel lines ran,which was rather easy.glad i went with braided lines.also figured out with the 243 heads and the ls7 lifters i needed a pushrod length of 7.350 ,this will give me .080 of lifter pre load.got my rockers installed today.
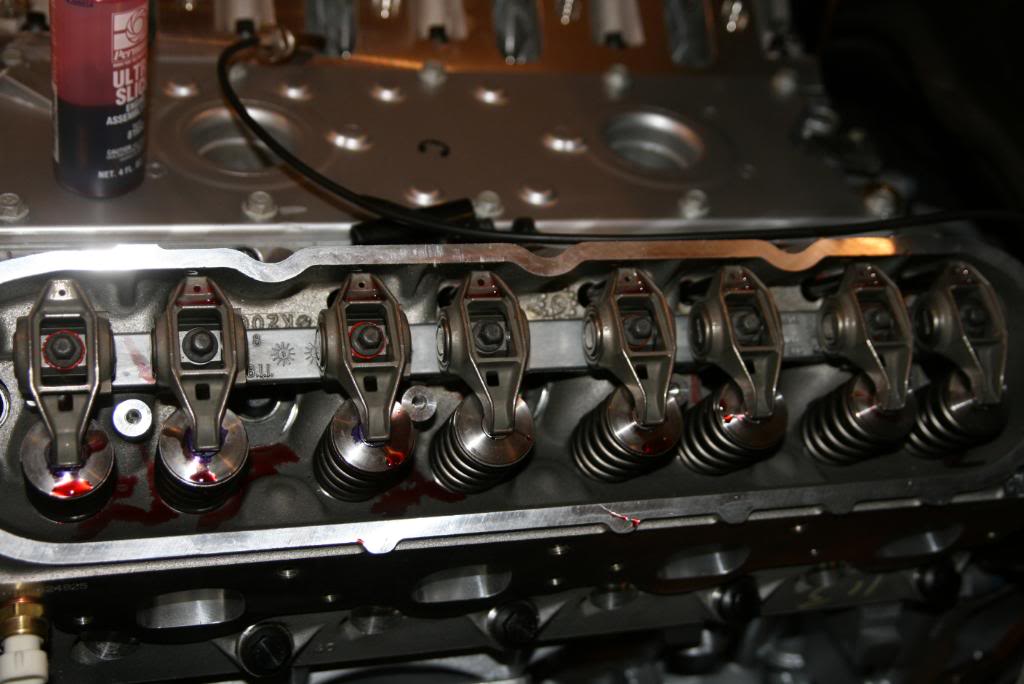
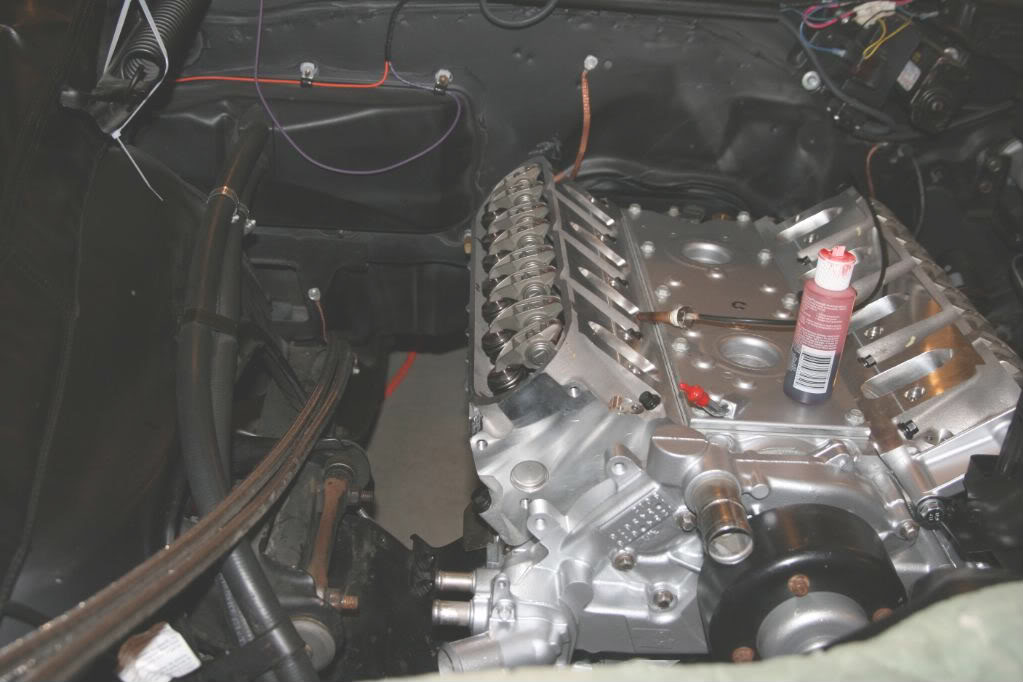
started putting everything on the front of the motor back together.
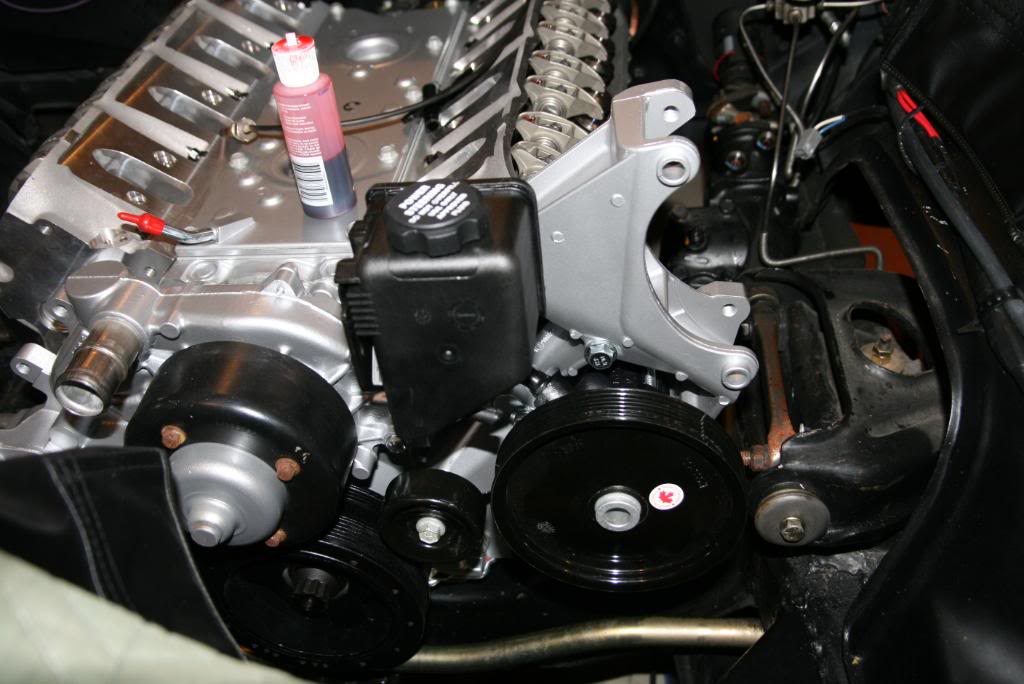
boy the power steering pulley is a tight fit,for the pic i only have the pulley loosely on the shaft to see how it would fit.everything has gone back together soo good i new something would have to give me trouble,lol
started putting everything on the front of the motor back together.
boy the power steering pulley is a tight fit,for the pic i only have the pulley loosely on the shaft to see how it would fit.everything has gone back together soo good i new something would have to give me trouble,lol
 03-08-2011, 05:21 AM
#170
Looks good,
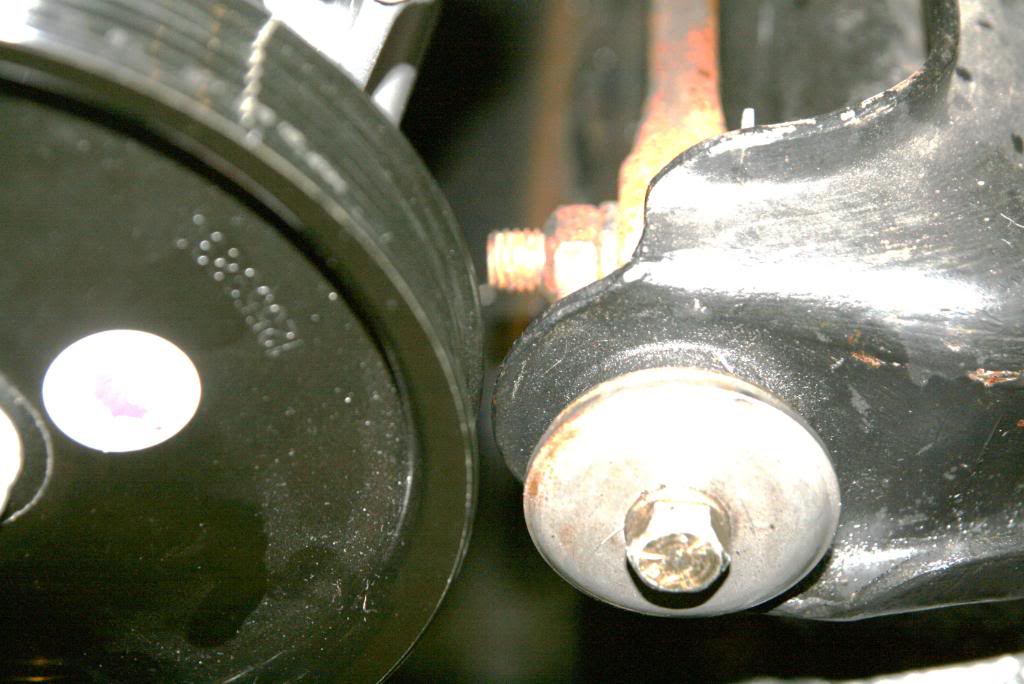
I think if you went with a F body ***. set up the pully would be lower, not mid A arm height, but looks like its time to grind the A arm!!!!
I can measure my Turn One pully, it looks smaller than stock,
But everything else looks great!
and I'd like to tell you guys your making me look bad!
I think if you went with a F body ***. set up the pully would be lower, not mid A arm height, but looks like its time to grind the A arm!!!!
I can measure my Turn One pully, it looks smaller than stock,
But everything else looks great!
and I'd like to tell you guys your making me look bad!
03-08-2011, 06:43 AM
#173
TECH Fanatic
Thread Starter
Join Date: Nov 2010
Posts: 1,679
Likes: 0
Received 0 Likes
on
0 Posts
Tsnow,yeah I will prob have to grind!just hope under engine torque it will still clear!!the pulley so far looks like it will line up the same on the water pump,very close to inner edge!I need to try a belt to make sure!
03-08-2011, 07:50 AM
#174
That side of the engine will try to go up under a load so no worries there. You are above the centerline now and it will only help the clearance under a load. I agree with Steve, grind the A-arm for added reassurance. Or go buy some aftermarket uppers and eliminate the clearance issue altogether. If you do opt for a smaller pulley for the p.steering pump you will be spinning it faster which might add to problems on down the road. I am no expert on this but if it was designed with the diameter that is on it it may be done for a reason.
03-08-2011, 08:06 AM
#175
On The Tree
iTrader: (5)
Join Date: Feb 2006
Location: Boiling Springs, SC
Posts: 167
Likes: 0
Received 0 Likes
on
0 Posts
Man, talking about movtivation! I picked up my 67 camaro last year and i am dying to swap a ls1. But of course i gotta get the "OK" from the wife first haha. Thanks for doing the build thread. It will help A LOT when it comes time for me to do mine. I can wait to see the finished product...

