71 Cutlass Conv L96/T56 build in Dayton OH


 05-13-2012, 07:08 AM
#142

I was looking at that Griffin radiator also. Does it have mounting tabs on it (the one in the summit pic has them)? Just curious, couldn't tell from your pics. Which fans are you going to use? Can you do me a favor and tell me how wide the core part of the radiator is? Thanks in advance!
05-14-2012, 09:26 PM
#144
Well, worked most of today on wiring under the hood. Finished the connections from the engine harness and added the chassis harness wires to the looms where appropriate and added separate looms for the remainder of the chassis harness. Put the radiator in place and checked clearance for the windstar electric fan; is going to work out nice. But I want to just finish the engine bay and install the radiator and wire the fans in place, but...
That means I need to get the A/C system in place. So I went to work and made brackets for the universal kit I have for the condensor, and mounted the dryer. But I need to mount the compressor so I can mock up the lines and take to a shop to get them crimped. So just finished installing the KWIC a/c setup a few minutes ago; done for the night. Hope to mock up the lines tomorrow after work.
That means I need to get the A/C system in place. So I went to work and made brackets for the universal kit I have for the condensor, and mounted the dryer. But I need to mount the compressor so I can mock up the lines and take to a shop to get them crimped. So just finished installing the KWIC a/c setup a few minutes ago; done for the night. Hope to mock up the lines tomorrow after work.
 05-25-2012, 02:24 PM
#146
What do you mean? look earlier in the thread (last page) for pictures of my speedhut gauges; if still a question repost.
Also, just got my fan mounted with the radiator; just have a question on the relays (see question here):
https://ls1tech.com/forums/conversio...l#post16351466
Hoping for a lot of progress this weekend
Also, just got my fan mounted with the radiator; just have a question on the relays (see question here):
https://ls1tech.com/forums/conversio...l#post16351466
Hoping for a lot of progress this weekend
05-27-2012, 09:07 PM
#147
Well, I made great progress today putting together the new exhaust. Have a pypes 2.5" stainless system, w/Walker Dynomax 17749 mufflers and two cheap catalytic converters. Needed to cut a custom piece to connect the exhaust manifold to the cat to the pypes system, so I bought two SS J-bends from Summit and I finally got to use my craigslist purchased milwaukee dry-cut cold saw. That thing is awesome! Super clean cuts (much cleaner than my band saw) and little mess compared to a chop saw. Makes me want to go cut some more metal!
Anyway I tack welded everything together and will take it into work where we have a tig welder to weld all the SS pipe together, then I'll bring it home to bolt up. Need to get a better muffler hanger to weld onto the muffler. Only major snag is that my 2.5 in v-band clamp set is less than 2.5" and the outside diameter of the muffler is like 2.68" (pipe fits w/in muffler pipe) and so I mounted two of the v-band clamps on the pipe w/some minor grinding and I'll machine the other two out at work. By next weekend I hope to have the exhaust completely up. Tomorrow I will be able to install the impala tank with the exhaust mocked up and I'll see how much room I have for the tank not to hit the over axle pipes!
BTW, anybody know the stud size for the exhaust flanges? I need to get some metric nuts for these studs this week.
05-28-2012, 07:01 PM
#148
Well I looked thru the pypes site and saw pictures on how to use the muffler hangers they had in the kit. Now I have it nice and tucked up high. Also took careful measurements to have just a bit over an inch of the "trumpet" exhaust tips out for the 442 (pic shows the drivers; I shortened the passenger later). Then I spent a lot of time bending the straps for the gas tank; j-bolts are really useful to ease the process.
Now everything is off the car and the exhaust loaded in the minivan; hope to tig it together this week, apply some of eastwoods high temp silver paint to all the exhaust, and then mount it this weekend. Then the gas tank can go on for good.
Now everything is off the car and the exhaust loaded in the minivan; hope to tig it together this week, apply some of eastwoods high temp silver paint to all the exhaust, and then mount it this weekend. Then the gas tank can go on for good.
06-06-2012, 10:16 PM
#150
Well, exhaust is tigged and installed. Not real happy w/the flanges to the exhaust manifolds nor the v-band clamp; hoping I have a good seal. Won't know till we fire it up.
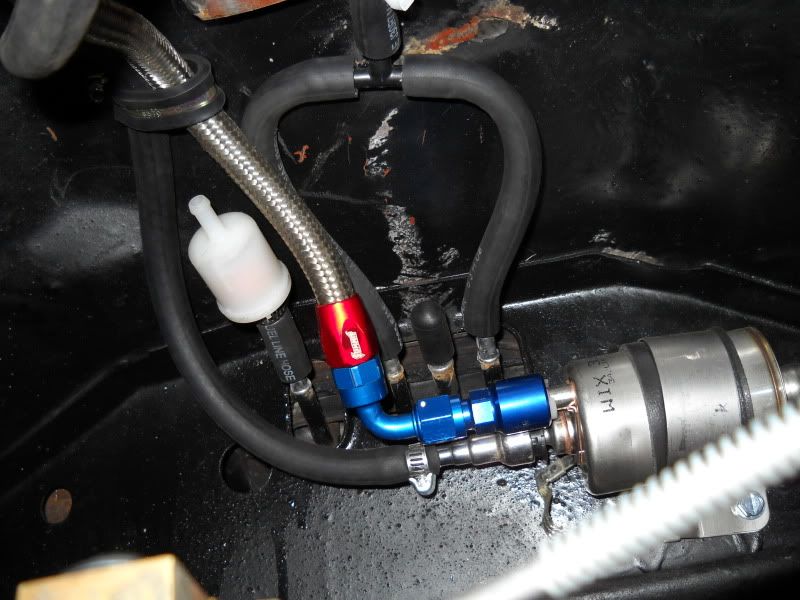
Got my plastic/nylon fuel lines in from a guy on the Impala website who had purchased the complete dorman kit to make them. Paid $110 for three lines made to my length shipped to me (contact loweredd in post below if you want him to make a set for you).
On a disappointing note, my MAF doesn't fit the hole! I followed futureuser's build and MAF setup here since he had a similar engine; his MAF must be different.
https://ls1tech.com/forums/14747309-post255.html
Hadn't really looked that close at mine till I tried to hook it up today. Won't work; need to figure this one out.
Last edited by Goldhawg; 06-08-2012 at 03:35 PM.
 06-06-2012, 10:35 PM
#152
I think someone else with the speedhut stuff had to add a + wire to the tach or something like that, have you made it that far? It might have been a function of his harness setup, not sure. If some parts come in I'm going to try and work on mine this weekend but don't want to mess with wiring I might not need.
06-07-2012, 06:43 AM
#153

You've got a truck MAF, that fitting is for an LS3 MAF. Not sure if they're interchangable. You might start a thread her or Gen IV external engine to find out. I'm pretty sure the flex fuel 6.0 and LS3 use the same ecu so there's a pretty good chance you can make the LS3 MAF work.
Last edited by garys 68; 06-07-2012 at 06:51 AM.
06-07-2012, 08:38 PM
#154
I think someone else with the speedhut stuff had to add a + wire to the tach or something like that, have you made it that far? It might have been a function of his harness setup, not sure. If some parts come in I'm going to try and work on mine this weekend but don't want to mess with wiring I might not need.
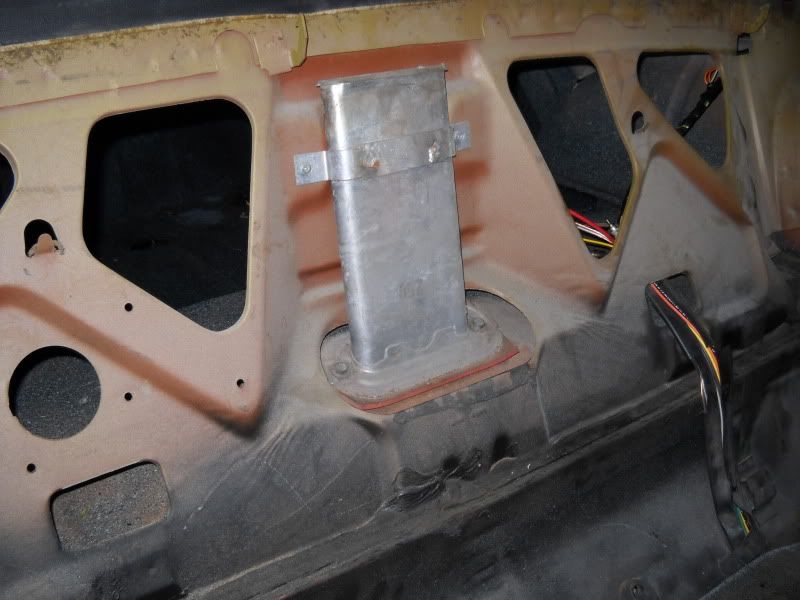
BTW, a few wiring/impala tank ??s for any gurus. Any idea how the tail light connector comes out? I tried twisting it and it does not want to come out; I'm afraid of trying some pliers on it. Also, on the impala tank, does it matter which of the two 5/16 lines you use as the return line? I assume the other is for ventilation that I need to hook up to my charcoal canister.
06-07-2012, 10:05 PM
#155
TECH Regular
iTrader: (2)

Join Date: Oct 2004
Location: Struble, IA
Posts: 443
Likes: 0
Received 0 Likes
on
0 Posts

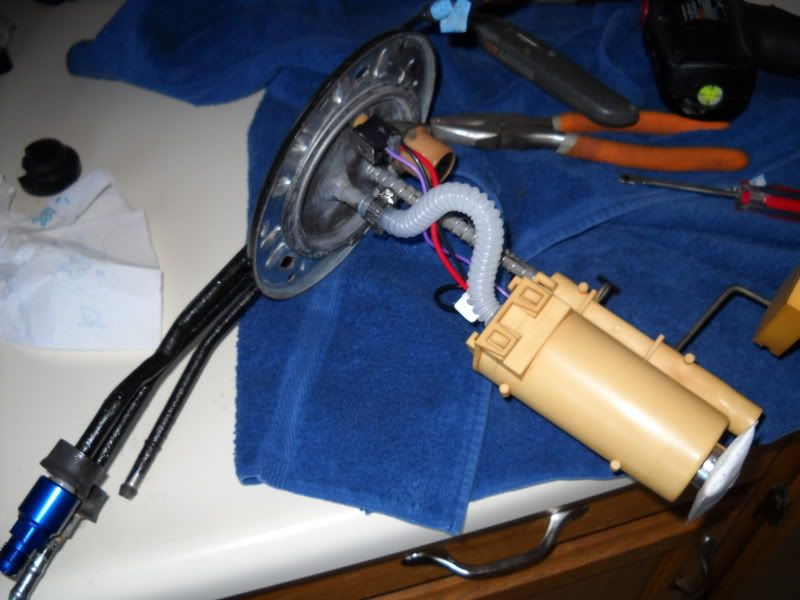
I undid the sending unit screws and lifted out the assembly, and I'm pretty sure you can tell which one is the return.
Are you wondering about the taillight wiring coming out of the body? If I remember correctly, there is a big rubber plug into the trunk, with a splitter box the wires go to.
Are you wondering about the taillight wiring coming out of the body? If I remember correctly, there is a big rubber plug into the trunk, with a splitter box the wires go to.
06-08-2012, 02:12 AM
#156
On the tank, yes it matters. When you take it out, which you will have to do to change the pump, you'll see which is which. The vent has an assembly that I think prevents fuel from flowing out in a rollover. It also would not direct returning fuel into the sump.
06-08-2012, 07:17 AM
#157
EDIT: BCZEE responded via PM w/a great picture that says it all; the one next to the 3/8" line is the return and the pic also shows how to route the line to the charcoal canister. I'll take and post my own pic when I'm done for other's reference. THX ALL!
Last edited by Goldhawg; 06-08-2012 at 12:36 PM. Reason: more info from forum mbt