
1967 GTO LQ4 (L92/LS3) swap
 12-11-2013, 08:22 PM
#101
Launching!
Thread Starter


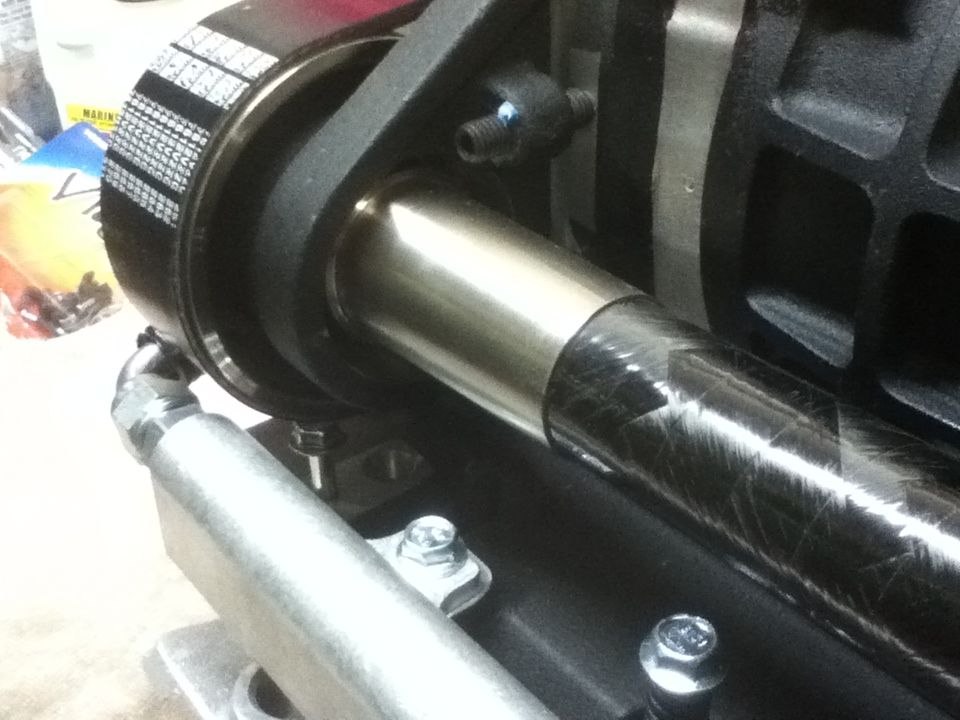
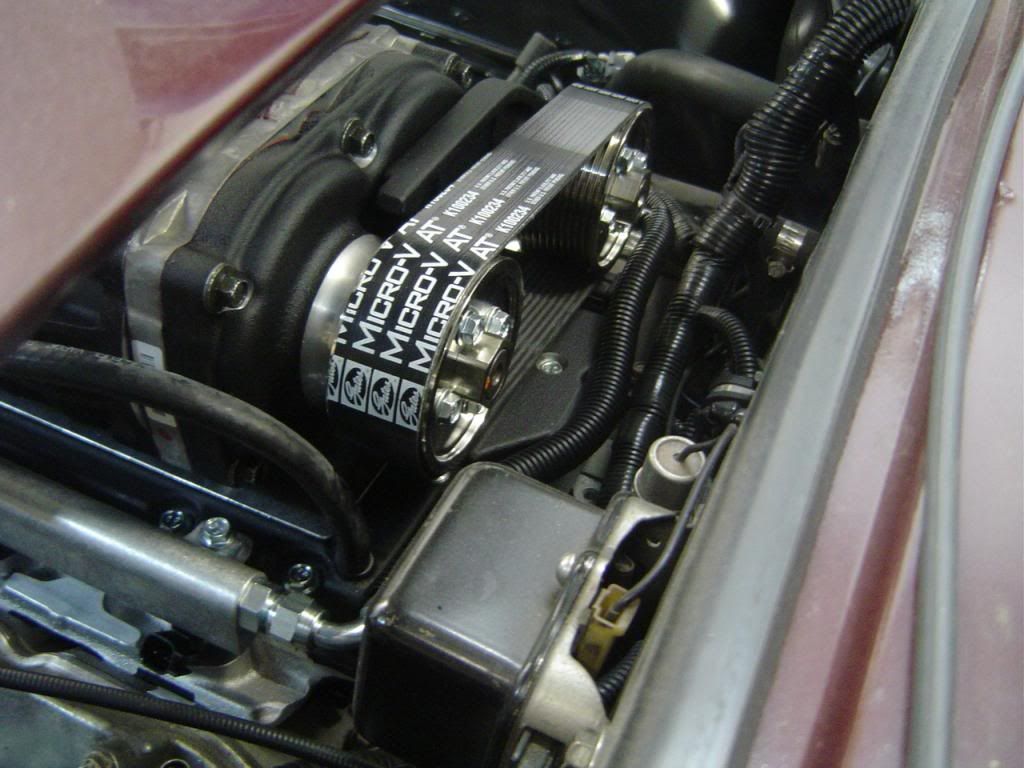
It's setup for truck pulley spacing so it's just driven by the serpentine belt. There's a10-rib pulley on it now (pictured), but I'll be swapping a 6-rib pulley on.
 12-13-2013, 06:04 AM
#102
TECH Fanatic
Sorry been down with the flu for the last week. Here a a couple of pics, the 1 is poor quality, but you get the idea. I used the large radiator overflow tank from a current Mustang GT500 and added a fitting at the top. It is mounted in the space originally intended for the battery on the drivers side.
12-14-2013, 12:00 PM
#103
Launching!
Thread Starter
The rest of the parts came in yesterday, at which point I realized I forgot to order the crank pinning kit. It's on it's way.
Heat exchanger, pump kit, 3.2" 6-rib pulley, tensioner/idler pulleys, seal kit
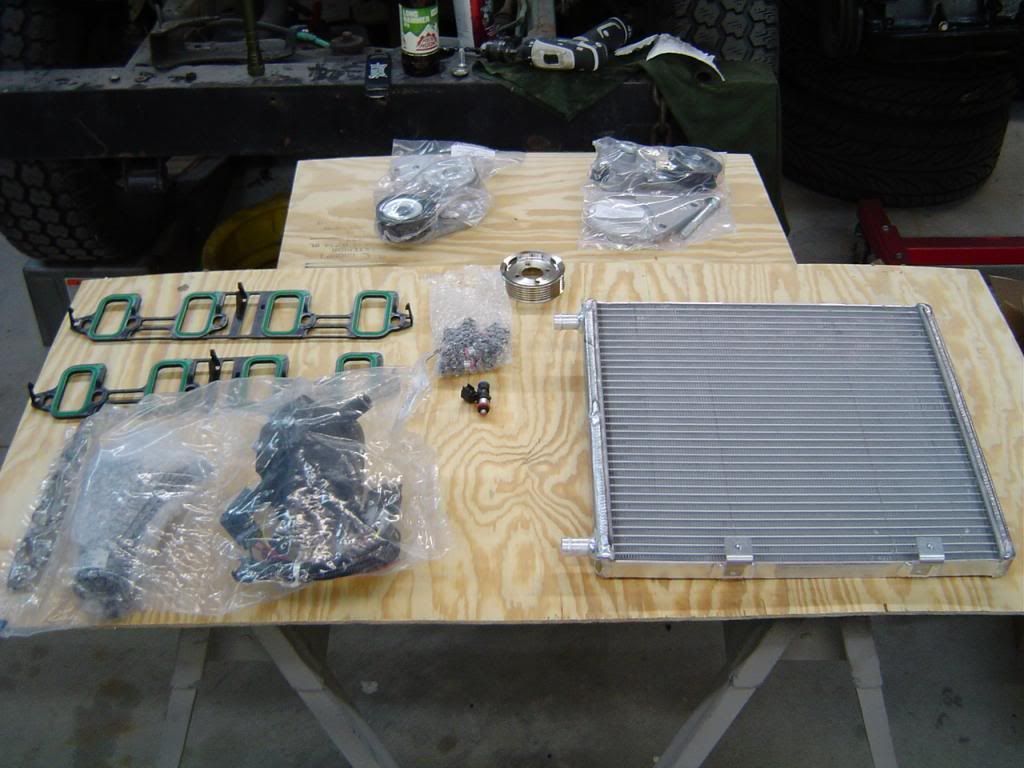
Heat exchanger, pump kit, 3.2" 6-rib pulley, tensioner/idler pulleys, seal kit
 01-28-2014, 06:08 AM
#104
Launching!
Thread Starter
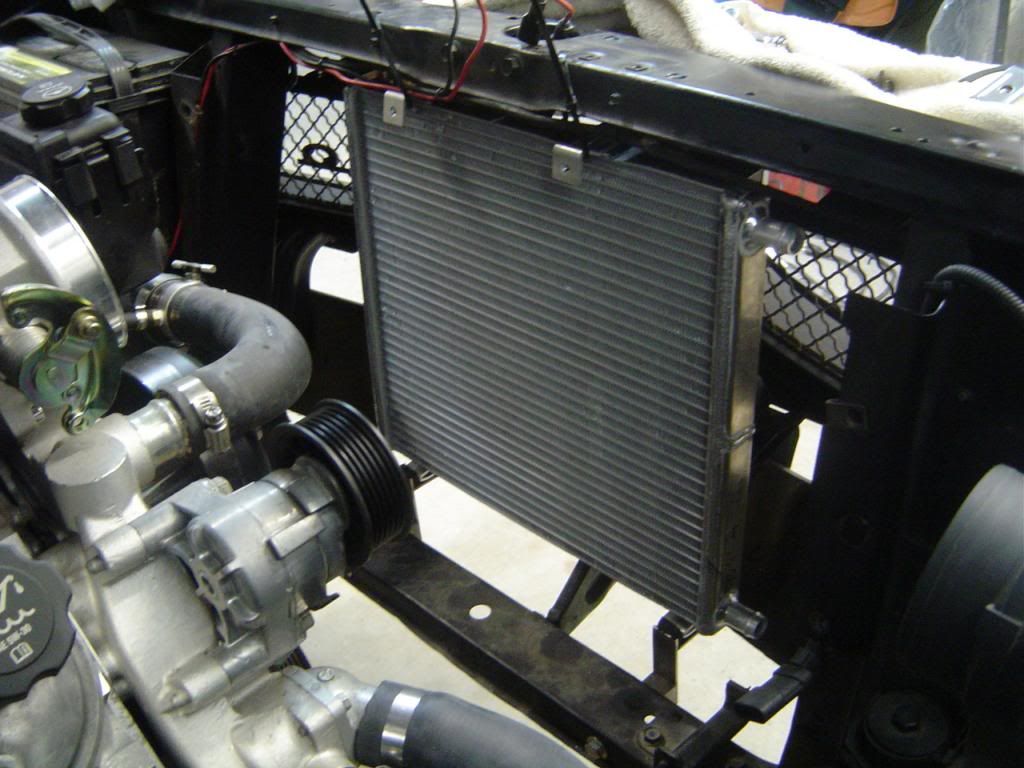
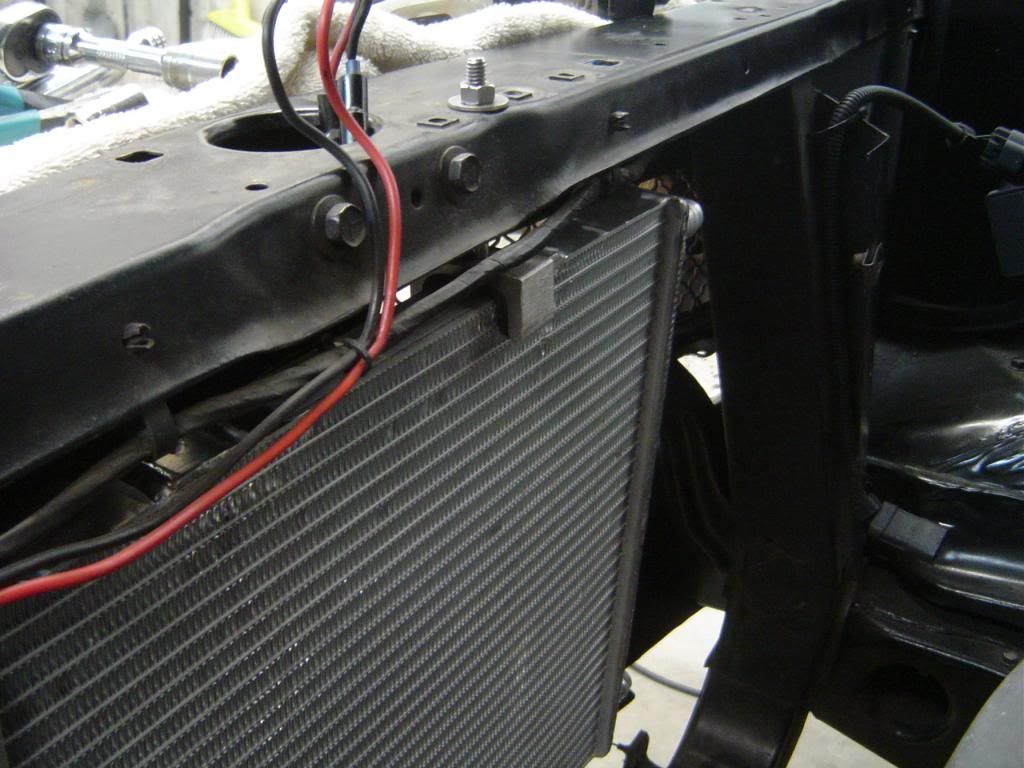
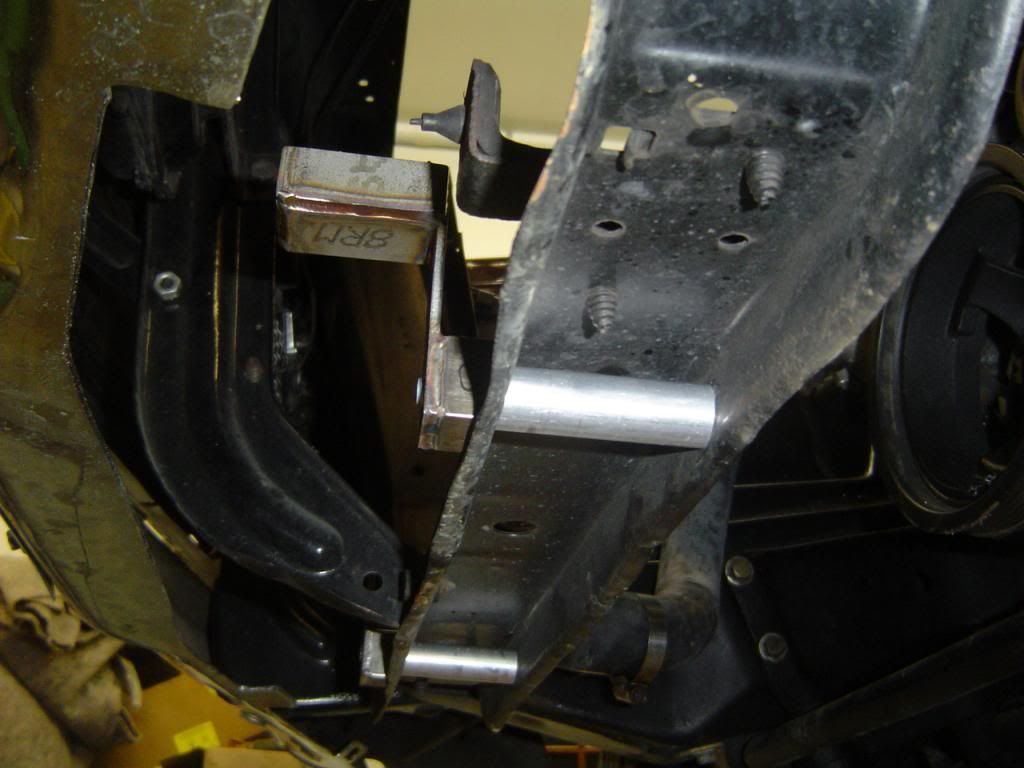
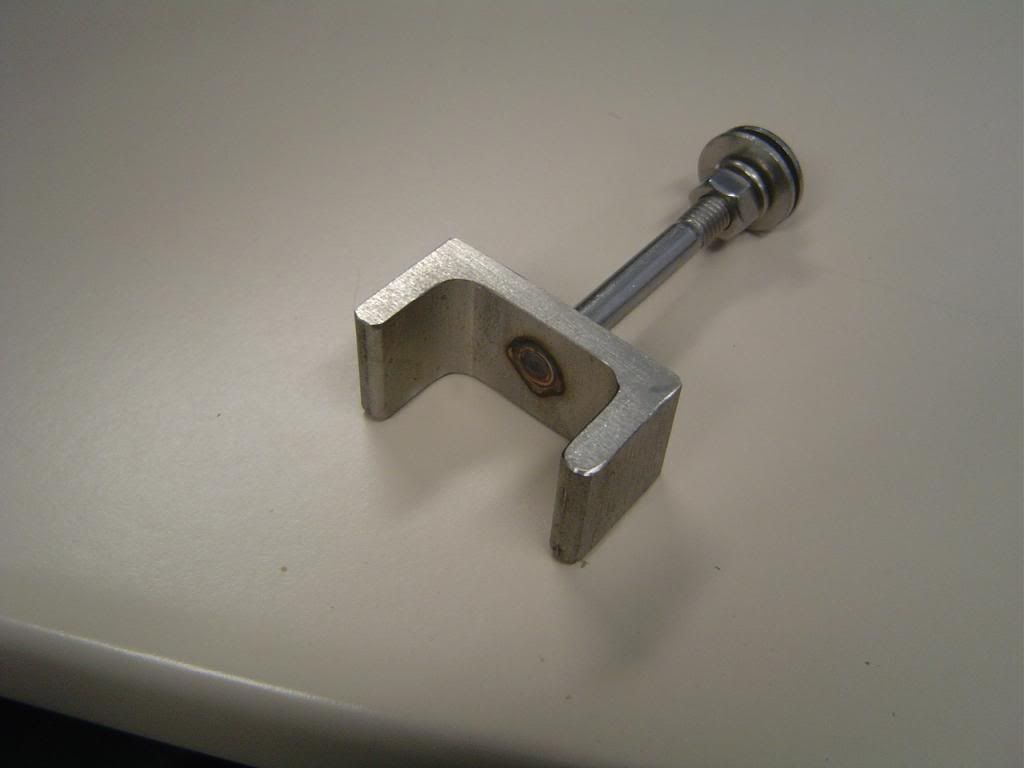
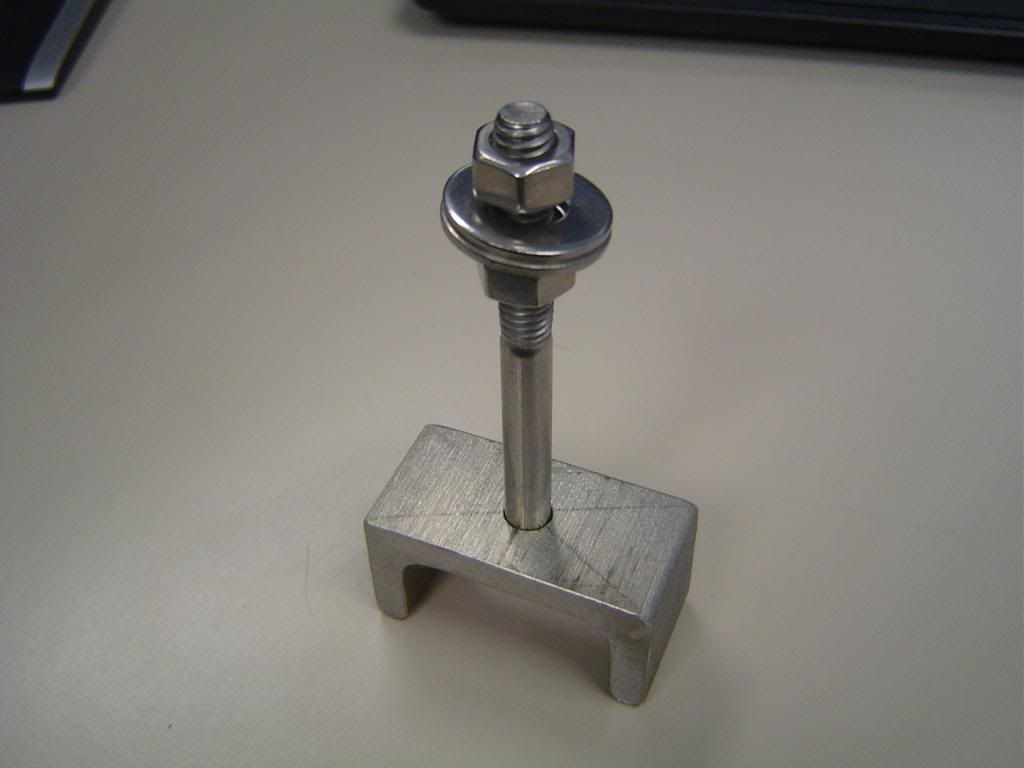
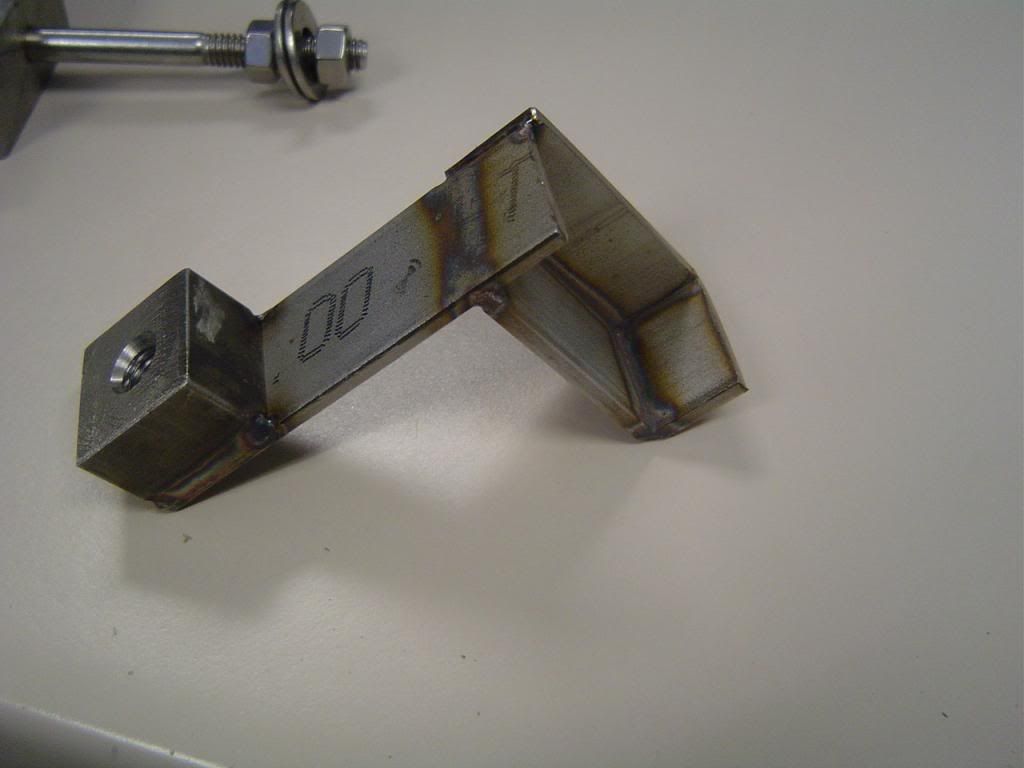
Finally got started on the install. I'm just working on mounting the heat exchanger first, which is almost done now. Just need to make a simple bracket for the top (those 2 factory brackets will be cut off). The lower brackets worked out great, but needed to be longer than pictured to clear the center bumper support bracket, but I just used the existing hangers on the heat exchanger and bent them into a Z to get the desired height. It's a little hokey, but worked out OK. I've already welded sides on the outside of each bracket to keep the heat exchanger contained. I'll post more pics of the finished product once the top bracket is done and installed.
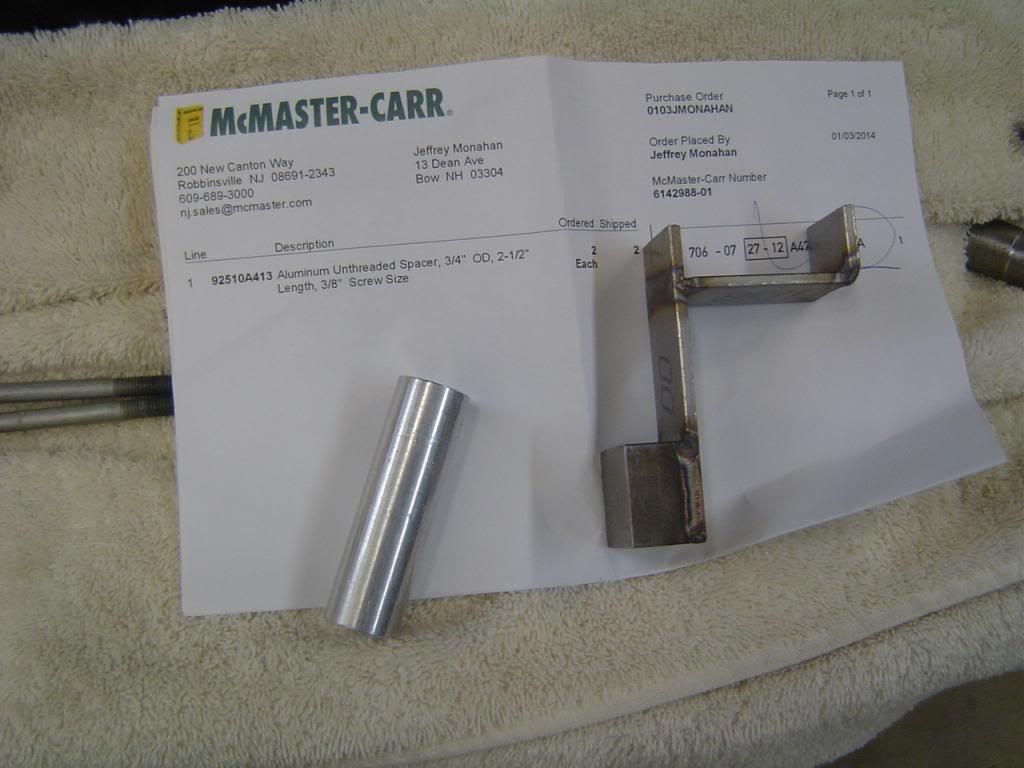
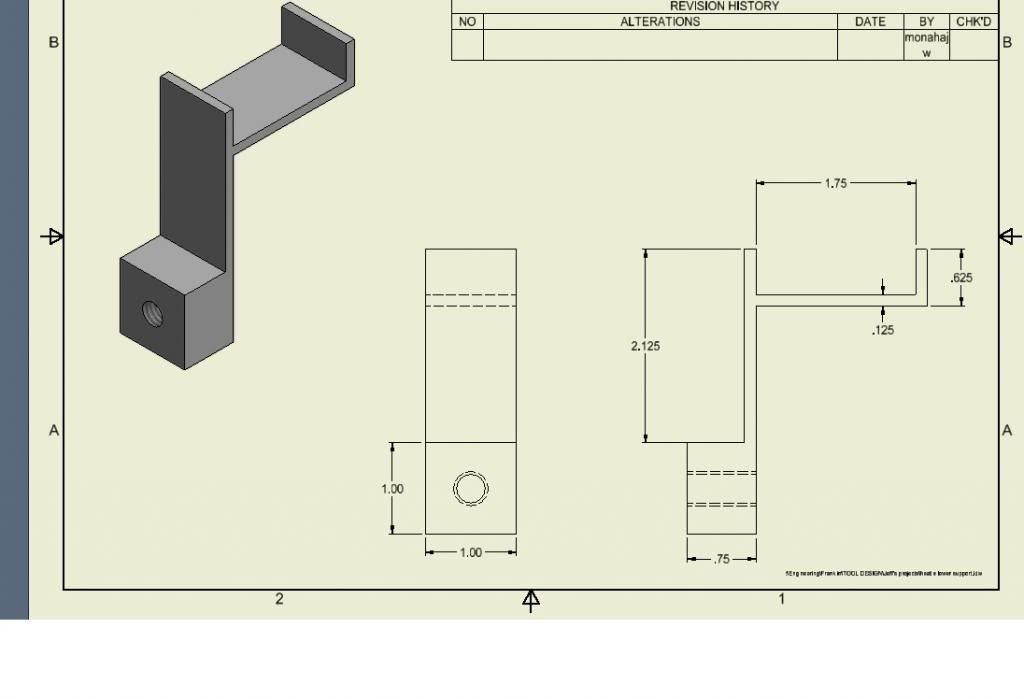
If someone wants to use the lower bracket design, add 1" to the 2.125" dimension and it should be about perfect. The McMaster spacer is for the lower radiator support.

If someone wants to use the lower bracket design, add 1" to the 2.125" dimension and it should be about perfect. The McMaster spacer is for the lower radiator support.


 01-29-2014, 05:59 AM
#105
Launching!
Thread Starter
More pics of heat exchanger mounting. I also removed the intake. Just waiting on the new valley cover....didn't realize I needed a new one to clear the supercharger until reading thru the install instructions last week. It'll be here next Monday. For reference, P/N is 31-14-59-034 for the LS1 valley cover (for my LQ4 block) and 31-12-02-090 for LS2, LS3 blocks.


 01-29-2014, 10:35 AM
#107
Teching In
iTrader: (1)

Join Date: May 2011
Location: Decatur, AL
Posts: 17
Likes: 0
Received 0 Likes
on
0 Posts
Awesome car. The LS has killed the old school engines for me. What are you doing for a speedometer since you using a newer trans? Specifically the electric signal converted to mechanical.
 01-30-2014, 05:52 AM
#109
Launching!
Thread Starter
The TKO-600 has a connection for the mechanical speedo. Well, this one does.....I bought it from Keisler, but I assume it's a standard option from Tremec.
01-30-2014, 08:17 AM
#111
Launching!
Thread Starter
01-30-2014, 08:22 AM
#112
Launching!
Thread Starter
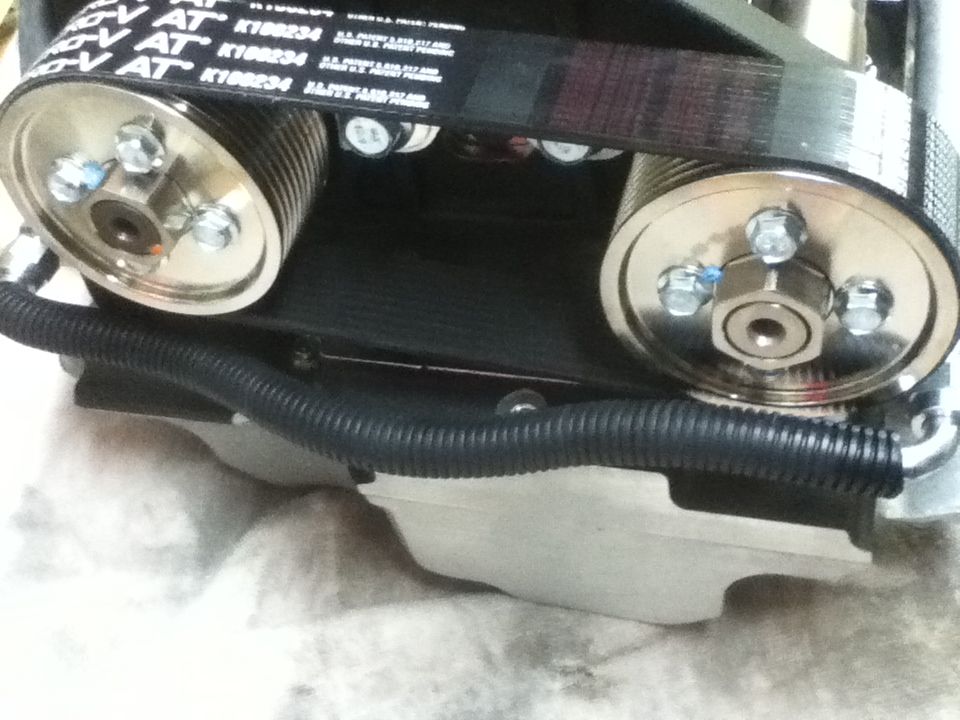
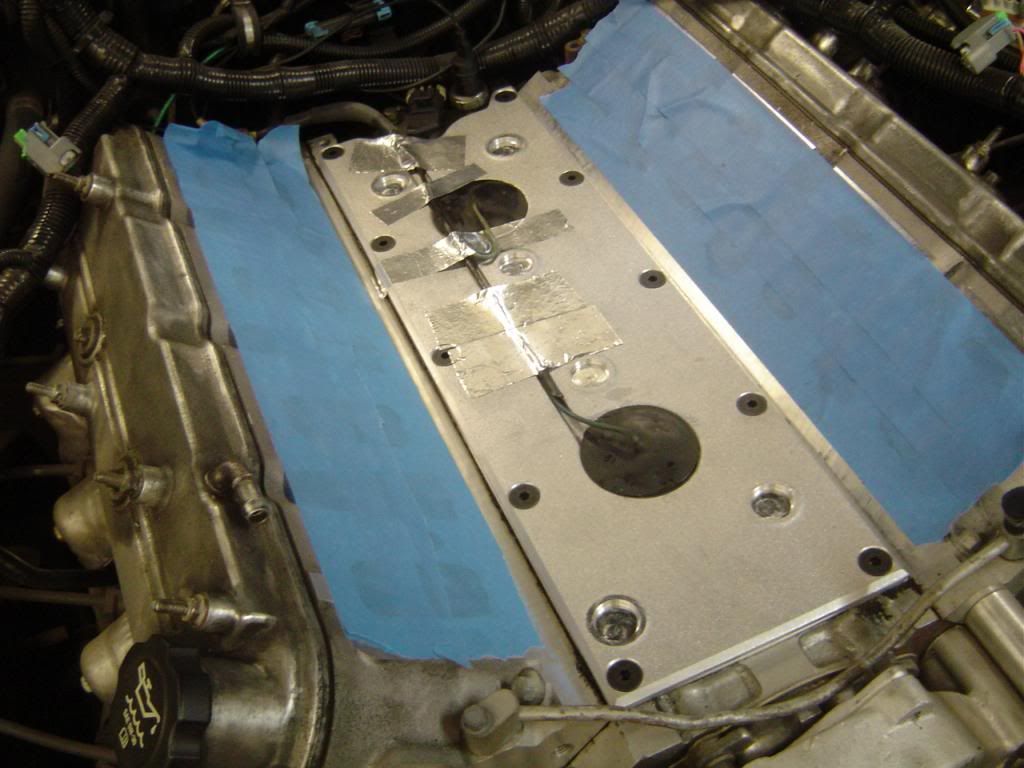
First minor issue. Need to install the MAP sensor in that hole under the pulley in the picture below. The bolt holds it down. This will require pulling the pulley off. Probably not a big deal, but are the blue dots some kind of tamper indicator for warranty reasons with Magnuson? To be honest, I'm not even sure if it has a warranty. I have an email in to Magnuson with these pictures.

 01-31-2014, 05:45 AM
#115
Launching!
Thread Starter
Sorry, no pics, but MAP sensor is installed. It was pretty straightforward to pull the rear pulley off and the jackshaft bracket front and rear to get the MAP sensor in and the hold down bolt out. It could probably be done on the car as well without too much trouble, which is good to know for future reference.
I installed the fuel injectors too and swapped the fuel rails so that the fuel line is on the driver's side so I don't have to re-plumb my existing setup.
Now I'm just waiting for the valley cover, which comes on Monday, and I'm ready to slap this baby on!
I installed the fuel injectors too and swapped the fuel rails so that the fuel line is on the driver's side so I don't have to re-plumb my existing setup.
Now I'm just waiting for the valley cover, which comes on Monday, and I'm ready to slap this baby on!
01-31-2014, 06:06 AM
#116
TECH Fanatic
What does your hood clearance look like? I had to remove a couple of pieces of bracing to clear the TB. A good thing cam out of all of it when I tilted the trans up a couple of degrees I gained oil pan clearance and a touch of hood clearance, as well as creating a better drive line angle.
01-31-2014, 08:12 AM
#117
Launching!
Thread Starter
What does your hood clearance look like? I had to remove a couple of pieces of bracing to clear the TB. A good thing cam out of all of it when I tilted the trans up a couple of degrees I gained oil pan clearance and a touch of hood clearance, as well as creating a better drive line angle.
-Jeff
 02-05-2014, 06:17 AM
#120
Launching!
Thread Starter
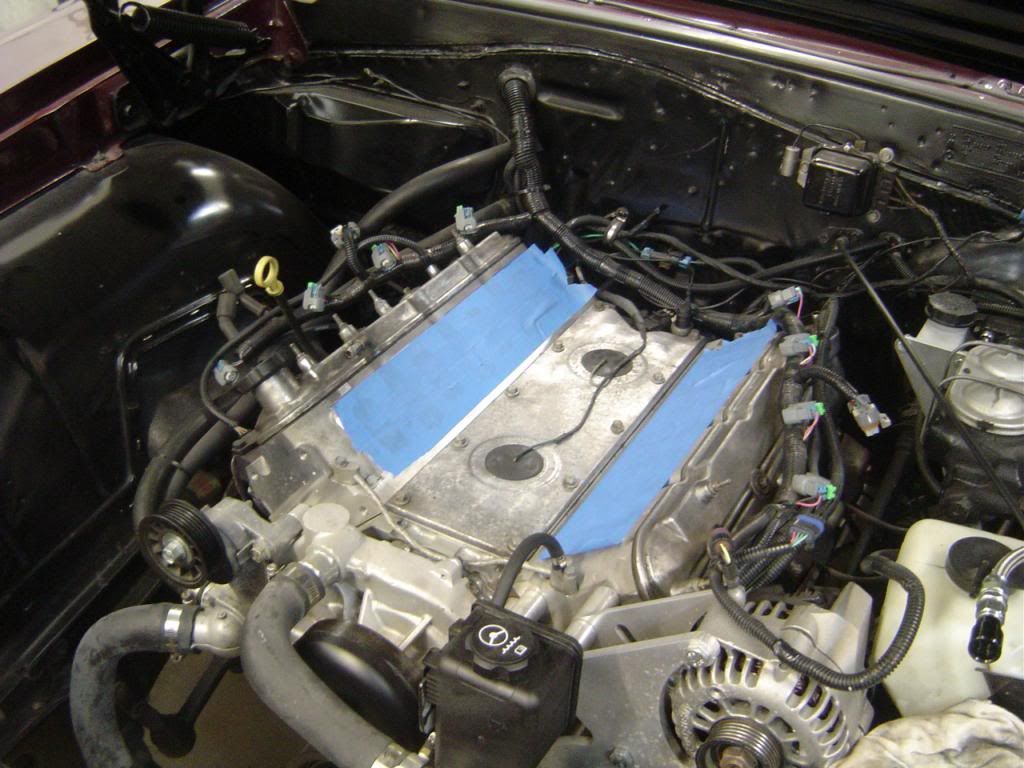
Well, she clears, but it's way tighter to the hood than I thought it was going to be. Main issue is the TB, which lines up with the hood bracing. It clears, but I'm not sure the intake tubing will. We'll see. I may try lifting the trans a bit to tilt the front of the motor down as oldgoat69 mentioned, but I might not need it. The silicone intake tubing might just dent a little, although that'll wear thru eventually with motor vibration.
The aluminum tape was the only thing that would stick to the rough surface of the new valley cover. Plus I left it there and figure it'll handle the heat just fine.
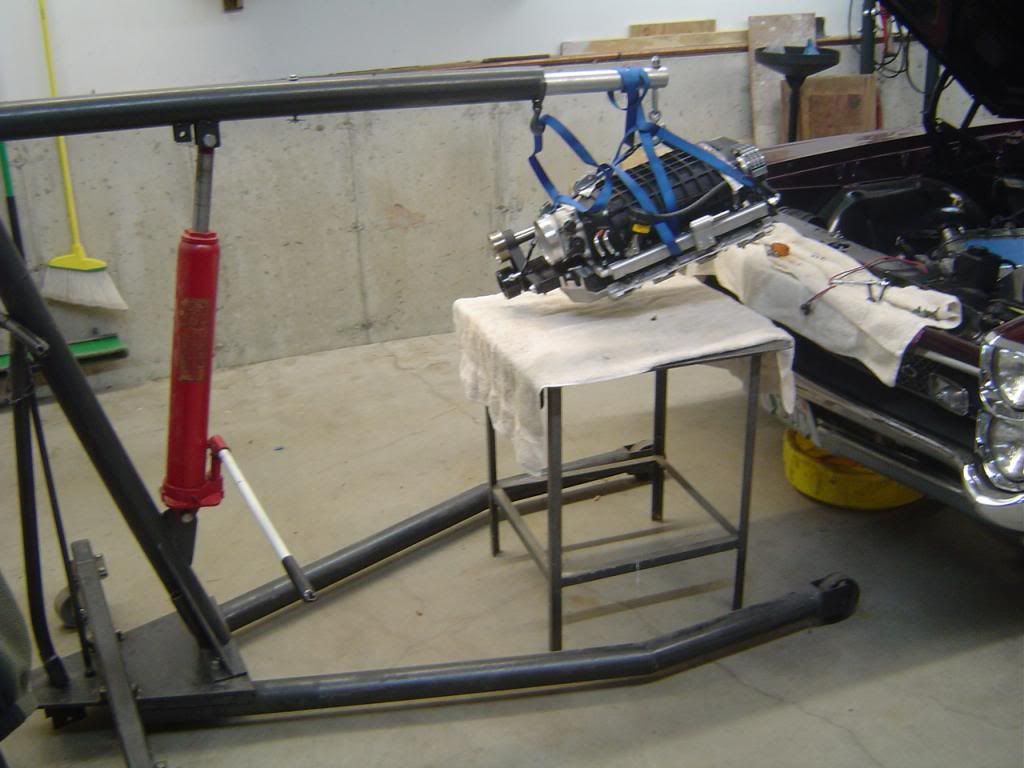
Since I'm working on this late at night and helpers are hard to find, this is how I got the blower on by myself. It worked awesome. This was also necessary to get the rear passenger bolt started without messing up the threads since the head of the bolt doesn't clear the pulley....so basically the bolt would be holding up the rear of the S/C and sitting on the threads....not good. This allowed me to start the bolt, then slowly lower the rear down while threading in the bolt. Other option would be to remove the pulley.....doable, but a pain in the *** while on the car and with the hood on. This worked great.
On!
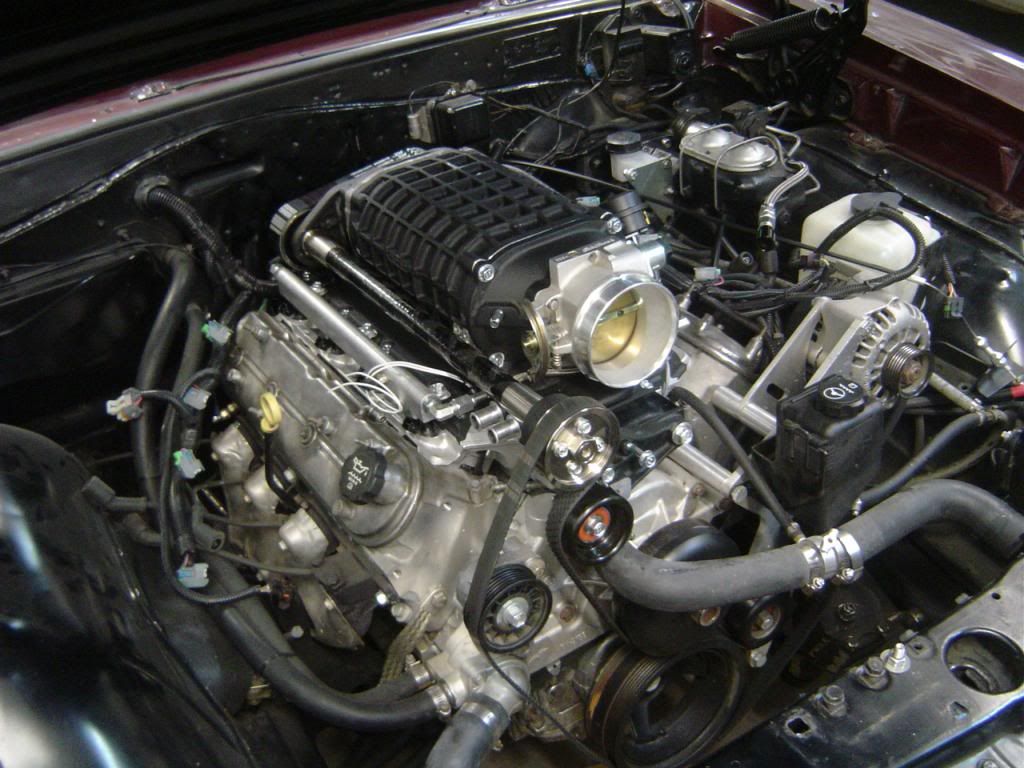
Plenty of firewall clearance.
The aluminum tape was the only thing that would stick to the rough surface of the new valley cover. Plus I left it there and figure it'll handle the heat just fine.

Since I'm working on this late at night and helpers are hard to find, this is how I got the blower on by myself. It worked awesome. This was also necessary to get the rear passenger bolt started without messing up the threads since the head of the bolt doesn't clear the pulley....so basically the bolt would be holding up the rear of the S/C and sitting on the threads....not good. This allowed me to start the bolt, then slowly lower the rear down while threading in the bolt. Other option would be to remove the pulley.....doable, but a pain in the *** while on the car and with the hood on. This worked great.

On!

Plenty of firewall clearance.
