

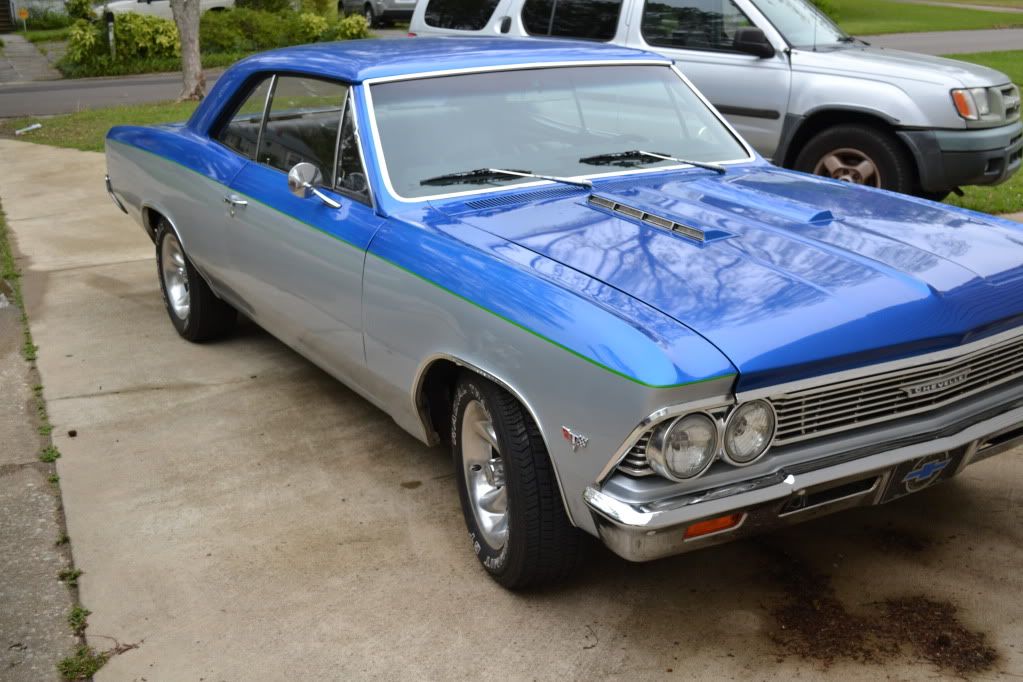
66 Chevelle LQ4 4l80 swap
 04-13-2011, 08:10 PM
#1
On The Tree
Thread Starter

Join Date: Apr 2011
Location: Mobile Alabama
Posts: 108
Likes: 0
Received 0 Likes
on
0 Posts
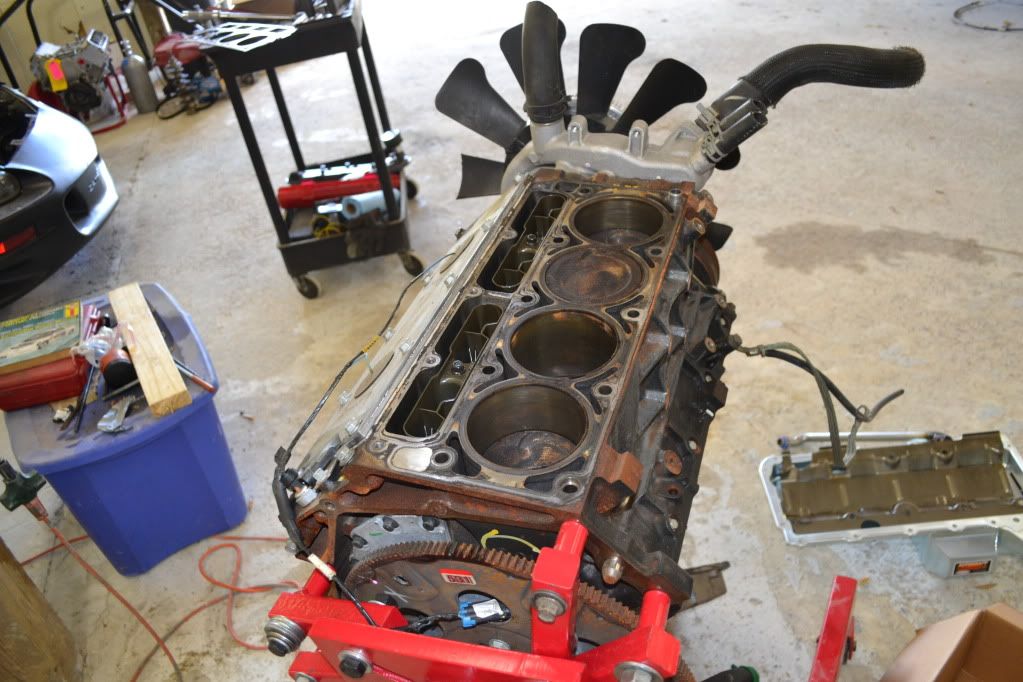
Motor and trans when I purchased this was a 350 and 700 R4. I have those pulled out and moving onward and upward with a Lq4 and trans from a 2007 Express van supposedly with under 40k miles on them.
This is well beyond anything I have done mechanically in the past so I will be doing as much as I can or until I run out of time, and the rest will be done by FTPerformance, the owner of the shop that I will be doing this work at. In generally anything that looks like it was done by a rank amateur you can assume that I have done personally and everything that looks immaculate with flawless welds you can assume he did.
Current changes planned:
- L92 heads milled 25thousands
- custom grind cam specced by the owner of the shop I will be doing the swap at. (FTPerformance.net) along with springs and pushrods
- Stainless Steel Headers made by FTPerformance
- LS3 intake with 92mm TB
- higher stall converter
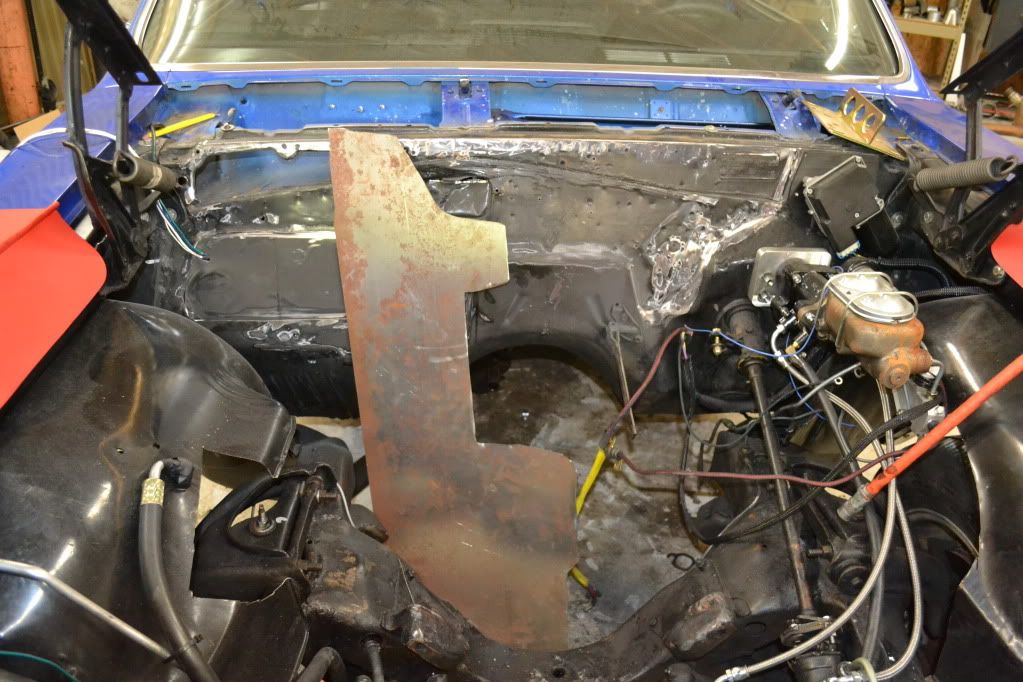
- Partial smoothing of firewall
- notching rear frame rails and enlarging wheel wells
The goal is to have this car fun to drive and able to be driven regularly. I will not be doing too much for the sole purpose of show quality appearance at this time.
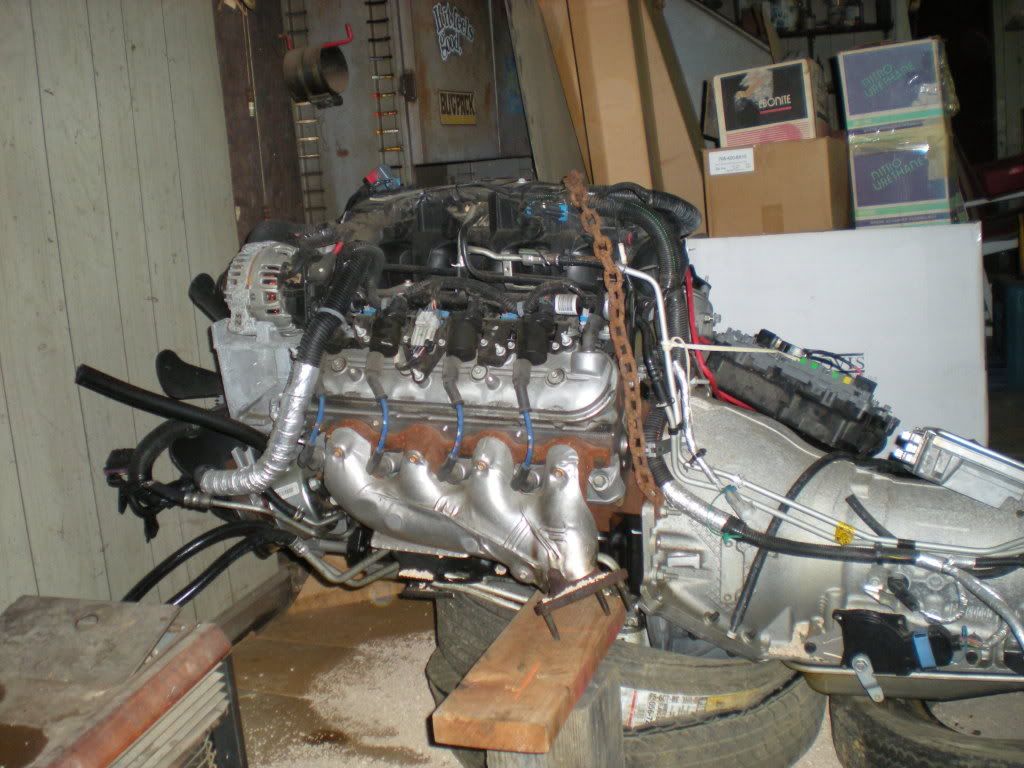
Motor and Trans As purchased

350 to be removed.
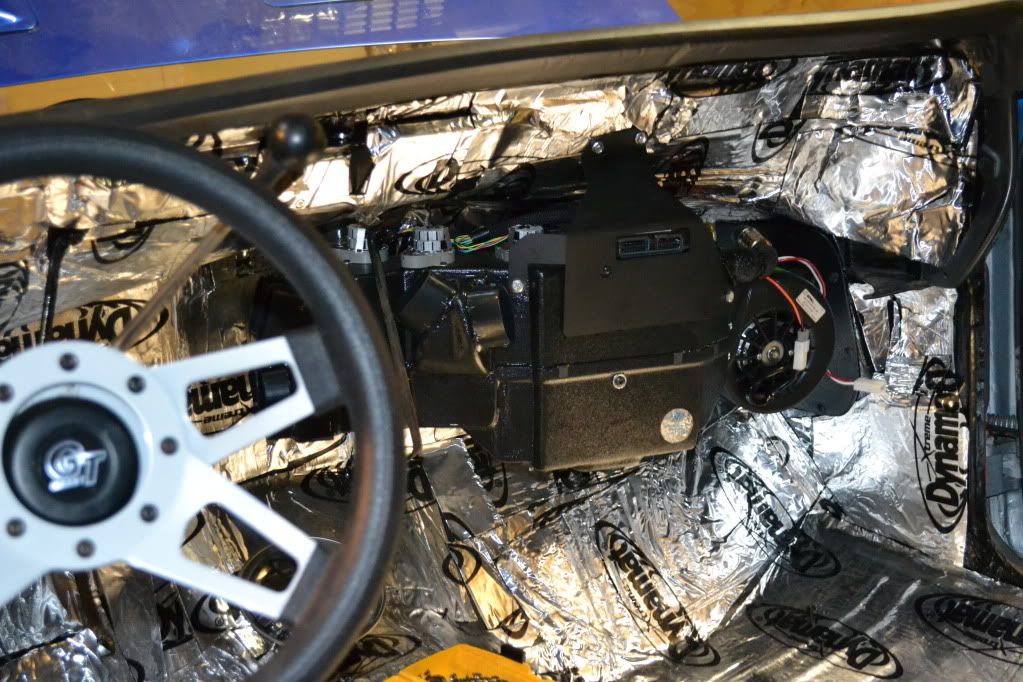
vintage air, American auto wire, and Dynamat already installed
Parts ordered thus far excluding performance parts some of which have been ordered from above:
- KWIK performance brackets both for the AC compressor and Alt/pump along with new pump
- Vintage Air compressor changed for serpentine belt
- Head studs;
- 10ft of alum 3/8th fuel line
- heater hose fittings
- PS pump to AN fitting
- 3/8ths line to -6AN fitting
- Walbro 255 and install parts but looking for a replacement since this is on back order
- Motor Mounts
- Holley LS adapter plate HOK-12624HKR
- some odds and ends for wiring to modify this harness.
This is well beyond anything I have done mechanically in the past so I will be doing as much as I can or until I run out of time, and the rest will be done by FTPerformance, the owner of the shop that I will be doing this work at. In generally anything that looks like it was done by a rank amateur you can assume that I have done personally and everything that looks immaculate with flawless welds you can assume he did.
Current changes planned:
- L92 heads milled 25thousands
- custom grind cam specced by the owner of the shop I will be doing the swap at. (FTPerformance.net) along with springs and pushrods
- Stainless Steel Headers made by FTPerformance
- LS3 intake with 92mm TB
- higher stall converter
- Partial smoothing of firewall
- notching rear frame rails and enlarging wheel wells
The goal is to have this car fun to drive and able to be driven regularly. I will not be doing too much for the sole purpose of show quality appearance at this time.
Motor and Trans As purchased
350 to be removed.
vintage air, American auto wire, and Dynamat already installed
Parts ordered thus far excluding performance parts some of which have been ordered from above:
- KWIK performance brackets both for the AC compressor and Alt/pump along with new pump
- Vintage Air compressor changed for serpentine belt
- Head studs;
- 10ft of alum 3/8th fuel line
- heater hose fittings
- PS pump to AN fitting
- 3/8ths line to -6AN fitting
- Walbro 255 and install parts but looking for a replacement since this is on back order
- Motor Mounts
- Holley LS adapter plate HOK-12624HKR
- some odds and ends for wiring to modify this harness.

 04-15-2011, 01:04 AM
#5
Teching In
Join Date: Dec 2010
Location: Orange County, CA
Posts: 17
Likes: 0
Received 0 Likes
on
0 Posts
very nice '66. Great choice of motor as well...I have heard those make some awesome power especially with L92 heads.
BTW, what is that wiper motor? Does it have mutiple spd/ intermittent and will it fit a 65?
BTW, what is that wiper motor? Does it have mutiple spd/ intermittent and will it fit a 65?
04-15-2011, 09:42 AM
#6
On The Tree
Thread Starter
Join Date: Apr 2011
Location: Mobile Alabama
Posts: 108
Likes: 0
Received 0 Likes
on
0 Posts
It is from Detroit Speed. They have a nice premium on the kit at 325.00 over the individual components but installation was very easy and their switch system would be difficult for me to replicate. (8 position rotary)
It does have multiple speeds and intermittent and has been working great thus far.
Here is the link
http://www.detroitspeed.com/1964-197...elcta-spd.html
04-15-2011, 10:04 AM
#7
I have the same Detroit Speed wiper setup and love it. I really never thought rain would be an issue while building the car, but it seems like everywhere we drove it last year we had downpours going or coming. At some point this year we'll be doing the same swap on our 64 wagon. Very nice setup!
Trending Topics
04-15-2011, 06:04 PM
#8
9 Second Club
Join Date: Dec 2006
Location: Gardendale AL
Posts: 61
Likes: 0
Received 0 Likes
on
0 Posts
Nice to see you on here Frank!! Nice to see you started a build thread also!
I will post some updated pictures in here as we start the tear down on the 6L, building of the headers, ect.
TJ
I will post some updated pictures in here as we start the tear down on the 6L, building of the headers, ect.
TJ
04-16-2011, 08:16 AM
#9
Launching!
iTrader: (5)

Join Date: Mar 2004
Location: Chippewa Falls, WI
Posts: 292
Likes: 0
Received 0 Likes
on
0 Posts

about half way done with my swap(6.0 4l80 turbo in 66), what pan are you using? you can fit it all without cutting the floor, but it will be tight with tierods and pan. 4l80 is a huge ****
04-16-2011, 12:18 PM
#11
Launching!
iTrader: (5)
Join Date: Mar 2004
Location: Chippewa Falls, WI
Posts: 292
Likes: 0
Received 0 Likes
on
0 Posts
i used a ctsv pan, but had to notch the crossmember also, i couldnt get the trans back any farther without hitting the tunnel, and i have to raise the engine a bit to clear the tierods. i think i was at 4-5 deg pinion angle when done.
I had converted to shiftworks floor shift conversion to get rid of the linkage style. Also changed to cable style throttle from 75 nova, bolts in to stock mount, just had to drill for cable in firewall. Also used stock powerglide crossmember, just moved it back and drilled new holes. HTH.
I had converted to shiftworks floor shift conversion to get rid of the linkage style. Also changed to cable style throttle from 75 nova, bolts in to stock mount, just had to drill for cable in firewall. Also used stock powerglide crossmember, just moved it back and drilled new holes. HTH.
04-19-2011, 11:25 AM
#12
On The Tree
Thread Starter
Join Date: Apr 2011
Location: Mobile Alabama
Posts: 108
Likes: 0
Received 0 Likes
on
0 Posts
gathered up some more parts for the swap yesterday but still not much time to work on it. Hopefully this weekend I will be able to spend a day or two on it.
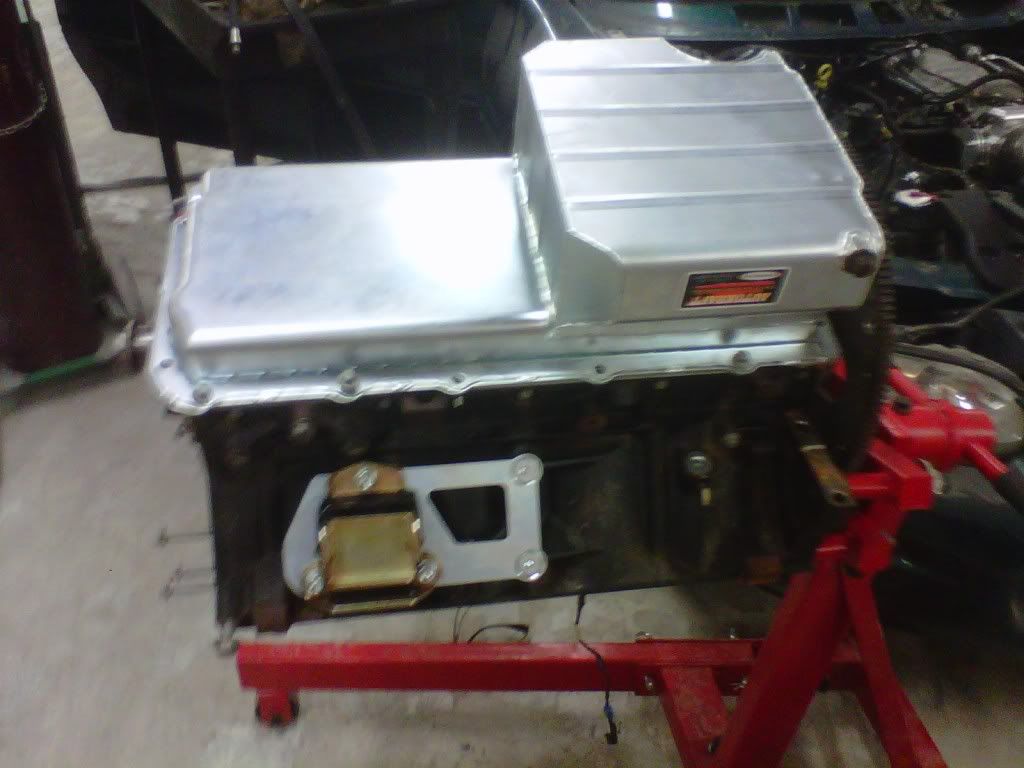
Decided to order the Autocraft pan after looking at more clearance pictures with the CTS-v. I really do not want it hanging below the cross member to get hit.
Also ordered:
Tanksinc in tank fuel pump set up,
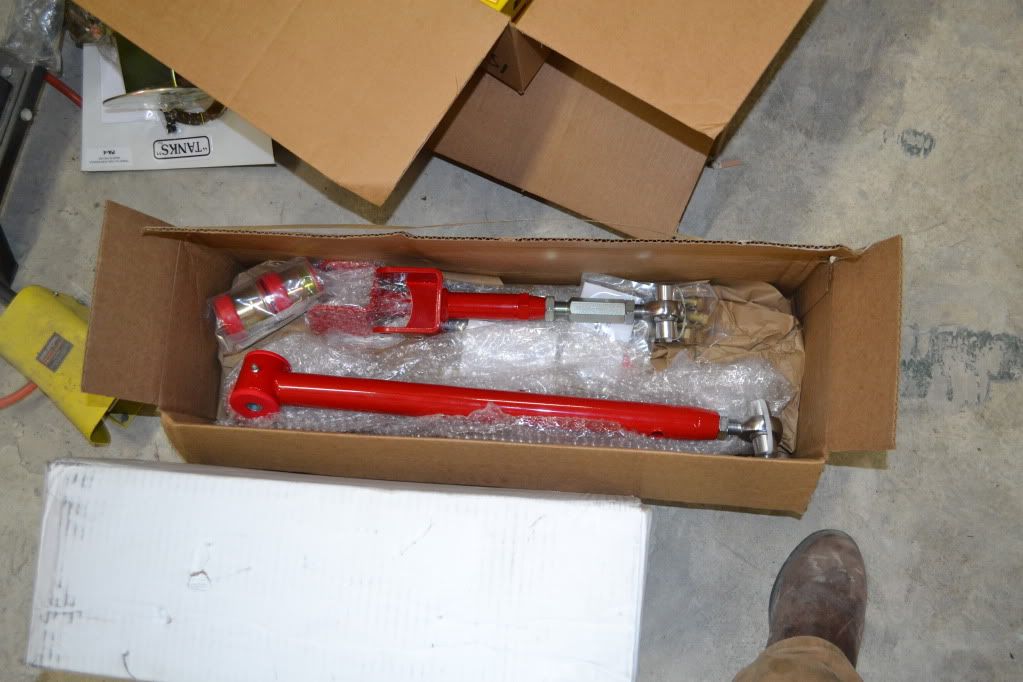
Rear control arms from UMI,
fittings and tube for trans cooler and lines,
Trans yoke for the 4l80e. I plan to find a conversion Ujoint to hook this up to the existing driveshaft if I do not have to get it modified
Corvette Fuel Regulator/filter
Hopefully I am getting close on what I need to buy since I am already over budget but every time I sit down to think about what I will need I find a few more items to buy.
Decided to order the Autocraft pan after looking at more clearance pictures with the CTS-v. I really do not want it hanging below the cross member to get hit.
Also ordered:
Tanksinc in tank fuel pump set up,
Rear control arms from UMI,
fittings and tube for trans cooler and lines,
Trans yoke for the 4l80e. I plan to find a conversion Ujoint to hook this up to the existing driveshaft if I do not have to get it modified
Corvette Fuel Regulator/filter
Hopefully I am getting close on what I need to buy since I am already over budget but every time I sit down to think about what I will need I find a few more items to buy.

 04-27-2011, 08:53 PM
#14
On The Tree
Thread Starter
Join Date: Apr 2011
Location: Mobile Alabama
Posts: 108
Likes: 0
Received 0 Likes
on
0 Posts
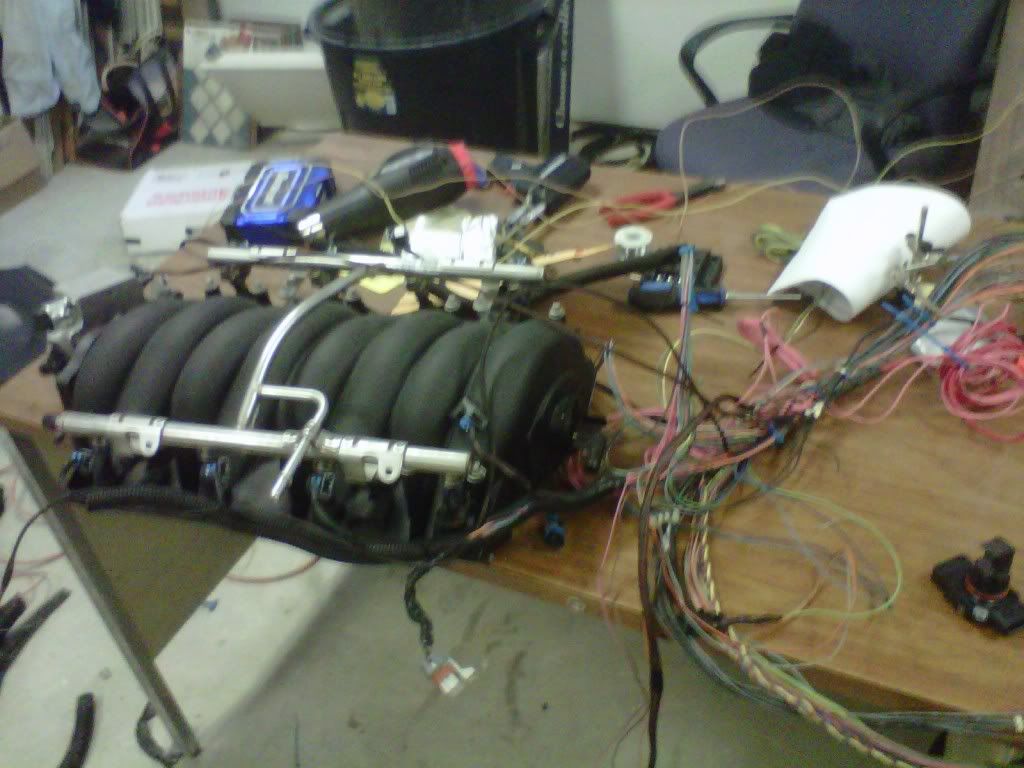
I am a good part of the way through sorting out this wiring harness now. I have removed most of the connections that I will not be using and now I am waiting on the plugs for IAC, IAT, and TPS to get them wired in to change to cable throttle body and speed density.
I made a ghetto set up to find the combustion chamber volume on the new l92 heads that were milled 25 thousands. Using a small piece of flat plastic from home depot, a graduated cylinder from a friend's science classroom and a level I came up with 63cc combustion chambers. That would give me about 10.3 compression ratio.
I have also received yet more parts and started the smooth panel process pics below:
 05-23-2011, 01:19 AM
#16
On The Tree
Thread Starter
Join Date: Apr 2011
Location: Mobile Alabama
Posts: 108
Likes: 0
Received 0 Likes
on
0 Posts
Past time for an update. Still been slow progress but that should speed up soon with a hard deadline coming up quickly.
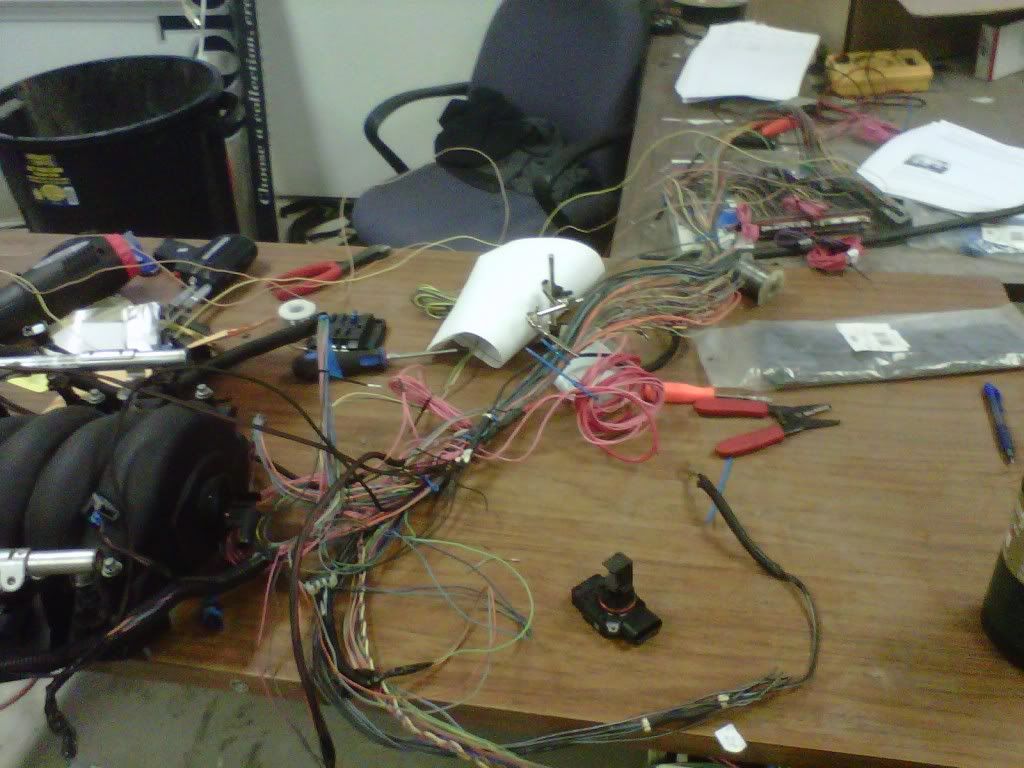
Over the last week I have finished up the mess of a wiring harness sans one connector I am still waiting on.
I might need to shorten up the section between the back of the block and the computer depending on where I finally decide to plant the computer. Right now I am thinking on top of the trans tunnel underneath the dash. I will be making a center console that hides that entire area eventually and I could speed that date up as needed.
Alternatively It could be mounted in the engine compartment on the firewall side of either wheel well. That would be easier but decidedly less clean.
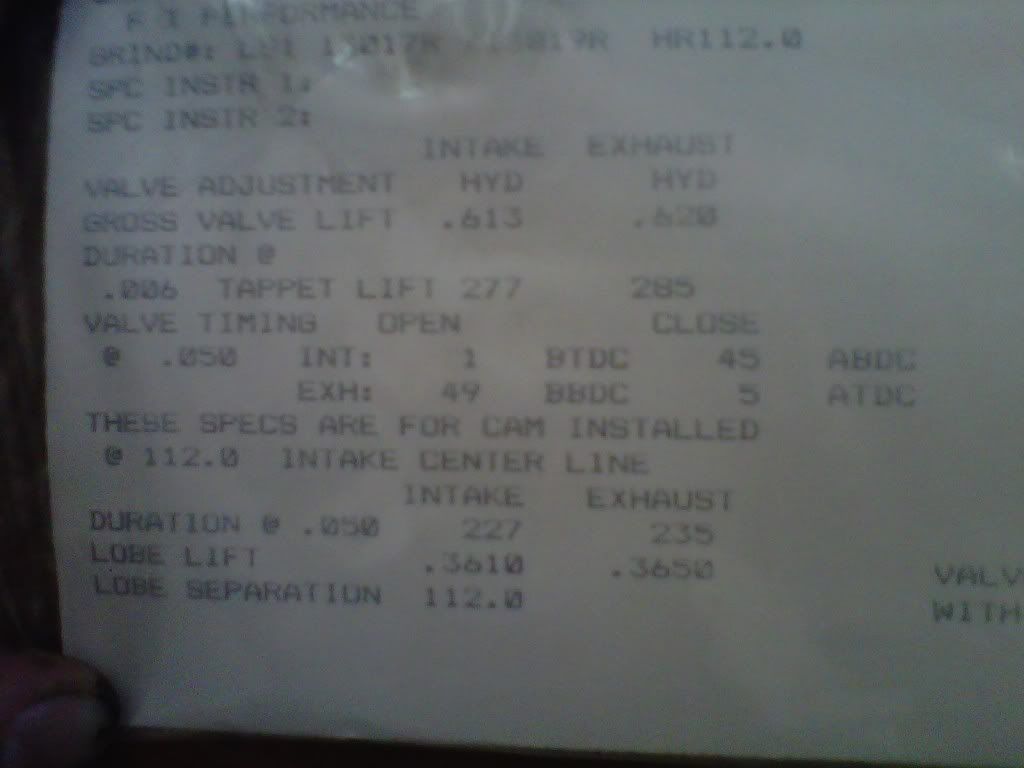
New cam was put in.
Engine getting ready to be placed in for the first test fit:
That will allow mock up for the intake that ideally will take air from behind the drivers side headlight with some work with the hole saw to open that spot up to pull air in from underneath.
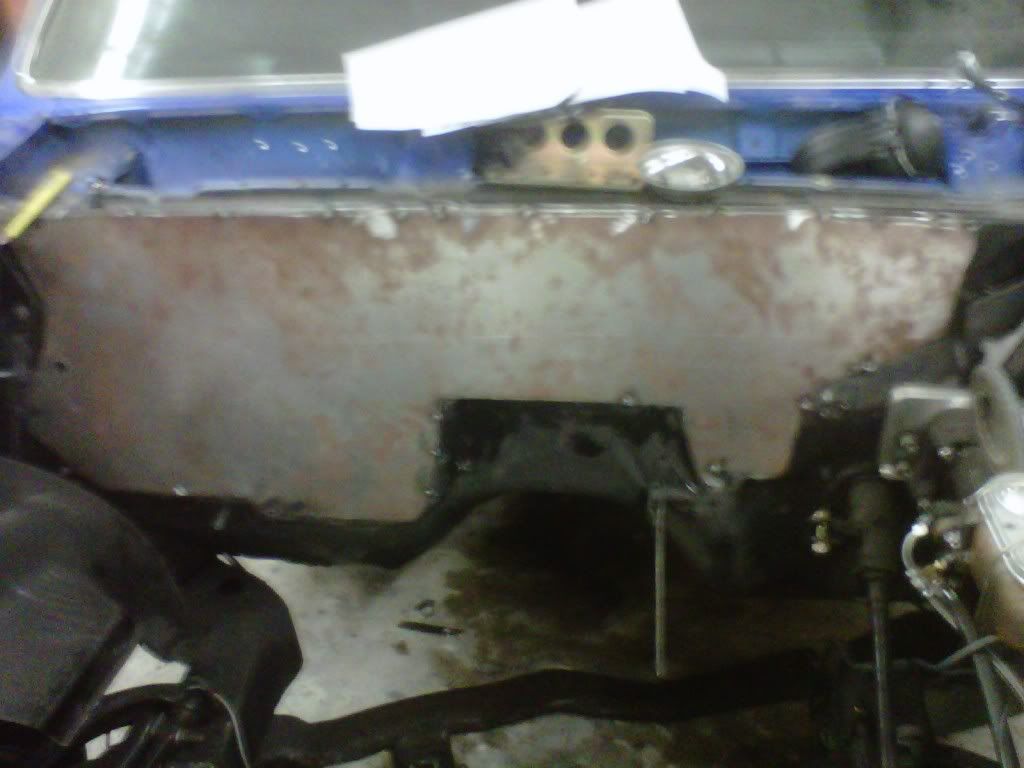
Smooth panel is in place and ready to be fully welded:
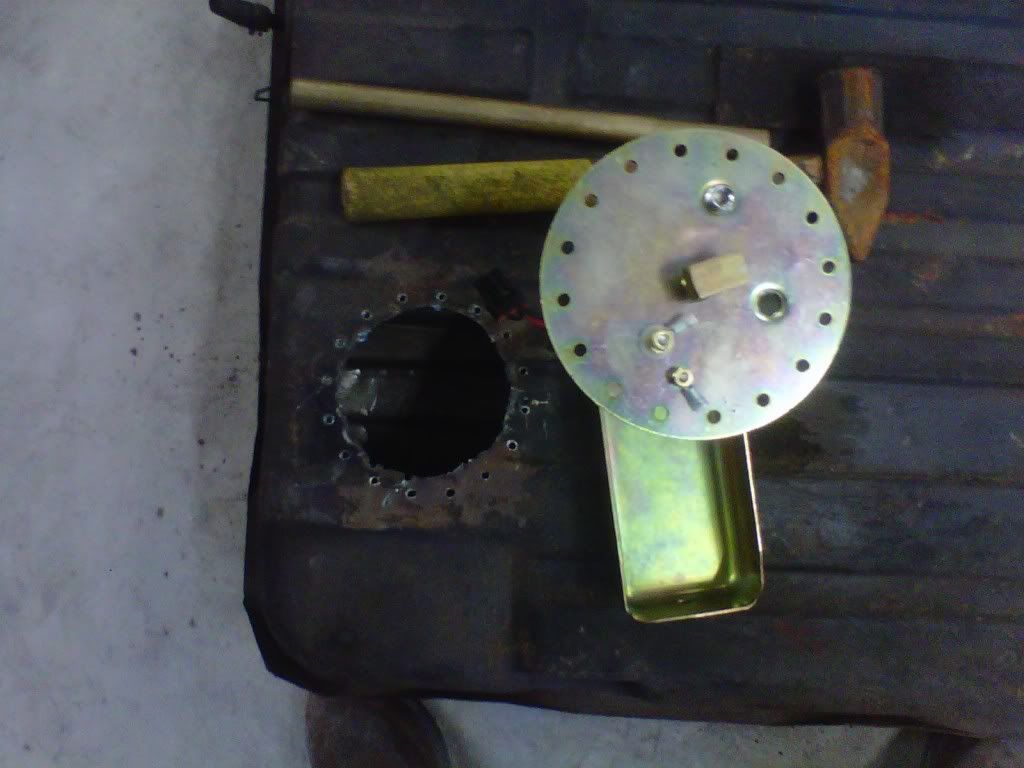
Tanksinc fuel pump setup is ready to go in as soon as we get a modern filler neck put on it to prevent fuel sloshing out every time I fill it up and clean the tank.
And finally Fat mat put in the doors and Power lock installation in progress:
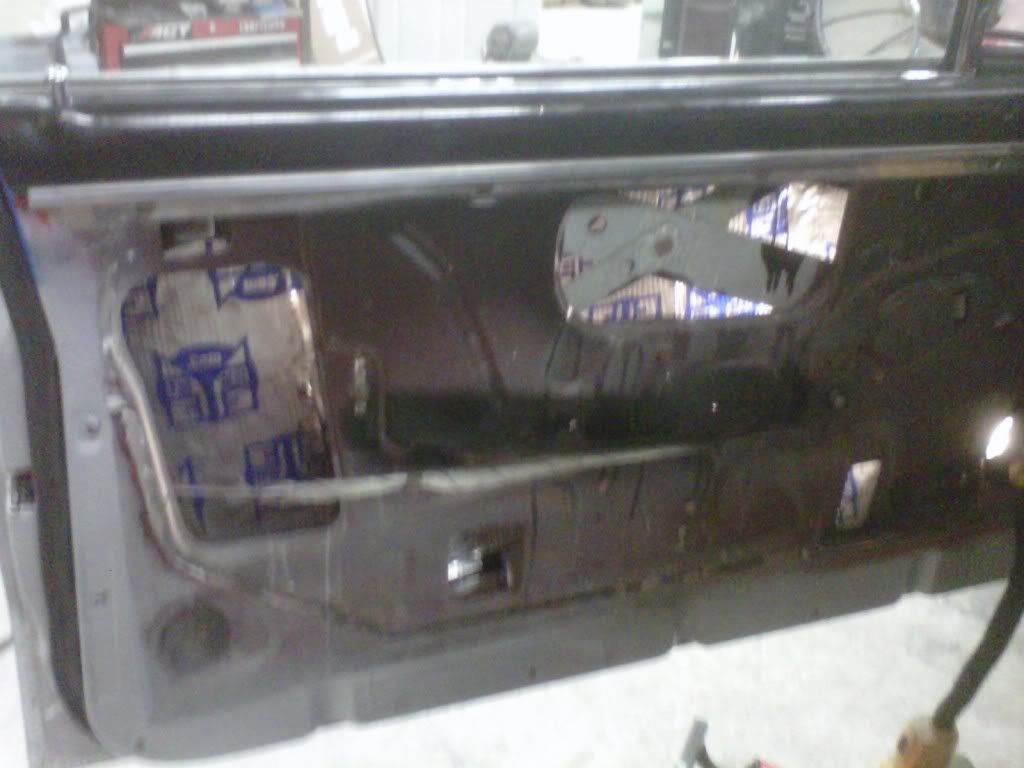
Actuators are in place and I have picked the spot to run the wires through the door if I get any time to work tomorrow. I am using the kit through AutoLoc that uses wireless activation so there will be no switches inside the cab which I like. This kit also includes an alarm and a button for a trunk actuator that will get changed over to a remote start for Ss and Gs.
I used Dynamat Xtreme on the floors and firewall but this seems to be very similar for right at 1/3rd of the cost so giving it a try.
Over the last week I have finished up the mess of a wiring harness sans one connector I am still waiting on.
I might need to shorten up the section between the back of the block and the computer depending on where I finally decide to plant the computer. Right now I am thinking on top of the trans tunnel underneath the dash. I will be making a center console that hides that entire area eventually and I could speed that date up as needed.
Alternatively It could be mounted in the engine compartment on the firewall side of either wheel well. That would be easier but decidedly less clean.
New cam was put in.
Engine getting ready to be placed in for the first test fit:
That will allow mock up for the intake that ideally will take air from behind the drivers side headlight with some work with the hole saw to open that spot up to pull air in from underneath.
Smooth panel is in place and ready to be fully welded:
Tanksinc fuel pump setup is ready to go in as soon as we get a modern filler neck put on it to prevent fuel sloshing out every time I fill it up and clean the tank.
And finally Fat mat put in the doors and Power lock installation in progress:
Actuators are in place and I have picked the spot to run the wires through the door if I get any time to work tomorrow. I am using the kit through AutoLoc that uses wireless activation so there will be no switches inside the cab which I like. This kit also includes an alarm and a button for a trunk actuator that will get changed over to a remote start for Ss and Gs.
I used Dynamat Xtreme on the floors and firewall but this seems to be very similar for right at 1/3rd of the cost so giving it a try.
08-03-2011, 08:46 PM
#17
9 Second Club
Join Date: Dec 2006
Location: Gardendale AL
Posts: 61
Likes: 0
Received 0 Likes
on
0 Posts
Thought I would give an update on his car since we have gotten alot done on it in the last month.
We took the body off the frame, narrowed the stock frame rails and plated both sides. We also plated/boxed the front frame rails. Replaced all the bushings, widened the stock rear wheel wells 2" and did a coil over conversion. The wheel wells are now wide enough that they will fit a 325/50/15 DR under them with the back end lower than it will ever be.


Here is the pass. header tacked up.

Here it is finished up.

Here it is on the car.

Here is the driver side mostly welded up. I ran out of U bends and my shipment had not came in yet. Finished it up the next day when everything came in but forgot to take pics.


Ground clearance on the headers.

One the car.

Also got started on the intake tube.

Have to get the wiring all in place and cleaned up now, hooked it up just to make sure everything worked.

More pics later.....
We took the body off the frame, narrowed the stock frame rails and plated both sides. We also plated/boxed the front frame rails. Replaced all the bushings, widened the stock rear wheel wells 2" and did a coil over conversion. The wheel wells are now wide enough that they will fit a 325/50/15 DR under them with the back end lower than it will ever be.
Here is the pass. header tacked up.
Here it is finished up.
Here it is on the car.
Here is the driver side mostly welded up. I ran out of U bends and my shipment had not came in yet. Finished it up the next day when everything came in but forgot to take pics.
Ground clearance on the headers.
One the car.
Also got started on the intake tube.
Have to get the wiring all in place and cleaned up now, hooked it up just to make sure everything worked.
More pics later.....
 08-25-2011, 12:37 PM
#20
Very nice work on the headers and great progress.
Regarding the intake tube, just like the headers, you can buy pre-bent aluminum tube and cut the angles you need. I can't believe how many cuts you used to make that part. It must have taken a long time. I don't mean to criticize, but I think you could have gotten that done a lot faster and cleaner. I'd still consider getting some prebent tube because cleaning up all those welds (assuming you plan to smooth it out) will likely take about as much time as starting over.
Regarding the intake tube, just like the headers, you can buy pre-bent aluminum tube and cut the angles you need. I can't believe how many cuts you used to make that part. It must have taken a long time. I don't mean to criticize, but I think you could have gotten that done a lot faster and cleaner. I'd still consider getting some prebent tube because cleaning up all those welds (assuming you plan to smooth it out) will likely take about as much time as starting over.