


LS into 190e 16v
Thanks. I bought 1/8", 1/4", 3/8", 1/2", 3/4", and 1". I have used a lot of 1/2". It is pretty nice stuff. I wish that I would have bought some textured tape instead of regular harness tape.
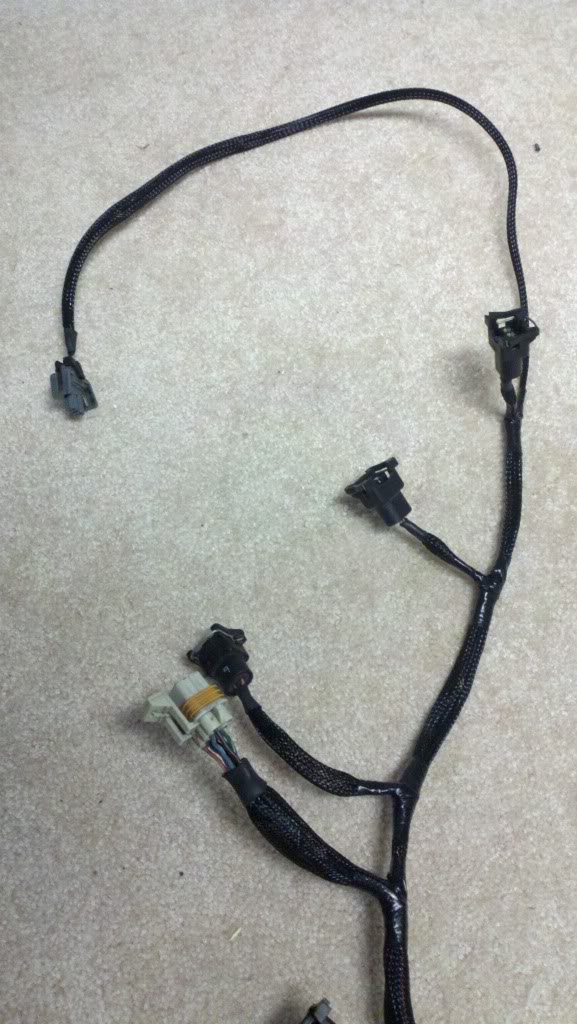
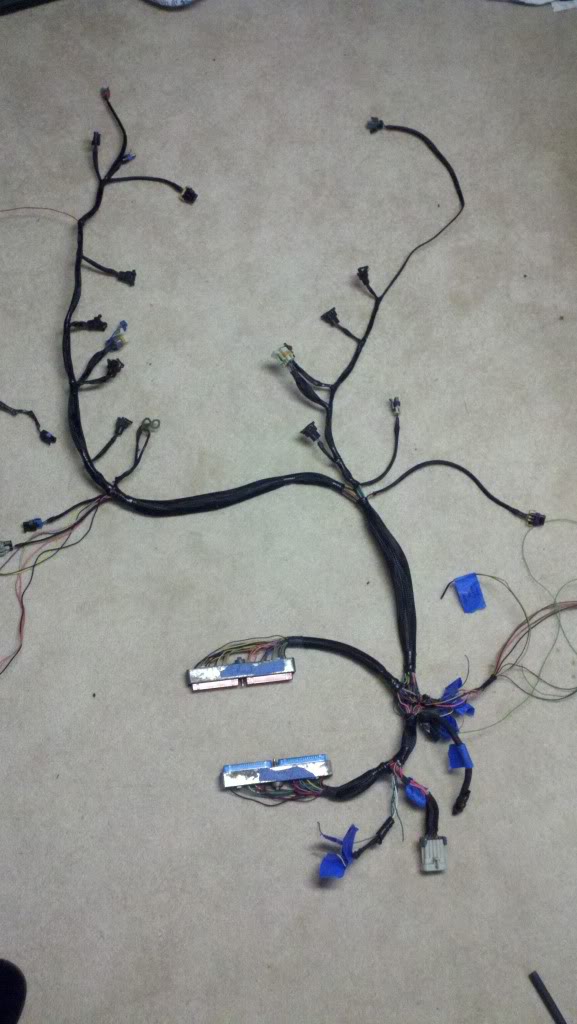
I did a little more work on the harness today. I still need to figure out the O2 sensor, alternator, coolant temp sensor, and a few other wire lengths. Here are a couple of pics.
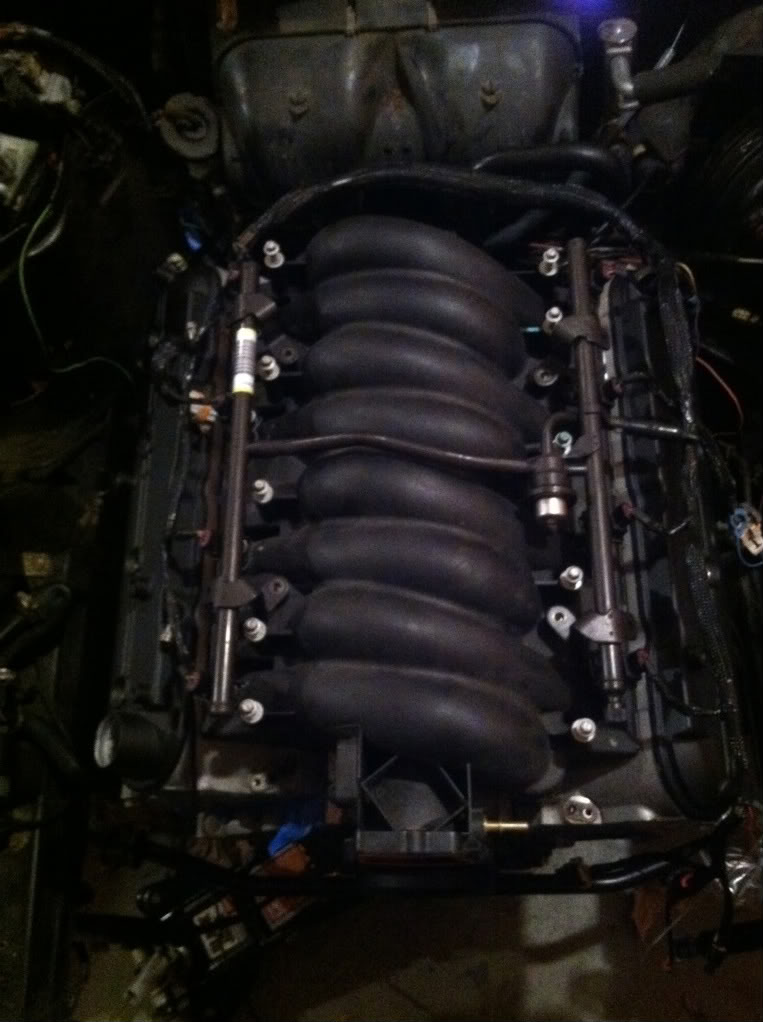
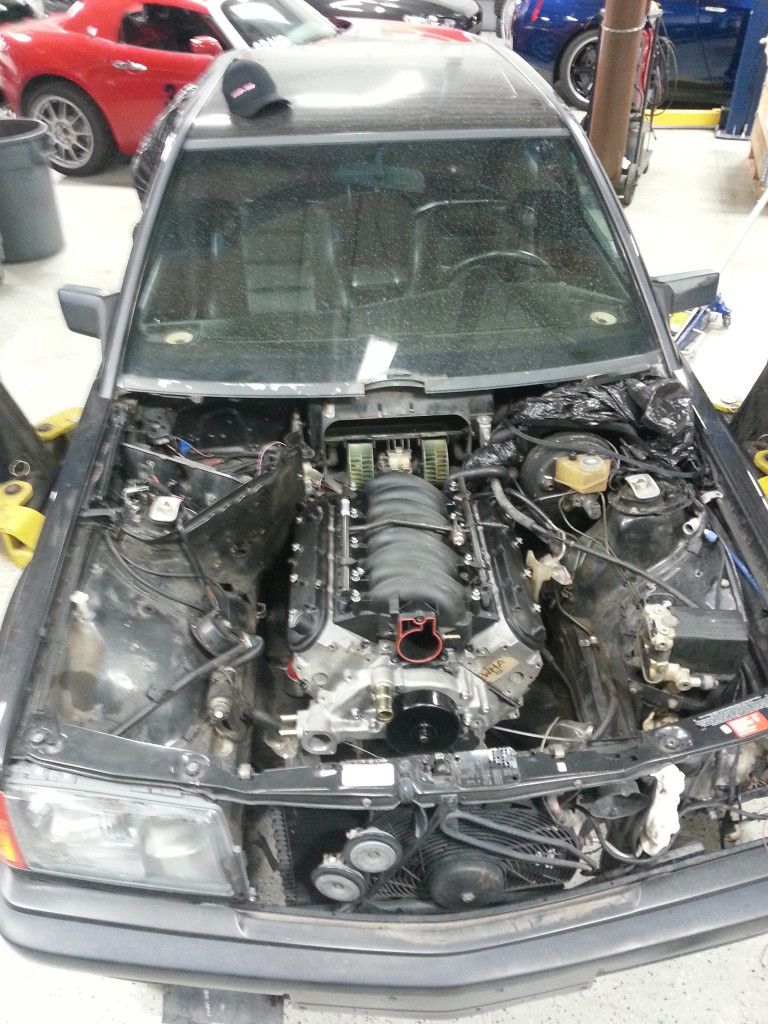
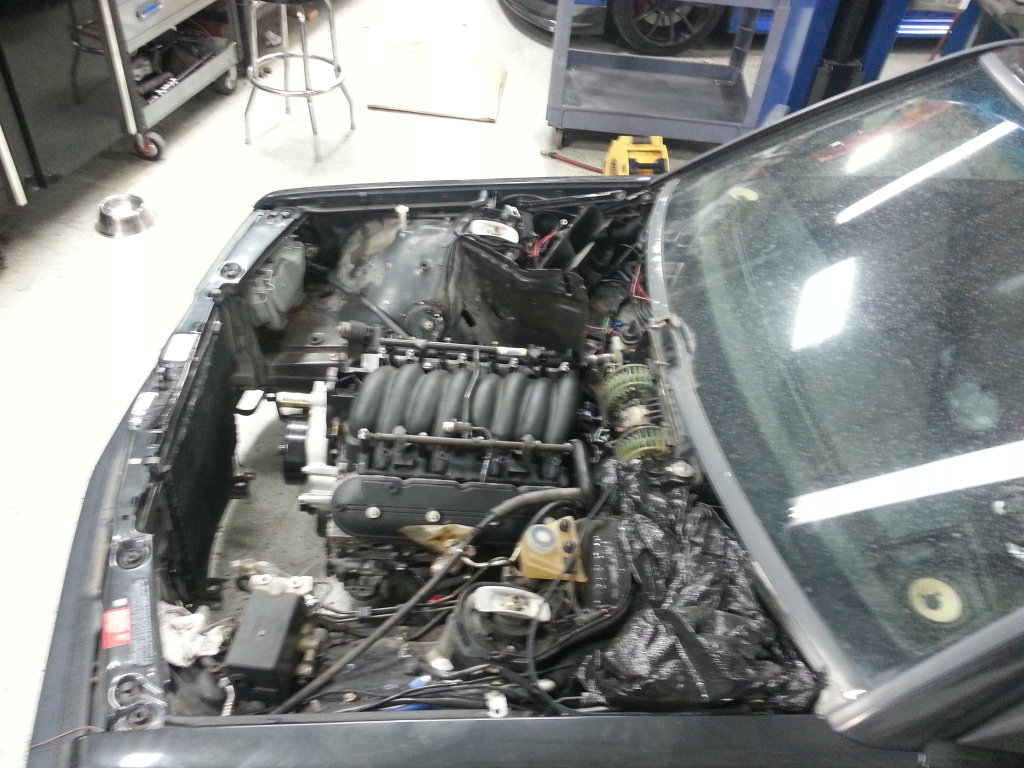
I threw the heads and intake on the car tonight. You can also see the powder coated valve covers and front cover.
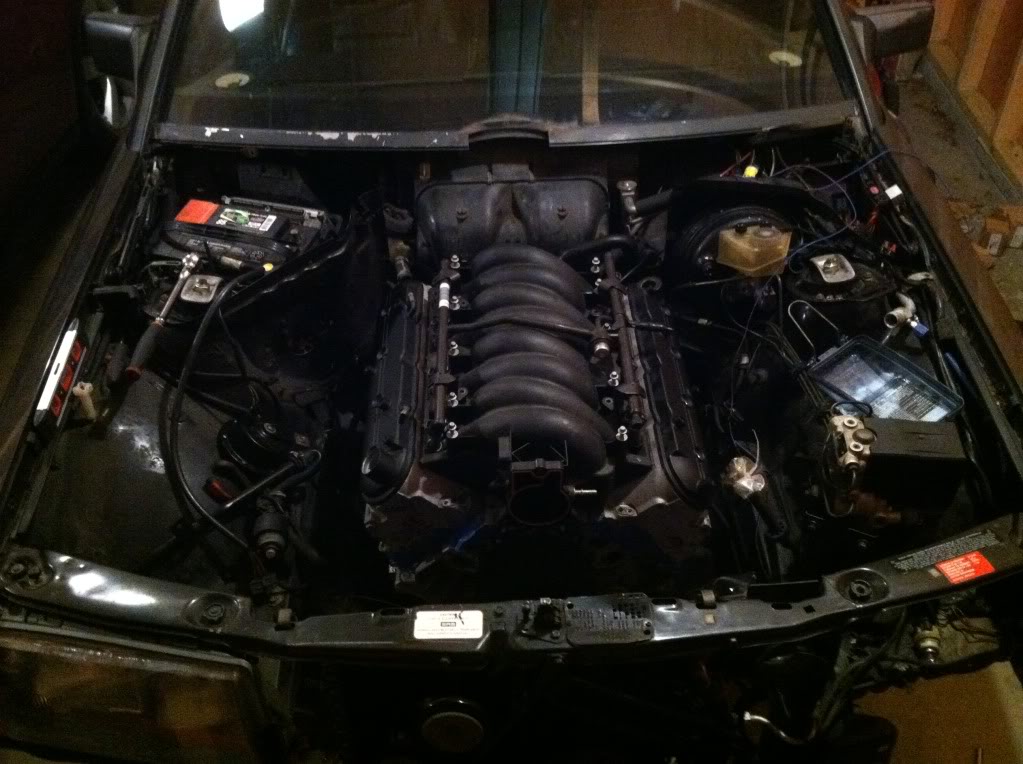
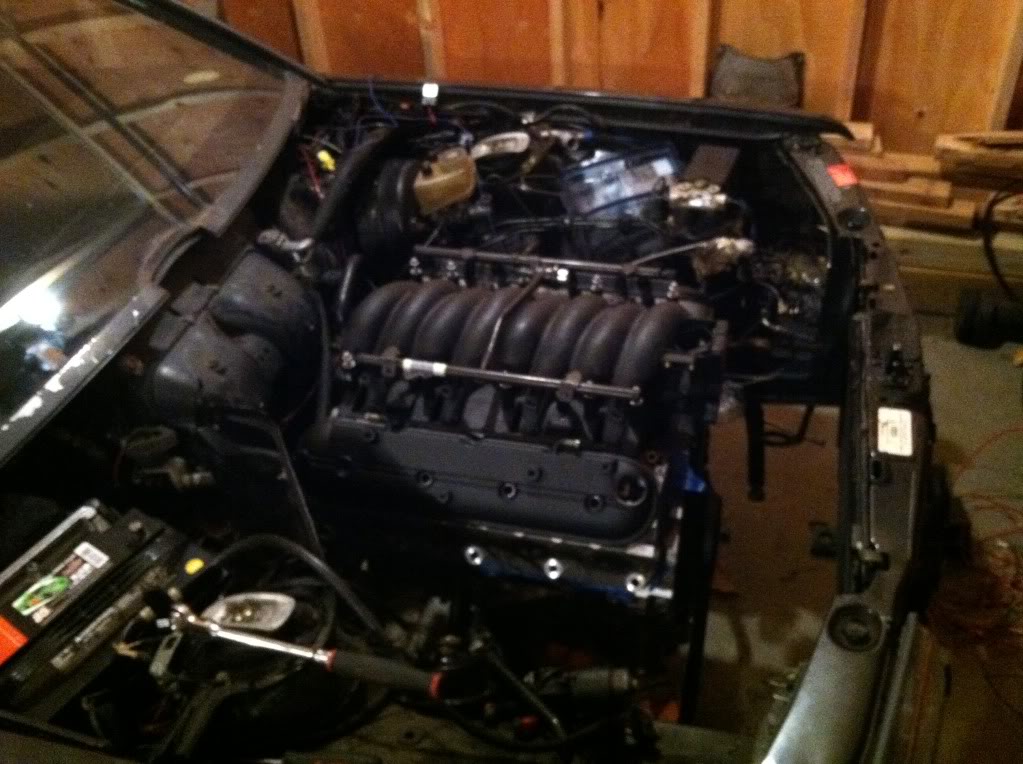
Then I threw the wiring harness on to get some more measurements for a couple of connectors. I think that it looks pretty good.

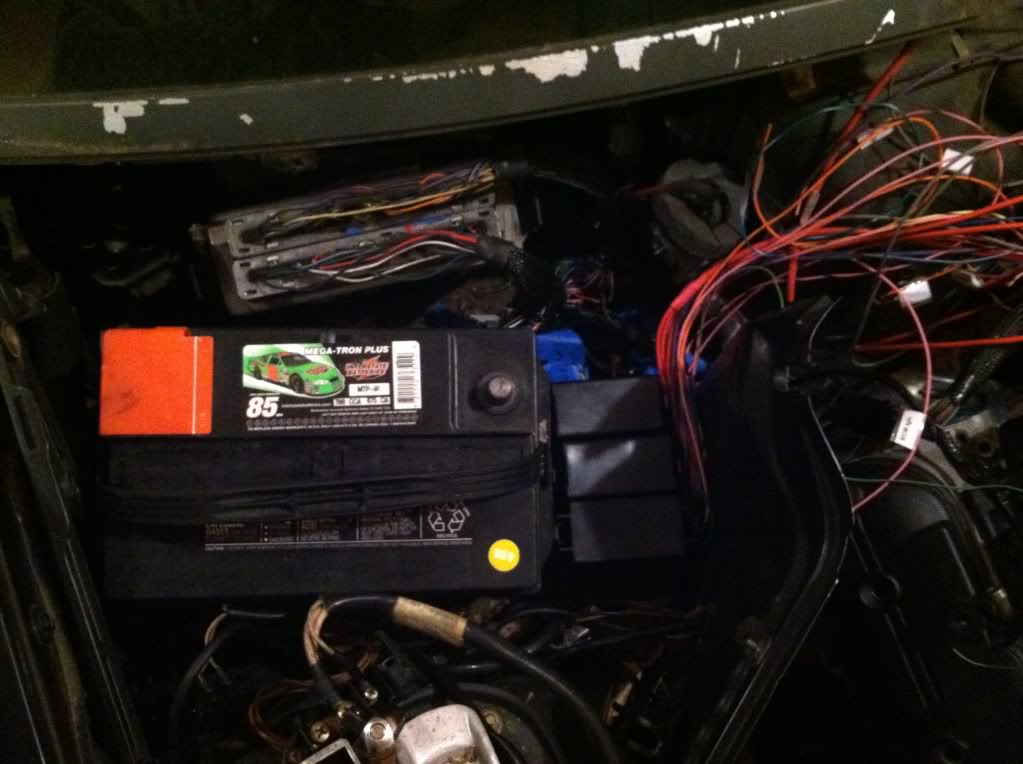
I also figured out how I want to mount the PCM and the fuse box. I figure that I can just push the battery over and mount the fuse box between the battery and the bulk head. All the wire lengths will work out perfectly.
Then I threw the wiring harness on to get some more measurements for a couple of connectors. I think that it looks pretty good.
I also figured out how I want to mount the PCM and the fuse box. I figure that I can just push the battery over and mount the fuse box between the battery and the bulk head. All the wire lengths will work out perfectly.
Mini Update.
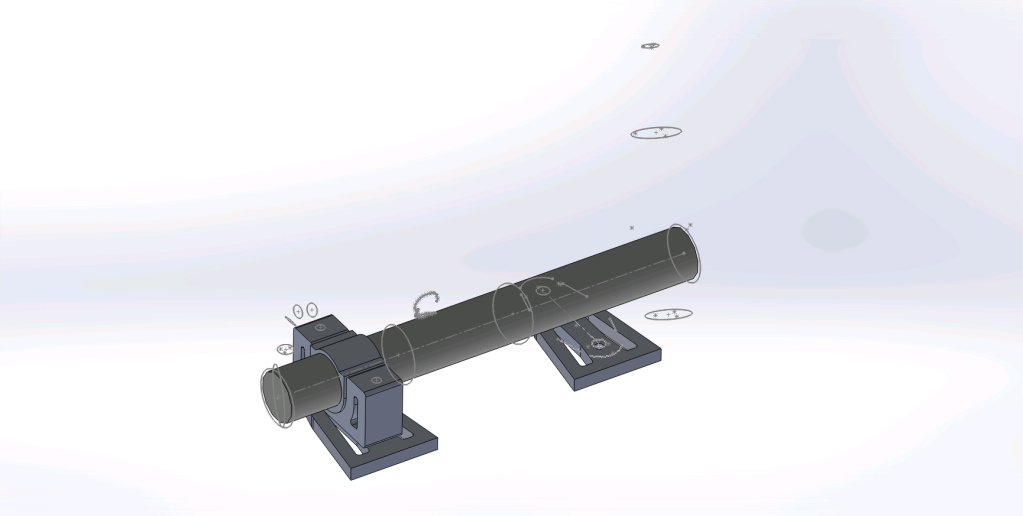
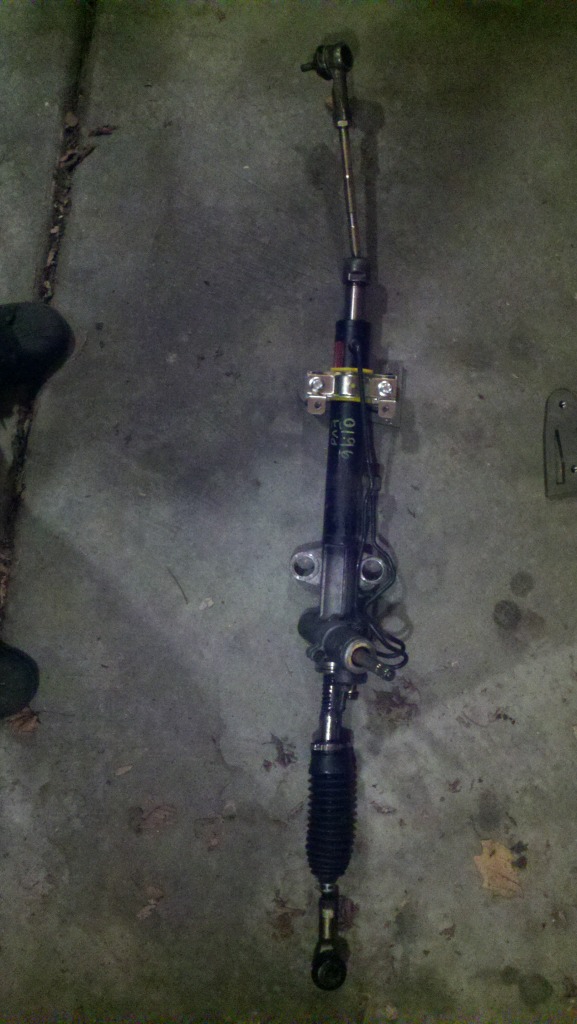
Well I finally got off my *** and started working on figuring out the steering system. Since I found out earlier that the EVO VIII rack was too long, I did a little research that I decided that the fact that the EVO VIII steering rack body is longer than the stock 16v drag link really shouldn't affect the steering at all. The bigger problem was that the 16v needs a steering rack that is ~47.5" from ball joint to ball joint. The EVO VIII rack measured 54" from ball joint to ball joint. So I bought '94 Galant inner tie rod ends. The '94 Galant inner tie rod ends are 3" shorter than the EVO VIII.
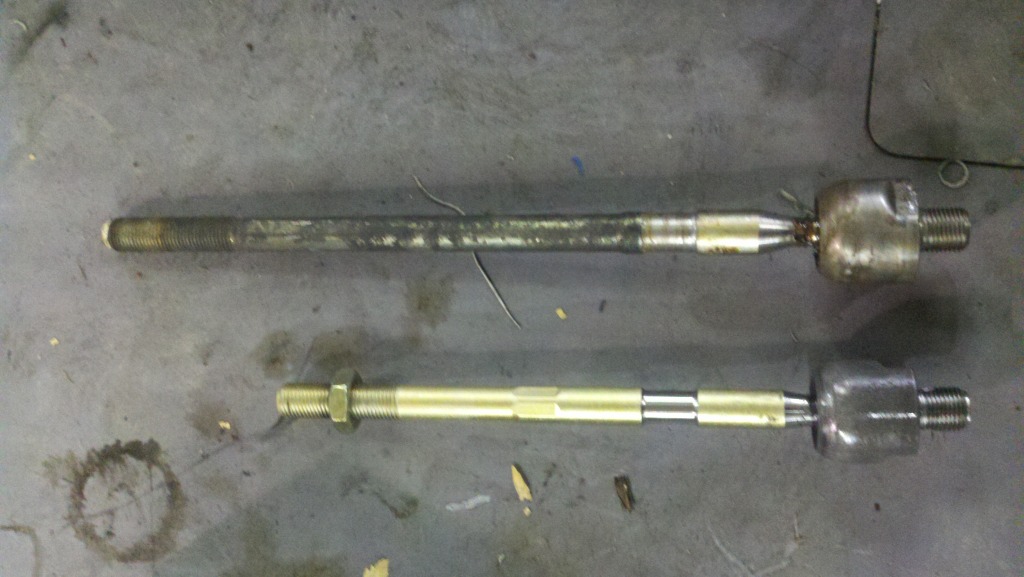
the EVO VIII inner tie rod end is on the bottom. I should be able to get to the 47.5" measurement with the adjustment in the outer tie rod end.
Next I got a set of White Line EVO VIII steering rack bashings.
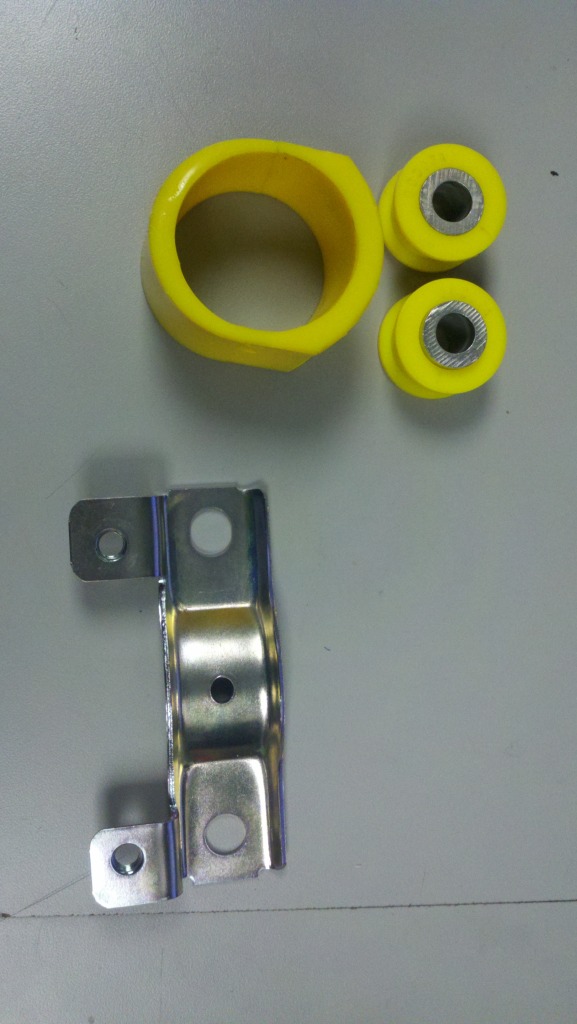
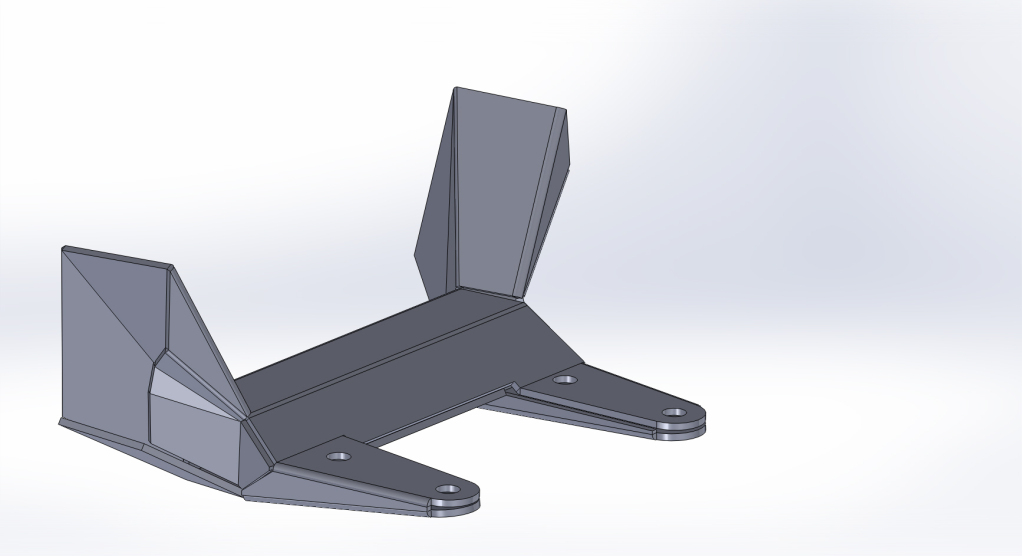
after some measuring, I designed some steering rack mounts and brackets.
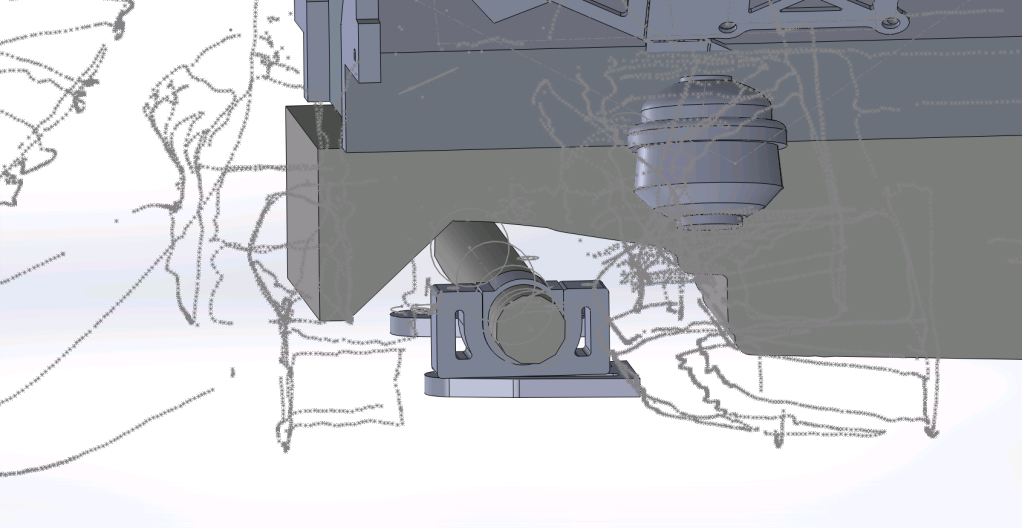
I am having these cut out by the waterjet tomorrow and I will be welding these in over the weekend. I will set up the steering rack, tack in the two bottom brackets, and then bolt everything in place. Next I will measure for bump steer. I am having several 1/16" aluminum shims cut so that I can raise the rack to eliminate bump steer if I need to.
I also got the wiring done. If everything goes well this weekend, and I don't get to drunk, I might hook up the battery and check that everything is working properly.
That's it for now.
Well I finally got off my *** and started working on figuring out the steering system. Since I found out earlier that the EVO VIII rack was too long, I did a little research that I decided that the fact that the EVO VIII steering rack body is longer than the stock 16v drag link really shouldn't affect the steering at all. The bigger problem was that the 16v needs a steering rack that is ~47.5" from ball joint to ball joint. The EVO VIII rack measured 54" from ball joint to ball joint. So I bought '94 Galant inner tie rod ends. The '94 Galant inner tie rod ends are 3" shorter than the EVO VIII.
the EVO VIII inner tie rod end is on the bottom. I should be able to get to the 47.5" measurement with the adjustment in the outer tie rod end.
Next I got a set of White Line EVO VIII steering rack bashings.
after some measuring, I designed some steering rack mounts and brackets.
I am having these cut out by the waterjet tomorrow and I will be welding these in over the weekend. I will set up the steering rack, tack in the two bottom brackets, and then bolt everything in place. Next I will measure for bump steer. I am having several 1/16" aluminum shims cut so that I can raise the rack to eliminate bump steer if I need to.
I also got the wiring done. If everything goes well this weekend, and I don't get to drunk, I might hook up the battery and check that everything is working properly.
That's it for now.
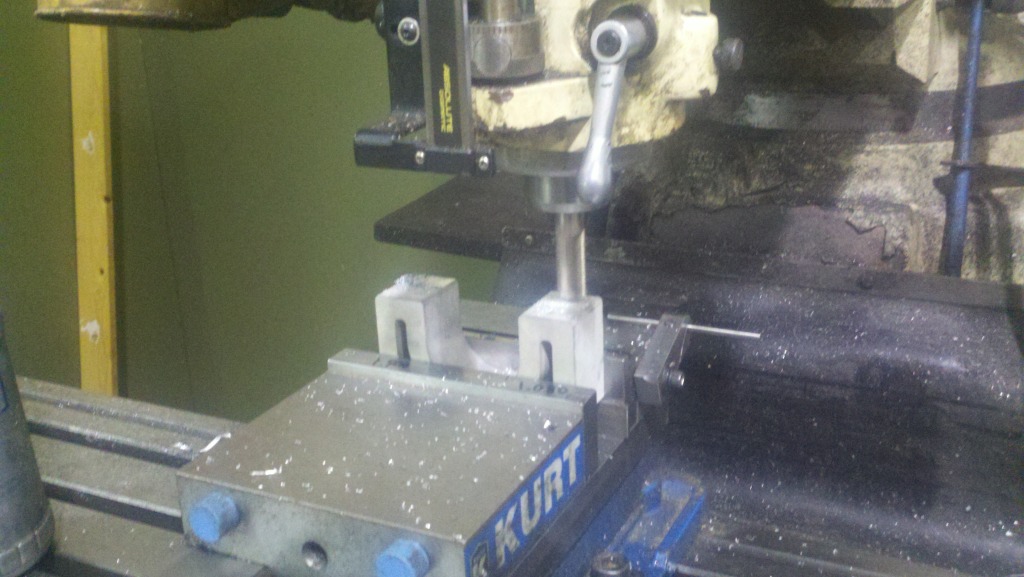
I got a good bit done this weekend. I got all the water jet parts and I had to do a bit of machining to them before I could install everything. I had to machine a bit off the steering rack collar because I measured it a bit too tall.
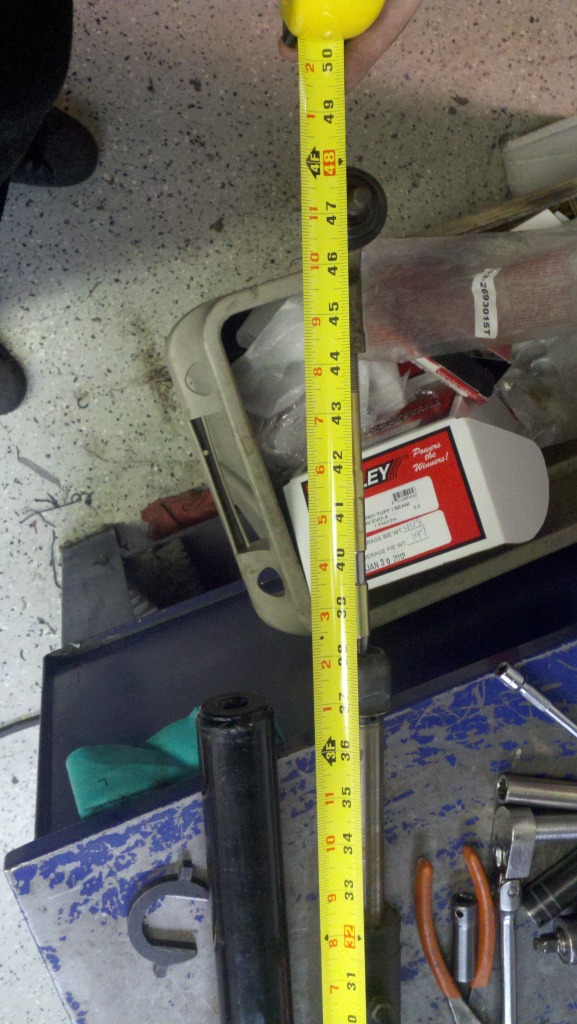
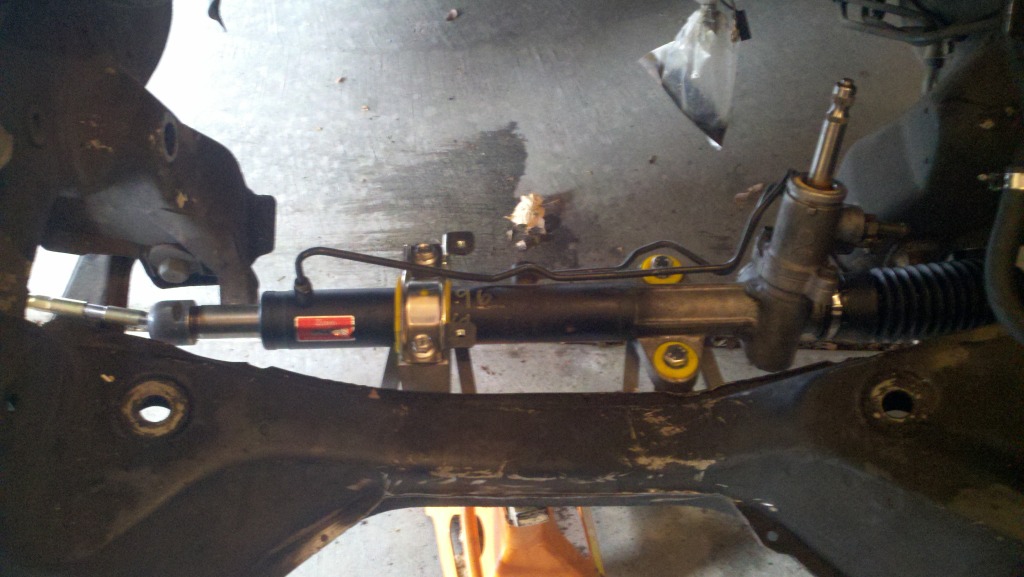
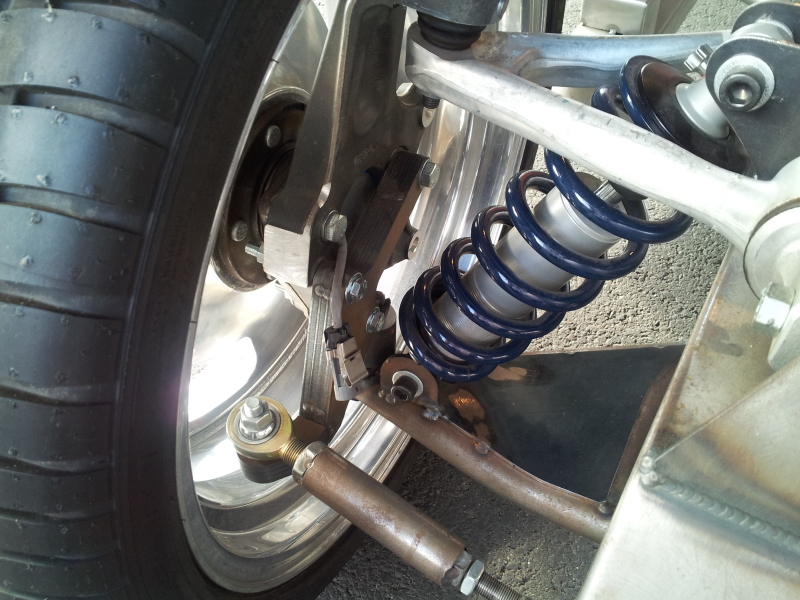
I got the two 94 galant inner tie rods installed and the ball joint to ball joint distance is now 47.5".
Here is the rack with the passenger side bolted up and ready to be tacked in place. You can see the driver's side bracket on the floor at the top of the picture.
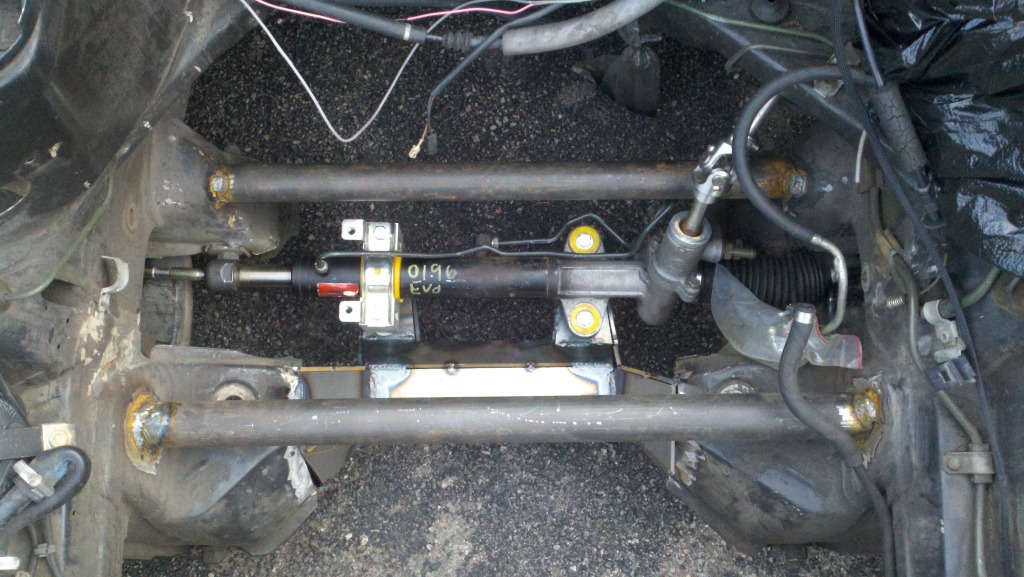
and finally everything tack in place. Now this is not the finally position that the mounts will end up at. I just got them tacked in place so that I could figure out a steering column solution and get the car onto a trailer so that I can take it back to AMS where I will have an easier time and getting everything level and straight before I final weld everything.
It looks like everything will clear just fine. The tie rods have about an 1/8" of clearance off the lower A arms under full droop. Depending on the bumpsteer, I will probably use the shims I had made to raise the rack up a bit. I will have to change out the outer rods b/c the stud on the EVO VIII outer tie rods are not long enough and only about 2 threads are coming through the steering arm. I will probably just go to NAPA again and find some that are longer. That is it for now.
I got the two 94 galant inner tie rods installed and the ball joint to ball joint distance is now 47.5".
Here is the rack with the passenger side bolted up and ready to be tacked in place. You can see the driver's side bracket on the floor at the top of the picture.
and finally everything tack in place. Now this is not the finally position that the mounts will end up at. I just got them tacked in place so that I could figure out a steering column solution and get the car onto a trailer so that I can take it back to AMS where I will have an easier time and getting everything level and straight before I final weld everything.
It looks like everything will clear just fine. The tie rods have about an 1/8" of clearance off the lower A arms under full droop. Depending on the bumpsteer, I will probably use the shims I had made to raise the rack up a bit. I will have to change out the outer rods b/c the stud on the EVO VIII outer tie rods are not long enough and only about 2 threads are coming through the steering arm. I will probably just go to NAPA again and find some that are longer. That is it for now.
About the wiring harness loom covering and shrink wrap. Superglue will keep it from sliding down the wire. I've done some flexible tubing covered up and you can keep the covering tight to the tube using SG. Works great.
Also look into TESA tape for the harness. Either 51602 or 56107, I've used both. Not the easiest to find but the best IMHO.
Roger
Also look into TESA tape for the harness. Either 51602 or 56107, I've used both. Not the easiest to find but the best IMHO.
Roger
Love the mount brackets!
Should sell em on 190rev and get a whole fleet of LS190's!
What are you gonna be running for a differential?
Im gonna stuff an 8.8 ford explorer diff in mine but ive been slacking for a long time
Your use of technology in this build is awesome.
Keep up the great work!
Should sell em on 190rev and get a whole fleet of LS190's!
What are you gonna be running for a differential?
Im gonna stuff an 8.8 ford explorer diff in mine but ive been slacking for a long time
Your use of technology in this build is awesome.
Keep up the great work!
Last edited by Gen3Benz; Apr 18, 2012 at 02:14 AM.
LS1 Tech Stories
The Best V8 Stories One Small Block at Time

Topdon ONE vs. Artidiag 800 BT2: Which is the Diagnostic Tablet For You?
Pouria Savadkouei
Gas Monkey Built a 6-Wheel Ferrari Testarossa With a Corvette LT4 Engine
Verdad Gallardo
7 Most Reliable High-Performance Engines GM Has Ever Built
Verdad Gallardo
Amazing '71 Camaro Restomod Is Modern Muscle Car Under the Skin
Verdad Gallardo
6 Common C5 Corvette Failures and What's Involved In Repairing Them
Pouria Savadkouei
Retro Modern Bandit Pontiac Trans AM Comes With Burt Reynolds' Autograph
Verdad Gallardo
Top 10 Greatest Cadillac V Series Performance Models Ever, Ranked
Pouria Savadkouei
Top 10 Most Powerful Chevy Trucks Ever Made!

Hennessey's New Supercharged Silverado ZR2 Has 700 HP
Verdad Gallardo


Teching In
Joined: Nov 2005
Posts: 16
Likes: 0
From: south florida
I just found your write-up. I am impressed, and also very motivated. I have an old 1961Cadillac convertible project car. If the original 390 has any issues, I will drop in an LS1 . I may even re-read your write up for any hard to find parts or stuff to make.
My daily driver is an 04GTO, so I have spares around the shop, and experience with the various mods. It seems like true best choice for a transplant. I like how you are doing everything in a clean manner and most importantly, going with the fuel injection.
I am also very impressed with the CAD program, and that bitchin' arm! I hope that in a few years the arm becomes cheap, and maybe on EBay!
On The Tree
Joined: Jul 2011
Posts: 149
Likes: 3
From: Maine
This swap is awesome, you must love your job! I'm currently in school for mechanical engineering but I got no clue as to what I want to do when I get out...have to say though...working at AMS would be pretty freaking cool haha
Nice work with solidworks!
Nice work with solidworks!
Update-
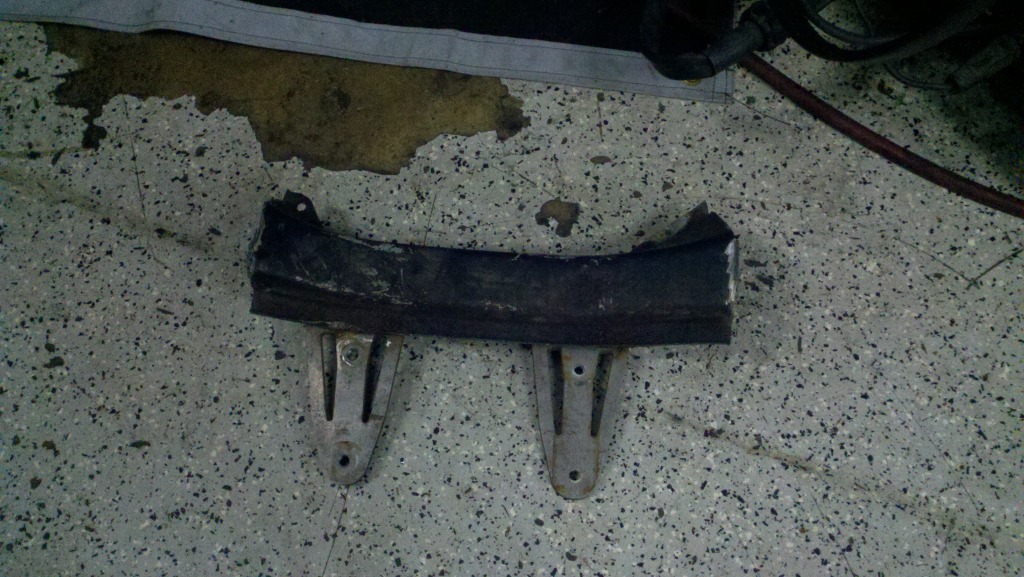
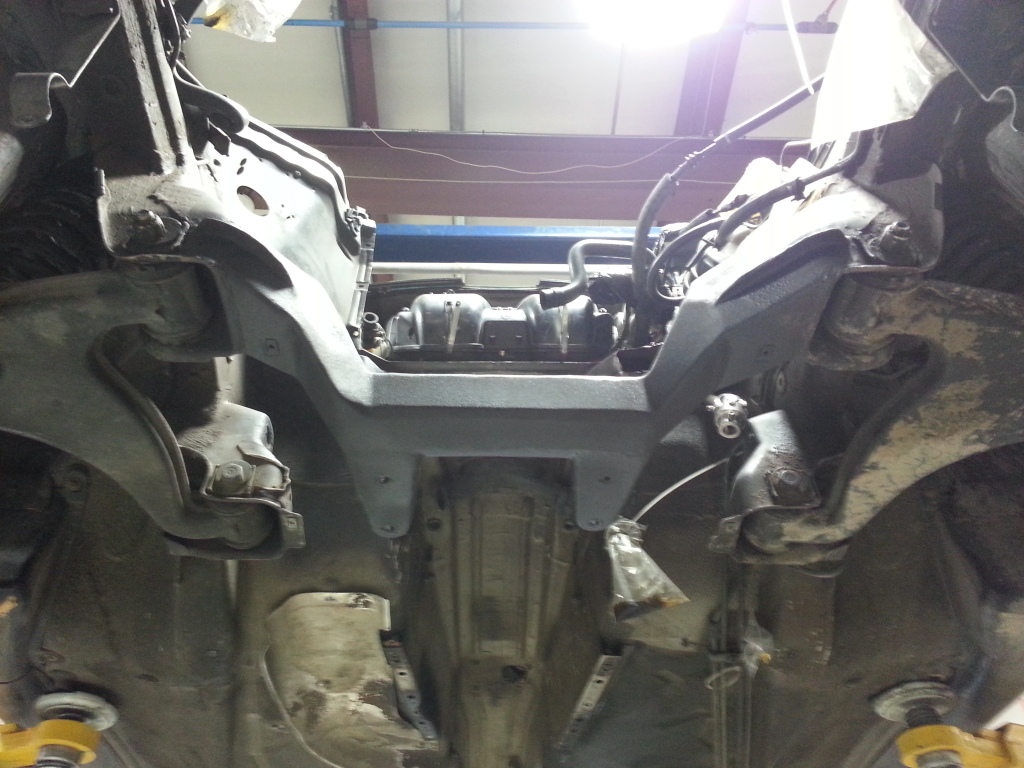
I'm bringing this thread back from the dead. I have been working on this project off and on for the past couple of months. I have made some progress. After getting the motor back in the car, I decided that I didn't like where the motor was sitting and I wanted to change some things. In order to put the motor lower and farther back in the engine bay, I was either going to have to cut out the subframe, or make a new trans tunnel. I decided that it was going to be easier to cut out the subframe. So I modeled a new subframe that would incorporate mounts for the steering rack.

Then, I braced the engine bay and cut out the factory subframe
Next I needed to weld in the new subframe
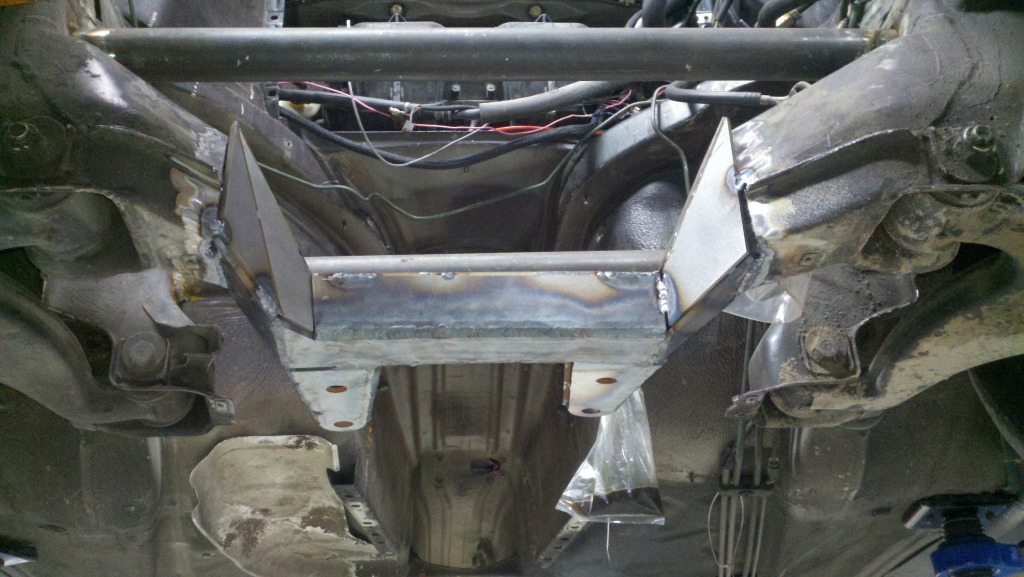
then after a lot of grinding and some some on undercoating
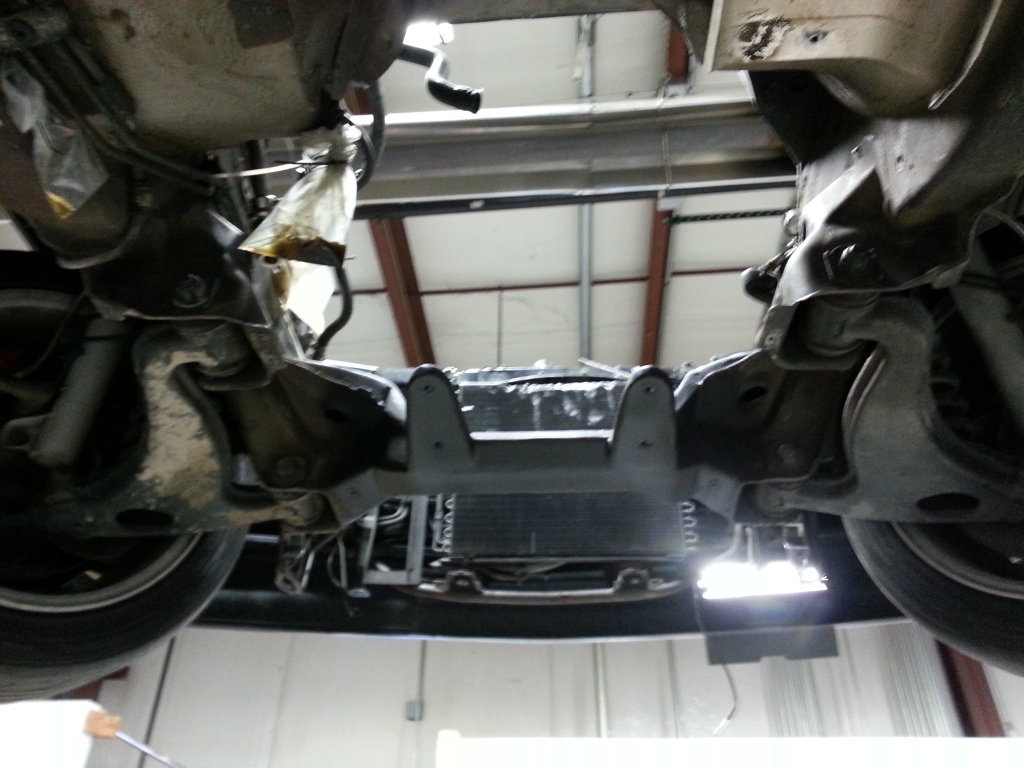
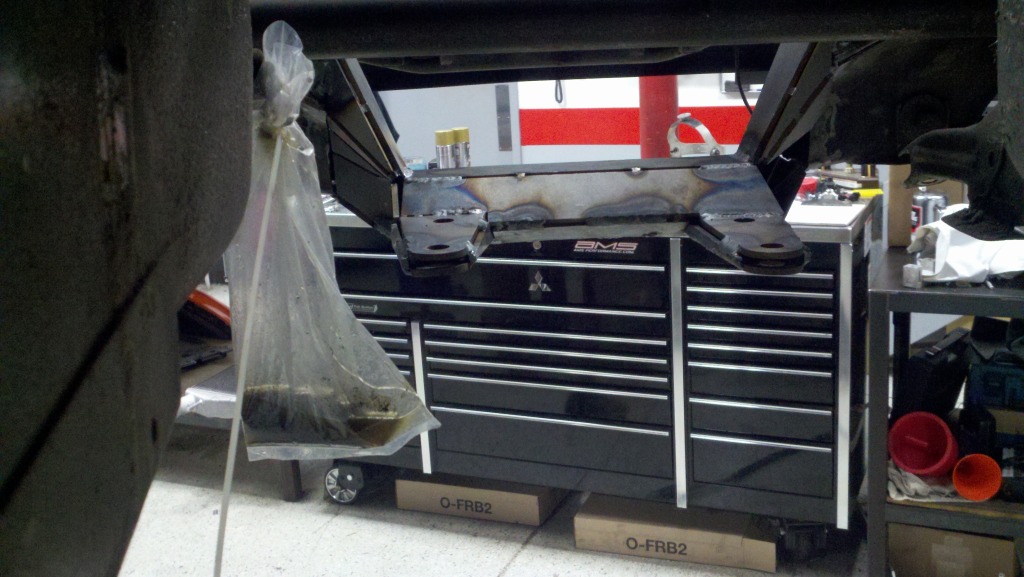
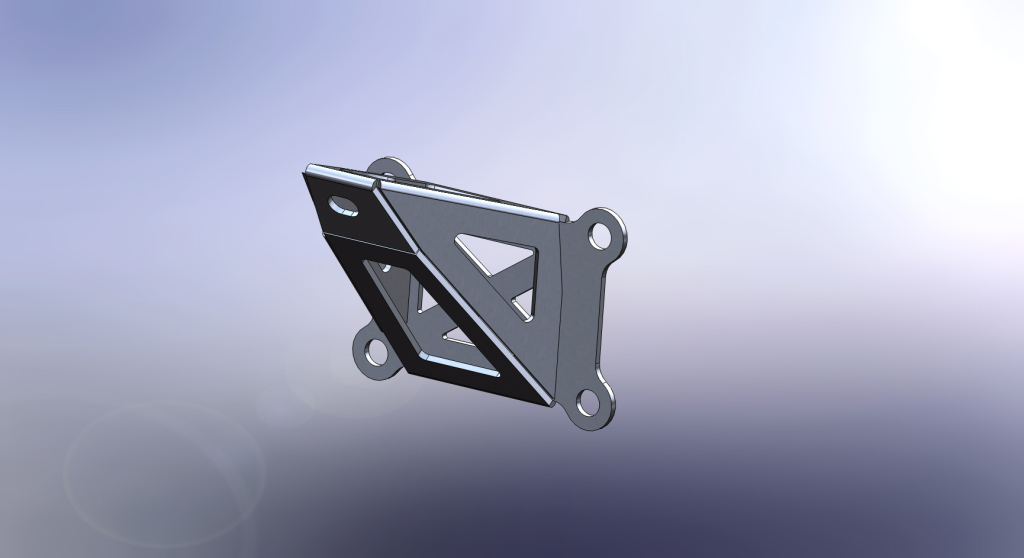
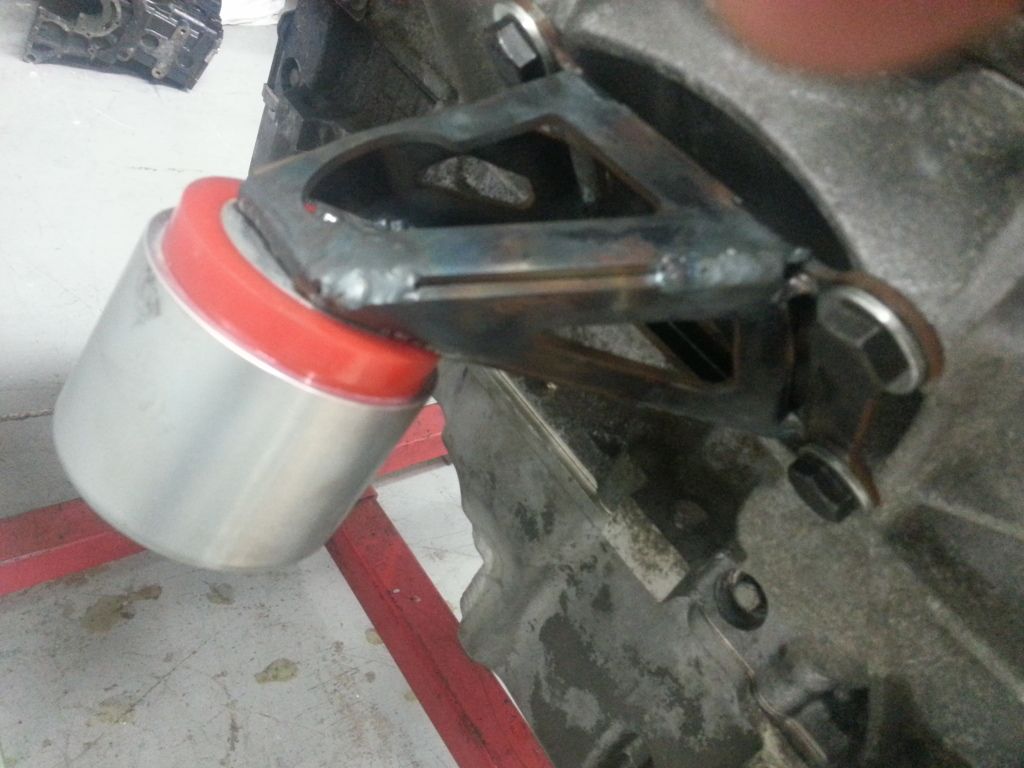
I also redesigned the motor mounts. With the engine lower and farther back in the engine bay, I could make the motor mounts a lot stronger.
Driver's side
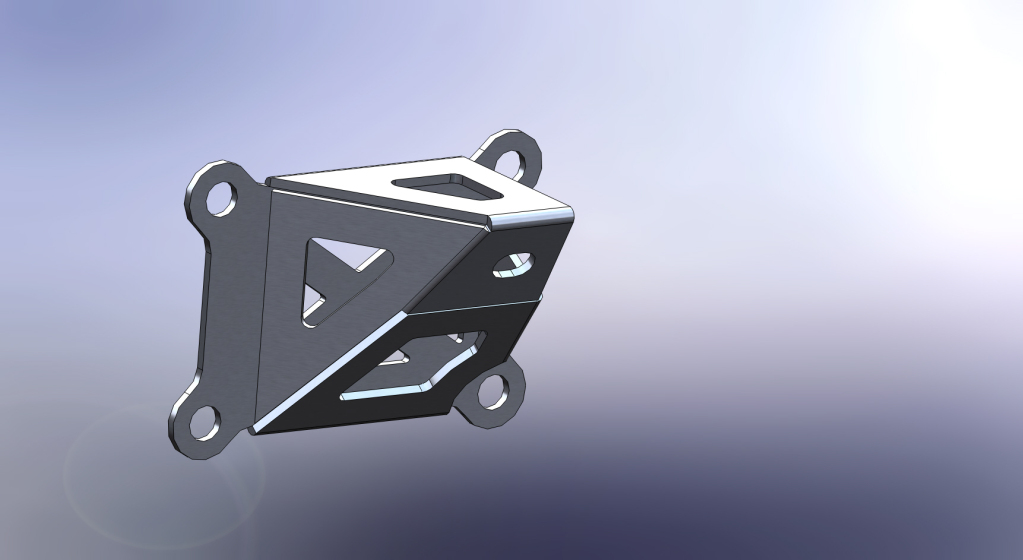
On the motor with the poly bushings
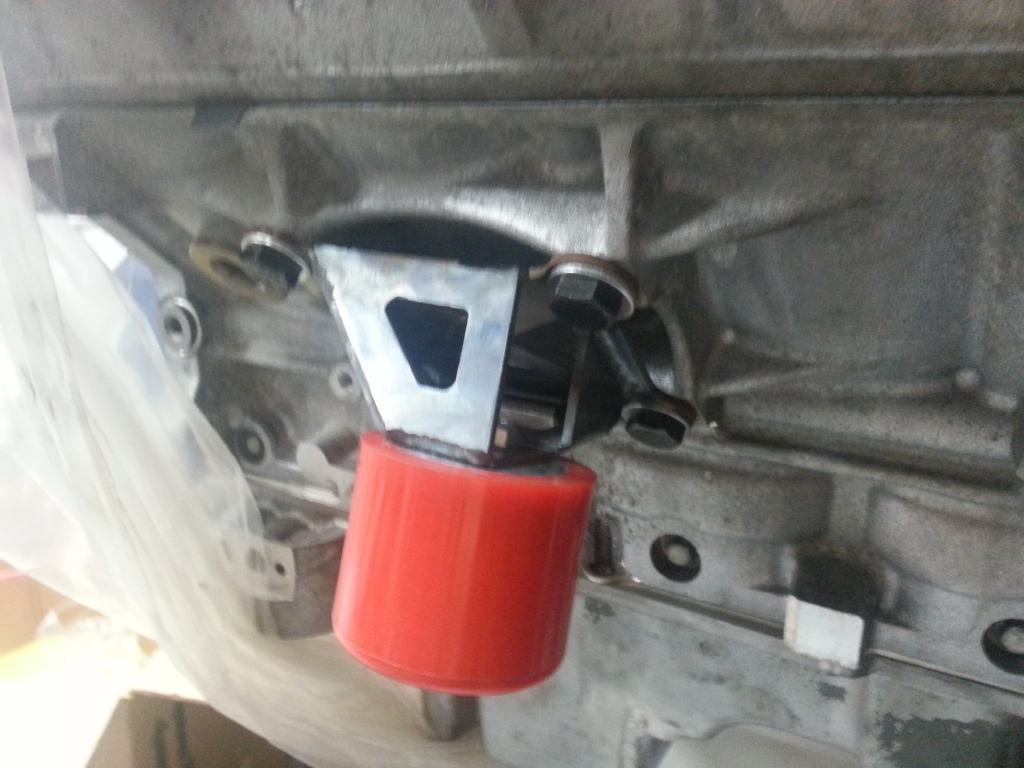
Passenger's side
After tonight I should have the trans mount done. After that, I still need to clearance the lower a-arms for the tie rods, shorten the steering arms and add a heim joint to the steering column. Once all of that is done, I should be able to drop the engine and trans in, build the exhaust, fuel lines, throttle linkage, etc. Slowly but surely I'm making progress.
Unfortunately, I am moving at the end of the month, so I don't expect to have much time to work on the car for a couple of weeks. I will post back with more updates as the happen.
Clayton
I'm bringing this thread back from the dead. I have been working on this project off and on for the past couple of months. I have made some progress. After getting the motor back in the car, I decided that I didn't like where the motor was sitting and I wanted to change some things. In order to put the motor lower and farther back in the engine bay, I was either going to have to cut out the subframe, or make a new trans tunnel. I decided that it was going to be easier to cut out the subframe. So I modeled a new subframe that would incorporate mounts for the steering rack.
Then, I braced the engine bay and cut out the factory subframe
Next I needed to weld in the new subframe
then after a lot of grinding and some some on undercoating
I also redesigned the motor mounts. With the engine lower and farther back in the engine bay, I could make the motor mounts a lot stronger.
Driver's side
On the motor with the poly bushings
Passenger's side
After tonight I should have the trans mount done. After that, I still need to clearance the lower a-arms for the tie rods, shorten the steering arms and add a heim joint to the steering column. Once all of that is done, I should be able to drop the engine and trans in, build the exhaust, fuel lines, throttle linkage, etc. Slowly but surely I'm making progress.
Unfortunately, I am moving at the end of the month, so I don't expect to have much time to work on the car for a couple of weeks. I will post back with more updates as the happen.
Clayton
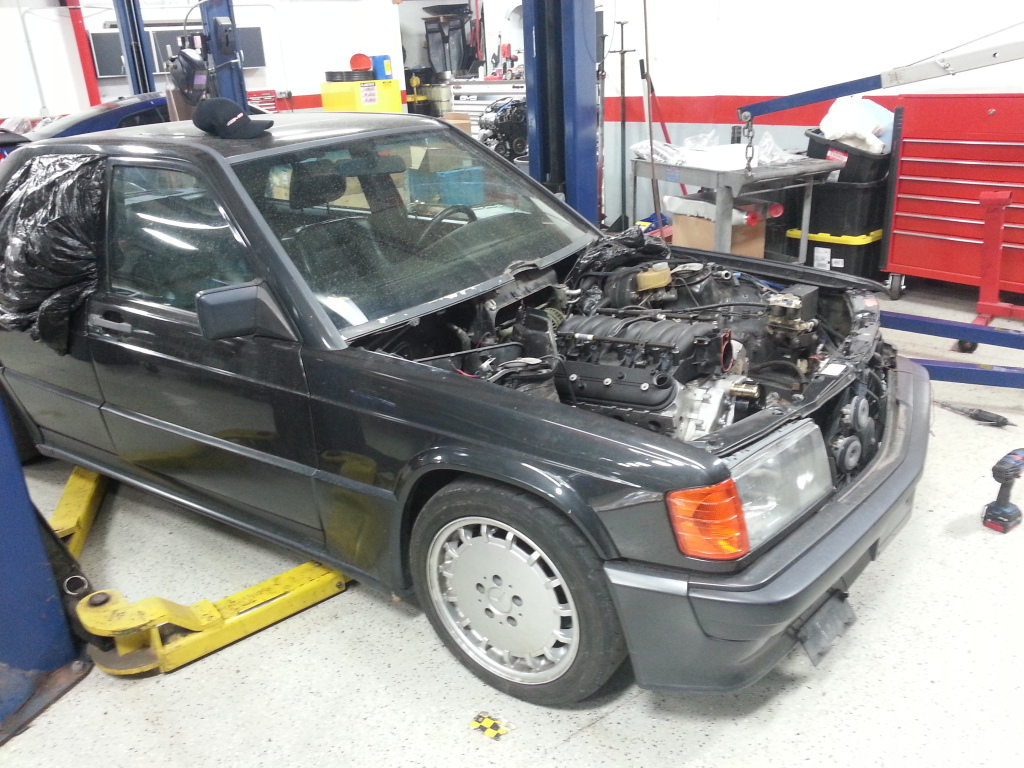
I worked on the trans mount last night. I ended spending about 2 hours working on it. I decided that I didn't really like the way it was turning out, but I was able to get some pictures of the car with the whole drivetrain in and the suspension loaded up. Sorry for the pictures being all blurry.

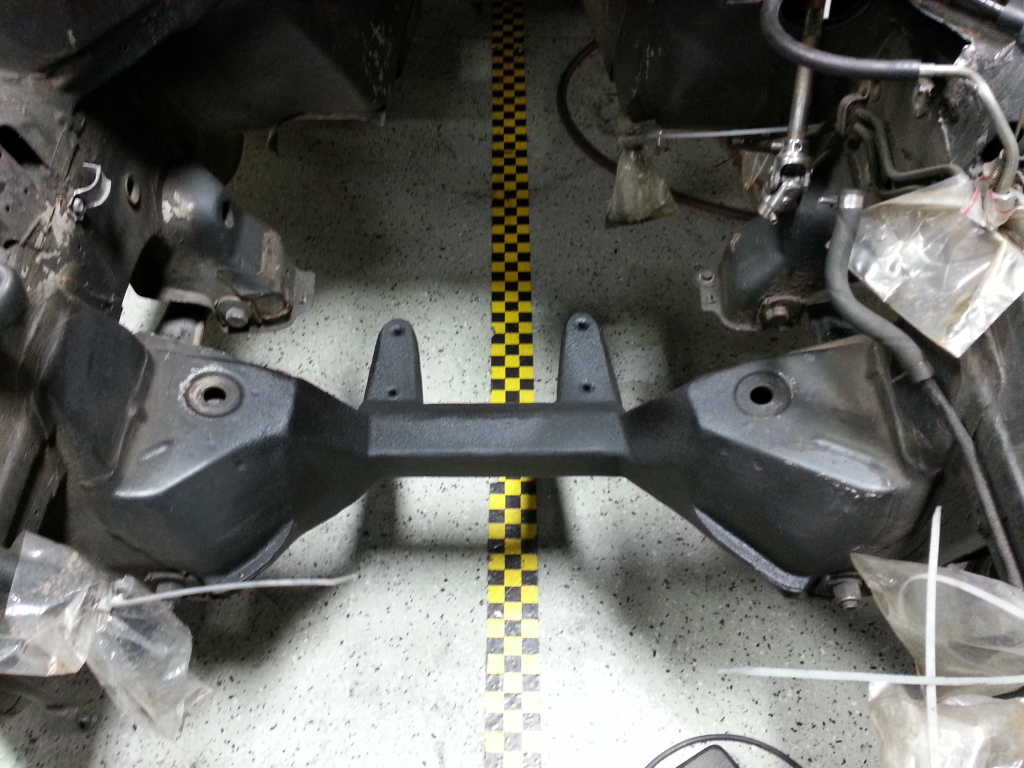
Small update.
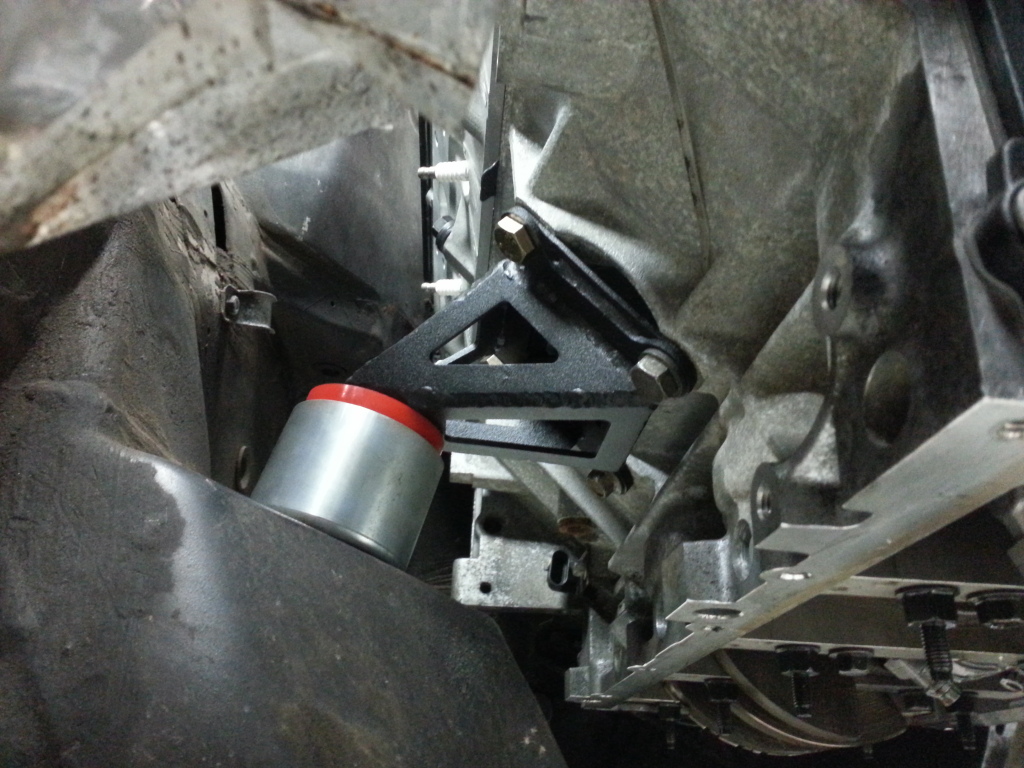
I got the motor and trans mounts back from the powdercoater. They came out nice. I added some more material to the back of the motor mounts for more strength.
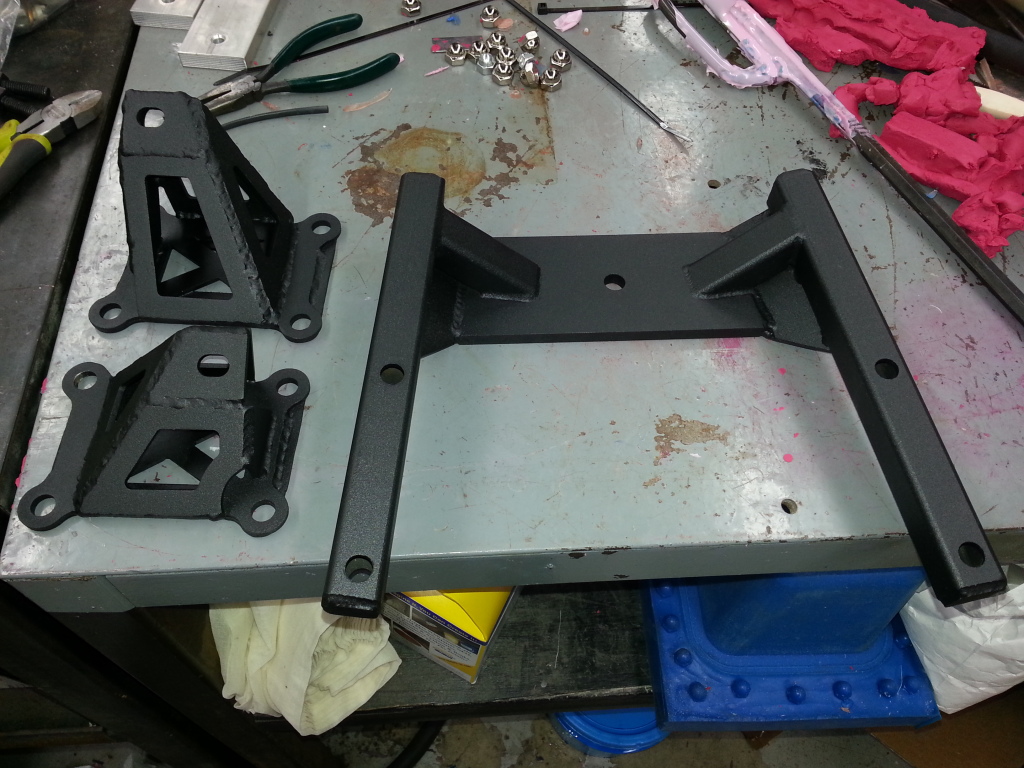
After messing around the car some more, I have decided that the rear steer rack just will not work. I am going to have to change the front end to work with a front steer rack. I am planning on using a BMW Z3 rack. I hope to have the this weekend.
I got the motor and trans mounts back from the powdercoater. They came out nice. I added some more material to the back of the motor mounts for more strength.
After messing around the car some more, I have decided that the rear steer rack just will not work. I am going to have to change the front end to work with a front steer rack. I am planning on using a BMW Z3 rack. I hope to have the this weekend.

Benzboy - what measurements do you want?
So after looking at the car swap more and more I decided that there really wasn't a good way to make the rear steer Evo rack work. I really didn't want to give up on it, but there was no way to have the engine as low as I wanted it and have a rear steer rack. I thought I could modify the a-arms to clear the tie rods, but I couldn't come up with anything I liked.
I searched the forum for some inspiration and finally decided on using a e36 rack. I didn't want to pony up the money for the more desirable z3 rack, so I bought a regular e36 rack with the intention of buying a z3 some where down the road. I ordered a rebuilt rack from rackdoctor.net for ~$210 shipped. Not bad. I received the rack a couple days later.
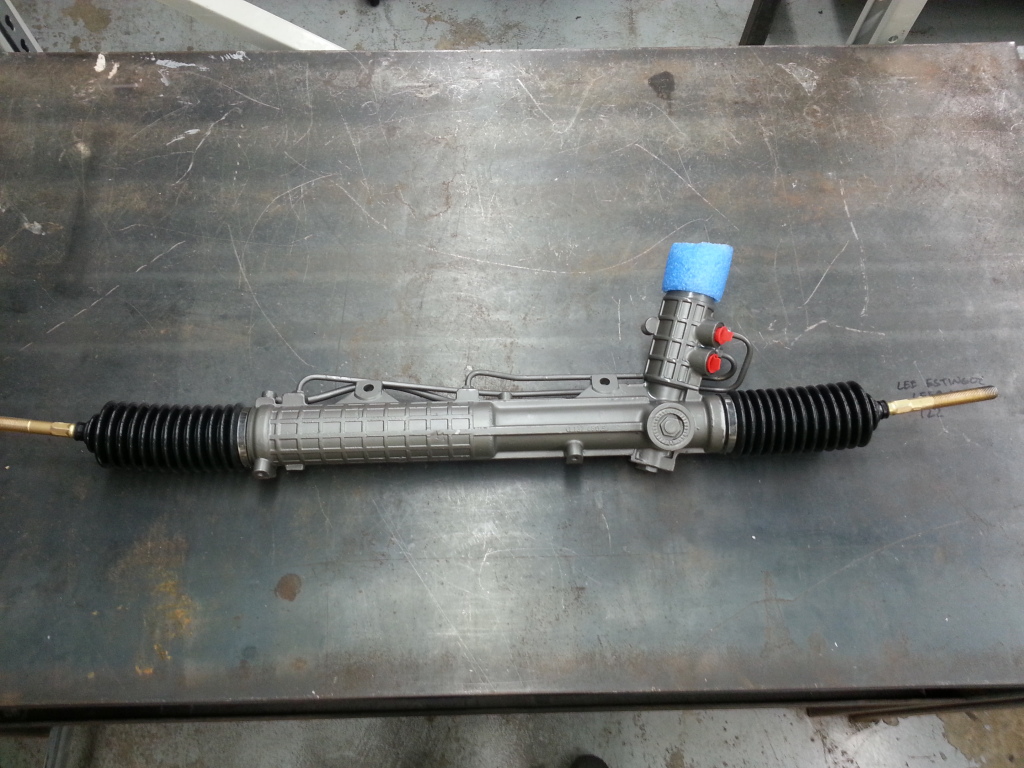
The rack looks great. I would highly recommend rackdoctot.net. They were very helpful and professional on the phone.
After getting the rack, I started thinking about using e36 knuckle as well since that would solve my steering arm problem. Since my old lady was out of town all weekend and I got hammered enough on Thursday night to last me for the weekend, I headed off to junk yard this morning. I went to Ashley 's pick-a- part down in Joilet IL. It was pretty cool. They have a great website that shows their inventory with mileage, engine size, and trans type. Pretty helpful. It's also nice bc half the cars are in an old factory building, so you are somewhat protected from the elements plus it is a cool setting. Kinda creepy at times.
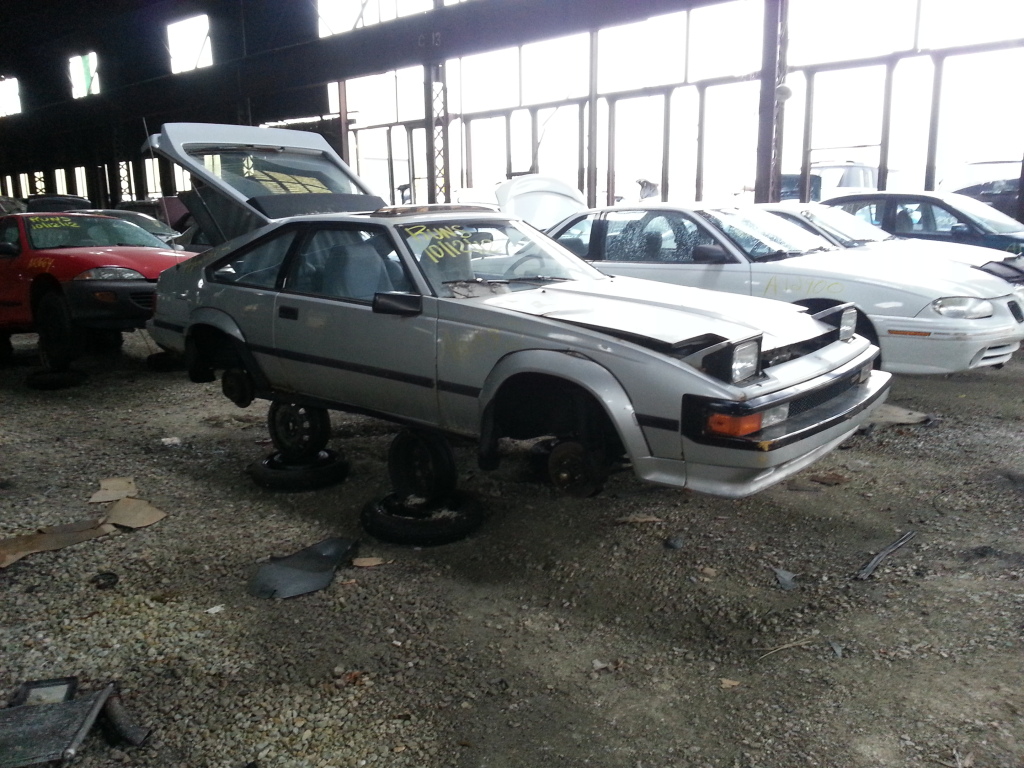
You can get a feel for it in this pic.
Well they had a couple e36s and I was able to score a e36 knuckle and a e36 intermediate steering shaft.
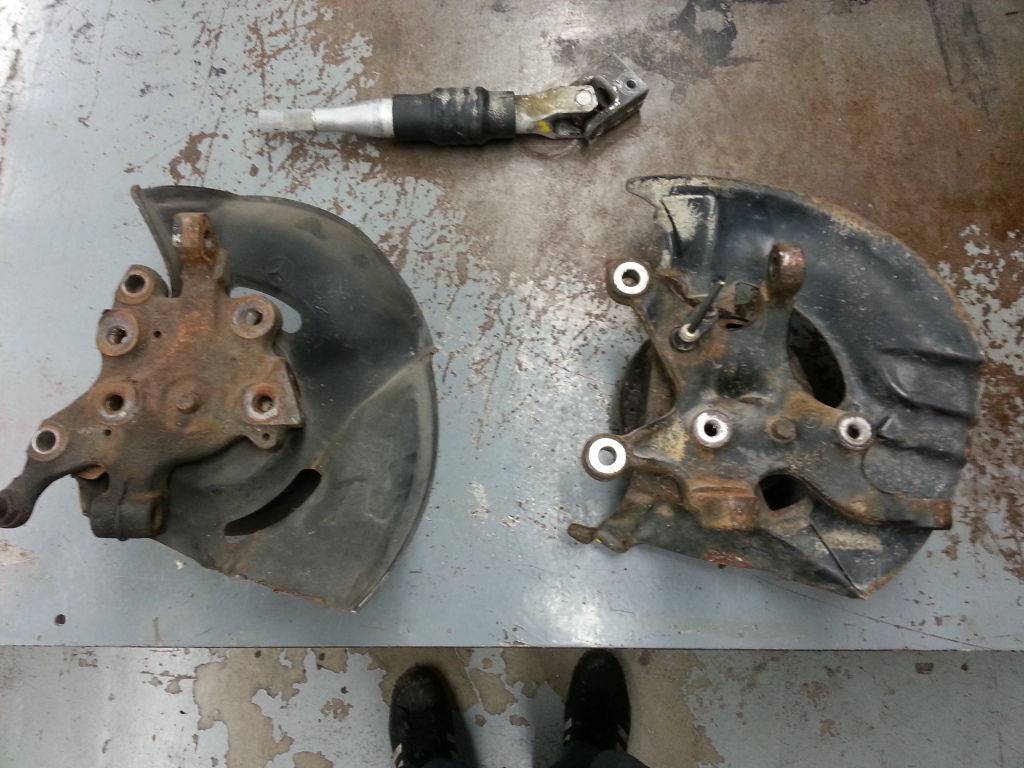
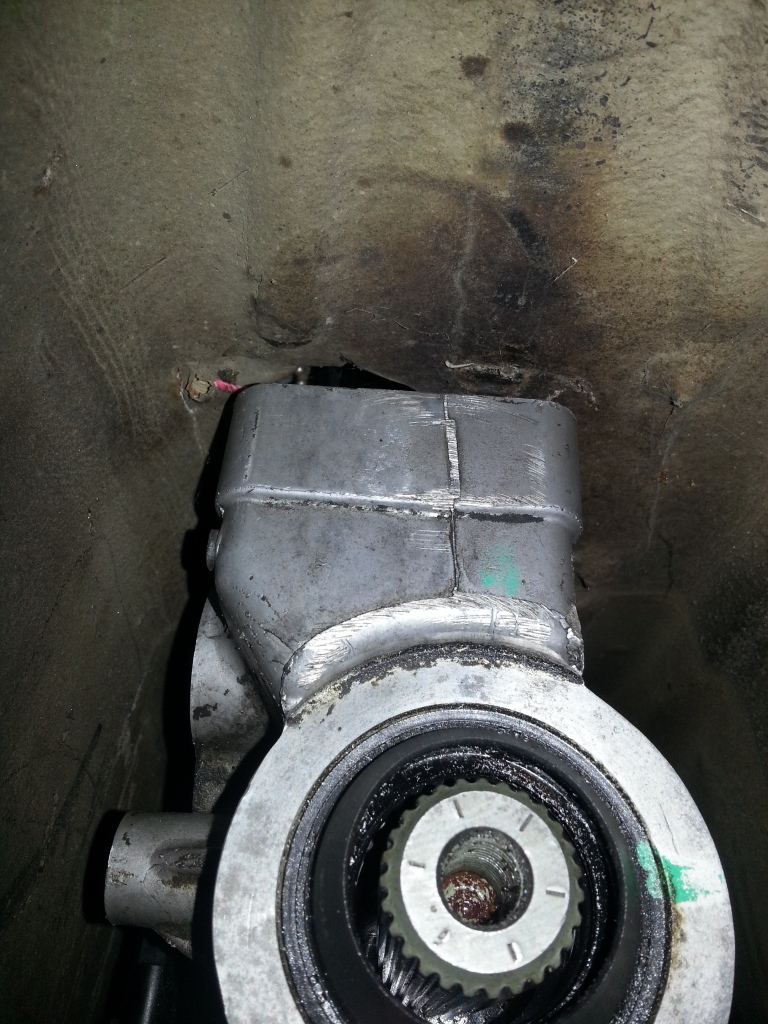
Here is the e36 knuckle next to the 190 knuckle with the steering shaft on top. The first thing I noticed was that the ball joint mounts are different and that the brake caliper spacing is different. I then CMMed both knuckles to compare them. It turns out that the e36 knuckle is significantly different from the 190 knuckle. The ball joint mount is about .75" farther towards the front of the car and it sits about 1" lower. The offset is different, the upper shock mount is different, the bolt pattern is different etc. So I decided that there would be too much to change to use the e36 knuckle.
So that means that I need to design a new steering arm for the 190 knuckle. In order to do that I needed to do more measuring. I hope to have some pictures of the data I got later this week. I got to use our Faro new laser scanner. It's pretty kick ***. I needed to figure out ride height as well. So the engine and trans had to go back in. It was also a good chance to final test fit the trans mount, bc I hadn't gotten an opportunity to after it was final welded. Well it must have moved during final welding. I had to drill out the holes a bit bigger, but no big deal. Once the holes were opened up a bit it went right in.
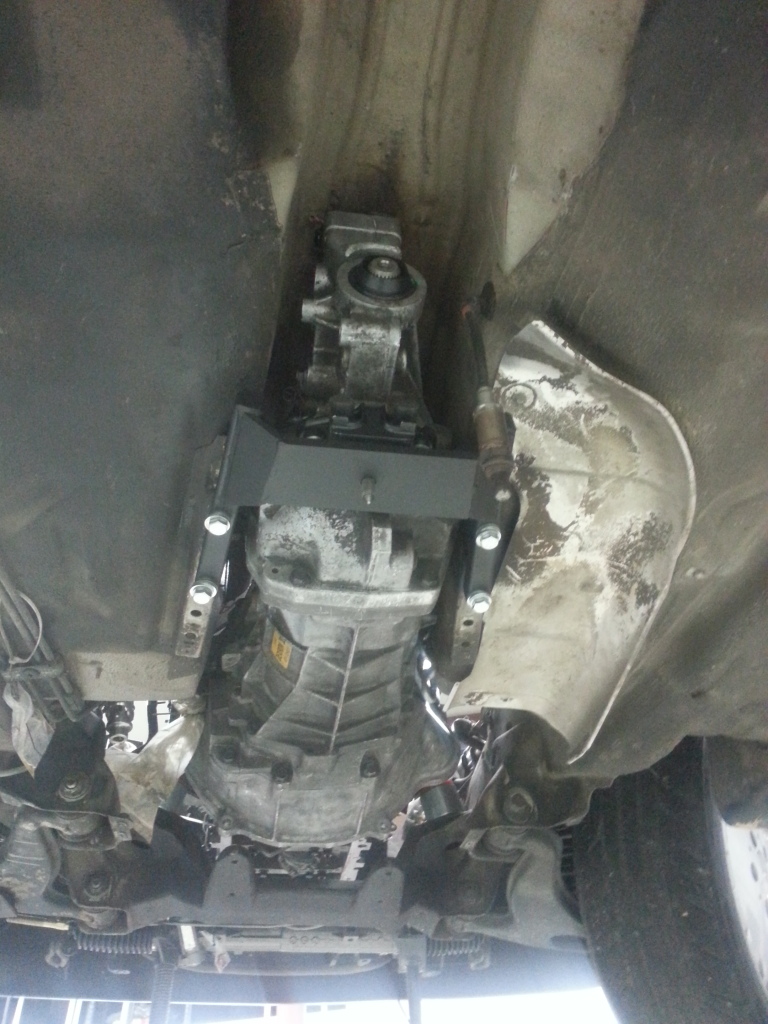
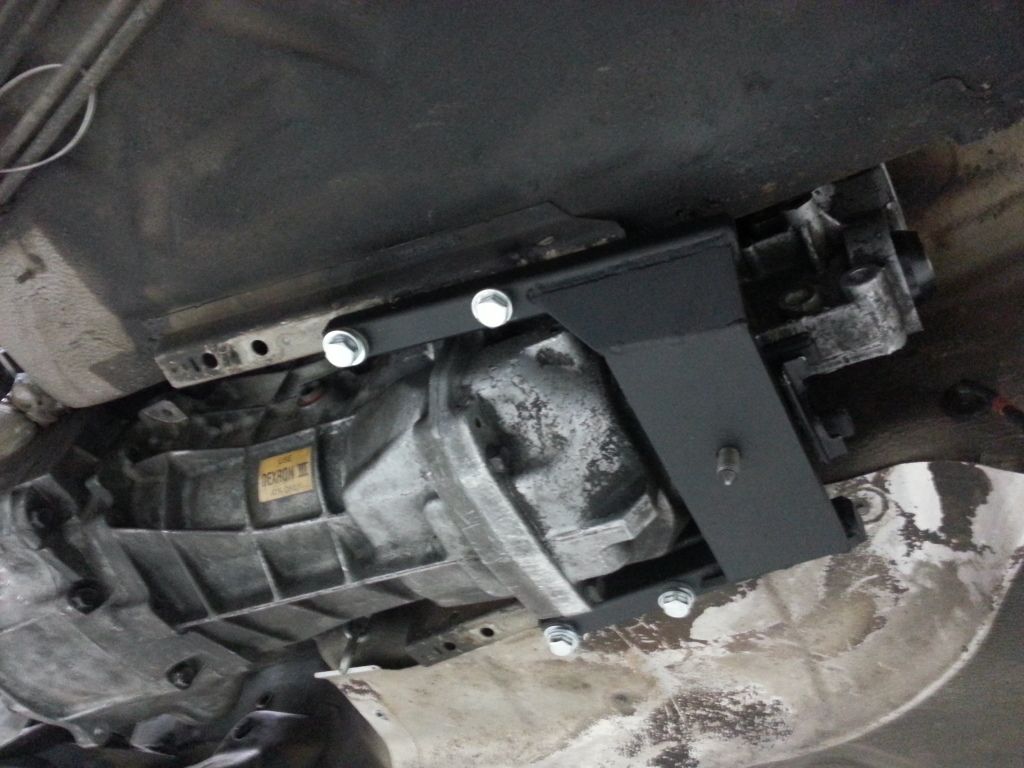
Don't mind all the washers. I couldn't find any hardware that worked.
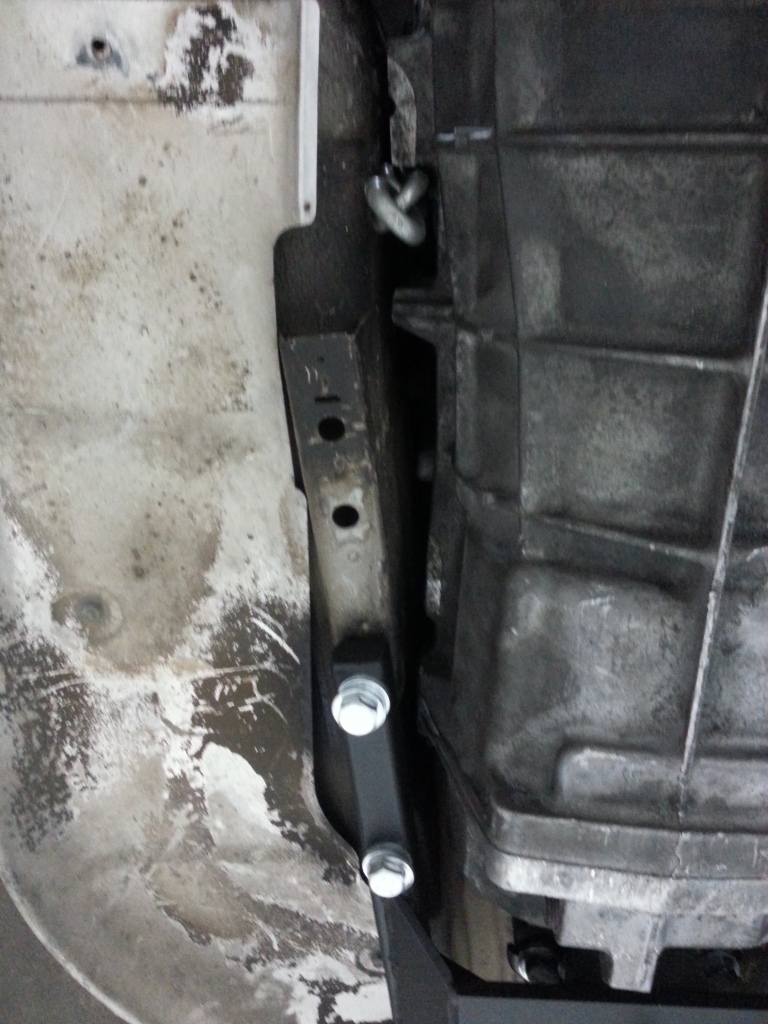
Here you can see just how tight of a fit it is in the trans tunnel.
I like the way the motor mounts look in the car with the powder coating.

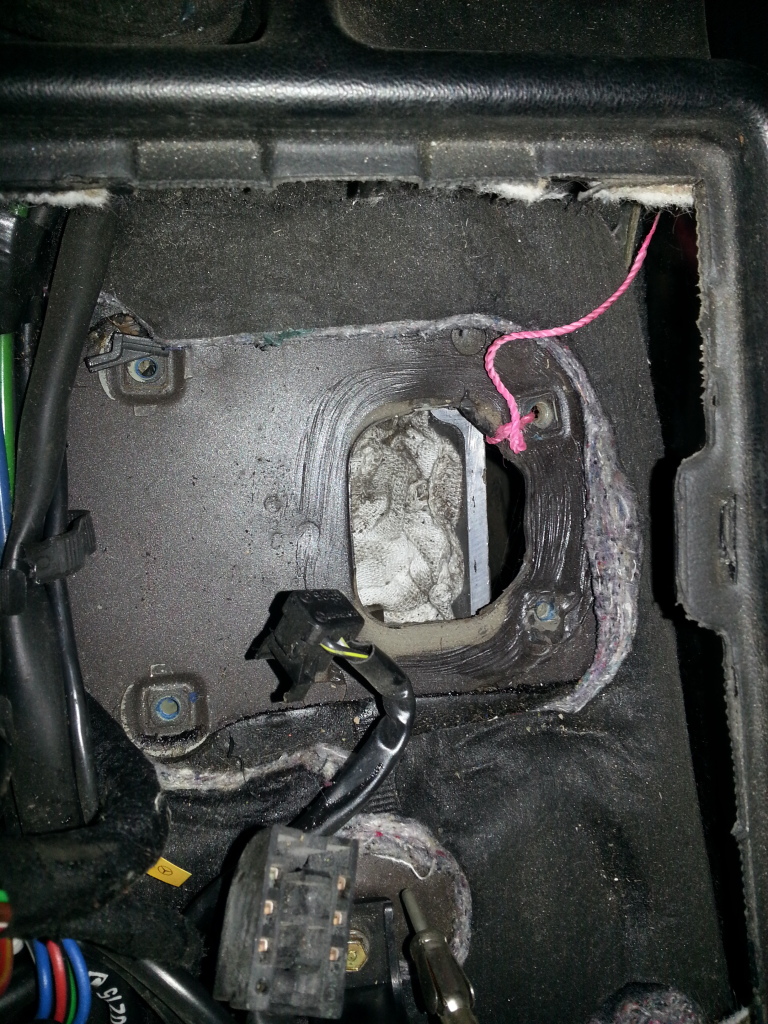
The trans ended up exactly where I wanted it in the tunnel so a f-body shifter should work perfectly. I will have to trim the old shifter hole some.
I was able to determine ride height and after some quick measurements figure out approximately where the rack should sit. The a-arms in the 190 are ~24.75" apart. Turns out the inner tie rods on the e36 rack are also 24.75" apart which means that the e36 rack should sit directly in front of the a-arms mounts. I positioned the rack just to make sure everything cleared and there wouldn't be any more problems.
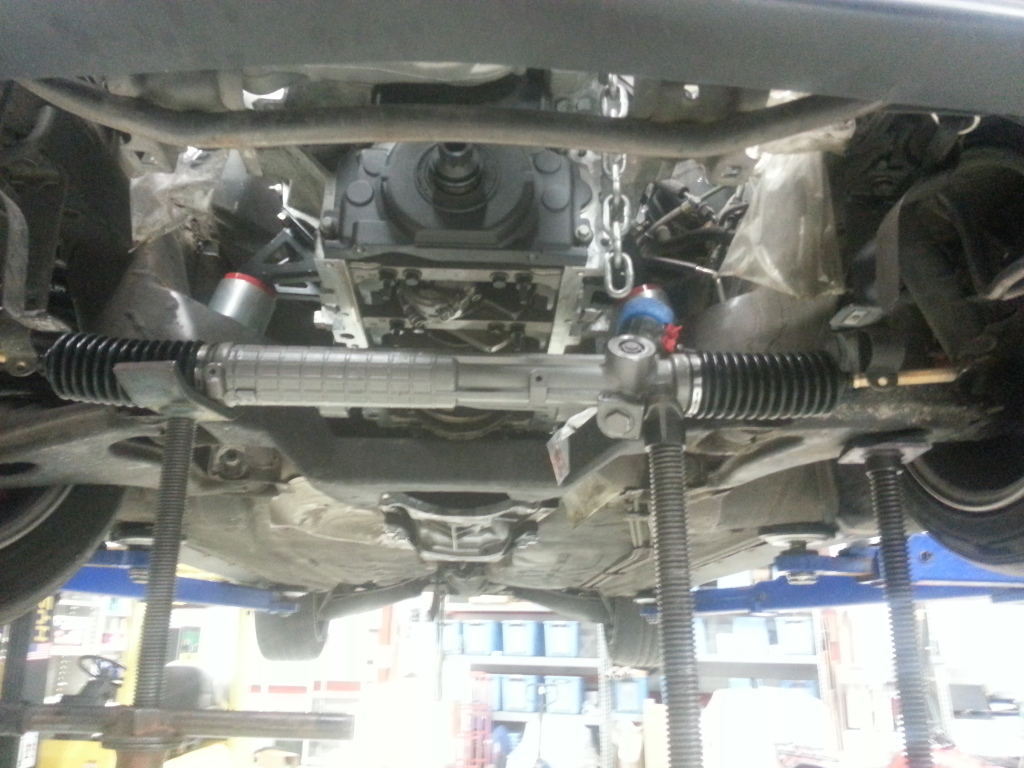
Everything looked good for the most part. I may have to raise the sway bar mounts on the a-arms some to make the tie rods clear. Other than that everything looks good. I hope to have mounts for the rack and the steering arm CAD done in the next day or two. I hope to more for yall soon.
So after looking at the car swap more and more I decided that there really wasn't a good way to make the rear steer Evo rack work. I really didn't want to give up on it, but there was no way to have the engine as low as I wanted it and have a rear steer rack. I thought I could modify the a-arms to clear the tie rods, but I couldn't come up with anything I liked.
I searched the forum for some inspiration and finally decided on using a e36 rack. I didn't want to pony up the money for the more desirable z3 rack, so I bought a regular e36 rack with the intention of buying a z3 some where down the road. I ordered a rebuilt rack from rackdoctor.net for ~$210 shipped. Not bad. I received the rack a couple days later.
The rack looks great. I would highly recommend rackdoctot.net. They were very helpful and professional on the phone.
After getting the rack, I started thinking about using e36 knuckle as well since that would solve my steering arm problem. Since my old lady was out of town all weekend and I got hammered enough on Thursday night to last me for the weekend, I headed off to junk yard this morning. I went to Ashley 's pick-a- part down in Joilet IL. It was pretty cool. They have a great website that shows their inventory with mileage, engine size, and trans type. Pretty helpful. It's also nice bc half the cars are in an old factory building, so you are somewhat protected from the elements plus it is a cool setting. Kinda creepy at times.
You can get a feel for it in this pic.
Well they had a couple e36s and I was able to score a e36 knuckle and a e36 intermediate steering shaft.
Here is the e36 knuckle next to the 190 knuckle with the steering shaft on top. The first thing I noticed was that the ball joint mounts are different and that the brake caliper spacing is different. I then CMMed both knuckles to compare them. It turns out that the e36 knuckle is significantly different from the 190 knuckle. The ball joint mount is about .75" farther towards the front of the car and it sits about 1" lower. The offset is different, the upper shock mount is different, the bolt pattern is different etc. So I decided that there would be too much to change to use the e36 knuckle.
So that means that I need to design a new steering arm for the 190 knuckle. In order to do that I needed to do more measuring. I hope to have some pictures of the data I got later this week. I got to use our Faro new laser scanner. It's pretty kick ***. I needed to figure out ride height as well. So the engine and trans had to go back in. It was also a good chance to final test fit the trans mount, bc I hadn't gotten an opportunity to after it was final welded. Well it must have moved during final welding. I had to drill out the holes a bit bigger, but no big deal. Once the holes were opened up a bit it went right in.
Don't mind all the washers. I couldn't find any hardware that worked.
Here you can see just how tight of a fit it is in the trans tunnel.
I like the way the motor mounts look in the car with the powder coating.
The trans ended up exactly where I wanted it in the tunnel so a f-body shifter should work perfectly. I will have to trim the old shifter hole some.
I was able to determine ride height and after some quick measurements figure out approximately where the rack should sit. The a-arms in the 190 are ~24.75" apart. Turns out the inner tie rods on the e36 rack are also 24.75" apart which means that the e36 rack should sit directly in front of the a-arms mounts. I positioned the rack just to make sure everything cleared and there wouldn't be any more problems.
Everything looked good for the most part. I may have to raise the sway bar mounts on the a-arms some to make the tie rods clear. Other than that everything looks good. I hope to have mounts for the rack and the steering arm CAD done in the next day or two. I hope to more for yall soon.
Last edited by clainhart3; Oct 14, 2012 at 08:57 PM.
Making great progress
Going with e36 rack, thats awesome. I took a pic of some steering arms at a car show, they took 4 pieces of waterjetted sheet and welded them all together like this:
I'm thinking I will have to redesign my steering as well, the 210 rack is a bit too wide and the tie-rods will be too short
I dont think I can front mount with how far my engine is pushed forward.
I have been on my car for way too long, but i sold the motorcycle and jetski and the weather is nice now.
Gen3 - thanks for the advice. I like the way that arm looks. I might try something similar. I was actually thinking about having my steering arms CNCed. My boss just bought a toolroom HAAS and he said he would cut my arms if I bought the material. I think that I will be able to cut the and from .5" plate so it shouldn't be that bad.
Is your car driving right now? I thought you took it back apart for paint and never got it back together. If it's driving I'd love to see some videos or pictures. Thanks. Good to see you are still around. I got a good bit of inspiration from your build
Is your car driving right now? I thought you took it back apart for paint and never got it back together. If it's driving I'd love to see some videos or pictures. Thanks. Good to see you are still around. I got a good bit of inspiration from your build