


69 Camaro LS2/4L70E install
I am finishing up a frame off restoration with an LS2/4L70E install. Everything on the car has been replaced or refurbished. This thread will provide a detailed account of my LS install complete with parts list (part numbers included) and pics. The goal for this swap is to get the stock motor/trans installed and running ASAP. I would like to do a cam/head swap now, but performance mods will come later, because as we all know these cars are never done and I would like to drive it for a while.
My decision for the LS conversion was bittersweet. On my previous motor, 355 SBC, I installed a very mild cam, was able to turn the motor over easily by hand, only later to learn how important it is to actually check piston to valve clearance. :sick: Once I determined the motor was toast, cracked block, trashed head and piston I started researching my options on pro-touring and ls1tech. I quickly came to the conclusion I wanted to do an LS conversion, even though I have no experience working on LS motors.
As I started looking for a motor, I fortunate enough to find daytonayellaz (Travis), who spent hours on the phone answering my LS conversion questions and providing invaluable insight/recommendations. I also had many pm's with Magntik (Jeremy), who bought the same setup from Travis, who answered additional questions and in the end I purchased a LS2/4L70E out of a 2008 TBSS from Travis.
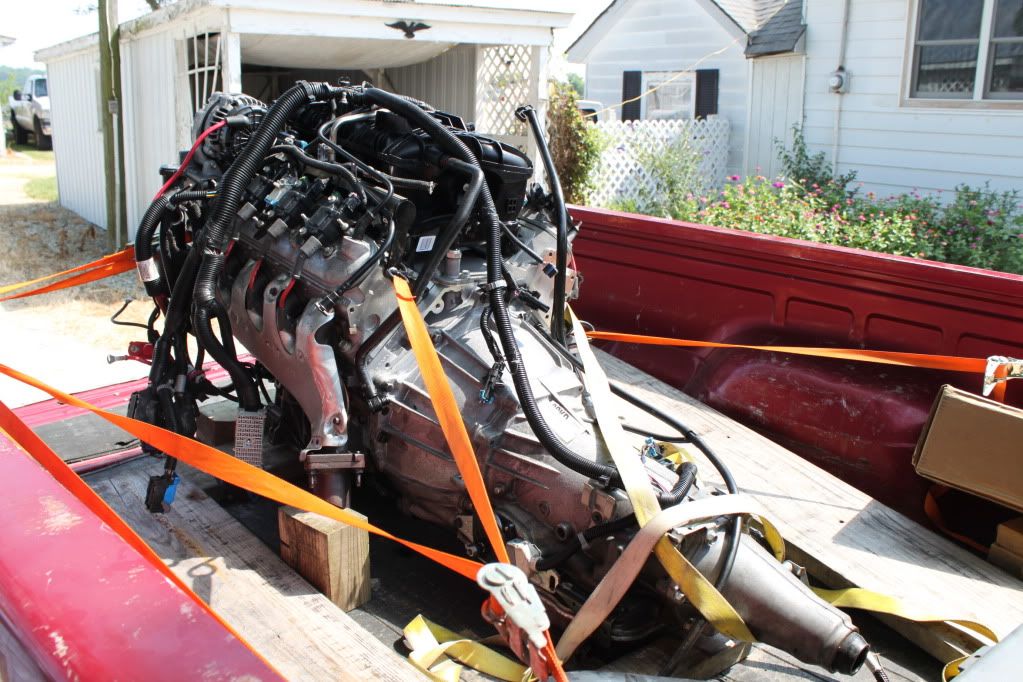
As for the engine, the longblock had been replaced under factory warranty and has less than 900 miles!! The rest of the of engine components and trans have around 18K miles. Needless to say the motor extremely clean! I would highly recommend contacting Travis if your looking for an LS engine! He is a great guy, who I would now call a friend, and continues to answer question I have and has even called me a few times to see how things are going.
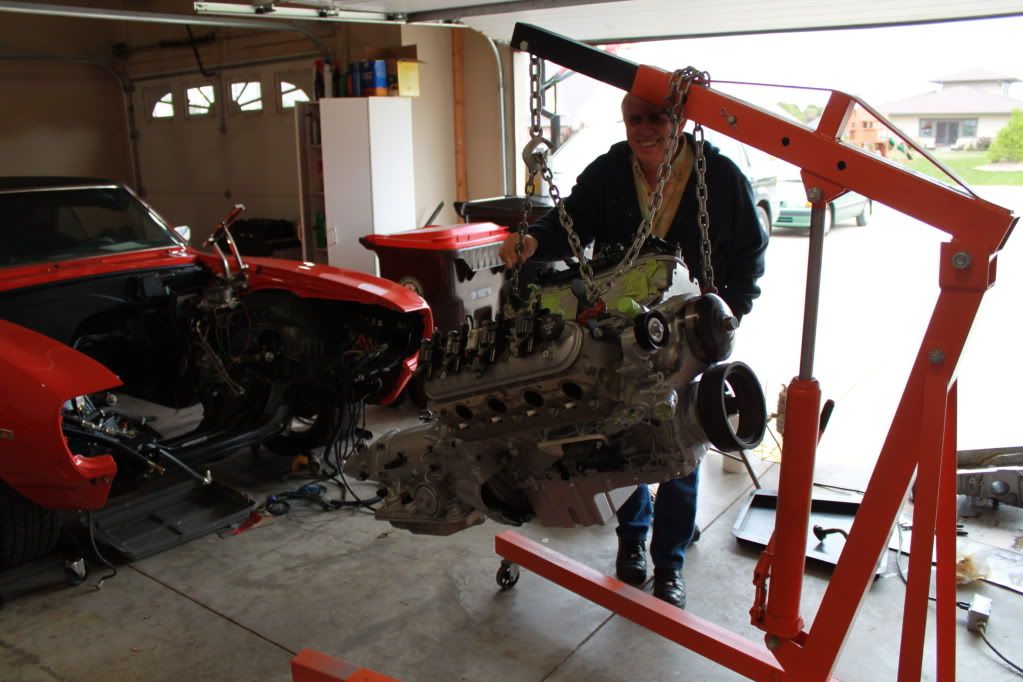
Engine loaded, tied down and ready for the trip home
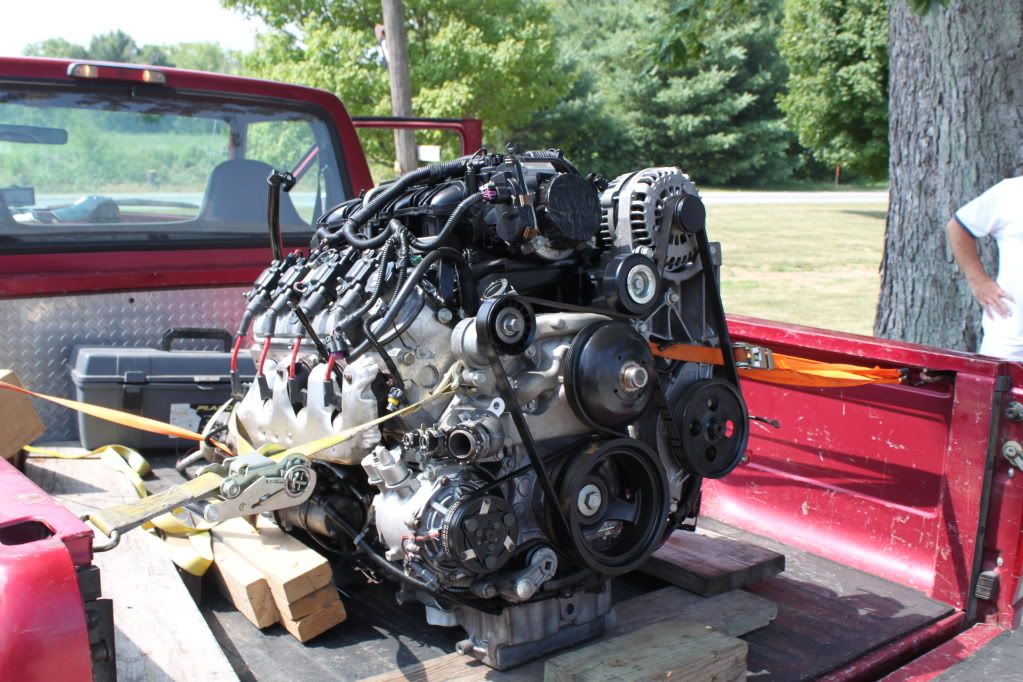
Engine safely at home and unloaded
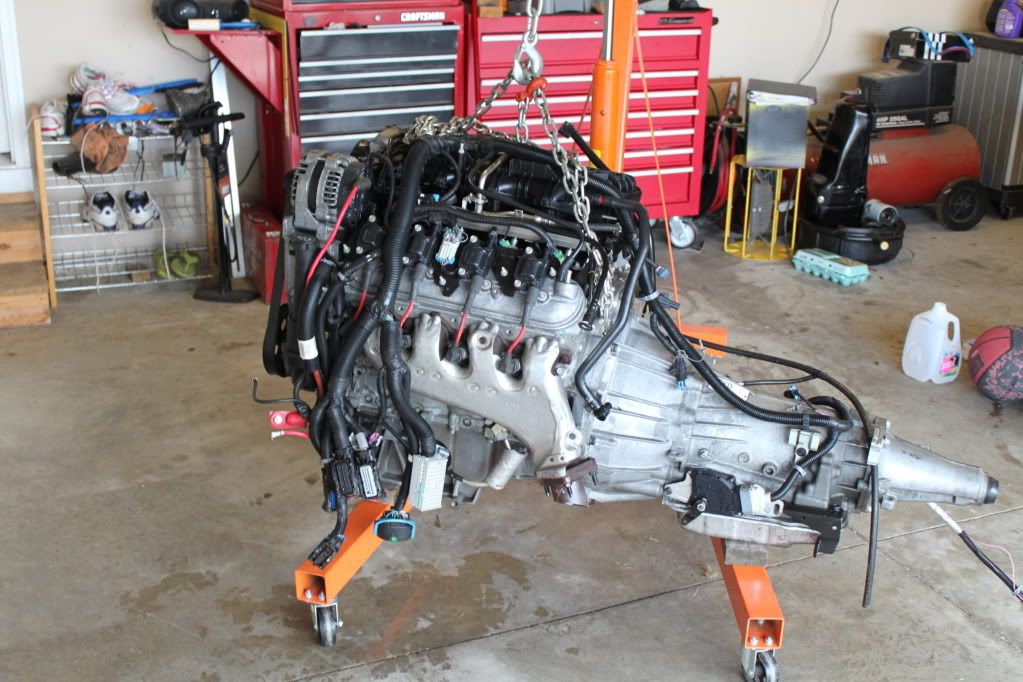
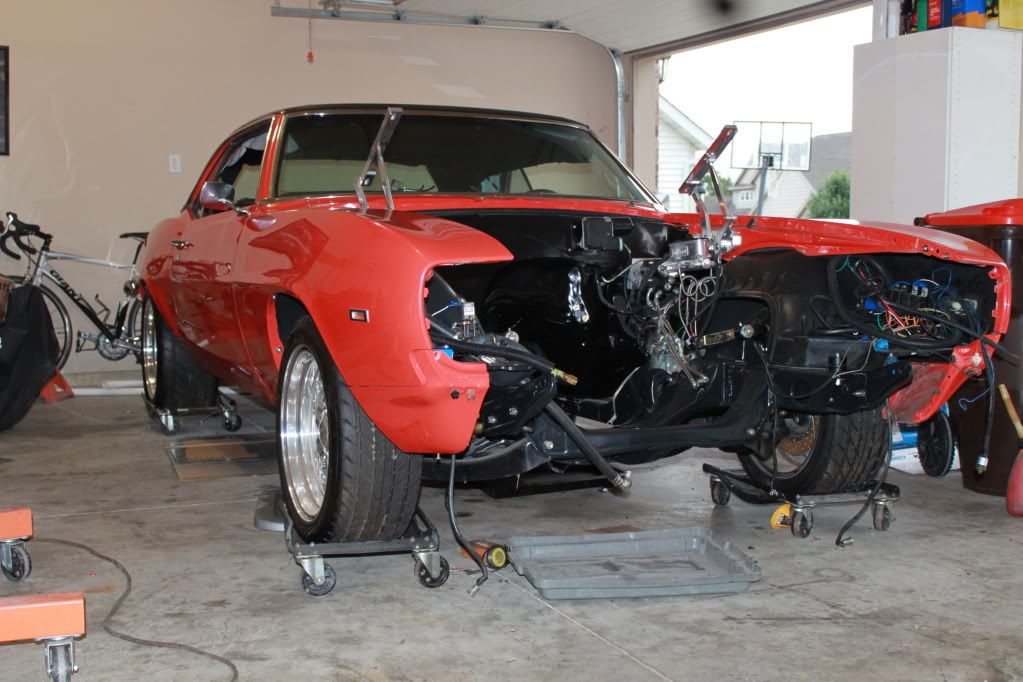
Here are a few pics of the transplant patient
My decision for the LS conversion was bittersweet. On my previous motor, 355 SBC, I installed a very mild cam, was able to turn the motor over easily by hand, only later to learn how important it is to actually check piston to valve clearance. :sick: Once I determined the motor was toast, cracked block, trashed head and piston I started researching my options on pro-touring and ls1tech. I quickly came to the conclusion I wanted to do an LS conversion, even though I have no experience working on LS motors.
As I started looking for a motor, I fortunate enough to find daytonayellaz (Travis), who spent hours on the phone answering my LS conversion questions and providing invaluable insight/recommendations. I also had many pm's with Magntik (Jeremy), who bought the same setup from Travis, who answered additional questions and in the end I purchased a LS2/4L70E out of a 2008 TBSS from Travis.
As for the engine, the longblock had been replaced under factory warranty and has less than 900 miles!! The rest of the of engine components and trans have around 18K miles. Needless to say the motor extremely clean! I would highly recommend contacting Travis if your looking for an LS engine! He is a great guy, who I would now call a friend, and continues to answer question I have and has even called me a few times to see how things are going.
Engine loaded, tied down and ready for the trip home
Engine safely at home and unloaded
Here are a few pics of the transplant patient
Last edited by Rocketrod; Jan 6, 2013 at 03:22 PM.
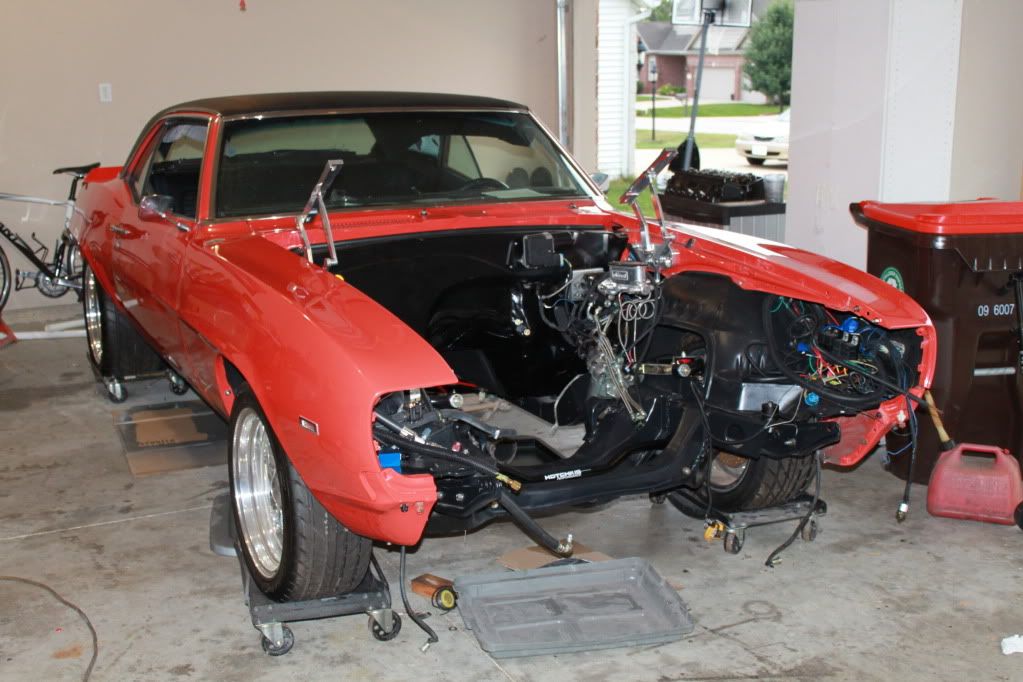
Thanks....here are a few pics of the car when it was together and during the frameoff
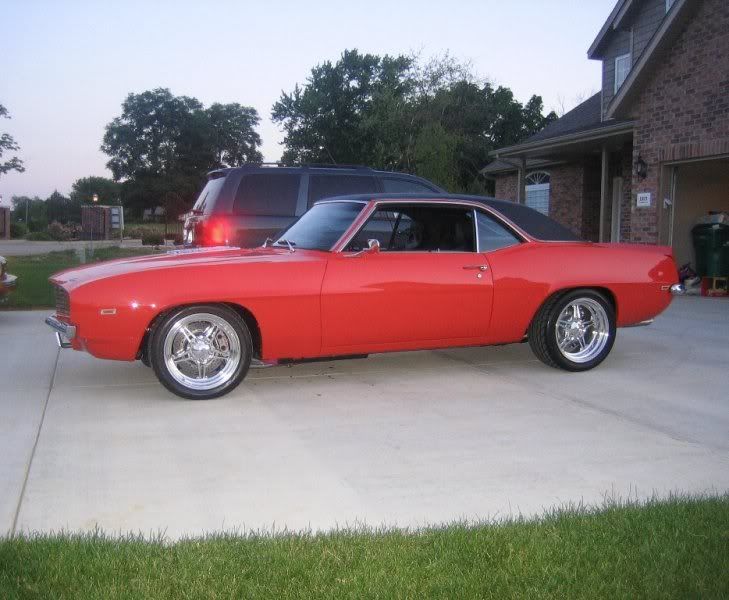

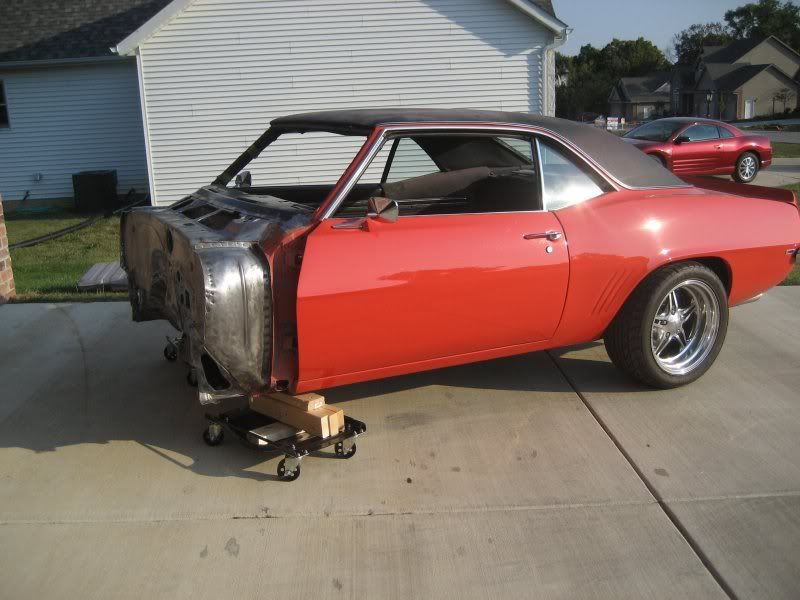
I purchased the car in August 2004 as a driver. The previous owner had done a frame off installing new GM quarters and applied a very nice paint job. The rest of the car was functional, but woefully out of date with drum brakes, turbo 350, stock suspension and weld superlites. Over the past seven years I have made the following improvements.
I purchased the car in August 2004 as a driver. The previous owner had done a frame off installing new GM quarters and applied a very nice paint job. The rest of the car was functional, but woefully out of date with drum brakes, turbo 350, stock suspension and weld superlites. Over the past seven years I have made the following improvements.
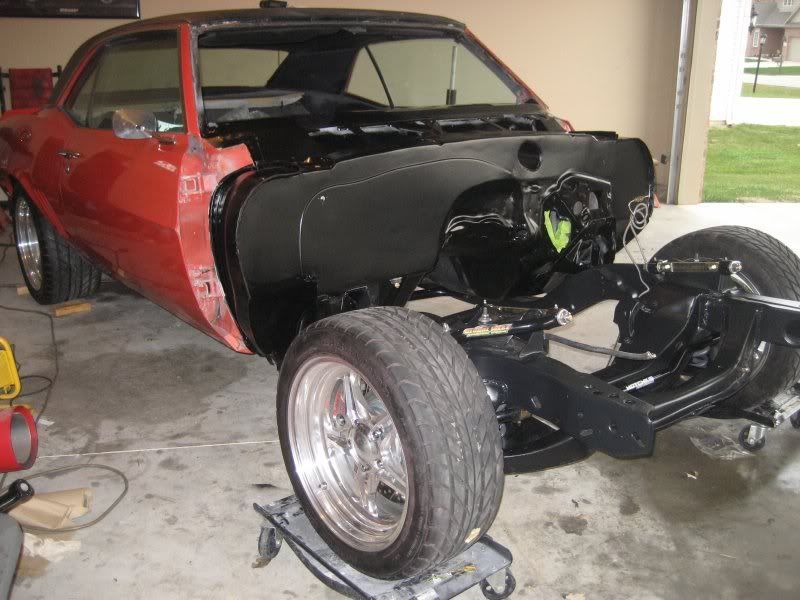
- Removed subframe and had frame, inner fender, rad support, headlight brackets, etc powdercoated.
- Smoothed firewall using Mikes Custom Cars firewall panel and replaced dash
- Sandblasted undercarriage and applied por-15
- Installed 12 bolt posi trac rearend with 3.73
- Installed Baer disc brakes, 13" up front a 12" out back with new stainless brake lines
- 17" Budniks Cobalts with 275s in the rear and 235 up front
- Installed Hydratech hydraboost
- Hotchkis front sway bar with Bilstien shocks on all four corners with Global West UCAs
- Installed Global West subframe connectors and solid body bushings
- Installed Vintage Air Gen IV A/C
- Installed AAW Classic Update wiring harness
- Added Marquez Design tail lights, running lights, side marker bezels,
- DSE Billet hood hinges, hood striker, wiper motor, headlights and battery mount
- DSE dash insert with Autometer Ultra Lite electrical gauges
- Lined interior with Damplier Pro, Luxury liner Pro and Firewall
- New front and rear bumpers
Nice! Every once in a while I found myself searching Camaro Pro Touring for sale, most miss the LS upgrade. I think many are intimated by the computer stuff, having owned many high HP cars in the late 90's I would never have one again.
Could not go back to suspension & brakes either!
I'm a bit envious of people like yourself that have the ability to take the best of years gone by & bring it to date.
Could not go back to suspension & brakes either!
I'm a bit envious of people like yourself that have the ability to take the best of years gone by & bring it to date.
I agree many are intimidated by the computer stuff, but they shouldn't be it really isn't that bad and there are plenty of companies that will mod/build harnesses for you and flash your ECM.
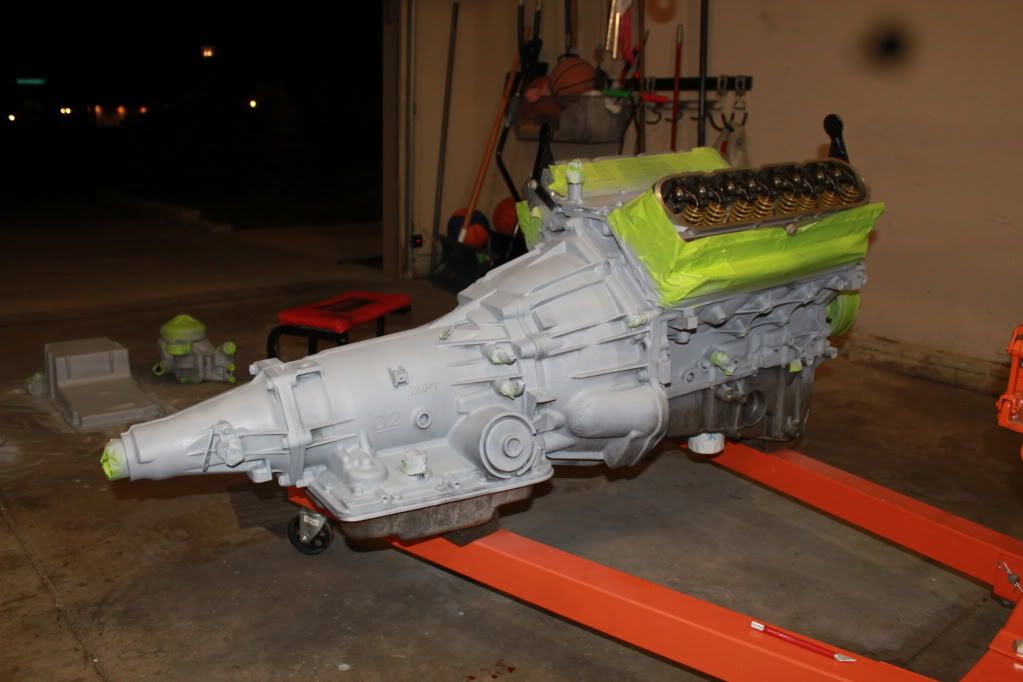
I got some time to work on the car this weekend and decided to clean and paint the motor, trans and accessories. After taking tons of pics I removed the harness, accessories, intake etc.
To clean the motor I used a degreaser called Super Clean, then wiped everything down with lacquer thinner. I taped everything off, applied two light coats of SEM Self etching Primer (rattle can), then topcoated with 2-3 coats Shop-Line series single stage paint. The color was poly silver with a light metallic. I am pretty pleased with the results! Total cost
of the degreaser, primer, reducer, hardener and 1 qt of paint was about $80.
I still need to install the Mast Motorpsports oil pan, get new motor mounts and transmission dipstick before I can install the engine.
Pics of motor with self etching primer applied at about 1am.
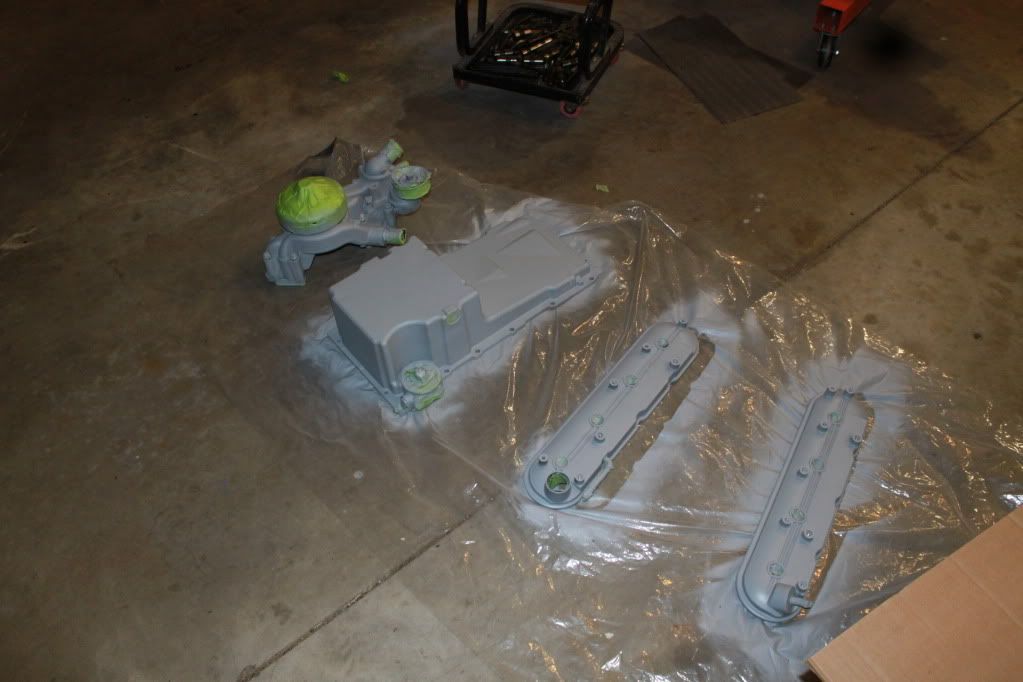
Pics of miscellaneous pieces with self etching primer applied
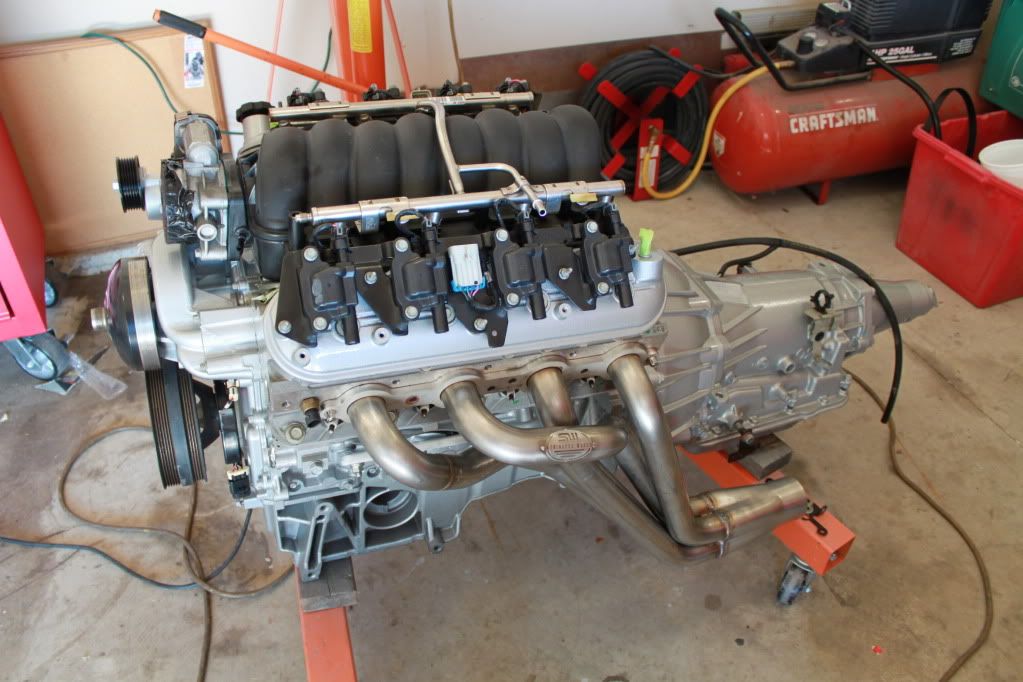
Pics after painting and installed intake, water pump and Stainless Work headers.
To clean the motor I used a degreaser called Super Clean, then wiped everything down with lacquer thinner. I taped everything off, applied two light coats of SEM Self etching Primer (rattle can), then topcoated with 2-3 coats Shop-Line series single stage paint. The color was poly silver with a light metallic. I am pretty pleased with the results! Total cost
of the degreaser, primer, reducer, hardener and 1 qt of paint was about $80.
I still need to install the Mast Motorpsports oil pan, get new motor mounts and transmission dipstick before I can install the engine.
Pics of motor with self etching primer applied at about 1am.
Pics of miscellaneous pieces with self etching primer applied
Pics after painting and installed intake, water pump and Stainless Work headers.
Time for another update. Parts have been arriving like crazy lately. I still need to get a fuel tank, fuel line, wiring harness, unlock/reflash ecm, mod driveshaft, power steering lines hoses and resvoir and a "few" miscellaneous parts....Here is what has arived so far. Total damage $2,797.04.
I have arranged the list with item description, cost, part number.
Now that I have the engine painted and all these parts it's time to get to work!
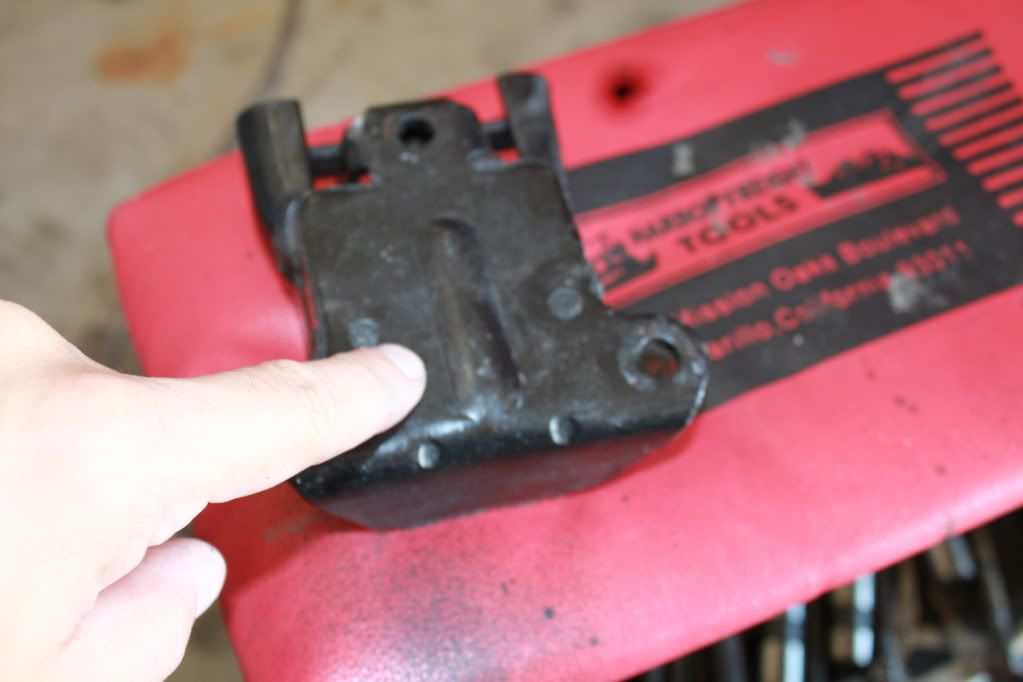
First order of busines was to install S&P adapter plates and stock motor mounts. In order to use the stock mounts you need to slowly grind away the hump on the back of the mount so they sit fluch on the adapter plate.
Next I removed the enormous TBSS oil pan and oil pump pickup tube.
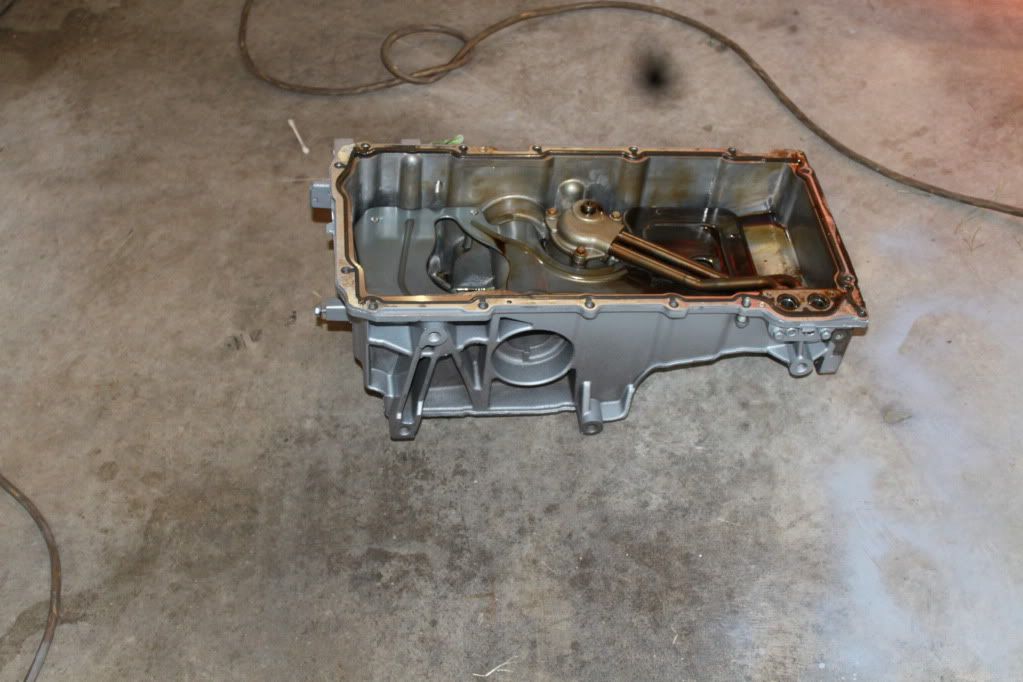
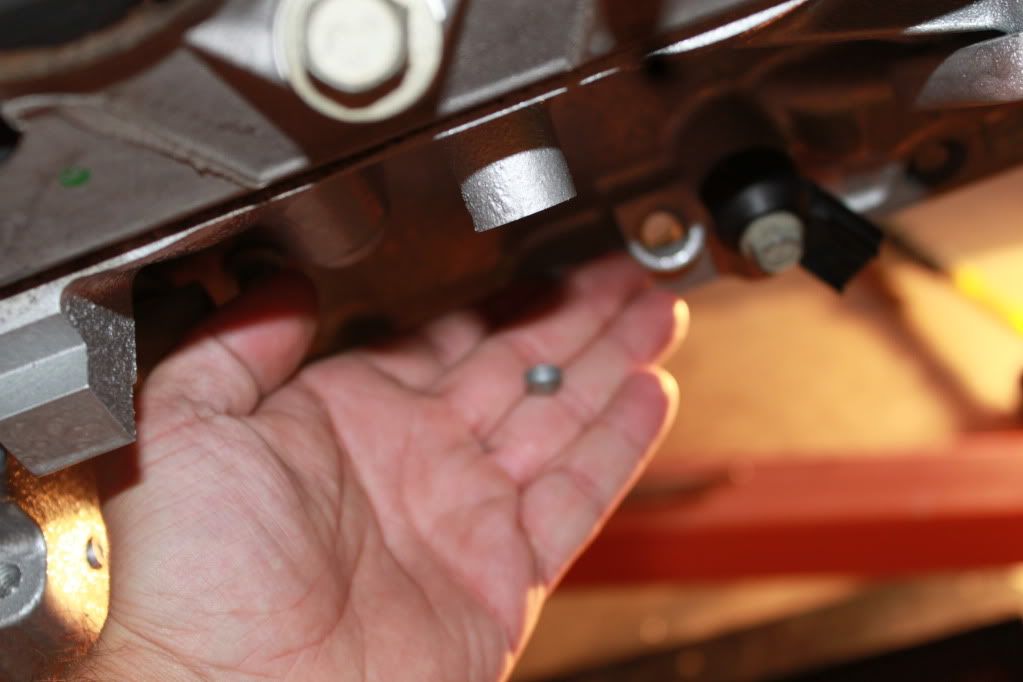
The TBSS oil dipstick tub was located in the side of the oilpan. I needed to install an LS2 dipstick tube in the block so I needed to remove the small plug from the block. I just used a small punch & hammer and from the bottom of the block tapped it out.
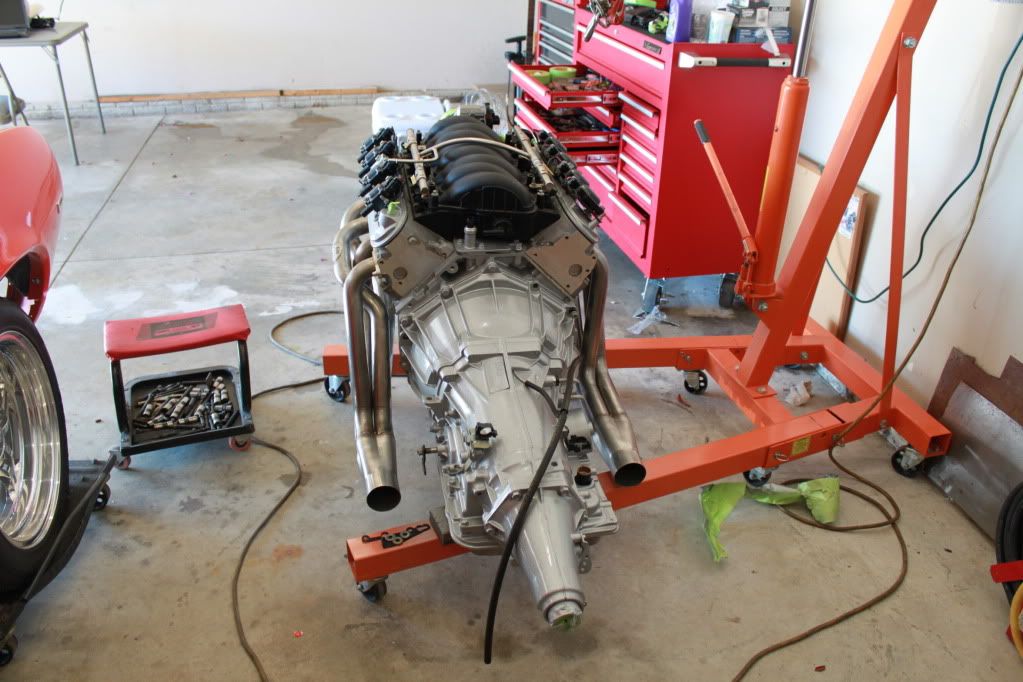
Next I installed the Mast Motorsports oil pan and oil pump pickup tube per the instructions. The Mast pan is a pretty nice piece. Here is a pic of the motor already to install.
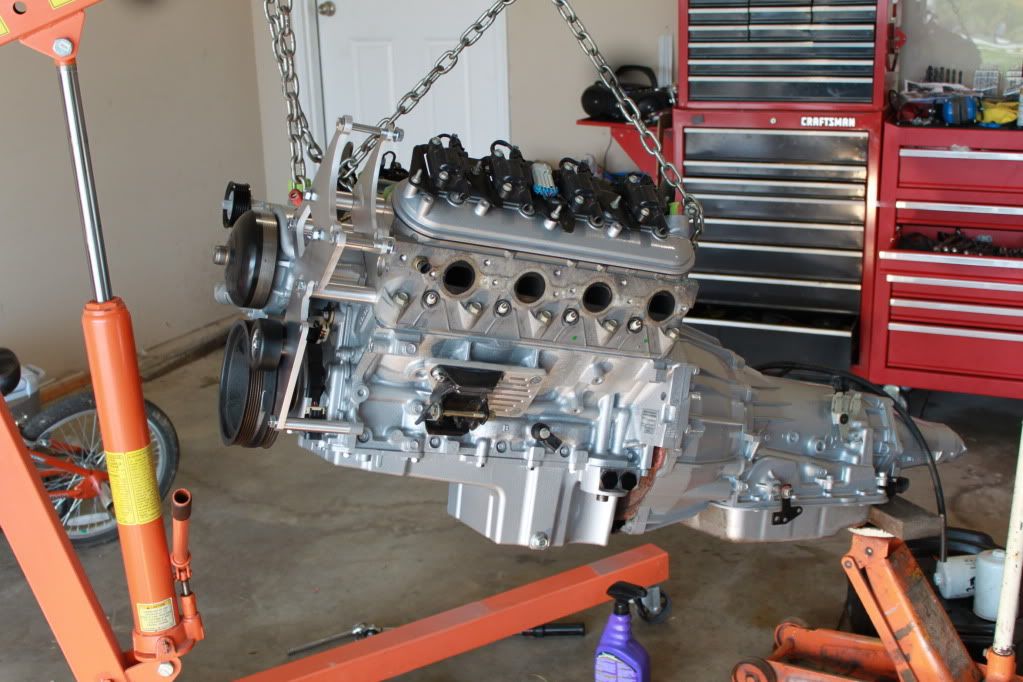
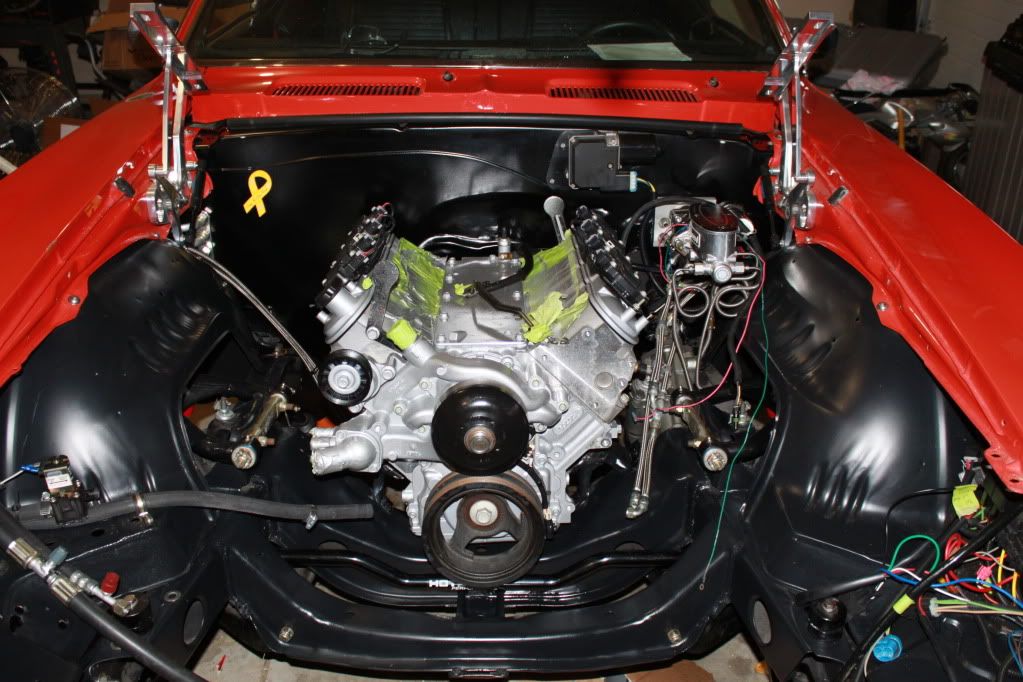
I still need to do some wiring work and general cleanup, but I wanted to test fit the engine now so I could check trans tunnel clearance, header fitment, ensure motor mounts work and there are no other surprises later. So with the help of my father we decided to put her in!!!
As luck would have it I had a couple minor issues getting the motor in. For starters, the motor mounts would not line up with the engine stands. I could get on bolt in, but the other was about 1/2" off. I ended up removing the mount and elongate all the holes on each mount. It took a couple times, but finally I got it in. Still a long ways to go, but I like what I am seeing.
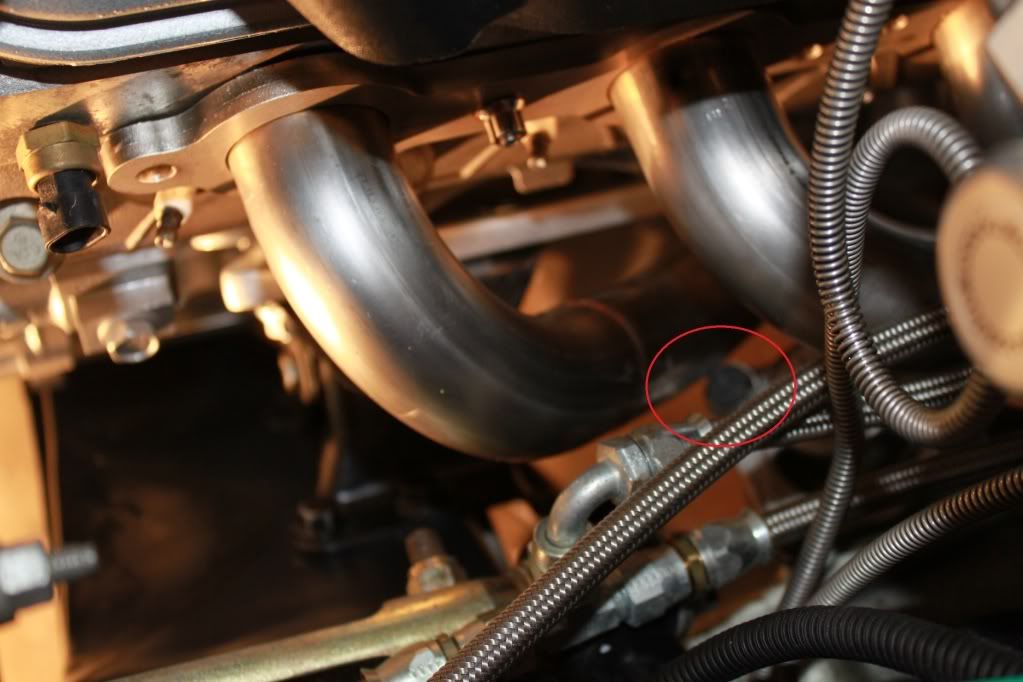
Next came the Stainless Works headers. These are really nice pieces and I would highly recommend them!! Of course the motor had to come out because they would not go in from under the car. Once they were the the #1 header tube ever so slightly touch the bolt on my gearbox as shown in the pic below. I will mark the header and lightly dimple the tube and grind away a little of the bolt head.
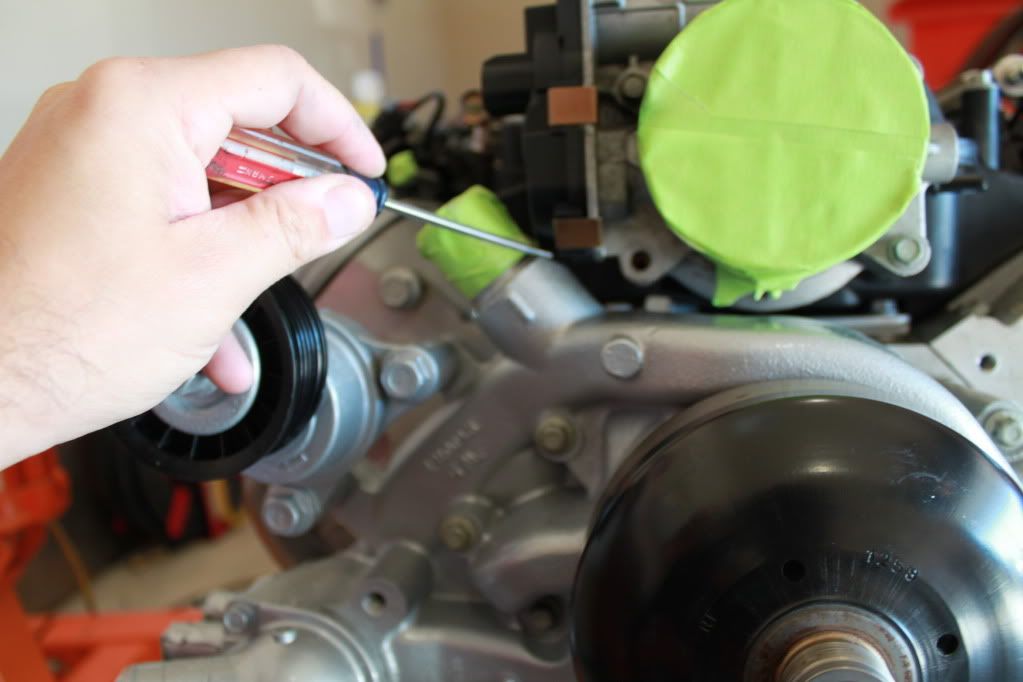
Next is installing the new LS2 intake. Actually this was day prior to installing the engine. Anyways I heard there may be clearance issues using a car intake with the TBSS TB and there is but on the 2008 models the it can be done if you grind away a small protion of the water pump housing.
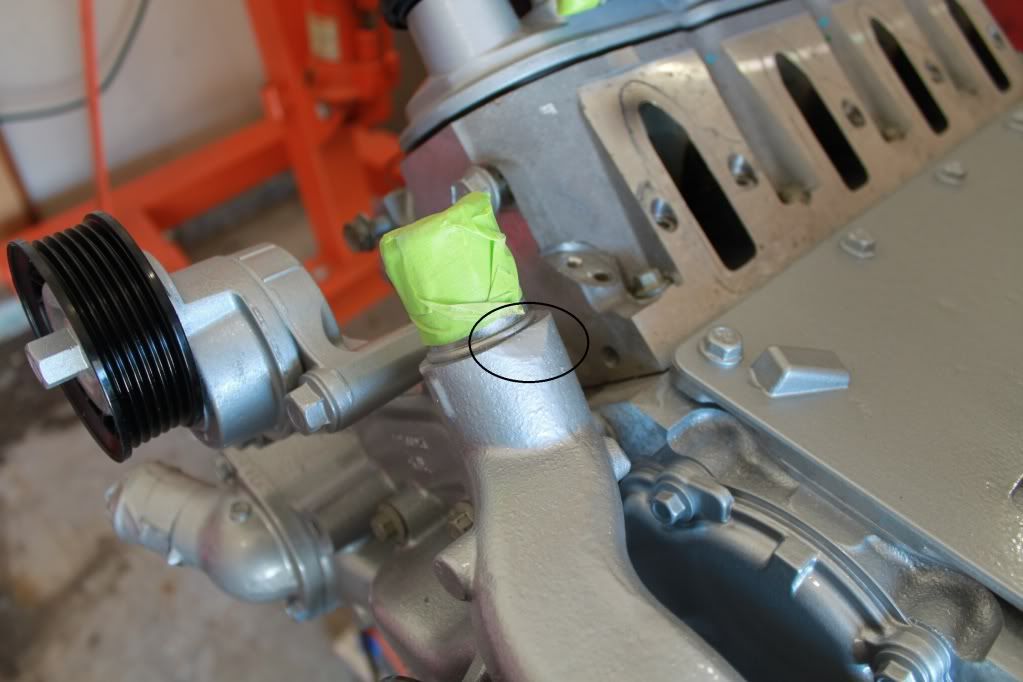
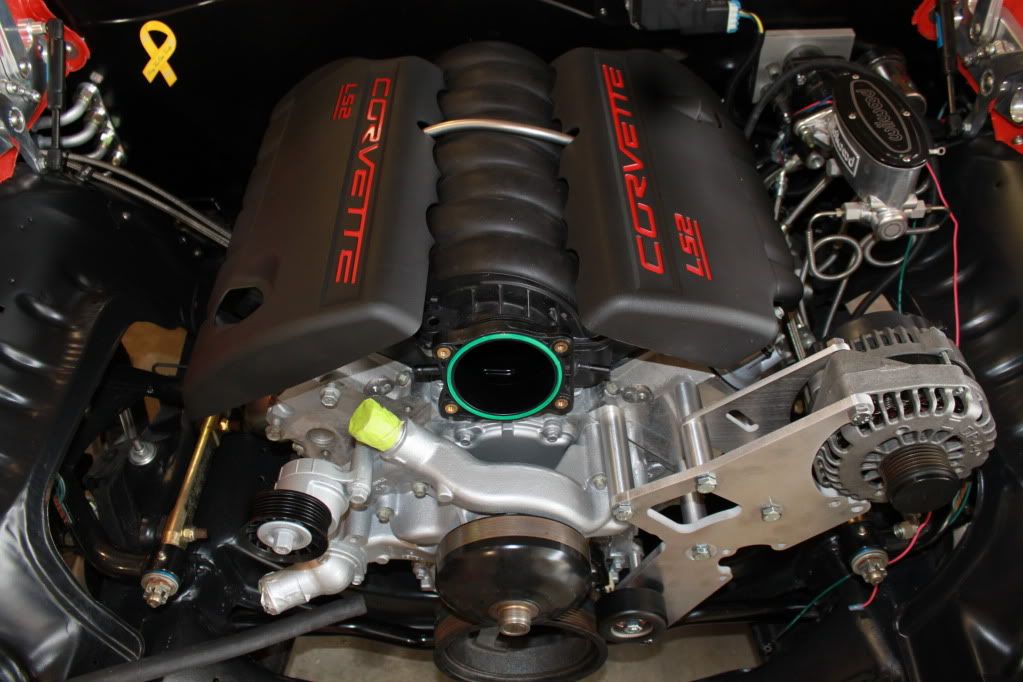
The next pic shows the TB installed and a very small gap and at the moment I am feeling victorious, but its a short lived victory. I want to use LS2 Corvette engine covers and contact the TB and would require more triming that I car for....so I will be installing a Corvette TB to mitigate this issue.
Here are a few more shots with everything mocked up. I don't know if I am going to stick with the Kwik brackets. It's a nice piece, but I am thinking about going with a Corvette setup, but we will see. If I keep it I will probably have to install a 2010 Camaro water pump as it may be difficult to find an upper radiator hose that makes and immediate 90 degree bend off the TBSS water pump.
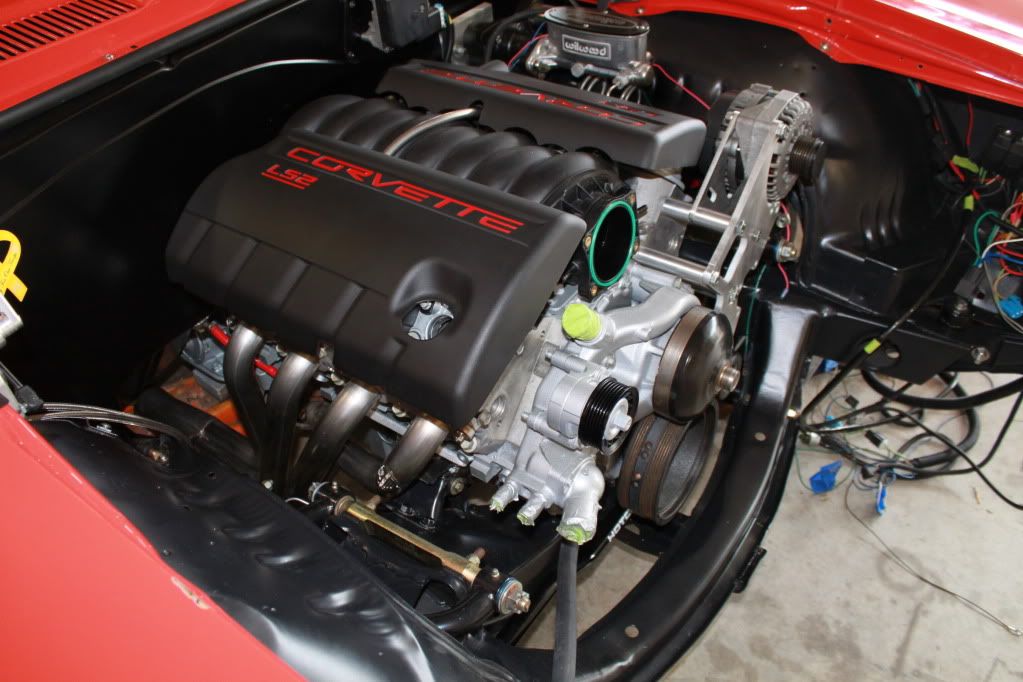
The conversion is actually coming together a lot faster than I anticipated and not nearly as difficult as some make it sound. I am very pleased so far...here are a few pics.

I have arranged the list with item description, cost, part number.
Now that I have the engine painted and all these parts it's time to get to work!
First order of busines was to install S&P adapter plates and stock motor mounts. In order to use the stock mounts you need to slowly grind away the hump on the back of the mount so they sit fluch on the adapter plate.
Next I removed the enormous TBSS oil pan and oil pump pickup tube.
The TBSS oil dipstick tub was located in the side of the oilpan. I needed to install an LS2 dipstick tube in the block so I needed to remove the small plug from the block. I just used a small punch & hammer and from the bottom of the block tapped it out.
Next I installed the Mast Motorsports oil pan and oil pump pickup tube per the instructions. The Mast pan is a pretty nice piece. Here is a pic of the motor already to install.
I still need to do some wiring work and general cleanup, but I wanted to test fit the engine now so I could check trans tunnel clearance, header fitment, ensure motor mounts work and there are no other surprises later. So with the help of my father we decided to put her in!!!
As luck would have it I had a couple minor issues getting the motor in. For starters, the motor mounts would not line up with the engine stands. I could get on bolt in, but the other was about 1/2" off. I ended up removing the mount and elongate all the holes on each mount. It took a couple times, but finally I got it in. Still a long ways to go, but I like what I am seeing.
Next came the Stainless Works headers. These are really nice pieces and I would highly recommend them!! Of course the motor had to come out because they would not go in from under the car. Once they were the the #1 header tube ever so slightly touch the bolt on my gearbox as shown in the pic below. I will mark the header and lightly dimple the tube and grind away a little of the bolt head.
Next is installing the new LS2 intake. Actually this was day prior to installing the engine. Anyways I heard there may be clearance issues using a car intake with the TBSS TB and there is but on the 2008 models the it can be done if you grind away a small protion of the water pump housing.
The next pic shows the TB installed and a very small gap and at the moment I am feeling victorious, but its a short lived victory. I want to use LS2 Corvette engine covers and contact the TB and would require more triming that I car for....so I will be installing a Corvette TB to mitigate this issue.
Here are a few more shots with everything mocked up. I don't know if I am going to stick with the Kwik brackets. It's a nice piece, but I am thinking about going with a Corvette setup, but we will see. If I keep it I will probably have to install a 2010 Camaro water pump as it may be difficult to find an upper radiator hose that makes and immediate 90 degree bend off the TBSS water pump.
The conversion is actually coming together a lot faster than I anticipated and not nearly as difficult as some make it sound. I am very pleased so far...here are a few pics.
Trending Topics
LS1 Tech Stories
The Best V8 Stories One Small Block at Time

6 Common C5 Corvette Failures and What's Involved In Repairing Them
Pouria Savadkouei
Retro Modern Bandit Pontiac Trans AM Comes With Burt Reynolds' Autograph
Verdad Gallardo
Top 10 Greatest Cadillac V Series Performance Models Ever, Ranked
Pouria Savadkouei
Top 10 Most Powerful Chevy Trucks Ever Made!

Hennessey's New Supercharged Silverado ZR2 Has 700 HP
Verdad Gallardo
Coachbuilt N2A Anteros Is an LS2-Powered C6 Corvette In Italian Clothes
Verdad Gallardo
Awesome K5 Blazer Restomod Comes With C7 Corvette Power
Verdad Gallardo
10 Camaros You Should Never Buy

10 LS Engine Myths That Refuse to Die
Verdad Gallardo
You could always go with a crossflow radiator so both the inlet and outlet are on the passenger side. I used one on my last conversion and it worked out great. Car runs exactly where the thermostat wants it to and I don't have a real long hose going from side to the other.
You could always go with a crossflow radiator so both the inlet and outlet are on the passenger side. I used one on my last conversion and it worked out great. Car runs exactly where the thermostat wants it to and I don't have a real long hose going from side to the other.


Well due to work I haven't gotten anything done to the car in the last two weeks.....anyways I did find a few moments to start checking clearances and laying out the wiring and other things that need to be done. I should also be receiving my gas tank this week and the wiring harness soon!!
I did find a header clearance issue. As the pic shows the #2 header tube has about 1/8" clearance on AN connector on the gearbox. I can dimple the area a little, but personally I don't think it will be enough. I may put a heat shield over it and run a power steering cooler. Anyone have any thoughts on this?
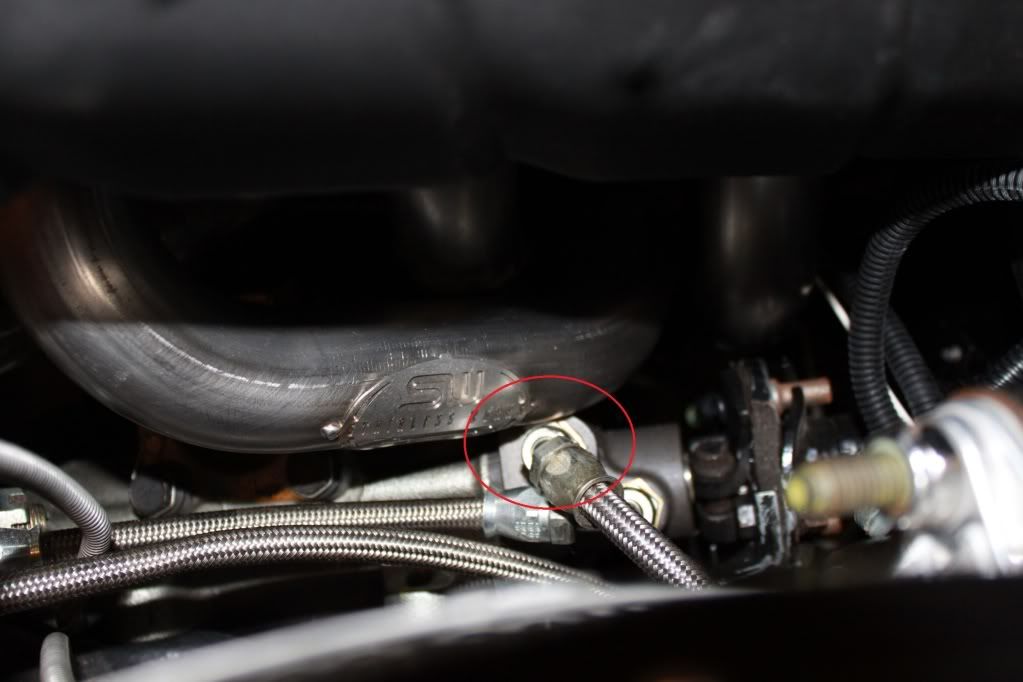
I did find a header clearance issue. As the pic shows the #2 header tube has about 1/8" clearance on AN connector on the gearbox. I can dimple the area a little, but personally I don't think it will be enough. I may put a heat shield over it and run a power steering cooler. Anyone have any thoughts on this?


No pics as this was just the initial test fit of the engine/trans. I will be using the standard GM dipstick tube and indicator. I ordered mine from GM and the tube does not come painted. I have used Lokar in the past, but their stuff is $$$ given the quality of the piece and the filler tube is extremely small in diameter making it a pita to add fluid.

TECH Fanatic
Joined: Nov 2010
Posts: 1,679
Likes: 0
I used S&P motor plates and stainless works headers,ran into same prob!mine was not touching but damn close!I had to use a factory 3rd gen steering line could not get the adapter to work with those an lines it would have touched header!so far I have not had any problems!I got some pics in my build of problem!I Also went to hydraulic hose shop and got a high temp slip cover and put it over hose in that area!!
Well I haven't gotten to work the car in almost a month, ggrrhhh, but one of my major parts arrived today and I thought I would share.  :bananna2::yeah:
mmmmhhh I wonder what it could be...
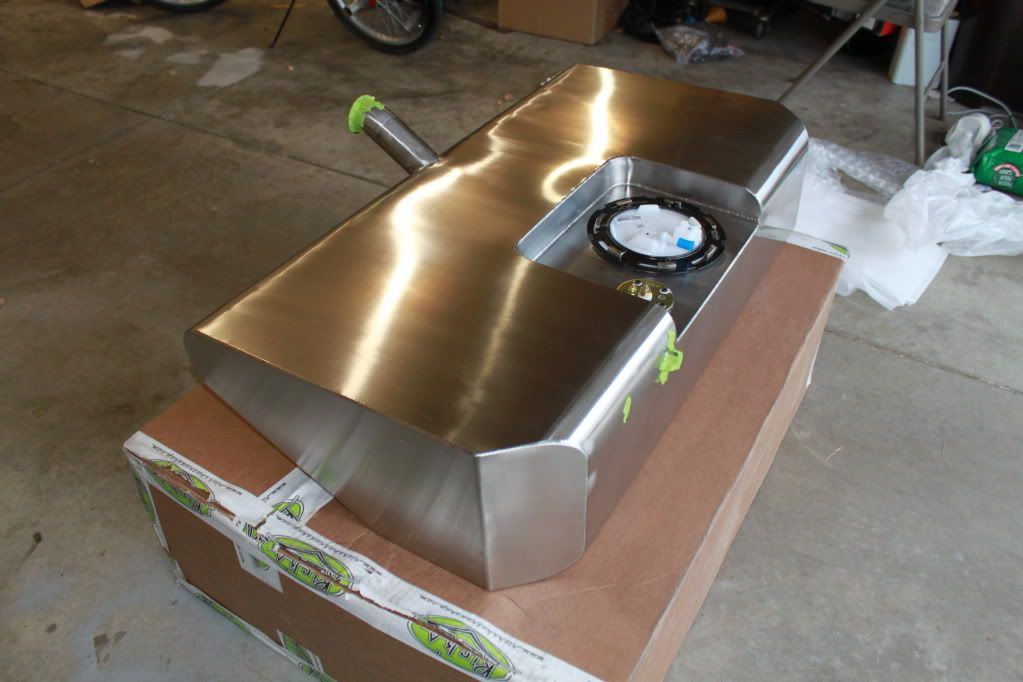
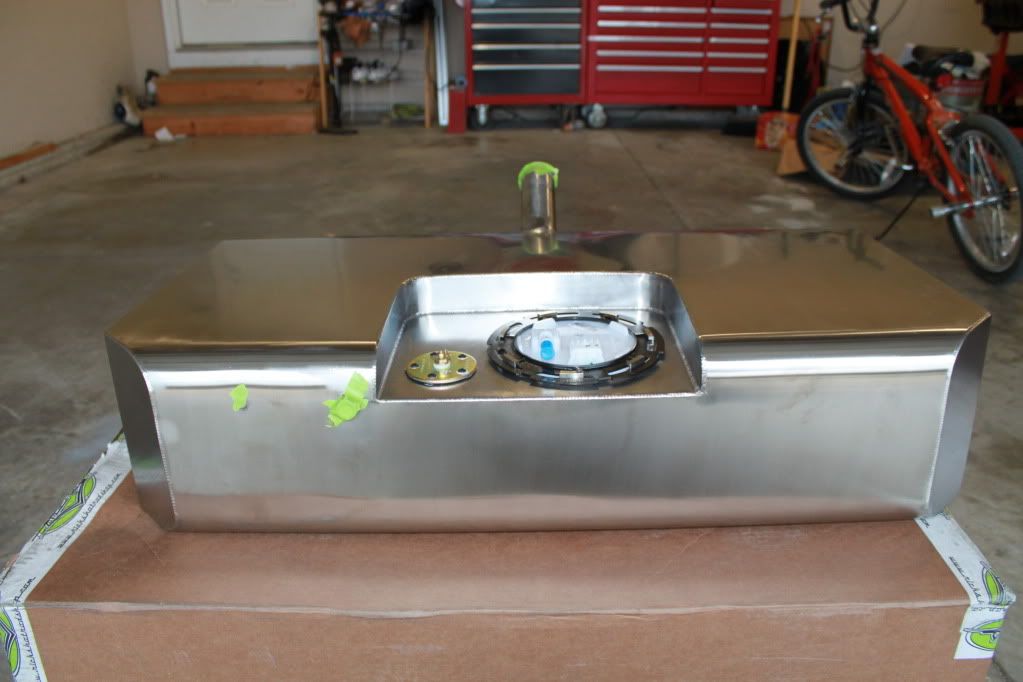
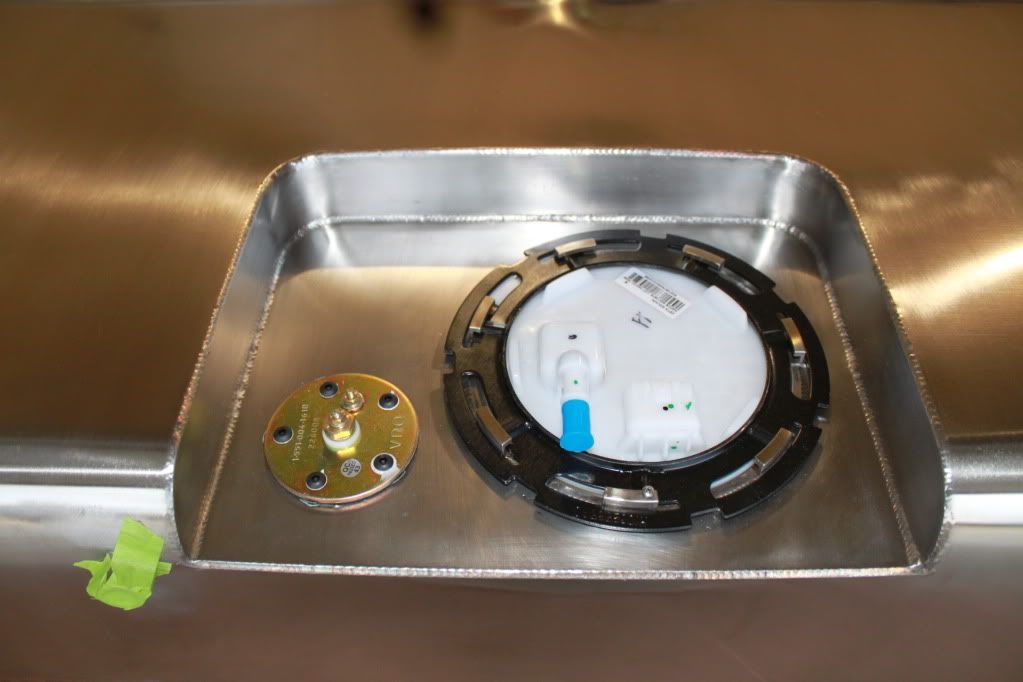
This is one part of my build that I splurged on a VaporWorx tank! It's a shame this will be tucked away underneath the car as the craftmanship is top notch!!! Now if I just get some time to work on the car.
mmmmhhh I wonder what it could be...
This is one part of my build that I splurged on a VaporWorx tank! It's a shame this will be tucked away underneath the car as the craftmanship is top notch!!! Now if I just get some time to work on the car.
Last edited by Rocketrod; Oct 12, 2011 at 07:19 PM.