
79 Cutlass Wagon, 5.3 G machine


 10-26-2011, 11:03 PM
#64
On The Tree
Thread Starter
Join Date: Aug 2010
Location: Eagle Mountain, Utah
Posts: 143
Likes: 0
Received 0 Likes
on
0 Posts
Thanks everyone!
I had to take a 2 week break from the car to wrap up a bunch of class assignments for mid term grades, more on that in a few.
Getting back on the car I finished up the floors. The pullmax did a great job with the strengthening ribs and the end result looks great and matches the integrity of the factory floors. There was a lot of surface rust so I stripped the whole front floor area and coated it with Por-15.
Driver's side...
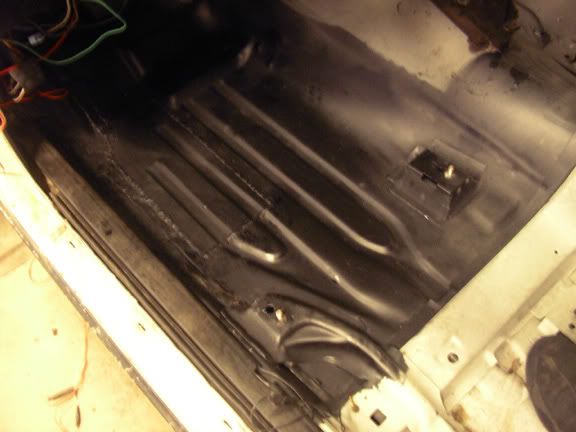
Passenger side. The dash and shifter shadow makes it look warped but it's nice and flat...

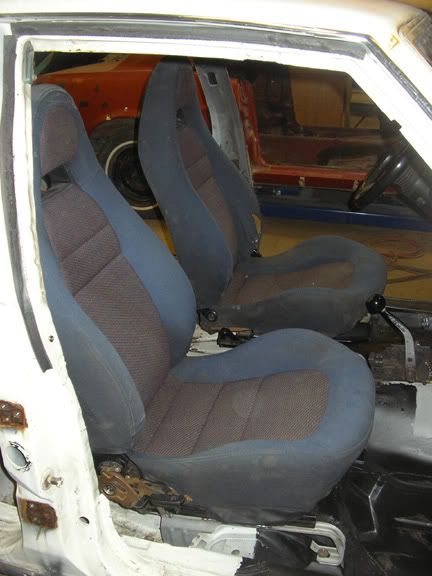
After the floor was complete I got the seat brackets knocked out. I decided to use the Mazda sliders and modify and weld them to the "legs" of the Cutlass seat brackets. Now they're just the right height and the sliders work fantastic. The back part of the seat also reclines back and forward smoothly, something the factory bench didn't do. I will finish them up by painting the brackets black and then building a sheet metal cover to keep them hidden.
I had to take a 2 week break from the car to wrap up a bunch of class assignments for mid term grades, more on that in a few.
Getting back on the car I finished up the floors. The pullmax did a great job with the strengthening ribs and the end result looks great and matches the integrity of the factory floors. There was a lot of surface rust so I stripped the whole front floor area and coated it with Por-15.
Driver's side...
Passenger side. The dash and shifter shadow makes it look warped but it's nice and flat...
After the floor was complete I got the seat brackets knocked out. I decided to use the Mazda sliders and modify and weld them to the "legs" of the Cutlass seat brackets. Now they're just the right height and the sliders work fantastic. The back part of the seat also reclines back and forward smoothly, something the factory bench didn't do. I will finish them up by painting the brackets black and then building a sheet metal cover to keep them hidden.
10-26-2011, 11:05 PM
#65
On The Tree
Thread Starter
Join Date: Aug 2010
Location: Eagle Mountain, Utah
Posts: 143
Likes: 0
Received 0 Likes
on
0 Posts
On Monday evenings I go to the "paint your own car" class at the school. This gives me another 4 hours a week to get work done, only draw back is it's in a different shop. So instead of working on the car itself I have some individual body parts over there that I work on.
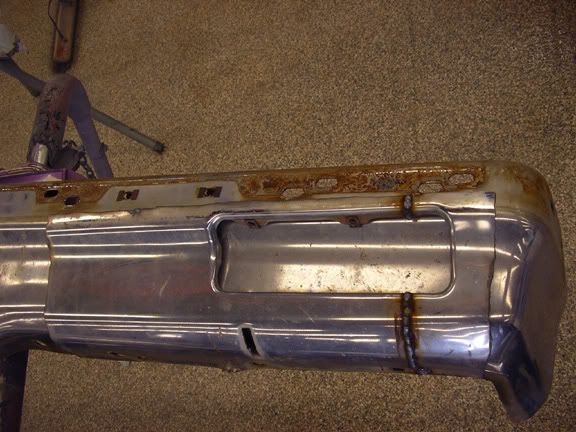
This past Monday I worked on the front bumper. Mine is pretty rotted on the passenger side, you can see the floor through it! The rest of the rust is surface rust, which will be taken care of during sandblasting.
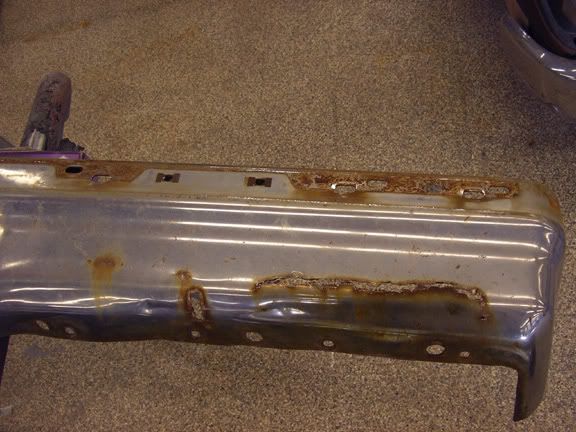
As I mentioned before, I picked up a wrecking yard bumper from an 85 Cutlass Supreme to get mine back in shape. The 85 bumper has different body lines on the top so the plan was to cut the bottom half out and graft it into mine. Nice thing about the later model bumper is that it has the turn signals in the bumper rather than near the headlights like mine. These will become functional brake cooling ducts.
First thing I did was using the plasma cutter I cut out a larger than needed patch area.
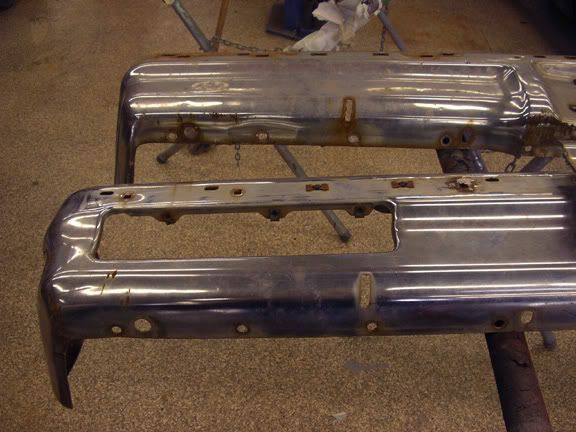
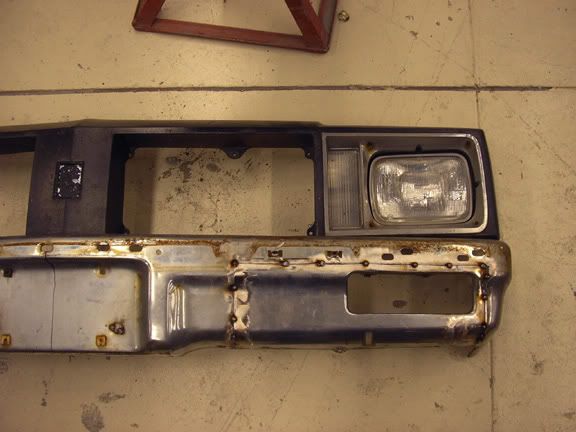
The turn signal openings are huge and would look out of proportion with my single compared to the 85 dual headlights, so I narrowed them by 4.5" where the weld line is. Here's a mock up of where they will go.
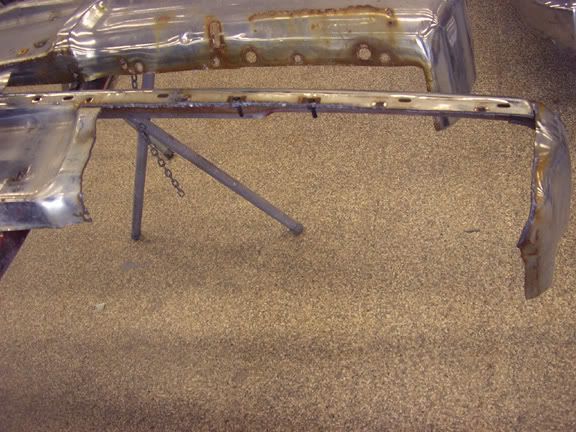
I then cut out a large rectangle from my bumper and also narrowed it 1" above the left side cut line to tuck it in close to the body. The weld has already been ground down in this shot. I then trimmed the new piece to fit and tacked it in.

Here's a couple shots of what it will look like on the car. I'll finish welding and get the other side done next week.

This past Monday I worked on the front bumper. Mine is pretty rotted on the passenger side, you can see the floor through it! The rest of the rust is surface rust, which will be taken care of during sandblasting.
As I mentioned before, I picked up a wrecking yard bumper from an 85 Cutlass Supreme to get mine back in shape. The 85 bumper has different body lines on the top so the plan was to cut the bottom half out and graft it into mine. Nice thing about the later model bumper is that it has the turn signals in the bumper rather than near the headlights like mine. These will become functional brake cooling ducts.
First thing I did was using the plasma cutter I cut out a larger than needed patch area.
The turn signal openings are huge and would look out of proportion with my single compared to the 85 dual headlights, so I narrowed them by 4.5" where the weld line is. Here's a mock up of where they will go.
I then cut out a large rectangle from my bumper and also narrowed it 1" above the left side cut line to tuck it in close to the body. The weld has already been ground down in this shot. I then trimmed the new piece to fit and tacked it in.
Here's a couple shots of what it will look like on the car. I'll finish welding and get the other side done next week.
10-26-2011, 11:06 PM
#66
On The Tree
Thread Starter
Join Date: Aug 2010
Location: Eagle Mountain, Utah
Posts: 143
Likes: 0
Received 0 Likes
on
0 Posts
Here I thought I'd take a moment and talk a bit about what we have been learning. First half of the semester we've been getting familiar with the machines in the shop by doing small projects. This included forming steel sheet metal and getting familiar with gas and tig welding. We covered mig welding last year and I was excited to learn tig this year.
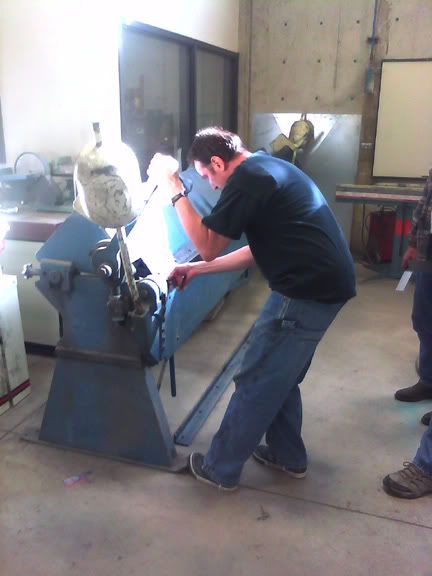
Our professor is pretty dedicated to learning real hot rod based practical skills so his program is very hands on. We're also lucky to have some great forming equipment. This includes the Pullmax I've mentioned before, a Power Hammer, a planishing hammer, an Eckold that we use for shrinking and stretching, hand shrinker/ stretchers, a huge sheet metal brake, power shears, power and hand crank bead rollers, a slip roller, an english wheel, sand bags and mallets, and a few other big boy toys I'm forgetting. Here are a few projects we all had to make...
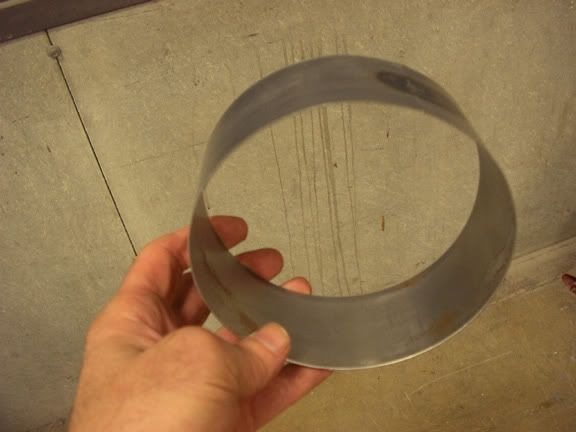
A simple circle made by running a flat strip through the slip roller until it was uniformly round and then tack weld with the gas welder.
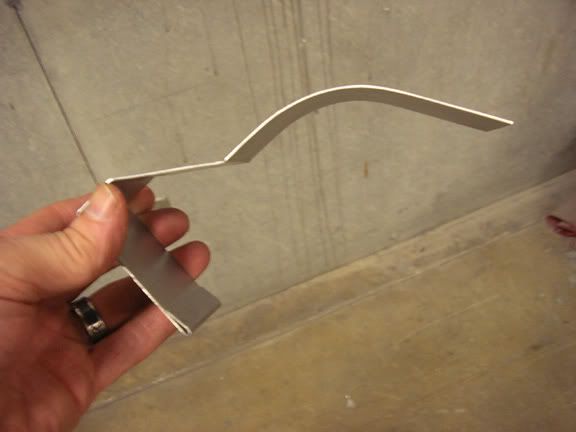
Here the sheet metal brake was used to make a "multi angle with a curve and a fold" strip that had to match the one the professor made. The curve was made by making several small low angle bends.
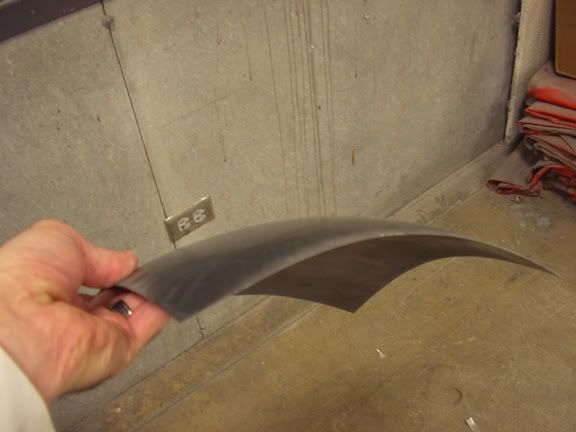
Here I had to cut a curve in the sheet metal and using hand tools bend the metal over a wire, finishing it off with the Pullmax. If you're not familiar with this it's very common in areas like fender wheel openings on early cars such as a 30s Fords.

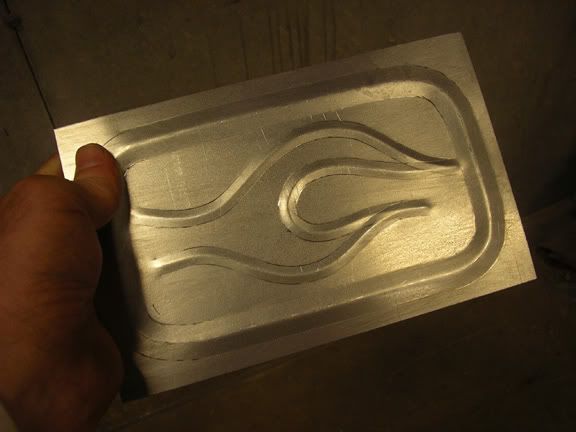
For this one I had to use two different dies on the bead roller. Can't help it, I like flames.
Our professor is pretty dedicated to learning real hot rod based practical skills so his program is very hands on. We're also lucky to have some great forming equipment. This includes the Pullmax I've mentioned before, a Power Hammer, a planishing hammer, an Eckold that we use for shrinking and stretching, hand shrinker/ stretchers, a huge sheet metal brake, power shears, power and hand crank bead rollers, a slip roller, an english wheel, sand bags and mallets, and a few other big boy toys I'm forgetting. Here are a few projects we all had to make...
A simple circle made by running a flat strip through the slip roller until it was uniformly round and then tack weld with the gas welder.
Here the sheet metal brake was used to make a "multi angle with a curve and a fold" strip that had to match the one the professor made. The curve was made by making several small low angle bends.
Here I had to cut a curve in the sheet metal and using hand tools bend the metal over a wire, finishing it off with the Pullmax. If you're not familiar with this it's very common in areas like fender wheel openings on early cars such as a 30s Fords.
For this one I had to use two different dies on the bead roller. Can't help it, I like flames.
10-26-2011, 11:07 PM
#67
On The Tree
Thread Starter
Join Date: Aug 2010
Location: Eagle Mountain, Utah
Posts: 143
Likes: 0
Received 0 Likes
on
0 Posts
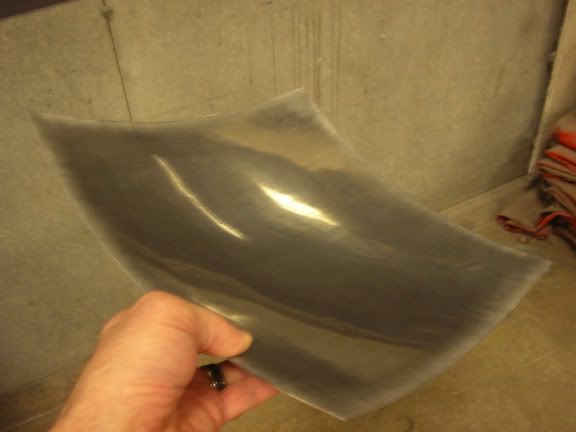
The next projects were a little more complicated. First I had to use the mallets and sandbag to beat a flat sheet into a bowl that actually looked like a beat up mess when I got done. Then using the hand shrinker on the edges and a hammer and dolly in the center I worked it until it was a smooth 12 degree bowl that had to fit flush to the professor's template. After I got the grade on that one I then had to use the planishing hammer to put more dish into it to get it to match a 7 degree template curve. Here's the end result-

Next was using the english wheel to form a flat sheet to fit the professor's bowl. This was cool to learn because the wheel doesn't work like you might think as you try to make it travel across the panel. End result-

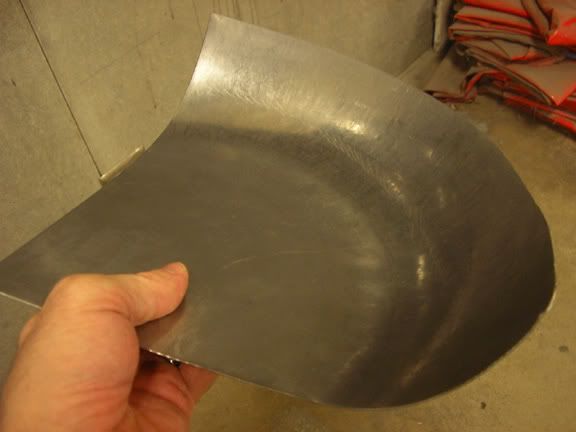
Next was a small version of part of an inner wheel well. This one started by laying paper over the professor's part and folding it to find out where the highlight was and where to shrink it for the curve. I then transferred our paper pattern to the flat sheet, trimmed, and hit it with the Pullmax and shrinking dies. That got the curve started but that area was a warped mess. The planishing hammer smoothed it out some and the Eckold with shrinking dies continued the curve around. Back and forth between the three machines ended in a nice smooth wheel well that had to fit closely matched to both the outside and inside of the professor's version.

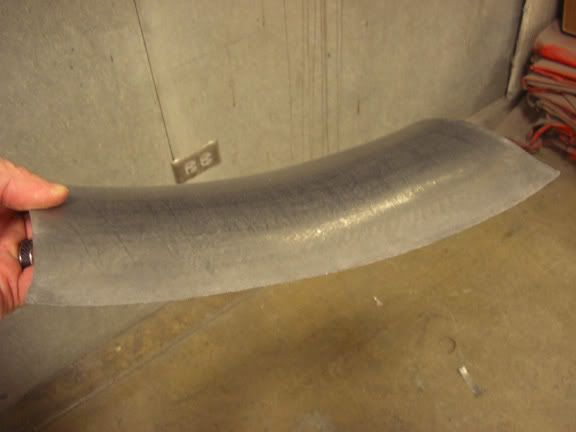
Finally the one our professor calls the b**** project, a complex curve that has a concave long curve with a convex curve along the sides. I initially started the bend on the flat sheet cranking it over my leg. Then lots of trips back and forth between the Eckold shrinker and the planishing hammer finally ended up like this, again we had to match the one our professor made when laid on top.

Next was using the english wheel to form a flat sheet to fit the professor's bowl. This was cool to learn because the wheel doesn't work like you might think as you try to make it travel across the panel. End result-
Next was a small version of part of an inner wheel well. This one started by laying paper over the professor's part and folding it to find out where the highlight was and where to shrink it for the curve. I then transferred our paper pattern to the flat sheet, trimmed, and hit it with the Pullmax and shrinking dies. That got the curve started but that area was a warped mess. The planishing hammer smoothed it out some and the Eckold with shrinking dies continued the curve around. Back and forth between the three machines ended in a nice smooth wheel well that had to fit closely matched to both the outside and inside of the professor's version.
Finally the one our professor calls the b**** project, a complex curve that has a concave long curve with a convex curve along the sides. I initially started the bend on the flat sheet cranking it over my leg. Then lots of trips back and forth between the Eckold shrinker and the planishing hammer finally ended up like this, again we had to match the one our professor made when laid on top.
10-26-2011, 11:09 PM
#68
On The Tree
Thread Starter
Join Date: Aug 2010
Location: Eagle Mountain, Utah
Posts: 143
Likes: 0
Received 0 Likes
on
0 Posts
For the welding side we started with several gas welding projects, including butt welding with and without rod, vertical welding, welding up 1/2" holes, brass brazing steel to steel and copper pipe to steel. Gas welding uses a lot of heat so it warps the sheet quite a bit but it leaves a soft weld. Simply hammer and dolly-ing right on the weld straightens it right back out. Pretty neat.

This assignment we had to simulate bullet holes with a pick hammer, much like those that are often in old cars out in the fields. Then using a hammer and dolly I straightened them out and welded up the holes.

This assignment we had to simulate bullet holes with a pick hammer, much like those that are often in old cars out in the fields. Then using a hammer and dolly I straightened them out and welded up the holes.
10-26-2011, 11:10 PM
#69
On The Tree
Thread Starter
Join Date: Aug 2010
Location: Eagle Mountain, Utah
Posts: 143
Likes: 0
Received 0 Likes
on
0 Posts
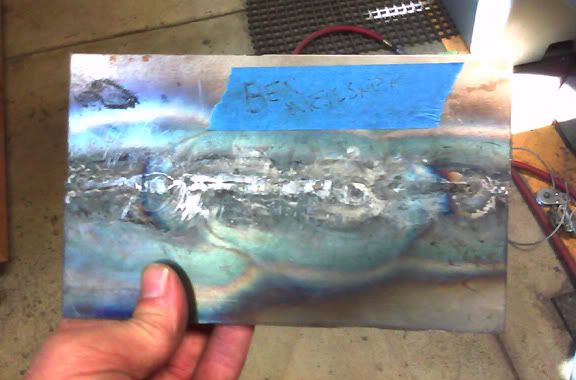
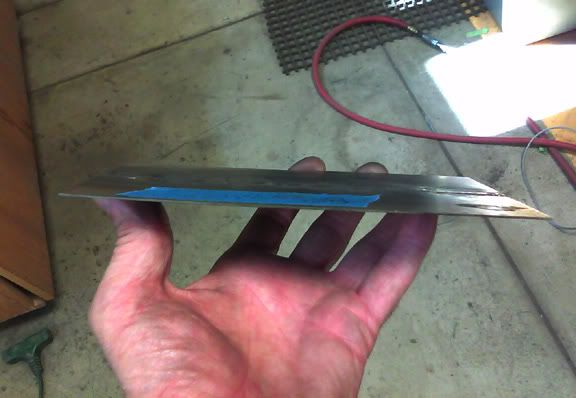
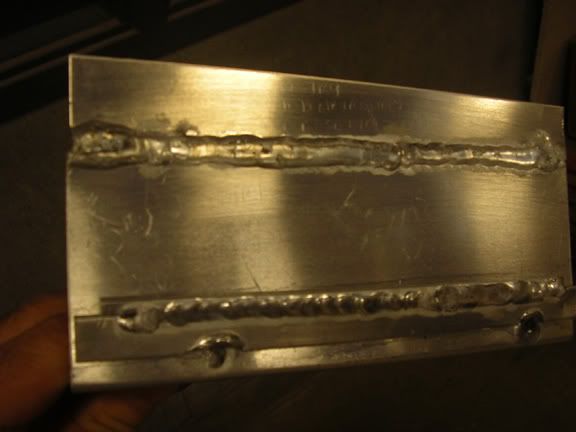
Finally my most anticipated new thing to learn- TIG welding. For practice with this we worked with steel butt welding with and without rod, vertical butt with rod, stainless, and aluminum. Although I thought it would be easier, aluminum turned out to be harder. Although it's softer and you'd think you would use less heat, aluminum absorbes and dissipates the heat so fast you actually have to use more voltage and ac rather than dc to get a good puddle going. The throttle is sensitive because it's real easy to get it too hot. Here are a couple of my butt welds after some practice. Top one got a little too hot and sank in a bit. Other two aren't too bad for my first time ever welding aluminum.

Now for the second half of the semester we'll have a lot of practice putting to work what we've learned so far. We each have to french a tail light and an antennae and then we each have to build a complete hot rod body for a pedal car chassis out of .063 sheet aluminum. This ought to be fun! ...
Now for the second half of the semester we'll have a lot of practice putting to work what we've learned so far. We each have to french a tail light and an antennae and then we each have to build a complete hot rod body for a pedal car chassis out of .063 sheet aluminum. This ought to be fun! ...
10-27-2011, 10:13 PM
#71
On The Tree
Thread Starter
Join Date: Aug 2010
Location: Eagle Mountain, Utah
Posts: 143
Likes: 0
Received 0 Likes
on
0 Posts
It definitely is fun! Doesn't see, like work at all.
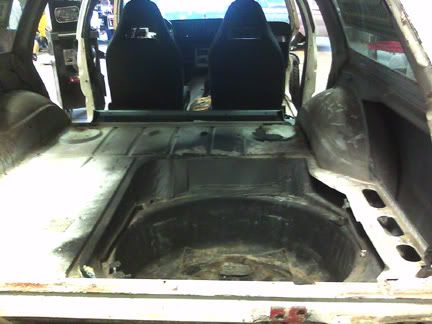
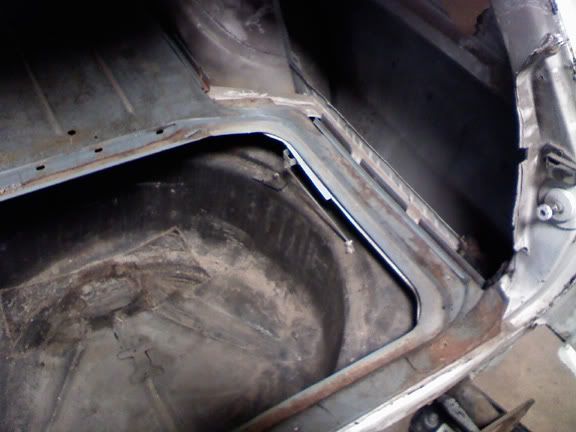
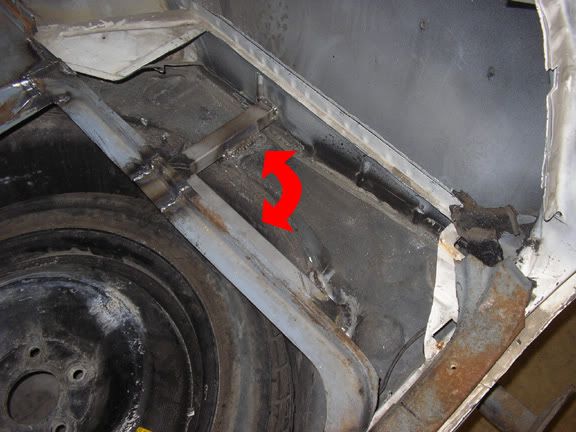
Next item to get in place before I can start building the roll bar is the battery. It needed to move to the rear to clean up the engine bay and help a little with the weight bias. I want to keep as much room available in the back so I can still use it to haul stuff around, so tucking it was in order. Here's a couple shots of what I have to work with.
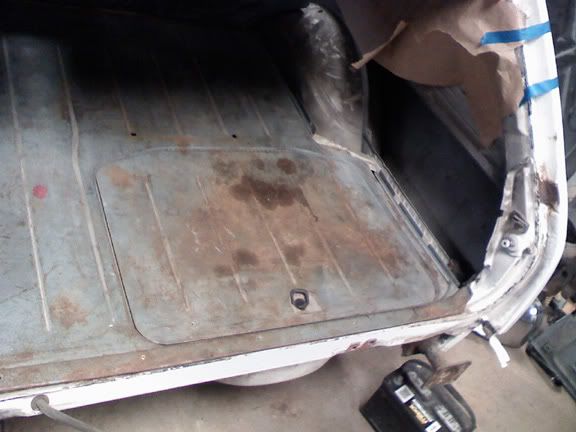
The whole blue rear floor unscrews and comes out to reveal another floor underneath on this car. Underneath the right side of the blue sheet metal is a support to help hold the upper floor up. The frame rail is directly below that.
After looking at a couple different options I decided that positioned right above the frame rail on the right would be best. That means moving some things around and removing the support.
I cut and relocated the right side floor edge that supports the spare tire door. The arrow shows where it used to be attached. Where it used to be it was shorter because of the angle at the top (see above photo) so it took a spacer welded in the middle to make it the new correct length. I also had to cut out the support metal underneath.
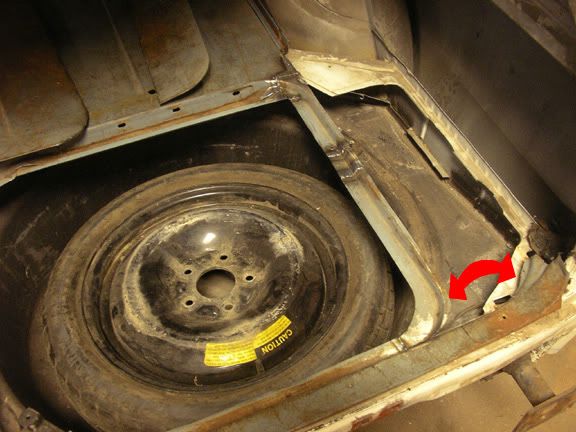
Notice also the space saver spare, I got it free from a guy I know that owns a couple Corvettes. Its a 155-70-17, lighter and skinnier than a full size, perfect for clearing the bigger F-body brakes, and is the same height as a 275-40-17.
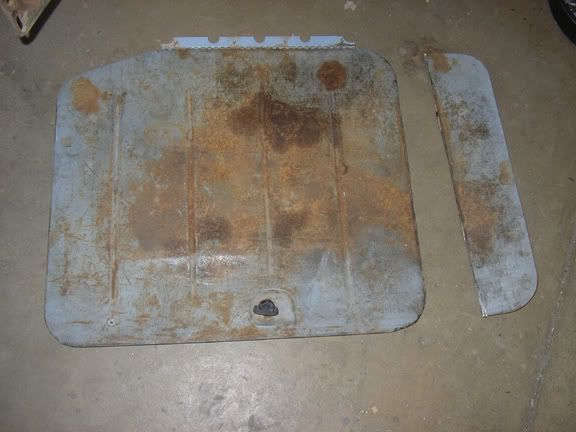
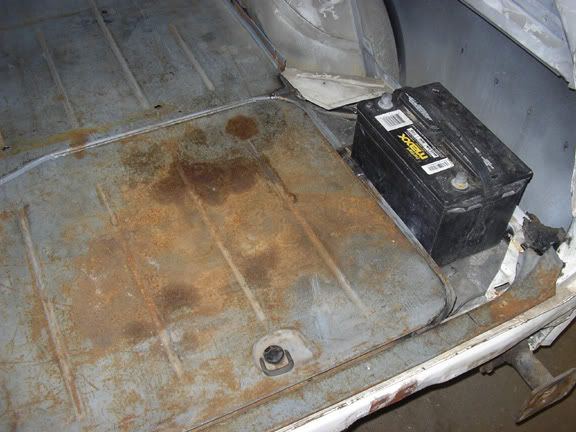
Next I cut the door and reshaped it to fit in the recess.
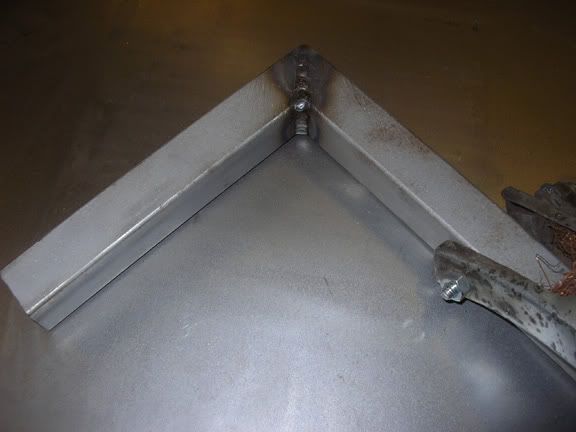
The lower floor is contoured to fit the frame so if I set the battery in as it is it was raked down towards the front. To make a flat support for the batt to sit on I grabbed some scrap 1" square tube, cut it at a 45 deg angle and welded up an L shape.
I then welded it into the car on top of the inner floor...
... and here's the end result. The battery is sunk into the floor about 3" and it has a strong support to bolt the box to. Tomorrow I start making a battery box from .063 aluminum. Cost of the materials is about 6 bucks compared to paying $80+ for one already made.
Next item to get in place before I can start building the roll bar is the battery. It needed to move to the rear to clean up the engine bay and help a little with the weight bias. I want to keep as much room available in the back so I can still use it to haul stuff around, so tucking it was in order. Here's a couple shots of what I have to work with.
The whole blue rear floor unscrews and comes out to reveal another floor underneath on this car. Underneath the right side of the blue sheet metal is a support to help hold the upper floor up. The frame rail is directly below that.
After looking at a couple different options I decided that positioned right above the frame rail on the right would be best. That means moving some things around and removing the support.
I cut and relocated the right side floor edge that supports the spare tire door. The arrow shows where it used to be attached. Where it used to be it was shorter because of the angle at the top (see above photo) so it took a spacer welded in the middle to make it the new correct length. I also had to cut out the support metal underneath.
Notice also the space saver spare, I got it free from a guy I know that owns a couple Corvettes. Its a 155-70-17, lighter and skinnier than a full size, perfect for clearing the bigger F-body brakes, and is the same height as a 275-40-17.
Next I cut the door and reshaped it to fit in the recess.
The lower floor is contoured to fit the frame so if I set the battery in as it is it was raked down towards the front. To make a flat support for the batt to sit on I grabbed some scrap 1" square tube, cut it at a 45 deg angle and welded up an L shape.
I then welded it into the car on top of the inner floor...
... and here's the end result. The battery is sunk into the floor about 3" and it has a strong support to bolt the box to. Tomorrow I start making a battery box from .063 aluminum. Cost of the materials is about 6 bucks compared to paying $80+ for one already made.

 10-29-2011, 12:13 PM
#74
On The Tree
Thread Starter
Join Date: Aug 2010
Location: Eagle Mountain, Utah
Posts: 143
Likes: 0
Received 0 Likes
on
0 Posts
Thanks guys! LS, your skills are great too, that Elky is one sweet ride.
99- that wagon is awesome. I'm a hardcore Nova fan, I own two right now, a 73 hatch resto-mod and a 74 street strip. I used to have a 65 wagon when I was younger but had to sell it when I moved across country. I've wanted another since then but prices have gone beyond what I have to drop on a project car. I wanted to drop it 3" and put 17" rallies, your photos in your album are too cool!
99- that wagon is awesome. I'm a hardcore Nova fan, I own two right now, a 73 hatch resto-mod and a 74 street strip. I used to have a 65 wagon when I was younger but had to sell it when I moved across country. I've wanted another since then but prices have gone beyond what I have to drop on a project car. I wanted to drop it 3" and put 17" rallies, your photos in your album are too cool!
10-29-2011, 12:15 PM
#75
On The Tree
Thread Starter
Join Date: Aug 2010
Location: Eagle Mountain, Utah
Posts: 143
Likes: 0
Received 0 Likes
on
0 Posts
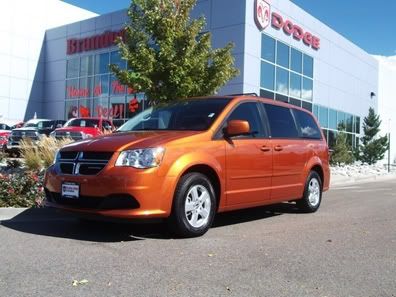
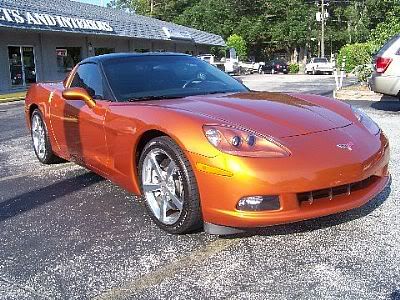
I was on date night with my wife last night and as we were getting into the car a guy pulled in next to us in an orange 2011 Caravan. I liked the shade a lot, similar to Vette Atomic orange. I've looked at lots of orange paint colors and I think I've narrowed it to one of these two paint codes. I'm not sure if the Vette is a 3 stage or not, I'd imagine the Caravan is two. Whichever fits the budget better wins this bout.
10-29-2011, 09:31 PM
#77
On The Tree
Thread Starter
Join Date: Aug 2010
Location: Eagle Mountain, Utah
Posts: 143
Likes: 0
Received 0 Likes
on
0 Posts
Are you thinking to do a wagon as a driver?
I plan on driving mine pretty much daily for about 8 months a year. That's why chose the 5.3 over a 6.0 I could've bought, I heard a lot of folks say the 5.3 gets much better mileage, and I'm not out for top hp anyway. I think after all the mods it'll be even more fun to drive everyday.
I plan on driving mine pretty much daily for about 8 months a year. That's why chose the 5.3 over a 6.0 I could've bought, I heard a lot of folks say the 5.3 gets much better mileage, and I'm not out for top hp anyway. I think after all the mods it'll be even more fun to drive everyday.
