
S10 Xtreme L33 swap!
 03-07-2013, 08:17 PM
#121
On The Tree
Thread Starter
Got some parts on the way, shorter K&N filter for my air intake setup, some fittings and power steering hose to make a new high pressure line that will fit better than the factory one I have on their that's like 2 miles too long haha.
Got a bouquet of EV1 connectors from the USPS man!
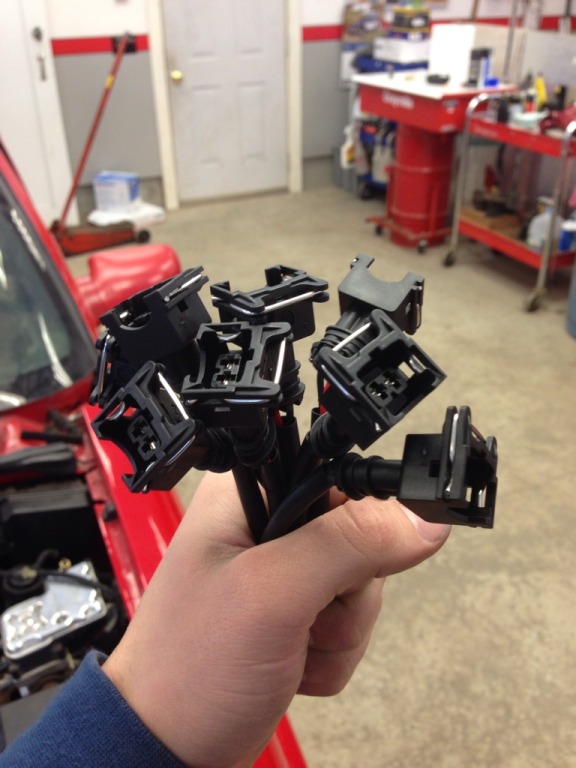
Set to work swapping the old mini delphi style connectors over to the EV1 connectors fro the LS6 injectors...

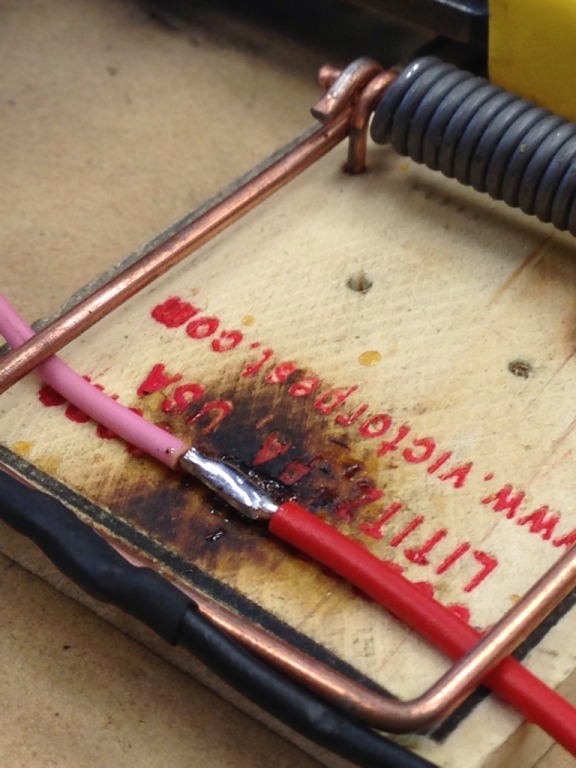
Dat soldering.
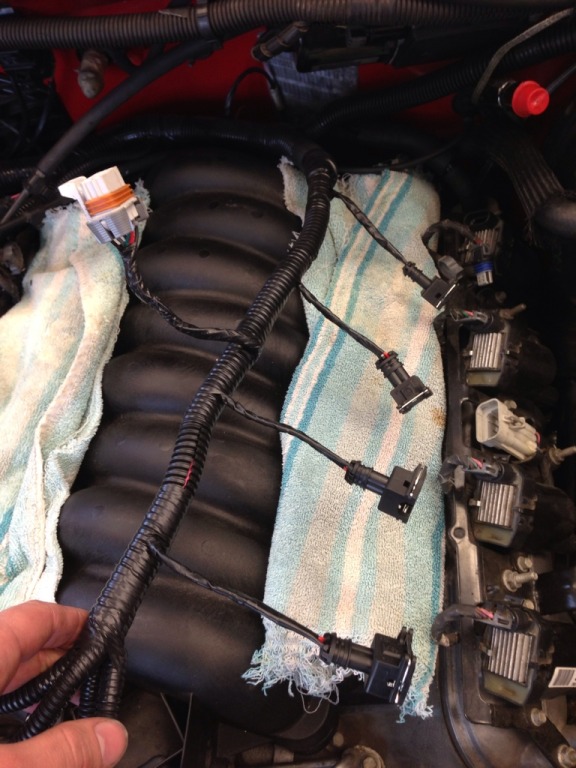
One side all finished and taped back up!
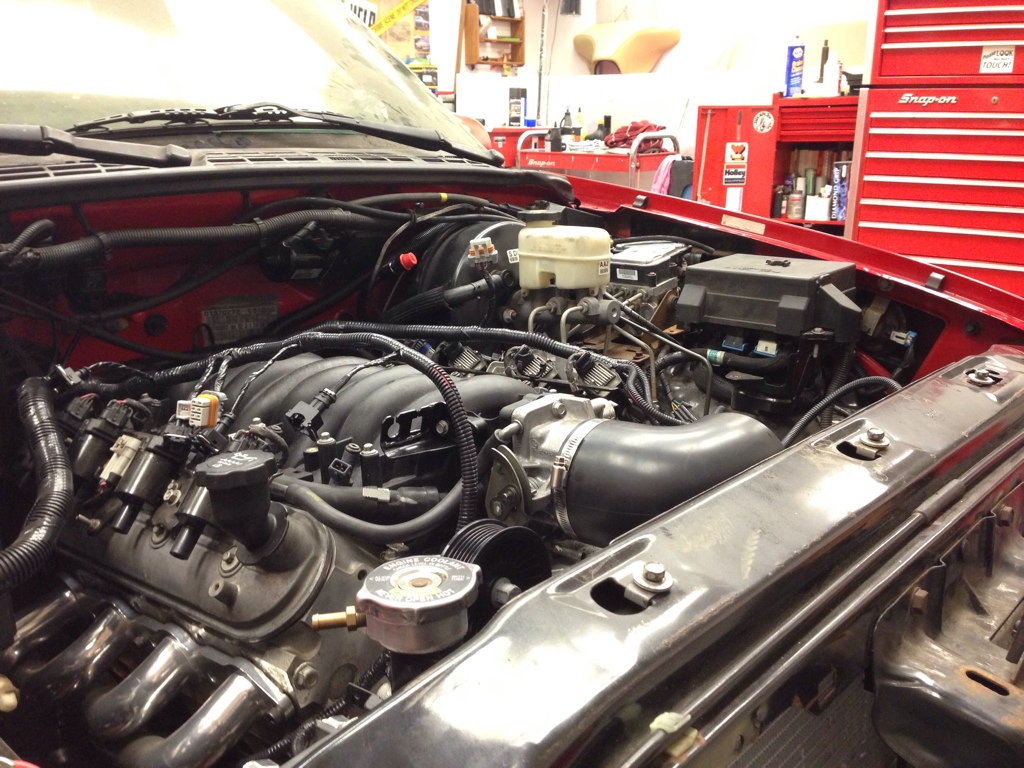
LS6 intake makes this thing look 10x better under the hood, so glad I switched haha
Got a bouquet of EV1 connectors from the USPS man!
Set to work swapping the old mini delphi style connectors over to the EV1 connectors fro the LS6 injectors...
Dat soldering.
One side all finished and taped back up!
LS6 intake makes this thing look 10x better under the hood, so glad I switched haha

 03-10-2013, 12:22 AM
#124
On The Tree
Thread Starter
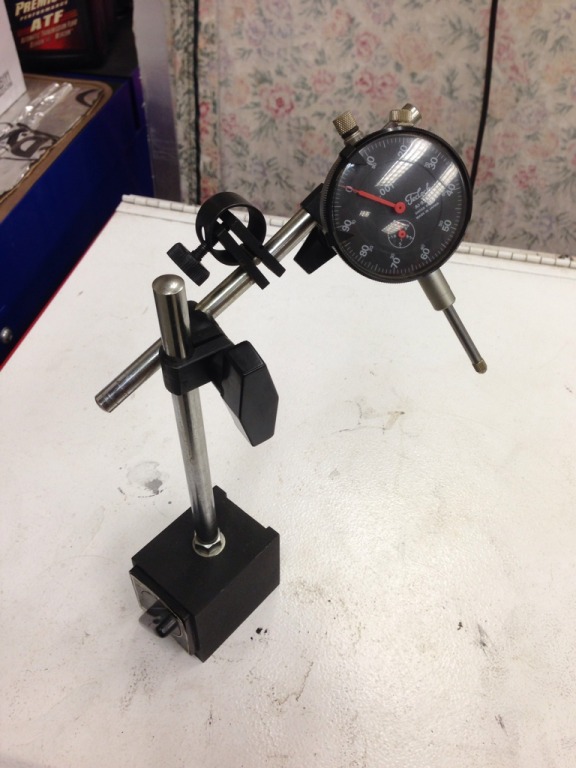
Picked a dial indicator off ebay to setup my rear diff...
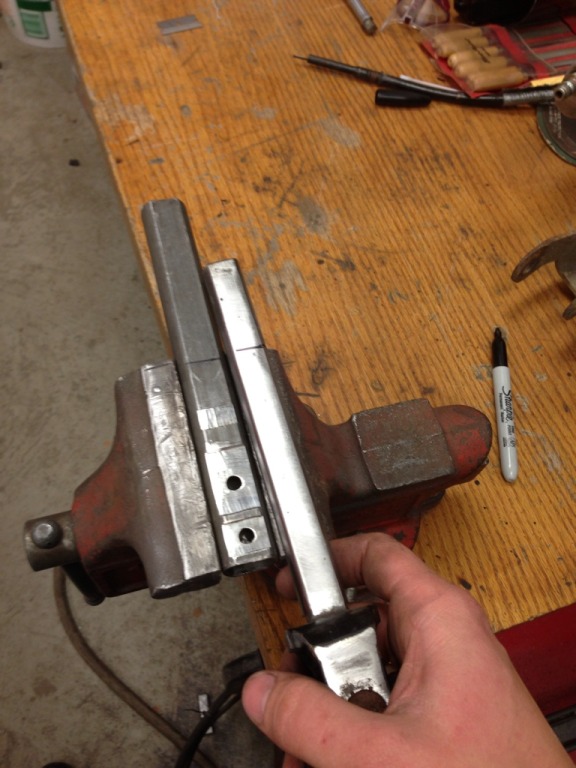
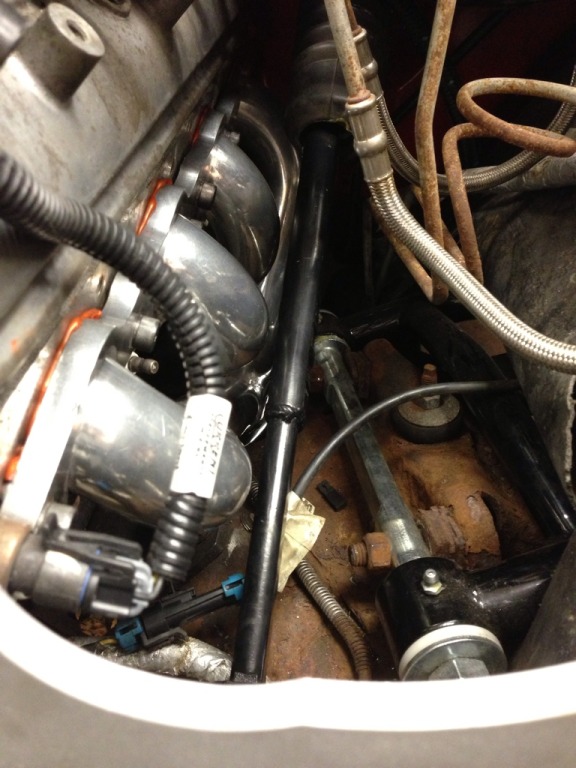
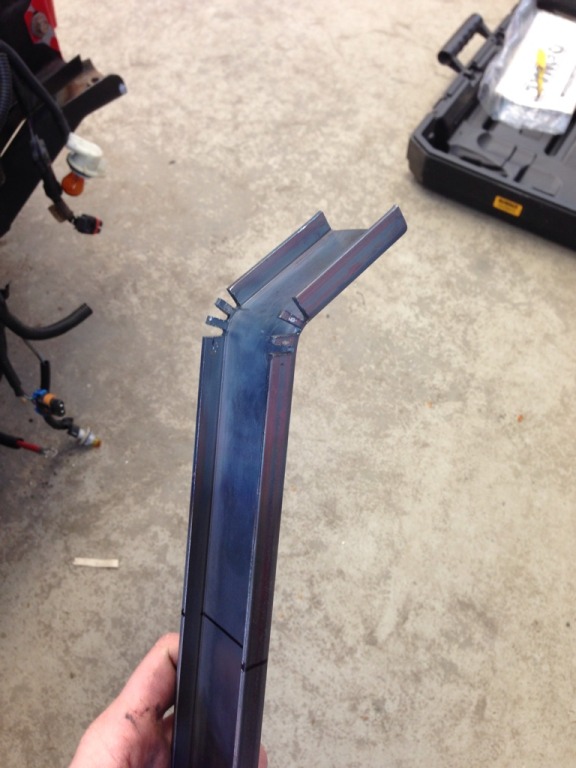
FINALLY figured out my steering shaft situation haha, went to the junkyard today and got some miscellaneous stuff for the truck and pulled a shaft from a cherokee, was much longer than the other jeep shaft I had. Brought it home...did some thinking about my steering shaft and came up with this design...
I cut down the jeep shaft to the length I needed, and then took the 1" DD shaft from the stock S10 steering shaft and welded it to the jeep shaft. With how it's setup, it has a few inches to collapse given an accident and is also easy to install and remove.
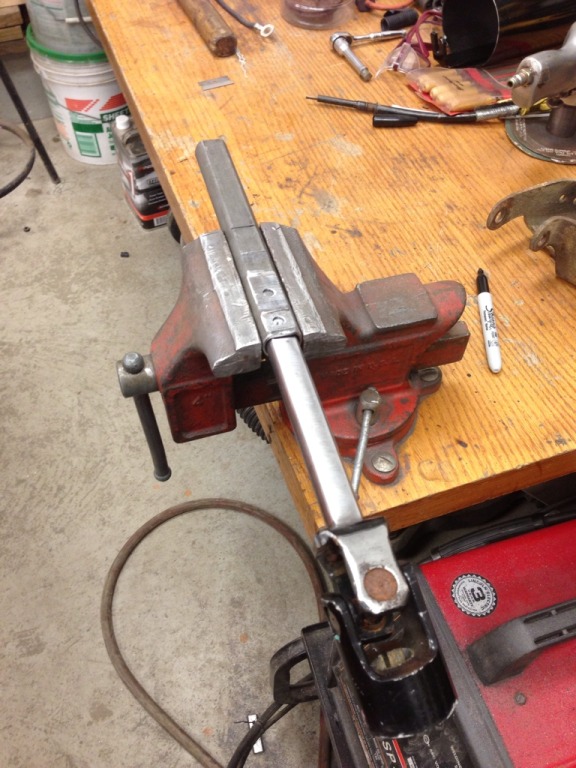
Cut and marked...
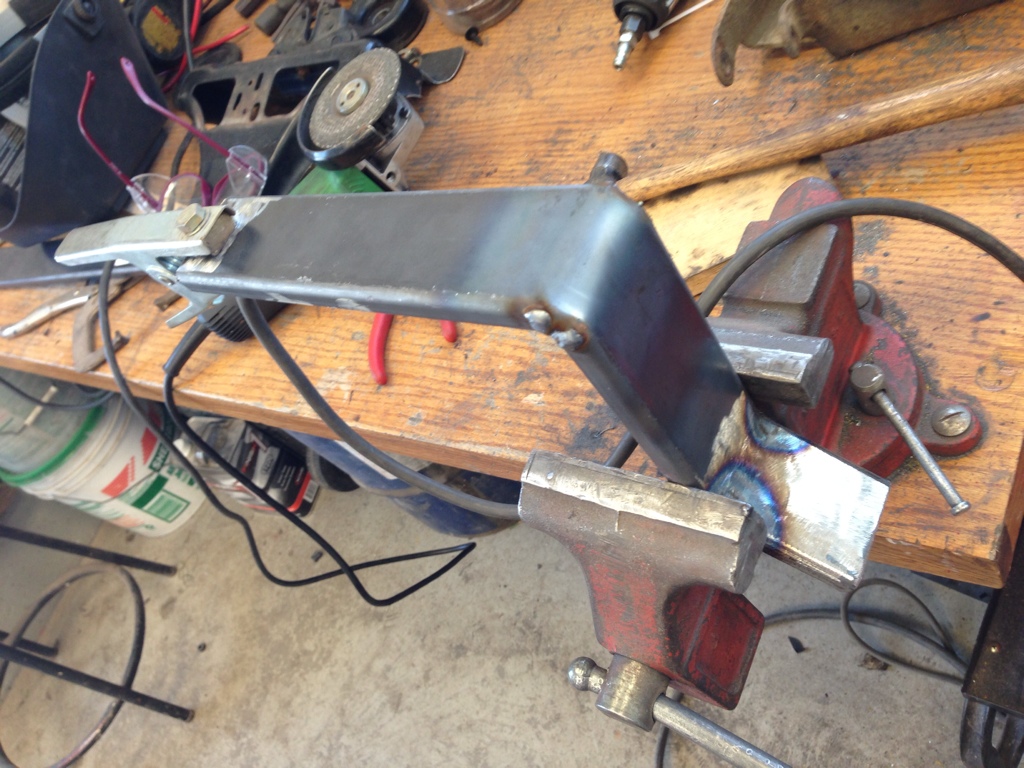
Ready for welding, drilled a couple holes for welds for more strength...
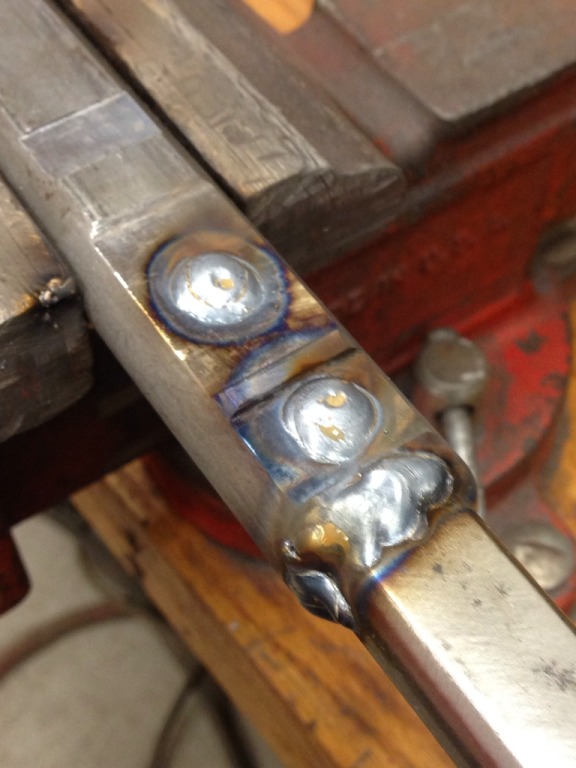
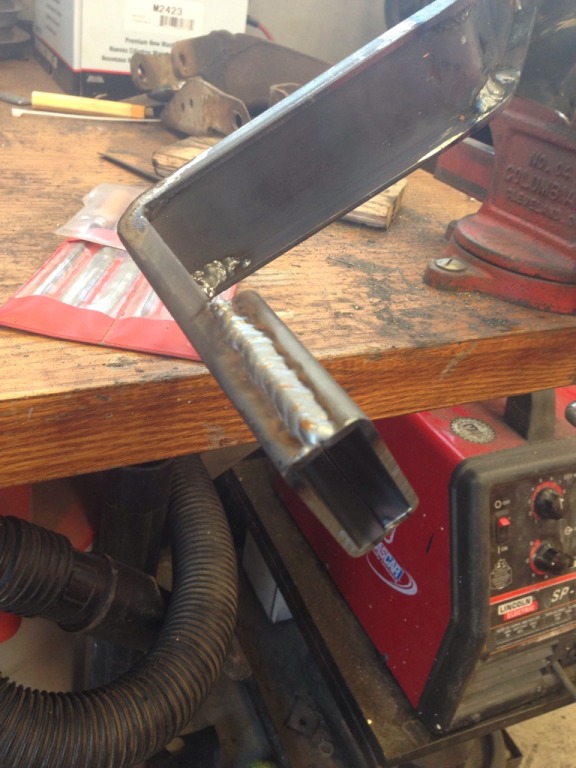
All welded up...
Painted it up...
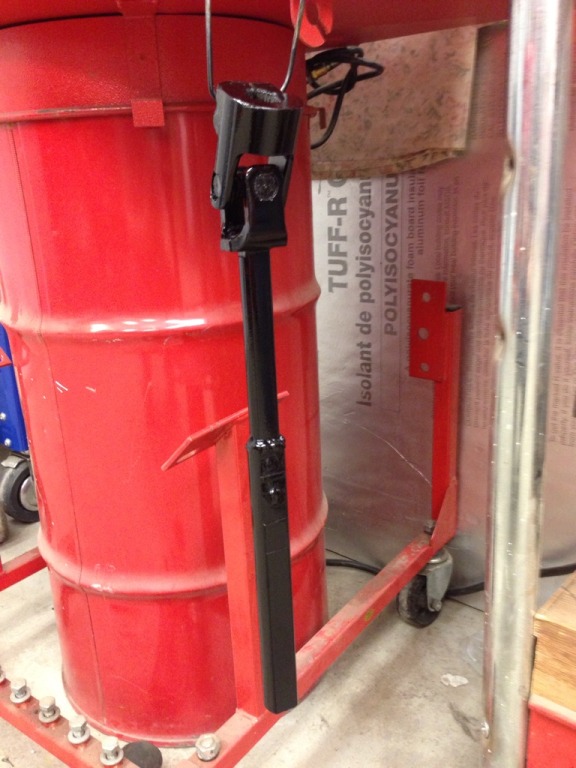
And clearance on the truck...may not look like much but it's better than what I started with! I'm comfortable with it! I'm going to shim the steering box some to get a little more angle out of it as well.
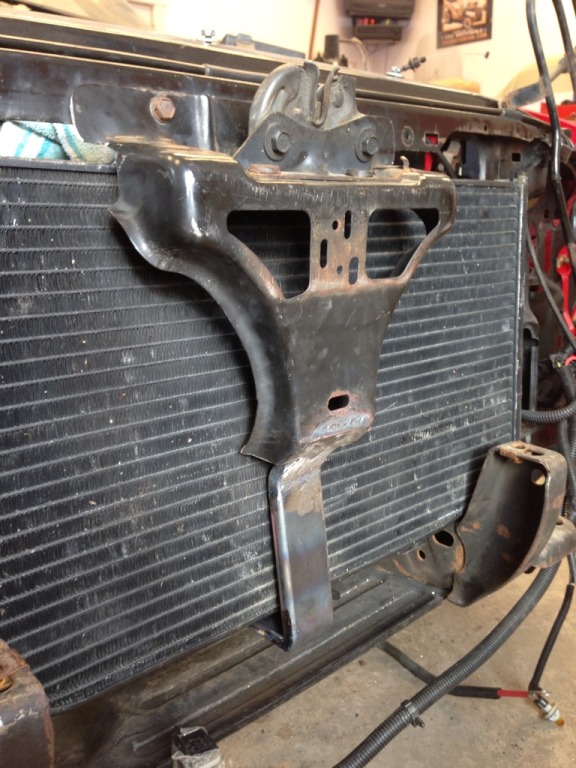
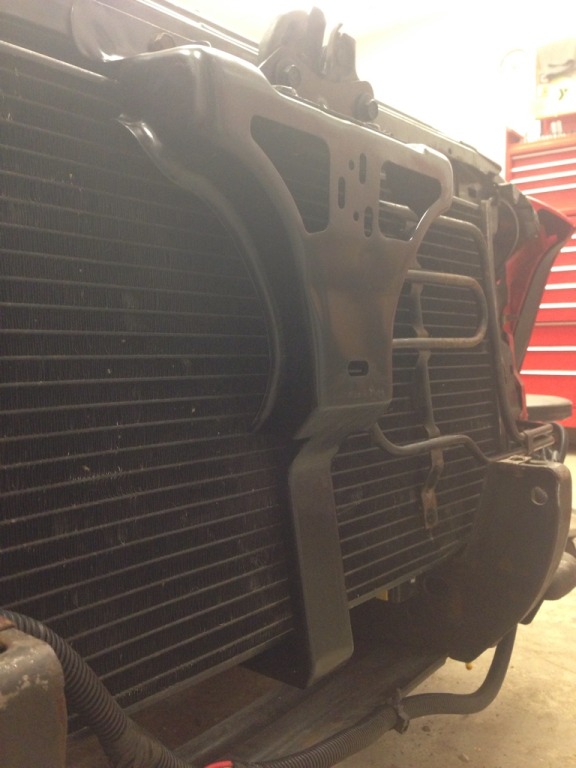
Started to work on relocating the AC condenser and modifying the hood latch.
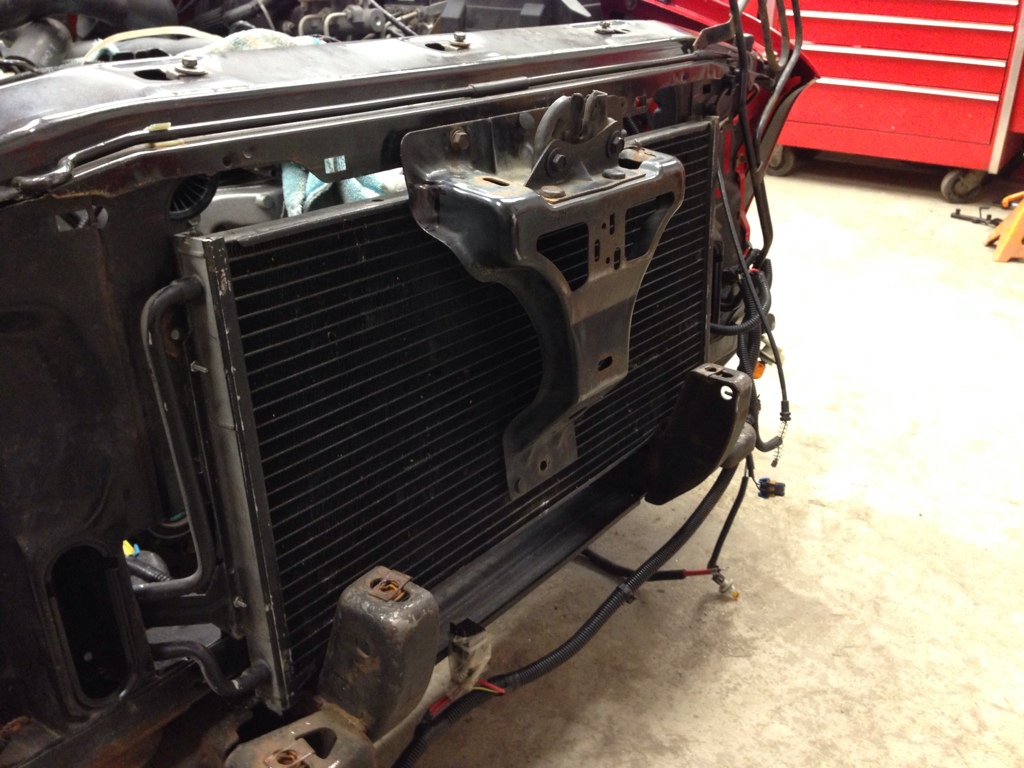
How I mounted it, there's foam on the back side between the core support and condenser. Can also see the cut I had to make for the lines to travel through the core support.
FINALLY figured out my steering shaft situation haha, went to the junkyard today and got some miscellaneous stuff for the truck and pulled a shaft from a cherokee, was much longer than the other jeep shaft I had. Brought it home...did some thinking about my steering shaft and came up with this design...
I cut down the jeep shaft to the length I needed, and then took the 1" DD shaft from the stock S10 steering shaft and welded it to the jeep shaft. With how it's setup, it has a few inches to collapse given an accident and is also easy to install and remove.
Cut and marked...
Ready for welding, drilled a couple holes for welds for more strength...
All welded up...
Painted it up...
And clearance on the truck...may not look like much but it's better than what I started with! I'm comfortable with it! I'm going to shim the steering box some to get a little more angle out of it as well.
Started to work on relocating the AC condenser and modifying the hood latch.
How I mounted it, there's foam on the back side between the core support and condenser. Can also see the cut I had to make for the lines to travel through the core support.
03-10-2013, 08:54 PM
#125
On The Tree
Thread Starter
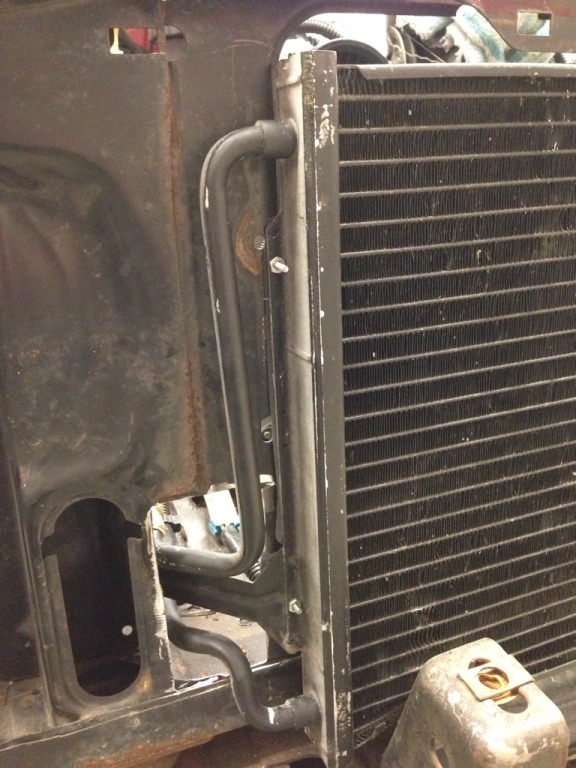
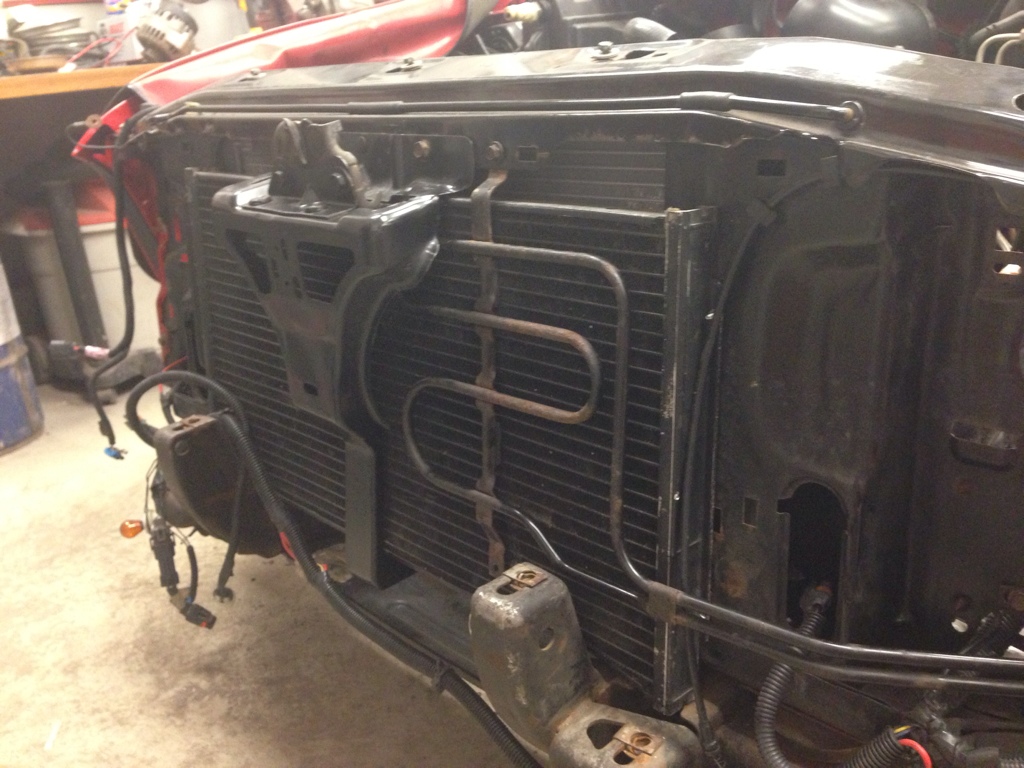
Finished up the hood latch today. Picked up some 2" steel c-channel from home depot. Did some pie cuts to get my bends...
Welded up the pie cuts and working on smoothing welds out...
welded a piece of the c-channel on top of of itself where it mounts to the core support on the bottom. Some stitches in the corner where they were pie cut for strength.

Was pretty happy with these welds...not the ones on the inside haha
Mocked up...
And all painted up with the condenser mounted up! Had to tweak the power steering cooler lines a bit, came out pretty good though!
Welded up the pie cuts and working on smoothing welds out...
welded a piece of the c-channel on top of of itself where it mounts to the core support on the bottom. Some stitches in the corner where they were pie cut for strength.
Was pretty happy with these welds...not the ones on the inside haha
Mocked up...
And all painted up with the condenser mounted up! Had to tweak the power steering cooler lines a bit, came out pretty good though!
 03-11-2013, 11:29 PM
#128
On The Tree
Thread Starter
Thanks!
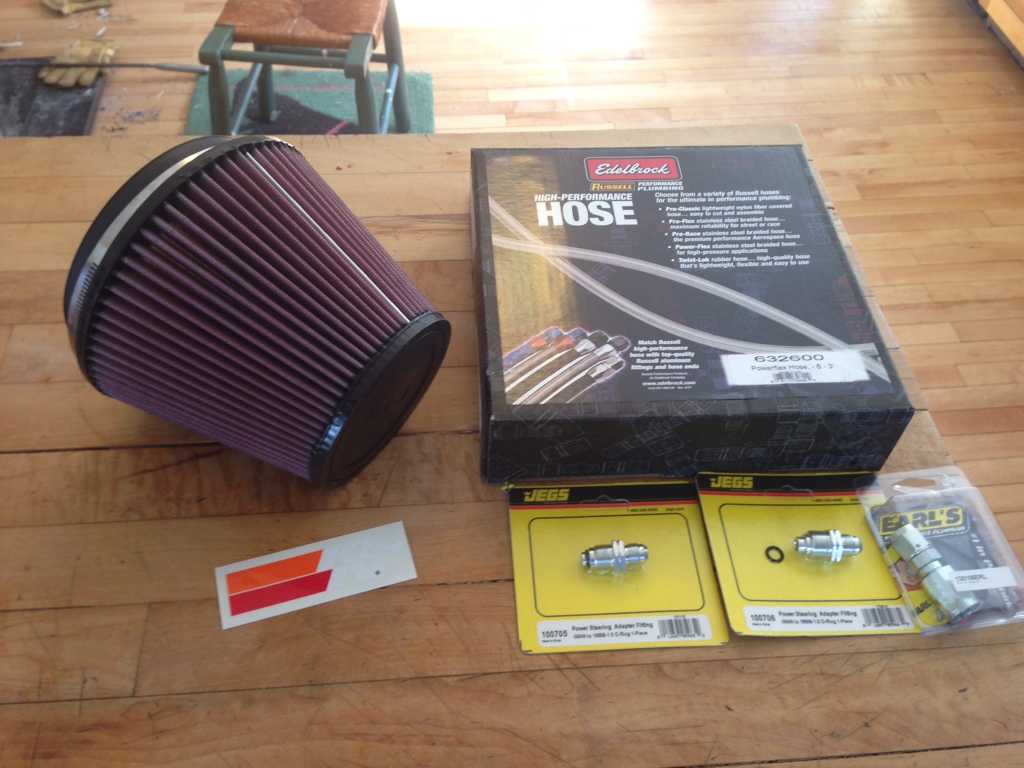
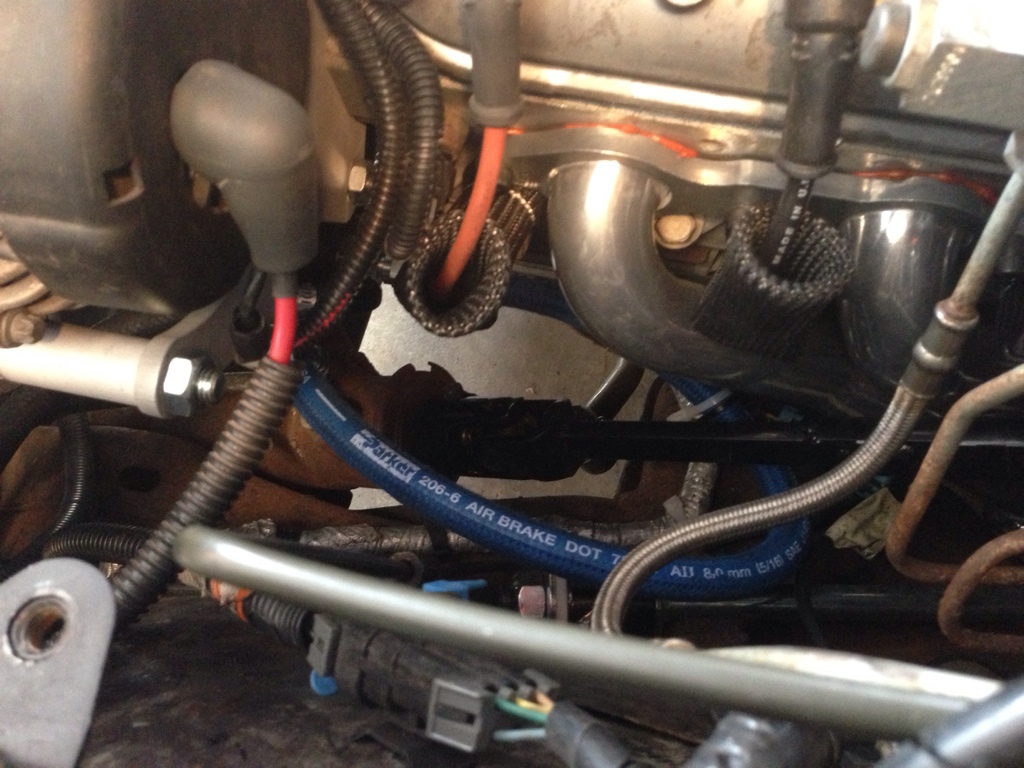
Not much progress today. Some parts came in, hose, adapters and fittings for my new power steering line (still waiting on one fitting that got drop shipped) and a shorter K&N filter for my air intake.
Got the new fuel rail in...

Going to look at some wheels tomorrow...
Not much progress today. Some parts came in, hose, adapters and fittings for my new power steering line (still waiting on one fitting that got drop shipped) and a shorter K&N filter for my air intake.
Got the new fuel rail in...
Going to look at some wheels tomorrow...
03-12-2013, 11:25 PM
#129
On The Tree
Thread Starter
I didn't get much done on the truck today, went back to school to use a mill for my shifter bracket, that didn't work out the I found out that guy sold those wheels to someone else when we scheduled a time to meet so I could check them out. So I was pretty pissed today, wasted the whole day.
I did get some plug wire sleeves in, though I had some pictures of them but apparently not. After getting home pissed I busted out the sawzall and started cutting that 3/8 plate to make my shifter bracket since I didn't get anything done at school.
Picture makes it look really ugly, I'll get some better ones tomorrow when its installed. And then I got bored and fired it up for the hell of it!
03-13-2013, 07:54 PM
#130
On The Tree
Thread Starter
Pictures of the plug wire sleeves I put on...
Swapped out my straight connector for a 45 on my fuel line for better fitment.
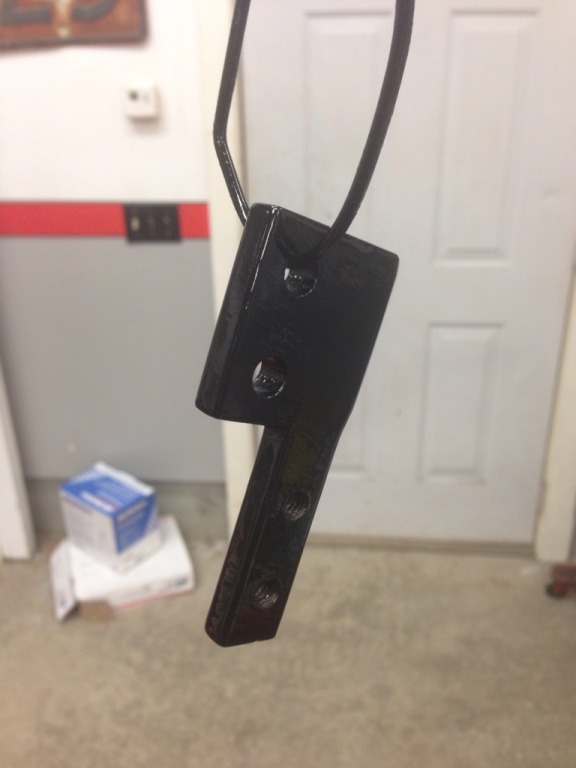
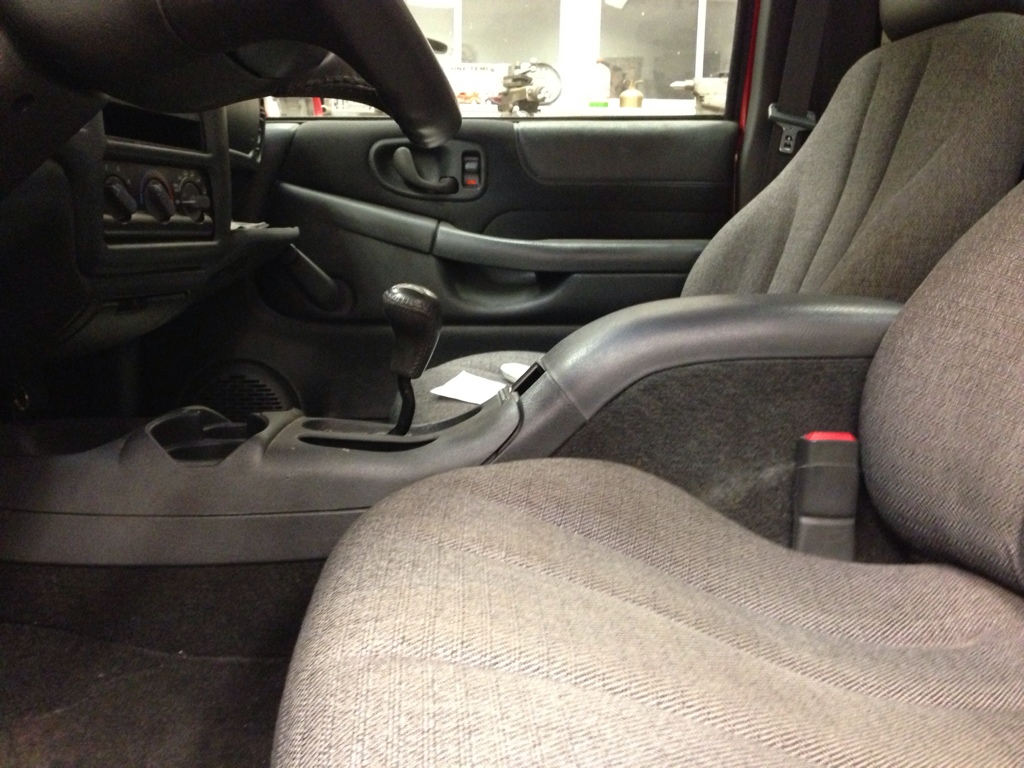
Shifter bracket installed...
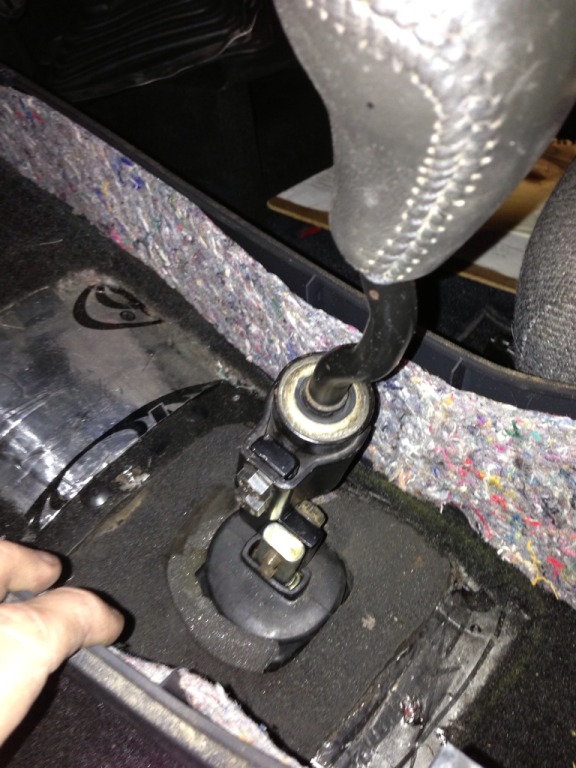
New shifter height, it's so much better. Hand falls right onto the shift **** when your arm is on the arm rest.
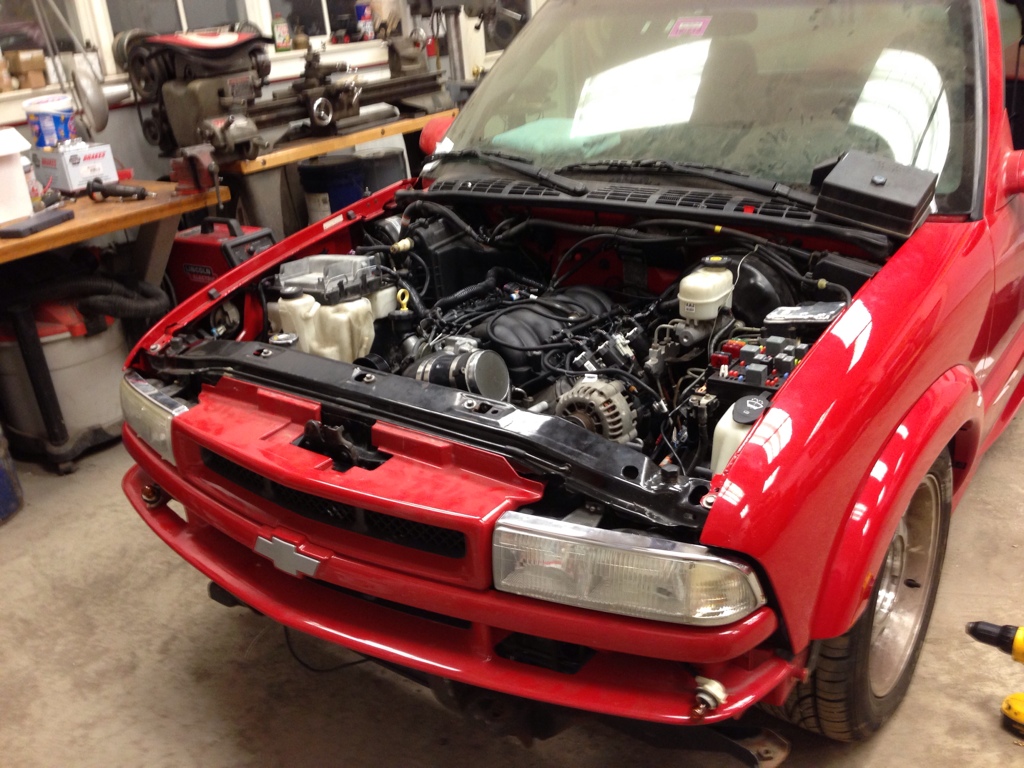
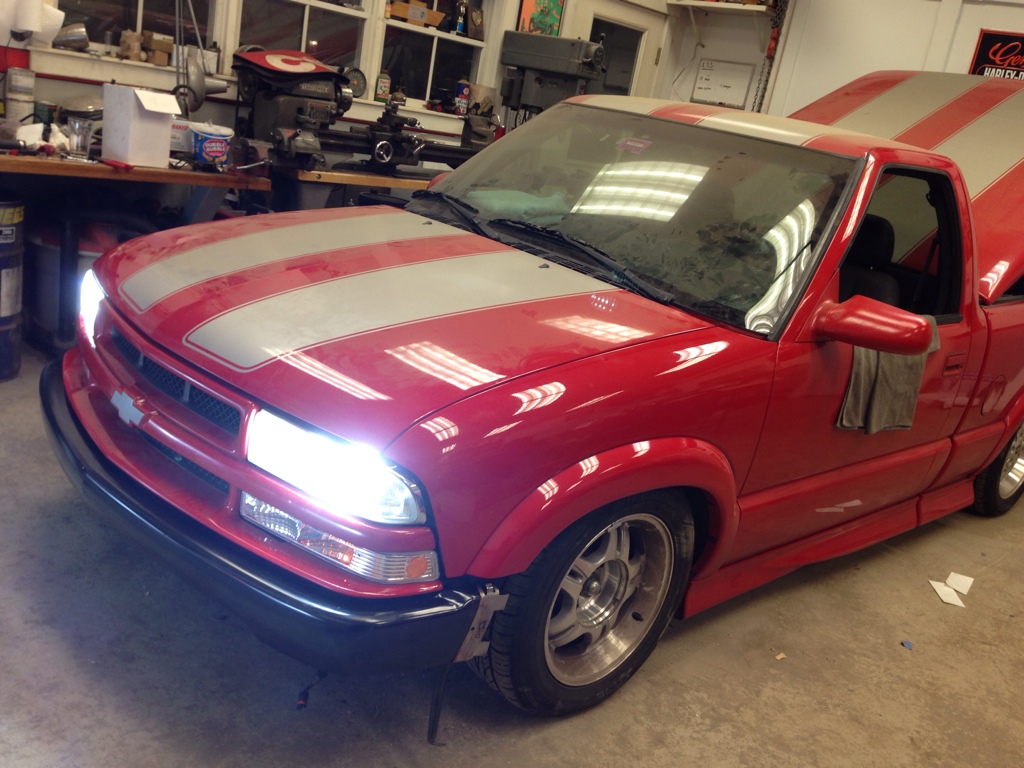
Fitted the headlights and grille back on, two wires, a power steering hose, my air intake, AC lines, and some miscellaneous hardware and it's all done under the hood!!!
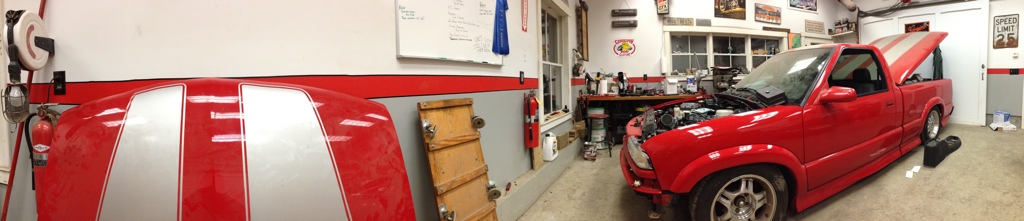
Cool panorama shot!
Swapped out my straight connector for a 45 on my fuel line for better fitment.
Shifter bracket installed...
New shifter height, it's so much better. Hand falls right onto the shift **** when your arm is on the arm rest.
Fitted the headlights and grille back on, two wires, a power steering hose, my air intake, AC lines, and some miscellaneous hardware and it's all done under the hood!!!
Cool panorama shot!
03-14-2013, 05:18 PM
#131
On The Tree
Thread Starter
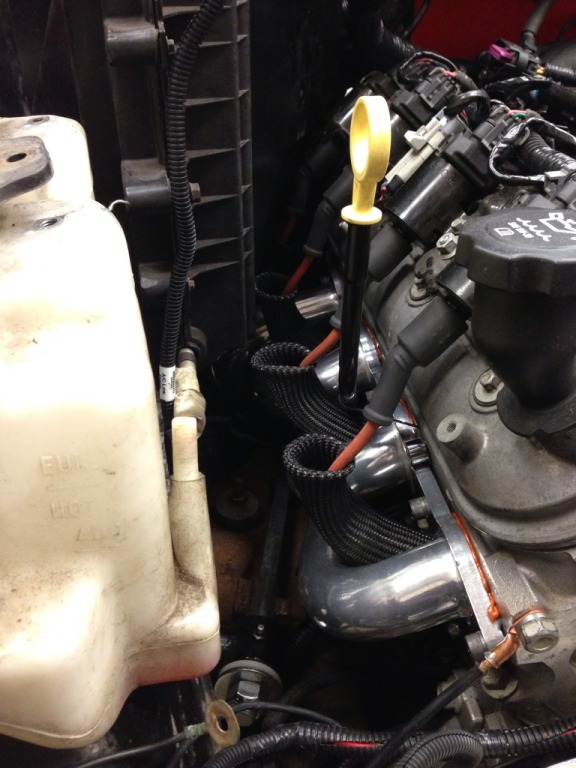
Does anyone know why there are two connections on the overflow tank? Obviously one is for the overflow from the radiator filler, but what would the second one be for?

Front fascia going back together, new GM bumper since the stock one had rotted away on one corner. Leaving it black for now until I can get it painted. Also new Anzo clear corners.
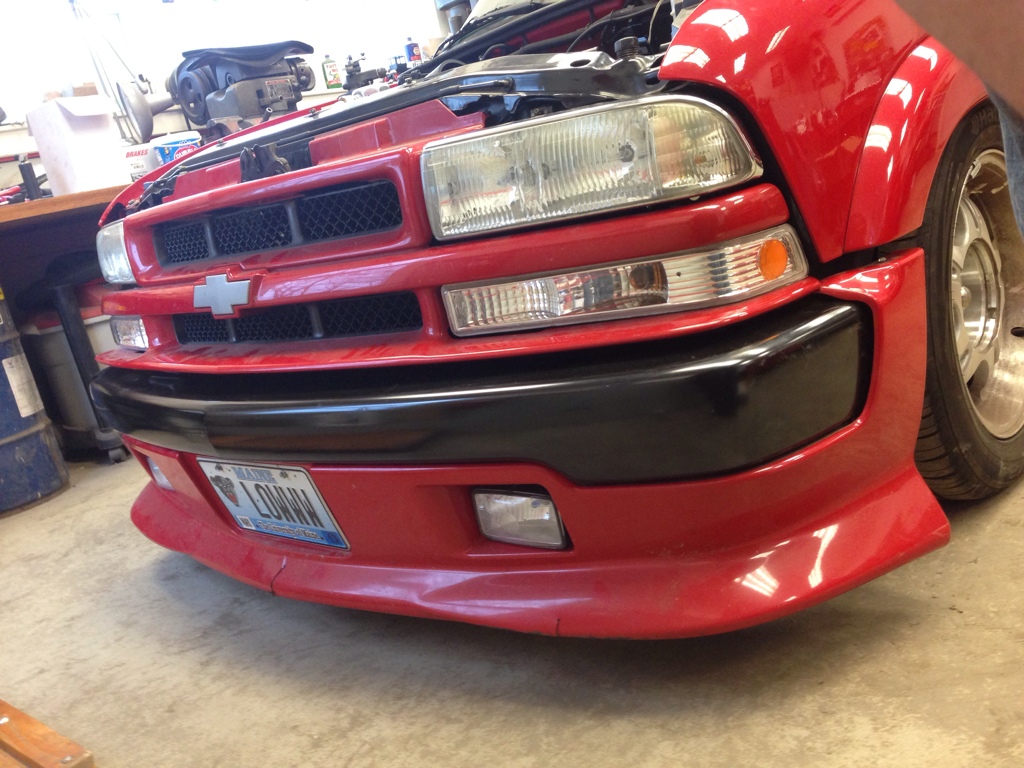
Front fascia going back together, new GM bumper since the stock one had rotted away on one corner. Leaving it black for now until I can get it painted. Also new Anzo clear corners.
03-15-2013, 12:14 AM
#132
On The Tree
Thread Starter
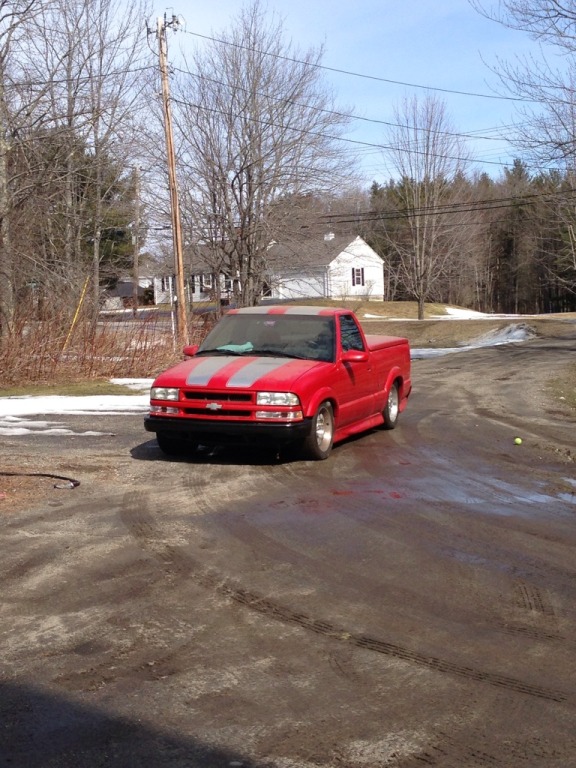
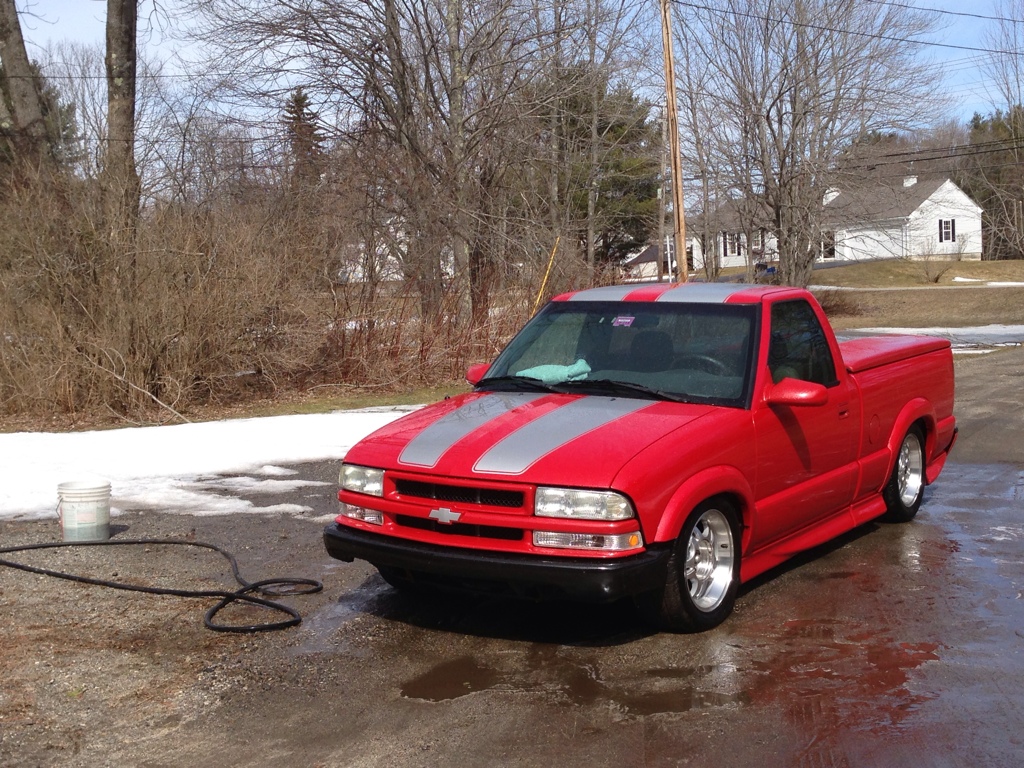
Buttoned up all of the wiring tonight, yay! Once my power steering line stuff, AC line parts, and air intake parts come in I'll just need to button those up and it will be all finished under the hood! Tomorrow, I'm going to pull it out (under it owns power!!!!!  ) and give it bath...it's dirty from sitting for close to a year haha
My spring break comes to an end soon so before I leave I'm going to pull it back out into the barn and drop the axle out from under the truck so I can work on that and the Nova can get some loving before summer too. Hopefully I will be able to come home next weekend though and button up the air intake, steering lines and all that stuff. Rear axle hopefully too, and then it just needs to go to a shop and get an exhaust, alignment, AC charge and sticker...
THERE'S LIGHT AT THE END OF THE TUNNEL!
) and give it bath...it's dirty from sitting for close to a year hahaMy spring break comes to an end soon so before I leave I'm going to pull it back out into the barn and drop the axle out from under the truck so I can work on that and the Nova can get some loving before summer too. Hopefully I will be able to come home next weekend though and button up the air intake, steering lines and all that stuff. Rear axle hopefully too, and then it just needs to go to a shop and get an exhaust, alignment, AC charge and sticker...
THERE'S LIGHT AT THE END OF THE TUNNEL!
03-15-2013, 08:25 AM
#133
On The Tree

Join Date: Apr 2011
Location: Vancouver, WA
Posts: 129
Likes: 0
Received 0 Likes
on
0 Posts

The bottom connection goes to the radiator overflow. The top one is to route the tank overflow below the truck.

 03-16-2013, 01:10 AM
#135
On The Tree
Thread Starter
Threw the 3.73's from the stock diff onto my posi unit..
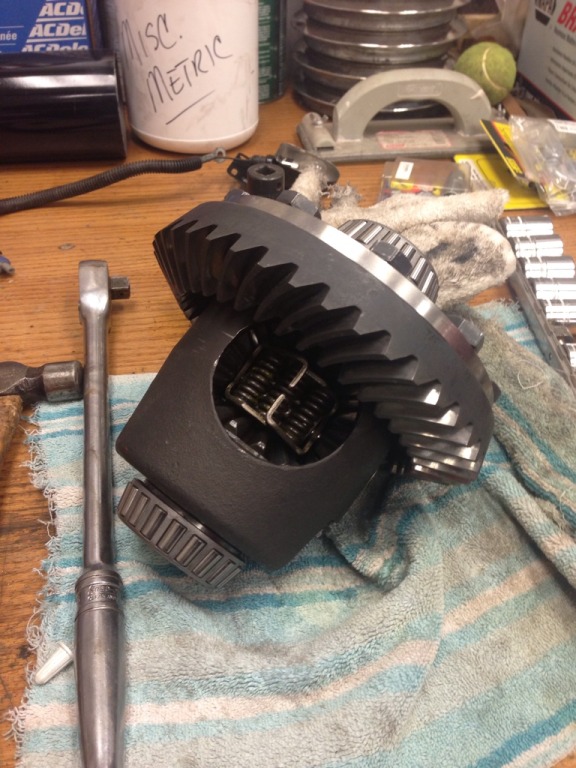
Pulled the stock diff out of the rear...
And now...

LOL, lots of youtube video's and reading right now. I'm so beyond lost haha
Pulled the stock diff out of the rear...
And now...
LOL, lots of youtube video's and reading right now. I'm so beyond lost haha
03-16-2013, 09:19 PM
#137
On The Tree
Thread Starter
They really should!
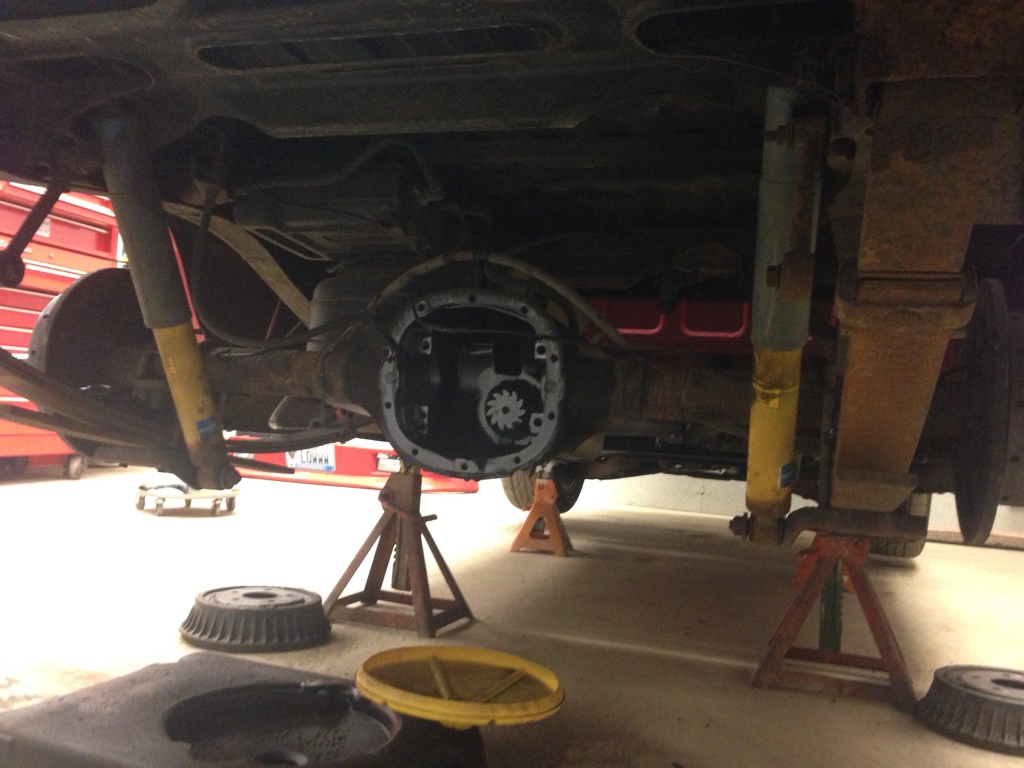
Posi installed, took some trial and error but I finally got it all figured out!
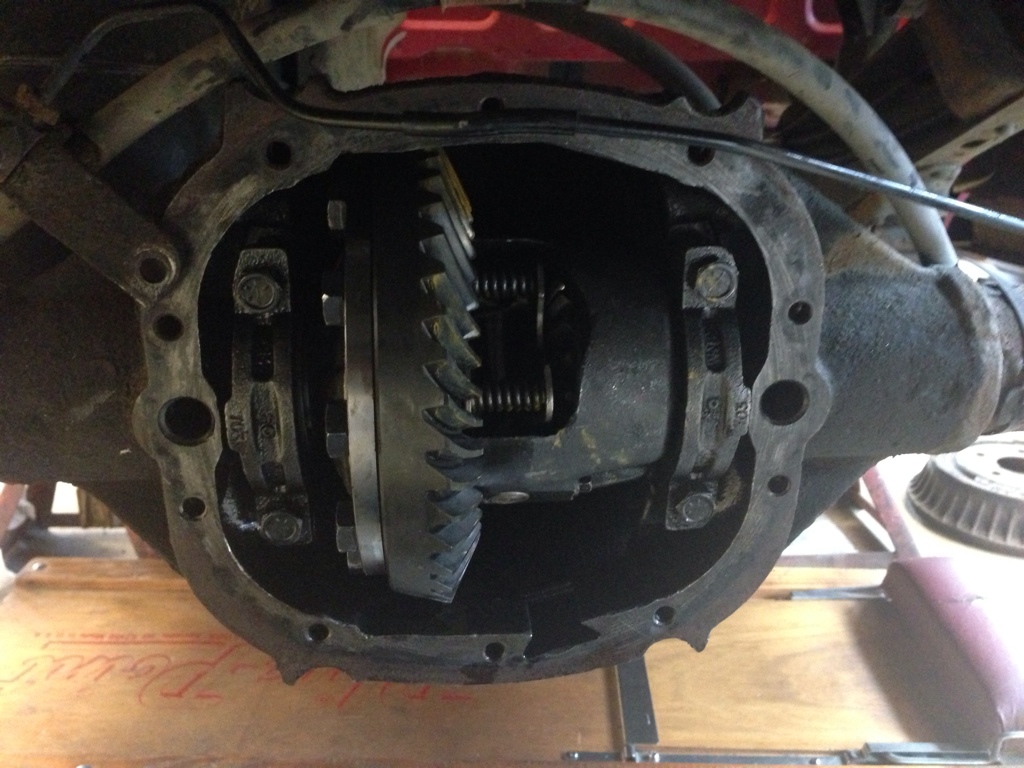
LPW girdle installed...
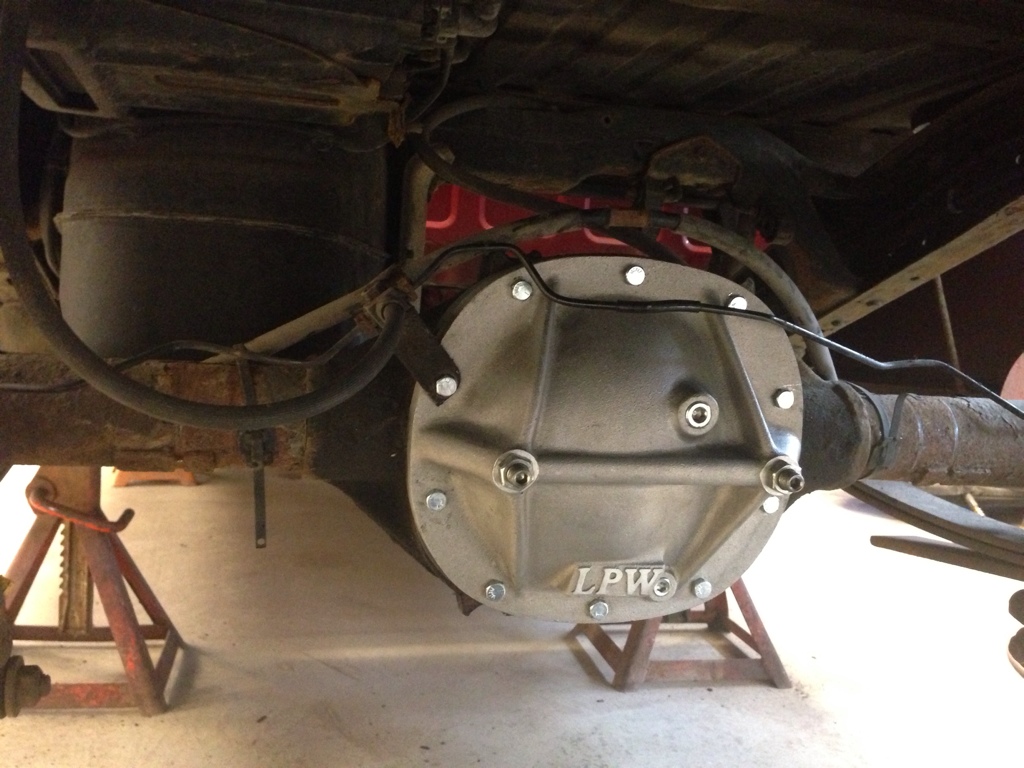
For S10 guys concerned with swaybar clearance and looking for a girdle, this one has plenty of clearance!
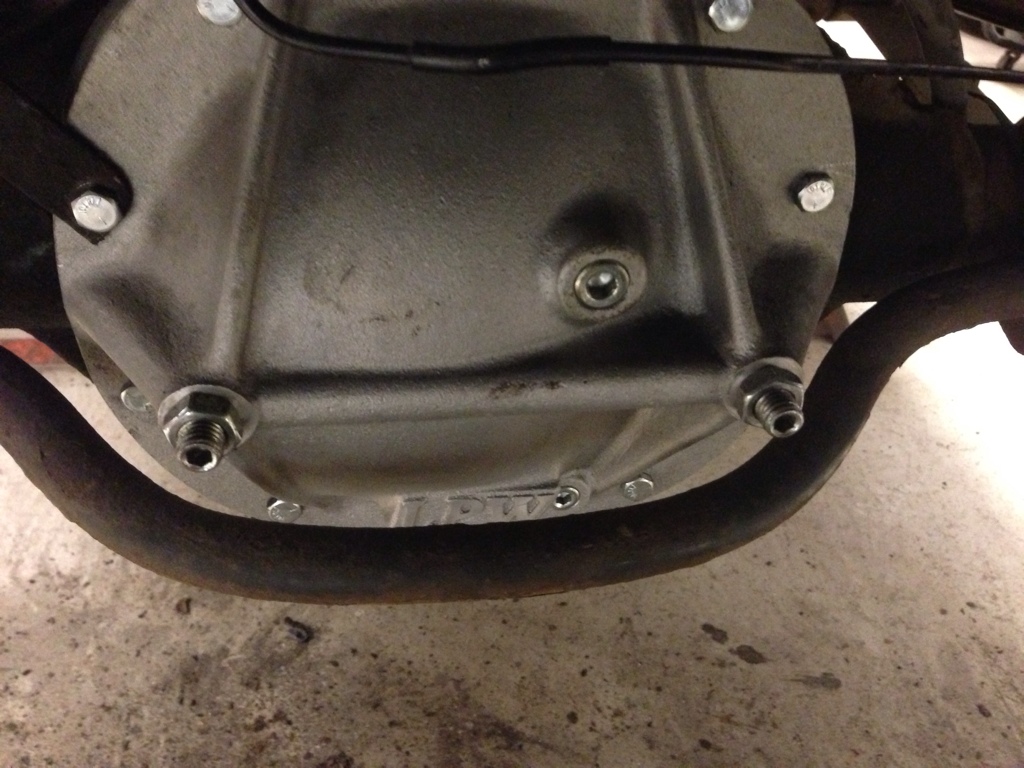
Rear end all tied back together
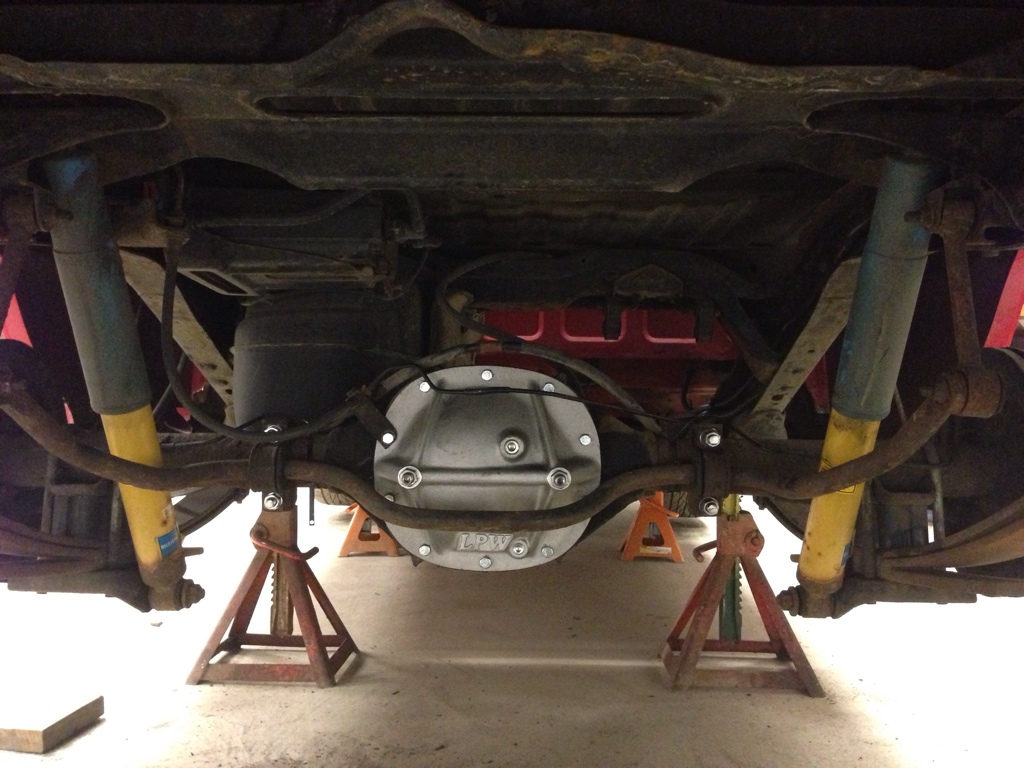
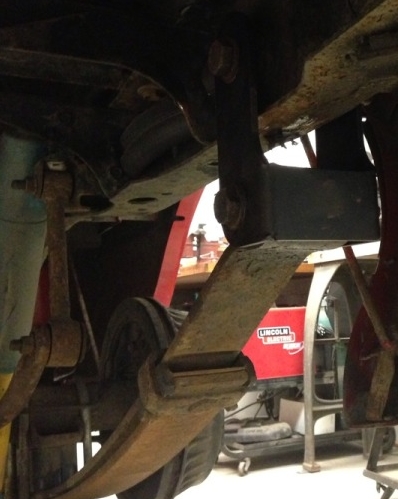
Replaced the leaf shackles as well, they were due...one of them had a rust hole in it LOL
Posi installed, took some trial and error but I finally got it all figured out!
LPW girdle installed...
For S10 guys concerned with swaybar clearance and looking for a girdle, this one has plenty of clearance!
Rear end all tied back together
Replaced the leaf shackles as well, they were due...one of them had a rust hole in it LOL
03-22-2013, 07:20 PM
#138
On The Tree
Thread Starter
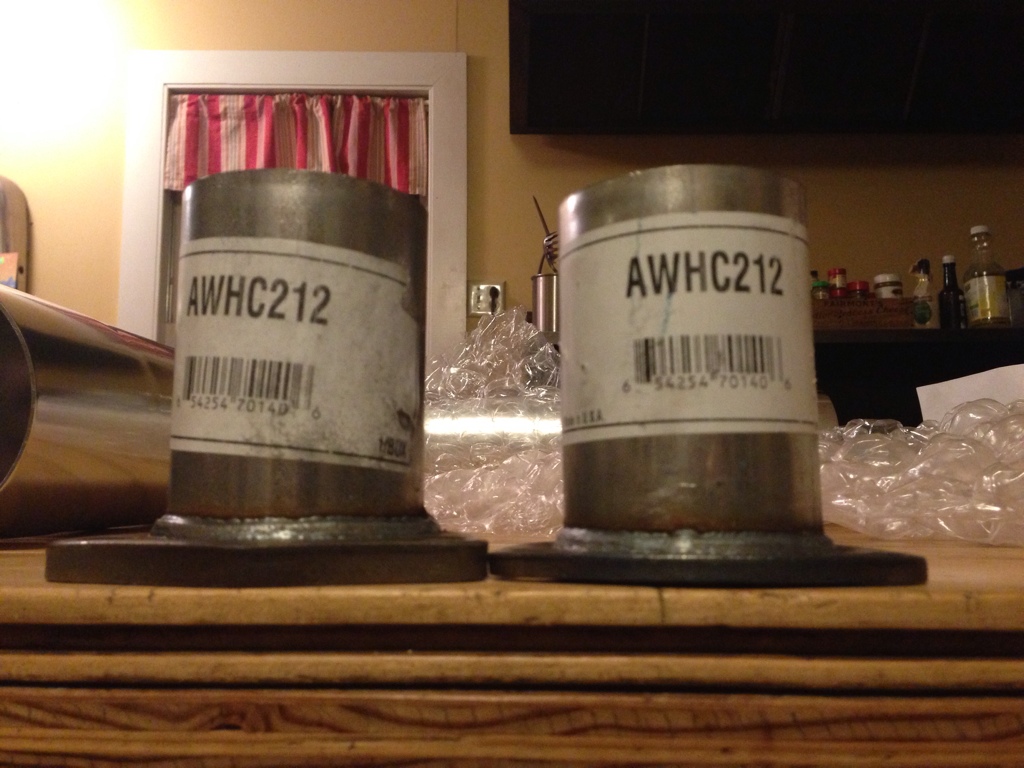
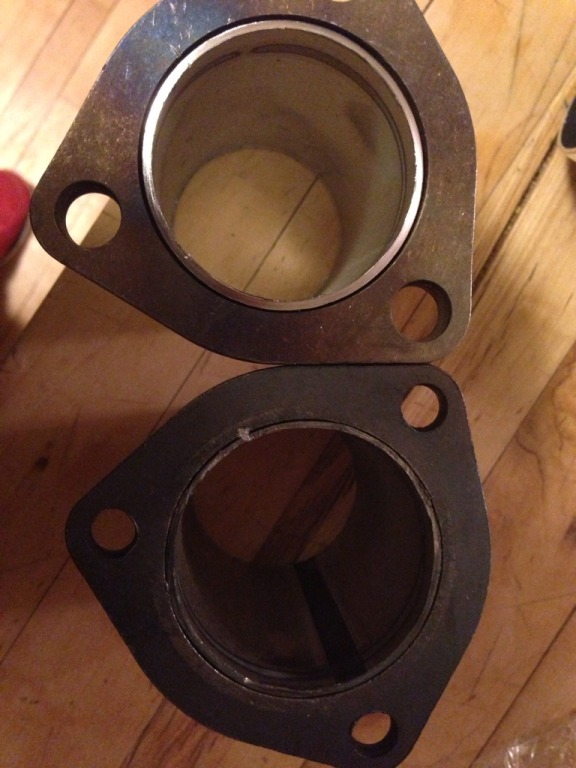
Home for the weekend to do some more work on the truck! Parts in!
- 4" aluminum intake tube to finish my air intake
- 2.5" x-pipe
- Section of power steering hose
- black radiator hose fitting for my coolant crossover connection
- O2 bungs
- SS mirror glass, broke one pulling the truck out of the shop last weekend :rant:
- SCE copper collector gaskets
- Collector bolts with locking nuts
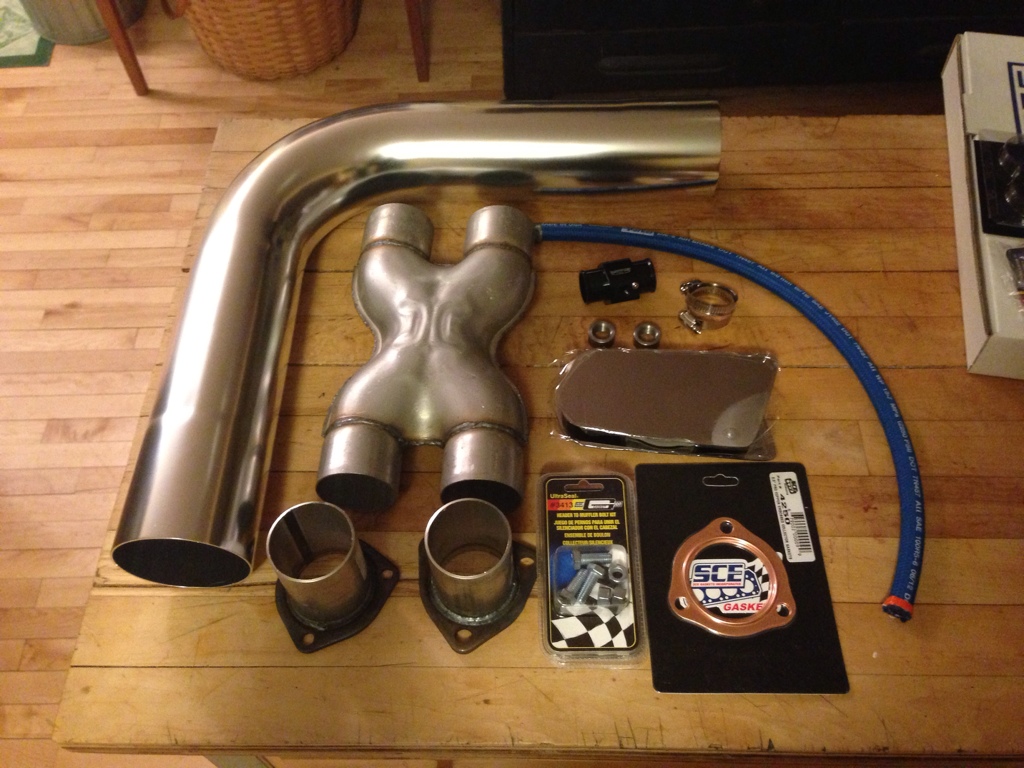
Freakin knuckle heads at summit sent me two different collectors, they're both 2.5" pipe and have the same part number (probably mislabeled by some knuckle head), but one has a much thicker flange and larger bolts holes.
- 4" aluminum intake tube to finish my air intake
- 2.5" x-pipe
- Section of power steering hose
- black radiator hose fitting for my coolant crossover connection
- O2 bungs
- SS mirror glass, broke one pulling the truck out of the shop last weekend :rant:
- SCE copper collector gaskets
- Collector bolts with locking nuts
Freakin knuckle heads at summit sent me two different collectors, they're both 2.5" pipe and have the same part number (probably mislabeled by some knuckle head), but one has a much thicker flange and larger bolts holes.
The following users liked this post:
safwanL33 (01-05-2024)
03-24-2013, 12:32 AM
#140
On The Tree
Thread Starter
More pics!
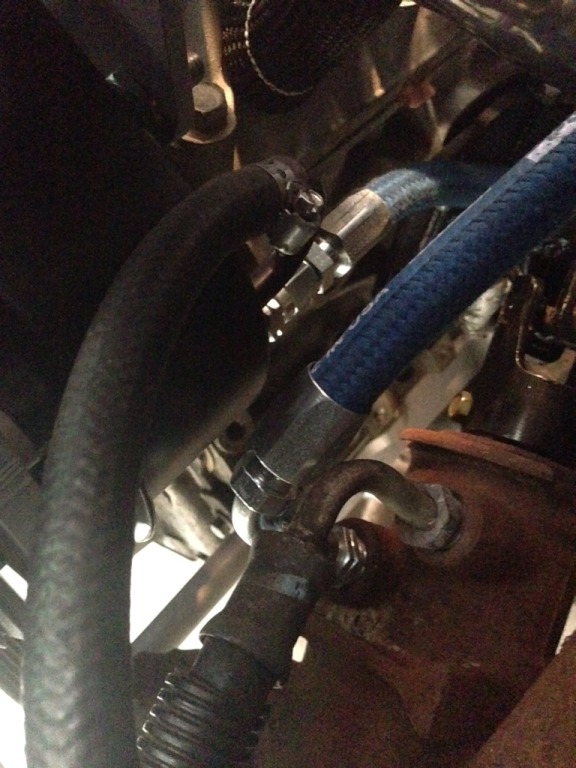
Power steering hose, its covered in wire loom now.
The fittings used, 90 degree off the box and a straight fitting out the pump...
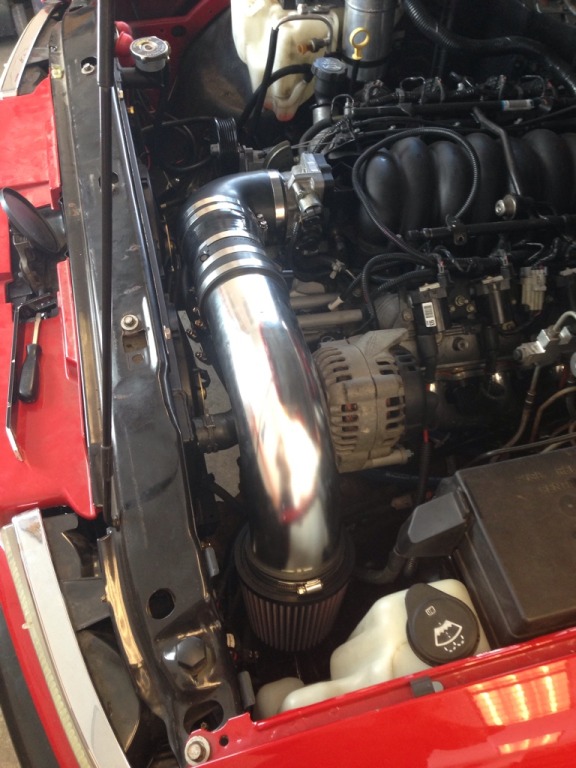
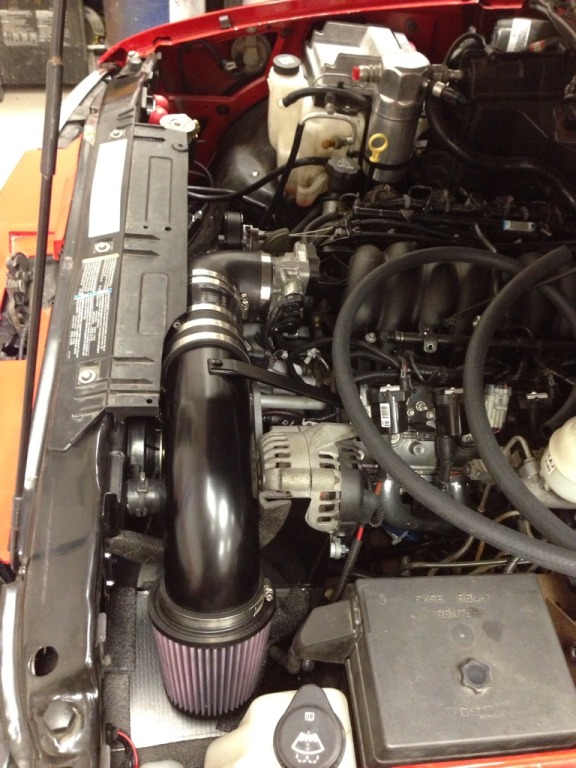
Intake routing...
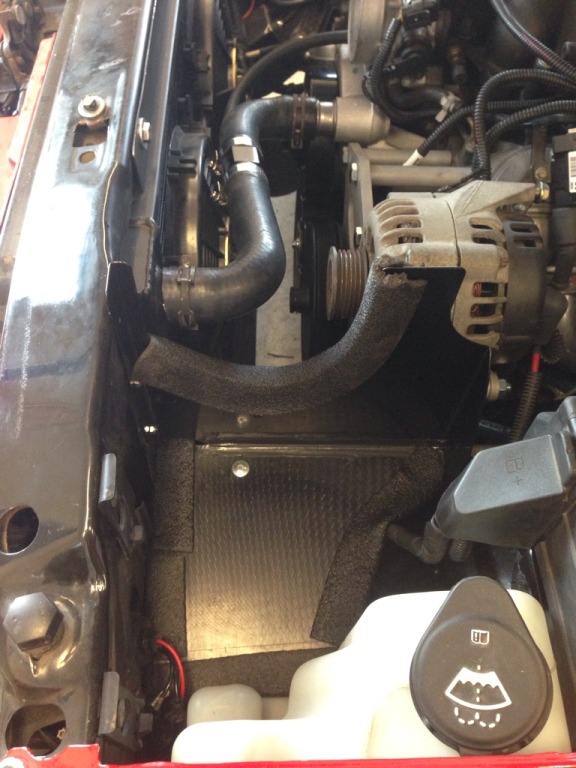
Built a small box out of one of the metal panels that came with the silverado cold air intake kit I bought to use for parts, fit pretty well. Bolted it to the core support and then used a piece of carbon fiber I had laying around for the bottom panel. When I get some more time, I'll make it a little more air tight. For now it serves the purpose of making sure it doesn't suck up a bunch of water LOL
Intake tube painted black and all installed...
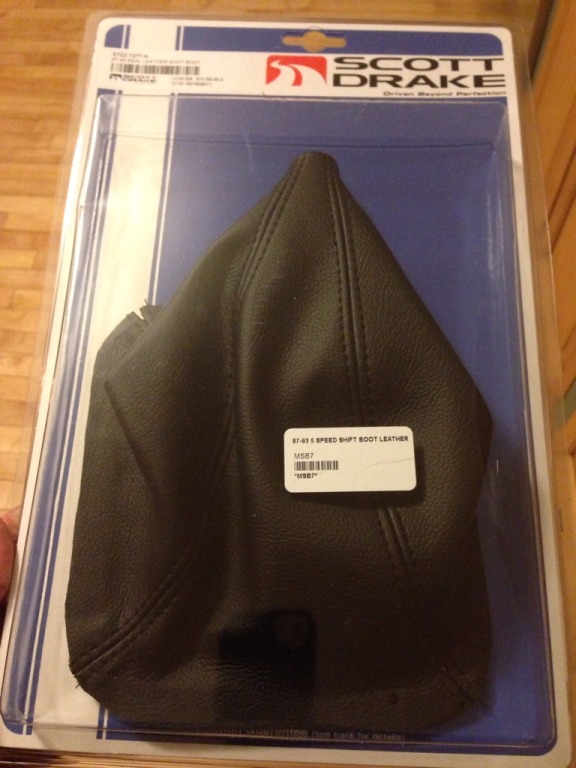
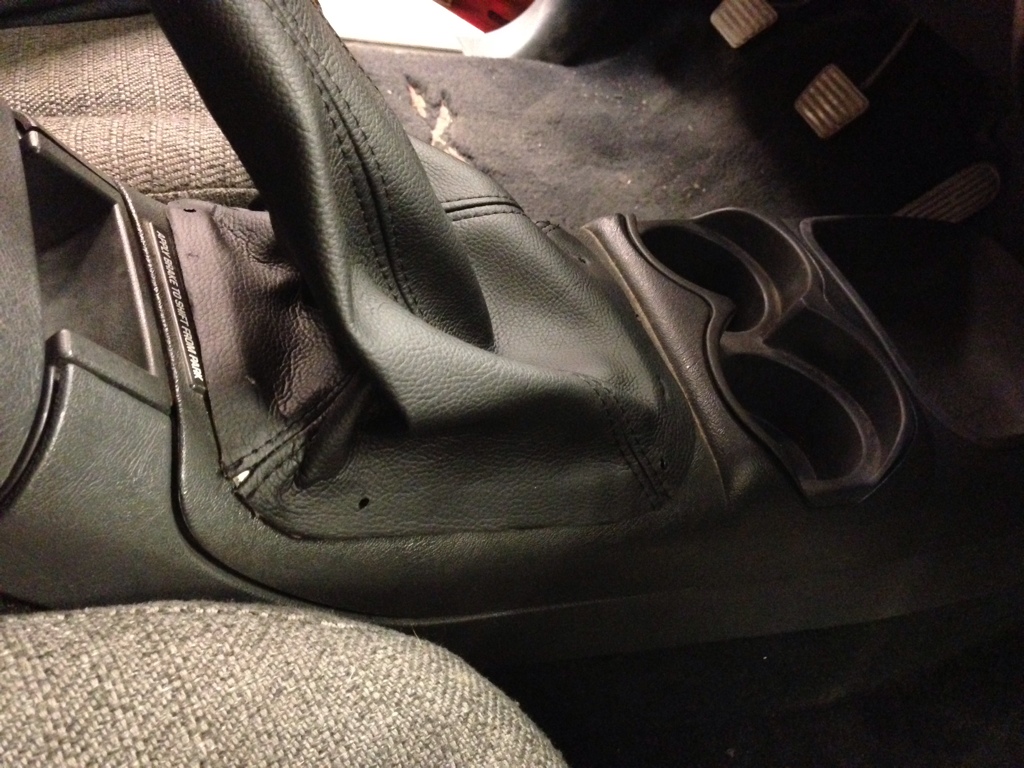
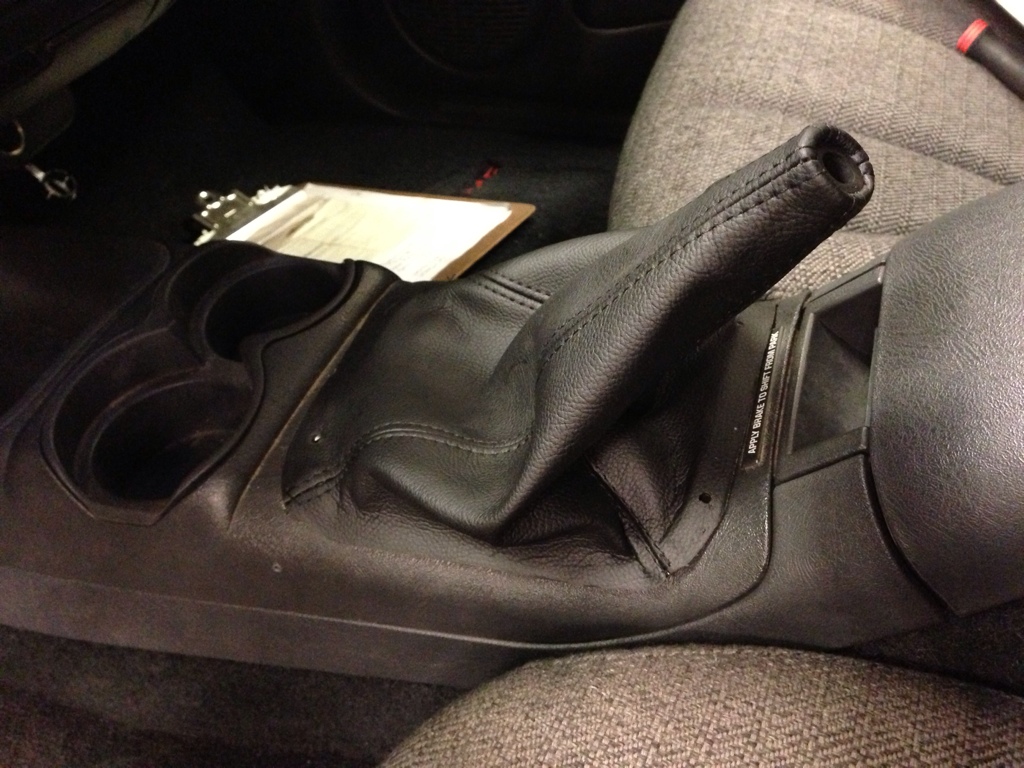
Made a bracket for my console, didn't get a picture of that. But my next big piece I'm trying to work on is the shift boot...How have other people installed their shift boots? I'm trying to figure out how to do it correctly and make it look clean. I thought of attaching it from the bottom of the console, but there isn't much to attach it to, and I could attach it to the top of the console (honestly doesn't look that bad), but I'm not real crazy about that either. I'm debating bringing the console to an upholsterer and just letting them do it...here's some pics of the boot just laying on top of the console.
Power steering hose, its covered in wire loom now.
The fittings used, 90 degree off the box and a straight fitting out the pump...
Intake routing...
Built a small box out of one of the metal panels that came with the silverado cold air intake kit I bought to use for parts, fit pretty well. Bolted it to the core support and then used a piece of carbon fiber I had laying around for the bottom panel. When I get some more time, I'll make it a little more air tight. For now it serves the purpose of making sure it doesn't suck up a bunch of water LOL
Intake tube painted black and all installed...
Made a bracket for my console, didn't get a picture of that. But my next big piece I'm trying to work on is the shift boot...How have other people installed their shift boots? I'm trying to figure out how to do it correctly and make it look clean. I thought of attaching it from the bottom of the console, but there isn't much to attach it to, and I could attach it to the top of the console (honestly doesn't look that bad), but I'm not real crazy about that either. I'm debating bringing the console to an upholsterer and just letting them do it...here's some pics of the boot just laying on top of the console.
The following users liked this post:
safwanL33 (01-05-2024)