
My 1965 Buick Skylark L92/6L80 Swap
 05-07-2016, 04:55 PM
#661
TECH Resident

Good safety move.
Just a heads up, that braided stainless line will abrade anything it touches. A sleeve of shrink tubing where it makes contact will eliminate or some braided wire loom works great, too.
Doug
Just a heads up, that braided stainless line will abrade anything it touches. A sleeve of shrink tubing where it makes contact will eliminate or some braided wire loom works great, too.
Doug
 05-07-2016, 10:01 PM
#662

 07-06-2016, 04:29 PM
#664
Now that Summer is here I am looking at ways to bring down my coolant temperatures. It is running just ok on warm days. A little hotter than I would like with the A/C on. I went around and sealed any holes or gaps between the fan housing and the radiator. Mine was pretty good but a little more sealing to get every last CFM.
On thing I found out is that the A/C condenser needs to be right up close to the radiator, maybe 1/4" to 3/8" away. This is to reduce the swirling of the air between the two for better airflow. Well using the finger method I would say my condenser is around a 1.25" away. So I am now in the process of moving it about an inch closer to the radiator core. After this is done I will do some road testing.
One more thing is I have a big transmission cooler in the front. This thing is about 1 foot square with no holes though it. In this case I moved it as far forward as I can next to the grill. With the condenser moved back about an inch the gap will be between 3 and 4 inches. I would really like to relocate it but I don't have a good spot for it.
Last edited by 1989GTA; 07-06-2016 at 04:35 PM.
07-07-2016, 06:44 AM
#665
Just saw this post (I think, lol) will have to read thru it all
I also have a 65 Buick (Special sedan) with a 6.0 and turbo
I was interested in the Detroit Speed wiper conversion-wondering if you
could cut off the threads on the orig. switch, and either thread the inside
or bore it close, loc tite or JB Weld on the cutoff piece.
Cool project, good MPH
I also have a 65 Buick (Special sedan) with a 6.0 and turbo
I was interested in the Detroit Speed wiper conversion-wondering if you
could cut off the threads on the orig. switch, and either thread the inside
or bore it close, loc tite or JB Weld on the cutoff piece.
Cool project, good MPH
07-07-2016, 12:58 PM
#666
Just saw this post (I think, lol) will have to read thru it all
I also have a 65 Buick (Special sedan) with a 6.0 and turbo
I was interested in the Detroit Speed wiper conversion-wondering if you
could cut off the threads on the orig. switch, and either thread the inside
or bore it close, loc tite or JB Weld on the cutoff piece.
Cool project, good MPH
I also have a 65 Buick (Special sedan) with a 6.0 and turbo
I was interested in the Detroit Speed wiper conversion-wondering if you
could cut off the threads on the orig. switch, and either thread the inside
or bore it close, loc tite or JB Weld on the cutoff piece.
Cool project, good MPH
I would say that is certainly a possibility. You might have to take the threads off the Detroit Speed wiper switch or file them down. Not a bad idea at all. By the way I really like how the Detroit Speed wiper conversion works. One of the better upgrades I have done.
12-20-2016, 05:11 PM
#667
A little update as to my latest modification. The car currently has disc brakes all the way around. The front disc brakes are what you find on say a 1970 Chevelle with the 11" rotor and D52 calipers. The rear brakes are off say a 1979 Eldorado. They also have 11" rotors.
I had installed EBC redstuff pads on the calipers to help with the braking. This helped but I still wanted better braking. So currently the car is in the shop getting yellowstuff pads which have more friction for better stopping power. Also new upper ball joints.
Next up is to install Corvette C5 12.8" x 1.26" rotors. I can do this with all factory parts with some modifications to the caliper brackets. Here is the list and the parts are readily avialable.
1. 1967-9 Camaro drum spindles. They may need some very slight machining or grinding.
2. Plain Corvette C5 rotors. I do not need the holes or slots for street driving.
3. GM D52 front calipers off say a 1975 Chevrolet C20 pickup. These are under $60 for the pair at the local auto parts with no core. These are wider for the 1.26" rotors.
4. I think I have to get new flex brake line hoses as the mounting to the truck caliper is slightly different than the car version.
Here is what I bought extra to mock up in the garage so I don't have to do this on the car. I have to modify the factory caliper bracket so that the caliper is in the proper position over the rotor. The parts are cheap enough.
1. A set of caliper brackets for say a 1970 Chevelle.
2. An extra spindle for a 1970 Chevelle.
The caliper bracket holes need be extended about .900" so that the caliper will fit over the rotor. Also the bracket spacing will have to be adjusted and I will not know what that is until I mock everything up. So I have to make something up to weld to the factory bracket in order to put the caliper in the right position. For those interested I will take pictures.
Last edited by 1989GTA; 12-20-2016 at 05:17 PM.
 12-20-2016, 06:49 PM
#669
The C5 caliper piston area is 4.81" square. That is quite a drop in piston force for the same pressure in comparison to the truck D52 caliper. The aluminum Wilwood D52 caliper comes with dual 2" pistons for 6.28" square of piston area which is not bad. This caliper comes for either the 1" wide or the 1.26" wide caliper.
I will see how good the braking is with the new combination. If it turns out to be too much I might drop back down to the Wilwood D52 caliper as that would be a bolt on. Too much might be with the 12.88 front rotor and the EBC yellowstuff brake pads. We shall see.
12-22-2016, 12:16 PM
#670
I got the car back from the shop today with the new brake pads on. I went from the EBC Red Stuff brake pads with a CF of .5 to the EBC Yellow Stuff brake pads with a CF of .6 and that made a good difference. Now the car is stopping the way I think it should.
I will go ahead and install the C5 front rotors which are 12.8" in diameter and see what that does. It may well turn out to be too much braking. If so I have a couple of options to tone it down some.
I will go ahead and install the C5 front rotors which are 12.8" in diameter and see what that does. It may well turn out to be too much braking. If so I have a couple of options to tone it down some.
01-07-2017, 12:54 PM
#671
Update on installing the Corvette C5 front 12.8" brake discs on my Skylark using factory parts. I bought some extra parts so that I could mock things up on the bench as listed in post 667.
I mocked up the stock 11" disc brake system to get the centerline of the 11" x 1" rotor. Next I mocked up the system with the 12.8" x 1.26" C5 brake system in order to get the centerline of the rotor. Turns out there is a 1.243" difference.
So the caliper would have to move out towards the wheel 1.243" as well as move away from the spindle center line .900". By the way this is with using the stock D52 brake bracket from the 1970 era and making adaptor spacers.
I did not think the spacing difference would be that great. I did some measuring with my 17" wheels and there is room to do this. So from that standpoint it will work.
One more thing is that the factory D52 brake caliper was not designed for that big of a rotor. It will work but everything has to be pretty much spot on and not much room for error.
During the mock up when I placed the caliper over the 12.80" rotor the brake pads need to be right at the edge of the rotor in order to get the clearance needed for the bolts that hold the brake pads in place.
When I mocked up the stock 11" brake system the brake pads are like .200" from the edge of the rotor. So it looks like I will have to move the caliper out another .200" over the already .900" for a total of 1.100". When I go out to my friends machine shop next week we will measure all this at least one more time. The old saying of measure twice cut once. Hehehehe
Last edited by 1989GTA; 01-28-2017 at 07:57 PM.
01-28-2017, 05:59 PM
#672
An update on adding the Corvette C5 rotor to my front brakes. Here is a picture of the stock brake bracket with the spacers attached. These space out the bracket an additional 1 inch radius wise. They also space out the bracket 1.243" from the spindle. One more thing is I will be using all factory parts with the only special part being these brackets and they are very unlikely to break.

And one more view.


And one more view.

Last edited by 1989GTA; 01-28-2017 at 07:58 PM.
 01-28-2017, 07:50 PM
#675
Here are a couple of pictures with things partially assembled to the spindle.


One more thing I will be doing is using AN bolts to bolt the brake bracket to the spindle. These have a shoulder all the way down and enough thread so that I can use virtually all the thread in the spindle. These bolts are tough.
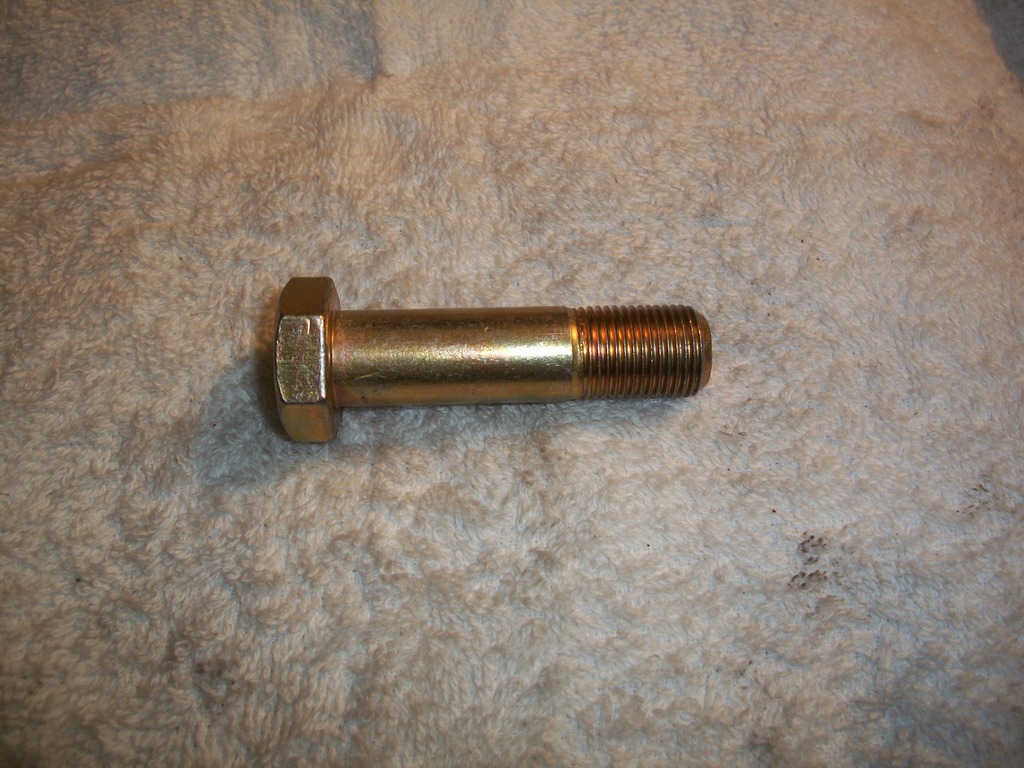


One more thing I will be doing is using AN bolts to bolt the brake bracket to the spindle. These have a shoulder all the way down and enough thread so that I can use virtually all the thread in the spindle. These bolts are tough.
 10-03-2017, 06:53 PM
#676
A little update. The car has been running just fine. However the temperature range is in the 210-218 range and a little warmer on a hot day. Now I have a dual pass radiator and a 25% under drive harmonic damper. I have been told this is a no-no with a dual pass radiator.
The dual pass radiator has more restriction to water flow than a single pass radiator. So I am going to increase the damper diameter back to the stock 7.48" diameter. I have ordered a ATI damper part number 918644 and I will give that a shot. This should increase the water flow through the motor and radiator and hopefully lower the radiator temperature.
Edit: This damper does not have the pulley for the A/C. My A/C runs off the main belt.
11-11-2017, 01:57 PM
#677
I added LED sequential tail lights to the car. I had to make my own as the kits do not seem to work right with the 1157 style LED bulb. I used the Sylvania Zevos red 1157 LED bulb. The key to this thing was the Scott Drake led flasher. The "on" portion for the flasher is a little longer than most and it is adjustable.
I used 4 on delay relay boards, 2 per side. Pictures below and all wired up per side. Here is a link to the YouTube video, my first I might add. By the way the 2nd half of the video is with the brakes on. Edit: one more thing is that the parts came in at under $60. Now I did have the wire and Molex connectors on hand. With the volume on you can hear the car idling.
I used 4 on delay relay boards, 2 per side. Pictures below and all wired up per side. Here is a link to the YouTube video, my first I might add. By the way the 2nd half of the video is with the brakes on. Edit: one more thing is that the parts came in at under $60. Now I did have the wire and Molex connectors on hand. With the volume on you can hear the car idling.
Last edited by 1989GTA; 11-11-2017 at 02:06 PM.

