

My 1965 Buick Skylark L92/6L80 Swap
 12-29-2012, 12:12 PM
#101
Teching In


When are you planning on dropping the motor in? I pulled the 300 out of mine last week, and I am in the process of cleaning up the engine bay now(pressure washer broke just after i started). I'm hoping to at least test fit the engine/trans within the next week.
 12-29-2012, 01:33 PM
#102
Staging Lane
iTrader: (4)
Join Date: Jul 2009
Location: Killeen, Texas
Posts: 99
Likes: 0
Received 0 Likes
on
0 Posts
1989GTA, I was wondering the same thing, about your engine mock up. I just recently posted a thread for help on my frame mount situation. No replys yet. I also baught the Dirty Dingo slider mounts, they had my engine sit really high in the engine bay, even though clearance is not an issue with the LS6 intake. I made changes to my altenator location (Alper motor sports) and PS bracket same company. My frame mounts are the 68-69 Camaro frame mounts which are really tall in comparison to my original mounts and sit really high in comparison to the original. Look at my thread. I'm sure my engine bay is a little larger than yours, but not 100% sure. I'm looking to get the regular type of LSX swap mounts to fix my dilema.
Ken.
Ken.
12-29-2012, 03:11 PM
#103

Here is the plan. Right now I am working on little things such as fixing up the interior and still waiting on my right hand dash panel to be powder coated. They have been having a warping issue with it but the left hand side came out nice. Should have it soon. The E38 ECM is off to TSP for programming as I have their VVT-3 camshaft and ported heads. Also the motor and transmission will be very close to a modded 2010+ L99 Camaro so the tune should be fairly close.
In late January I will take the car over to a friends house who has more garage room than me and we will pull the motor and transmission. Also install the built corporate 8.5" rear end at the same time. Probably drop the original fuel tank as well. Also clean and paint the engine bay.
In February the car will go into the shop for the L92/6L80 engine/transmission to be installed. We already have a plan to raise the transmission tunnel for the 6L80 clearance that will be needed. After that is installed we can measure for the new drive shaft. As stated I have purchased the Dirty Dingo slider engine mount adaptors. Also the tall and narrow mounts. We shall see how that works out.
I will be installing power steering as well. The other item is to open the rear wheel wells to see how much room I can make for a larger tire. I will not be cutting the frame. The person doing the work is very familiar with the A body cars and thinks one trick we can do is push out the fender area maybe 1/2" to gain some room. He has gone as much as 1" on some cars.
The headers and new dual 3" exhaust system with a X-pipe will get fitted up. I will fit in the largest 3" Magnaflow muffler that I can. Hoping the 21" will fit.
The new fuel tank will go in with the intank fuel pump. Using the Corvette filter and pressure regulator. I am seriously thinking of getting a 25% underdrive pulley to help shorten up the belt length. I just don't like using a belt approaching 120" in length with the A/C on the same belt. I am trying to get it down to under 110" in length and have done some things to do so such as the Dirty Dingo idler pulley relocate bracket. Also a smaller power steering pulley.
After all that is done on to the local programmer for the final drivability tune and the WOT dyno tune. After that I will take it to the paint shop. Right now I am thinking of maybe a 2010 Ford Edge tri-coat pearl white paint.
Last but not least will be new carpeting and rear seat covers. I am already working on re-covering the bucket seats I will be adding. They are from a 1965 GTO. Then it will be just tinkering with it such as replacing the windshield wiper motor with one that has variable speeds and things such as that.
Sounds like you guys are ahead of me. I will look into your thread. Your engine compartment should be larger than mine.
Last edited by 1989GTA; 12-29-2012 at 11:37 PM.

 01-17-2013, 02:35 PM
#107
I have not posted anything since last year but a lot of little things going on with the car. Progress is being made and we are moving forward. I removed the front carpeting to expose the transmission tunnel. It will need to be cut open so that the 6L80 will fit. I think we will just cut it about an inch or so above the base and maybe raise the whole thing about an inch.
Some rust on the floor panels but nothing major. Nothing that a little wire brushing and some POR15 won't cure. Bucket seat foam and some interior parts such as new chrome door and window handles should be coming in today. I have to decide on the carpet. I know ACC is suppose to be the good brand to buy. OPGI has what they call "Essex" carpet which is suppose to be a little more luxurious. Anyone have any experience with it. Also I am thinking of just re-painting my kick panels. By the way a couple of picture for those who like to look at pictures.
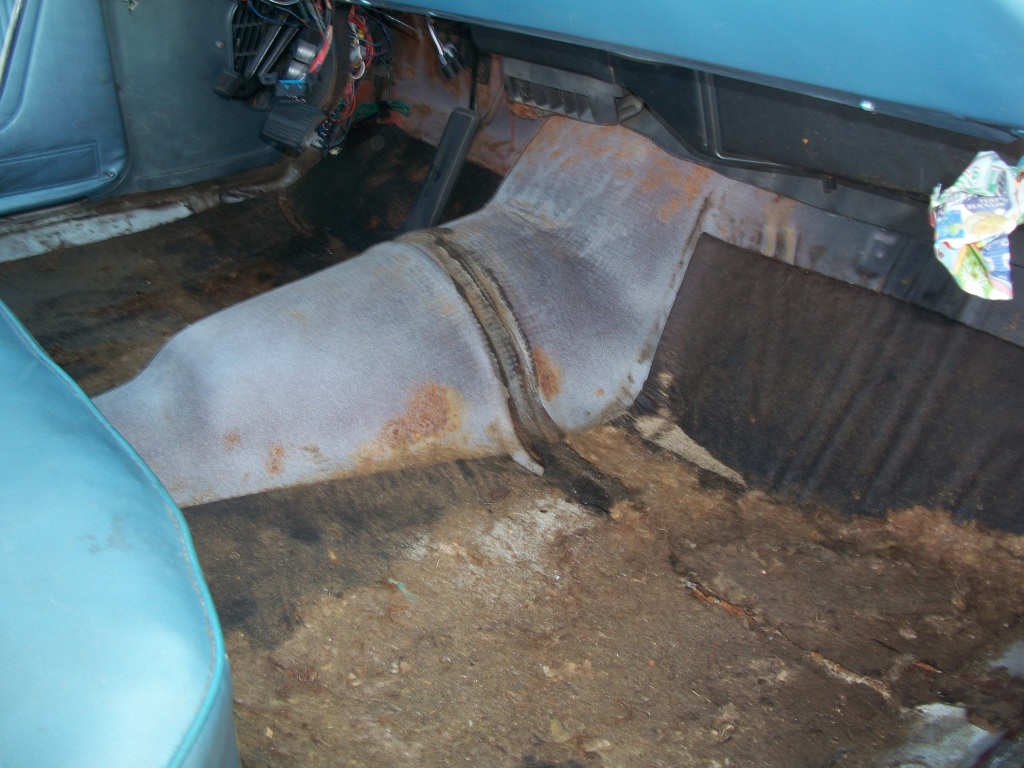
I removed the front carpeting to expose the transmission tunnel. It will need to be cut open so that the 6L80 will fit. I think we will just cut it about an inch or so above the base and maybe raise the whole thing about an inch.Some rust on the floor panels but nothing major. Nothing that a little wire brushing and some POR15 won't cure. Bucket seat foam and some interior parts such as new chrome door and window handles should be coming in today. I have to decide on the carpet. I know ACC is suppose to be the good brand to buy. OPGI has what they call "Essex" carpet which is suppose to be a little more luxurious. Anyone have any experience with it. Also I am thinking of just re-painting my kick panels. By the way a couple of picture for those who like to look at pictures.
01-17-2013, 09:02 PM
#109
Hey Speedtigger, I think I read this being a post car it is 50 pounds lighter than a non post car. Still hoping to be at 3500 pounds or lighter when it is finished. That would put me 3-400 pounds lighter than the new Camaro.
 01-21-2013, 06:06 PM
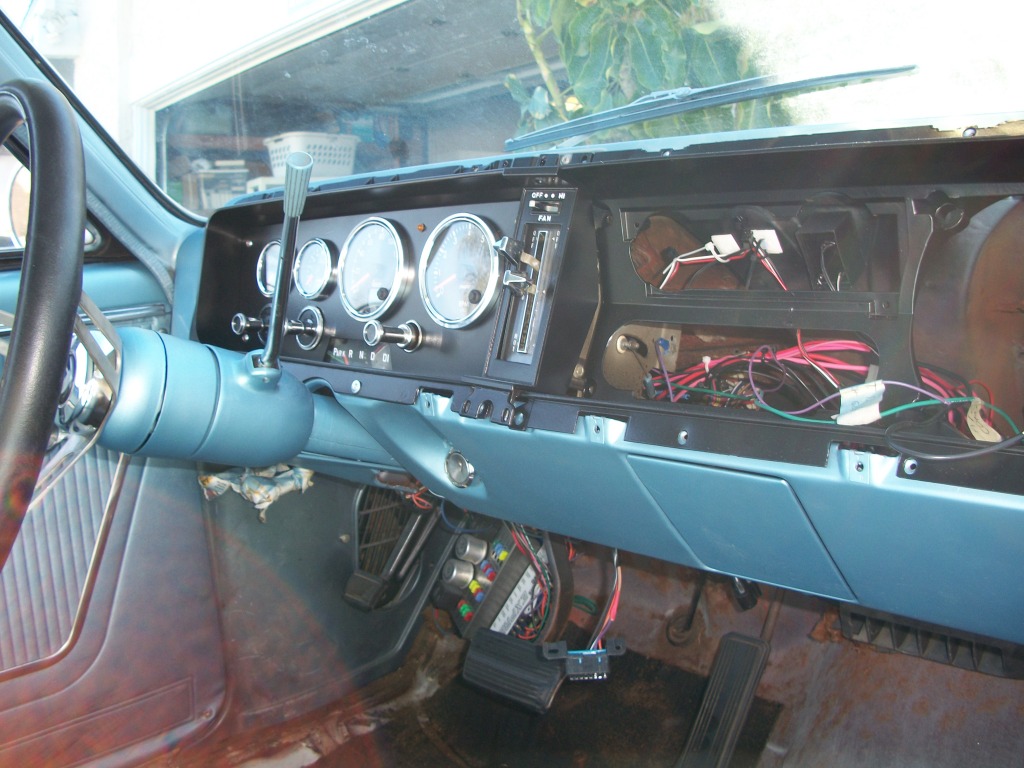
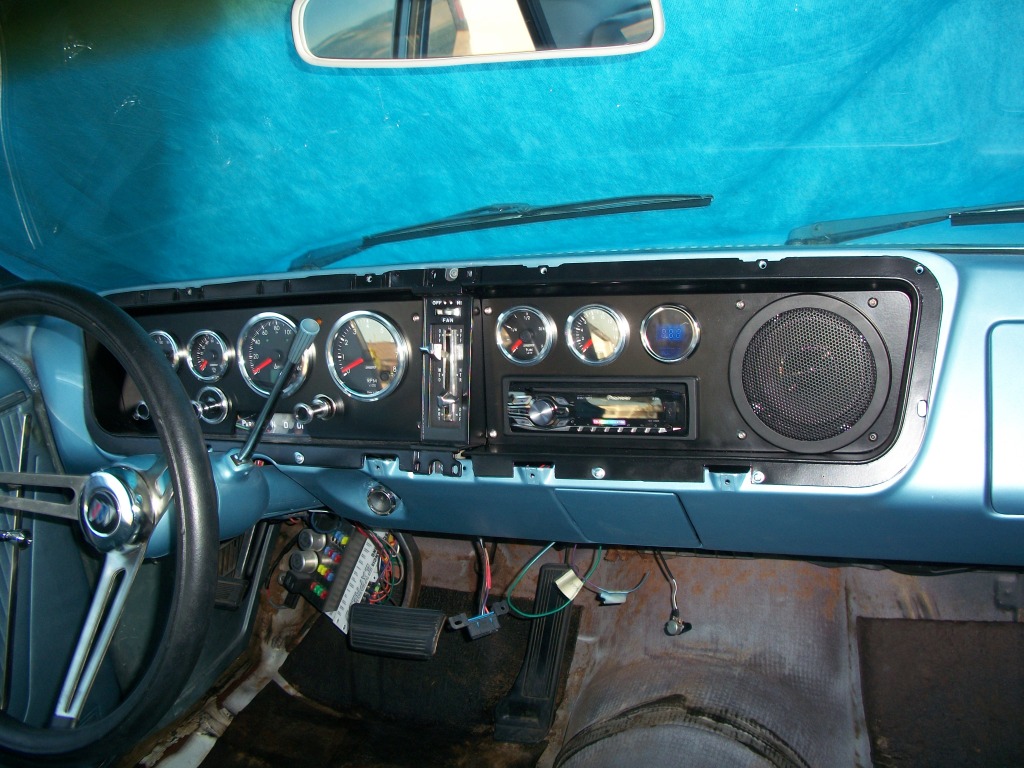
#111
The painter finally got the right side guage panel done. I went ahead and installed it in the car to see how it was going to look. Here is a photo with both gauge panels in place.
01-21-2013, 06:42 PM
#112

OPGI has what they call "Essex" carpet which is suppose to be a little more luxurious
http://forums.performanceyears.com/f...584076&page=21
01-21-2013, 06:56 PM
#113
Essex is made by ACC. It's a very nice carpet. Rockauto is a cheaper source for the carpet. I bought Essex with mass back for my 68 GTO conversion. Pictures can be found here. Post 401
http://forums.performanceyears.com/f...584076&page=21
http://forums.performanceyears.com/f...584076&page=21
02-14-2013, 12:36 PM
#114
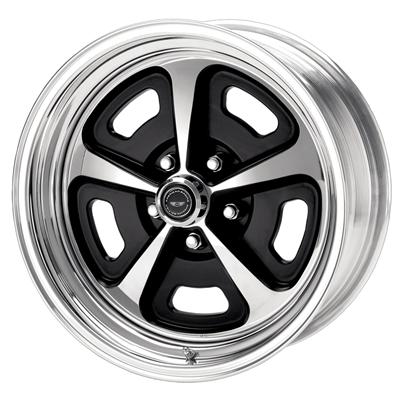
Just an update. Looks like the car will be going into the shop the 1st week of April. There it will get all the major surgery done. Here are the wheels I will be using. In the rear they will be American Racing VN500 17 " x 9.5" and the front will be 17"x8". The tires will be Nitto 555's. 285/40R17 in the rear and 245/45R17 in the front. Here is a picture of the wheel which is very close to the factory ones in appearance. Also continuing to get in a bunch of small parts to make the swap out go as smooth as possible.
Last edited by 1989GTA; 02-14-2013 at 08:30 PM.
02-16-2013, 11:59 AM
#116
Thank you. The Vintiques are about twice the money so that is why I am not going that route.
To the person who asked about suspension mods. Here is the plan as of now because these parts are available from friends at a good price. Sway bar front and back. Edelbrock upper control arms for the rear axle. Boxed in lower control arms. Front already has disc brakes. I will be adding disc brakes to the rear. Not sure on the shocks for now but will probably do something down the road as finances permit.
Edit: Forgot to say that down the road I will look into tubular upper and lower control arms for the front. They are suppose to have better geometry and are lighter.
Last edited by 1989GTA; 02-16-2013 at 12:52 PM.
02-28-2013, 03:36 PM
#117
Got the bucket seats back today. Here is a picture of one of them. I have to add the sliders. One interesting note is I bought the front and back seat covers from OPGI. The rear seat cover showed up first and it was from Legendary. The bucket seats covers showed up later and they are from PUI. Luckily the colors are pretty darn close.


