
My 1965 Buick Skylark L92/6L80 Swap
 05-14-2013, 04:40 PM
#161


Couple of parts came in.
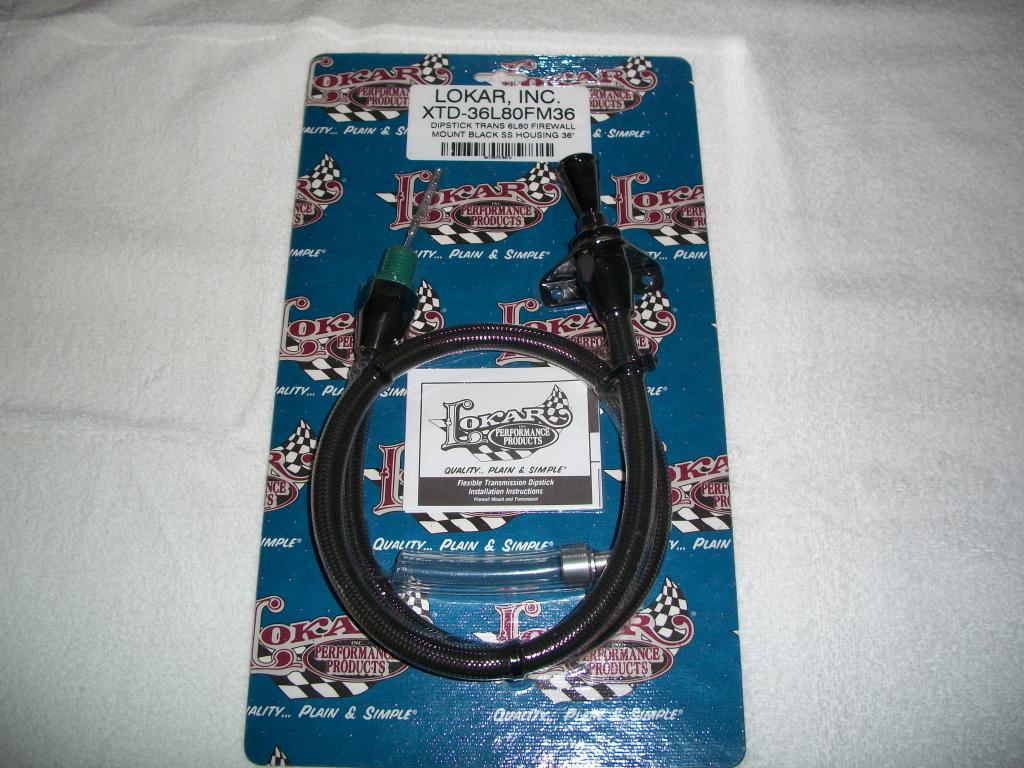
First up is the Lokar 6L80 transmission dipstick. We just could not fit in the factory unit. Just not enough room.
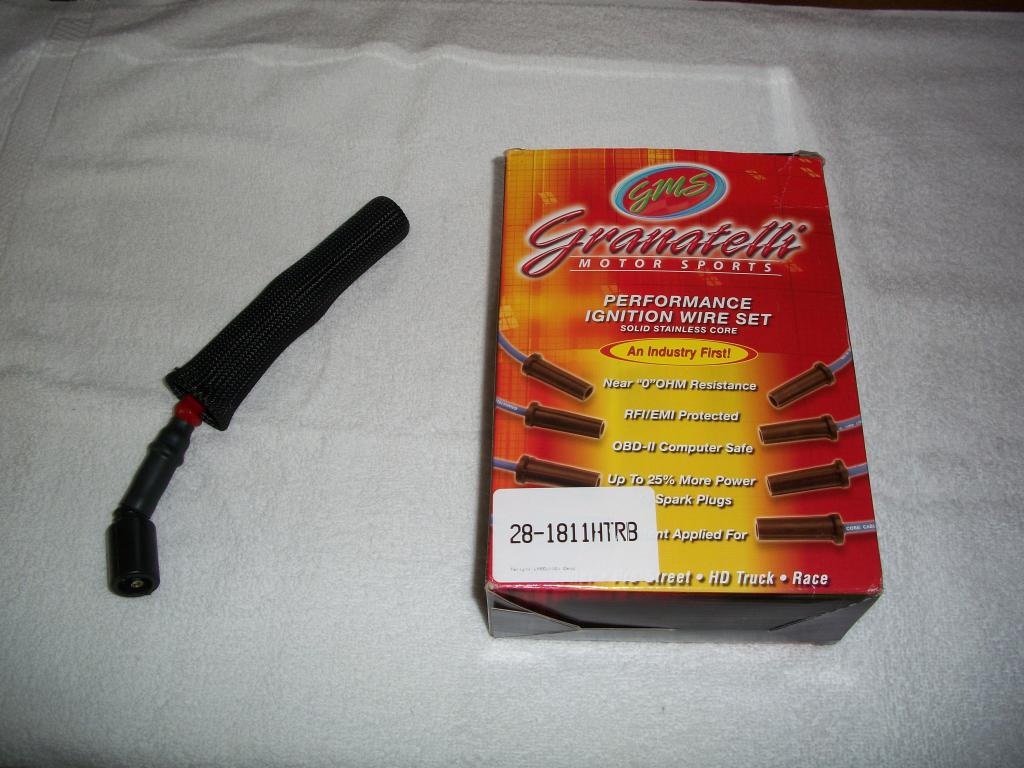
Next up I decided to go with the Granatelli 0 ohm spark plug wires. I just was not 100% sure of the condition of the used factory wires.
First up is the Lokar 6L80 transmission dipstick. We just could not fit in the factory unit. Just not enough room.

Next up I decided to go with the Granatelli 0 ohm spark plug wires. I just was not 100% sure of the condition of the used factory wires.

Last edited by 1989GTA; 05-14-2013 at 04:49 PM.
 05-14-2013, 04:46 PM
#162
Three more pictures from today. We are getting a lot of little things done and I am hoping to fire this thing up next week. We are real close.
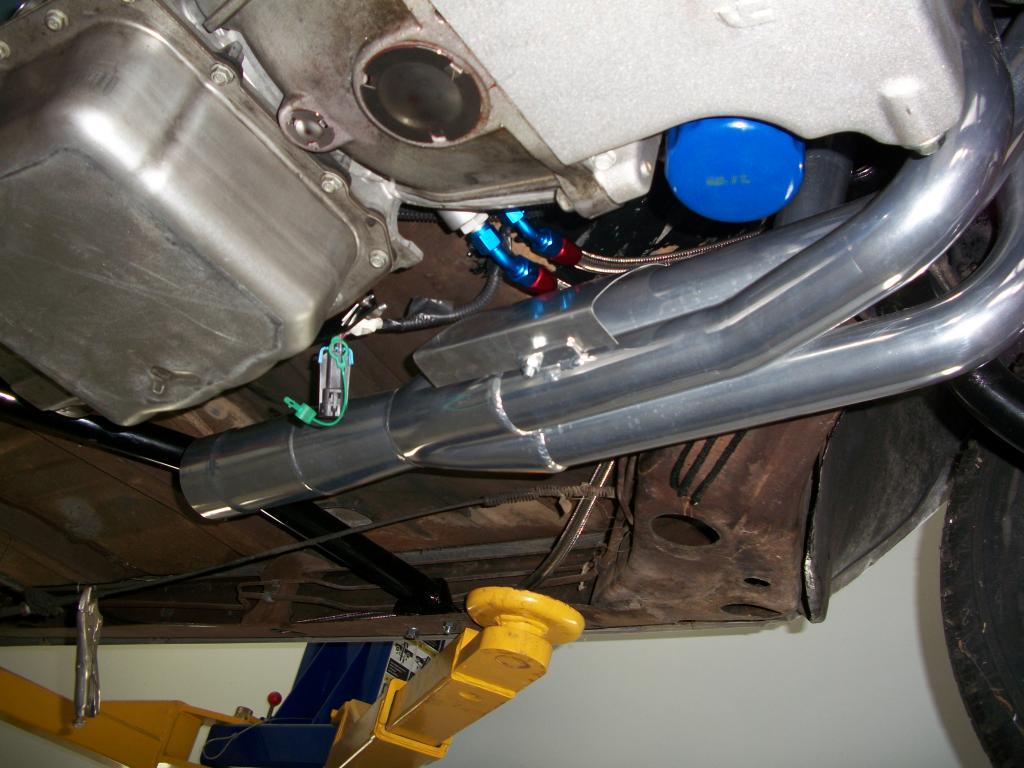
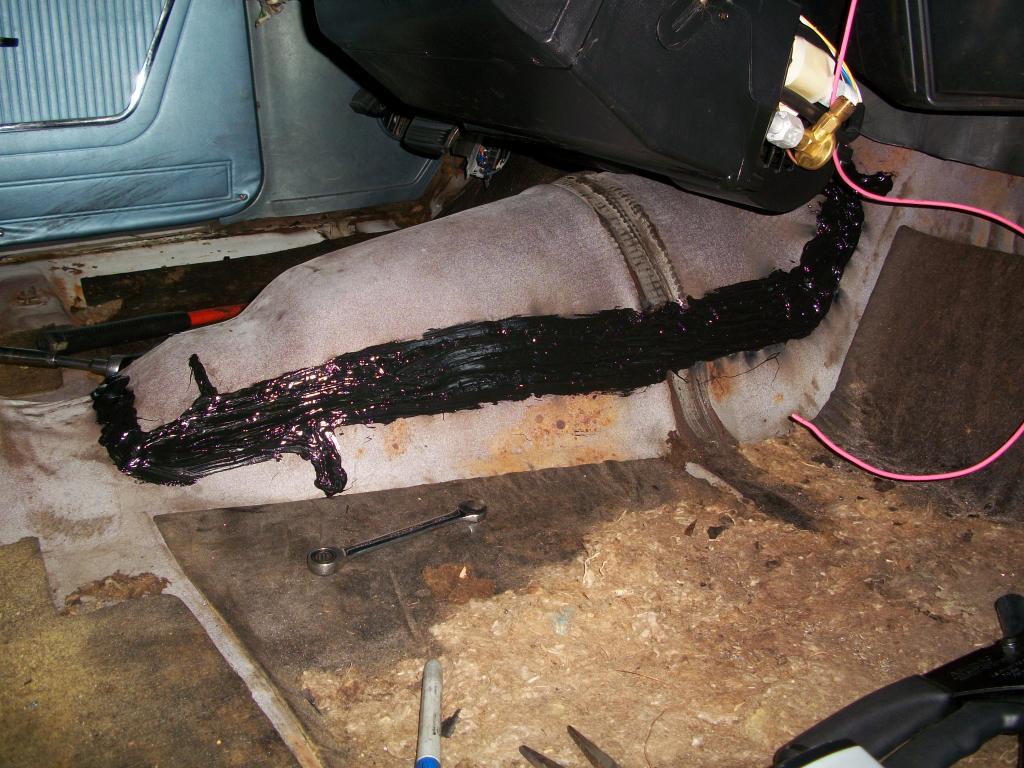
First picture is of a heat shield we added to help keep the transmission lines cooler as they are running over the header. Running them over the headers was about the only way to get the lines to the front of the car. The heat shield has more spacing than shown in the photo.
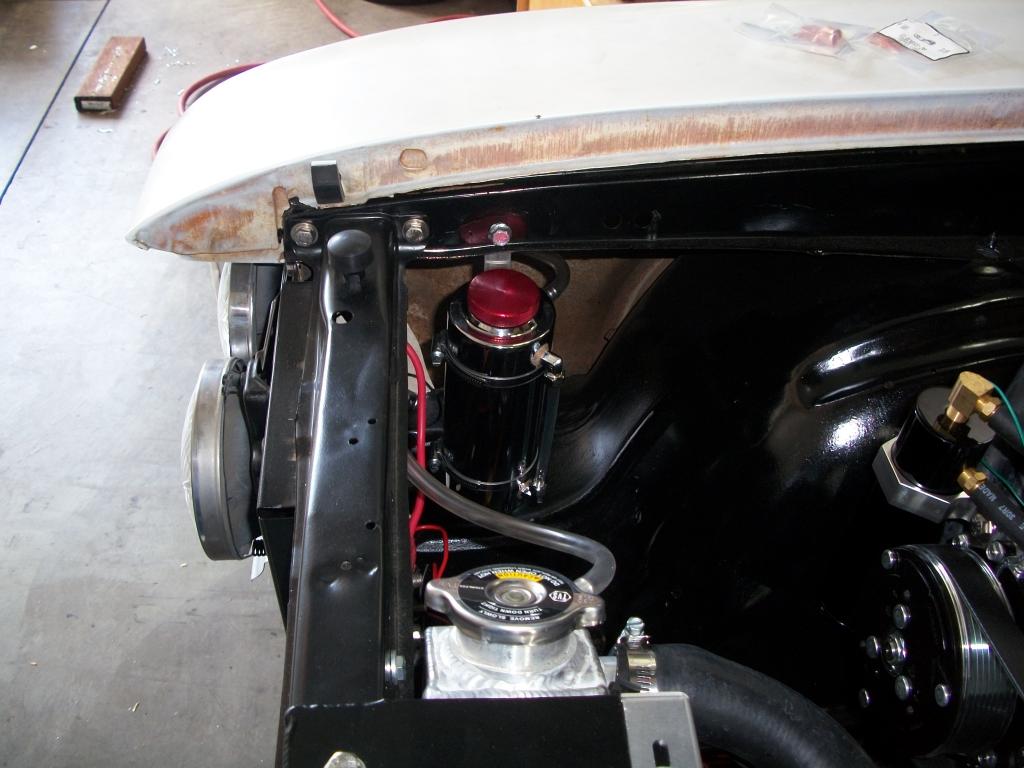
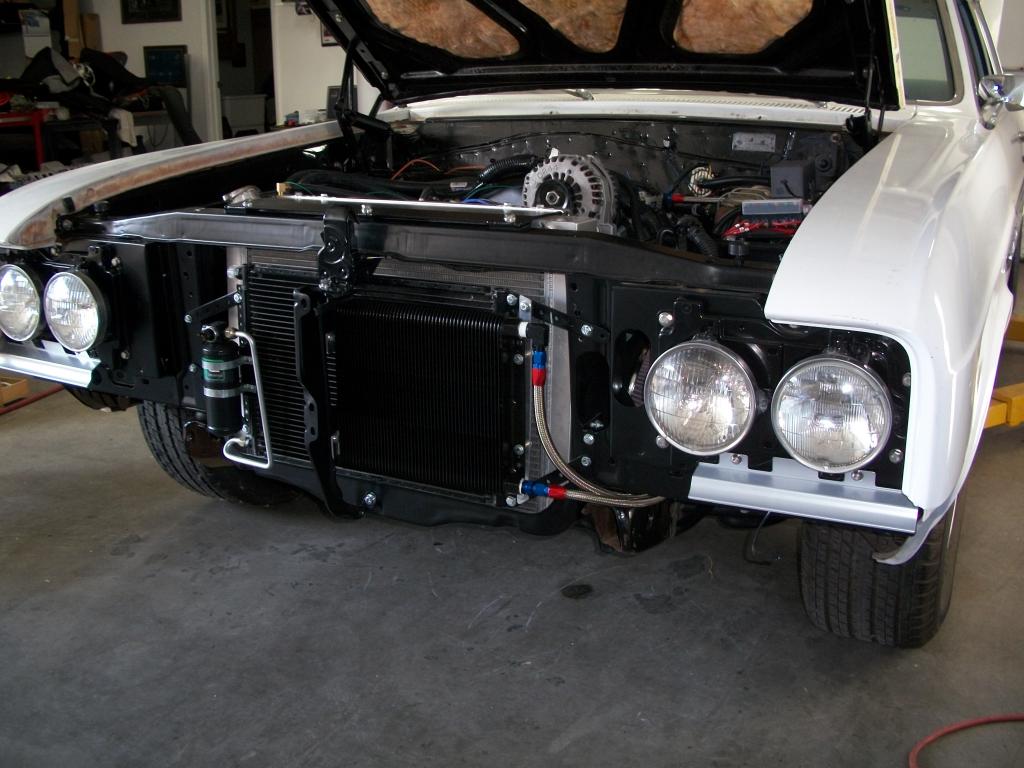
This picture shows the mounting of the radiator overflow coolant tank. I bought one that has a sight glass.
This picture shows the final mounting of the transmission cooler and the lines running to it.
First picture is of a heat shield we added to help keep the transmission lines cooler as they are running over the header. Running them over the headers was about the only way to get the lines to the front of the car. The heat shield has more spacing than shown in the photo.

This picture shows the mounting of the radiator overflow coolant tank. I bought one that has a sight glass.

This picture shows the final mounting of the transmission cooler and the lines running to it.

Last edited by 1989GTA; 05-14-2013 at 04:52 PM.
05-15-2013, 04:39 PM
#163
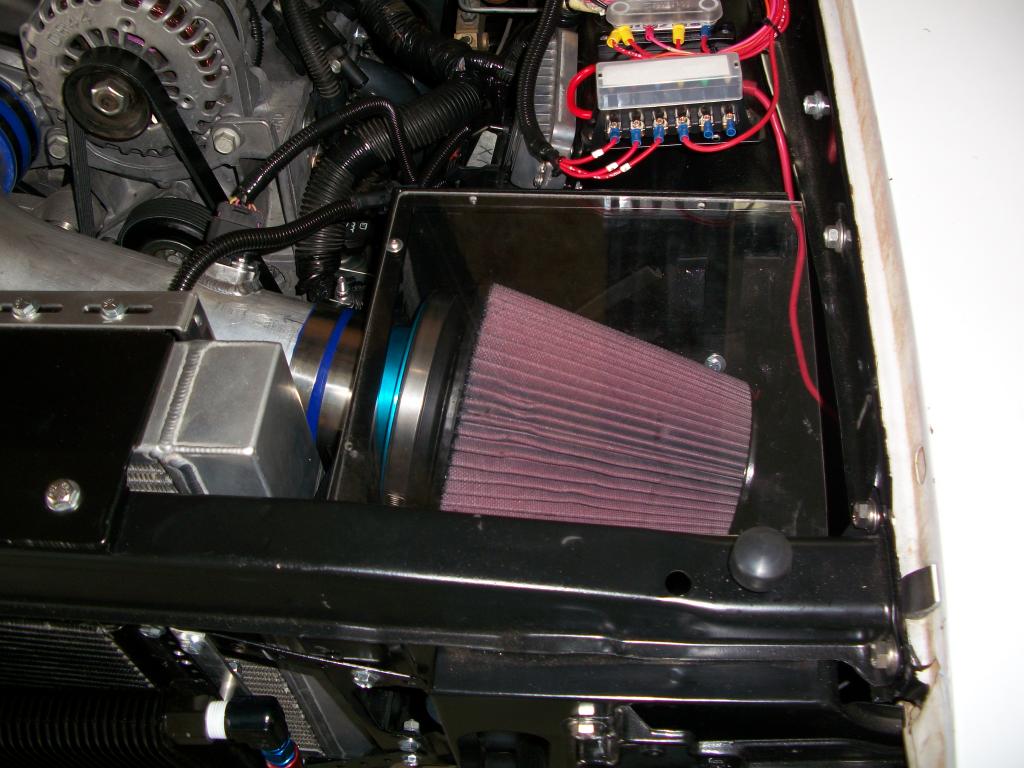
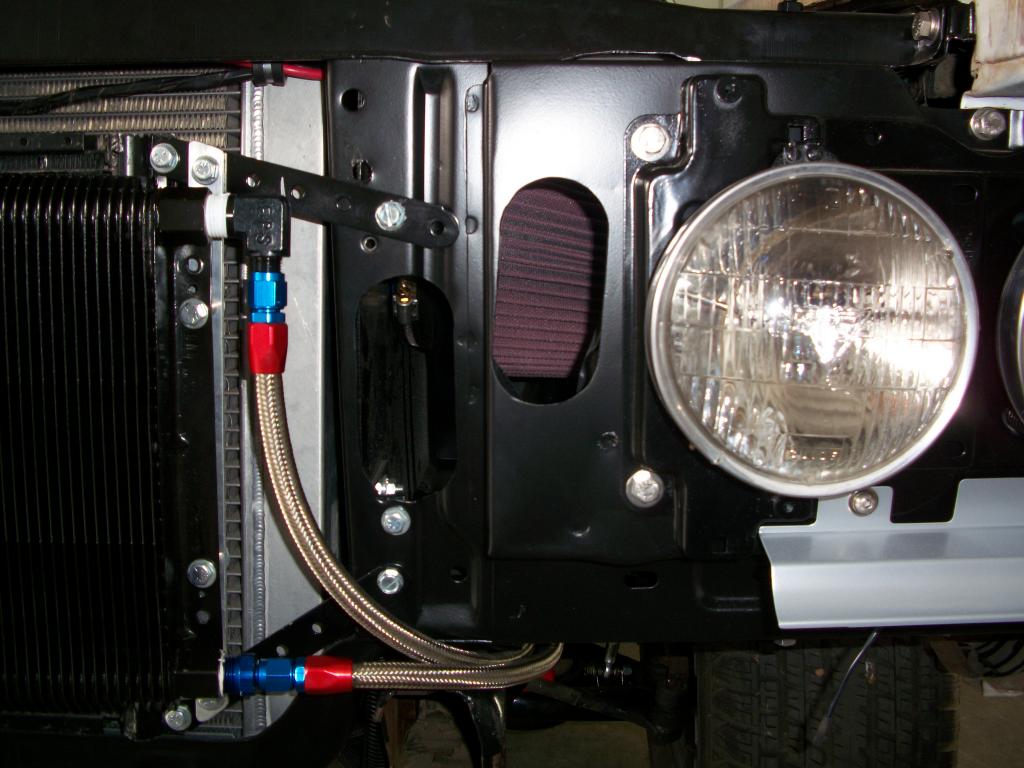
From today, these are pictures of my cold air intake which is virtually about done.
This is a top view looking down through the plexiglass cover. You can see that the MAF is now installed just to the left of the filter.
This view is from the passenger side. I have another duplicate 4" aluminum tube out being ceramic coated with a thermal barrier coating on the inside and out. Should have it sometime next week. It will have a black exterior finish.

This is another view from the front showing the two holes we cut into the core support. This time the filter is in place which you can see through one of the holes.
This is a top view looking down through the plexiglass cover. You can see that the MAF is now installed just to the left of the filter.

This view is from the passenger side. I have another duplicate 4" aluminum tube out being ceramic coated with a thermal barrier coating on the inside and out. Should have it sometime next week. It will have a black exterior finish.

This is another view from the front showing the two holes we cut into the core support. This time the filter is in place which you can see through one of the holes.
 05-15-2013, 11:05 PM
#165
I believe it is 6" radius. I got them off a guy on the GEN 5 Camaro forum. I think he goes by JackFab and makes cold air intakes among other products. He is changing his design for the 5th Gen Camaro and was selling these at a big discount. That is why I bought two of them. I have seen others for sale on the internet. They are not hard to come by.
05-21-2013, 08:08 PM
#166
Couple of pictures from today showing the now completed transmission tunnel modification. We raised the tunnel somewhere around 1 to 1.25" in order to clear the 6L80 transmission.


Last edited by 1989GTA; 05-21-2013 at 10:15 PM.
 05-22-2013, 06:02 PM
#168
"Do you have a link to that fuse block?"
Oh boy. It is a 6 terminal fuse block. I do remember searching on line for it but I just can't remember where I bought it.
Made a lot of progress today. We now have everything installed for firing the car up and will try and start it the first thing tomorrow morning. We turned the motor over with out spark plugs until we had good oil pressure. Everything appears ready to go. Hopefully she fires right up. Here are some pictures of the exhaust system from today.
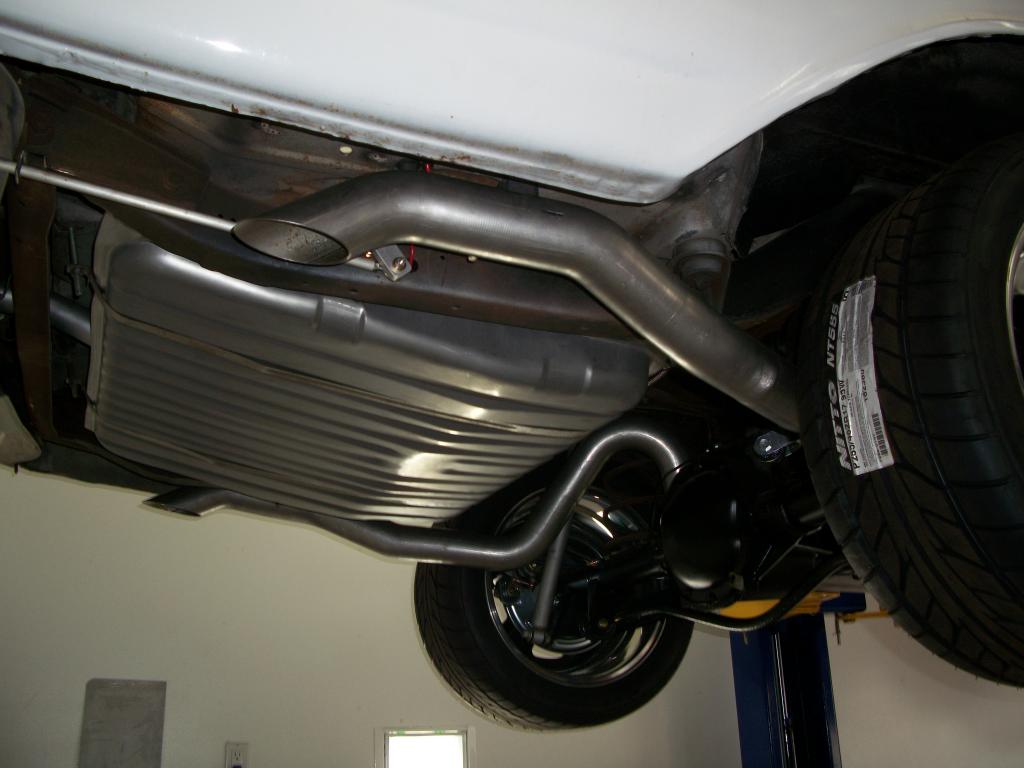
This one shows the 3" TA Performance tailpipes. Everything fit just fine.
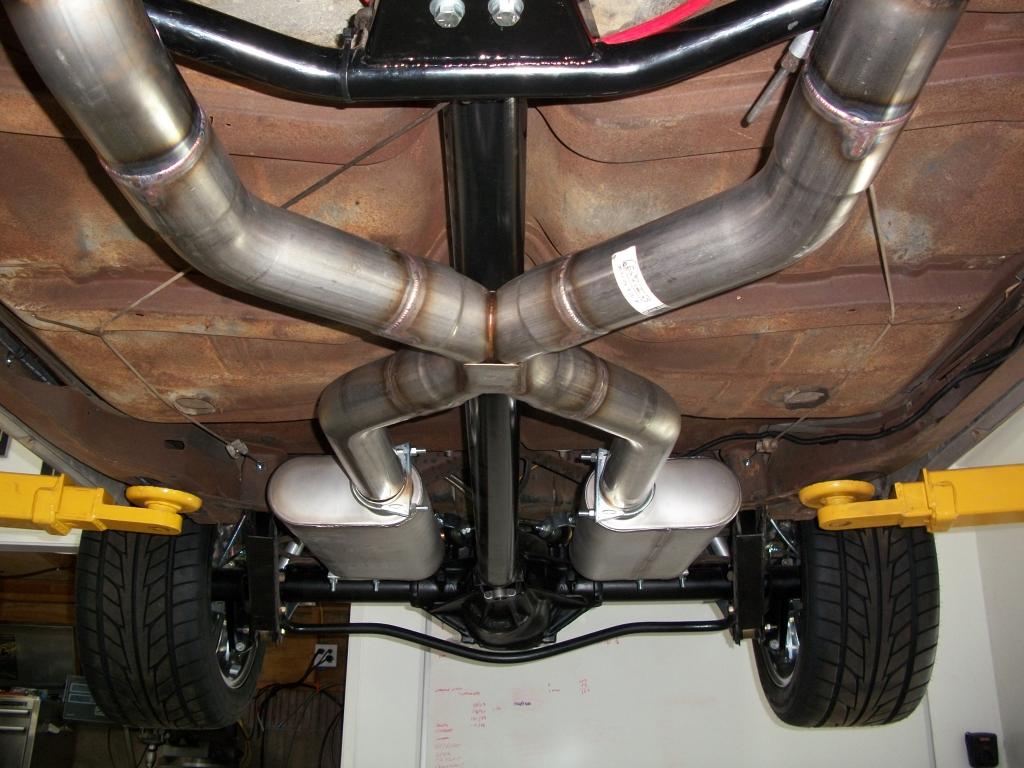
This pictures shows the Pypes X-pipe installation.
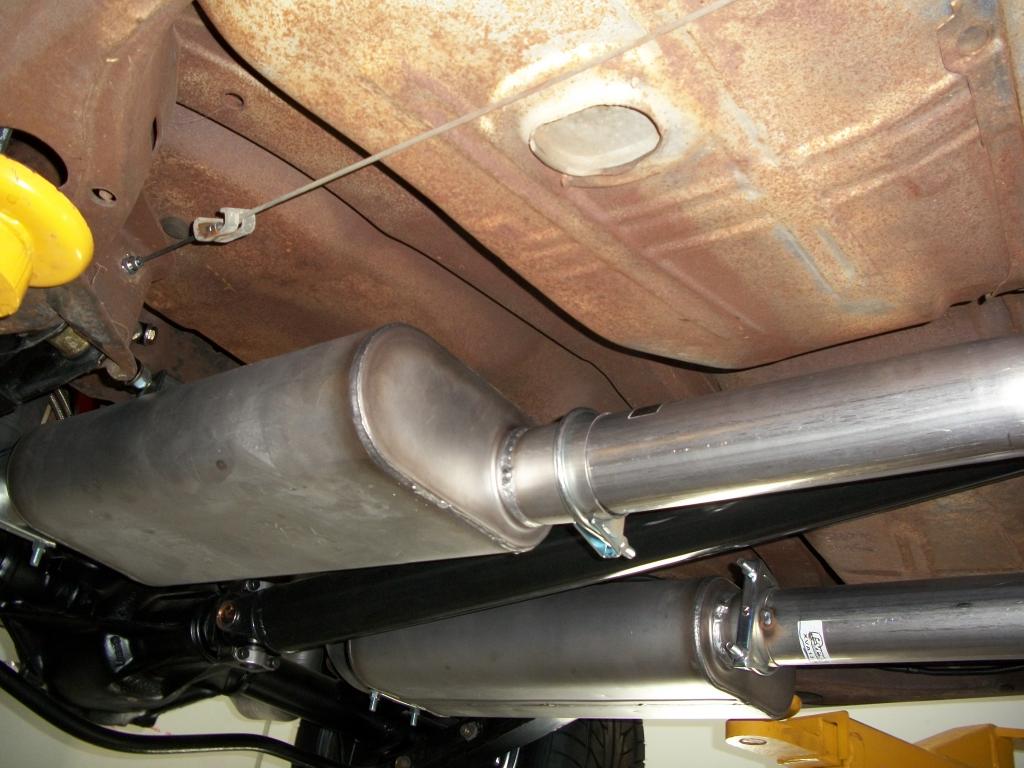
This one shows how much more room I had for a longer muffler. The one on the car is a Dynomax 20". I could easily have went with a 22" muffler. I was being cautious with a lot of different opinions on how long a muffler you can fit on an early A-body car.
Oh boy. It is a 6 terminal fuse block. I do remember searching on line for it but I just can't remember where I bought it.
Made a lot of progress today. We now have everything installed for firing the car up and will try and start it the first thing tomorrow morning. We turned the motor over with out spark plugs until we had good oil pressure. Everything appears ready to go. Hopefully she fires right up. Here are some pictures of the exhaust system from today.
This one shows the 3" TA Performance tailpipes. Everything fit just fine.

This pictures shows the Pypes X-pipe installation.

This one shows how much more room I had for a longer muffler. The one on the car is a Dynomax 20". I could easily have went with a 22" muffler. I was being cautious with a lot of different opinions on how long a muffler you can fit on an early A-body car.

Last edited by 1989GTA; 05-22-2013 at 10:26 PM.
05-22-2013, 06:31 PM
#169
Blue Sea makes a very similar fuse holder. I used one on a trailer project - they are quality parts. http://www.bluesea.com/support/appli...ade_Fuse_Block
05-22-2013, 07:02 PM
#171
TECH Apprentice

Love the exhaust system! Whats the part number of the X pipe? Looks clean and quite, Just a Buick should be! Can't wait to hear them, I'm following in your foot steps. Great work.
05-23-2013, 06:03 PM
#174
Thanks guys. Hey Speedtigger, I was kind of following your build. Thanks for your informative thread on your car.
Well the car tried to start but I think I have a VATS problem. Will run for about 3 seconds and that is it. Also a code P2138. What is the best software to buy so I can eliminate items such as VATS and make some other software changes. Maybe HP Tuners? Does it have to be car specific?
Update: Seeing as I have an A6 transmission it looks like HP Tuners has the best software. Looks like I will be going with them. I will talk with TSP as they programmed my E38 computer to make sure.
Last edited by 1989GTA; 05-23-2013 at 08:13 PM.
05-26-2013, 12:08 PM
#175
Here is an update. The car will be coming home from the shop on Wednesday. The shop was mainly for the mechanical and wiring to be done plus a few odds an ends. Not an OBD2 shop. It is not running and will not start though it tries.
The problem may lie in the way I ran the cables from the battery and causing a low voltage at the ecm. Plus there could be some grounding issues even though I thought we addressed them pretty good.
Here is how the wiring is. We relocated the battery to the trunk passenger side. Ran a 1/0 cable from the battery to the starter solenoid. From the solenoid we ran a 4 gauge cable to a big Blue Sea buss bar on the passenger side where the battery used to be. From that point an 8 gauge cable from the passenger buss bar to smaller bus bar up on the drivers side fender. That is the one that goes to the E38 ECM and other points.
So with the starter being in the middle of this it could be pulling the voltage down low enough to be affecting the ECM. As to the ground we have a ground point on the frame up by the front wheel. It attaches the engine, chassis and frame together. Uses 1/0 wire and a 4 gauge wire. I was thinking I might add a small 12V motorcycle battery in the left front fender well if need be to keep that area as close to 12 volts as possible at all times.
On the drivers side I have a fender/chassis ground for the electronics in that area. I will connect another wire from that point to the back of the drivers side head. Then from the head to the fire wall. On the inside of the fire wall I have some grounds so that should help out in that area.
I will keep everyone posted as to what I find out. This is where I will begin my trouble shooting and go from there.
Last edited by 1989GTA; 05-28-2013 at 05:24 PM.
05-28-2013, 04:07 PM
#176
SHE RUNS!!! That is a load off my mind. The main problem was how I ran the power wires off the battery in the trunk as stated in the above post. Today we added a 4 gauge cable from the battery straight to my fuse/relay center on the right front fender. Also a 4 gauge cable from the ground post next to my fuse/relay center to the rear of the drivers side head. She fired right up after that. I should say while we were running the extra cables and had the battery disconnected we shorted the postive and ground cables together to make sure the ECM was drained of all power for a good reset.
My tachometer appears to be working although at maybe half the rpm. I need to make the tach adjustment. This is where I picked up the tack output wire from the E38 ECM and ran it to my Speedhut tach. I also added a 1K ohm pullup resistor. I know a few have had problems in this area and some have not. Mine looks to be working. Just needs adjusting.
On my punch list I need to do a few clean up items, get the carpeting done and a new paint job. Take it in for a dyno tune and then onto the track.
05-28-2013, 05:15 PM
#177
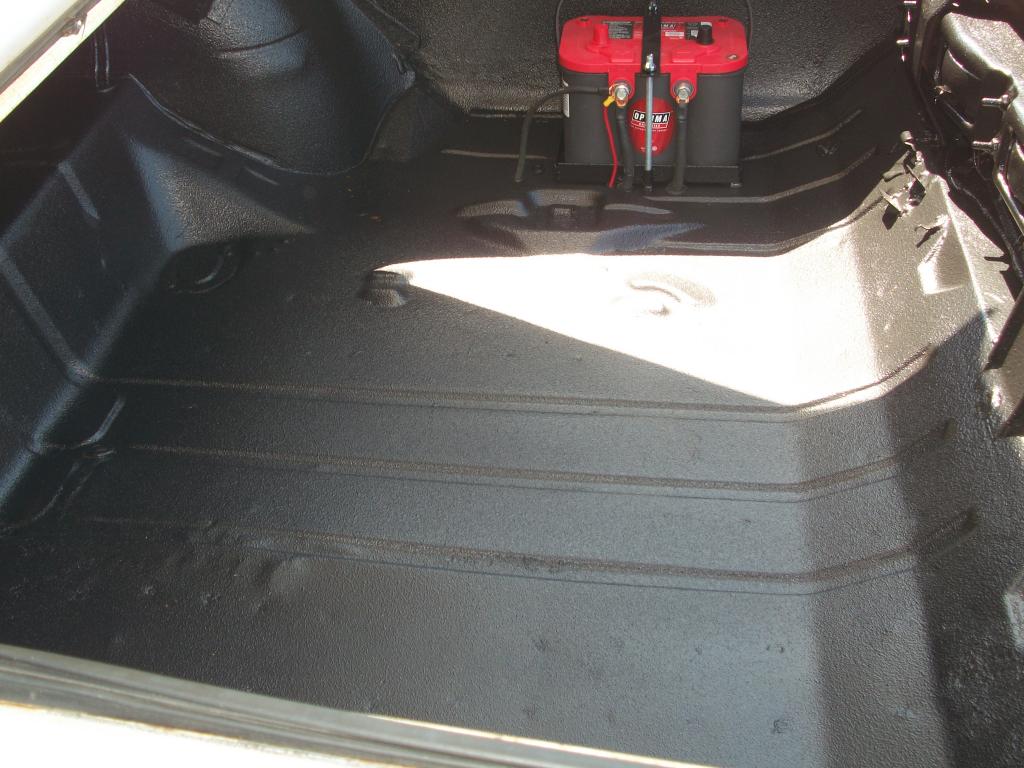
Here are a couple of pictures of the trunk now that it has been painted black. It came out real good though it might be hard to tell in the pictures. You can also see the battery mounting.
And another view.
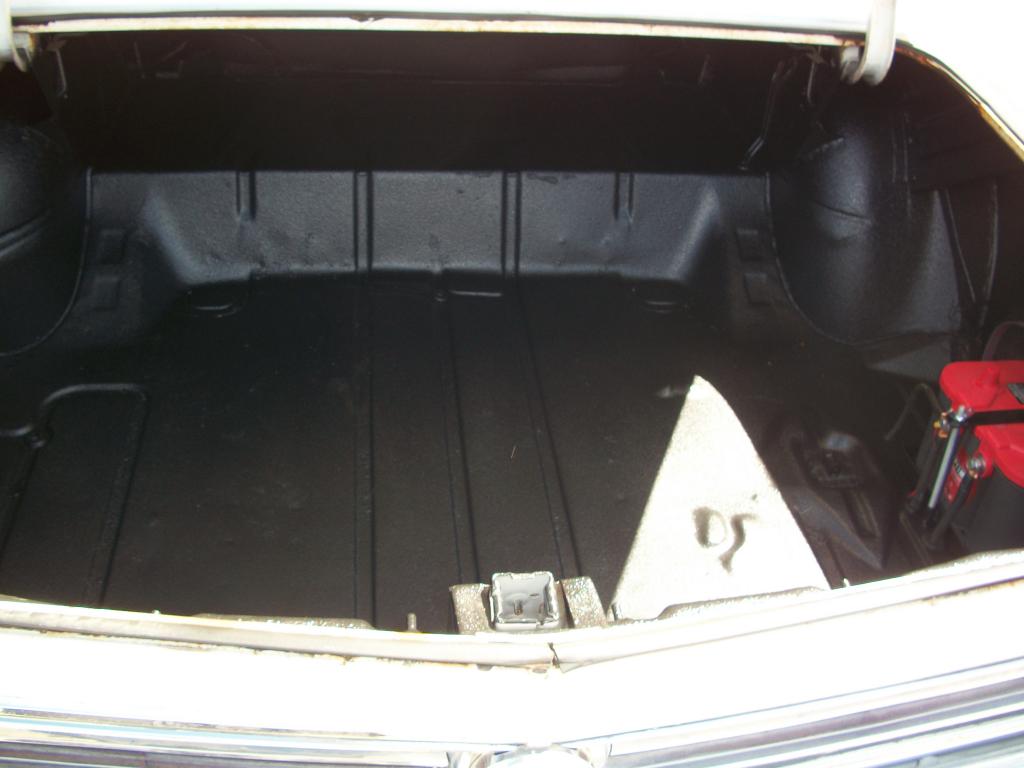

And another view.
 05-28-2013, 05:19 PM
#178
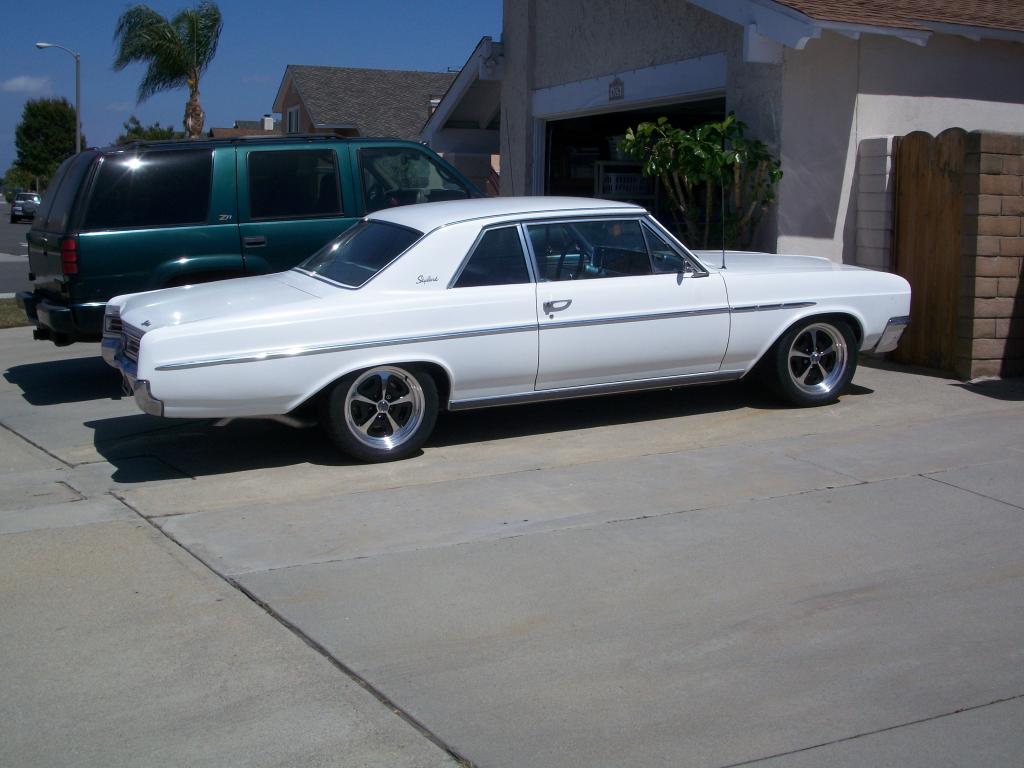
Here are a couple of more pictures from today. First up is showing the new tires and wheels and mainly the stance. The stance may be a little hard to see as the driveway is on a slope. IMHO I would like to raise the rear maybe 1/2 to 1 inch. This would give me a little more ground clearance for the transmission.
Last, we have installed the bucket seats.
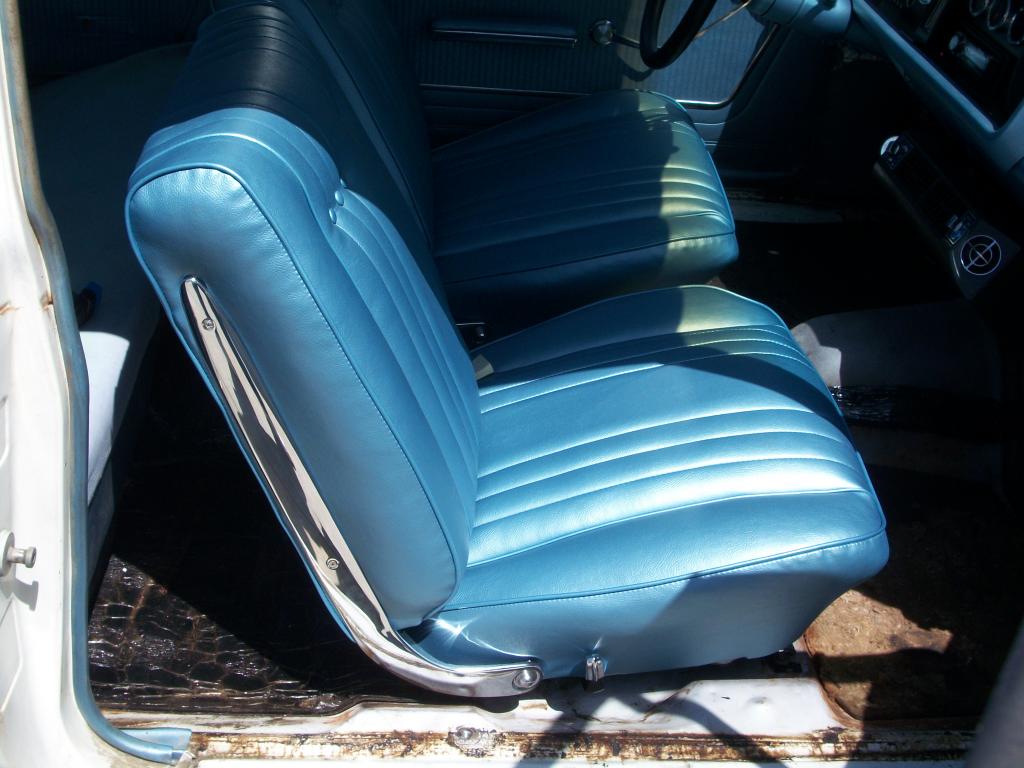

Last, we have installed the bucket seats.

 05-29-2013, 10:13 AM
#180
TECH Senior Member
iTrader: (7)

Cool build. I love seeing solid original cars being upgraded with modern drivetrain and then being driven!
Can someone drop some 6L80/90 transmission knowledge on me? Are they tough? How do you control it? Are the shifting parameters programable?
Andrew
Can someone drop some 6L80/90 transmission knowledge on me? Are they tough? How do you control it? Are the shifting parameters programable?
Andrew
Last edited by Project GatTagO; 05-29-2013 at 10:18 AM.