

Project "Blasphemy" - LSx Foxbody


 01-11-2013, 12:30 PM
#28
TECH Resident

This is damn near exactly what I plan on building but with a stock 6.0 block and a glide. That motor should make some pretty big power with those heads and that cam.
 02-24-2013, 11:39 AM
#31
I currently have the stock steering shaft in there, and it fits fine...including the big *** rag joint
my plan is to buy the Flaming River power rack and then install it and measure for a new steering shaft
currently my stock one has about a 2" extension I made for it....literally Just welded in a chunk of round stock so that I could still move the car around the shop for now.
not sure exactly why, but guessing the team Z Kmember and the 4cylinder Kmember have slightly different positions on the steering rack mounting, or the v8 and 4cyl k members are slightly different or something...
either way... I'm going to install the rack, and measure before I order the steering linkage
Last edited by soundengineer; 02-24-2013 at 01:56 PM.
05-07-2013, 11:12 PM
#32
so I got home from the Alicia Keys US tour last week.....and decided to try to tackle a few things on the car while I am home for a short break before we head over to start the European Leg of the tour..
Ordered a Flaming River Billet Power Steering Rack.
Ordered an Induction Solutions 4150 Nitrous Burst Plate
Ordered some LED Tail Lights and New set of Headlights(my original ones from stock are Junk...LOL)
Ordered a Maximum Motorsports Manual Brake Kit with plumbing and an improved geometry pedal.
ordered some Fuel system stuff...
Designed a Custom Bracket for my throttle Linkage with my 4150 TB.
well...
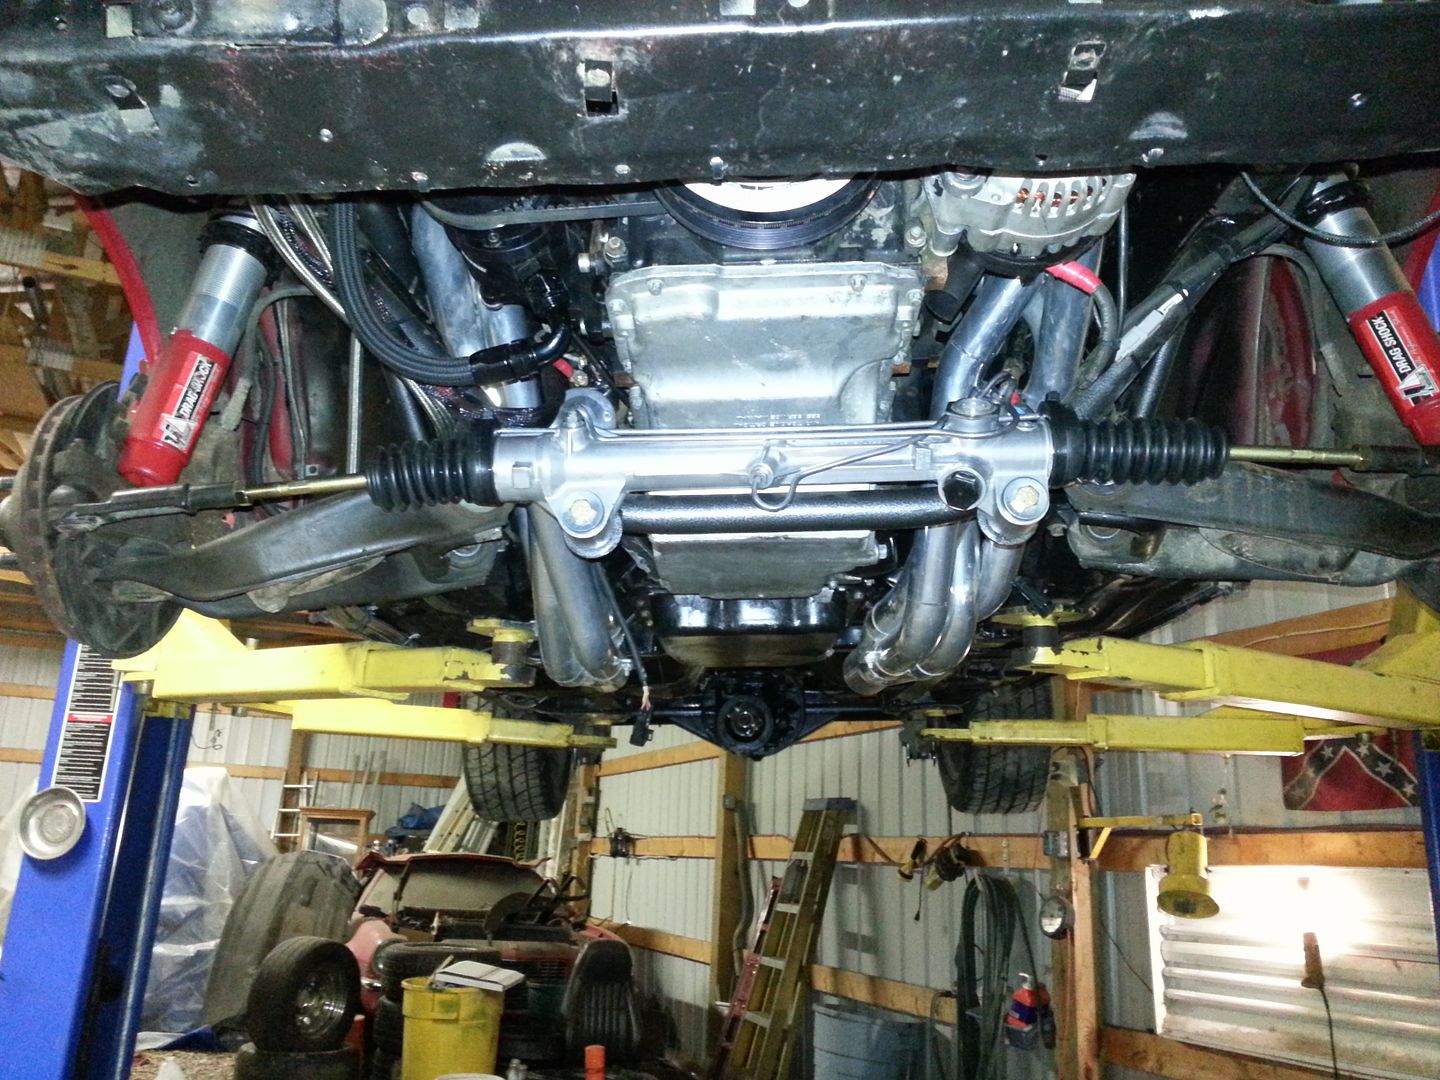
the Flaming River Billet Power Steering rack showed up last week...so this weekend I made an attempt to install it...
BIG PROBLEM!
it doesnt work with the Team-Z K-member...
as you can see here, it hits the Tubular K-member quite a ways from being close to going on
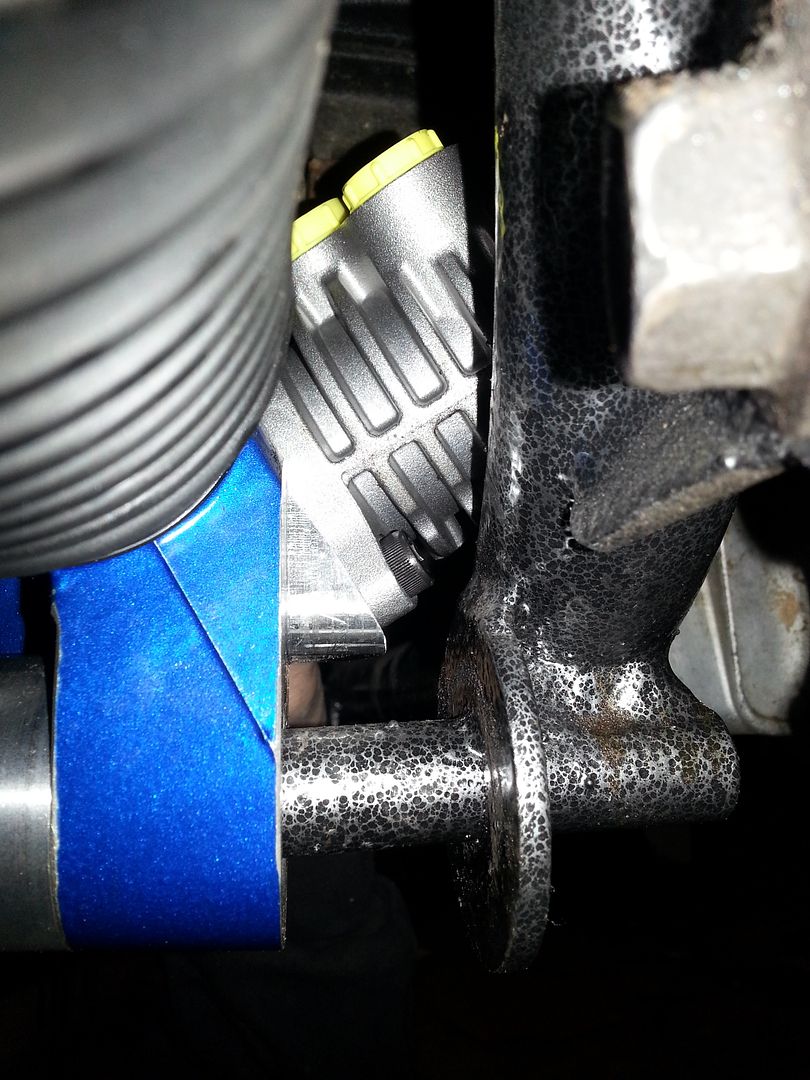
in the Flaming River Instructions, they say you have to notch one of the motor mounts and part of the stock K-member for it to work......needless to say....I cant notch a Tubular K-memeber and still feel good about safety...and I have no motor mounts causing any interference...I even played around with it to see if I could use the offset bushings to make it work...and its just not physically possible.
so I sent the Flaming River rack back, and I ordered an AGR Performance steering rack from Summit.....
physically the same dimensions as my stock rack which fits just fine, but with a better steering box at a 15:1 ratio
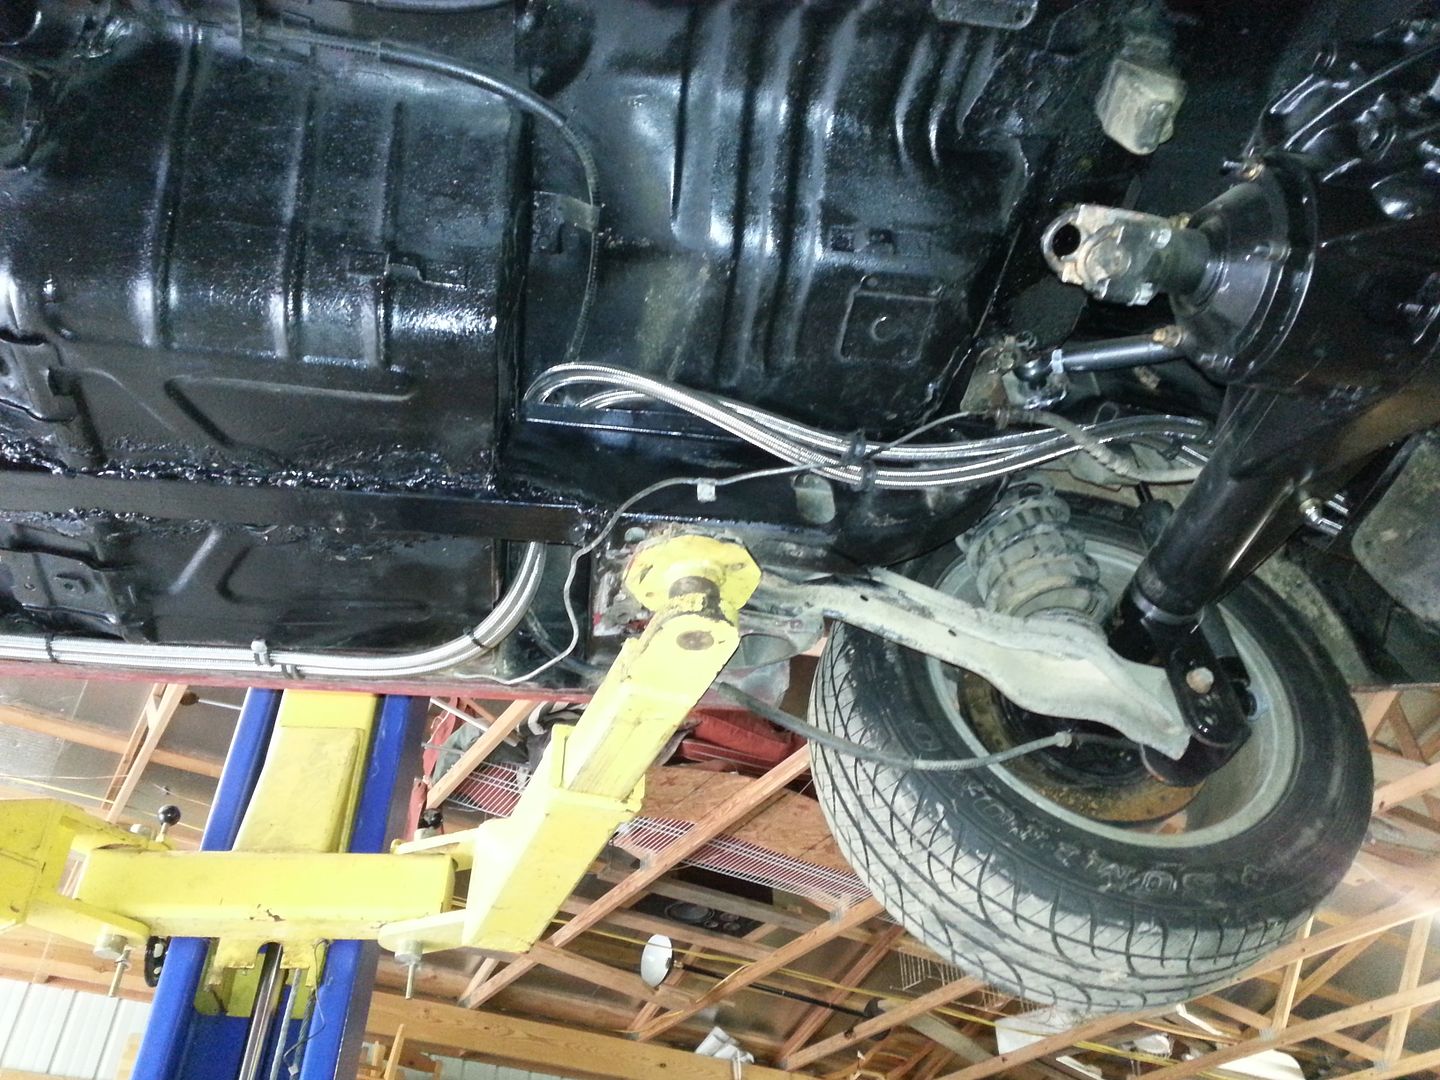
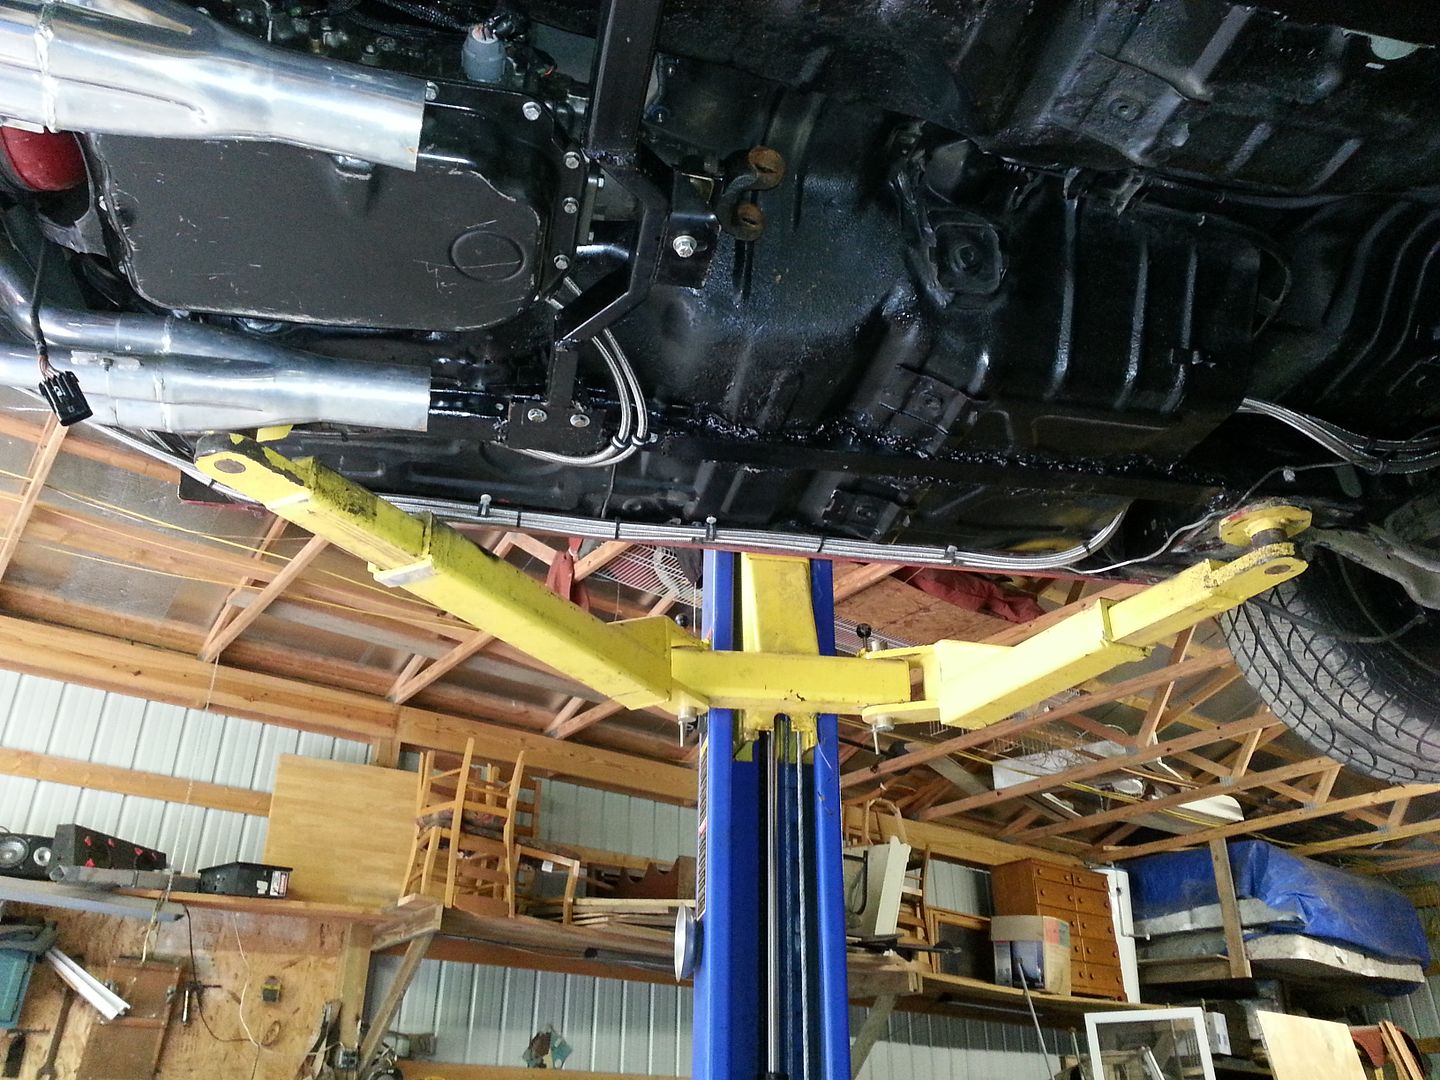
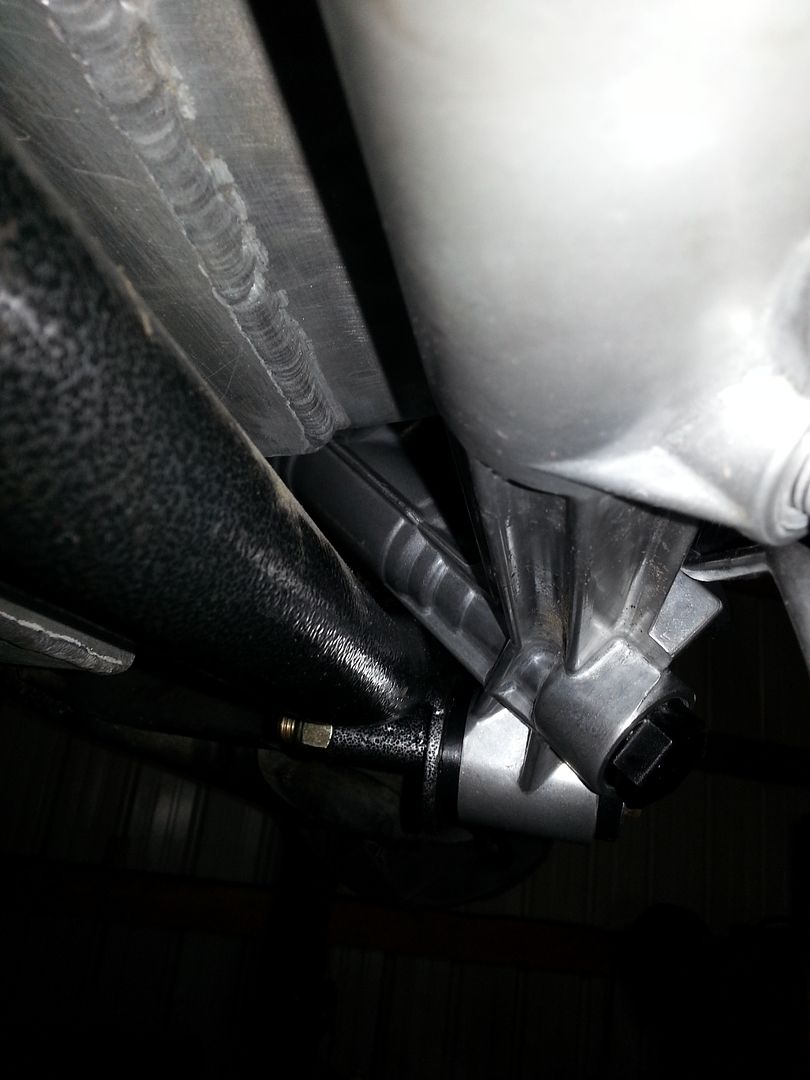
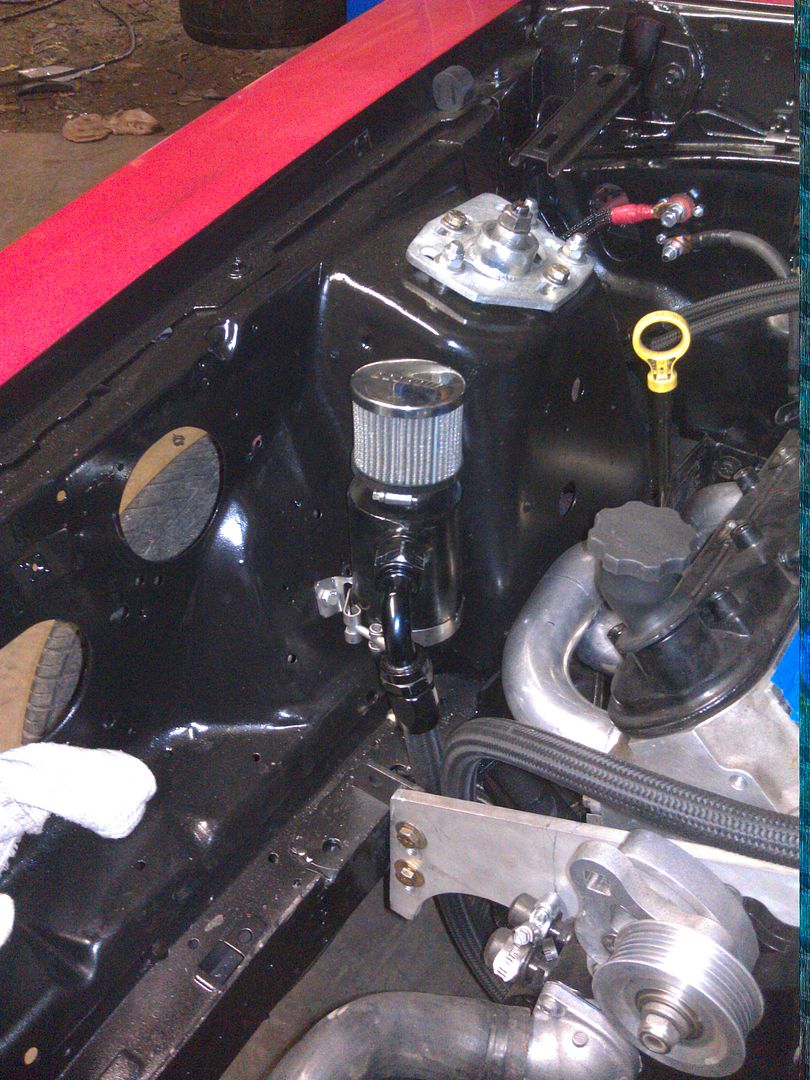
I also started install of my Gas tank and fuel lines now that my Fuel pump and filters have shown up.
Made a plate to mount to the rear bumper support, and welded it in place.
attached the Fuel pump and Filters
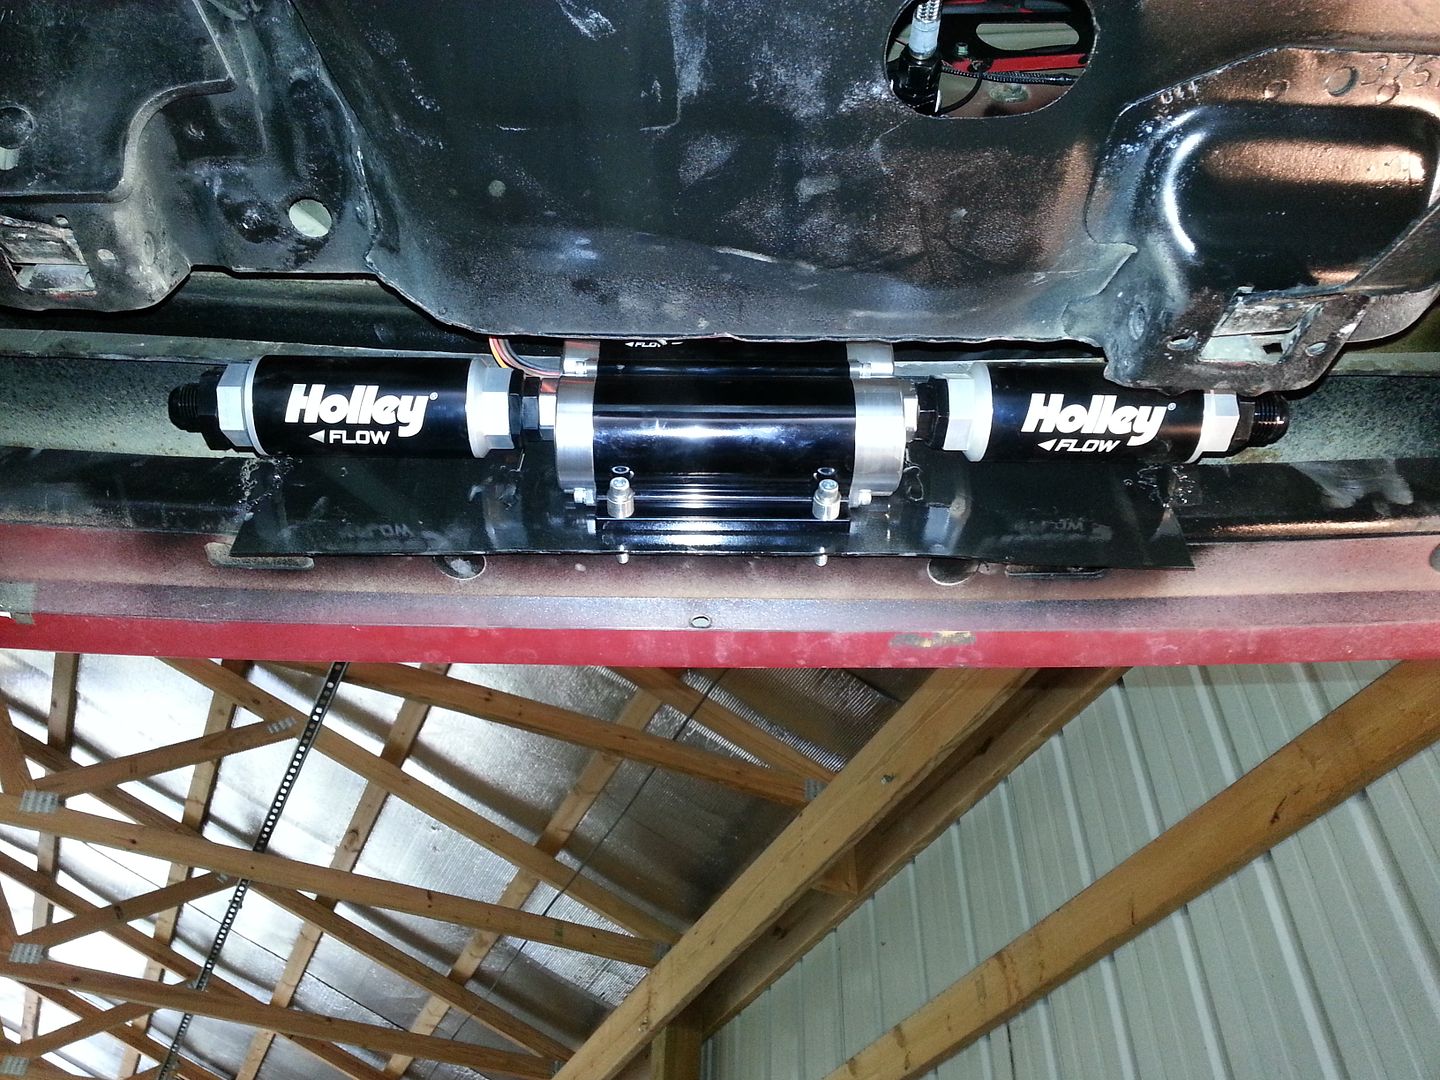
came to the realization that the lowerst I could get the fuel pump, was going to be above the sump...almost above the whole gas tank...
so to fix the problems that would cause, I elected to buy a 15 gallon Fuel cell from Jegs and mount it in the Spare tire well...It means I have to find a new location for my Nitrous bottles...but whatever...
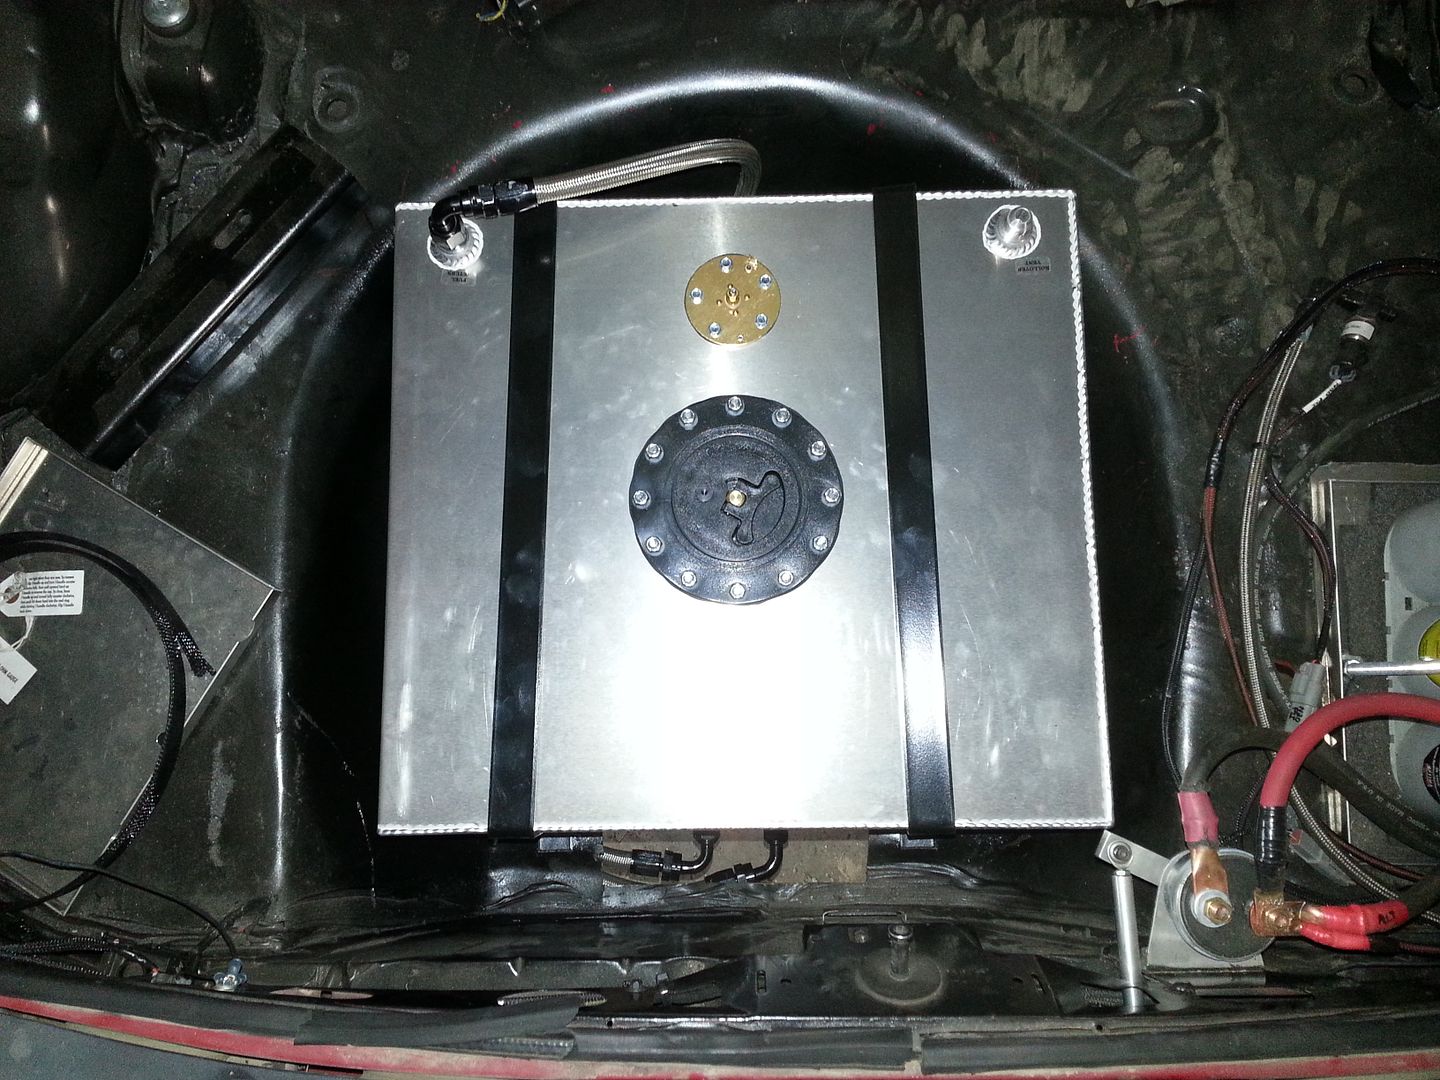
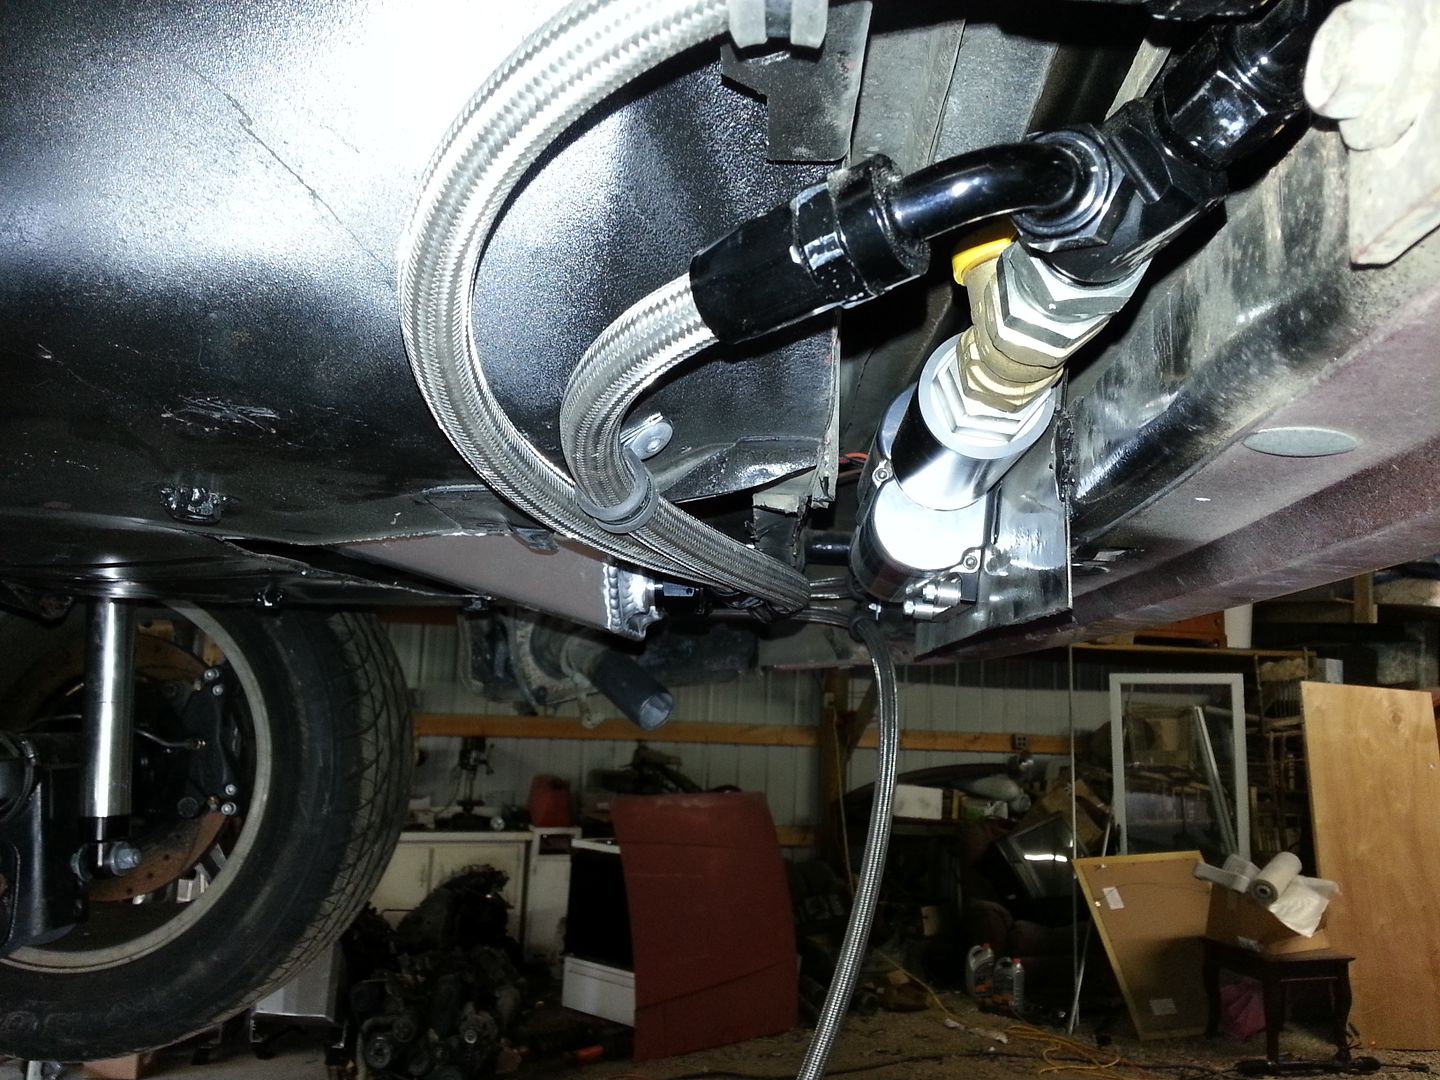
I also took the time to run my fuel lines down the passenger side of the car....

Effectively.....
Fuel cell is a dual 8an outlet...so I go dual 8 to a 12an Y, 12an-3/4npt thru the valve and back to 12an for the first filter
the pump (Holley 12-1800) is 10an in and out, so theres a 12an/10an O ring coupler between each filter and the pump
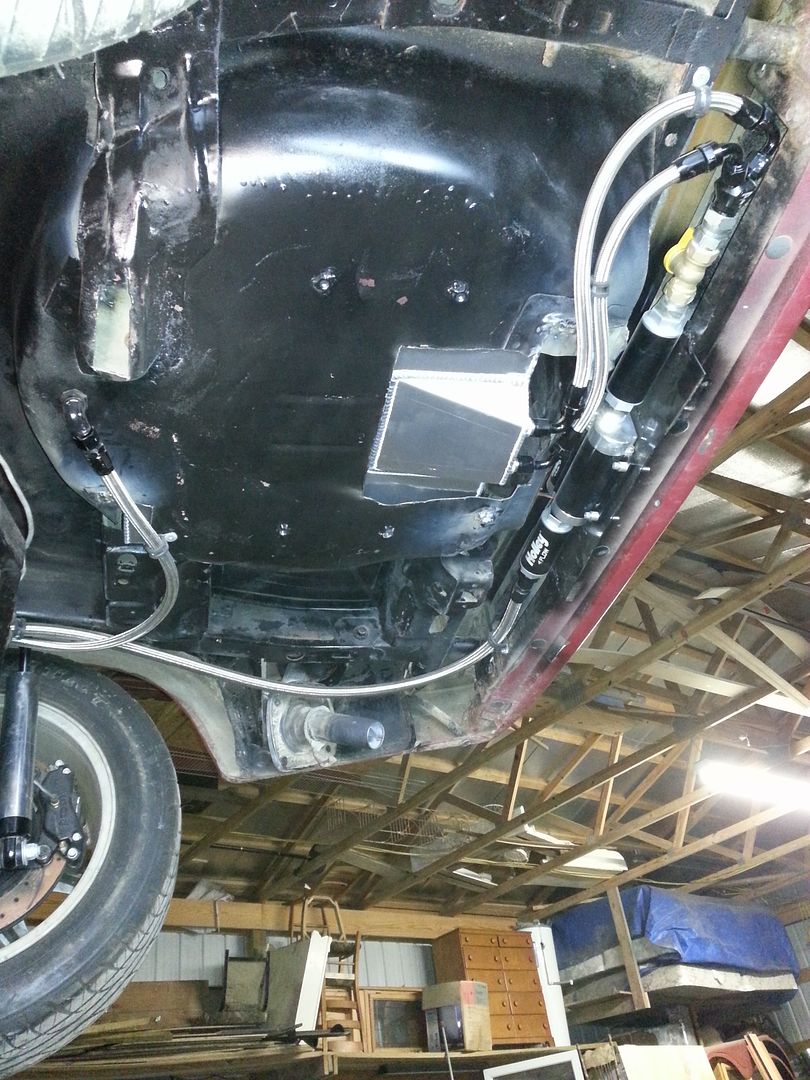
then I come out of the 2nd filter 10an and go all the way up to the engine bay...
at the engine bay, in the wheel well, I split back to two 8an lines to hit each fuel rail(8an), then I come out of each fuel rail(8an) to a Weldon A2040 and 8an out the bottom to return to the tank.
I still have to finish up the Fuel lines and routing up in the engine bay, waiting on a few fittings to show up yet....
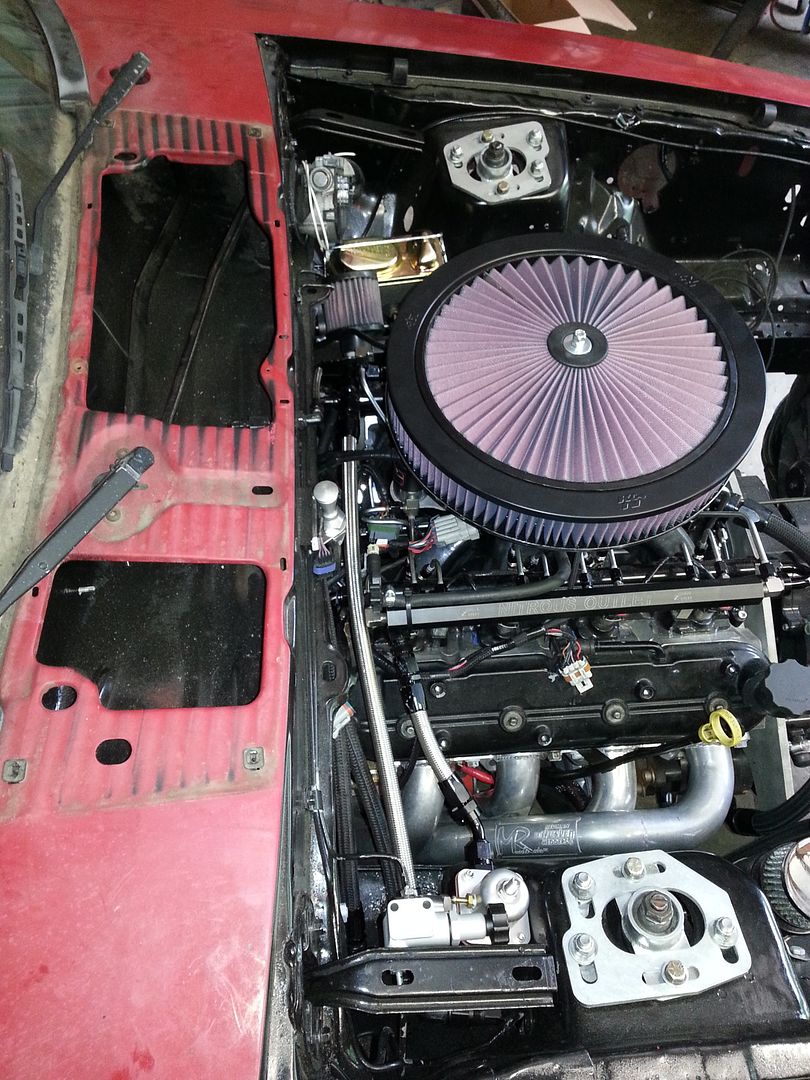
I added a Maximum Motorsports Manual Brake Kit with a proportioning valve(cant see it here but its over on the passenger side in place of where the brake line coupler is)....and along with the Brake lines, I installed a Line lock
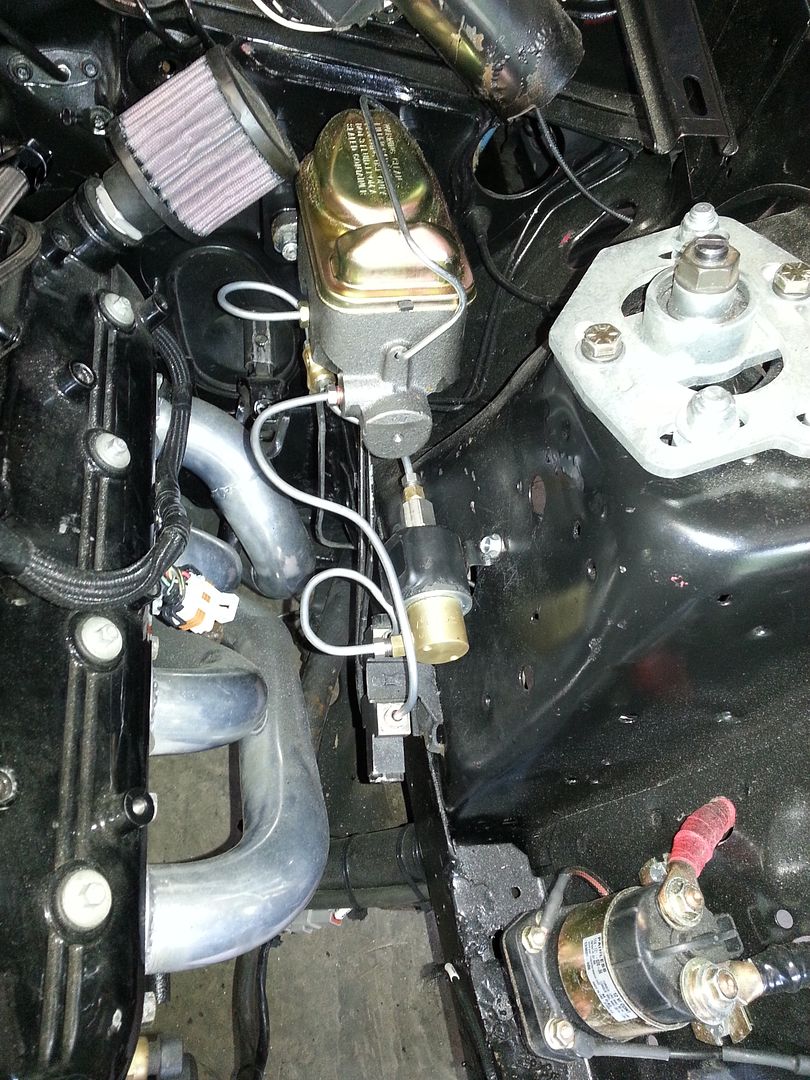
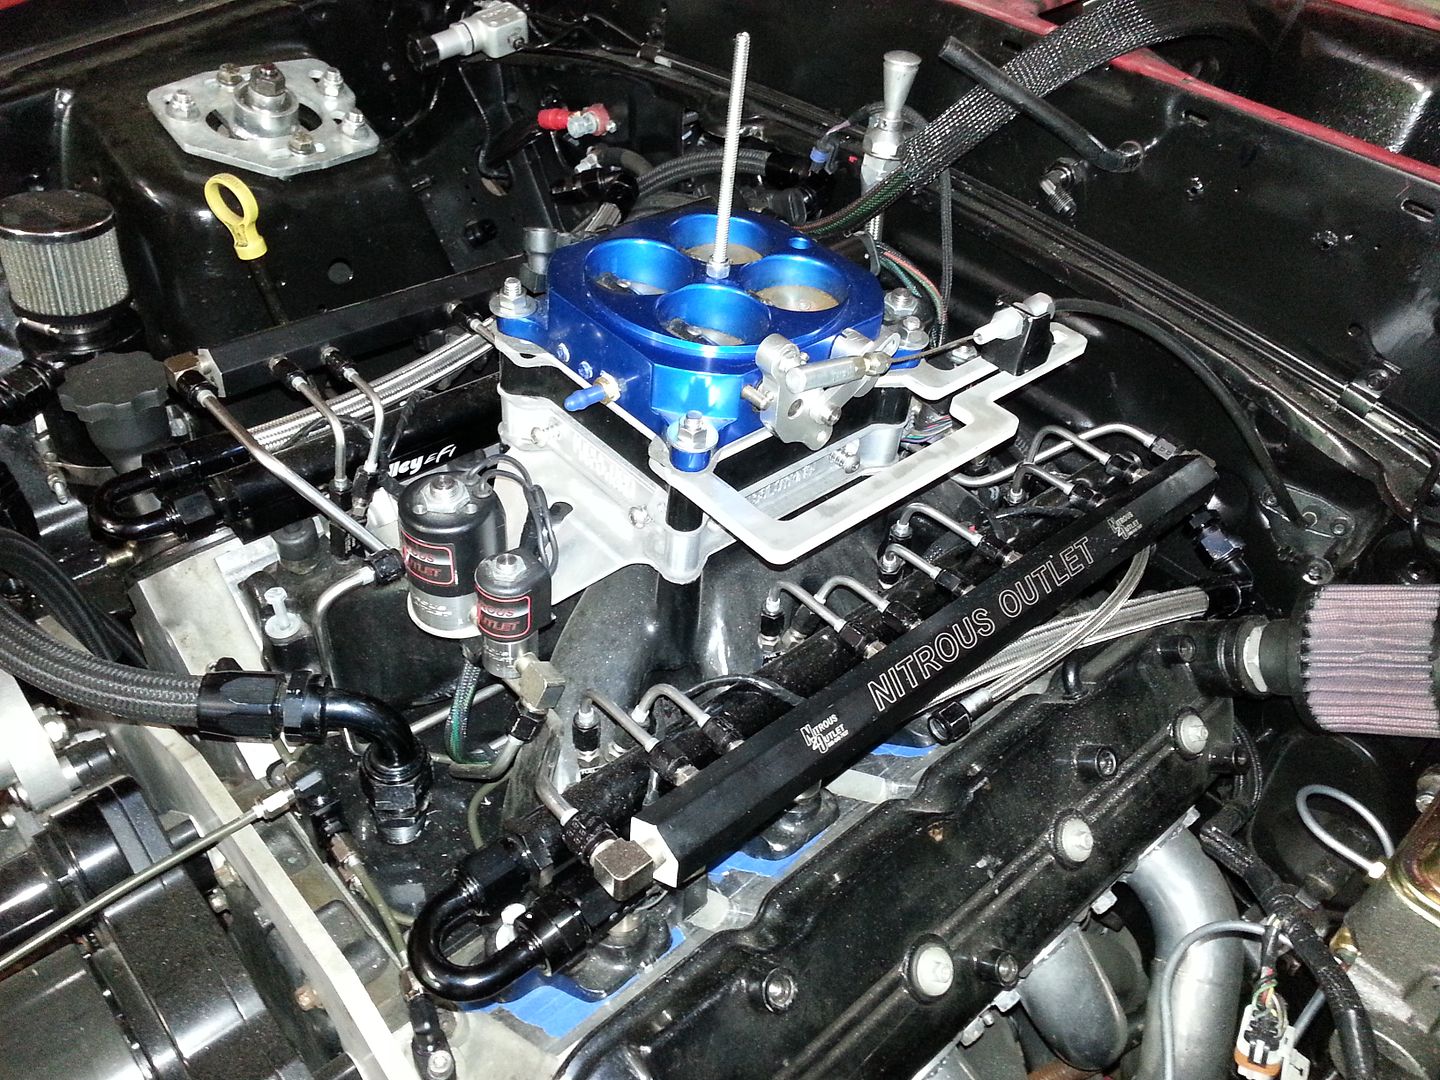
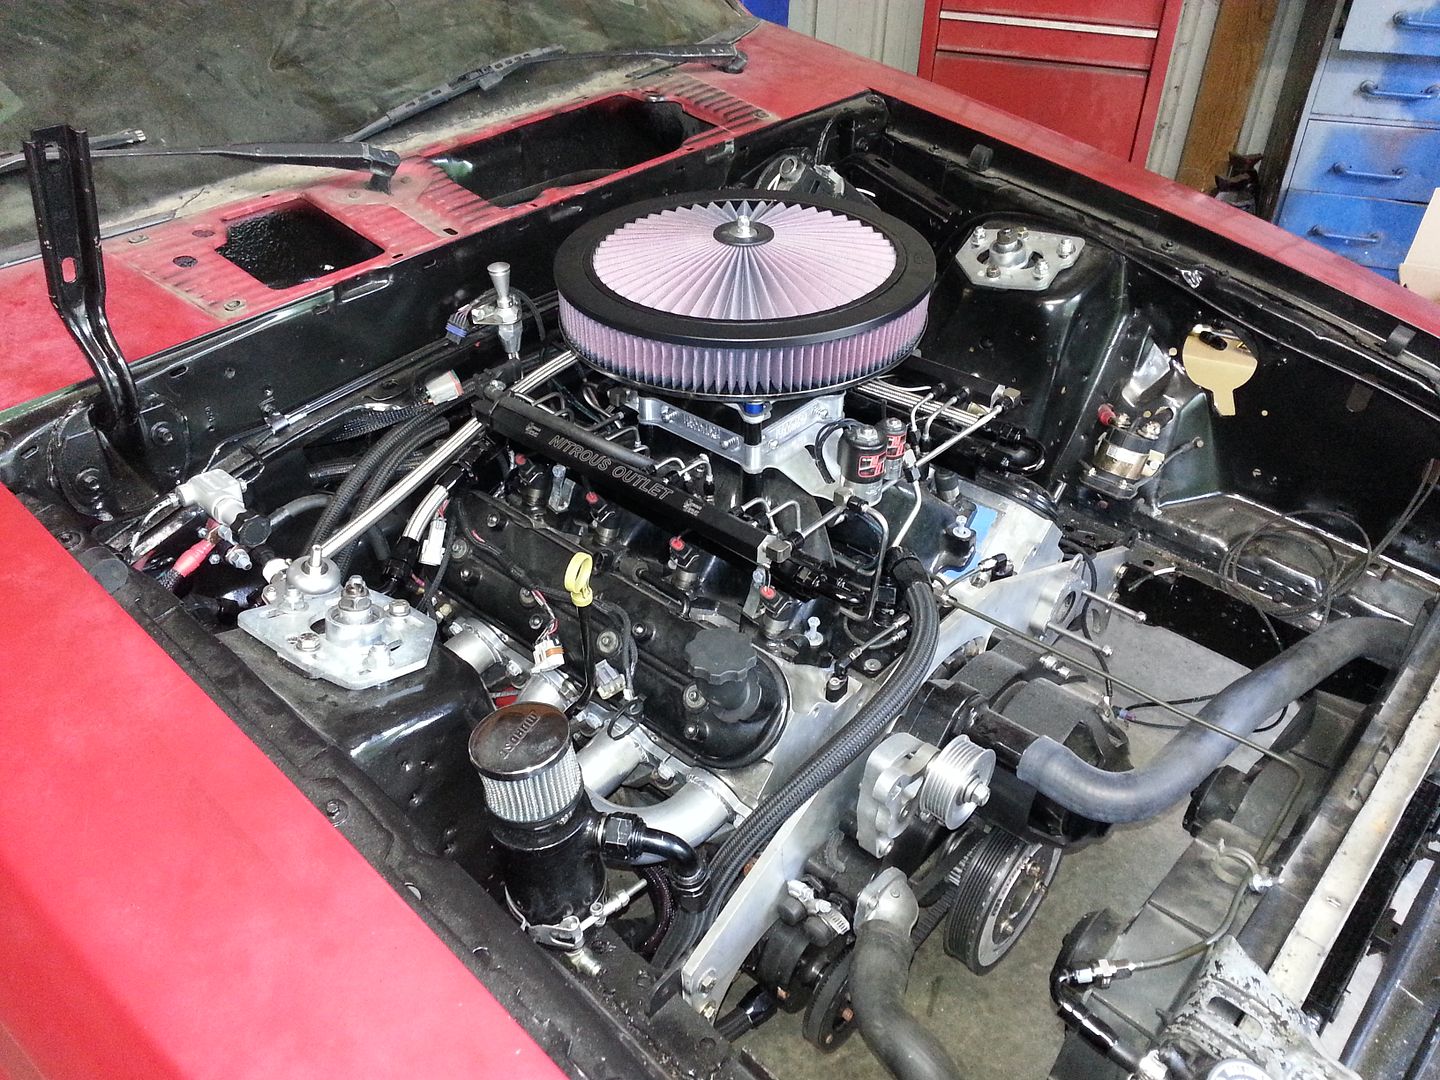
and I made a Bracket to mount the throttle cable onto the Throttle body....
I had a bracket that I bought from Jegs...It was anice piece, but honestly, it didnt line up the throttle cable with the throttle linkage for my 4150 throttle body
the bracket I made, puts the Throttle Cable in line with the linkage, and it also mounts under the throttle body as a plate to allow for the correct alignment of the linkage up and down as well.
AutoCad + Local Water Jet Shop = WIN!
Ordered a Flaming River Billet Power Steering Rack.
Ordered an Induction Solutions 4150 Nitrous Burst Plate
Ordered some LED Tail Lights and New set of Headlights(my original ones from stock are Junk...LOL)
Ordered a Maximum Motorsports Manual Brake Kit with plumbing and an improved geometry pedal.
ordered some Fuel system stuff...
Designed a Custom Bracket for my throttle Linkage with my 4150 TB.
well...
the Flaming River Billet Power Steering rack showed up last week...so this weekend I made an attempt to install it...
BIG PROBLEM!
it doesnt work with the Team-Z K-member...
as you can see here, it hits the Tubular K-member quite a ways from being close to going on

in the Flaming River Instructions, they say you have to notch one of the motor mounts and part of the stock K-member for it to work......needless to say....I cant notch a Tubular K-memeber and still feel good about safety...and I have no motor mounts causing any interference...I even played around with it to see if I could use the offset bushings to make it work...and its just not physically possible.
so I sent the Flaming River rack back, and I ordered an AGR Performance steering rack from Summit.....
physically the same dimensions as my stock rack which fits just fine, but with a better steering box at a 15:1 ratio
I also started install of my Gas tank and fuel lines now that my Fuel pump and filters have shown up.
Made a plate to mount to the rear bumper support, and welded it in place.
attached the Fuel pump and Filters

came to the realization that the lowerst I could get the fuel pump, was going to be above the sump...almost above the whole gas tank...
so to fix the problems that would cause, I elected to buy a 15 gallon Fuel cell from Jegs and mount it in the Spare tire well...It means I have to find a new location for my Nitrous bottles...but whatever...


I also took the time to run my fuel lines down the passenger side of the car....


Effectively.....
Fuel cell is a dual 8an outlet...so I go dual 8 to a 12an Y, 12an-3/4npt thru the valve and back to 12an for the first filter
the pump (Holley 12-1800) is 10an in and out, so theres a 12an/10an O ring coupler between each filter and the pump
then I come out of the 2nd filter 10an and go all the way up to the engine bay...
at the engine bay, in the wheel well, I split back to two 8an lines to hit each fuel rail(8an), then I come out of each fuel rail(8an) to a Weldon A2040 and 8an out the bottom to return to the tank.
I still have to finish up the Fuel lines and routing up in the engine bay, waiting on a few fittings to show up yet....
I added a Maximum Motorsports Manual Brake Kit with a proportioning valve(cant see it here but its over on the passenger side in place of where the brake line coupler is)....and along with the Brake lines, I installed a Line lock

and I made a Bracket to mount the throttle cable onto the Throttle body....
I had a bracket that I bought from Jegs...It was anice piece, but honestly, it didnt line up the throttle cable with the throttle linkage for my 4150 throttle body
the bracket I made, puts the Throttle Cable in line with the linkage, and it also mounts under the throttle body as a plate to allow for the correct alignment of the linkage up and down as well.
AutoCad + Local Water Jet Shop = WIN!


Last edited by soundengineer; 05-08-2013 at 08:25 AM.
05-08-2013, 08:50 PM
#33
Good news... the AGR Steering rack fits perfect....Just like the stock one did....what a concept!
one note to anybody else buying one of these...
it ships with some Poly bushings preinstalled...and there is a metal ferrule inside the busings....
well.. none of that **** fits... so buy some bushings of your own from energy suspension, and remove the ones they ship with it...
I bought my bushings from summit... they work perfectly.
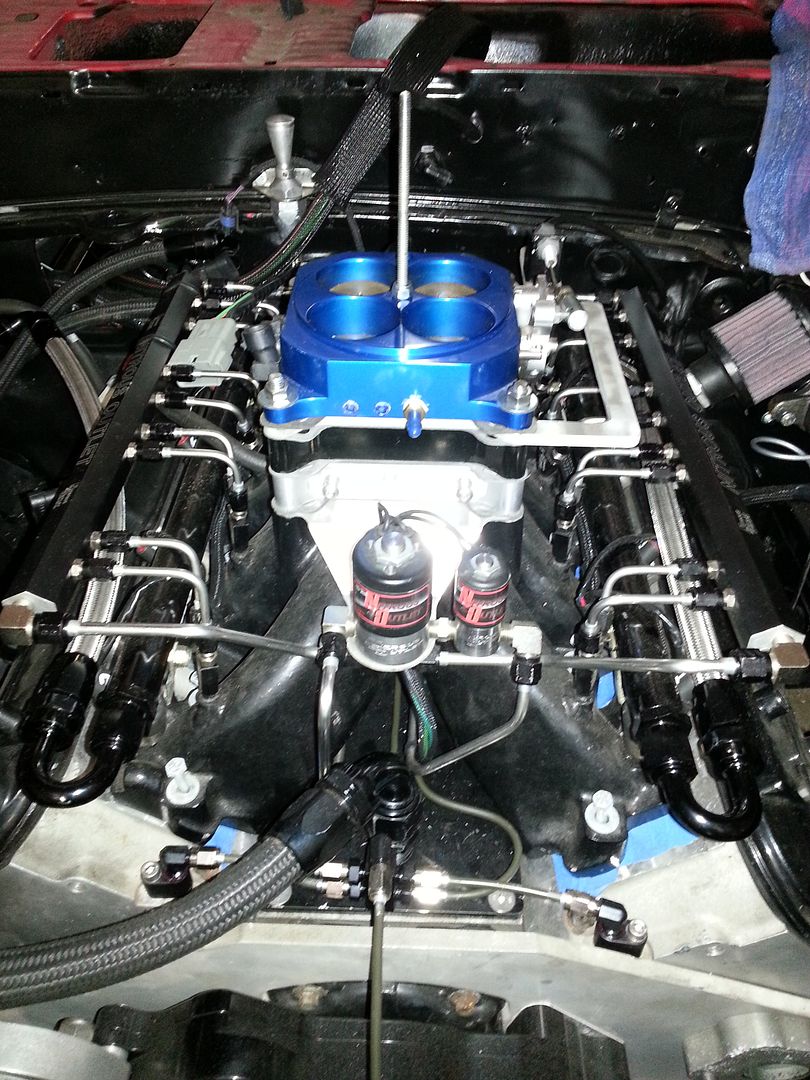
finished up the Fuel line routing and the regulator mounting...was waiting on one fitting to arrive(it showed up this morning) so I could finish things up
everything in this corner is sort of a mess right now... lots of wiring things still hanging out not connected yet...but that will all clean up before its ready to run.
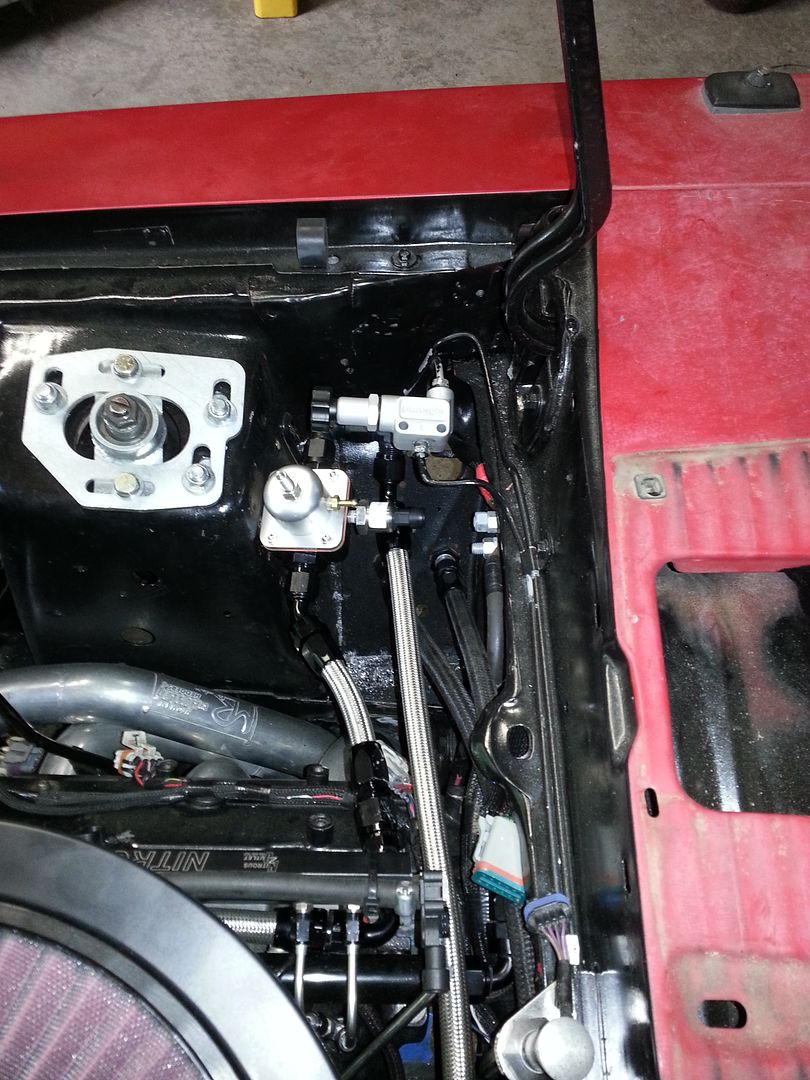
as you can see... things are starting to come together...
now I have to head out of town for work again for a couple of months again..LOL
one note to anybody else buying one of these...
it ships with some Poly bushings preinstalled...and there is a metal ferrule inside the busings....
well.. none of that **** fits... so buy some bushings of your own from energy suspension, and remove the ones they ship with it...
I bought my bushings from summit... they work perfectly.


finished up the Fuel line routing and the regulator mounting...was waiting on one fitting to arrive(it showed up this morning) so I could finish things up
everything in this corner is sort of a mess right now... lots of wiring things still hanging out not connected yet...but that will all clean up before its ready to run.


as you can see... things are starting to come together...

now I have to head out of town for work again for a couple of months again..LOL
 05-10-2013, 09:09 PM
#36
09-27-2013, 10:34 PM
#39
Actually......YES!
sorry there havent been any updates in a while....
I work on the road for a living as an audio engineer, and basically havent been home since May..LOL
but since my last post, there have been a few changes in progress....
I've made the decision to stop filling nitrous bottles, and go for a more constant amount of power.....
I'm switching to a Supercharger....I bought an F1c, and it came with a bunch of pieces that I probably cant use on my car....but I'm going to reuse the bracket and just modify it and make it work with my setup because my setup is custom anyways....LOL
I basically bought a bunch of pieces parts while I was out on the Road over in Europe and South America over the summer, and when I got home I had Brown Box Christmas
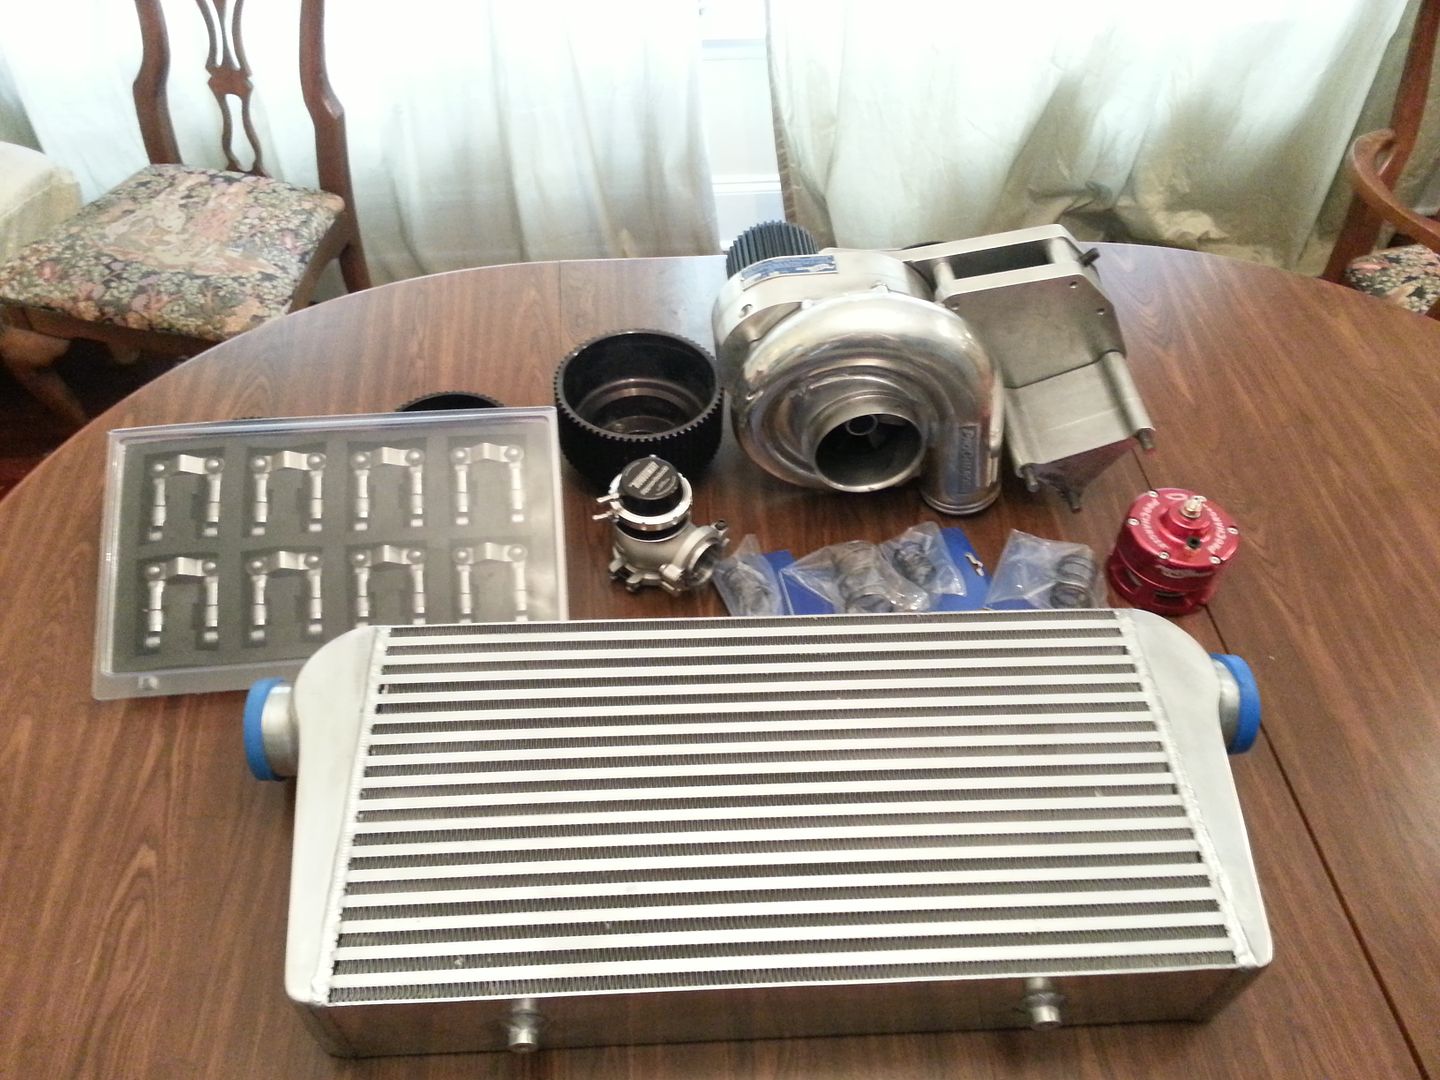
The plan is F1c cog setup....spin the **** out of it....Air to Air (4" in and out)
Big Red BOV for throttle closing pressure release, and a Wastegate to control Boost levels...just changing springs for now, and running less boost on the street and turning it up at the track.....and down the road using the Holley Boost control to just do it at a flip of a switch
I had already planned on throwing in a set of Morel Link Bar lifters....so I bought them while I was out as well...
Thanks to a recommendation of a buddy who works at a race shop that always does well at the "Engine Masters" Challenges, I'm going to Lower compression by putting on a Thicker Head Gasket. (going to a Cometic .140)
we're going to make a slight change to the heads and lay back the chambers a little bit as well.
we should be able to get the compression from 11.2 down to around 9.3
its still going to be pump gas...and probably some meth at the track
its going to take a little bit of work to get things sorted out for the Supercharger....but I have a game plan, and its going to be pretty slick when I finally get it done.
the hardest part is going to be Mounting the supercharger....I'll be working on making a bracket in CAD for the next few days, and then trying to get it cut at my local water jet/cnc shop in a reasonable time frame.
09-28-2013, 11:01 PM
#40
Spent all Day forming a mock up supercharger out of Foam, and then working on making brackets for it out of foam board....
figured out what I wanted to do for bracketing...spent the larger portion of the day working in AutoCAD...
hopefully my measurements are correct...I'm usually dead on, or pretty close on the first shot.
then I ate some dinner, and went back out to the garage to work on some other parts..
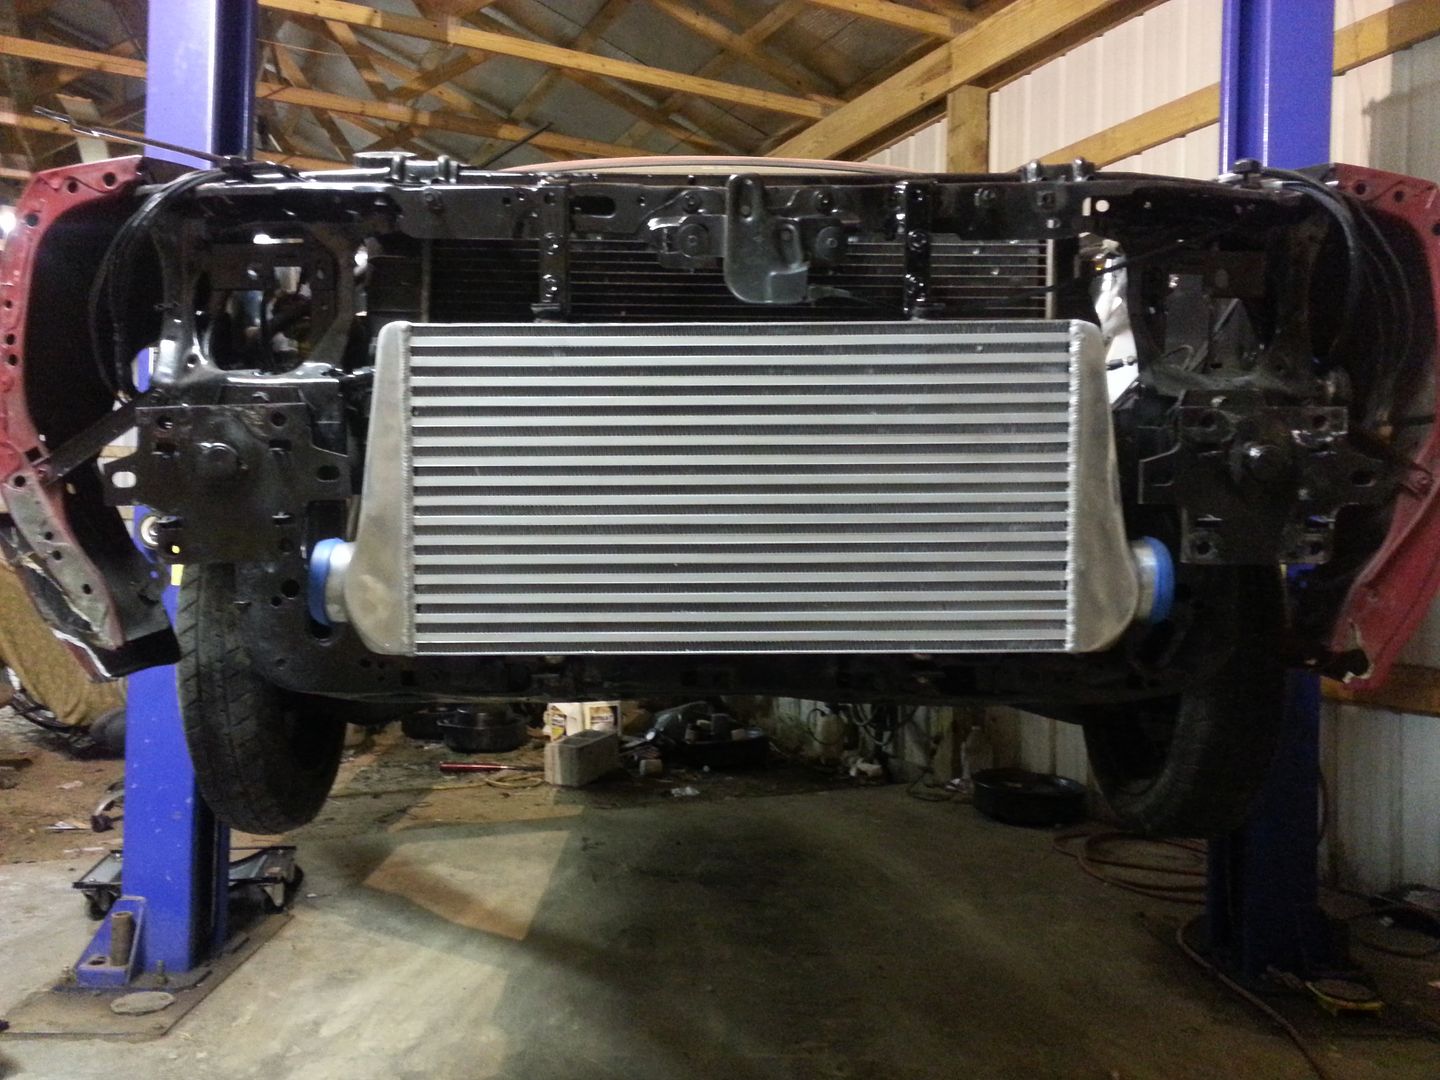
Mounted the Air to Air Intercooler...
figured out what I wanted to do for bracketing...spent the larger portion of the day working in AutoCAD...
hopefully my measurements are correct...I'm usually dead on, or pretty close on the first shot.
then I ate some dinner, and went back out to the garage to work on some other parts..
Mounted the Air to Air Intercooler...
