

Project "Blasphemy" - LSx Foxbody


 10-21-2014, 09:16 PM
#102
I measured that when I was thinking about buying a hood or modifying the stock hood...
from my valley plate to the top is 14.0 Inches
LSx Super Victor, 1" 4150 Spacer, Scorpion 4150 TB(it is shorter than the Accufab/FAST 4150 TB), and Extreme Velocity Pro Carb Hat..
from my valley plate to the top is 14.0 Inches
LSx Super Victor, 1" 4150 Spacer, Scorpion 4150 TB(it is shorter than the Accufab/FAST 4150 TB), and Extreme Velocity Pro Carb Hat..
 10-21-2014, 10:30 PM
#107
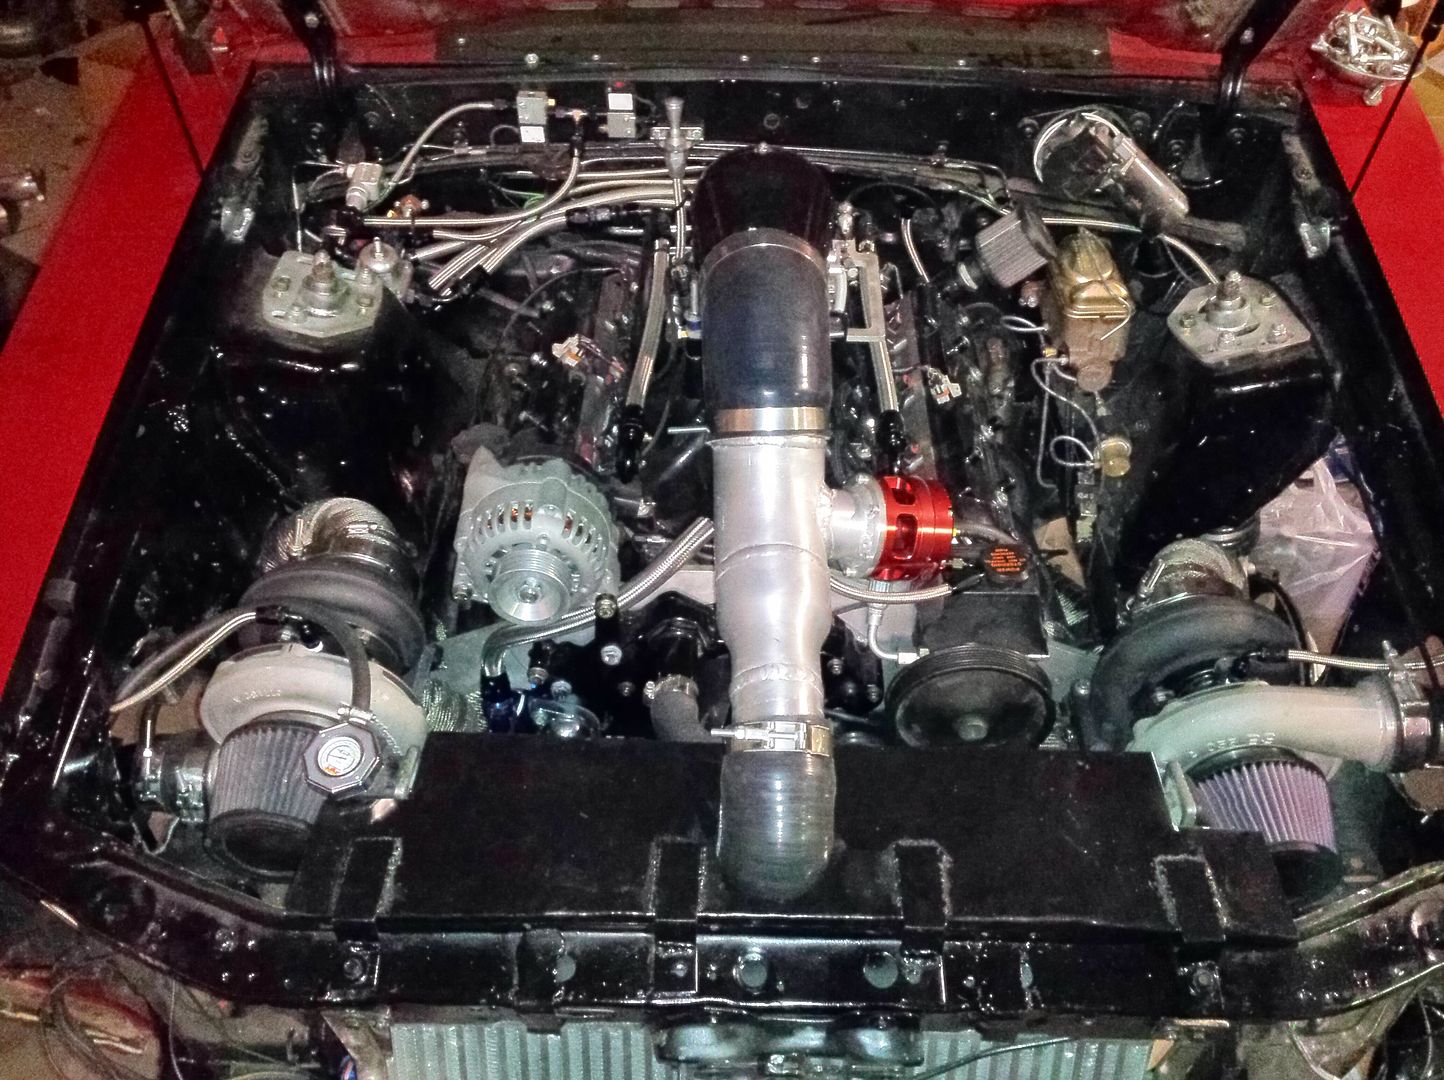
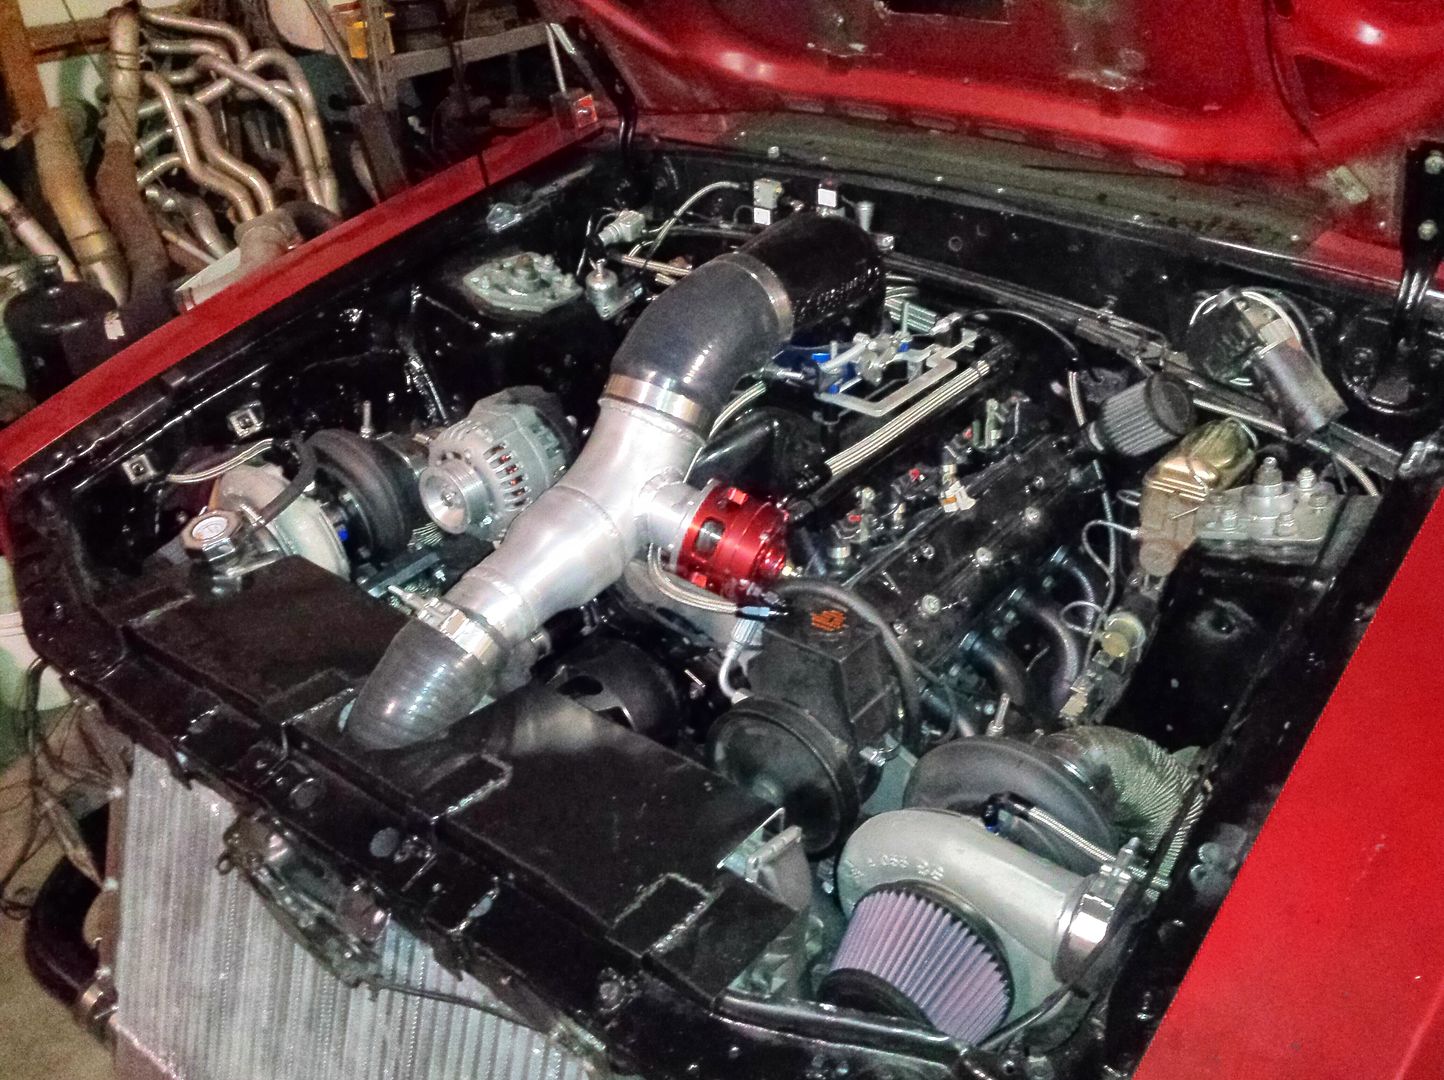
I went with some Stainless truck Shorty Headers..
forward facing downward orientation
I had to make a 3/4" header spacer to push the passenger side header out a little bit to get the collector to clear the vacuum pump because of how it is located and oriented on my setup.
quite a bit better than using the stock truck cast iron headers
safer to weld to, and you get some scavenging benefits from the way the tubes are designed
people try to say it doesnt matter with a turbo...
and it wont make much of a noticeable difference for max power...
but it will make quite a big different in how fast it spools...
better exhaust headers = better pressure ratios = faster spooling.
forward facing downward orientation
I had to make a 3/4" header spacer to push the passenger side header out a little bit to get the collector to clear the vacuum pump because of how it is located and oriented on my setup.


quite a bit better than using the stock truck cast iron headers
safer to weld to, and you get some scavenging benefits from the way the tubes are designed
people try to say it doesnt matter with a turbo...
and it wont make much of a noticeable difference for max power...
but it will make quite a big different in how fast it spools...
better exhaust headers = better pressure ratios = faster spooling.
Last edited by soundengineer; 10-21-2014 at 10:37 PM.
11-03-2014, 11:47 PM
#109
Finished up the Headers and Main portion of the Downpipe tonight....and wrapped them in header wrap.
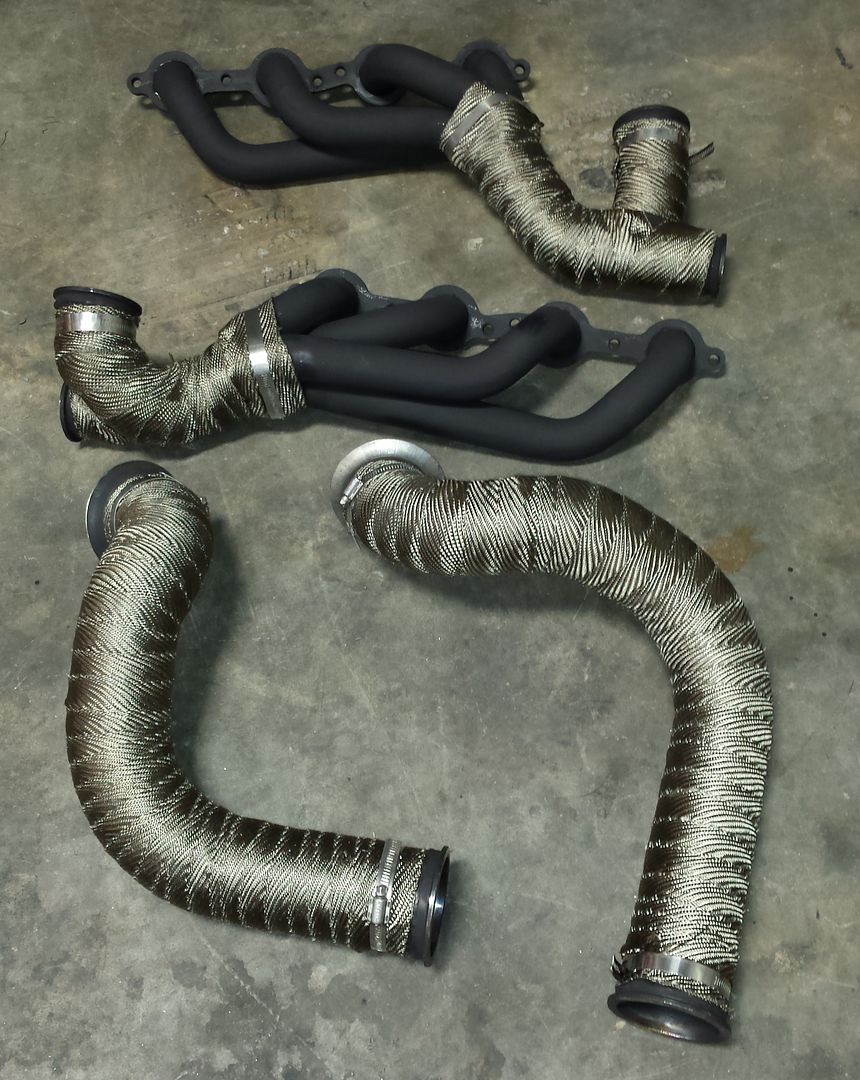
for other peoples reference...when you want to know how much header wrap you will need...
this little bit took up about 90 feet of 2" header wrap....I bought a 100 ft roll and I have about 10 feet left

for other peoples reference...when you want to know how much header wrap you will need...
this little bit took up about 90 feet of 2" header wrap....I bought a 100 ft roll and I have about 10 feet left
11-11-2014, 10:31 PM
#110
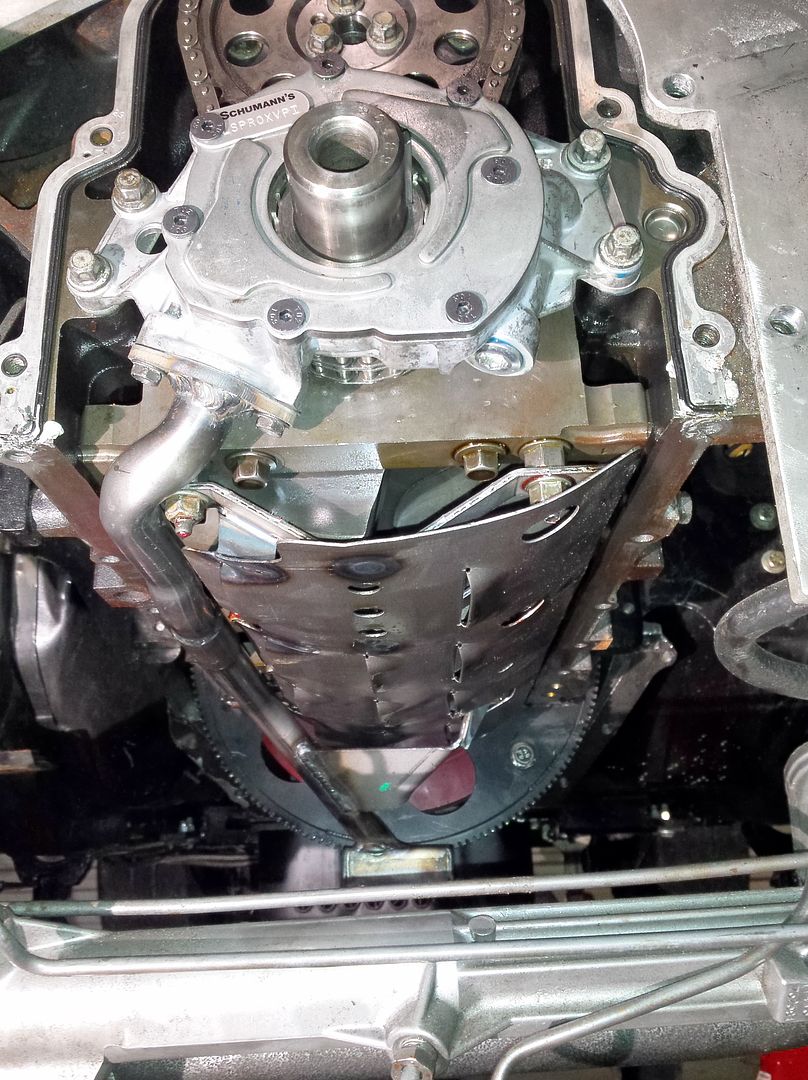
so I decided to upgrade my oil pump and pan while I was at it...
figured I could use the extra oil capacity and extra flow and pressure with the Turbos stealing some of the oil
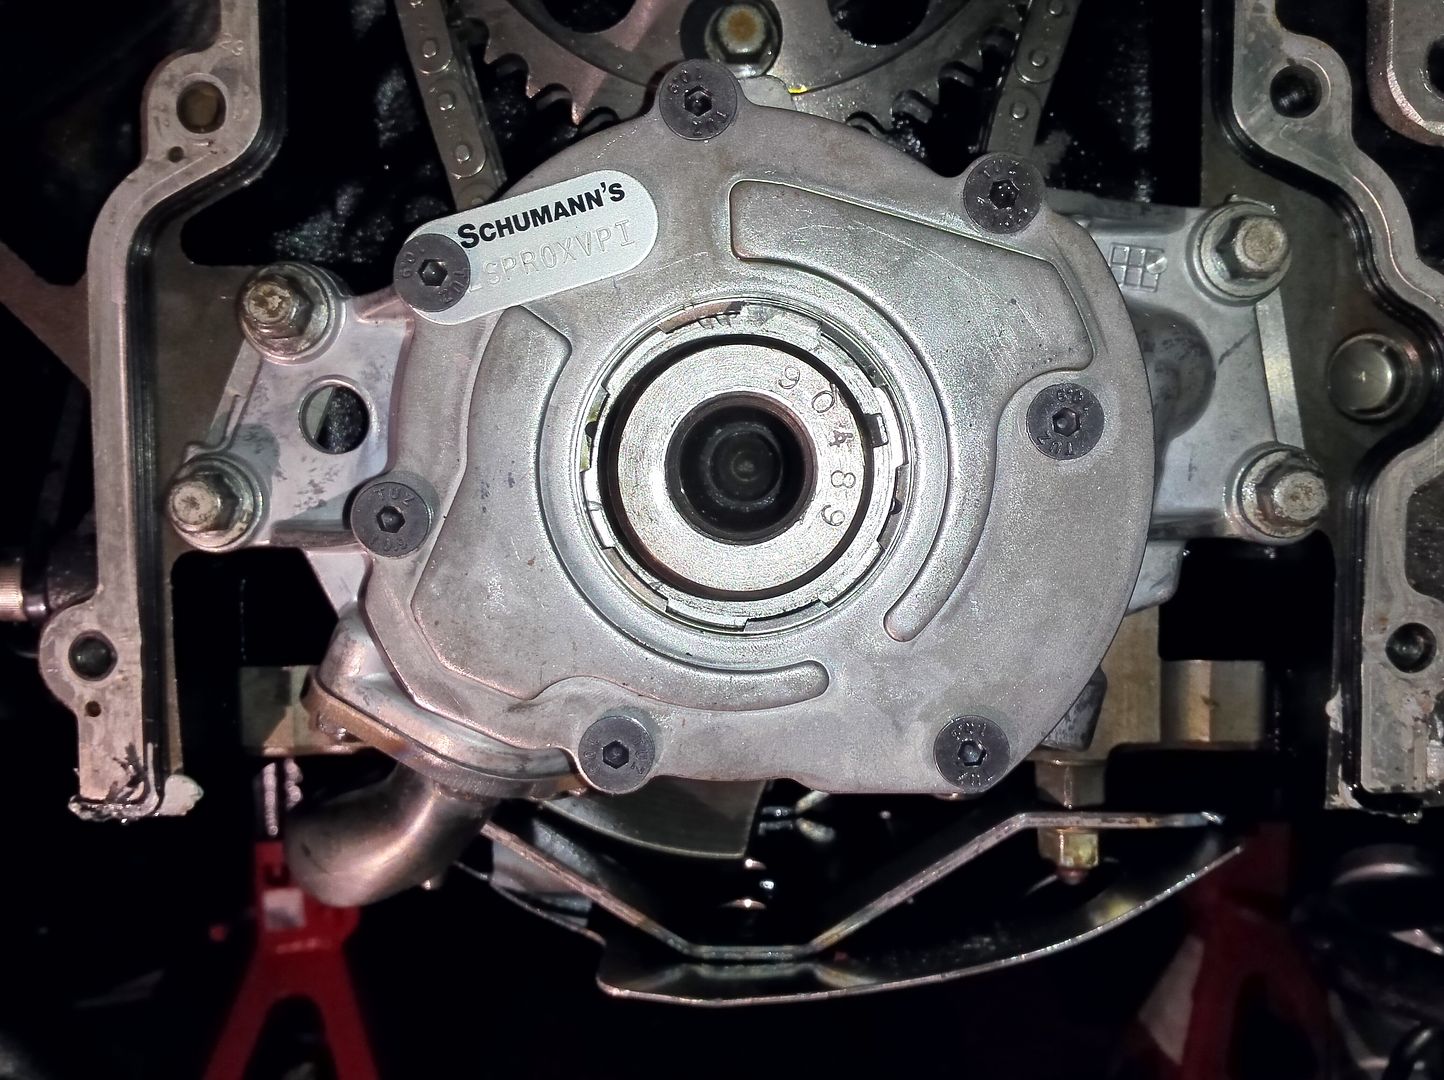
so I upgraded to a Schumanns Oil pump
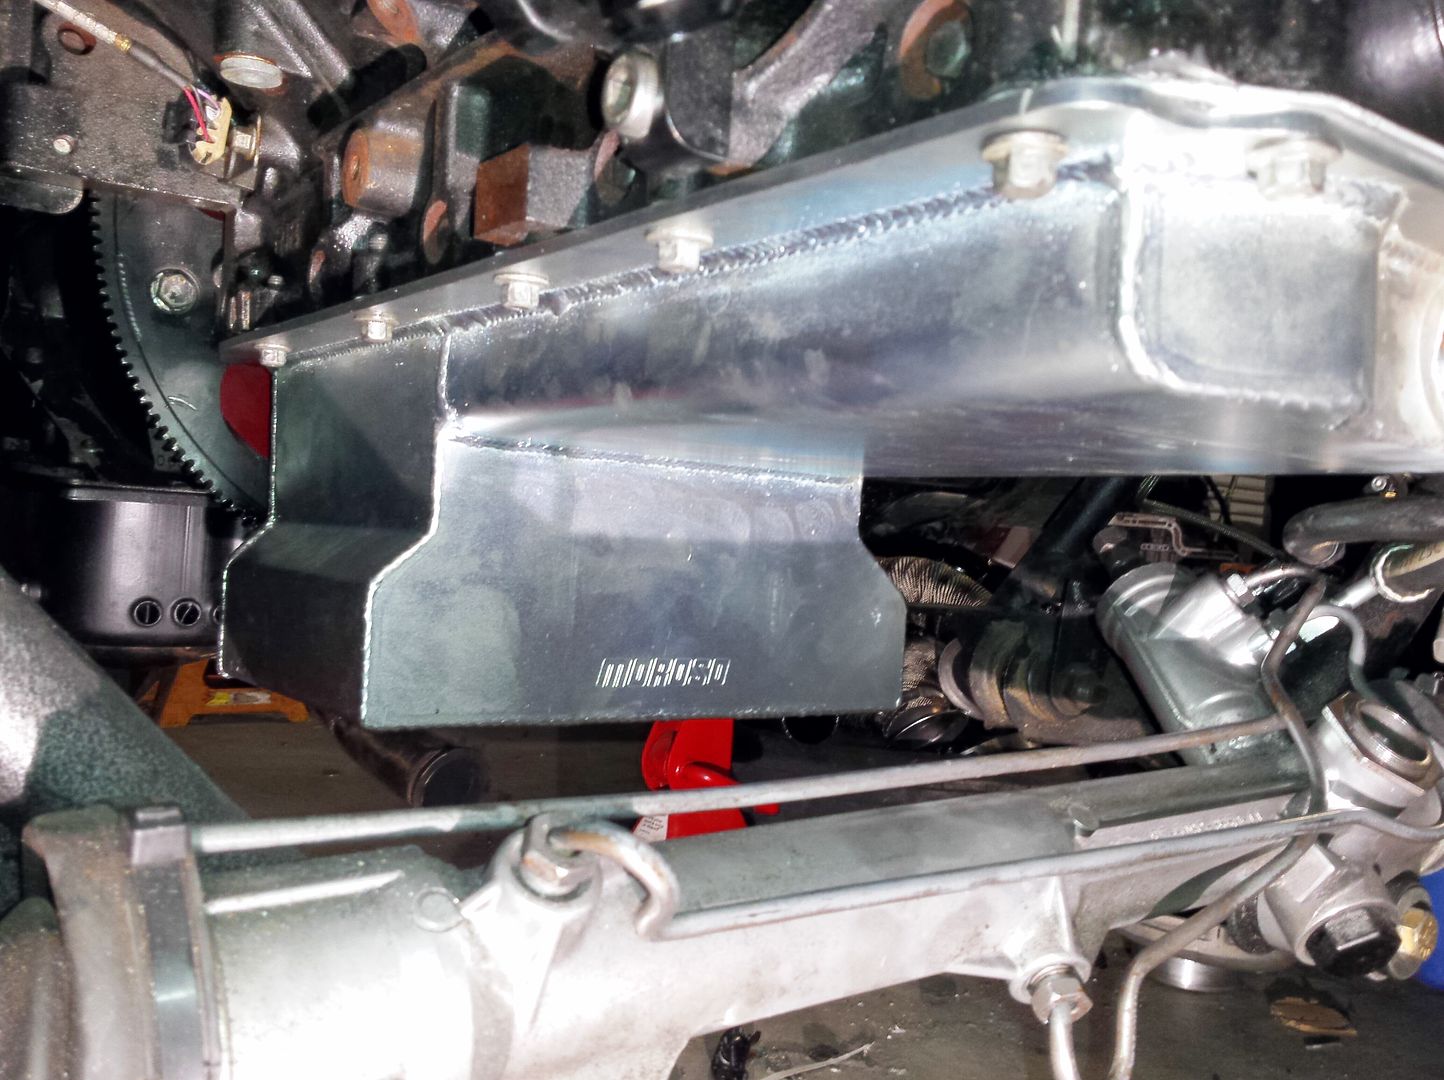
and I dropped the K-member temporarily so I could put on a Moroso oil pan, Pickup , and Windage Tray
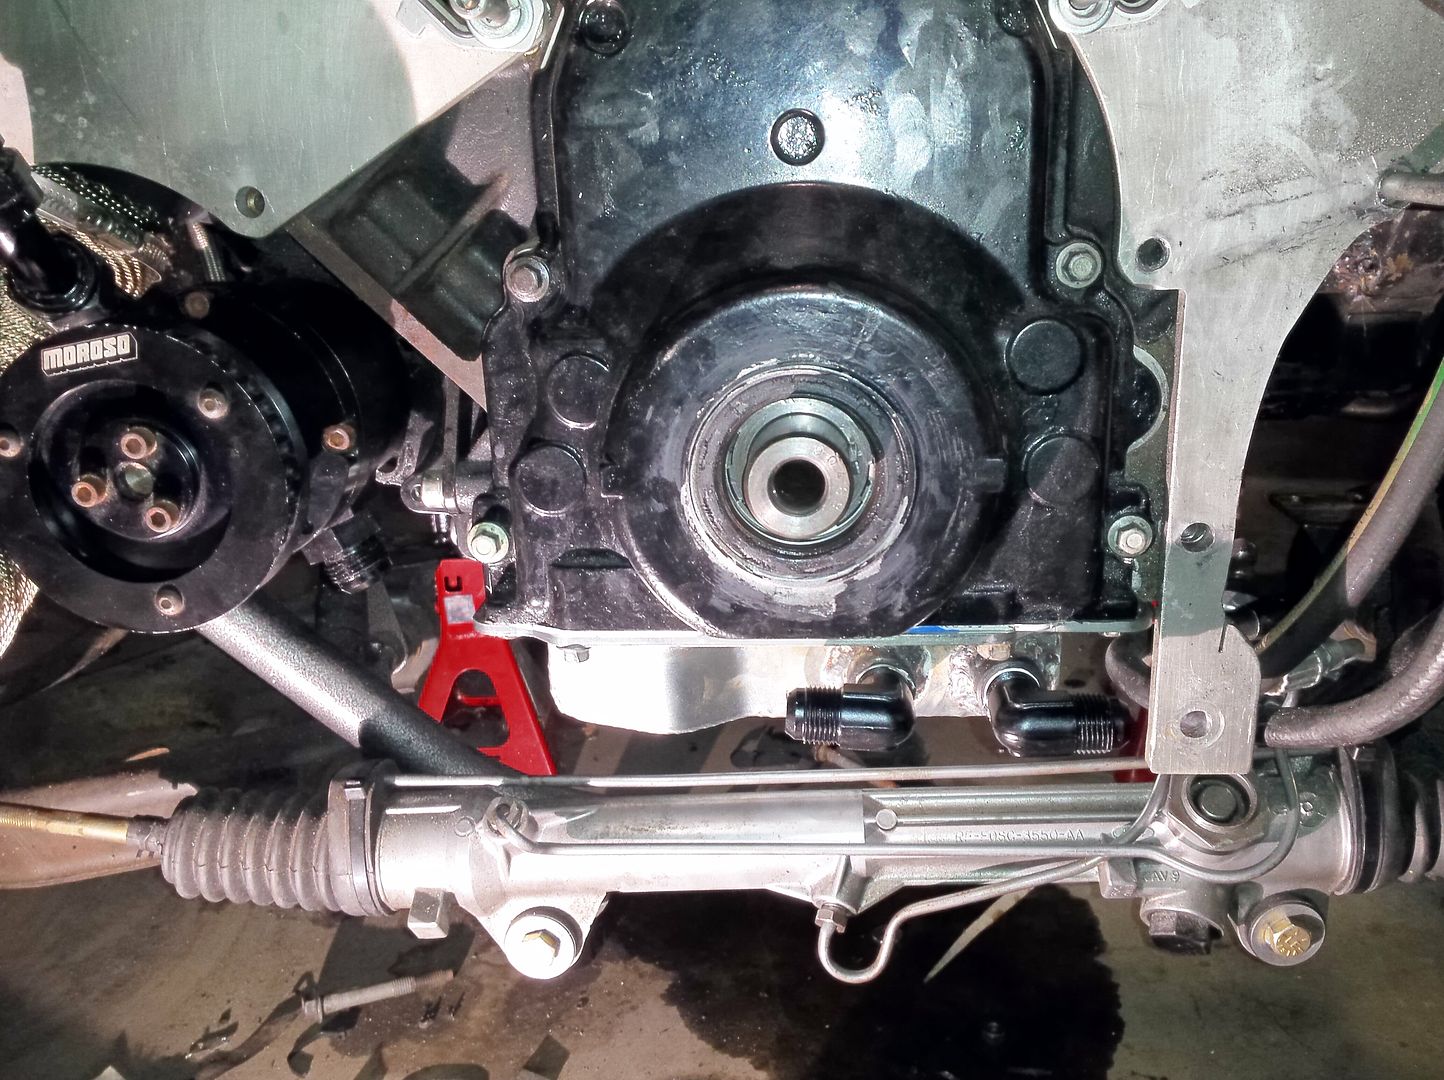
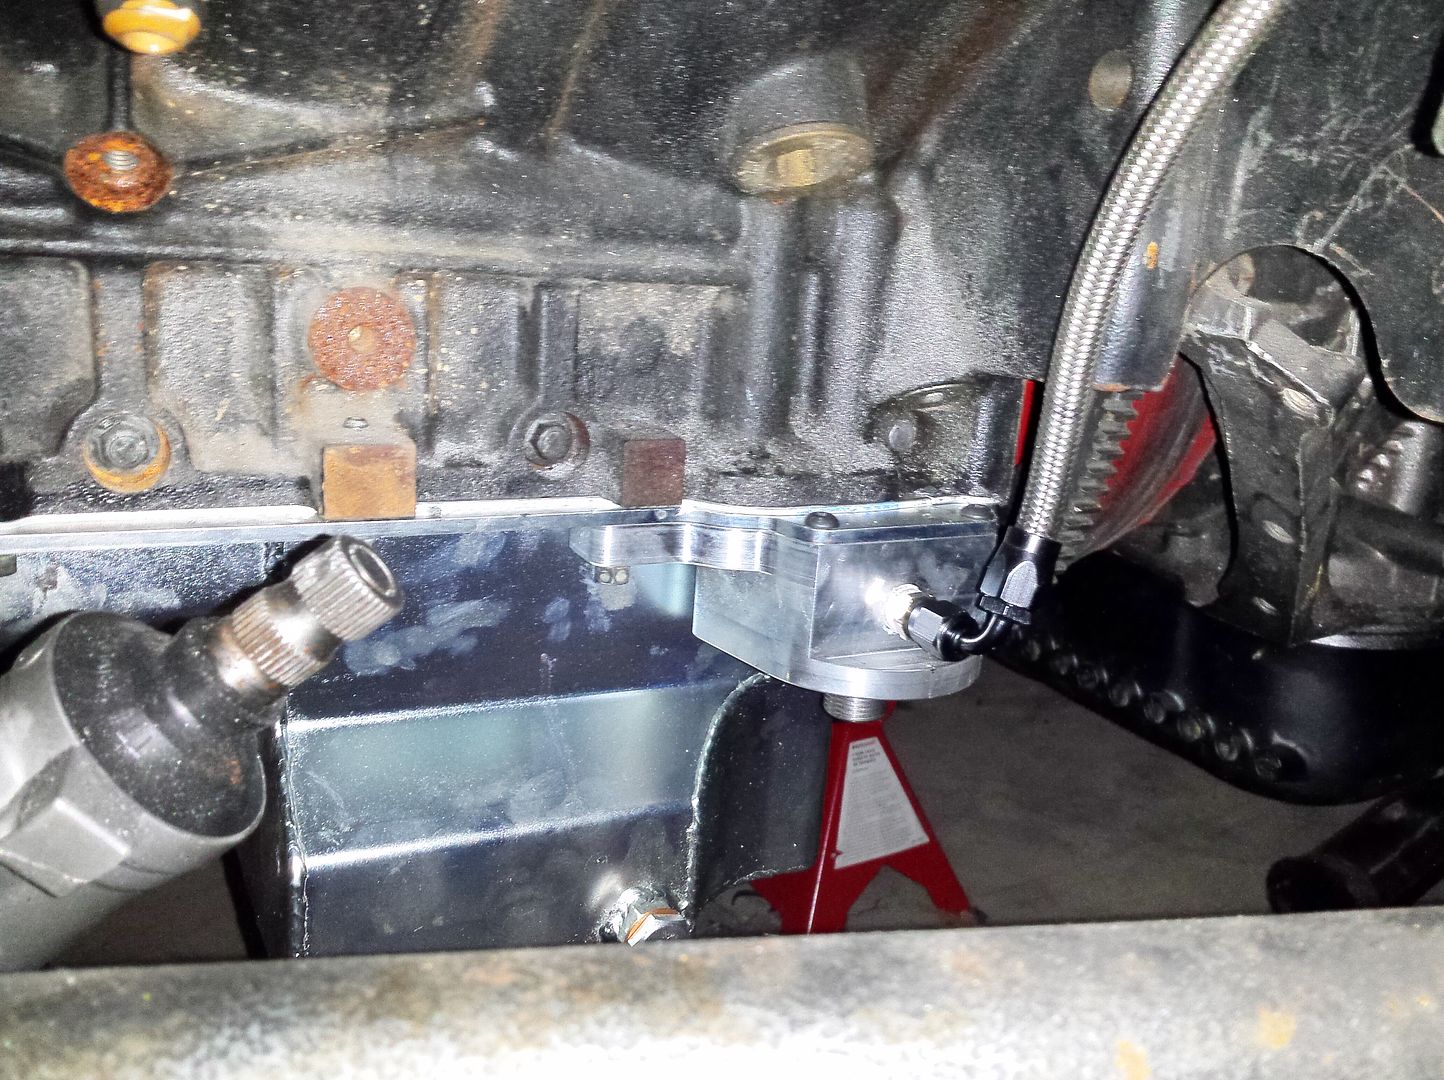
I put my turbo oil Drain lines into the front of the pan as it was the easiest and shortest place to route the lines to
my Drain lines are 10an
I welded some 1/2" NPT Fittings into the pan, and then added some 1/2 to 10an 90* fittings
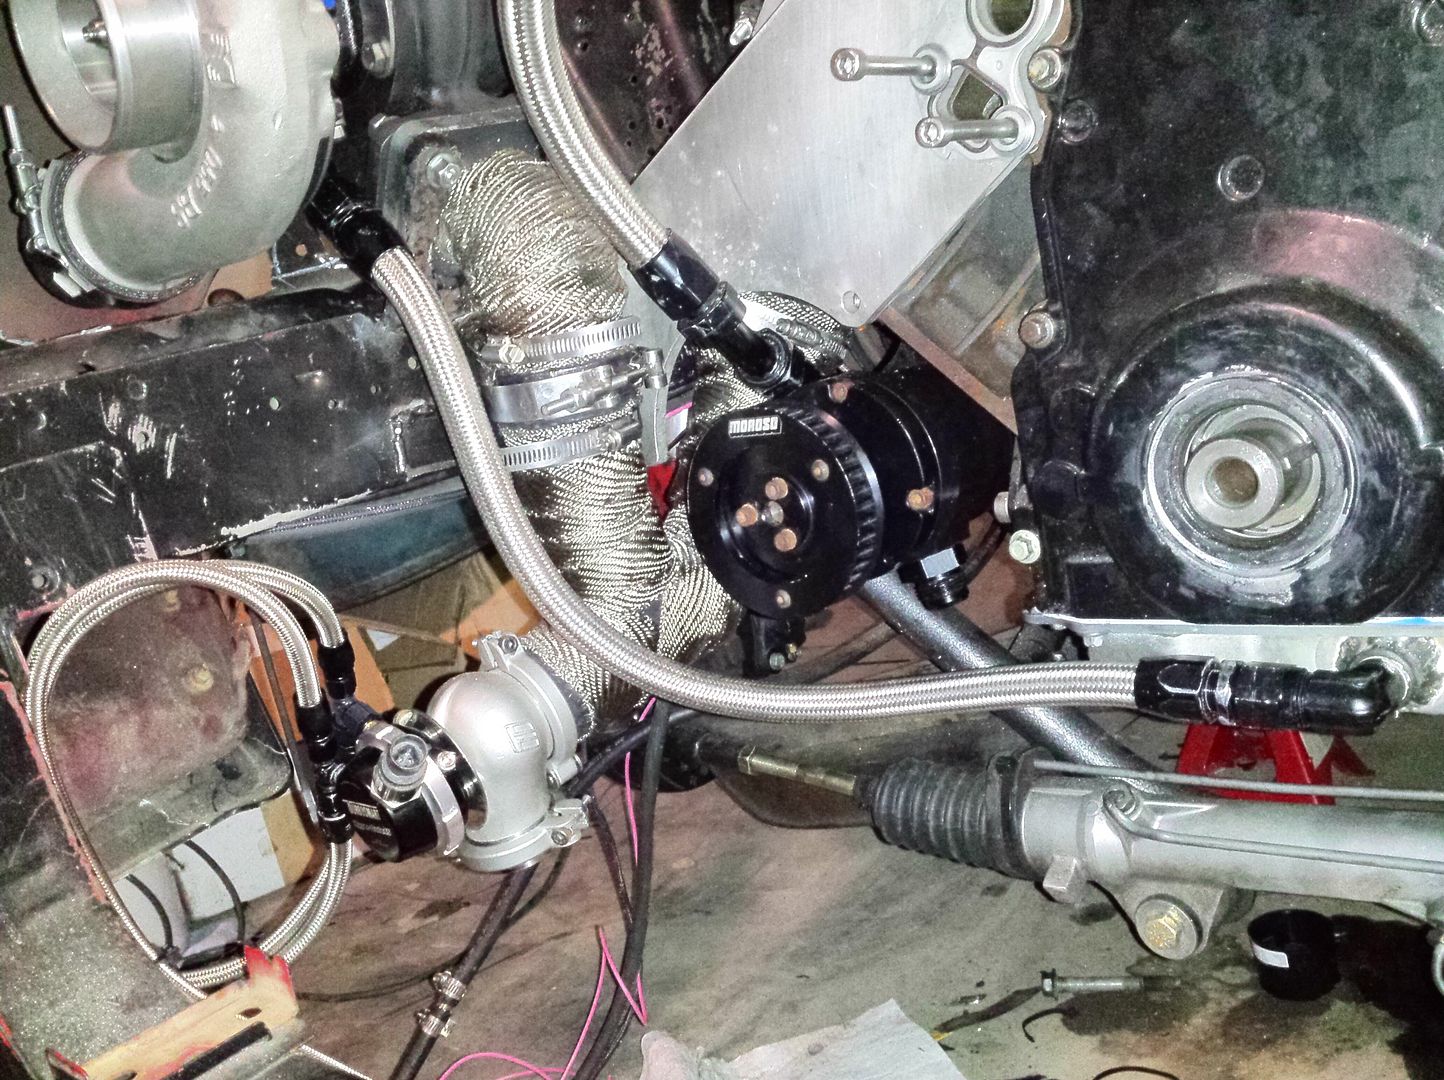
I also Plumbed my wastegates
figured I could use the extra oil capacity and extra flow and pressure with the Turbos stealing some of the oil
so I upgraded to a Schumanns Oil pump

and I dropped the K-member temporarily so I could put on a Moroso oil pan, Pickup , and Windage Tray


I put my turbo oil Drain lines into the front of the pan as it was the easiest and shortest place to route the lines to
my Drain lines are 10an
I welded some 1/2" NPT Fittings into the pan, and then added some 1/2 to 10an 90* fittings


I also Plumbed my wastegates


 11-12-2014, 05:08 AM
#112
I've known about the Schumann's pump for quite some time
Just finally had a reason to upgrade
I was already in the motor just to change out the pan and pick up
And I was doing a cam swap for the turbos as well
So it just seemed like a good time to do the pump upgrade at the same time
The pan is a Moroso 20142
I bought the windage tray and pick up that they recommend to go with it as well
For the Schumann's pump I had to cut off the oil pick up tube flange
And weld on the one that the Schumann's pump supplies
I have another block here at the shop with a junk oil pump that I used for mock up reasons.
They get rid of the o-ring and give you a standard flat gasket to go in between the flange and the pump
And the flange they give you is a 2 bolt flange
11-18-2014, 11:42 PM
#113
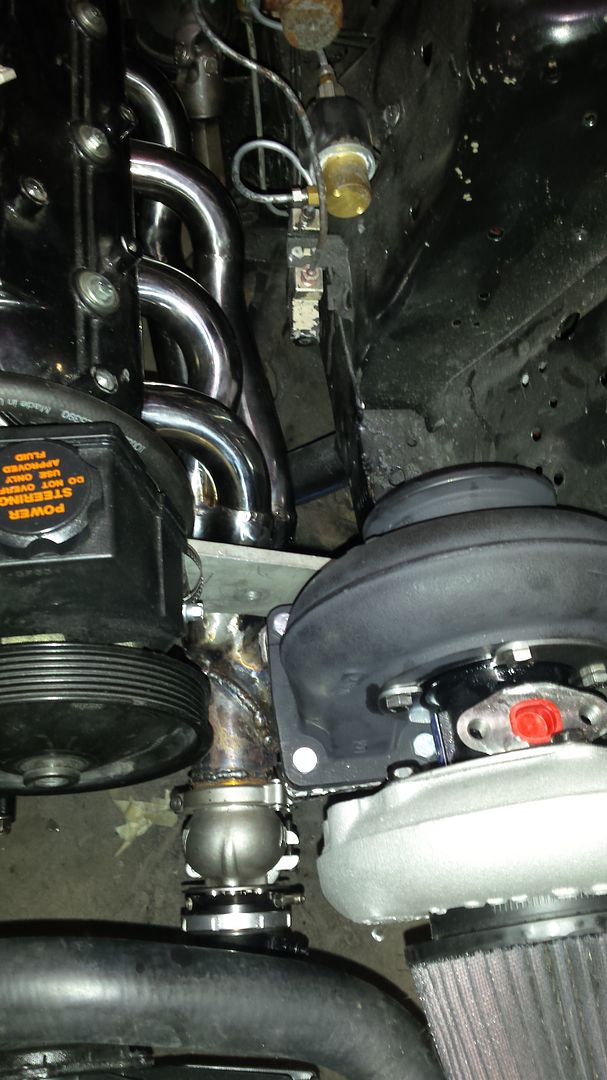
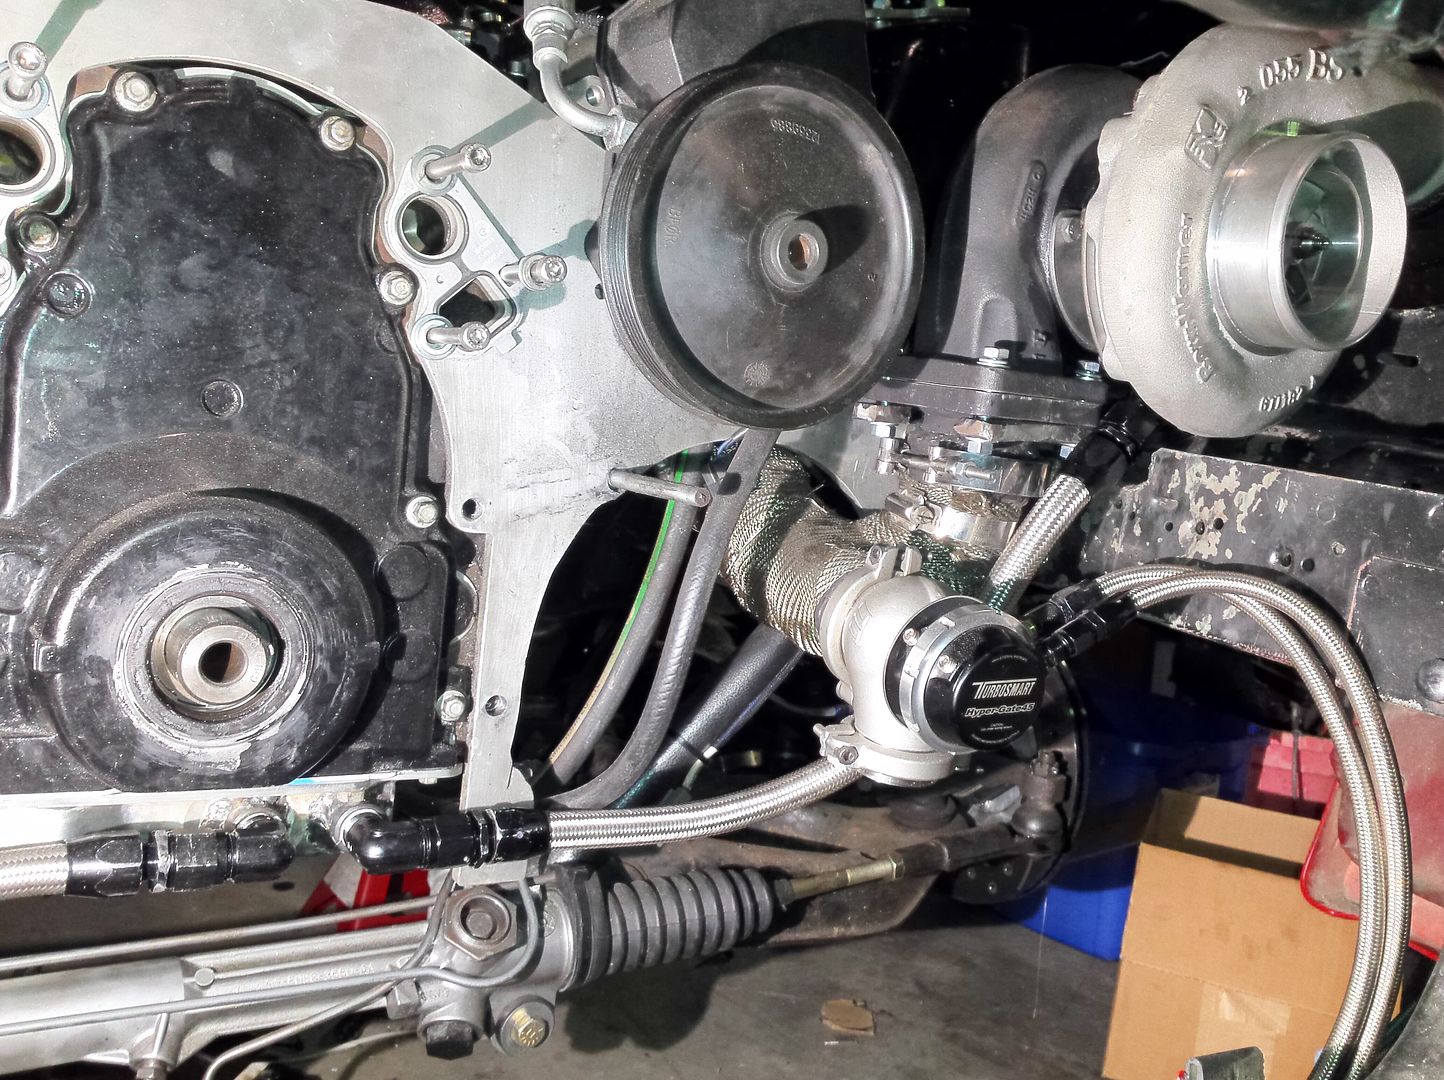
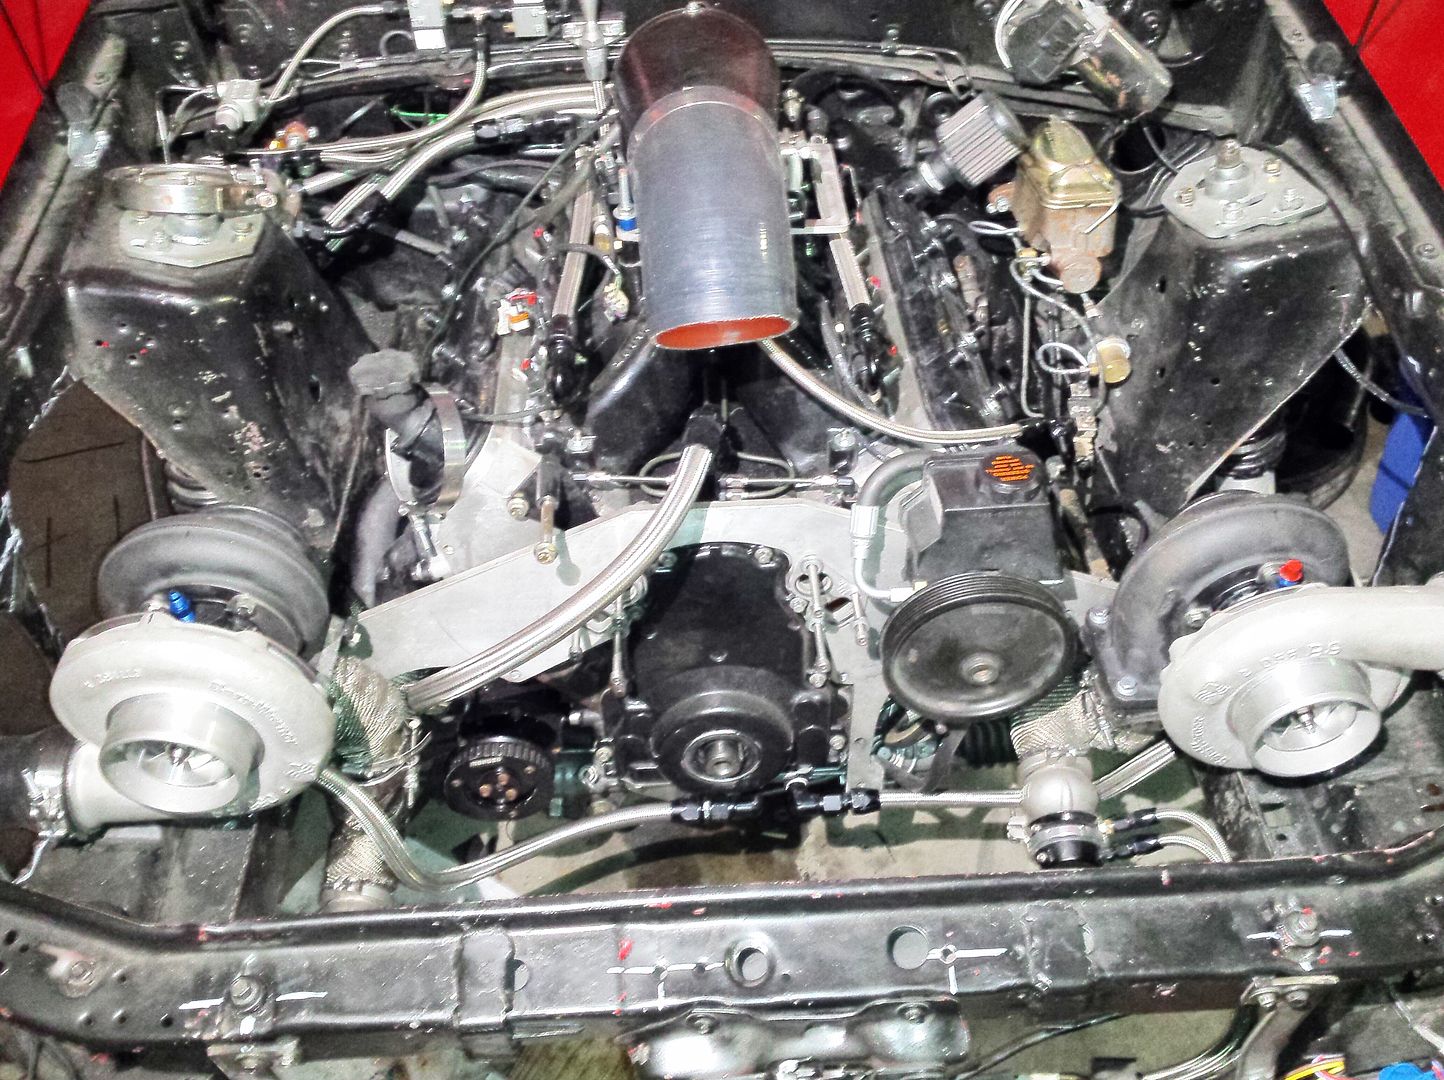
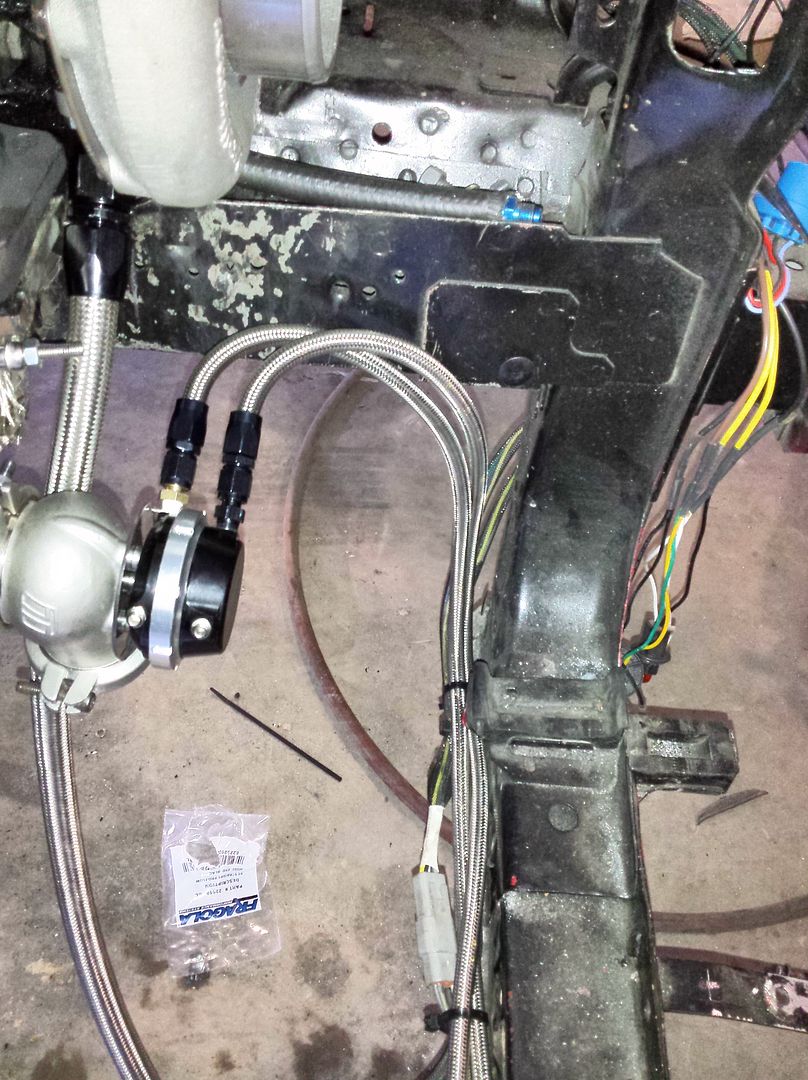
Turbo Oil Feed Lines Complete
I come off of the pan, up to a T on the Firewall, and then go out to the inner fender area to go up to the turbos to keep it cleaner.

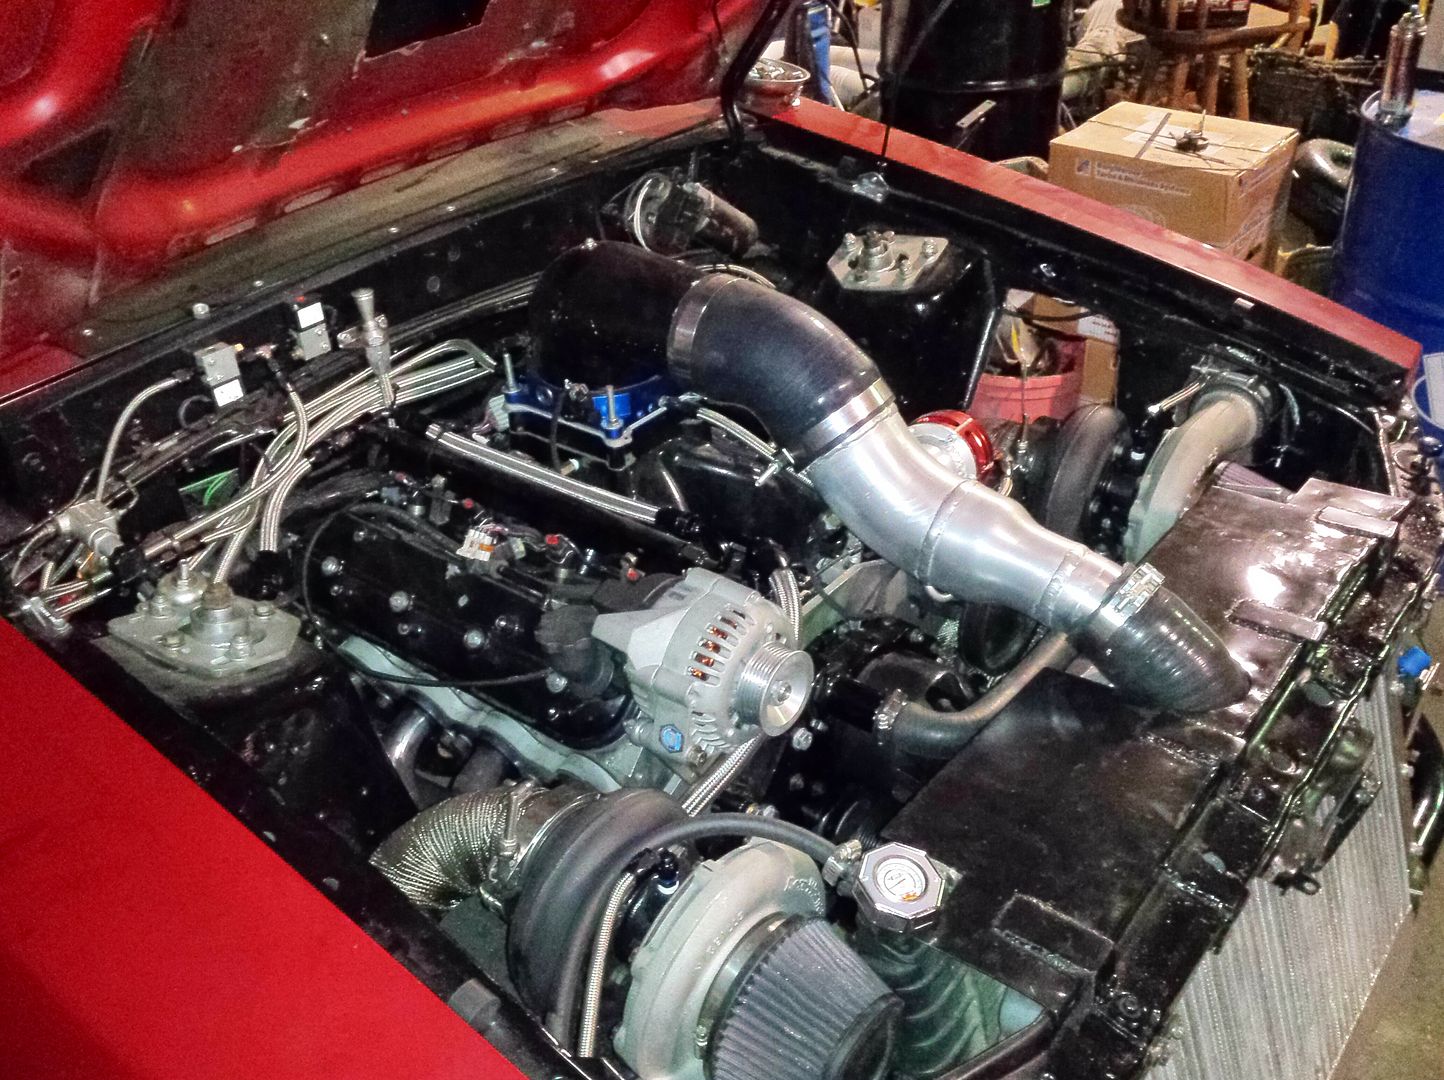
I also mounted all of my catch cans inside the passenger inner fender
Coolant Overflow is the rectangle Square can
Vacuum Pump seperator/breather is the upper right black can, and the lower can is the reservoir/drain tank for any oil that is seperated by the upper can.
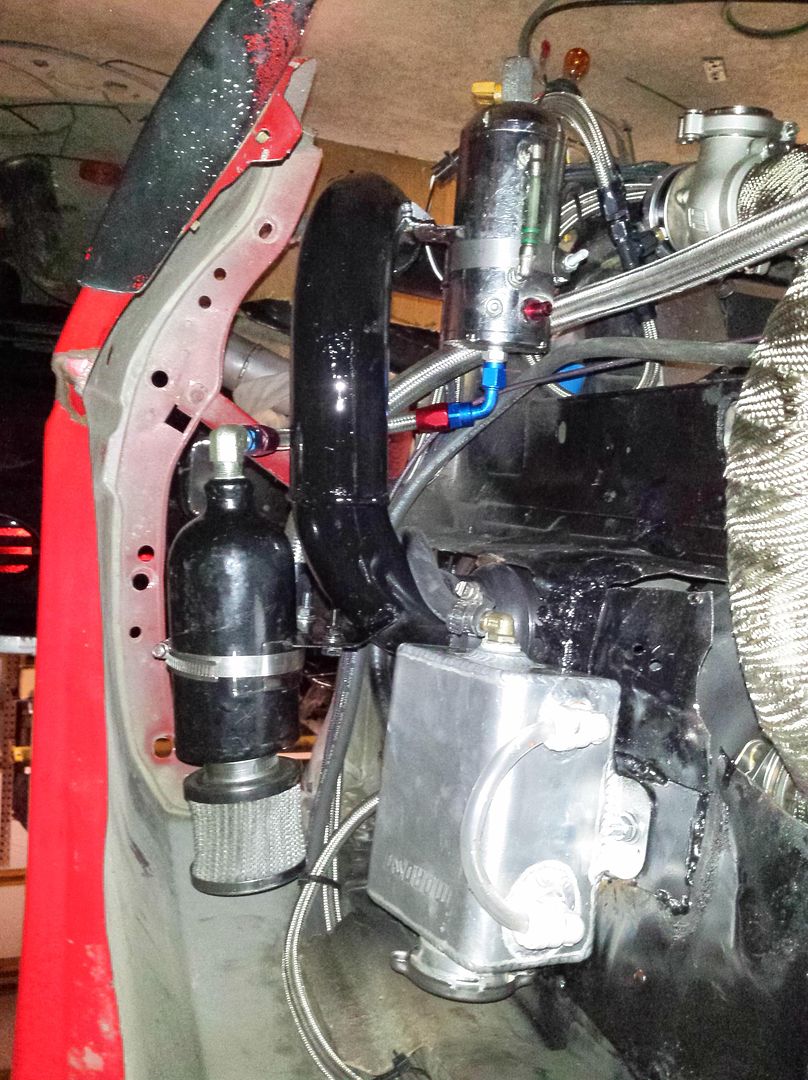
I Also got all the Plumbing done for the Vacuum Pump and all of my overflow drain lines...
all of my overflow lines go out the rear of the vehicle, so if I should overflow the tanks for any reason, it will exit at the rear of the vehicle... behind my tires
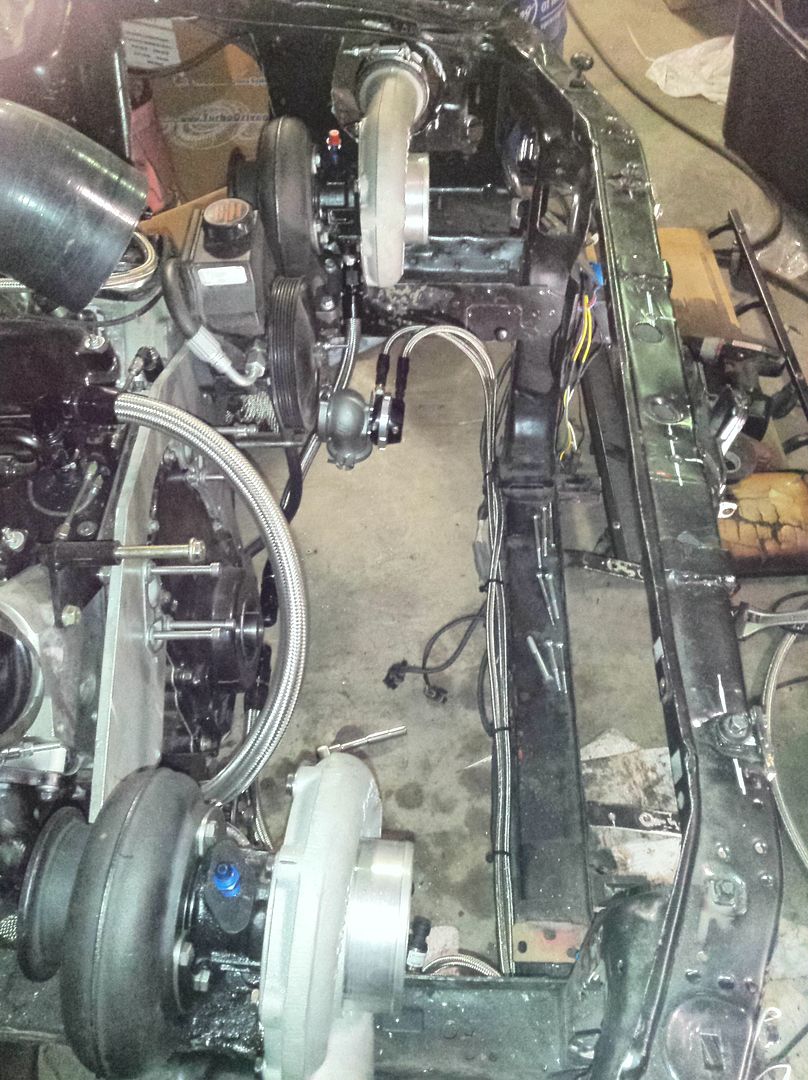
and today I re-routed the Starter Wires as they needed to change with where I have the Downpipes going.
I still have to get this thing up in the air to complete the connection from the downpipes to the main portion of the exhaust that routes everything out the rear of the vehicle
and I still have a little bit of wiring to do
but I might be able to fire it up later this week
I come off of the pan, up to a T on the Firewall, and then go out to the inner fender area to go up to the turbos to keep it cleaner.


I also mounted all of my catch cans inside the passenger inner fender
Coolant Overflow is the rectangle Square can
Vacuum Pump seperator/breather is the upper right black can, and the lower can is the reservoir/drain tank for any oil that is seperated by the upper can.

I Also got all the Plumbing done for the Vacuum Pump and all of my overflow drain lines...
all of my overflow lines go out the rear of the vehicle, so if I should overflow the tanks for any reason, it will exit at the rear of the vehicle... behind my tires
and today I re-routed the Starter Wires as they needed to change with where I have the Downpipes going.
I still have to get this thing up in the air to complete the connection from the downpipes to the main portion of the exhaust that routes everything out the rear of the vehicle
and I still have a little bit of wiring to do
but I might be able to fire it up later this week
Last edited by soundengineer; 11-18-2014 at 11:48 PM.
 11-23-2014, 01:01 AM
#116
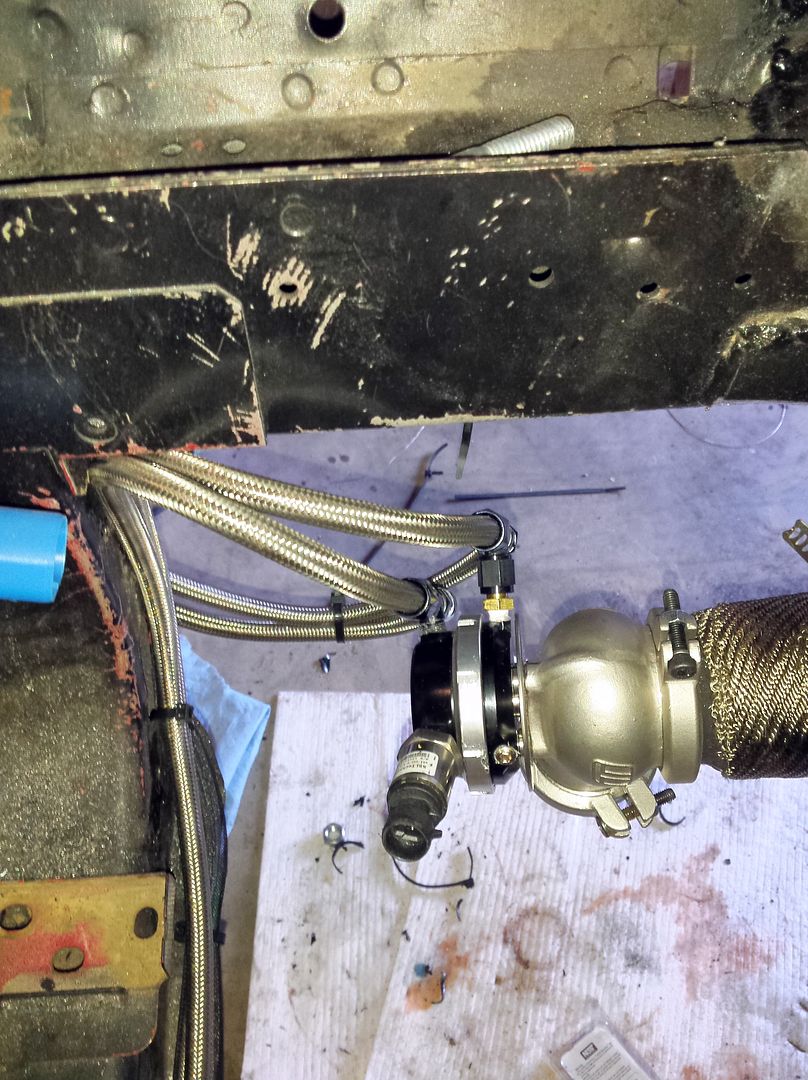
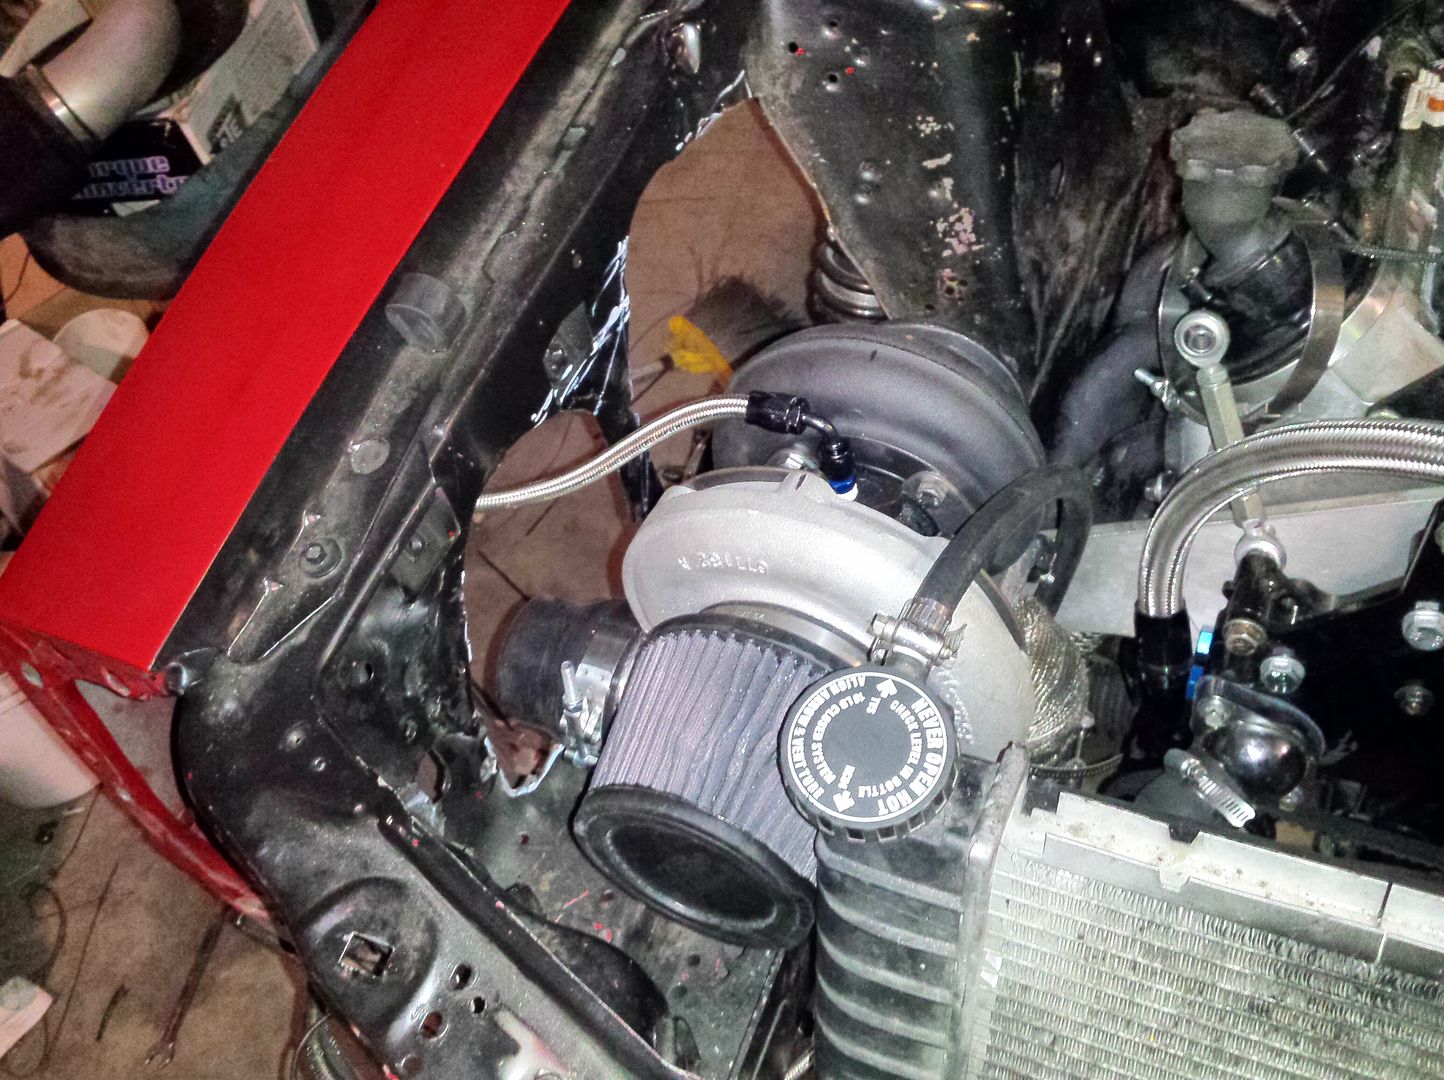
CO2 bottle in rear of the car
runs from the back of the car to the front of the car and into the Solenoids....with a T between the two solenoids
first solenoid is the "Fill" solenoid, the second Solenoid is the "Vent" Solenoid
From the Solenoid Tee it goes to my First wastegate Dome and tee's off to go to the 2nd wastegate dome
11-25-2014, 09:18 PM
#117
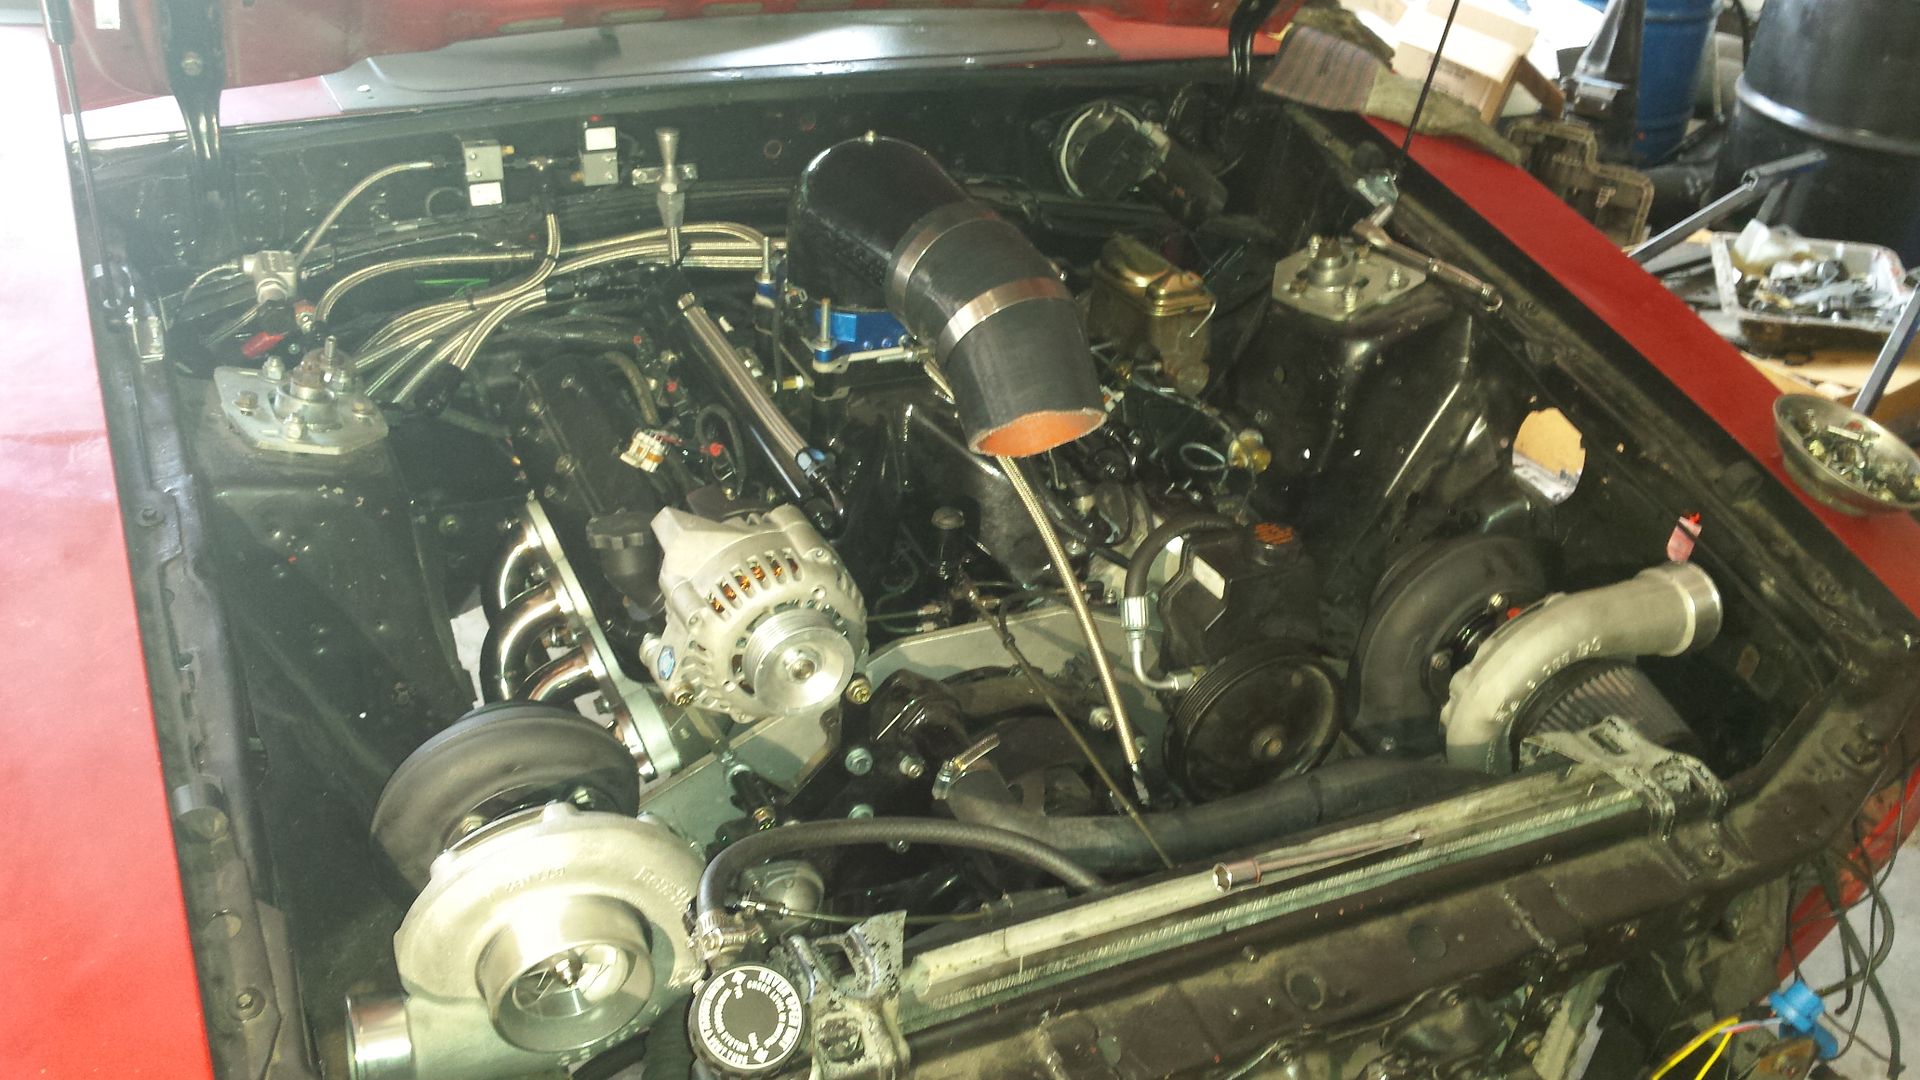
It Runs!
hoping to get it up on the rack on turkey day and connect the downpipes to the exhaust and tidy up a few things so I can go down the road.
oh....and Yes.. thats almost 80 PSI of (Cold) oil pressure at Idle while with 20-50 Valvoline VR1 non Synthetic Oil thanks to the Schumann's Oil pump
hoping to get it up on the rack on turkey day and connect the downpipes to the exhaust and tidy up a few things so I can go down the road.
oh....and Yes.. thats almost 80 PSI of (Cold) oil pressure at Idle while with 20-50 Valvoline VR1 non Synthetic Oil thanks to the Schumann's Oil pump
Last edited by soundengineer; 11-25-2014 at 09:26 PM.

 12-14-2014, 12:53 PM
#120
Bob at AEI CNC is a good buddy of mine...
so he sent me an SN95 LSx swap plate....along with the AutoCAD file for it
and I made some modifications to it for how I needed it to sit, and transferred that stuff into the AutoCAD File and had it re-cut.
My motor sits a little over 1" lower than where anybody elses standard motor mount kit would put it location wise