

67 Camaro swap, project "belly button"
 09-11-2014, 02:32 PM
#121

Composite lowering blocks made of renewable resources - I love it!
You are right about the house - it is a never ending project. We owned our last home, but didn't do a ton of renovation, because we knew we would eventually move. This place is taking all the extra time I didn't have to begin with!
You are right about the house - it is a never ending project. We owned our last home, but didn't do a ton of renovation, because we knew we would eventually move. This place is taking all the extra time I didn't have to begin with!
 12-11-2014, 04:05 PM
#122
TECH Apprentice
Thread Starter
Updates:
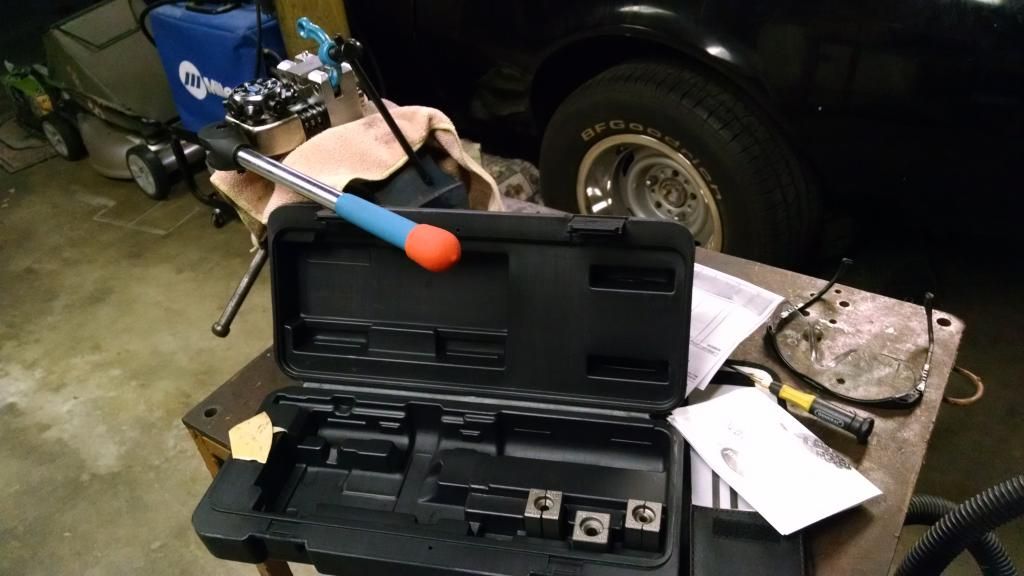
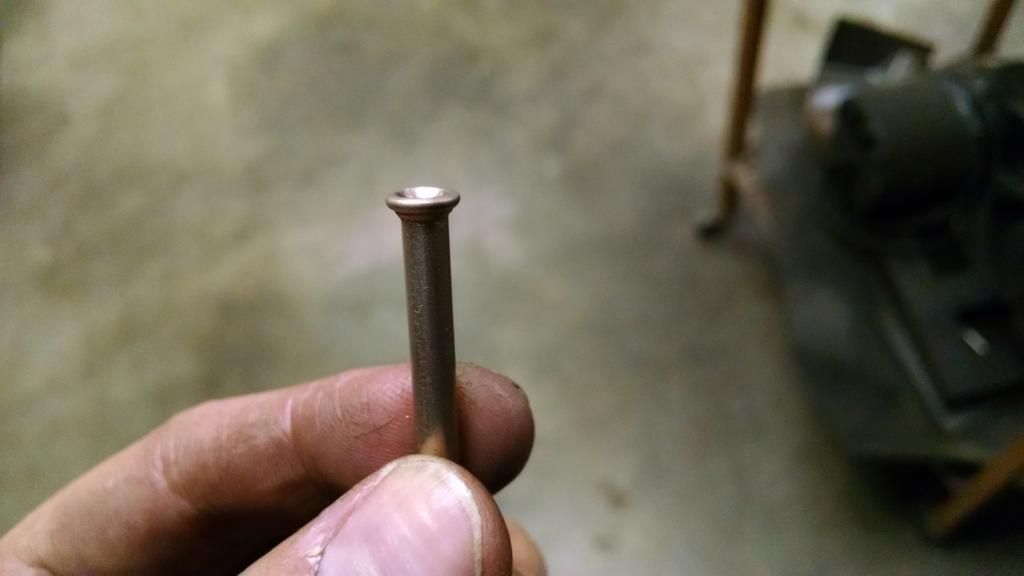
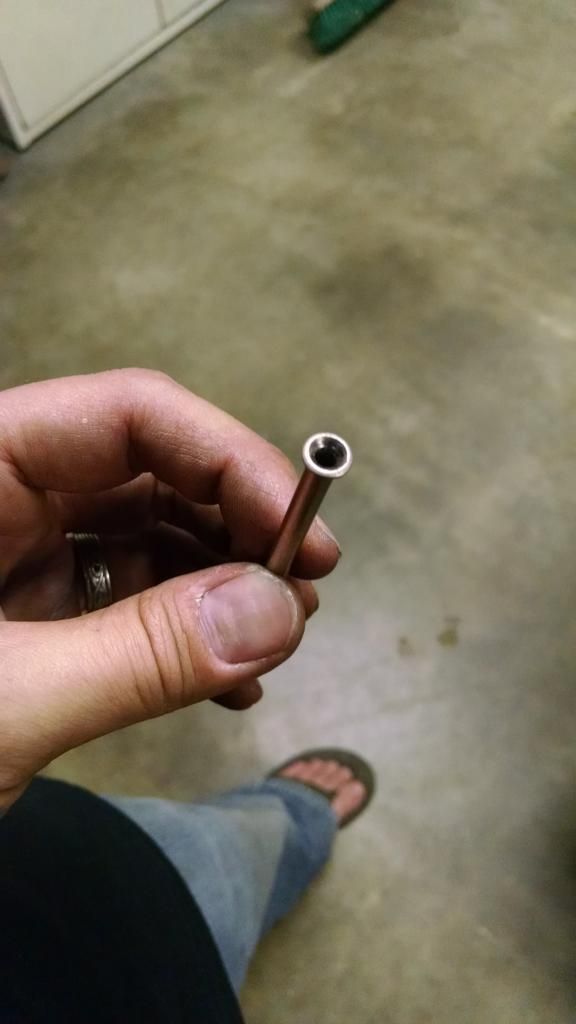
I have been working overtime this fall so not much time to spend on the car. I did, however, get my copper/nickle brake line in from Tobin at Kore3. I also picked up an eastwood flaring tool on sale and found a way to make a tubing straightener using angle iron and glass door sliders. With very little time to dig out the car, I was able to do a little prep work by making the tube straightener and practicing flares with the new tool. I will be free from extra work starting January and plan to work on the car several weekends this winter. Here are some updated pics for now.
Finally set up the drill press my father gave me when we started the project, worked perfectly!

This is not mine but here is what the final product looks like:

Flaring Tool:
Sample flares:

Drilled and painted parts:

Various pieces for construction:

Next up is installing the rear end in the car and running hardlines. I hope to tackle that in January. I will eventually pull the engine and R&R the clutch/hydraulics before putting it back in the car for the last time and buttoning everything up.
I have been working overtime this fall so not much time to spend on the car. I did, however, get my copper/nickle brake line in from Tobin at Kore3. I also picked up an eastwood flaring tool on sale and found a way to make a tubing straightener using angle iron and glass door sliders. With very little time to dig out the car, I was able to do a little prep work by making the tube straightener and practicing flares with the new tool. I will be free from extra work starting January and plan to work on the car several weekends this winter. Here are some updated pics for now.
Finally set up the drill press my father gave me when we started the project, worked perfectly!

This is not mine but here is what the final product looks like:

Flaring Tool:

Sample flares:


Drilled and painted parts:

Various pieces for construction:

Next up is installing the rear end in the car and running hardlines. I hope to tackle that in January. I will eventually pull the engine and R&R the clutch/hydraulics before putting it back in the car for the last time and buttoning everything up.
 12-11-2014, 06:04 PM
#124
TECH Apprentice
Thread Starter
 07-06-2015, 12:43 PM
#126
TECH Apprentice
Thread Starter
Hey Bandit! Funny you ask. I have not touched the car in several months due to work/family obligations. However, I scheduled myself these next two weekends to get back to it and even have some family coming over to help. Looking forward to getting this project rolling. I feel like this time it might get fired up! This weekend I'll be clearing the garage and then getting the leaf springs and rear end installed. Maybe even plumb the rear end hardlines. Looking forward to it! Thanks for checking in Clint. Hope your project is also going well.
07-07-2015, 04:50 PM
#128
TECH Apprentice
Thread Starter
 07-13-2015, 10:17 AM
#129
TECH Apprentice
Thread Starter
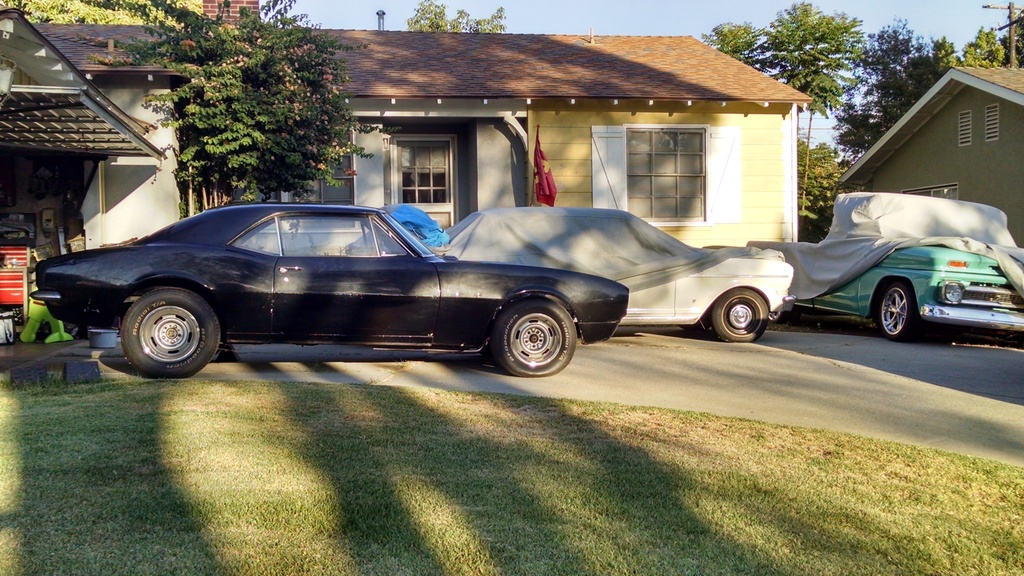
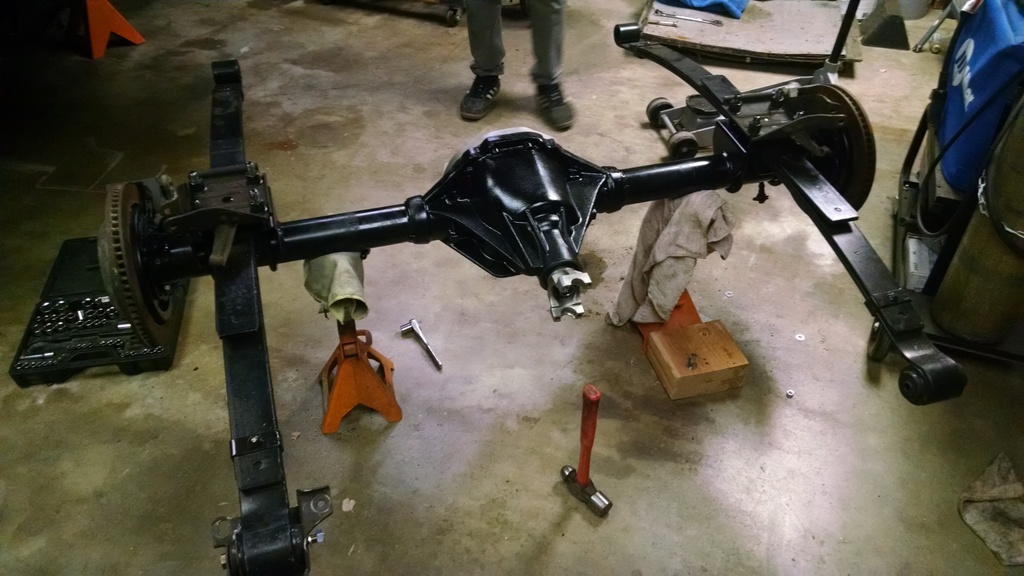
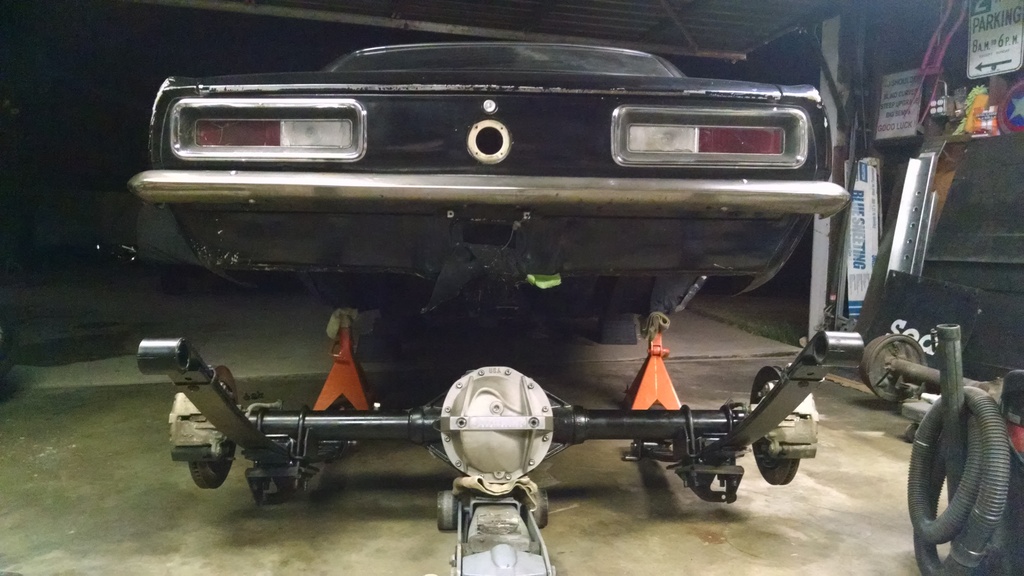
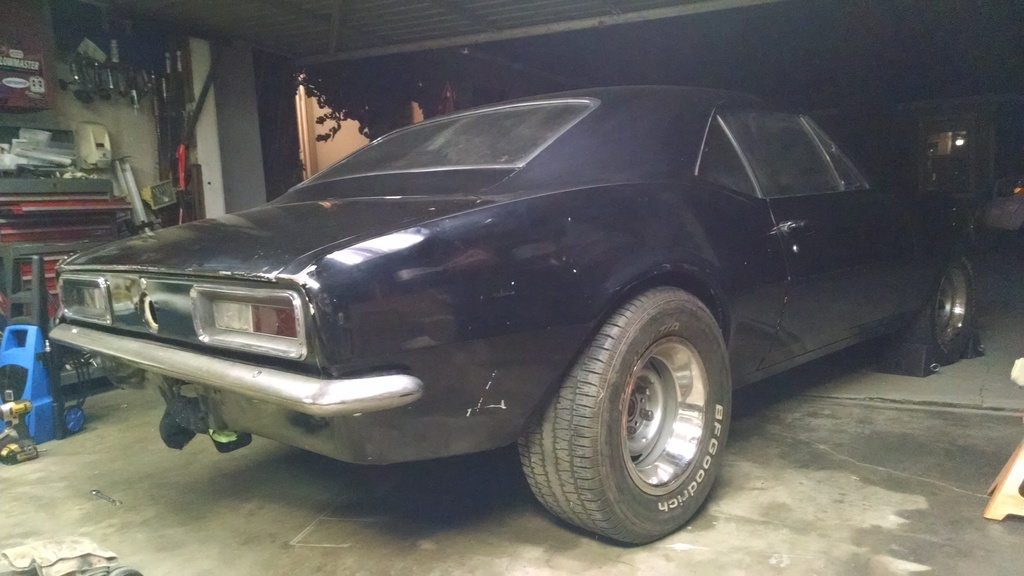
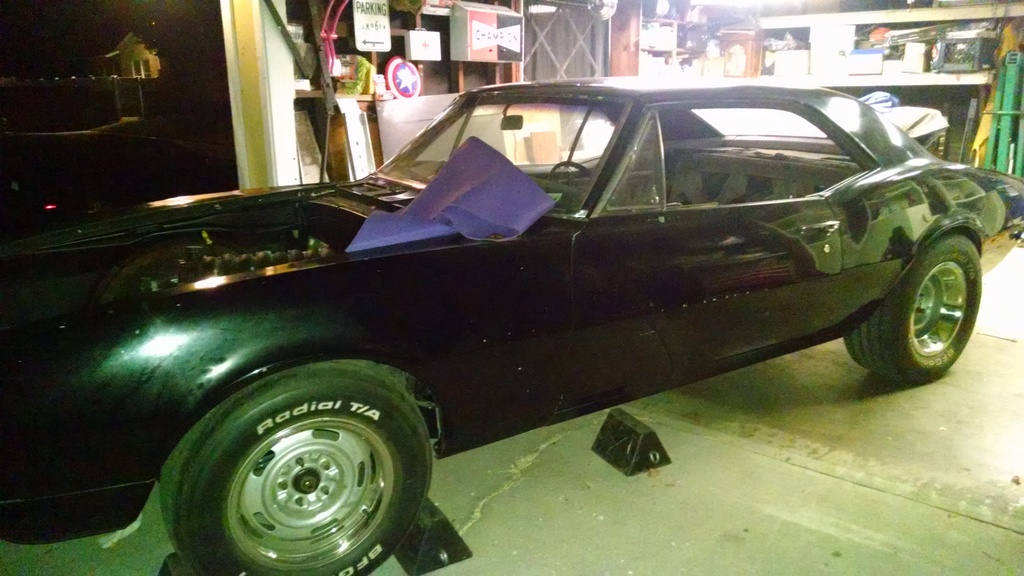
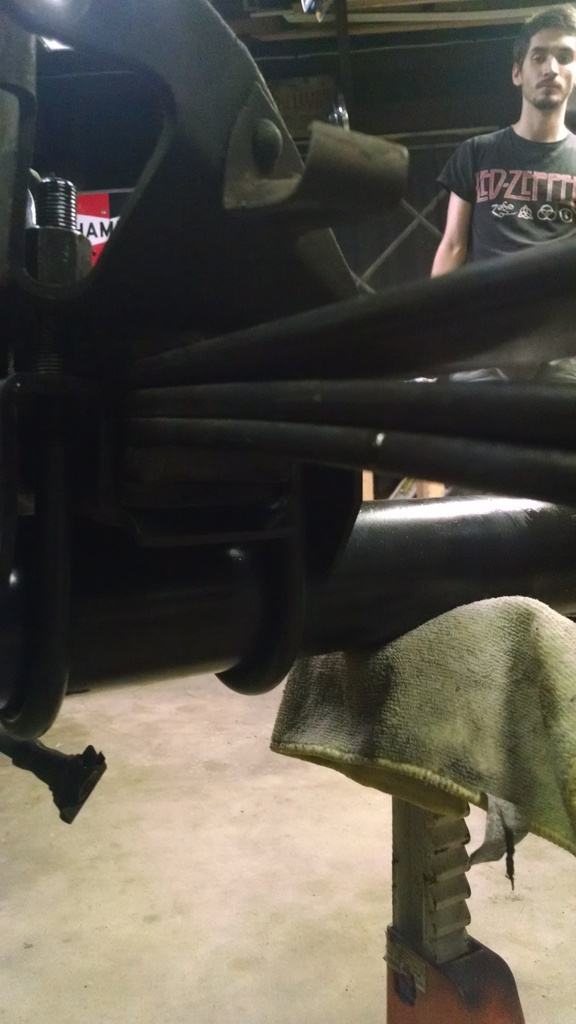
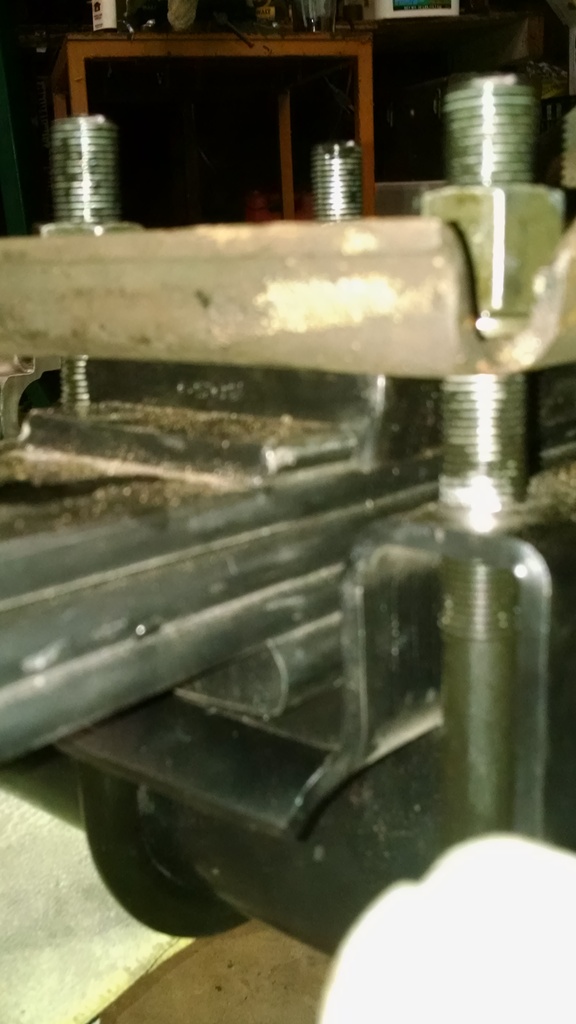
While I have to admit not a lot of progress has been made on the project this past year, last night's step was one small step for mankind but a giant leap forward for project bellybutton! My brother and I pulled an all nighter and installed the hotchkis 3" drop springs and new to me Moser 12 bolt with '02 Camaro disc brakes. Been working on the brakes, painting, aligning, etc little by little. Although I didn't get to paint the spring buckets that attach to the front of the leafs, nor did I buy the correct lower shock mounts (those are on order this week) my brother and I feel the momentum gaining on the project. At times it was a little tough seeing pieces of this particular rear end install already handled by my dad prior to his passing, it was as if he was telling us he already did his part (he had installed the rear poly bushings and shackles before we slapped the original rear end back in the car for the move to our new home a few years back) and now it was up to us to finish. Overall it was a great day and next weekend should be more productive with a couple more relatives coming over to wrench on the car. To do list for next weekend includes: align driver door and fix upper hinge with a pin kit (already purchased), dynamat interior, and install the gas tank. If time permits we'll start plumbing brake lines. Looking forward to these next few weeks. Here are some pics of the progress we made this weekend...
Pulled out of garage to clean:
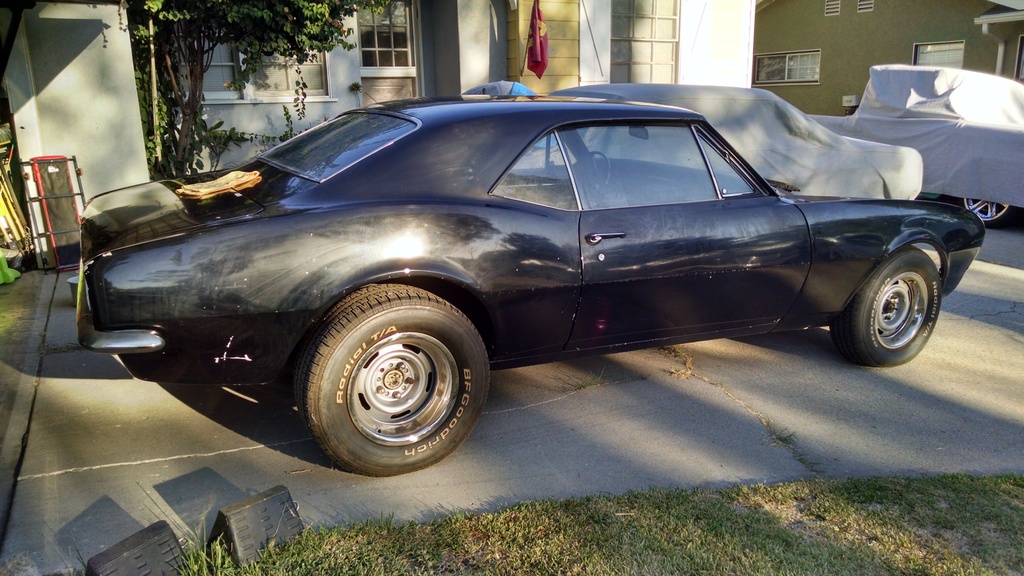
A quick cut and buff on the trunk lid to see if she'll shine...
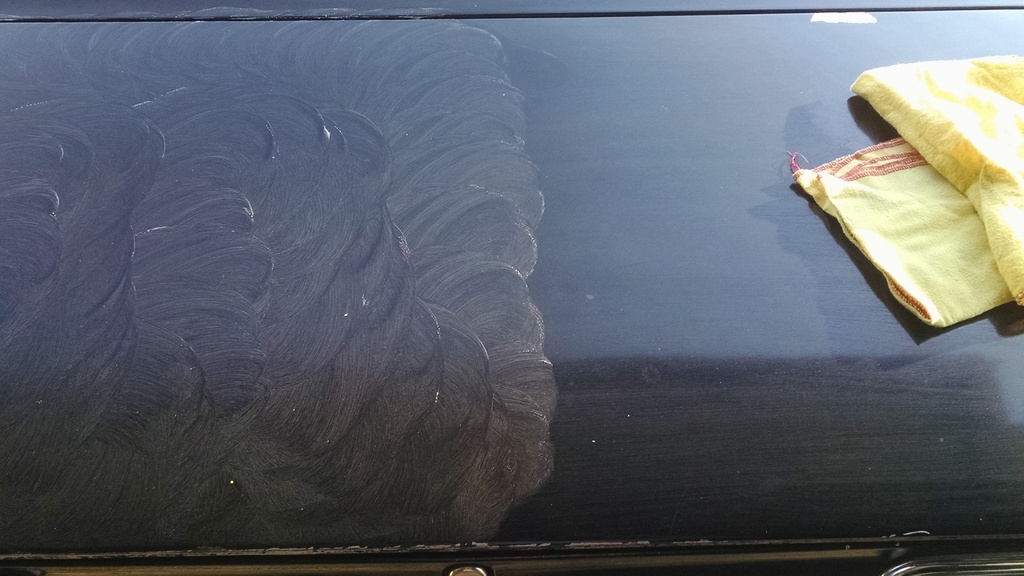
Guess she will buff out to a mirror shine, perfect! (no money or time for paint so going "patina" look just the way dad last saw her):

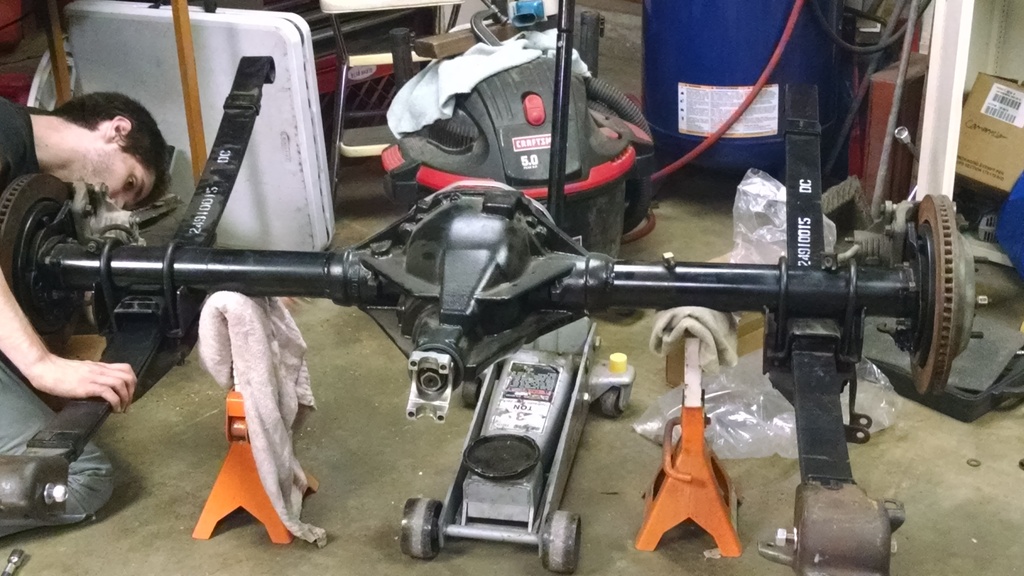
Out with the old/in with the new:
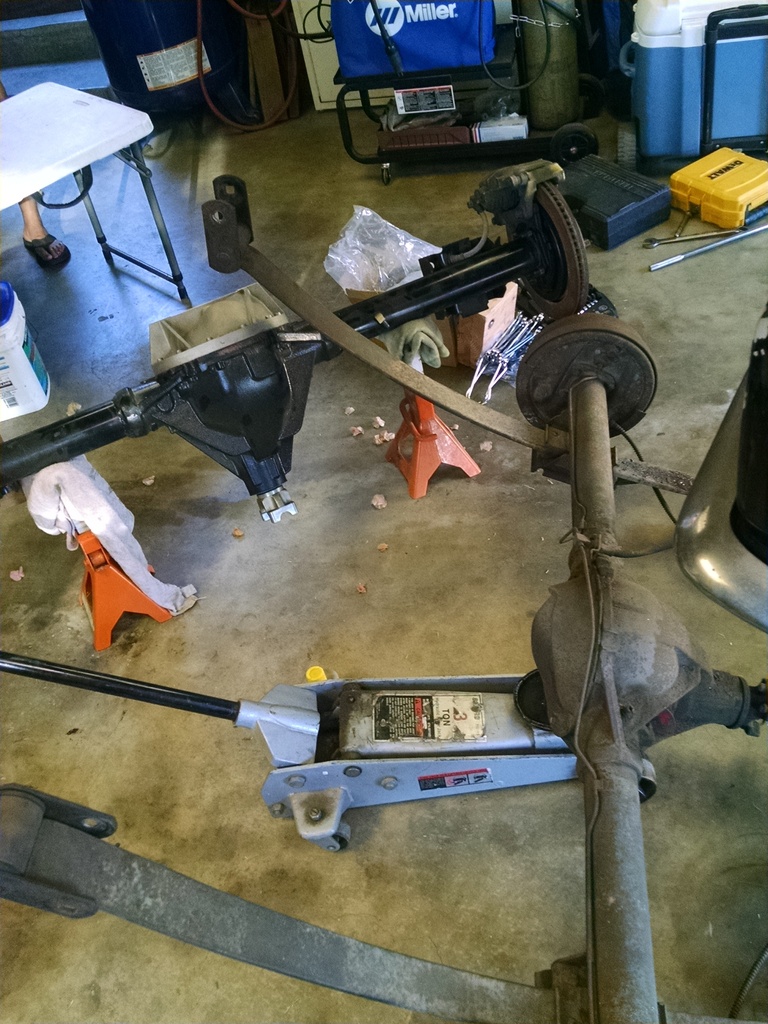

The old mono leaf stance:
The new stance:
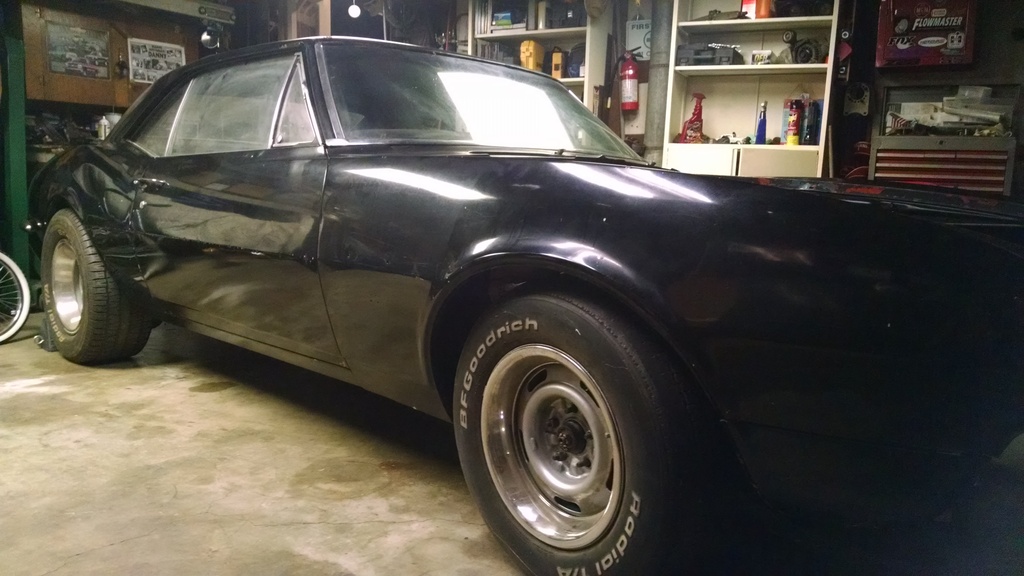
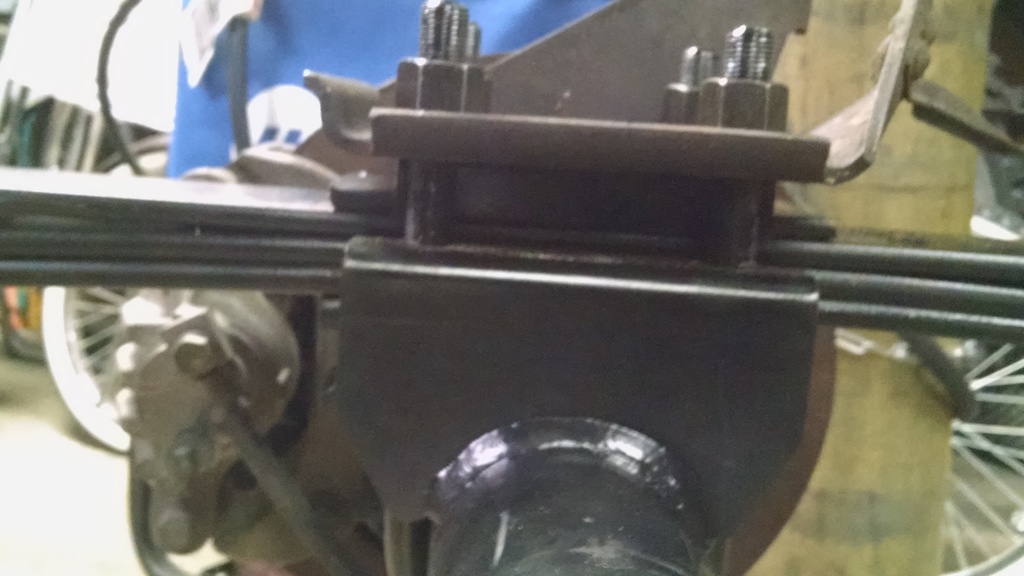
Spring stack not quite squeezed all the way. I might have to remove a pad or two to make the lower shock plate touch the spring mounts, any advice on this step?
That's all the progress for this weekend
Pulled out of garage to clean:


A quick cut and buff on the trunk lid to see if she'll shine...

Guess she will buff out to a mirror shine, perfect! (no money or time for paint so going "patina" look just the way dad last saw her):

Out with the old/in with the new:


The old mono leaf stance:
The new stance:


Spring stack not quite squeezed all the way. I might have to remove a pad or two to make the lower shock plate touch the spring mounts, any advice on this step?


That's all the progress for this weekend
Last edited by MisterD; 07-13-2015 at 10:26 AM.
07-14-2015, 10:01 AM
#130
It appears you're using a multi-leaf spring in a perch designed for a mono-leaf. Do a search for mono leaf to multi-leaf conversion.
You have two options: (1) Keep the spring pads. When using pads, the plate is supposed to make contact with the spring perch so the u-bolts can tighten against them rigidly. The perches you have are not deep enough for this. You can get spacers to take up the space, for example the Global West p/n 1035 or make your own. I've seen people use washers. You can also replace the perches with purpose-made ones, but that requires cutting and welding which I doubt you want to do. I've also seen people just run it the way you have it (which is what I did), but you risk the u-bolts coming loose or bending the spring plate when tightening. (2) Lose the spring pads and rigidly mount the springs. You can do this by simply removing the pads altogether and have the plate tighten against the leafs directly. If you do this, you should still have space between the plate and the perch and you'll need to make sure you have a locating dowel pin and corresponding hole in the perch. The disadvantage to this is you lose some compliance from the rubber that helps with vibration isolation and gives the spring a little more rotational freedom to prevent bind.
You have two options: (1) Keep the spring pads. When using pads, the plate is supposed to make contact with the spring perch so the u-bolts can tighten against them rigidly. The perches you have are not deep enough for this. You can get spacers to take up the space, for example the Global West p/n 1035 or make your own. I've seen people use washers. You can also replace the perches with purpose-made ones, but that requires cutting and welding which I doubt you want to do. I've also seen people just run it the way you have it (which is what I did), but you risk the u-bolts coming loose or bending the spring plate when tightening. (2) Lose the spring pads and rigidly mount the springs. You can do this by simply removing the pads altogether and have the plate tighten against the leafs directly. If you do this, you should still have space between the plate and the perch and you'll need to make sure you have a locating dowel pin and corresponding hole in the perch. The disadvantage to this is you lose some compliance from the rubber that helps with vibration isolation and gives the spring a little more rotational freedom to prevent bind.
Last edited by -TheBandit-; 07-14-2015 at 11:07 AM.
07-14-2015, 10:28 AM
#131
TECH Apprentice
Thread Starter
Thanks Clint. The spring perch is definitely multi-leaf on the rear axle. I will have to purchase the lower spring plates for multi leaf cars since they are stronger and have a different attachment point for the rear shock. I spoke with Hotchkis yesterday and they said that I will always have a gap like this between the lower plate and the spring perch. According to them, they say just torque to 50 ft. lb. and I should be alright. We'll see though... The mono to multi kit has two little blocks to sandwich between the perch and lower bracket but I'm not 100% comfortable with that either, makes me wonder if the springs are torqued enough or if the blocks stopped the torqueing. I'll work this out later once we do final tightening up of everything before hitting the road.
07-14-2015, 11:14 AM
#132
Also I wanted to say congrats on getting back into the project and having her back on all four again. It's great to see it rolled out into the driveway - makes it feel like a real car again and not just a project! I'm sure your dad would be very happy to see the progress!
Your perch may indeed be for a multi-leaf, just not as thick of a multi-leaf as what you're using. I ran my springs with a gap like that for many years without issue, but it's technically not quite right because the pads may allow the u-bolts to loosen. I think it may be more of a theoretically problem than a practical one though.
Thanks Clint. The spring perch is definitely multi-leaf on the rear axle. I will have to purchase the lower spring plates for multi leaf cars since they are stronger and have a different attachment point for the rear shock. I spoke with Hotchkis yesterday and they said that I will always have a gap like this between the lower plate and the spring perch. According to them, they say just torque to 50 ft. lb. and I should be alright. We'll see though... The mono to multi kit has two little blocks to sandwich between the perch and lower bracket but I'm not 100% comfortable with that either, makes me wonder if the springs are torqued enough or if the blocks stopped the torqueing. I'll work this out later once we do final tightening up of everything before hitting the road.
07-14-2015, 11:28 AM
#133
TECH Apprentice
Thread Starter
Yes it does feel great to see it on all fours and the lowered stance is perfect! More updates to come after this weekend. Believe me, I should be working on the house but I scheduled these two weekends for nothing but Camaro time:-) Doing my best to stick to it.
07-14-2015, 12:41 PM
#134
TECH Fanatic
iTrader: (26)

Join Date: Mar 2010
Location: Milledgeville, GA
Posts: 1,909
Likes: 0
Received 0 Likes
on
0 Posts
Not wanting to hi-jack, but between your build (and the car in the movie it reminds me of) I jumped at the chance to buy a friend's '68 last week so this seems like the best place to reveal it. This will be my first 1st Gen so I'll have lots of questions I'm sure. 
Those seats are from a C4 and are going to go away.
Rear is a 9" with 35 spline spool & 4.10's.
Manual Disc brakes/steering. Front suspension rebuilt w poly bushings.
Moroso front springs and Comp. Eng. adj. shocks.
Relocated Calvert mono-leafs with Rancho adj. shocks.
Cal-tracs bars. DS loop. Crossmember & Moly DS for PG/TH350/4 spd.
Fuel cell. Stock radiator. Stock rear seat. Clutch pedals.
Bolt-on 4" cowl hood. No headliner/carpet/rear int. panels/bumpers.
This was a mid 5 sec 1/8 mile car a few years back that cut 1.30 sixty foot times with a 555" and N2O. He cut the rollbar out and swapped everything to a Mustang to save the Camaro.
Current plans are to swap in a 327 & either a Muncie or TH350 to get it running. I've got an L96 that may find it's way in later.
Thanks to you and your dad for the inspiration. Jason
07-14-2015, 02:23 PM
#135
TECH Apprentice
Thread Starter
Not wanting to hi-jack, but between your build (and the car in the movie it reminds me of) I jumped at the chance to buy a friend's '68 last week so this seems like the best place to reveal it. This will be my first 1st Gen so I'll have lots of questions I'm sure.
Those seats are from a C4 and are going to go away.
Rear is a 9" with 35 spline spool & 4.10's.
Manual Disc brakes/steering. Front suspension rebuilt w poly bushings.
Moroso front springs and Comp. Eng. adj. shocks.
Relocated Calvert mono-leafs with Rancho adj. shocks.
Cal-tracs bars. DS loop. Crossmember & Moly DS for PG/TH350/4 spd.
Fuel cell. Stock radiator. Stock rear seat. Clutch pedals.
Bolt-on 4" cowl hood. No headliner/carpet/rear int. panels/bumpers.
This was a mid 5 sec 1/8 mile car a few years back that cut 1.30 sixty foot times with a 555" and N2O. He cut the rollbar out and swapped everything to a Mustang to save the Camaro.
Current plans are to swap in a 327 & either a Muncie or TH350 to get it running. I've got an L96 that may find it's way in later.
Thanks to you and your dad for the inspiration. Jason
07-14-2015, 03:11 PM
#136
TECH Fanatic
iTrader: (26)
Join Date: Mar 2010
Location: Milledgeville, GA
Posts: 1,909
Likes: 0
Received 0 Likes
on
0 Posts
What size are you tires on the rally wheels and what size are the front wheels?
What is the deal with only using a spacer on one side for the LS1 rear brakes?
07-14-2015, 04:12 PM
#137
TECH Apprentice
Thread Starter
As for spacers, your guess is as good as mine. I am thinking that something is off with the rear end axle flange or something. I received another backing plate from another member to try and see if it has the same problem and indeed it did. I even swapped the backing plates from one side to another and the problem persisted. We're talking thousandths of an inch so I decided to center the passenger side with shims (came out perfect) and get the driver's side as close as I could (turned out no shims needed). The driver side is very close to center but that was all the adjustment I had. Again, maybe an issue with the axle flange on the Moser rear end? Best advice I can give is to mock everything up early if you are thinking about going the route of 4th gen/C5 or C6 brakes. You might also need to turn down the axles. Tobin at KORE suggested the following if using C-5 rotors (5.94" diameter with an 1/8" X 45 degree chamfer). I did not turn mine down because the rotors from the 4th gen brakes fit over the axle perfect.
Let me know if you have any other questions. Feel free to PM your cell and we can chat as well. Very happy to see you now have a first gen! BTW, Just wanted to let you know that I started this restoration with the intent of rebuilding a 327 with camel hump heads and a muncie 4 speed. After two cracked 327 blocks I decided it was "cheaper" to go with the LS1 swap you see today (jury is still out on whether it was cheaper or not, lol).
09-09-2015, 10:28 PM
#138
TECH Fanatic
iTrader: (26)
Join Date: Mar 2010
Location: Milledgeville, GA
Posts: 1,909
Likes: 0
Received 0 Likes
on
0 Posts
I somehow missed your reply. Thank you for the info. I'll PM you my number.
How are things going on yours?
I've got tons of more questions for you!
For starters: I don't know why I didn't catch this months ago when you posted pictures after the rearend swap - Did the 15" rally wheels end up fitting even with the LS1 rear brakes or are they just stuck on there without the calipers/rotors installed?
2. I bought and installed a T56 master cylinder bracket for future 6 speed plans. While bolting it up I thought about the increased space the brake master now sits out. Do you do anything to the pedal pushrod to maintain the same stroke? Seems like that extra 1/4" or so would cause problems. I tried searching and found no mention of that despite the brackets being used in more builds than I can count.
3. How do you like the LS1 front brakes? I have a '98 donor parts car. My 68 already has stock discs. I "think" I can use the drum brake hubs off of my '61 Bel Air since I don't have any Camaro hubs. My disc conversion on that old car uses 1st gen rotors on the drum '61 spindles. Seems like that would mean the hubs will fit.
4. Have you seen the Rev 107 brand aluminum 17" rally wheels on Ebay? They are very affordable ($135 shipped) and it appears that stock rally caps fit them. Painted centers with a polished lip that gives the trim ring effect.
I'll think of a lot more later.
Jason
01-25-2016, 06:42 PM
#140
TECH Apprentice
Thread Starter
I somehow missed your reply. Thank you for the info. I'll PM you my number.
How are things going on yours?
I've got tons of more questions for you!
For starters: I don't know why I didn't catch this months ago when you posted pictures after the rearend swap - Did the 15" rally wheels end up fitting even with the LS1 rear brakes or are they just stuck on there without the calipers/rotors installed?
2. I bought and installed a T56 master cylinder bracket for future 6 speed plans. While bolting it up I thought about the increased space the brake master now sits out. Do you do anything to the pedal pushrod to maintain the same stroke? Seems like that extra 1/4" or so would cause problems. I tried searching and found no mention of that despite the brackets being used in more builds than I can count.
3. How do you like the LS1 front brakes? I have a '98 donor parts car. My 68 already has stock discs. I "think" I can use the drum brake hubs off of my '61 Bel Air since I don't have any Camaro hubs. My disc conversion on that old car uses 1st gen rotors on the drum '61 spindles. Seems like that would mean the hubs will fit.
4. Have you seen the Rev 107 brand aluminum 17" rally wheels on Ebay? They are very affordable ($135 shipped) and it appears that stock rally caps fit them. Painted centers with a polished lip that gives the trim ring effect.
I'll think of a lot more later.
Jason
How are things going on yours?
I've got tons of more questions for you!
For starters: I don't know why I didn't catch this months ago when you posted pictures after the rearend swap - Did the 15" rally wheels end up fitting even with the LS1 rear brakes or are they just stuck on there without the calipers/rotors installed?
2. I bought and installed a T56 master cylinder bracket for future 6 speed plans. While bolting it up I thought about the increased space the brake master now sits out. Do you do anything to the pedal pushrod to maintain the same stroke? Seems like that extra 1/4" or so would cause problems. I tried searching and found no mention of that despite the brackets being used in more builds than I can count.
3. How do you like the LS1 front brakes? I have a '98 donor parts car. My 68 already has stock discs. I "think" I can use the drum brake hubs off of my '61 Bel Air since I don't have any Camaro hubs. My disc conversion on that old car uses 1st gen rotors on the drum '61 spindles. Seems like that would mean the hubs will fit.
4. Have you seen the Rev 107 brand aluminum 17" rally wheels on Ebay? They are very affordable ($135 shipped) and it appears that stock rally caps fit them. Painted centers with a polished lip that gives the trim ring effect.
I'll think of a lot more later.
Jason
1. They did not clear the rallies with the calipers on so I removed them and stuck the wheels on so I could roll her around. I'm likely going to have to get another set of wheels for this car since the brakes are larger diameter.
2. You should just be able to adjust the joint at the pedal to make up for that extra thickness of the master cylinder bracket. I don't see a problem with that at all. Just be sure to measure your stroke and make sure it's correct for your application.
3. I can not comment on the brakes yet since I'm not driving the car. However, I will say that I'm happy with the fit/finish. I will be using this car around town etc. so I can not see needing anything larger. Plus, these parts were part of the donor car so the price ("free") was right for the brakes

4. I have not seen those 17" rallies but I will surely look into them. I'm still on the fence about the wheel choice to be honest. Thinking about going VWW like Carl Cassanova's Camaro. Not sure though, I'll cross that bridge when I get there.
Feel free to send me any DM's and I'm happy to chat any time. Best of luck with your project.