
My 280z ground up restomod LS1 swap
 10-09-2013, 11:17 PM
#1
Teching In
Thread Starter

Join Date: Oct 2013
Location: Boise
Posts: 8
Likes: 0
Received 0 Likes
on
0 Posts
I've always loved the datsun / nissan Z cars and have a 350z for my DD. I drove it to work one day when a woman I worked with mentioned she had an old Z sitting in her field out in the country. That peaked my interest so I came to looked at it.
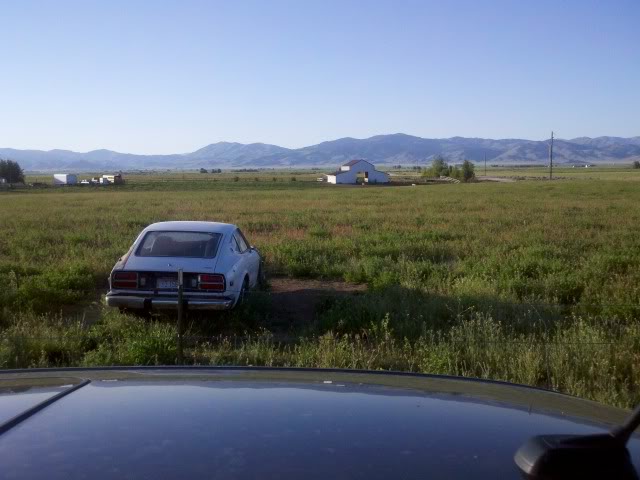
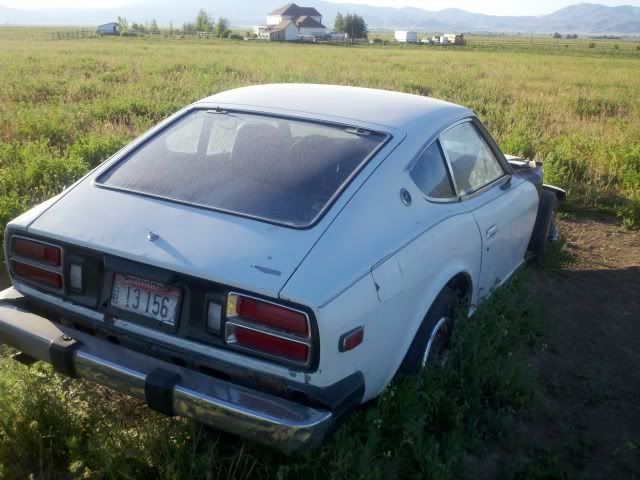
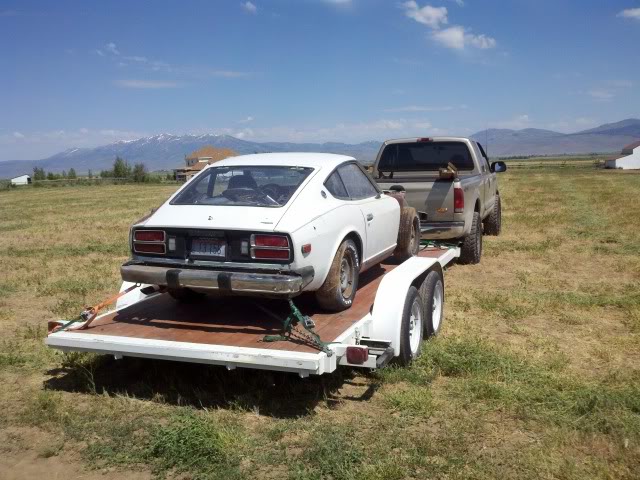
It's a 76 280z...and its been sitting for the better part of 15 years where it found a new role as a home for critters of all shapes and sizes. However, it will suit my need perfectly!
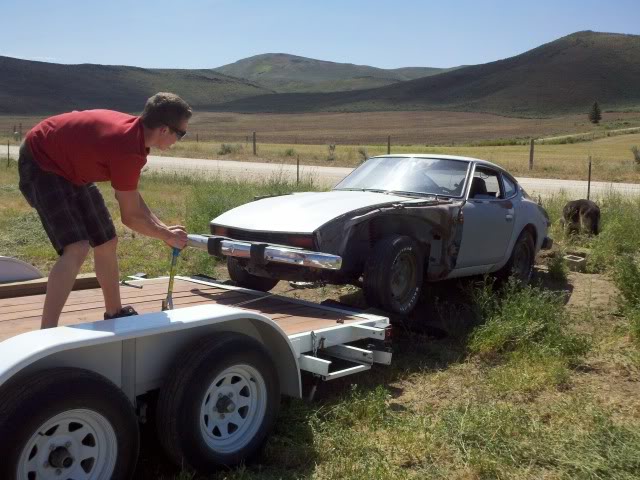
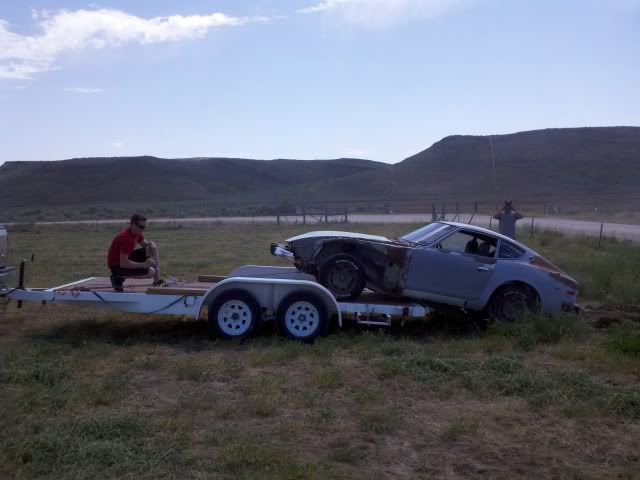
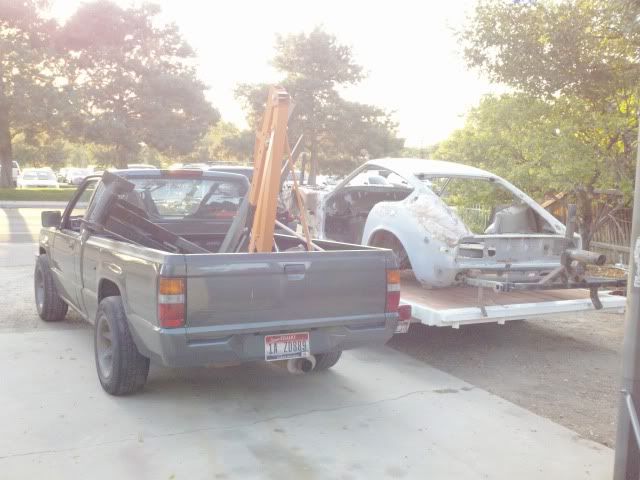
Towing it back to Boise...
My goal is to do a ground up resto-mod and V8 swap perhaps with a supercharger (gotta put the beat down on my buddy's supras. I've just always loved the concept of a small, light RWD coupe with a big v8.
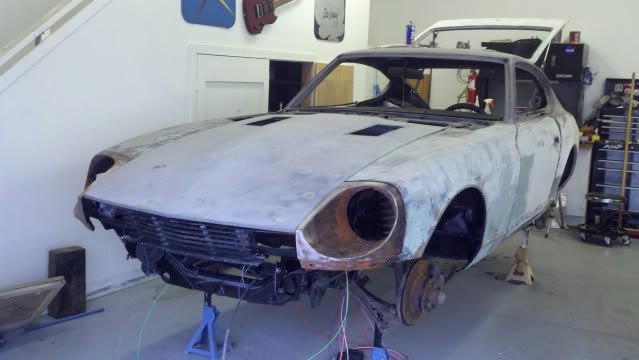
It had a little rust when we picked it up BUT we figured we would try to put some air in the tires and see what happens and every tires held air! Even the factory struts for the hatch still work...after 35 years!
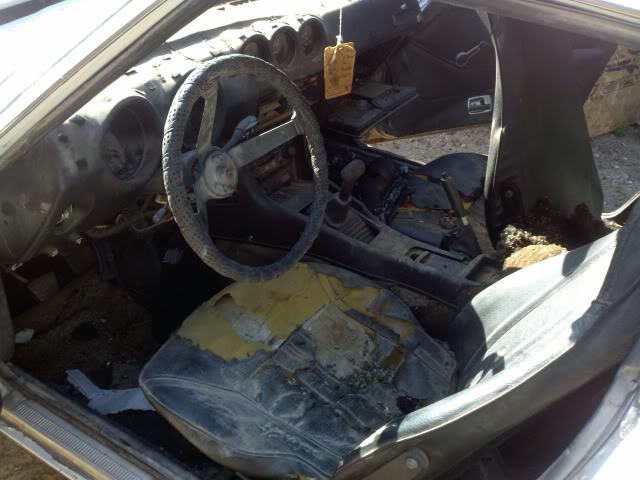
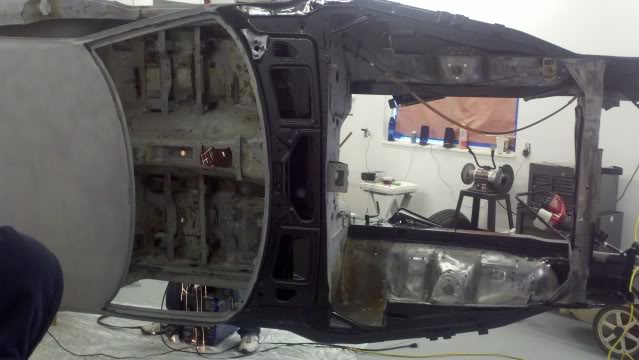
Ugh..what to say about the interior...ugh...
Time to strip it down and try not to get breath...
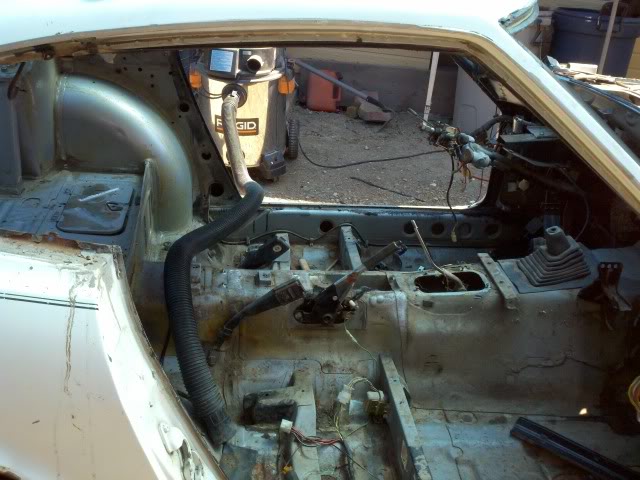
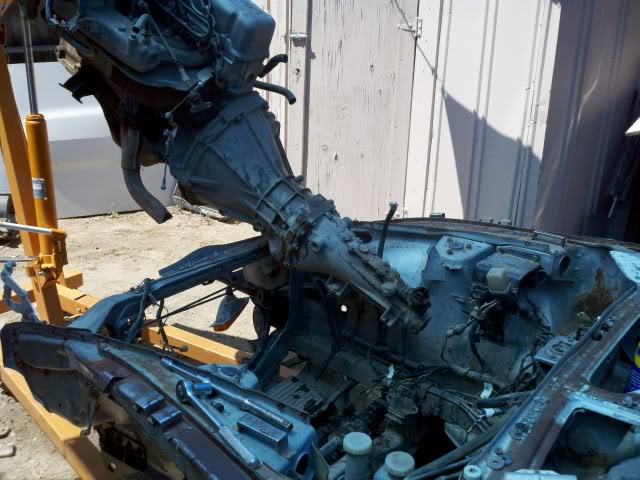
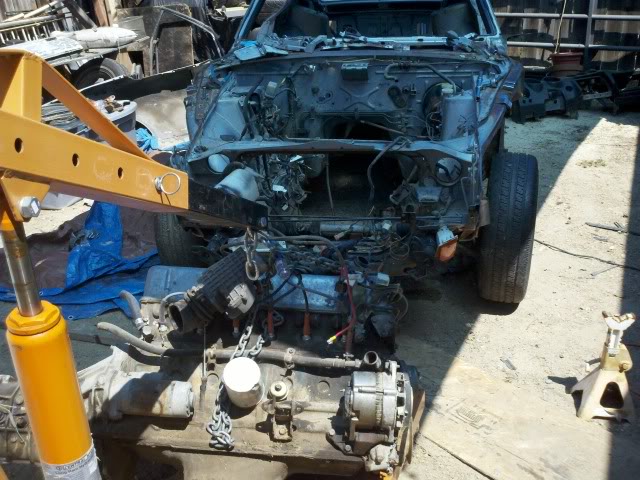
With the interior stripped, time to pull the engine...
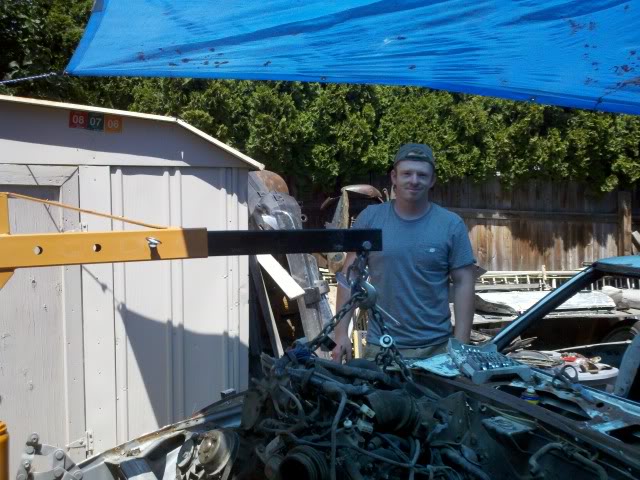
^That's me
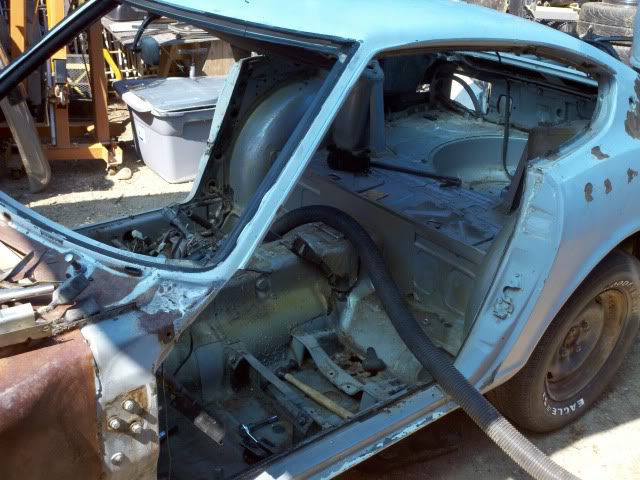
I decided the easiest and most thorough way to do the resto part of the project was to put it on a rotisserie. Pulling the rear end out (sorry for the horrid pic quality)...
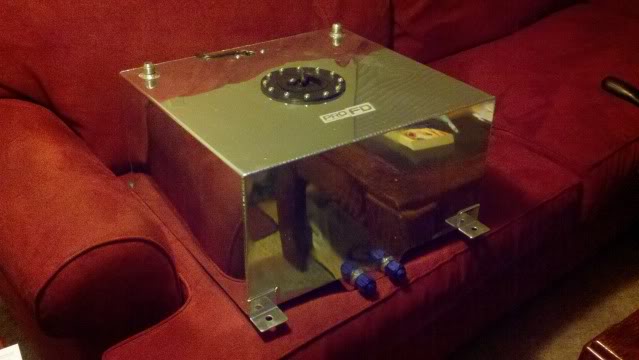
I decided I wanted a fuel cell and not the factory tank so I used a spot weld drill and took out the spare tire well and gas tank in preparation.
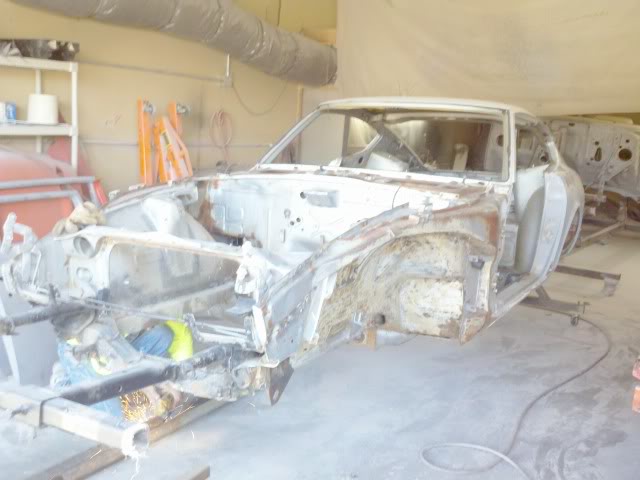
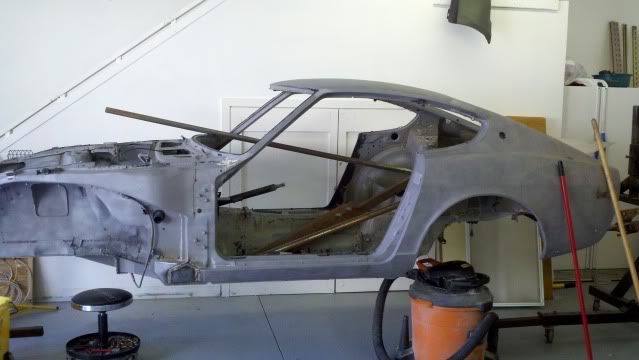
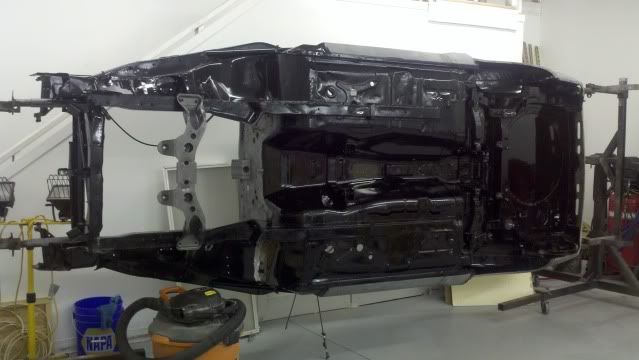
Fully stripped, it was time to go to the sandblaster!
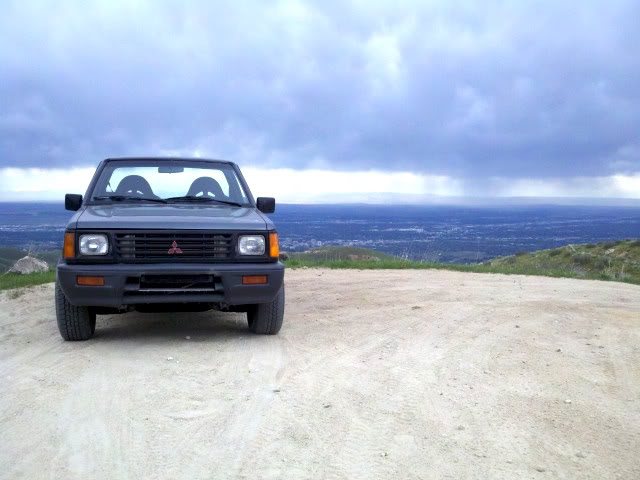
On a side note, the truck with the engine hoist was my past project. I put a 4g63 turbo (DSM motor) in it with a toyota supra tranny and LSD diff. It's been a great little truck...love beating up on (most of)the big diesel guys around the town but it gets sketchy above 100mph so I just use it as a little fun run about.
Anyways...
The before shot...
and after....
All cleaned up and free of critter crap, it was time to get it into the shop...
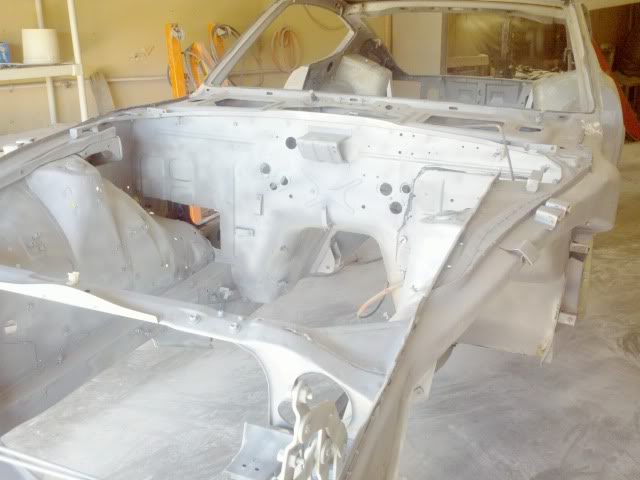
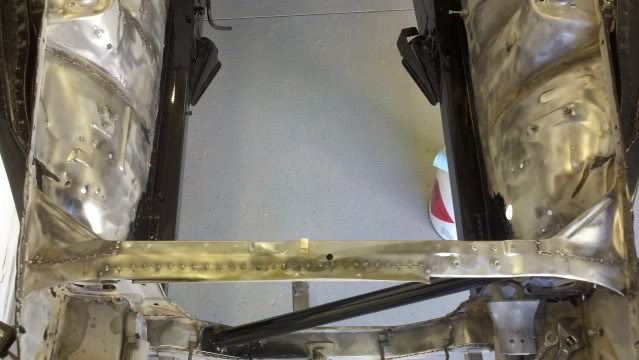
Because these are such light cars with thin steel, I thought it would be a good idea to do some stitch welding...actually a lot of boring, tedious stitch welding and some tube steel reinforcement. I've heard stories of older frames that have actually broken the radiator cores when doing some aggressive cornering. Think of it as a square box folding over. I put in some tube steel to give it some rigidity.
Since these cars are known to rust, I wanted to use a rust preventer everywhere I could. I used POR 15, which is tenacious stuff!
^More rust proofing. I also tied the bottom frame rail into the stock tower area with some tube steel.
Another shot...
Here's what makes a rotisserie so cool, if you want or need to work on the bottom of the car, just rotate it! I didn't take any pics but I added 'bully dog' frame rails which overlay the existing rails to add more strength. You can see the sheet metal piece I welded in place of the wheel well.
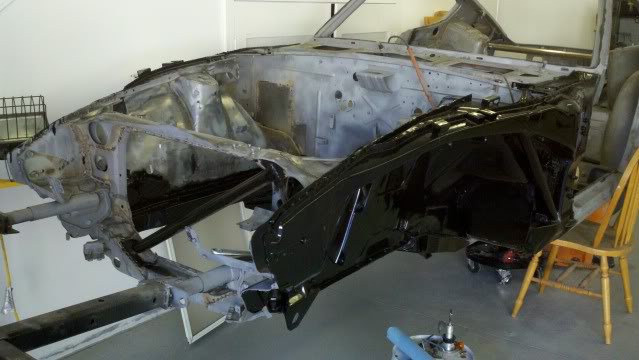
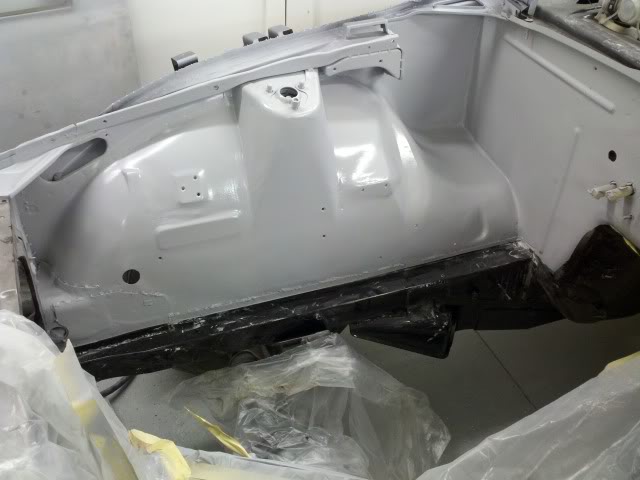
I went a little crazy with the POR 15 I wanted a "clean" engine bay which meant deleting the battery tray bracket and all the other little crap in the bay and smoothing it out.
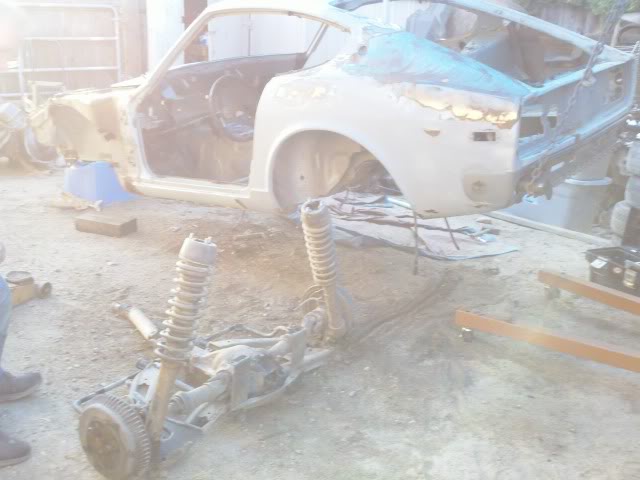
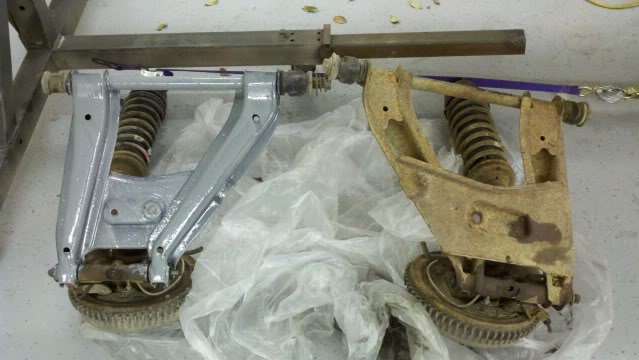
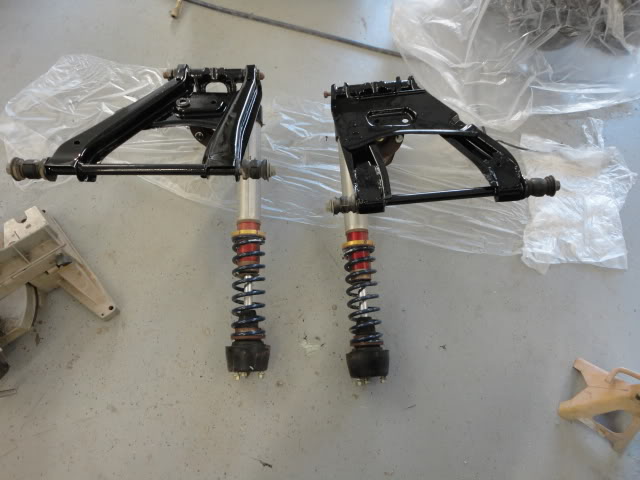
Cleaning up the old rear a-arms...
Getting bored with the body work so I took a crack at swapping the rear diff for something better. It just so happens that its a 'long nose' R200 (200mm ring gear). It's strong but still only an open diff. For what I'm doing, I need an LSD of some type at least. From what I've learned, the VLSD out of a 240sx pops directly into my housing! Easy enough. As another advantage, I can get rid of the stock U-joints for some CV axles from a 280zx turbo! So the drain train is basically bullet proof (knock on wood).

^This is the stock diff, not much to show...
I tend to get bored with one aspect of the car so I tend to bounce around. The stock wiring was BAD...all chewed up by previously mentioned criters. I decided to order a new wiring kit.

And then I took a break..lol

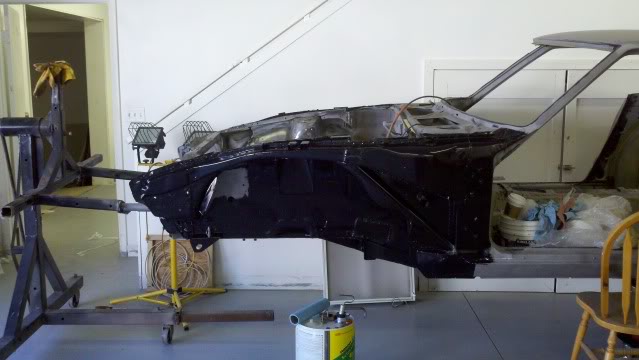
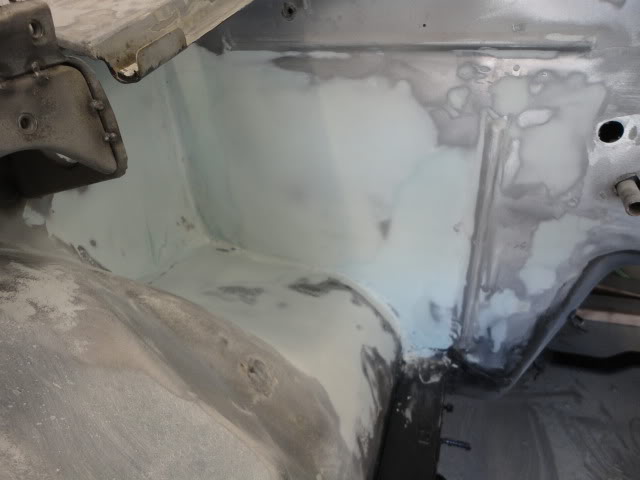
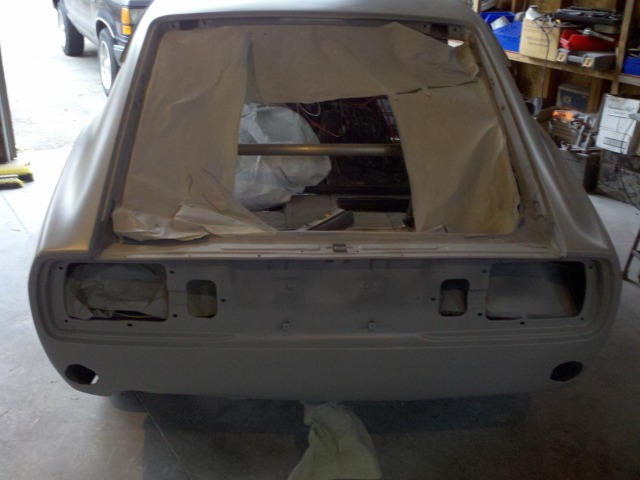
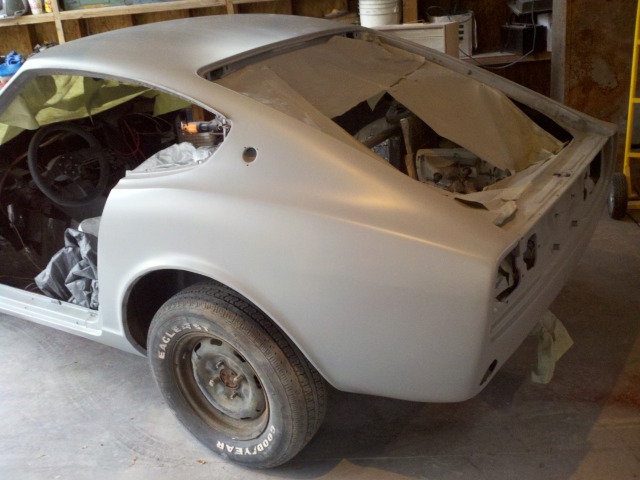
It was time to take it off the rotisserie and start getting to work on some dent and other spots. I'm not very good at body work and I honestly hate it lol. But, I wanted to make it less work for the painter. The most rusted area was around where the battery was (pretty typical). We actually fiber glassed over the 6" hole.
I started receiving some new parts...
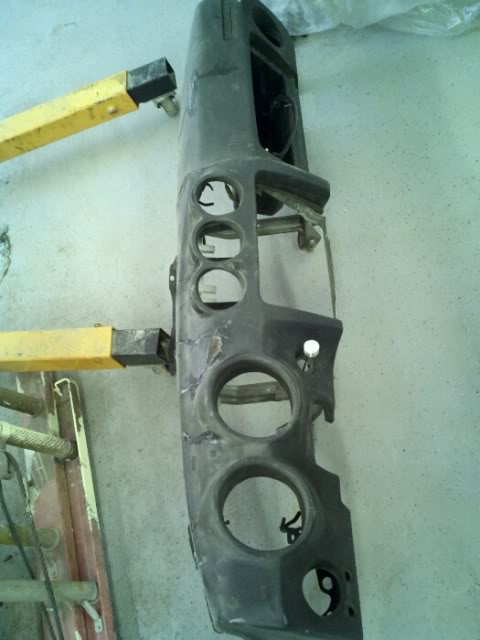
The old dash...
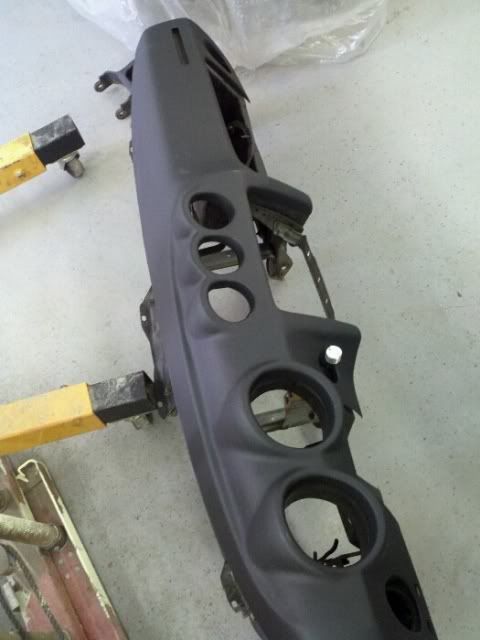
and the new...


It's a 76 280z...and its been sitting for the better part of 15 years where it found a new role as a home for critters of all shapes and sizes. However, it will suit my need perfectly!
Towing it back to Boise...


My goal is to do a ground up resto-mod and V8 swap perhaps with a supercharger (gotta put the beat down on my buddy's supras.
I've just always loved the concept of a small, light RWD coupe with a big v8.It had a little rust when we picked it up BUT we figured we would try to put some air in the tires and see what happens and every tires held air! Even the factory struts for the hatch still work...after 35 years!
Ugh..what to say about the interior...ugh...

Time to strip it down and try not to get breath...


With the interior stripped, time to pull the engine...


^That's me

I decided the easiest and most thorough way to do the resto part of the project was to put it on a rotisserie. Pulling the rear end out (sorry for the horrid pic quality)...

I decided I wanted a fuel cell and not the factory tank so I used a spot weld drill and took out the spare tire well and gas tank in preparation.
Fully stripped, it was time to go to the sandblaster!

On a side note, the truck with the engine hoist was my past project. I put a 4g63 turbo (DSM motor) in it with a toyota supra tranny and LSD diff. It's been a great little truck...love beating up on (most of)the big diesel guys around the town but it gets sketchy above 100mph so I just use it as a little fun run about.

Anyways...
The before shot...

and after....

All cleaned up and free of critter crap, it was time to get it into the shop...

Because these are such light cars with thin steel, I thought it would be a good idea to do some stitch welding...actually a lot of boring, tedious stitch welding and some tube steel reinforcement. I've heard stories of older frames that have actually broken the radiator cores when doing some aggressive cornering. Think of it as a square box folding over. I put in some tube steel to give it some rigidity.

Since these cars are known to rust, I wanted to use a rust preventer everywhere I could. I used POR 15, which is tenacious stuff!

^More rust proofing. I also tied the bottom frame rail into the stock tower area with some tube steel.
Another shot...

Here's what makes a rotisserie so cool, if you want or need to work on the bottom of the car, just rotate it! I didn't take any pics but I added 'bully dog' frame rails which overlay the existing rails to add more strength. You can see the sheet metal piece I welded in place of the wheel well.

I went a little crazy with the POR 15
I wanted a "clean" engine bay which meant deleting the battery tray bracket and all the other little crap in the bay and smoothing it out.
Cleaning up the old rear a-arms...

Getting bored with the body work so I took a crack at swapping the rear diff for something better. It just so happens that its a 'long nose' R200 (200mm ring gear). It's strong but still only an open diff. For what I'm doing, I need an LSD of some type at least. From what I've learned, the VLSD out of a 240sx pops directly into my housing! Easy enough. As another advantage, I can get rid of the stock U-joints for some CV axles from a 280zx turbo! So the drain train is basically bullet proof (knock on wood).

^This is the stock diff, not much to show...
I tend to get bored with one aspect of the car so I tend to bounce around. The stock wiring was BAD...all chewed up by previously mentioned criters. I decided to order a new wiring kit.

And then I took a break..lol

It was time to take it off the rotisserie and start getting to work on some dent and other spots. I'm not very good at body work and I honestly hate it lol. But, I wanted to make it less work for the painter. The most rusted area was around where the battery was (pretty typical). We actually fiber glassed over the 6" hole.


I started receiving some new parts...
The old dash...

and the new...

 10-09-2013, 11:35 PM
#2
Teching In
Thread Starter
Join Date: Oct 2013
Location: Boise
Posts: 8
Likes: 0
Received 0 Likes
on
0 Posts
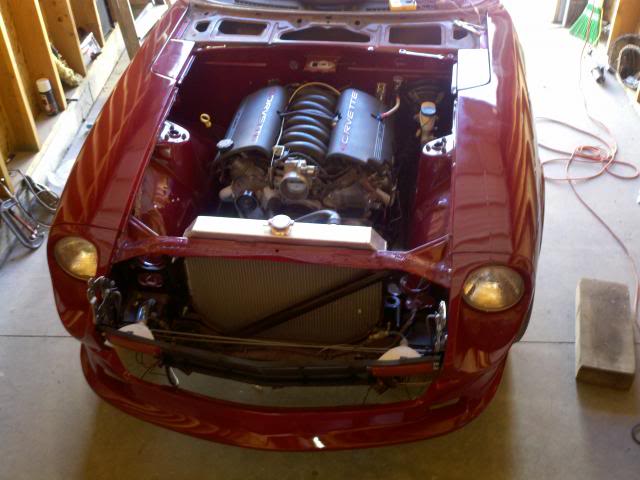
Finally some primer on the engine bay...
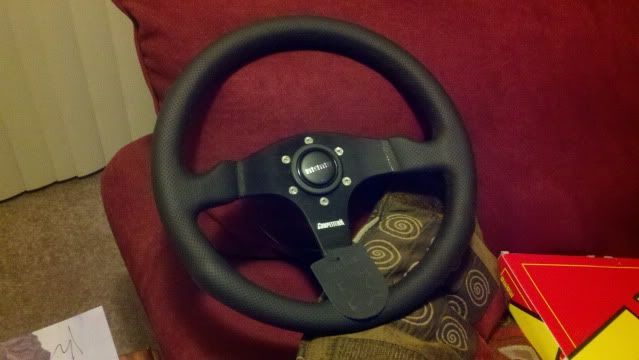
More go fast parts!
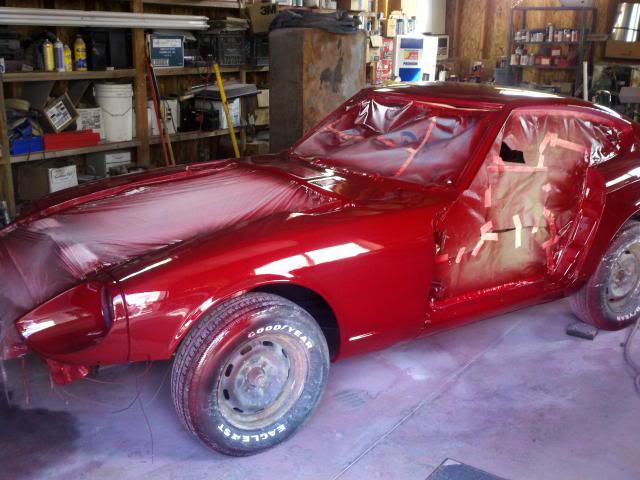
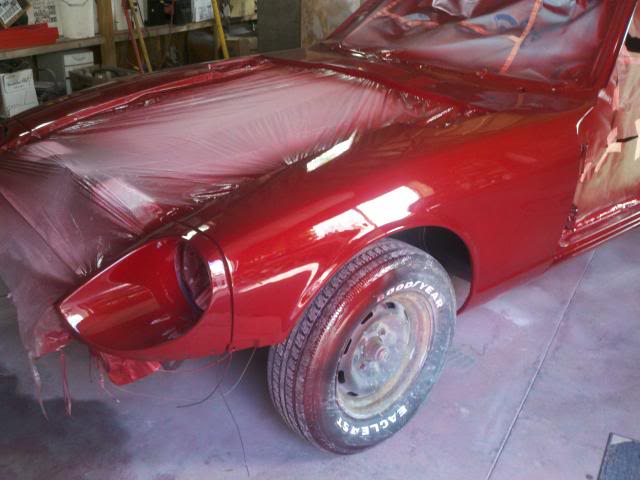
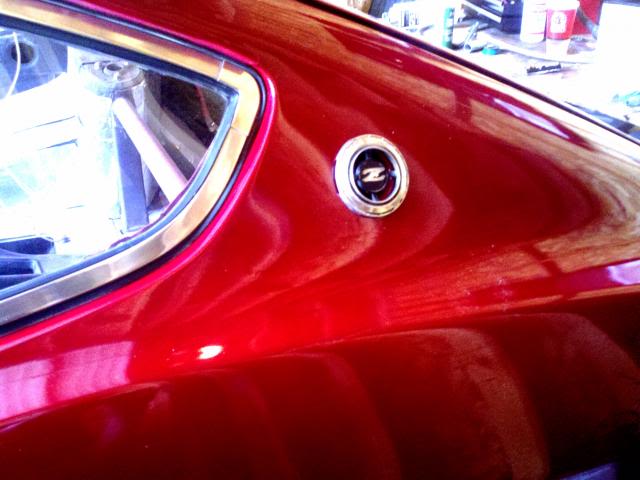
I decided on the color...GM passion red. The painter added in some gold metal fleck and it look eff-ing awesome! So incredibly happy with the color.
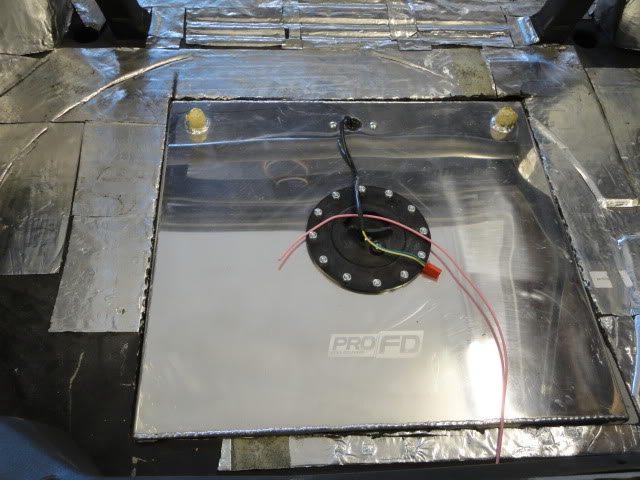
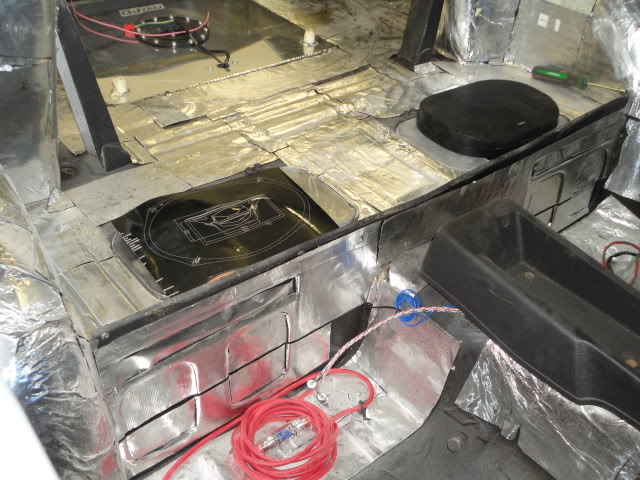
Time to do some sound dedening...you can see the new fuel cell cut into the floor. Probably not legal for drag racing since there is no barrier between the fuel cell and cabin but I don't really care.

Another shot...
The car came with little cubbies behind the seats...one was for the jack and the other was the owner's manual. They make PERFECT spots for some 6x9 speakers. I would like to have the amps mounted on the vertical wall right in from of them.

Speaking of go fast parts...what could that be in the back of the truck?!
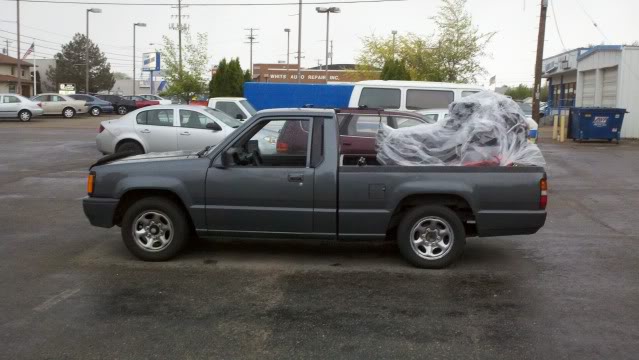

More go fast parts!


I decided on the color...GM passion red. The painter added in some gold metal fleck and it look eff-ing awesome! So incredibly happy with the color.
Time to do some sound dedening...you can see the new fuel cell cut into the floor. Probably not legal for drag racing since there is no barrier between the fuel cell and cabin but I don't really care.

Another shot...

The car came with little cubbies behind the seats...one was for the jack and the other was the owner's manual. They make PERFECT spots for some 6x9 speakers. I would like to have the amps mounted on the vertical wall right in from of them.


Speaking of go fast parts...what could that be in the back of the truck?!
 10-09-2013, 11:55 PM
#3
Teching In
Thread Starter
Join Date: Oct 2013
Location: Boise
Posts: 8
Likes: 0
Received 0 Likes
on
0 Posts
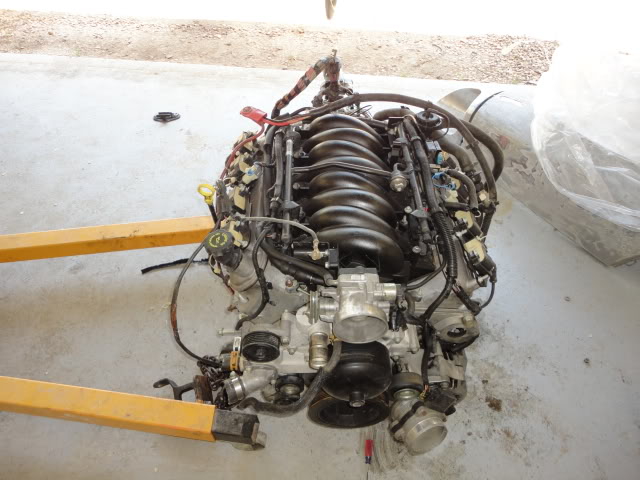
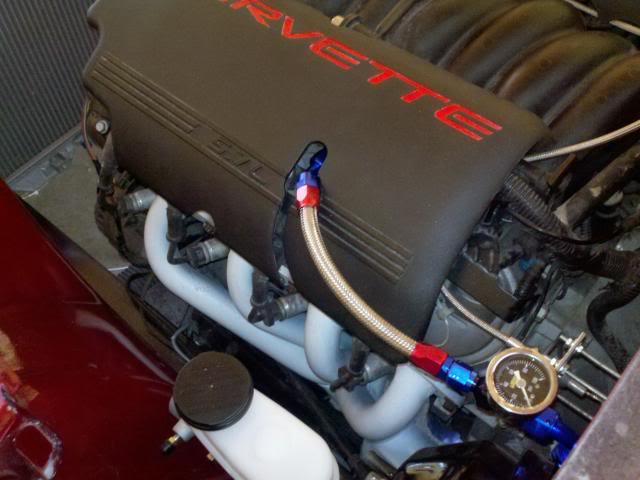
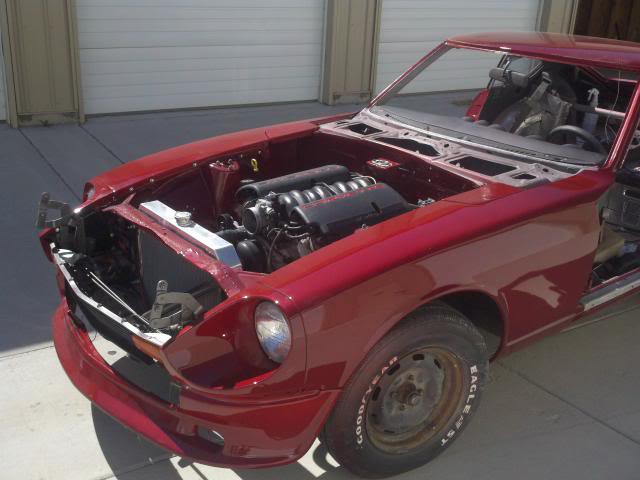
The engine and tranny are out of a 2002 SS with about 40k miles. It has an ls6 intake (that's about all I know).
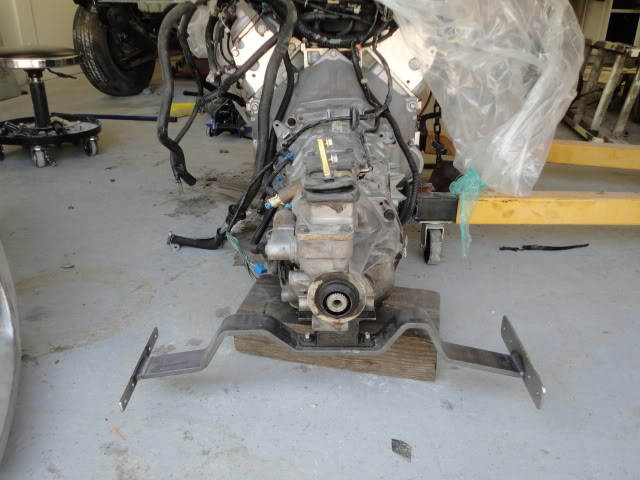
Rear shot with trans mount...
Off to get some primer and paint for the body!
I have sooooo much respect for anyone with the skill and/or patience to do body work and paint. My painter called me up to tell me it was one of the best jobs he's ever done.
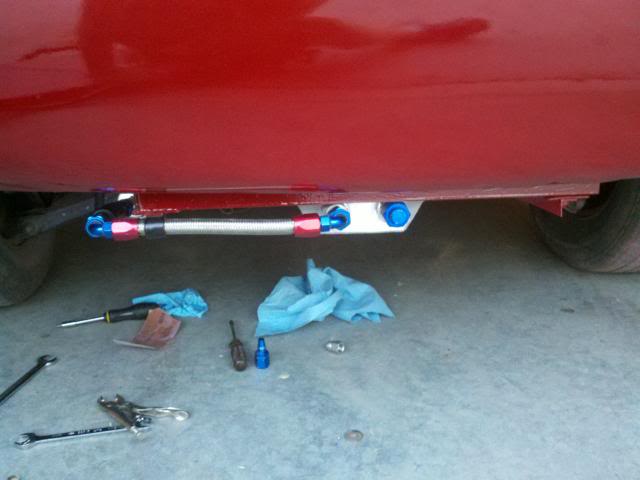
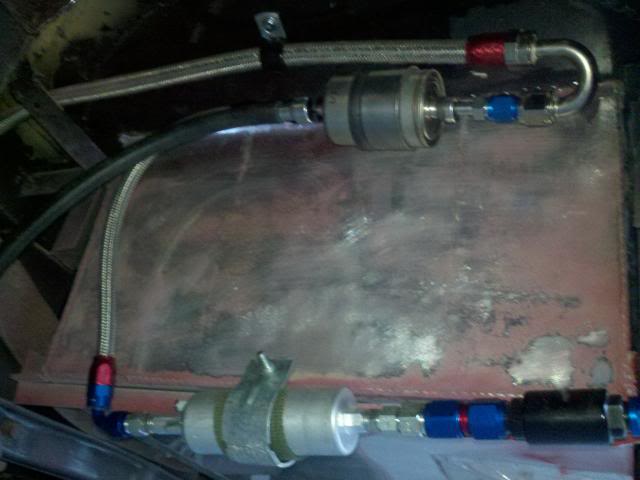
I built the fuel system and it holds pressure! I used a walbro 255 external pump.
I kinda like how you can see the sump of the fuel cell from the back.
Now time to pop the engine in...carefully
Her she is as of last week
I just finished building all the relays for the PCM and it cranked over. So I flushed the fuel system, threw some gas in , duct taped the MAF to the throttle (redneck I know) and it fired right up!...and then died. I learned about a thing called VATS (vehicle anti theft system). It thinks its stolen lol. Time for HP tuners, but first I need to solder in my diagnostic plug so I can actually use HP tuners.

Rear shot with trans mount...

Off to get some primer and paint for the body!


I have sooooo much respect for anyone with the skill and/or patience to do body work and paint. My painter called me up to tell me it was one of the best jobs he's ever done.


I built the fuel system and it holds pressure! I used a walbro 255 external pump.
I kinda like how you can see the sump of the fuel cell from the back.


Now time to pop the engine in...carefully

Her she is as of last week


I just finished building all the relays for the PCM and it cranked over. So I flushed the fuel system, threw some gas in , duct taped the MAF to the throttle (redneck I know) and it fired right up!...and then died. I learned about a thing called VATS (vehicle anti theft system). It thinks its stolen lol. Time for HP tuners, but first I need to solder in my diagnostic plug so I can actually use HP tuners.
Last edited by Boise-nick; 10-10-2013 at 12:10 AM.
10-10-2013, 07:11 AM
#6
TECH Resident
iTrader: (4)

Join Date: Feb 2009
Location: Ohio
Posts: 784
Likes: 0
Received 0 Likes
on
0 Posts
Paint looks good, where are you headed for wheels?
You shouldn't have any issues with the R200. I've been abusing the one in my 88 300ZX with a H/C/I 5.3 for around 15k miles. I don't have sticky tires. The Z31s require some funky hybrid CV shafts to use the S chassis or Z32 VLSD, so make sure you can use stock S130 axles.
You shouldn't have any issues with the R200. I've been abusing the one in my 88 300ZX with a H/C/I 5.3 for around 15k miles. I don't have sticky tires. The Z31s require some funky hybrid CV shafts to use the S chassis or Z32 VLSD, so make sure you can use stock S130 axles.
10-10-2013, 08:49 AM
#7


Nice find! And good for you for rescuing her from the field!
Im jealous. Doing an LS1 Z is at the top of my wish list. I love those cars. Too bad its hard to find them without horrible rust and if you do they are a fortune.
Looking forward to seeing this completed!
J.
Im jealous. Doing an LS1 Z is at the top of my wish list. I love those cars. Too bad its hard to find them without horrible rust and if you do they are a fortune.
Looking forward to seeing this completed!
J.
Trending Topics
10-10-2013, 09:05 AM
#8
Teching In
Join Date: Aug 2013
Posts: 36
Likes: 0
Received 0 Likes
on
0 Posts
Hey...this looks great! I remember back in High School, I wanted to do this to a 240Z...but never was able to make it happen! Does someone make a kit for this or did you make all your own mounts?
Keep up the great work! Look forward to seeing the finish product...especially if you end up with a blower! Oh yeah........
Keep up the great work! Look forward to seeing the finish product...especially if you end up with a blower! Oh yeah........

 10-10-2013, 05:03 PM
#12

Welcome to the fold. I have a recommendation for you (from a 240z LS1 owner): ditch that small pre-filter before the pump and invest in a good quality, high flow pre-filter. I had something similar before my Walbro and I was burning pumps up since the pressure drop across the filter is rather large due the small surface area of the filter. I bought a Peterson 600 series pre-filter that has an integrated shut-off valve. I am not saying you have to use that exact one, but get something that has a large cylindrical filter area.
I type this while drinking a Rogue Hazelnut Brown Nectar.
I type this while drinking a Rogue Hazelnut Brown Nectar.
 10-11-2013, 12:36 AM
#14
Teching In
Thread Starter
Join Date: Oct 2013
Location: Boise
Posts: 8
Likes: 0
Received 0 Likes
on
0 Posts
Paint looks good, where are you headed for wheels?
You shouldn't have any issues with the R200. I've been abusing the one in my 88 300ZX with a H/C/I 5.3 for around 15k miles. I don't have sticky tires. The Z31s require some funky hybrid CV shafts to use the S chassis or Z32 VLSD, so make sure you can use stock S130 axles.
You shouldn't have any issues with the R200. I've been abusing the one in my 88 300ZX with a H/C/I 5.3 for around 15k miles. I don't have sticky tires. The Z31s require some funky hybrid CV shafts to use the S chassis or Z32 VLSD, so make sure you can use stock S130 axles.

or the xxr 531's (basically CCW classic knockoffs).

On the CV axle issue, I have modern motorsport stub shafts that allow for the 280z turbo CV's with no shortening. I still think they are a little long but the suspension travels from full droop to full compression without binding. The 300zx axles some people use do still require shortening from what I've been told.
Last edited by Boise-nick; 10-11-2013 at 12:44 AM.
10-11-2013, 12:51 AM
#15
Teching In
Thread Starter
Join Date: Oct 2013
Location: Boise
Posts: 8
Likes: 0
Received 0 Likes
on
0 Posts
Well I glossed over a lot of details in getting the thread up to where I am currently. The "new" dash is actually an overlay to the original. I bought it from Modern-Motorsports.com The site is acting stange, not sure what going on with it.
10-11-2013, 12:56 AM
#16
Teching In
Thread Starter
Join Date: Oct 2013
Location: Boise
Posts: 8
Likes: 0
Received 0 Likes
on
0 Posts
Welcome to the fold. I have a recommendation for you (from a 240z LS1 owner): ditch that small pre-filter before the pump and invest in a good quality, high flow pre-filter. I had something similar before my Walbro and I was burning pumps up since the pressure drop across the filter is rather large due the small surface area of the filter. I bought a Peterson 600 series pre-filter that has an integrated shut-off valve. I am not saying you have to use that exact one, but get something that has a large cylindrical filter area.
I type this while drinking a Rogue Hazelnut Brown Nectar.
I type this while drinking a Rogue Hazelnut Brown Nectar.
That's a good thought on the filter. I mounted the walbro at the bottom of the tank because I know they require flooded suction to really function well. I'll probably run a tank or two through it to get any debris collected and switch it.
10-12-2013, 09:23 AM
#18
Man, you have made my day. I've been looking for wheels for the 240 and was having issues. Don't like the panasport look everyone else seems to use but those xxr's are lookin fine to me.
In my opinion a 76 is the best year z car to swap. I've pulled a ton of parts off every year imaginable for my 1970 240 and the 76's are heavier because they are better made. Datsun beefed up a lot of critical parts when they added the weight. Even things like the type of electrical connectors were vastly improved in the later years. I need to add some bracing like you did. Unbelievable the ripples I have in the chassis sheet metal.
I have the 300 turbo axles on mine. there seems to be a lot of different opinion on whether they bottom out or not. Pretty much everyone agrees they are stronger. Wolf creek racing has a beautiful set up but they are pretty pricey.
You are doing nice work. Any ideas what you will do for seats?

